
FRF253SS - Refrigerator Campomatic - Free user manual and instructions
Find the device manual for free FRF253SS Campomatic in PDF.


| Product Type | Refrigerator |
| Brand | Campomatic |
| Model | FRF253SS |
| Finish | Stainless Steel |
| Total Net Capacity | Approximately 250 Liters |
| Refrigerator Net Capacity | Approximately 200 Liters |
| Freezer Net Capacity | Approximately 50 Liters |
| Energy Class | F (estimated based on model age) |
| Annual Energy Consumption | Approximately 240 kWh/year |
| Climate Class | N-ST |
| Noise Level | Approximately 40 dB |
| Dimensions (H x W x D) | 1770 mm x 600 mm x 650 mm |
| Weight | Approximately 60 kg |
| Defrost Type | Frost-Free (Auto Defrost) |
| Interior Light | Yes, LED |
| Number of Shelves | 4 adjustable glass shelves |
| Door Bins | 4 (including egg tray) |
| Crisper Drawers | 1 |
| Freezer Drawers | 3 |
| Reversible Door | Yes |
| Temperature Control | Mechanical thermostat |
| Fast Cool Function | No |
| Fresh Zone | No |
| Care & Cleaning | Clean with mild detergent and soft cloth |
| Safety | Keep ventilation openings clear; do not store flammable materials |
| Spare Parts Availability | Shelves, door bins, thermostat, etc. (contact Campomatic support) |
Frequently Asked Questions - FRF253SS Campomatic
User questions about FRF253SS Campomatic
0 question about this device. Answer the ones you know or ask your own.
Ask a new question about this device
Download the instructions for your Refrigerator in PDF format for free! Find your manual FRF253SS - Campomatic and take your electronic device back in hand. On this page are published all the documents necessary for the use of your device. FRF253SS by Campomatic.
USER MANUAL FRF253SS Campomatic
Safety Precautions 4-6
Location 7
Removing & Replacing Door 8-10
Preparation 11-13
Initial Use 14
Functions 15-18
Instructions for Refrigerator Compartment
About Refrigerator Compartment----19-20
Storing Food in Refrigerator Compartment----21
Useful Tips----22
Instructions for Freezer Compartment
About Freezer Compartment----22-23
Storing Food in Freezer Compartment----24
Defrosting • Cleaning • Vacation
Defrosting • Cleaning----25
Vacation 26-27
Troubleshooting • After-sale Services
Troubleshooting----28-29
After-sale Services----30-31
Technical Data• Circuit Diagram • Packing List
Technical Data• Circuit Diagram • Packing List --32-33
- Please read this User Manual carefully before use.
- Please keep this User Manual in a safe place.
- Your refrigerator could be slightly different from that illustrated herein with respect to appearance, color or painting.
Features
① Ice making
A built-in semi-automatic icemaker will produce ready-to-use ice cubes based on your preference.
②Chill compartment
The chill compartment at the bottom of the refrigerator compartment is intended for storage of delicatessen within the temperature range from -2^ to +3^ .
③ Slide-out shelf for easy food access
The refrigerator compartment is equipped with slide-out shelves for easy loading and unloading. The shelves can be removed when the door is in the right-angle position.
④ Artificial Intelligent (AI) design
The optimum refrigeration performance is secured based on the inner temperature and the ambient temperature without manual intervention.
⑤Super slim, super large and super luxurious
Compact dimensions, large capacity, spacious refrigerator compartment and freezer compartment, supreme internal and external design
⑥ CFC-free and frost-free deep freezing enabled by efficient air cooling system
⑦Air Curtain technology
The air curtain located at the front end of the refrigerator compartment is intended to provide the desired food storage by preventing invasion of warm air and facilitating equal distribution of cooled air.
⑧Cooling before defrosting to prevent thawing
A pre-cooling process will be activated based on the inner temperature measured to avoid the adverse impact of temperature rise on food stored in the refrigerator.
⑨ Optimized refrigeration performance and long service life of compressor enabled by efficient condenser unit and fan motor
⑩Door-open alarm, touch button and large-screen LCD display
⑪ Smooth and effortless drawer slideway
Names of parts
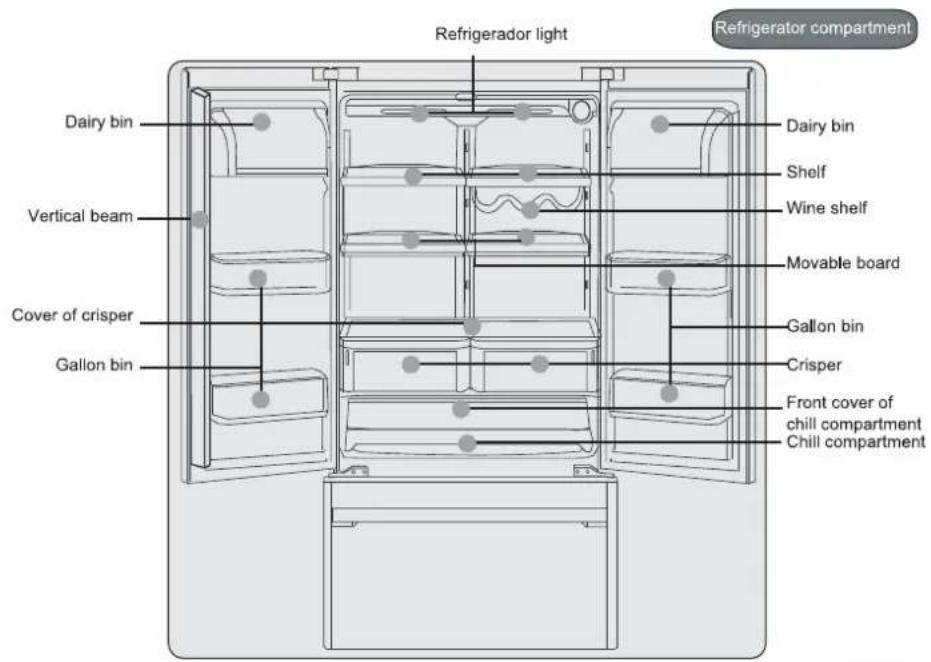
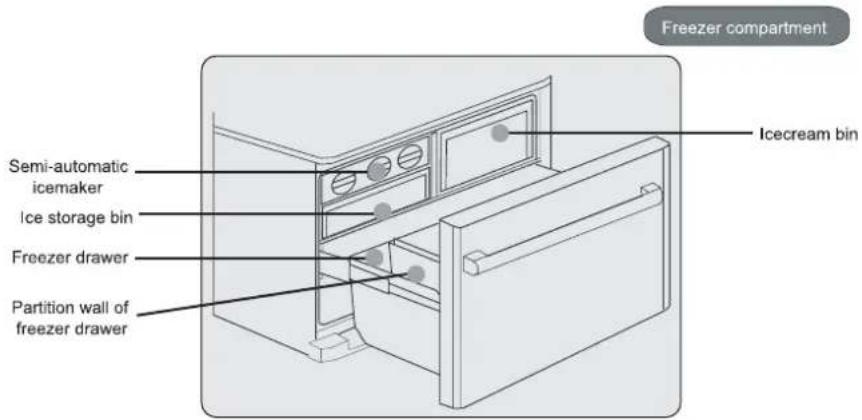
Names of parts
Dear Customer
Thank you for purchasing Haier product.
Haier product is of supreme quality and superior performance. Please read these instructions and following the procedures described herein.
You are enjoying the International Star Service from Haier. For any question you may have, please make your request for service by contacting our service centers at the telephone numbers or address specified in the Letter of Warranty.
Haier - Sincere forever!
NOTE: The product specifications are subject to change from time to time due to product improvement without further notice.
The appliance must be positioned so that the plug is accessible.
If the supply cord is damaged, it must be replaced by the manufacturer, its service agent or similarly qualified persons in order to avoid a hazard.
Warning: Keep ventilation openings, in the appliance enclosure or in the built-in structure, clear of obstruction.
Warning: Do not use mechanical devices or other means to accelerate the defrosting process, other than those recommended by the manufacturer.
Warning: Do not damage the refrigerant circuit.
Warning: Do not use electrical appliances inside the food storage compartments of the appliance, unless they are of the type recommended by the manufacturer.
Safety Precautions
Power supply: AC 220V-240V/50HZ
If the voltage fluctuates violently (beyond 187\~242V), it is necessary to use a voltage stabilizer of 750W or above to prevent startup failure, damaged control board or compressor, or unusual noise.
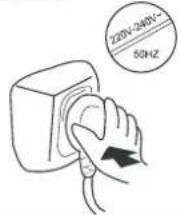

The appliance must be plugged into a dedicated outlet that is securely grounded.
The power cord of this appliance is fitted with the three-prong plug (grounded) that complies with the standard three-prong outlet (grounded). Never cut off or remove the third prong. The refrigerator should be located so that the plug is accessible.
WARNING! The plug should be securely connected to the socket or otherwise fire hazard may arise.
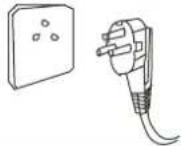

Be careful not to damage the power cord.
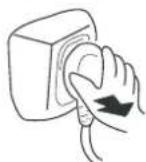
Always pull at the plug other than the cord itself to disconnect the appliance from the outlet.
Route the power cord in a way to eliminate the risk of damage caused by the weight of refrigerator or reading.
Be careful not to damage the power cord when moving the appliance away from the wall.
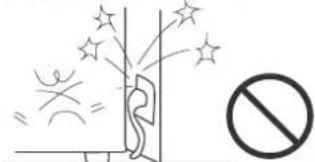
When the power cord is damaged
The use of cracked cord or worn plug is strictly prohibited. If the power cord is damaged, it should be replaced in an authorized service center.
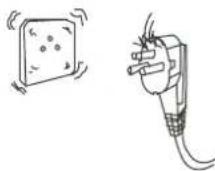

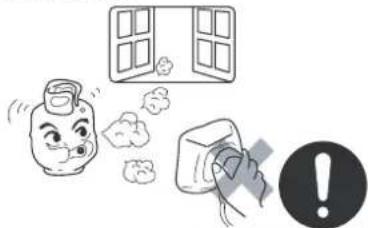
When there is a gas leakage
Shut off the gas valve.
Open the doors and windows for ventilation.
Do not plug or unplug the refrigerator or other electric appliances.
natural_image
Illustration of a cartoon kettle, a window, a hand holding a box with an exclamation mark, and a cloud (no text or symbols)Always remember to unplug the appliance in the following cases:
Unplug the appliance before cleaning and reparation.
Unplug the appliance before replacing the old light bulb to prevent electric shock.

Safety Precautions
Never store inflammable or explosive items and strong corrosive acids or alkalis in the appliance. Mousse / Spraying agent / Gas/ Acid / Alkali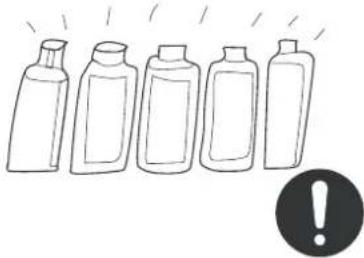 | This appliance is a household refrigerator, which is produced in accordance with the specification of national standard. It is intended for food storage only, not for storage of blood, medicine and biological products.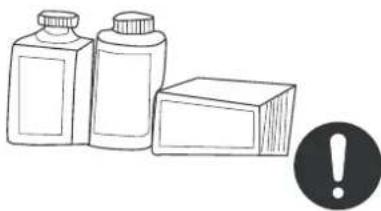 |
Vaccine / Strain / ChemicalsTo prevent risk of fire, keep the appliance away from gasoline or any other inflammables.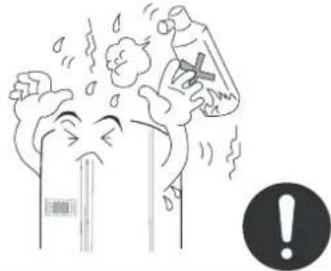 | To prevent risk of electromagnetic interference or other accidents, do not place any patch panel, voltage stabilizer and microwave oven on top of the refrigerator or use any electric appliance (unless recommended by the manufacturer) inside the refrigerator.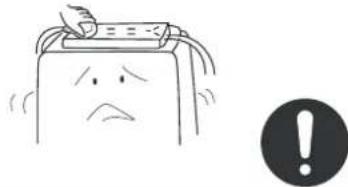 |
Children are not allowed to play with the door or the bottle racks. Serious injury may occur.Do not walk on the door or the cabinet when loading and unloading the refrigerator.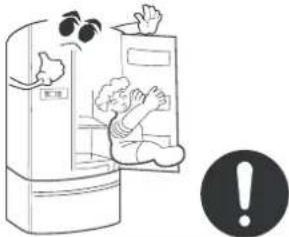 | The internal surface of freezer compartment is very cold when the appliance is running. Do not touch the surface especially when hands are wet.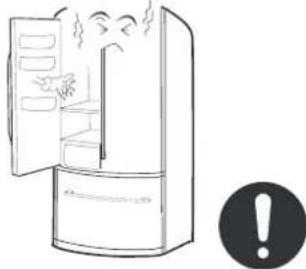 |
Safety Precautions
Hold the door handle when opening and closing the doorThe gap between the doors and the gap between the doors and the cabinet are very small. Make sure figures do not get stuck. Always keep children away when a door is opened or closed.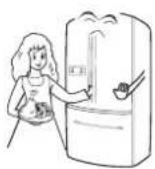 | Do not splash water onto the refrigerator. Keep off places of high humidity that may have adverse effect on the electric insulation performance.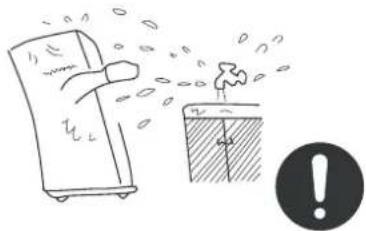 |
No dismantlement or modification can be made without authorization. Damage to refrigeration system is strictly prohibited. Reparation must be carried out by authorized personnel.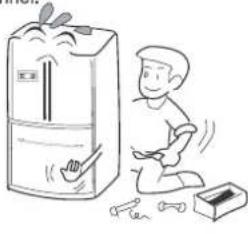 | Bottled beer or beverage should not be stored in the freezer compartment – risk of explosion.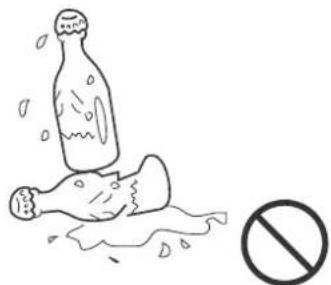 |
Unplug the appliance in the event of power interruption or cleaning. The appliance can be plugged again only after an interval of at least 5 minutes to prevent damage to the compressor caused by frequent startups.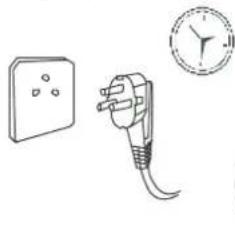 | Please remove the door, door seal and shelves before disposal of the old appliance and put them away in a safe place to prevent children from being entrapped.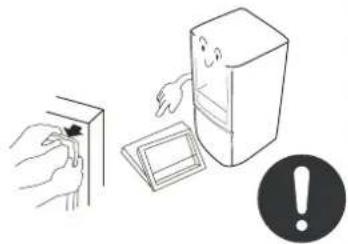 |
Location
Levelling
The appliance should stand firmly on solid floor. To support it, use firm and solid pads that are inflammable. Never use the packaging materials for supporting. Level the appliance with the adjustable legs whenever necessary. Turn clockwise to raise the refrigerator, and anticlockwise to lower it.
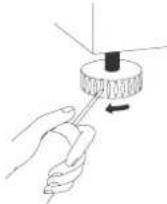

Do not expose the appliance to rain and moisture. Keep the appliance dry and clean.
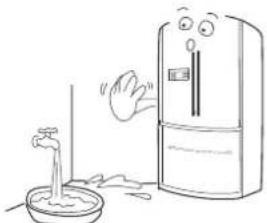
natural_image
Simple line drawing of a refrigerator with a hand reaching out, next to a water tap (no text or symbols)
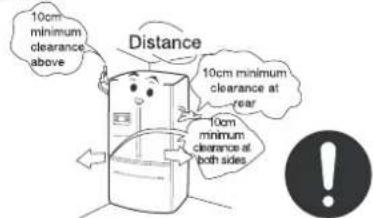
The appliance should be placed in a well-ventilated room. 10cm minimum clearance at both sides and at rear surface is required. If a built-in installation is needed, allow 25cm or more above the top surface of the appliance and 5cm or more away from the wall for proper air circulation.
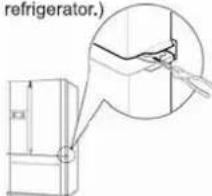
If the heights of the two doors are different, please adjust them according to the below steps:
- Lift the door which you propose to lift with one hand;
- Insert the washers with the help of pincers with your other hand;
- Insert more washers until the two doors are of the same height.
(Three spare washers will be provided together with the refrigerator.)

To prevent risk of injury and accident, do not place heavy load and water container on top of the refrigerator.

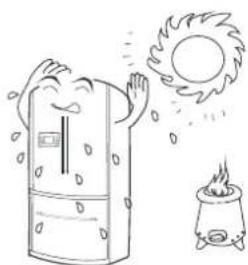
Do not expose the appliance to direct sunlight or heat source.
natural_image
Illustration of a refrigerator and a stovet with a sun and steam rising (no text or symbols)
Removing & Replacing Door

NOTE
To avoid injury, property loss or damage to the refrigerator, make sure to remove all food from door racks and then remove bottle bin(s), unplug the refrigerator and shut off water supply before removing and replacing a door.
To avoid injury or property loss, remove or replace the door with the help of 2 persons or more. The following instructions should be observed.
Removing and replacing the right door of refrigerator compartment
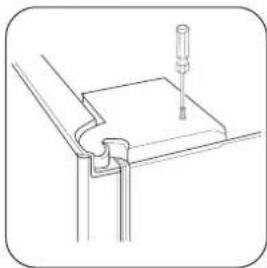
①Unscrew the upper right hinge cover by means of screwdriver and then remove the hinge cover.
natural_image
Technical line drawing of a mechanical assembly with a tool and bracket (no text or symbols)③Remove the door and place it in a proper position.
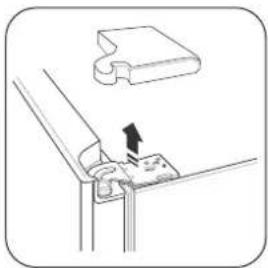
② Unscrew the upper right hinge by means of hexagonal screwdriver and then remove the hinge.
natural_image
Technical line drawing of a mechanical bracket assembly with a highlighted part (no text or symbols)④ Remove the middle hinge if necessary.
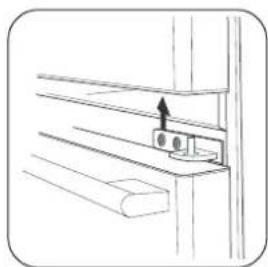
natural_image
Line drawing of a mechanical bracket or bracket assembly with an arrow indicating direction (no text or symbols)⑤Replace the door in a reverse sequence of removal.
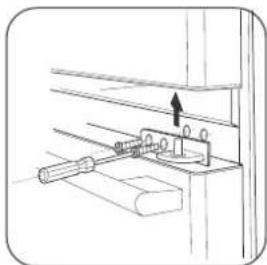
natural_image
Technical line drawing of a mechanical assembly with a lever and bracket (no text or symbols)
NOTE
Be careful to prevent the door from falling onto you when lifting the door from the hinge.
Removing & Replacing Door
Removing and replacing the left door of refrigerator compartment
①Unscrew the upper left hinge cover by means of screwdriver and then remove the hinge cover.
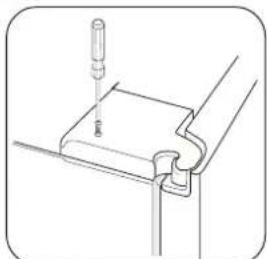
natural_image
Technical line drawing of a mechanical assembly with a tool inserted (no text or symbols)③Remove the door and place it in a proper position.
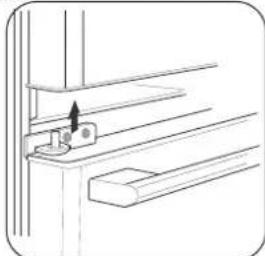
natural_image
Pure technical line drawing of a mechanical bracket or mounting bracket without any text, numbers, or symbols⑤Replace the door in a reverse sequence of removal.

NOTE
Be careful to prevent the door from falling onto you when lifting the door from the hinge.
Removing & Replacing Freezer Drawer
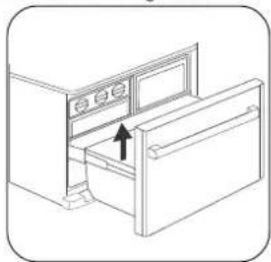
①Pull out the freezer drawer entirely and remove it from the refrigerator.
natural_image
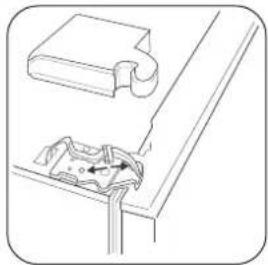
Line drawing of a cabinet with an open drawer and a door, showing a directional arrow (no text or symbols)②Unscrew the upper left hinge by means of hexagonal screwdriver and then remove the hinge.
natural_image
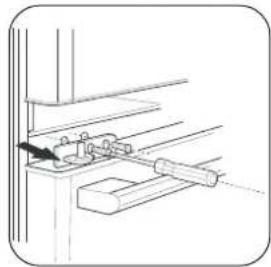
Technical line drawing of a mechanical assembly with a bracket and clamping tool (no text or symbols)④Remove the middle hinge if necessary.
natural_image
Line drawing of a mechanical clamp or bracket assembly with a handle and lever (no text or symbols)② Replace the freezer drawer in a reversal sequence to removal.

WARNING
To prevent the risk of suffocation, keep children and pets away from the drawers, in case they may get entrapped in the drawers.
Preparation

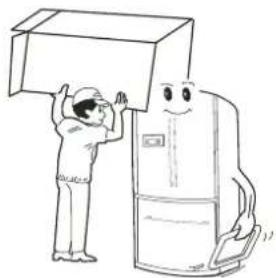
Remove all packaging materials.
Foam support and adhesive tapes should be removed.

Check the accessories and literature.
Check the accessories in accordance with the packing list. Any doubt, contact the dealer.

Locate the appliance in a proper position. See "Location".
Please write down the model number and serial number in Letter of Warranty for later reference.
natural_image
Cartoon illustration of a person holding a cardboard box next to a refrigerator (no text or symbols)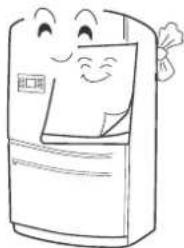
natural_image
Cartoon illustration of a smiling refrigerator with a bandage and a paper sheet (no text or symbols)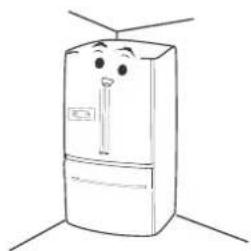
natural_image
Simple line drawing of a refrigerator with a smiling face and handle (no text or symbols)Preparation

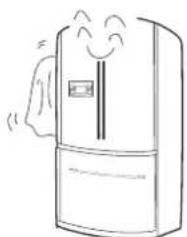
It is recommended to clean the appliance before operation. See "Cleaning".
natural_image
Simple line drawing of a refrigerator with a smiling face and waving hand (no text or symbols)
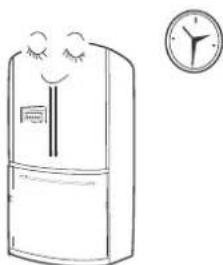
Standstill
To ensure normal operation, allow the appliance to stand still for 6 hours or longer after installation and cleaning.
natural_image
Line drawing of a refrigerator with two eyes and a clock beside it (no text or symbols)
Installing Bottom Trim
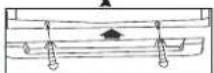
Open the door of refrigerator compartment and take out the bottom trim. Fasten it to the bottom of refrigerator with screws as illustrated.
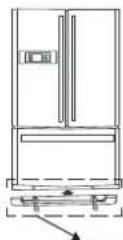
Wear a pair of gloves to protect your hands when dismantling the bottom trim and adjustable legs of the refrigerator.
Preparation

Removing & Replacing Door Handle
Take out the door handles from the refrigerator compartment (2 longer handles to be installed on the refrigerator and 1 shorter handle to be installed on the freezer). The following instructions should be observed.
Removing & Replacing Refrigerator Door Handle
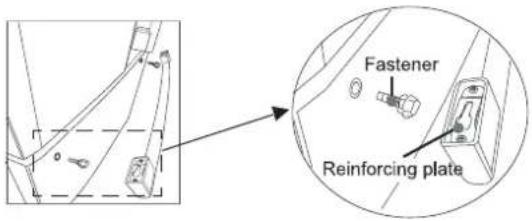
Get 2 fasteners out of the accessory bag and place them in 2 reserved holes in the left door. Install a handle by attaching the reinforcing plate to the fasteners and then pushing the handle downwards into its place. Install the right handle in the same way. To remove the handle, push it upwards.
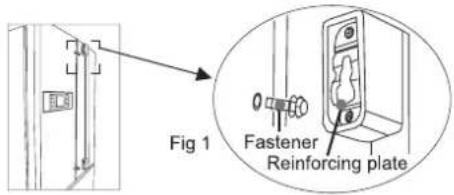
Removing & Replacing Freezer Door Handle
Get 2 fasteners out of the accessory bag and place them in 2 reserved holes in the freezer door. Install a handle by attaching the reinforcing plate to the fasteners and then pushing the handle leftwards into its place. To remove the handle, push it rightwards.
Preparation

Installing wine shelf
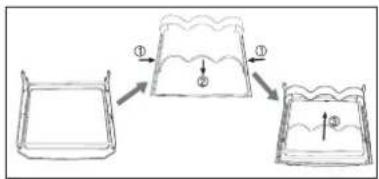
Open the door of refrigerator compartment. Take out the food shelf at the upper left corner. Place the glass shelf downward on a table. Then take out the wine shelf from the delicatessen drawer at the bottom. Hold the wine shelf at both ends, attach it to the food shelf (as shown below in Fig 1) and then push it in place (as shown below in Fig 3).
flowchart
graph TD
    A["Rectangular Box"] --> B["Converging Box"]
    B --> C["Inverted Container Box"]
    style A fill:#f9f,stroke:#333
    style B fill:#ccf,stroke:#333
    style C fill:#cfc,stroke:#333

Installing front cover of chill compartment
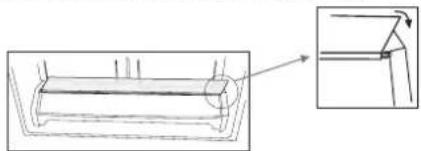
Open the door of refrigerator compartment. Take out the front cover of chill compartment from the crisper cover. Then place the rotary shaft at both ends of the chill compartment into the supporting slot of the slide guide, and turn the front cover of chill compartment down.
natural_image
Technical line drawing of a mechanical component with an inset showing a close-up view (no text or symbols)Initial Use

- Connect the appliance to the power supply.
The actual temperatures in the refrigerator and the freezer are shown.
The appliance has a backup memory and the settings before a power interruption will be stored. (See Backup Memory section on Page 18 for details)

Operation Modes
Recommendation!
Once the AI mode is selected, there is no need to make any adjustment within a prescribed range of temperature, notwithstanding the changes in ambient temperature.
You can select one of the following operation modes.
(1) AI: Unless otherwise required, it is recommended that the AI mode is used. Tap the AI button and the indicator will illuminate. The appliance will start an automatic operation. (See the AI Mode section on Page 15)
(2) Manual: Alternatively, you can adjust the inner temperature by means of the temperature control button. (See the Temperature Setting & Regulation section on Page 17)

Loading the refrigerator
The inner compartment will be cold enough and ready for food storage after a couple of hours of non-load operation.
natural_image
Simple line drawing of a person holding a tray with flowers (no text or symbols)
When the temperature setting is adjusted, it takes some time to reach the desired inner temperature. The period will be longer or shorter, depending on the ambient temperature, amount of food and how often the door is opened.
Functions
(1)
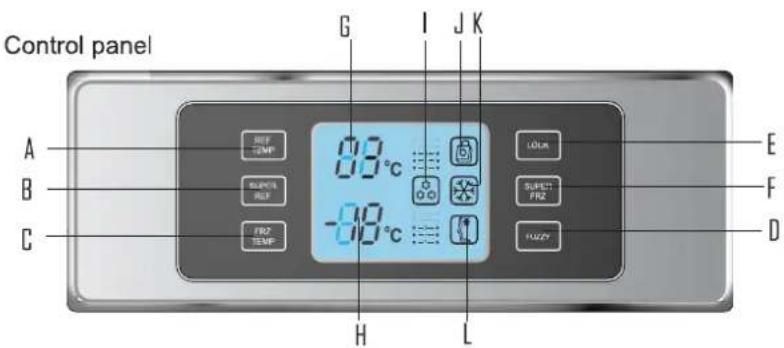
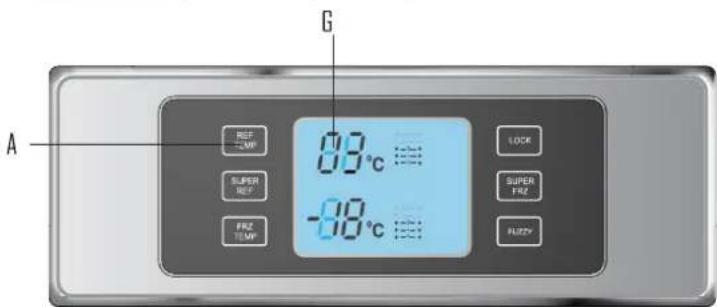
A.....Refrigerator temperature control button G.....Refrigerator temperature display
B.....Fast chill button H.....Freezer temperature display
C.....Freezer temperature control button I..... Fast chill icon
D.....Al button J.....Lock icon
E.....Fast freeze button K.....Fast freeze icon
F.....Lock / unlock button L.....Al icon
(2)
AI Mode
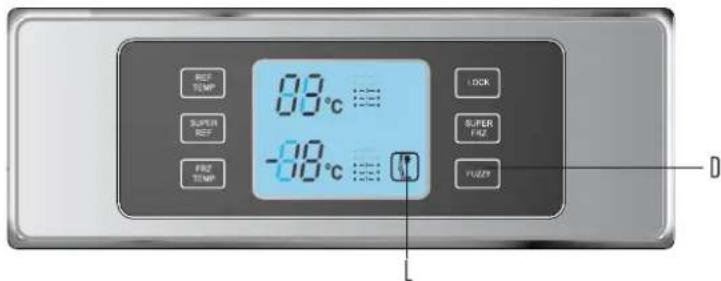
The AI mode means there is no need for manual intervention and the temperature setting will change automatically along with the ambient temperature and the inner temperature. Under the Unlock mode, the AI button (D) may be tapped to display the AI icon (L) and activate the AI mode. To quit the AI mode, tap the AI button (D) again. The AI icon (L) will disappear.
(3)
Fault Display
When a fault with a control or function is detected, the refrigerator temperature display and the freezer temperature display will disappear while the fault codes will be displayed, i.e. E0, E1, E2, F1, F2, F3, and F5, etc.
Functions

Lock & Unlock
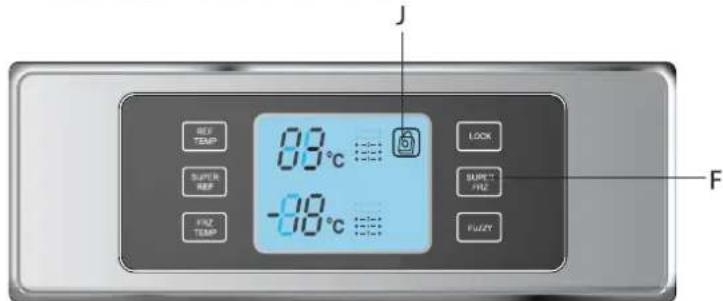
Under the Unlock mode, the Lock / Unlock button (F) may be tapped to display the Lock icon (J) and enter into the Lock mode. To quit the Lock mode, tap the Lock / Unlock button (F) again. The Lock icon (J) will disappear.
NOTE: Controls for selecting temperatures in refrigerator and freezer compartments and functions such as fast freeze, fast chill and AI (artificial intelligence) cannot be operated under the Lock mode.

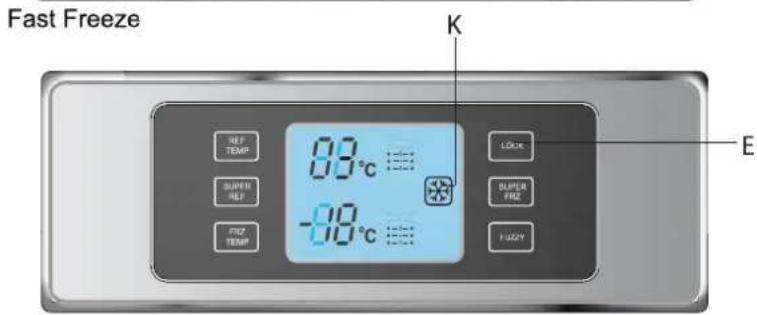
This function is intended for retaining nutrients contained in the food stored in the freezer by freezing the food fully within a short period of time.
Under the Unlock mode, the Fast Freeze button (E) may be tapped to display the Fast Free icon (K) and activate the Fast Freeze mode. The Fast Freeze mode is activated and will be stopped automatically after 3 hours. To quit the Fast Freeze mode, tap the Fast Freeze button (E) again. The Fast Freeze icon (K) will disappear.
NOTE: The Fast Freeze mode is not available under the AI mode.
NOTE: When making ice, you may select Fast Freeze to speed up ice-making process and quit Fast Freeze after the ice-making process is completed.
Functions
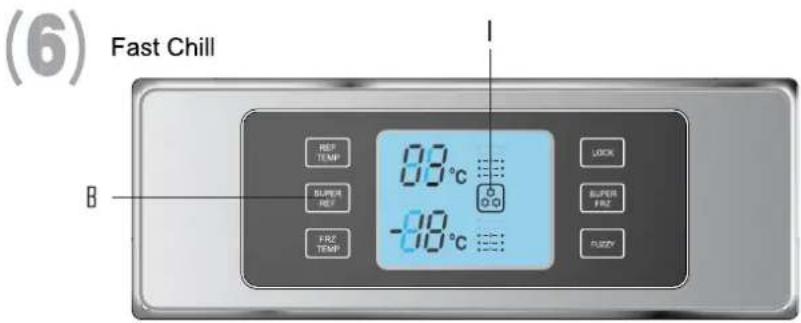
This function is intended for retaining nutrients contained in the food stored in the refrigerator by chilling the food to the desired temperature within a short period of time. Under the Unlock mode, the Fast Chill button (B) may be tapped to display the Fast Chill icon (I) and activate the Fast Chill mode. The Fast Chill mode will be stopped automatically once the refrigerator temperature arrives at the pre-set temperature. To quit the Fast Chill mode, tap the Fast Chill button (B) again. The Fast Chill icon (I) will disappear.
(7) Temperature Setting & Regulation
temperature setting & regulation: This function is available only when the AI mode is deactivated. The following instructions should be observed.
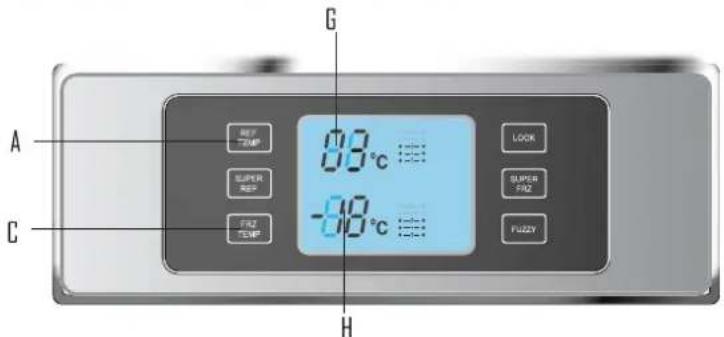
To set the refrigerator temperature: Under the Unlock mode(the display screen is on), the refrigerator temperature control button (A) may be tapped. The refrigerator temperature display (G) will glisten. Each time the refrigerator temperature control button (A) is tapped, the display sequence is as follows:
7^ C-5^ C-3^ C-2^ C-1^ C-7^ C
Functions
To set the freezer temperature: Under the Unlock mode(the display screen is on), the freezer temperature control button (C) may be tapped. The freezer temperature display (H) will glisten. Each time the freezer temperature control button (C) is tapped, the display sequence is as follows:
-16°C--17°C--18°C--20°C--22°C--16°C

Door-open Alarm
When the door is kept open or not properly closed, an audible alarm will be given once for a while until the door is closed.

Economic Display Control
The display screen will go dark 30 seconds after the operation of control panel is finished. The display is restored when any control button is tapped or any door is opened. But such button operation will not change the present setting of the refrigerator.

Refrigerator On / Off Control
Under the Lock mode, hold the refrigerator temperature control button (A) 3 seconds to turn off the refrigerator. The refrigerator temperature display (G) will disappear while the refrigerator light will remain functional. Hold the refrigerator temperature control button (A) 3 seconds to turn on the refrigerator. The refrigerator temperature display (G) will illuminate and the normal operation of refrigerator compartment will be resumed.

Backup Memory
The temperature settings will be memorized and, in case of a power interruption, restored after the power interruption is over.
About Refrigerator Compartment
● The refrigerator can be used for short-time food storage.
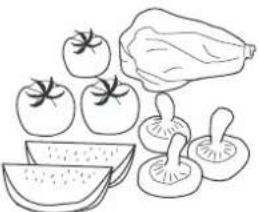
TThe average temperature of the compartment is generally maintained within 0\~10°C (-2\~3°C for chill compartment). Therefore it is only used for short-time food storage and not suitable for keeping food fresh for a long time.
natural_image
Illustration of fresh vegetables including tomatoes, lettuce, mushrooms, and a halved chicken (no text or labels)● Height-adjustable Shelf
The height of shelf can be adjusted to meet your storage needs.
To adjust the shelf height, remove the shelf first. The steps are as follows: tilt the shelf up at front, and lift it up and out of tracks. To replace the shelf, with shelf front raised slightly, engage the lugs in tracks. Then lower shelf front until it locks into position.

NOTE
Make sure the shelf is installed securely and in the same level to prevent shelf falling or food spills.
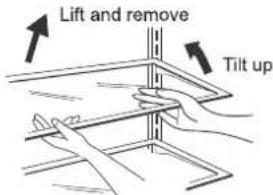
To remove
Engaged the lugs
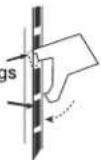
To replace
How to User the Crisper
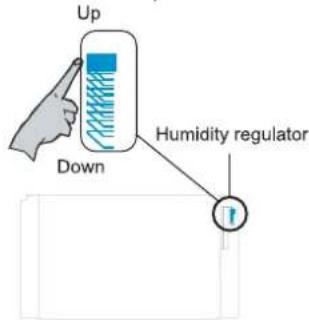
The appliance is equipped with a crisper for vegetable and fruit storage. You can set the humidity to meet your storage needs.
● Turn the humidity regulator (located at the upper right corner of the crisper) up to get a higher humidity suitable for storage of cucumber, grape, kiwifruit and persimmon etc.
● Turn the humidity regulator (located at the upper right corner of the crisper) down to get a lower humidity suitable for storage of strawberry, orange, bean, garlic, watermelon, plum and tomato etc.
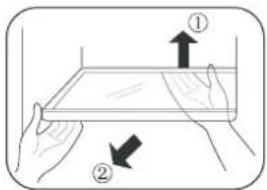
● Removing Crisper Cover
Take out the crisper and put it away. Lift up the cover end (1) and remove it (2).
About Refrigerator Compartment
● How to Use the Chill compartment
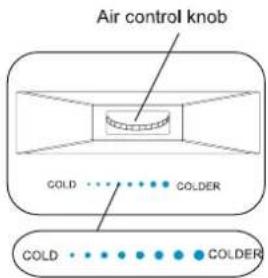
The appliance is equipped with a delicatessen drawer with a temperature range from -2°C\~+3°C. The temperature can be adjusted by the air control knob to meet your storage needs.
● Turn the air control knob leftwards (weak) to reduce the cooled air moving in the chill compartment and maintain a higher temperature;
● Turn the air control knob rightwards (strong) to increase the cooled air moving in the chill compartment and maintain a lower temperature.
● Cleaning door bin
Lift the bin up (1) and pull it towards you (2). Replace the bin in the reverse sequence of removal after cleaning.
● Food Arrangement
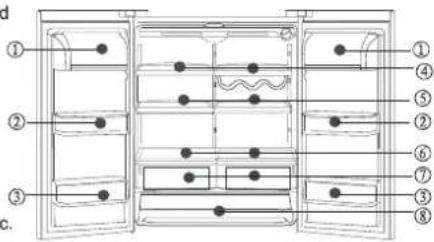
As a result of air circulation in the refrigeration compartment, some areas are warmer and the others are colder. Foods should be organized accordingly.
①=Egg, butter and cheese etc.
②=Pop cans, canned food, condiments etc.
③=Beverages and bottled food etc.
④=Pickles and canned food etc.
⑤=Sausage and snacks etc.
⑥=Pastries, canned food, milk and bean curd etc.
⑦=Fruit, vegetable and salad etc.
⑧=Delis and sausage etc.
● Replacing the Light Bulb
Bulb specifications: 230V\~, 25W
Socket: E14 (DO NOT use a bulb over 25W)
● Unplug the appliance.
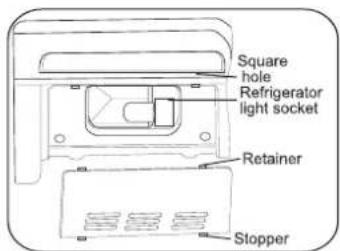
● ①To remove the light shield, press the stopper at rear out of the square hole.
② Pull the shield backward until the retainer is separated from the square hole.
● Turn the bulb anticlockwise and out. Replace a bulb of the same specifications in the reverse sequence of removal.
● To replace the light shield: Engaged the retainer into the square hole and then press the shield rear forward until the stopper is locked in the square hole.
Light bulb
Storing Food in Refrigerator Compartment
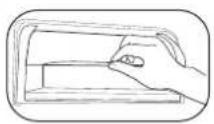
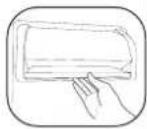
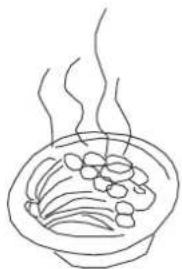
| When loading or unloading the dairy bin, it is safe to open and close the dairy bin in such a way as illustrated below. | Allow warm foods to cool down before putting them into the refrigerator. | |
 |  |  |
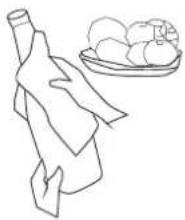
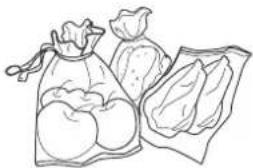
| Make sure the food is clean and the extra water is wiped away before storing. | Wrap or cover food before storing.This will help prevent the loss of water content, keep fruit and vegetable fresh and avoid any unpleasant odor. | |
 |  | |
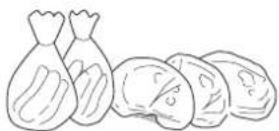
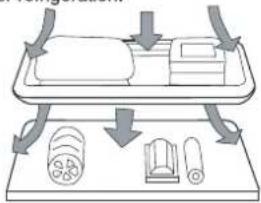
| Sorting before storageSort the foods by category. For those to be used up soon, place them in the front of the shelf, so as to avoid frequent and prolonged door opens and food deterioration. | Do not overfill your refrigerator.Leave enough space between foods stored in the refrigerator to keep good air-circulation for better refrigeration. | |
 |  | |

Greasy foods may cause corrosion of lining materials gradually. Keep them away from the walls of inner compartment. Keep the inner compartment clean and free of oil stains.
Useful Tips
Remove leaves of carrots and radishes before adding them to the refrigerator, thus to prevent nutrition loss.
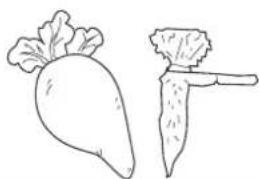
natural_image
Line drawing of two radishes, one with leafy top and one with a pointed tip (no text or symbols)For food which can maintain freshness under ambient temperature storage, such as onions, garlic, and other roots, it is not necessary to put them in the refrigerator.
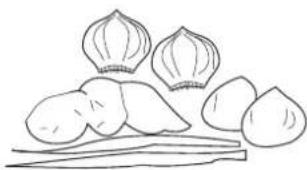
natural_image
Simple line drawing of sliced vegetables and root vegetables (no text or symbols)Thaw frozen food in the refrigerator compartment, this will help cooling food in the refrigerator compartment and save energy.
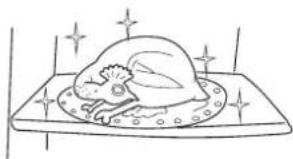
natural_image
Simple line drawing of a sleeping pumpkin on a tray with sparkles (no text or symbols)Fruits such as rice melon, Chinese quince, sweet melon, banana and pine apple can get ripe faster under lower temperatures, these fruits are not suitable for refrigerated storage unless you need them to ripen sooner.
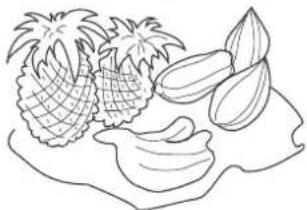
natural_image
Line drawing of pineapples and fruits on a stylized human head (no text or symbols)About Freezer Compartment
● The Freezer is intended for long-term food storage.
The temperature in the freezer is very low, making it ideal for storage of frozen food. Add food expected to be stored for a longer period of time in the freeze, but the expiry date indicated on its packing should be observed.
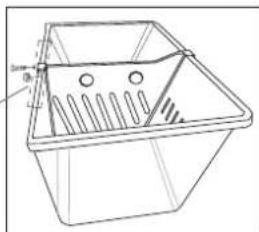
● Adjustable partition wall of freezer drawer
A movable partition wall is provided in the freezer drawer to divide the drawer into two parts. You may move the partition wall right or left to meet your storage needs.
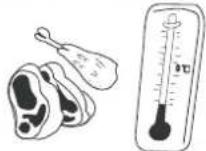
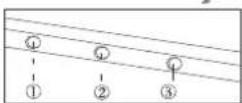
natural_image
Technical line drawing of a rectangular container with internal compartments and a handle (no text or symbols)About Freezer Compartment
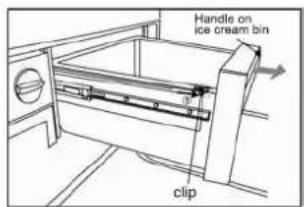
- If you want to clean the ice-cream box, please process it according to the below steps:
1). Draw out the ice-cream box as large as you can.
2). Fold down the clips on both sides of the ice-cream box;
3). Take out the ice-cream box and clean it;
4). After the cleaning, please install the ice-cream box in the opposite way and fix the clips;
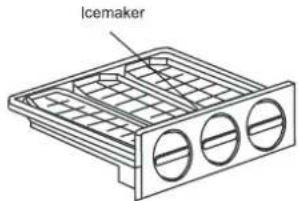
- Icemaking
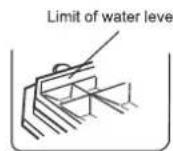
● Pour water in the icemaker to 3/4 of its capacity and then place it in the freezer.
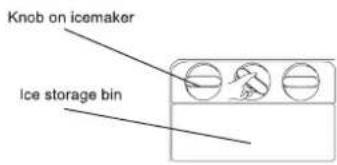
● To get ice cubes, turn the knobs on the icemaker respectively and the ice cubes will be collected in the ice storage bin.
● The ice cubes in the ice storage bin are ready for use.
- When you need, Semi-automatic icemaker can be taken out and Ice storage bin can be used to store more food.
● Replacing the Light Bulb
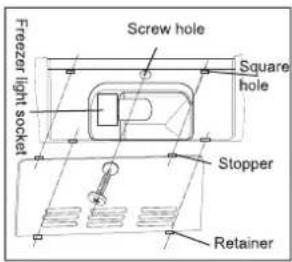
Bulb specifications: 230V\~, 25W Socket: E14 (DO NOT use a bulb over 25W)
To replace the light bulb:
Unplug the appliance.
①Remove the front screw with a screwdriver.
● ②To remove the light shield, press the stopper at front out of the square hole.
③Pull the shield forward until the retainer is separated from the square hole.
Turn the bulb anticlockwise and out. Replace a bulb of the same specifications in the reverse sequence of removal.
To replace the light shield: Engaged the retainer into the square hole and then press the shield front backward until the stopper is locked in the square hole. Replace and tighten the screw.
Freezer light bulb
Storing Food in Freezer Compartment
Allow warm foods to cool down before putting them into the freezer.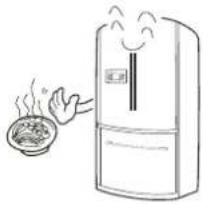 | Store food in smaller packages. This will make it easier to freeze the food fully and provide better quality when the food is thawed. It's recommended that each package should not exceed 2.5kg.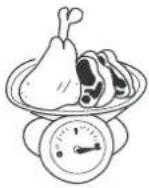 |
Wrap food before storing. Make sure the wrappings are dry to prevent them from sticking to each other. The wrapping materials used should be odorless, airtight, leak-proof, nontoxic and environmental friendly to prevent unpleasant odor or food deterioration.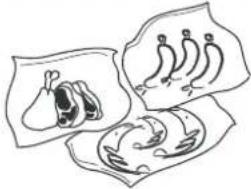 | The package of food should indicate information such as name of food, date of storage and expiry date.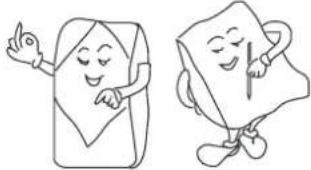 |
Once thawed, food cannot be returned to the freezer unless it has been cooked. Always get frozen food from the freezer for thawing according to actual needs.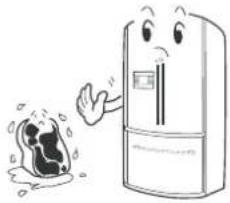 | Do not put too much fresh food in your freezer. The freezing capacity (as indicated in the Technical Data sheet) should be observed.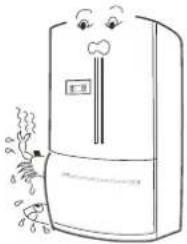 |
Defrosting • Cleaning
Defrosting Freezer Compartment
The defrost cycle of freezer compartment is automatic and no manual operation is needed.
Cleaning
Clean the inner compartments to get rid of food residues and eliminate unpleasant odors.
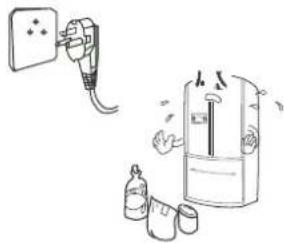
● Unplug the appliance before cleaning.
● Use a cloth or sponge to wash the inner compartments with lukewarm water and mild detergent.
●Dry the external surface with a dry cloth.
natural_image
Illustration of a wall-mounted electrical plug connected to a refrigerator with cleaning bottles nearby (no text or symbols)
NOTE
①The appliance is heavy. Protect the finish of flooring if the appliance has to be moved during cleaning and servicing.
②For the sake of electric insulation, do not splash water on the appliance.
③To clean electric components such as switches and illuminators, make sure the appliance is not connected before cleaning with a dry cloth.
④When cleaning, do not use sharp or pointed brush, hard cleansers, gasoline, amyl acetate, acetone or other organic solvents, boiled water, acid or alkali.
⑤Do not touch the cold metal surface when the hands are wet.
⑥When cleaning, do not use hot water to clean the glass shelves. Glass may get broken due to thermal shock and cause the risk of injury and property loss.
⑦Clean the door seal from time to time.
⑧Never use amyl acetate to get rid of any unpleasant odor. That will cause the risk of fire.
⑨ Only detergents intended for refrigerator should be used in cleaning.
Vacation
Power failure
Food can be stored well for several hours in the event of power failure even if it is in summer.
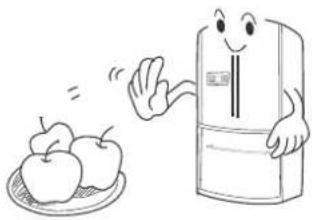
- Do not add foods in the appliance and keep the doors closed as far as possible when there is a power failure.
- If a power failure is announced beforehand, make some extra ice cubes and hold them in a leak-proof container. Place the container on the top shelf in the refrigerator compartment.
natural_image
Cartoon illustration of a smiling refrigerator with three apples on a plate (no text or symbols)
NOTE
Temperature rise in the freezer due to power interruption or other faults may shorten the shelf life and have an adverse effect on food quality.
Stopping Use
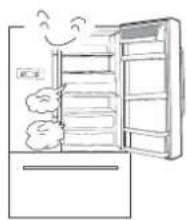
Please unplug the appliance and clean it as described above if the appliance will not be used for a long period of time.
Keep the door open to prevent unpleasant odors caused by food residues.
natural_image
Illustration of an open refrigerator with a smiling face and steam rising (no text or symbols)
NOTE
To ensure a long service life, do not stop the appliance frequently.

NOTE
After unplugging the appliance, wait 5 minutes at least before connecting it to the power supply again.
Vacation
When leaving for a vacation
- If you are leaving for a long vacation, it's necessary to shut off the power, take out all of the foods, defrost and clean the appliance. Dry the appliance and leave the door open to prevent odors
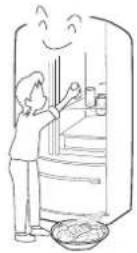

A discarded appliance must be disposed by professional personnel, or otherwise may have an undesired impact on environment or give rise to other hazards.
When moving your refrigerator
● Unplug the appliance before transportation.
● Take out foods from the appliance
● Fix the shelves in refrigerator, crisper and shelves in freezer in position with adhesive tapes.
- Keep the door closed during transportation with adhesive tapes.
- When moving the refrigerator, it cannot be tilted over 45 degrees (the angle to the vertical direction). Otherwise it may cause the risk of malfunction of the refrigeration system.
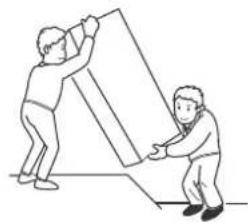
natural_image
Two people assembling a large block, one lifting the other (no text or symbols visible)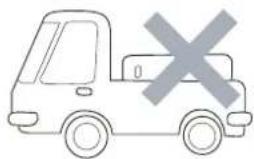
natural_image
Simple line drawing of a van with a cross symbol on the front (no text or labels)
Keep the refrigerator upright other than horizontal.
Troubleshooting Tips
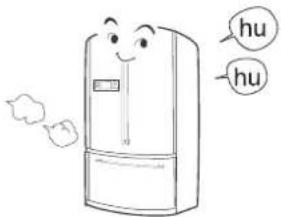
It's normal that when the refrigerator is first plugged in, the compressor operates for long periods or cycles on and off frequently. It would take a longer time for the inner temperature to reach the desired value.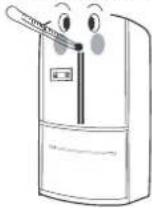 | It's normal that the refrigerator is humming when first plugged in or started up. The sound will fade away when the refrigerator is in stable operation.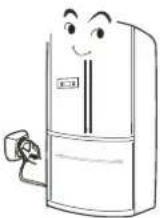 |
It's normal that the external surface of refrigerator gets warm, especially when first plugged in, as a result of anti-sweat design.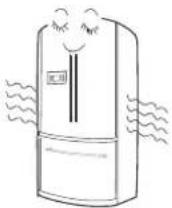 | The compressor may cause a humming sound during operation and a clicking sound upon starts and stops.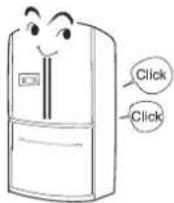 |
The flow of refrigerant through the refrigeration coils may make a babbling noise. The noise is usually found at the evaporator and the compressor. When the compressor comes to a stop, the backflow of refrigerant will make a noise like running water from time to time or continuously.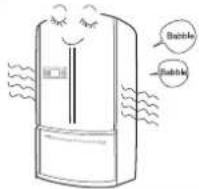 | Water dropping on the defrost heater can cause a sizzling or buzzing sound during a defrost cycle. At the end of a defrost cycle, a slight popping sound may be heard, and the evaporator may make a gurgling noise like boiling noise.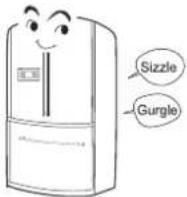 |
Troubleshooting Tips
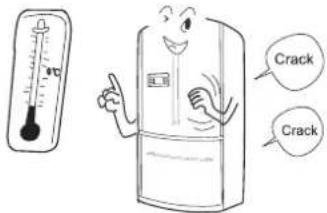
| It's normal that there is a noise of fan spinning during operation. | Expansion and contraction of the evaporator and refrigerating coils due to temperature change can cause a cracking or popping sound. |
 |  |
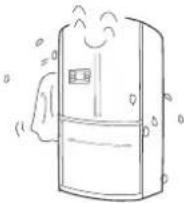
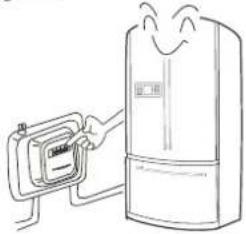
| Moisture may form on the outside of refrigerator and between the doors during periods of high humidity. | The rated power consumption specified in the Technical Data sheet is measured during a period of 24 hours under stable operation at an ambient temperature of 25°C with the refrigerator and freezer maintained at 5°C and -18°C respectively. The actual power consumption depends on the amount of fresh food stored in the refrigerator, |
 |  |
After-sale Service
When calling for service, provide the model name, list of accessories and the series number (described in the nameplate of the product).
Before calling for services, check the following points to see if you can solve the problems yourself.
Refrigerator does not work.
Refrigerator is not connected to the power supply (plug, outlet and fuse) or the power control is set to OFF.
Voltage is too low.
Interior light does not work.
Light bulb has burned out.
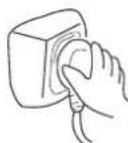
Refrigerator is not connected to the power supply.
Unusual noise
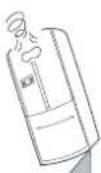
Refrigerator is not level.
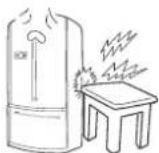
Refrigerator rubs against the wall or furniture.
Compartments are warmer than expected
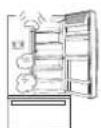
Door is not closed properly, opened frequently or kept open too long.

Temperature is set a warmer setting.(see the Functions section from page 15 to page 18.)
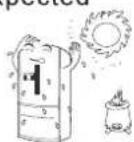
The appliance is exposed to direct sunshine or placed near a stove or radiator.
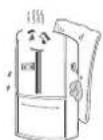
Poor ventilation. Check if the heat radiation unit on the rear is blocked.
After-sale Service
Before calling for services, check the following points to see if you can solve the problems yourself.
Compressor operates for long periods or cycles on and off frequently.
- It's normal when refrigerator is first plugged in.
● A large amount of food is placed in the refrigerator for storage or freezing.
● Door is left open or held open by food package.
● Door is opened frequently. - It is hot weather.
● Temperature is set a warmer setting. See the Initial Use section.
● Poor ventilation
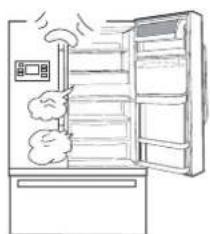
natural_image
Line drawing of an open refrigerator with a mounted air conditioner and smokestack (no text or symbols)Frost or ice crystals form on food.
● Frost within package is normal.
● Door is left open or held open by food package.
● Door is opened frequently or kept open too long.
● Food is placed near the vent.
Unpleasant odor
● Food with strong odors should be tightly wrapped.
● Food is deteriorated.
● Compartments need cleaning.
Technical Data • Circuit Diagram • Packing List
Technical Data
| Model | Input power | 180W | ||
| Freezing class | *** | Defrost watt | 280W | |
| Climate class | T | Energy consumption | 1.10 kW·h/24h | |
| Protection class | I | Refrigerant | R134a 170g | |
| Total volume | 555L | Refrigerating capacity | 10kg/24h | |
| Freezer volume | 158L | Weight | 130kg | |
| Rated voltage | 220V-240V~ | Dimensions (DxWxH)(mm) | 770×910×1770 | |
| Rated frequency | 50Hz | Type of cord connection | Y | |
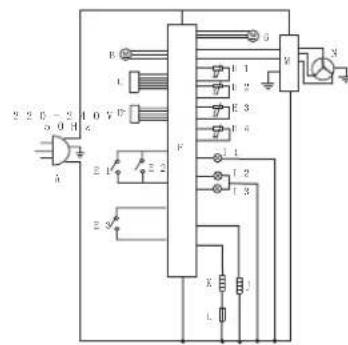
A. Power plugB. Freezer fan motor
C. RefrigeratDoDoodnmfiesrplay | panel
E1. Refrigerator door switch l
E2. Refrigerator door switch 1 2
E3. Freezer do fr ①w in tt q h o l | p a n e l
G. Cooling fan motor II 1. Defrost sensor
H2. Freezer HsSensRerfrigerator sensor
ll 4. Environmentlseffsørezer| lamp
12. Refrigerator lamp 113. Refrigerator
J. Refrigerator, heater heater
L. FusMe. Inverter N. Compressor
Technical Data • Circuit Diagram • Packing List
Packing List
| Quantity/Model\Name | User Manual | Leg | Bottom trim | Handle | Ice cream bin | Freezer divider | Freezer drawer | Ice storage bin | Semi-automatic | Gemaker | Wine shelf | Movable shelf | Refrigerator shelf | Chili compartment | Crisper cover | Crisper | Dairy bin | Gallon bin | Handle fastener | Front cover of chili compartment | Washer |
| 1 | 2 | 1 | 3 | 1 | 2 | 1 | 1 | 1 | 1 | 2 | 2 | 1 | 1 | 2 | 2 | 4 | 6 | 1 | 3 |
The product specifications are subject to change from time to time due to product improvement without further notice.
- Features
- Names of parts
- Safety Precautions
- Location
- Levelling
- Removing & Replacing Door
- Removing and replacing the right door of refrigerator compartment
- Removing and replacing the left door of refrigerator compartment
- Removing & Replacing Freezer Drawer
- Preparation
- Standstill
- Installing Bottom Trim
- Removing & Replacing Door Handle
- Removing & Replacing Refrigerator Door Handle
- Removing & Replacing Freezer Door Handle
- Installing wine shelf
- Installing front cover of chill compartment
- Initial Use
- Recommendation!
- Functions
- Fault Display
- Lock & Unlock
- Temperature Setting & Regulation
- Door-open Alarm
- Economic Display Control
- Refrigerator On / Off Control
- Backup Memory
- About Refrigerator Compartment
- ● How to Use the Chill compartment
- ● Cleaning door bin
- ● Food Arrangement
- ● Replacing the Light Bulb
- Storing Food in Refrigerator Compartment
- Useful Tips
- About Freezer Compartment
- - Icemaking
- Storing Food in Freezer Compartment
- Defrosting • Cleaning
- Defrosting Freezer Compartment
- Cleaning
- Vacation
- Power failure
- Stopping Use
- When leaving for a vacation
- When moving your refrigerator
- Troubleshooting Tips
- After-sale Service
- Compressor operates for long periods or cycles on and off frequently.
- Frost or ice crystals form on food.
- Unpleasant odor
- Technical Data • Circuit Diagram • Packing List
Brand : Campomatic
Model : FRF253SS
Category : Refrigerator