
DMO 297 - Microwave Defy - Free user manual and instructions
Find the device manual for free DMO 297 Defy in PDF.


| Brand | Defy |
| Model | DMO 297 |
| Product Type | Solo Microwave |
| Capacity (Liters) | 29 L |
| Power Output (Watts) | 900 W |
| Voltage / Frequency | 230 V ~ 50 Hz |
| Dimensions (H x W x D) mm | 280 x 510 x 420 mm |
| Weight (net) | 14 kg |
| Control Type | Digital with LED Display |
| Defrost Function | Yes, by weight or time |
| Auto Cook Programs | 8 preset programs |
| Turntable | Yes, 315 mm glass tray |
| Interior Light | Yes |
| Child Lock | Yes |
| Door Interlock | 2-door interlock system |
| Cleaning Instructions | Wipe interior with damp cloth after each use |
| Spare Parts Availability | Available from Defy service centers |
| Repair Service | Authorized Defy service centers |
| Energy Efficiency Class | A |
Frequently Asked Questions - DMO 297 Defy
User questions about DMO 297 Defy
0 question about this device. Answer the ones you know or ask your own.
Ask a new question about this device
Download the instructions for your Microwave in PDF format for free! Find your manual DMO 297 - Defy and take your electronic device back in hand. On this page are published all the documents necessary for the use of your device. DMO 297 by Defy.
USER MANUAL DMO 297 Defy
natural_image
Line drawing of a microwave oven with control knobs and display screen (no text or symbols)
YOU CAN RELY ON DEFY
INDEX
2 Introduction.
Microwaves and how they work.
Precautions.
Electrical installation.
3 Installation.
Safety tips and instructions.
4 The control panel.
5 Accessories and their use.
6 Selecting language.
Setting the time of day.
Child lock.
7 Power save mode.
Operational notes to remember.
8 Microwave cooking.
9 Grilling.
10 Convection cooking with pre heat.
11 Convection cooking—Traditional.
12 Combi—combination cooking.
15 Auto defrost.
16 Defrosting tips.
Cake.
17 Cake recipes.
19 Crusty cooking.
20 Auto cook.
Auto cook menu.
22 Memory cook.
Speedy cook.
23 Less and More.
Manual cooling.
Scroll speed.
24 Stop the oven from operating.
Warning messages.
General guide.
26 Cleaning and maintenance.
27 Problem solving.
Technical specifications.
28 Questions and answers.
29 Service Centres.
30 Warranty.
www.defy.co.za
Introduction
You are now the owner of one of the finest and most modern microwave ovens that today's technology can produce. You are going to make a great team together, but first you must familiarise yourself with the product.
Please take some time and read through this manual carefully. It will tell you all you need to know about your new microwave oven, what it will do and how to do it. We wish you many happy years of cooking.
How Microwaves work
Microwaves are high-frequency electromagnetic waves closely resembling ordinary daylight or radio waves. But whereas radio waves vary in length from 1 metre to many kilometres, microwaves are only about 12.5 cm long.
A magnetron, inside the oven, converts electrical energy into microwaves. The microwaves are not hot, so there is no heat in the microwave oven. The microwaves penetrate the food and provide energy which vibrates the water molecules present in the food. This incredibly rapid vibration produces extreme heat which cooks the food.
This explains the mystery of how hot food can emerge from a cold oven.
Microwaves are not retained in the air or in the food after the door is opened. Microwaves can not penetrate metals, so the oven cavity is lined with metal. The oven door window is transparent and is lined with a fine metal mesh which prevents the waves from passing through. The door mechanism is designed in such a manner that the oven will not operate if the door is open. During manufacture, the microwave ovens are subjected to stringent processes and testing to ensure that microwave leakage does not occur.
Precautions
- Do not attempt to operate the oven if the door is misaligned, bent, the hinges are loose or broken or if the door no longer closes properly. Report any damage to your dealer or nearest Defy Service Centre. They will be able to take the necessary corrective action.
- Do not tamper with or attempt to bypass the door safety interlocks.
-
Do not place or trap any object between the front edge of the oven and the door.
-
Clean up any residue which may accumulate on the door's inner sealing surface.
- Liquids or foods should not be heated in sealed containers as they might explode.
- Do not allow children or the infirm to use the oven without responsible supervision.
- Any adjustment or repairs should only be undertaken by a qualified service technician
Electrical installation
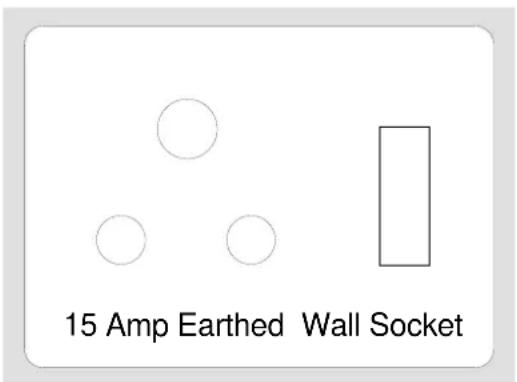
- Microwave ovens operate off a 15A earthed electrical socket and do not require specialised electrical installation. However improper earthing could result in electrical shocks.
- If the supply cord is damaged it must be replaced by a qualified service technician.
- The use of an extension cord is not recommended but if one must be used, ensure that the rating is equal or greater than that of the appliance.
Installation
- Remove all packaging, including the protective film on the cabinet exterior. Do not remove the clear film on the inside of the door viewing screen.
- Examine the oven for any damage. (A mis-aligned door, a dent in the cabinet)
- If damaged, do not operate the oven and notify your dealer or the nearest Defy Service Centre immediately.
-
The oven must be placed on a suitable flat, level and stable surface capable of supporting the weight of the product.
-
Install the oven well away from Hi-Fi and TV sets, as broadcast reception could be affected.
- Install the oven well away from heaters, or water taps.
- Allow an air space of at least 30mm around the sides and rear of the oven and 100mm above the oven for ventilation purposes.
- Do not block any of the air vents on the cabinet.
- If the oven is not adequately vented, it may overheat and this could lead to failure eventually.
Safety tips and instructions
- Do not use the oven for any purpose other than for cooking food.
- Do not operate the oven when it is empty.
- Do not use the oven as a storage space.
- Do not operate the oven without the turntable base and tray in position.
- Place the food in a microwave approved cooking utensil and place it centrally on the tray. Placing a heavy load near the perimeter of the tray could cause the tray to dislodge.
- Do not place food directly on the tray unless the food is self contained and will not spill. When cooking more than one item, arrange the food so that the items are evenly spaced.
- Monitor the oven when cooking food in plastic or paper containers to avoid accidental ignition.
-
Avoid using recycled paper products for cooking as these could contain impurities which could cause sparking.
-
Do not pop popcorn in the oven unless you use microwave popcorn in an approved bag.
- Pierce or puncture the skins of non porous foods such as egg yolk, sausages, pumpkins and tomatoes before cooking.
- Do not place eggs or nuts in their shells in the oven as they might explode.
- Remove all caps or lids when cooking food in sealed containers.
- Always test the temperature of food and drinks, especially feeding bottles and baby food jars, before consumption, to avoid getting burnt.
- Microwave heating of beverages could result in delayed eruptive boiling, so care should be taken when handling such containers.
- Never heat fat or oil in the microwave as the temperature cannot be controlled and combustion could result.
- Keep the oven and waveguide cover clean at all times. Remove all traces of fat or grease as these could ignite the next time the oven is used.
- Do not allow children or the infirm to operate the oven without supervision.
The control panel

THE DISPLAY WINDOW
The display will prompt you as to which action to take next.
The indicator lights show the selected cooking mode, options and power level which have been selected.
- Microwave.
- Defrost.
- Upper grill.
- Lower grill.
- Convection.
- Child lock.
- % microwave power.
THE BUTTONS
- Language: Press to select the desired language.
- Clock: Press to set the clock.
- Less: Press to deduct cooking time.
- More: Press to add cooking time.
- M/W: Press to select the microwave power level.
- Combi: Press to select Combination cooking.
- Auto defrost: Press to select the defrost menu.
- Convection: Press to select Convection temperatures.
- Grill: Press to select Grill mode.
- Cake: Press to select the cake menu.
- Crusty: Press to select the crusty menu.
- Auto cook: Press to select the Auto cook menu.
- Memory: Press to set your favourite cooking mode.
- Start/Speedy cook: Press to start a programme. This button is also used for Speedy cook: Each press adds 30 seconds to the microwave cooking time.
- Stop/Clear: Press once to stop a programme and twice to cancel a programme.
- Dial knob: Use to set time, weight and quantity.
Accessories and their use

natural_image
Line drawing of a microwave oven with a small antenna and internal components (no text or symbols)
natural_image
Diagram of a microwave oven with a circular fan and internal components, no text or symbols present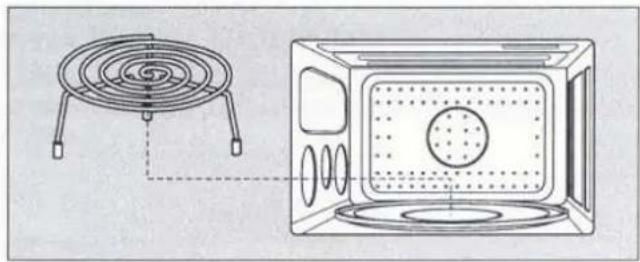
natural_image
Line drawing of a microwave oven and its internal structure, showing top-down view with no text or symbolsThe rotating base.
The rotating base should be securely fitted over the shaft at the centre of the oven floor.
The rotating base must remain in the oven at all times during cooking and should only be removed for cleaning purposes.
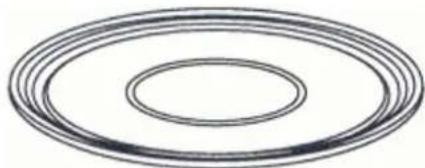
The turntable tray.
Position the tray on top of the rotating base so the groove in the tray locates snugly over the base rollers.
During operation, the tray must always be in place and will rotate clockwise or anti-clockwise.
The metal stand.
The microwave compatible stand is placed centrally on the tray and allows the food to be positioned closer to the upper grill.
natural_image
Concentric oval shapes with no text or symbols
natural_image
Line drawing of a dish on a circular stand with stars and geometric patterns (no text or symbols)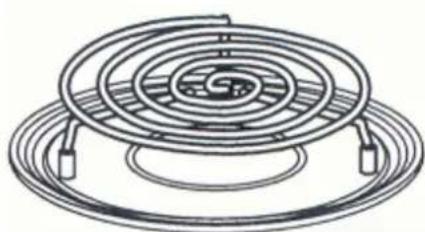
natural_image
Technical line drawing of a coiled electrical component with no visible text or symbolsUse the tray for Microwave cooking, Convection cooking, Combi cooking, Auto cooking and Defrosting.
Use the high metal stand for grilling.
Use the low metal stand for Defrosting and Cake menus.
Selecting the language
The microwave features a six language prompt menu.
When the oven is plugged in for the first time or after a power failure, the display will read :“SELECT LANGUAGE” in English, German, Dutch, French, Italian and Spanish.

By pressing the language button repeatedly, it is possible to select the preferred language. Once for English, Twice for German, three times for Dutch and so on.
Thereafter press the start button once to set and store the language into memory.
The display will briefly show the selected language ie.
ENGLISH and then reset to show :0. This is your prompt to set the time of day.
Setting the time of day
The clock has a 12hour and a 24hour display. To set the clock, proceed as follows:
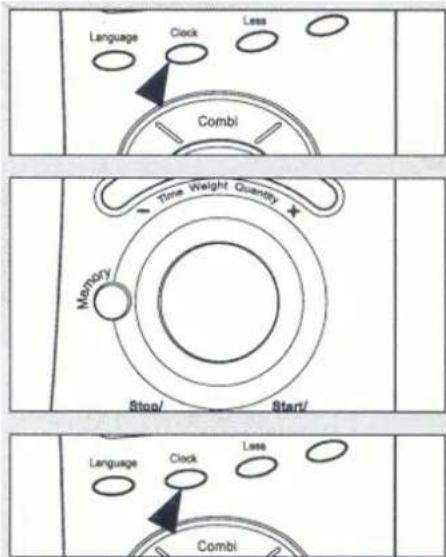
- To select a 12 hour display, press the clock button once. 12H and SET HOURS is displayed.
- To select a 24 hour display, press the clock button once more. 24H and SET HOURS is displayed. If you prefer a 12 hour display, ignore this step.
- Turn the dial knob until the desired hour is displayed. PRESS CLOCK is displayed thereafter.
- Press the clock button and SET MINUTES is displayed.
- Turn the dial knob until the desired minutes are displayed.
- Press the clock button. The colon (:) starts blinking.
- The clock is now operational.
Child lock
Activating the Child lock, will prevent the oven from being used.
To lock the controls, proceed as follows:

flowchart
graph TD
    A["Stop/ Clear"] --> B["Start/ Speedy Cook"]
    B --> C["Language"]
    B --> D["Clock"]
    B --> E["Less"]
    B --> F["More"]
- Press the stop clear button. :0 or the time of day is displayed.
- Press and hold the more button for 3 seconds. The oven will beep and the lock indicator light will glow.
- To cancel the lock, press and hold the more button for 3 seconds. The oven will beep, the lock indicator light will switch off and normal use may resume.
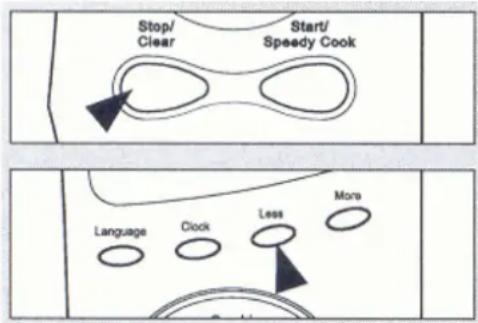
To set power save mode
Power save mode switches the display off until required. Then the display will function normally but if no buttons are pressed within a 10 second period, the display will clear.
To activate power save, proceed as follows:
flowchart
graph TD
    A["Stop/ Clear"] --> B["Start/ Speedy Cook"]
    C["Language"] --> D["Clock"] --> E["Less"] --> F["More"]
- Press and hold the less button for 3 seconds. The oven beeps and the display will clear.
- To cancel power save, press the clock button and thereafter hold the less button for 3 seconds. The display will re-appears and the oven beeps.
Operational notes to remember
Safety tip.
- While learning to operate the oven, place a cup of water on the tray inside the oven. This will absorb any microwave energy generated while you experiment. Never switch the oven on when it is empty.
At the end of the cooking cycle.
- At the end of a cooking cycle, the oven beeps 3 times, OPEN DOOR is displayed, the oven light switches off and the tray stops rotating.
- The oven will beep every 10 minutes thereafter unless the stop/clear button is pressed.
- If the cooking period exceeded 5 minutes, the cooling fan will continue to function for approximately 5 minutes after the cooking has stopped and COOLING is displayed.
- Opening the door will interrupt any operation except the cooling fan.
- If the door is inadvertently left open for 10 minutes or longer, a beep will sound every 10 minutes until the door is shut again.
- To interrupt any operation, press the stop/clear button. To resume the operation, press the start/speedy cook button.
- To cancel any operation, press the stop/ clear button twice.
- For cooking periods of up to 5 minutes, the time set will be in 10 second increments.
- For cooking periods of up to 10 minutes the time set will be in 30 second increments.
- For cooking periods of up to 60 minutes the time set will be in 1 minute increments.
- The oven light will only switch on when the oven is operating.
Microwave cooking
Microwave cooking allows you to set the desired power level and the duration of the cooking period.
The oven will automatically cook at 100% power unless a lower power level is selected.
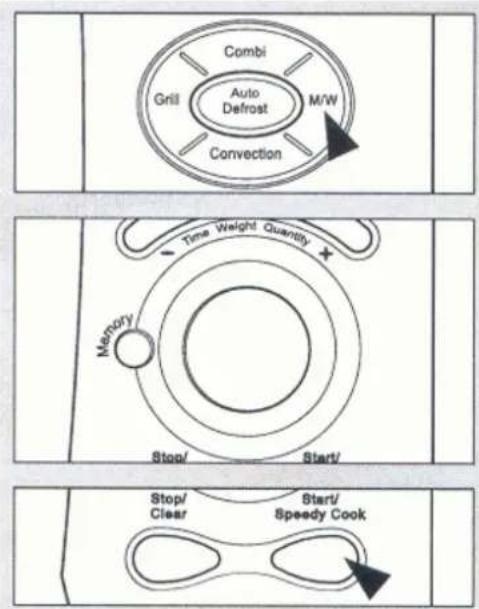
To activate microwave cooking, proceed as follows:
flowchart
graph TD
    A["Combi"] --> B["Grill"]
    B --> C["Auto Defrost"]
    C --> D["Convection"]
    D --> E["M/W"]
    F["Time Weight Quantity"] --> G["Memory"]
    G --> H["Stop/ Start/"]
    I["Stop/ Clear"] --> J["Start/ Speedy Cook"]
-
Press the m/w button. The microwave indicator lights up. 100% and SET TIME are displayed.
-
Select the power level by pressing the m/w button repeatedly until the appropriate level is displayed (from 100% to 10%).
-
Turn the dial knob to set the desired cooking time. The selected time and PRESS START are displayed.
-
Press the start/speedy cook button. The oven light switches on and the tray starts rotating.
-
Cooking commences and the remaining time is counted down in the display.
-
The power level may be checked during the cooking cycle by pressing the m/w button. The power level will then be displayed for about 3 seconds. During those 3 seconds the power level may be changed if so desired by repeatedly pressing the m/w button until the appropriate level is displayed.
-
At the end of the cooking period the oven will beep 3 times and OPEN DOOR will be displayed.
-
Open the door, remove the cooked food and press the stop/clear button.
| Power level | Percentage | Output |
| High 100% 1000W | ||
| Sauté 90% | 890W | |
| Re-heat | 80% | 790W |
| Medium—high | 70% | 680W |
| Simmer | 60% | 580W |
| Medium | 50% | 480W |
| Medium—low | 40% | 370W |
| Low | 30% | 270W |
| Defrost | 20% | 170W |
| Warm 10% | 100W |
Grilling
Grilling enables you to heat and brown food quickly without using microwaves.
The oven has both an upper and a lower grill which may be operated in unison or independently. When used for the first time, the grill elements will generate smoke and release an odour. We therefore recommend that you heat both the upper and lower grill elements for 10 minutes before placing food in the oven. To activate grilling, proceed as follows:

- Press the grill button. The upper grill indicator lights up. GRILL 1 and SET TIME are displayed.
- Select the grill options by pressing the grill button repeatedly until the appropriate option is displayed (refer to the grilling table below for further details).
- Turn the dial knob to set the desired grilling time. The selected time and PRESS START are displayed.
- Press the start/speedy cook button. The oven light switches on and the tray starts rotating.
- Grilling commences and the remaining time is counted down in the display.
- At the end of the cooking period the oven will beep 3 times and OPEN DOOR will be displayed.
- Open the door, remove the grilled food and press the stop/clear button.
Grilling table
| Grill button | Grill elements | Indicator display | Word display |
| Press once Upper | grill GRILL 1 | ||
| Press twice Lower | grill | GRILL 2 | |
| Press 3 times | Upper and Lower grill | GRILL 3 |
Tips
| Suggestions | Recommended cookware |
| Grilling is ideal for toasting bread or muffins.Remember to use oven gloves when handling food as the oven will be hot.Place the food on the metal stand ( high or low).The closer the food is placed to the upper grill element, the better the browning effect. | Use oven proof cookware.As there is no microwave energy generated, metal dishes or plates may be placed on the metal stands without the danger of arcing. |
Convection cooking with pre-heat
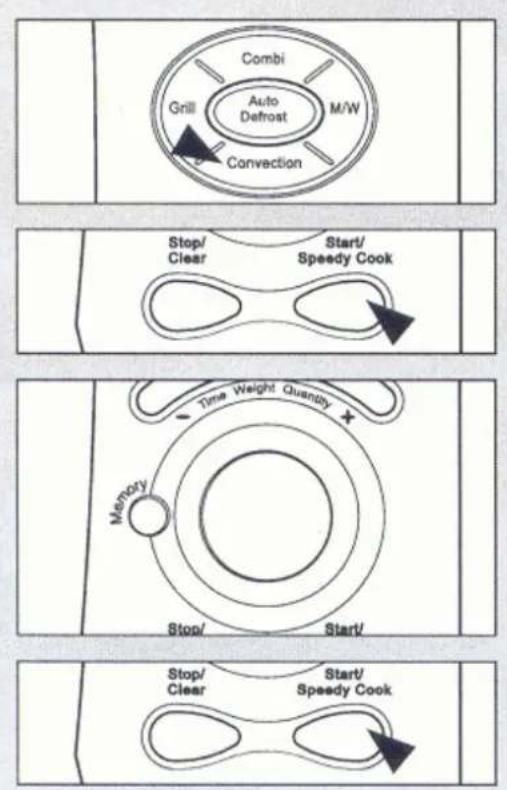
Pre-heating of the oven is recommended (except for 40^ C convection mode). The maximum pre-heating time allowed is 30 minutes. The convection indicator will blink and the pre-heated temperature will be displayed. If the cooking is not started immediately thereafter, the oven will maintain the selected temperature for another 15 minutes and then switch off automatically. To activate convection cooking with pre-heat, proceed as follows:
-
Press the convection button. The convection indicator lights up. 100°C, and PRESS START TO PREHEAT OR SET TIME are displayed.
-
Select the convection cooking temperature by pressing the convection button again until the appropriate temperature is displayed.
-
The temperature sequence reads from 100^ C to 250^ C Then down to 40^ C and back to 100^ C.
-
Press the start/speedy cook button. The convection indicator blinks and PREHEAT is displayed. When the selected pre-heat temperature is attained, the oven will beep and the pre-heated temperature will be displayed.
-
Open the oven door and place the food in the oven.
-
The oven temperature and SET TIME will be displayed.
-
Turn the dial knob to set the cooking time. The selected time and PRESS START are displayed.
-
Press the start/speedy cook button. The oven light switches on and the tray starts rotating.
-
Convection cooking commences and the remaining time is counted down in the display. You can check the oven temperature during the cooking process by pushing the convection button.
-
At the end of the cooking period the oven will beep 3 times and OPEN DOOR will be displayed.
-
Open the door, remove the cooked food and press the stop/clear button.
| Tips | |
| Suggestions Recommended cookware | |
| Use this mode of cooking for foods requiring a pre-heated oven.Remember to use oven gloves when handling food in the oven as the oven will be hot.Place all food dishes (depending on size) on the low or high oven stands. | Use oven proof cookware.As there is no microwave energy generated, metal dishes or plates may be placed on the metal stands without the danger of arcing. |
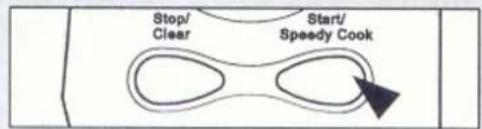
Convection cooking - Traditional cooking
The convection oven may be used in the same way as a traditional oven. Microwaves are not used. Always use oven gloves when handling food in the oven as dishes will be hot.


flowchart
graph TD
    A["Stop/ Clear"] --> B["Start/ Speedy Cook"]
    B --> C["Arrow pointing to the process"]
-
Press the convection button. The convection indicator lights up. 100°C, and PRESS START TO PREHEAT OR SET TIME are displayed.
-
Select the convection cooking temperature by pressing the convection button again until the appropriate temperature is displayed.
-
The temperature sequence reads from 100^ C to 250^ C Then down to 40^ C and back to 100^ C.
-
Turn the dial knob o set the cooking time. The selected time and PRESS START are displayed
-
Press the start/speedy cook button. The oven light switches on and the tray starts rotating.
-
Convection cooking commences and the remaining time is counted down in the display. You can check the oven temperature during the cooking process by pushing the convection button.
-
At the end of the cooking period the oven will beep 3 times and OPEN DOOR will be displayed.
-
Open the door, remove the cooked food and press the stop/clear button.
| Tips | |
| Suggestions Recommended cookware | |
| The convection mode is ideal for baking meringues, biscuits, scones, bread, puddings, large fruit cakes and all preserves.Remember to use oven gloves when handling food in the oven as the oven will be hot.Place all food dishes (depending on size) on the low or high oven stands. | Use oven proof cookware.As there is no microwave energy generated, metal dishes or plates may be placed on the metal stands without the danger of arcing. |
| Combination cooking (choose any of 5 different combination cooking modes.) | |||
| MODE ELEMENTS Suggested use Cookware | |||
| COMBI 1 | MICROWAVE CONVECTION | This is a very versatile combination and may be used for roasting meat, baking some cakes, meringues, cooking frozen and crumbed foods and for re-heating pastries and pies. | Foods should be placed on the tray or a wire stand. Do not use metal cookware as arcing may occur. |
| COMBI 2 | MICROWAVE CONVECTION LOWER GRILL | Use for foods which require crisping such as frozen oven chips, potato croquettes, waffles, fish fingers, chicken nuggets, beef burgers and sausages. | For COMBI 3.Metal cookware may be used without fear of arcing as no microwave energy is generated. |
| COMBI 3 | CONVECTION UPPER GRILL LOWER GRILL | ||
| COMBI 4 | MICROWAVE UPPER GRILL | The speed of microwave cooking is combined with the browning abilities of a grill .Use for foods which would normally be grilled like sausages, chops, bacon and chicken portions. | Foods should be placed on the tray or a wire stand. Do not use metal cookware as arcing may occur. |
| COMBI 5 | MICROWAVE UPPER GRILL LOWER GRILL | ||
Combi 1 ( microwave and convection cooking )
This function combines any of three microwave power levels (60%, 50%, 40%) with convection cooking to give traditional results in less time.
Always use microwave compatible and oven proof cookware. Glass or ceramic dishes are ideal as they allow even microwave penetration to the food.
Always use oven gloves when handling food in the oven as the oven and dishes get hot.
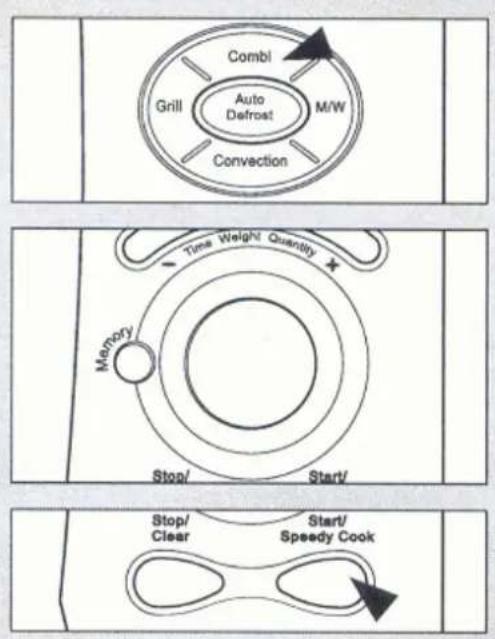
- Press the combi button once. The microwave and convection indicators light up. COMBI 1 and SET TIME are displayed.
- Turn the dial knob to set the cooking time. The selected time and PRESS START are displayed.
- Select the appropriate microwave power level by pressing the m/w button. If you omit this step, the power level will default to 60%.
- Press the start/speedy cook button. The oven light switches on and the tray starts rotating.
- Combi 1 cooking commences and the remaining time is counted down in the display. You can check the power level or cooking temperature while cooking is in progress by pressing the m/w or convection buttons.
- At the end of the cooking period the oven will beep 3 times and OPEN DOOR will be displayed.
- Open the door, remove the cooked food and press the stop/clear button.
Combi 2 ( microwave, convection and lower grill cooking )
This function combines any of three microwave power levels (50%, 40%, 30%) with convection cooking to give traditional baking or roasting results in less time.
Always use microwave compatible and oven proof cookware. Glass or ceramic dishes are ideal as they allow even microwave penetration to the food.
Always use oven gloves when handling food in the oven as the oven and dishes get hot.
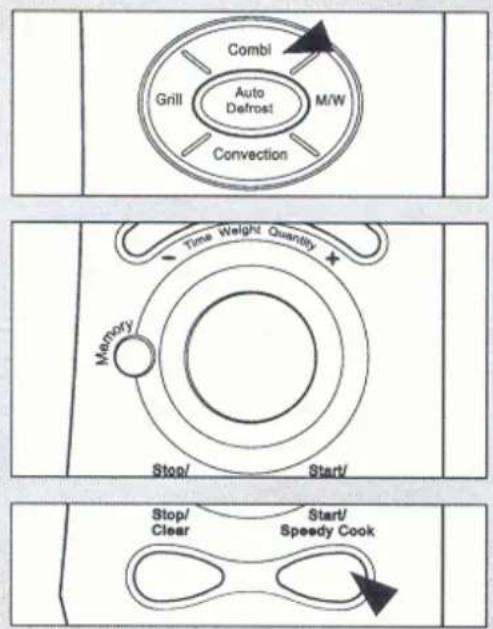
- Press the combi button twice. The microwave and convection and lower grill indicators light up. COMBI 2 and SET TIME are displayed.
- Turn the dial knob to set the cooking time. The selected time and PRESS START are displayed.
- Select the appropriate microwave power level by pressing the m/w button. If you omit this step, the power level will default to 50%.
- Press the start/speedy cook button. The oven light switches on and the tray starts rotating.
- Combi 2 cooking commences and the remaining time is counted down in the display. You can check the power level or cooking temperature while cooking is in progress by pressing the m/w or convection buttons.
- At the end of the cooking period the oven will beep 3 times and OPEN DOOR will be displayed.
- Open the door, remove the cooked food and press the stop/clear button.
Combi 3 ( convection, upper grill and lower grill cooking )
This function combines convection cooking with grilling and is ideal for crisping portions. Always use oven gloves when handling food in the oven as the oven and dishes get hot.

- Press the combi button three times. The convection, upper grill and lower grill indicators light up. COMBI 3 and SET TIME are displayed.
- Turn the dial knob to set the cooking time. The selected time and PRESS START are displayed.
- Press the start/speedy cook button. The oven light switches on and the tray starts rotating.
- Combi 3 cooking commences and the remaining time is counted down in the display. You can check the cooking temperature while cooking is in progress by pressing the convection button.
- At the end of the cooking period the oven will beep 3 times and OPEN DOOR will be displayed.
- Open the door, remove the cooked food and press the stop/clear button.
Combi 4 ( microwave, and upper grill cooking )
This function combines any of three microwave power levels (60%, 50%, 40%) with grilling to give traditional browning or grilling in less time.
Always use microwave compatible and oven proof cookware. Glass or ceramic dishes are ideal as they allow even microwave penetration to the food.
Always use oven gloves when handling food in the oven as the oven and dishes get hot.

flowchart
graph TD
    A["Combi"] --> B["Auto Defrost"]
    C["Grill"] --> B
    D["Convection"] --> B
    E["M/W"] --> B

flowchart
graph TD
    A["Stop/ Clear"] --> B["Start/ Speedy Cook"]
    B --> C["Arrow pointing to the second step"]
- Press the combi button four times. The microwave and upper grill indicators light up. COMBI 4 and SET TIME are displayed.
- Turn the dial knob to set the cooking time. The selected time and PRESS START are displayed.
- Select the appropriate microwave power level by pressing the m/w button. If you omit this step, the power level will default to 60%.
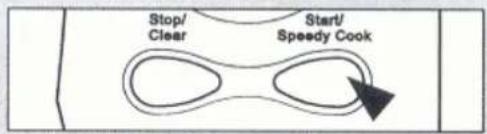
- Press the start/speedy cook button. The oven light switches on and the tray starts rotating.
- Combi 4 cooking commences and the remaining time is counted down in the display. You can check the power level while cooking is in progress by pressing the m/w button.
- At the end of the cooking period the oven will beep 3 times and OPEN DOOR will be displayed.
- Open the door, remove the cooked food and press the stop/clear button.
Combi 5 ( microwave , upper grill and lower grill cooking )
This function combines any of three microwave power levels (50%, 40%, 30%) with grilling to give traditional browning or grilling in less time.
Always use microwave compatible and oven proof cookware. Glass or ceramic dishes are ideal as they allow even microwave penetration to the food.
Always use oven gloves when handling food in the oven as the oven and dishes get hot.

flowchart
graph TD
    A["Combl"] --> B["Grill"]
    B --> C["Auto Defrost"]
    C --> D["Convection"]
    D --> E["M/W"]
    style A fill:#f9f,stroke:#333
    style B fill:#ccf,stroke:#333
    style C fill:#cfc,stroke:#333
    style D fill:#fcc,stroke:#333
    style E fill:#ffc,stroke:#333
flowchart
graph TD
    A["Memory"] --> B["Stop/"]
    B --> C["Start/"]
    D["Time Weight Quantity"] --> E["★"]
    style D fill:#f9f,stroke:#333
    style E fill:#ccf,stroke:#333

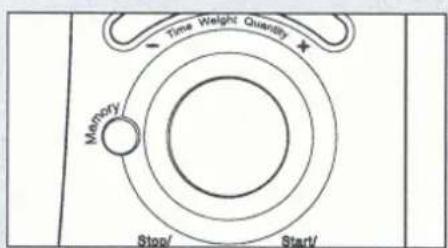
- Press the combi button five times . The microwave, upper grill and lower grill indicators light up. COMBI 5 and SET TIME are displayed.
- Turn the dial knob to set the cooking time. The selected time and PRESS START are displayed.
- Press the start/speedy cook button. The oven light switches on and the tray starts rotating.
- Combi 5 cooking commences and the remaining time is counted down in the display. You can check the power level while cooking is in progress by pressing the m/w button.
- At the end of the cooking period the oven will beep 3 times and OPEN DOOR will be displayed.
- Open the door, remove the cooked food and press the stop/clear button.
Auto defrost
This function allows accurate defrosting of meat, poultry fish and bread.
Simply enter the weight of the food and the oven will select the correct defrosting time.
During defrosting, the oven will beep to remind you to check the food.
TURN OVER will appear in the display as a reminder to attend to the food.
Always use microwave compatible cookware.

flowchart
graph TD
    A["Grill"] --> B["Combl"]
    B --> C["Auto Defrost"]
    C --> D["M/W"]
    D --> E["Convection"]
    E --> F["Stop/ Clear"]
    F --> G["Start/ Speedy Cook"]
    G --> H["Memory"]
    H --> I["Time Weight Quantity"]
-
Press the auto defrost button. The defrost, indicator light up. 1 MEAT and SET WEIGHT are displayed.
-
Turn the dial knob to set the weight. (Refer to the defrost chart below for further details.) The selected weight and PRESS START are displayed.
-
Press the start/speedy cook button. The oven light switches on and the tray starts rotating.
-
Defrosting commences and the remaining time is counted down in the display.
-
Follow the prompt TURN OVER and attend to the food if necessary.
-
At the end of the defrosting period the oven will beep 3 times and OPEN DOOR will be displayed
-
Open the door, remove the defrosted food and press the stop/clear button.
Auto defrost chart
| Press Auto defrost button | Defrost menu | Minimum weight | Maximum weight | Weight increments | Standing time |
| Once 1 MEAT | 100 g 2000 | g 50 g 20-40 min | |||
| Twice 2 POULTRY | 100 g | 3000 g 50 g 1-2 hours | |||
| Three times | 3 FISH | 100 g 2000 | g 50 g 10-20 min | ||
| Four times | 4 BREAD 50 | g 1000 g 50 g | 5 min |
| Item | Type | Suggestions |
| MEAT | Minced and cubed. Steaks and chops. | Use of the more/less buttons is usually not required. Use of the less button is recommended. |
| POULTRY | Whole chickens. Chicken portions. | Use of the less button is recommended. Use of the less button is recommended. |
| FISH | Whole fish. Fillets and portions. | Use of the more/less buttons is usually not required. Use of the more/less buttons is usually not required. |
| BREAD | All types of bread. Auto defrost is NOT suitable for defrosting cakes. | Begin by defrosting the loaf on its side. Then cut in half at the TURN OVER prompt. |
Please see DEFROSTING TIPS on the next page....
Defrosting tips
- Remove all packaging.
- Place the food on the low wire stand and place a paper towel on the tray below.
- Turn the food over when prompted to do so.
- Defrosted food should be cool but soft in all areas.
-
Poultry and fish may be held under running cold water to complete the defrost process if necessary.
-
Protect thin areas on poultry and meat with strips of aluminium foil to prevent them drying out.
- Standing time is important for bulky foods which cannot be stirred. This will ensure that the centre is defrosted evenly.
Cake
Selecting the CAKE function allows you to simply and automatically bake a whole range of cakes and bread. Remember to use oven gloves when handling food in the oven as the dishes and the oven get hot.
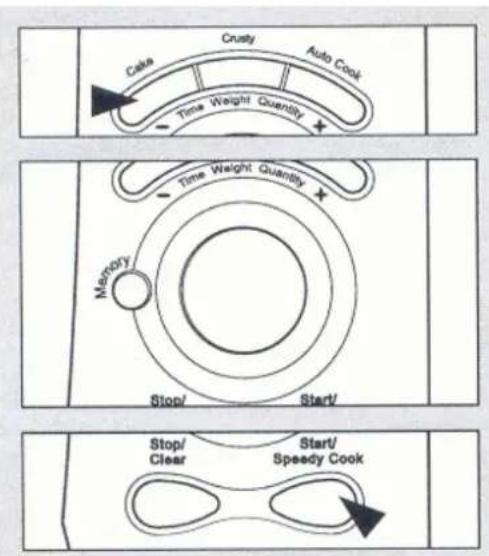
- Press the cake button. The microwave and convection indicators light up. 1.CAKE and SET WEIGHT are displayed.
- Select a menu by pressing the cake button until the appropriate menu is displayed. Refer to the Cake menu chart below.
- Turn the dial knob to set the weight. The selected weight and PRESS START are displayed
- Press the start/speedy cook button. The oven light switches on and the tray starts rotating.
- Baking commences and the remaining time is counted down in the display.
- At the end of the baking period the oven will beep 3 times and OPEN DOOR will be displayed.
- Open the door, remove the cake and press the stop/clear button.
Cake menu chart
| Press Cake button | Cake menu | Minimum weight | Maximum weight | Increments |
| Once 1 CAKE | 300 g 1500 g | 100 g | ||
| Twice | 2 BREAD | 100 g 1500 g | 100 g |
| Cake recipes | ||
| Ingredients Method | Cookware | |
| Fruity Cream Cheese cake150g butter10ml grated lemon rind125g cream cheese225g castor sugar3 eggs—beaten100g plain flour150g sultanas150g cherries | 1. Cream the butter, lemon rind, cream cheese and sugar until light and fluffy.2. Add the eggs a little at the time beating well after each addition.3. Fold in the sifted flour, sultanas and quartered cherries.4. Spread the mixture into a cake tin.5. Cook on CAKE. | 200mm round cake tin on low wire stand. |
| Chocolate cake50g cocoa350g castor sugar10ml water90g butter2 eggs15ml golden syrup5ml vanilla essence15ml raspberry jam275g plain flourPinch of salt10ml baking powder150ml milk | 1. Mix the cocoa, 175g castor sugar and water together in a small bowl.2. Cream the butter and balance of the sugar together and gradually add the eggs. Beat until the mixture is light and fluffy.3. Beat in the cocoa mixture, golden syrup, vanilla essence and raspberry jam.4. Fold in the sieved flour, salt and baking powder. Add milk to give a smooth dropping consistency.5. Place in a prepared tin and cook on CAKE. | 200mm round cake tin on low wire stand. |
| Apple pie30g castor sugar5ml cinnamon30g sultanas2 cooking apples-peeled cored and sliced15ml lemon juice350g puff pastry | 1. Mix the sugar, cinnamon and sultanas together.2. Toss the apples in lemon juice. Sprinkle the sugar mixture over.3. Divide the pastry in half. Roll out half and line the base of the plate.4. Place the apple filling on the pastry. Roll out the remaining pastry and cut to a circle for lid.5. Seal edges, crimp and brush top with egg.6. Cook on CAKE. | 200mm pie plate on low wire stand. |
| Carrot cake250g plain flour10ml bicarbonate of soda10ml baking powder10ml cinnamon10ml nutmeg250g dark brown sugar225ml vegetable oil3 eggs-beaten350g carrots-grated75g sultanasCream cheese topping75g butter100g cream cheese225g icing sugar | 1. Sieve the flour, bicarbonate of soda and baking powder into a bowl with cinnamon and nutmeg.2. Mix in the brown sugar and make a well in the centre.3. Add the oil and beaten eggs. Beat well until all the ingredients are combined. Stir in the grated carrots and sultanas. Spoon into a prepared cake tin.4. Cook on CAKE.1. Cream the butter and cream cheese until smooth. Stir in the sieved icing sugar.2. Decorate the cake with a cream cheese topping.Page 17 | 230mm round tin on low wire stand. |
| Party size sausage rolls425g frozen flaky pastry (defrosted)300g sausage meat10ml dried mixed herbs1 beaten egg | Roll out the pastry into two oblong shapes each about 250 x 200 mm. Cut each piece into two pieces lengthways.Combine the herbs with the sausage meat. Quarter the sausage meat and roll each piece into a long strip. Place on the pastry. Dampen the edge of pastry, roll around sausage meat and seal the edges. Brush with the beaten egg.Cut each strip into six equal portions, each approximately 50mm in length. Make two cuts in the top of each roll. Place on a greased circular baking tray.Cook on BREAD. | Round baking tray or pizza dish on low wire stand. |
| Baked jam roly poly pudding1 quantity of suet pastry75ml seedless raspberry jamMilk to glaze | Rollout pastry to approximately 230 x 320 mmSpread the jam over the pastry leaving a 10mm border all round. Brush the edges with milk and roll the pastry up evenly starting at one side and sealing the edges well.Brush the top with milk and place in a loaf tin.Cook on BREAD until golden brown. | 1kg loaf tin. |
| Standard bread450g plain flour1 sachet dried yeast5ml salt15g fat300ml warm water | Combine the flour, yeast and salt in a large bowl.Rub in the fat.Add warm water and mix into a dough.Turn onto a floured surface and knead for 10 minutes. Divide into two and place in a loaf tin.Place the tin in the oven and set on convection 40°C until the dough has doubled in size.Cook on BREAD.Repeat with the second loaf. | 2 x 450g loaf tins. |
| Fruit scones225g self raising flourPinch of salt5ml baking powder50g butter25g castor sugar50g sultanas150ml milkBeaten egg to glaze | Sift the flour, salt and baking powder together. Rub in the fat until the mixture resembles bread crumbs. Add the sugar and sultanas.Make a well in the centre and stir in enough milk to form a soft dough.Knead lightly. Pat out to 20mm thickness and cut into 10 rounds with a 50mm cutter. Place on a baking sheet, and brush with the beaten egg.Cook on BREAD. | Round baking sheet. |
Crusty (crispy)
Selecting the crusty function allows you to simply and automatically cook a range of crusty foods. Remember to use oven gloves when handling food in the oven as the dishes and the oven get hot.

-
Press the crusty button once. The microwave and convection indicators light up. 1 FRESH PIZZA and SET WEIGHT are displayed.
-
Select a menu by pressing the crusty button until the appropriate menu is displayed. Refer to the Crusty menu chart below.
-
Turn the dial knob to set the weight. The selected weight and PRESS START are displayed
-
Press the start/speedy cook button. The oven light switches on and the tray starts rotating.
-
Crusty cooking commences and the remaining time is counted down in the display.
-
At the end of the cooking period the oven will beep 3 times and OPEN DOOR will be displayed.
-
Open the door, remove the food and press the stop/clear button.
Crusty menu chart
| Crusty button | Crusty menu | Minimum weight | Maximum weight | Increments | |
| Press once | 1 FRESH PIZZA | 500g | 1000g | 100g | |
| Press twice | 2 FROZEN PIZZA | 100g | 900g | 100g | |
| Press three times | 3 FRESH GRATIN | 500g | 1500g | 100g | |
| Press four times | 4 FROZEN GRATIN | 300g | 900g | 100g | |
| Fresh pizza150g strong white flour90ml milk-lukewarm3g dried yeast1.5 tsp oilPinch of salt1 onion thinly sliced1 tomato-chopped150g mozzarella cheese | 1. Place the flour, yeast, salt, milk, and oil in a large bowl and mix well.2. Knead well on a floured board then return the dough to the bowl and using convection at 40°C heat the mixture until the dough doubles in size.3. Roll out the dough to form a round pizza shape.4. Place on a 230mm pie dish.5. Evenly spread the chopped tomato, onion and cheese on the pizza dough.6. Cook on CRUSTY FRESH PIZZA on the metal tray.Vary topping by replacing onion with chopped bacon, mushrooms etc.Frozen Pizza is cooked on CRUSTY FROZEN PIZZA on the metal tray. | ||||
| Fresh potato gratin12.5g butter450g potatoes-peeled and thinly sliced1 onion-finely choppedFinely chopped bacon200ml double cream100g grated cheeseSalt and pepper | 1. Place half the potato slices in a dish and sprinkle on some onions and bacon. Dot with butter and season. Place remaining potatoes on the top.2. Pour the cream over and sprinkle with cheese.3. Place a 250mm flan dish on the low metal stand.4. Cook on CRUSTY FRESH GRATIN.5. Garnish with parsley and tomato slicesVary taste by replacing onion with chopped bacon, mushrooms etc..Frozen gratin is cooked on CRUSTY FROZEN GRATIN | ||||
Auto cook
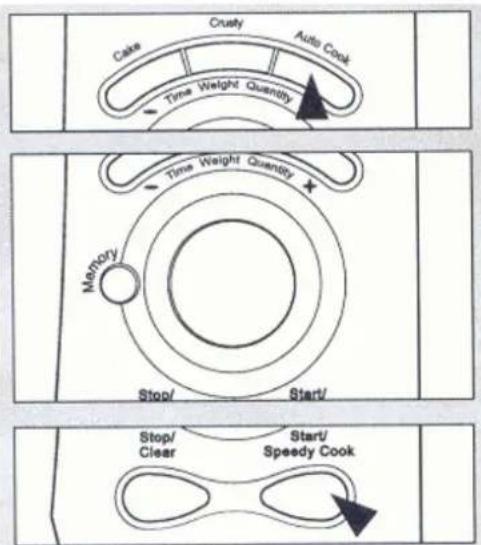
Selecting the auto cook function allows you automatically cook a range of popular foods. Remember to use oven gloves when handling food in the oven as the dishes and the oven get hot.
flowchart
graph TD
    A["Cake"] --> B["Crusty"]
    B --> C["Auto Cook"]
    C --> D["Time Weight Quantity"]
    D --> E["Memory"]
    E --> F["Stop/ Start/ Clear"]
    F --> G["Start/ Speedy Cook"]
    G --> H["End"]
- Press the auto cook button once. The microwave, convection and grill indicators light up. 1 ROAST BEEF and SET WEIGHT are displayed.
- Select a menu by pressing the auto cook button until the appropriate menu is displayed. Refer to the auto cook menu chart below.
- Turn the dial knob to set the weight. The selected weight and PRESS START are displayed.
- Press the start/speedy cook button. The oven light switches on and the tray starts rotating.
- Auto cooking commences and the remaining time is counted down in the display.
- At the end of the cooking period the oven will beep 3 times and OPEN DOOR will be displayed.
- Open the door, remove the food and press the stop/clear button.
Auto cook menu chart
| Auto cook button | Auto cook menu | Minimum weight | Maximum weight | Increments |
| Press once | 1 ROAST BEEF | 500g | 2000g | 100g |
| Press twice | 2 ROAST CHICKEN | 800g | 3000g | 100g |
| Press 3 times | 3 ROAST PORK | 500g | 2000g | 100g |
| Press 4 times | 4 BAKED FISH | 300g | 900g | 100g |
| Press 5 times | 5 BAKED POTATO | 1 ea 5 ea 1 | ea | |
| Press 6 times | 6 ROAST POTATO | 400g | 1000g | |
| Press 7 times | 7 FRESH VEG. | 100g | 900g | |
| Press 8 times | 8 FROZEN VEG. | 100g | 900g | |
| Press 9 times | 9 CASSEROLE | 500g | 2000g | 100g |
50g 50g 50g
Auto cook menu
| ROAST BEEFStart temp.= Chilled | 1. Tie the joint into a neat shape.2. Place the beef directly onto the metal tray.3. Brush with a little oil.4. Cook on AUTO COOK ROAST BEEF.5. Remove from the oven and drain off any excess juices.6. Let stand for 10 minutes before carving.7. Serve with Yorkshire pudding and gravy. | Place the beef directly on the metal turntable tray. |
Menu continued on next page
| Auto cook menu | ||
| ROAST CHICKENStart temp.= Chilled | 1. Wash and dry the chicken. Tie the legs loosely together with string.2. Pierce the skin a few times just under the legs.3. Brush the butter mixture all over the chicken.4. Place the chicken directly onto the metal tray.5. Cook on AUTO ROAST CHICKEN.6. Remove from the oven. Drain off any excess juices. Season with salt if required. Allow to stand for 10 minutes before carving.7. Serve with bacon rolls, chipolatas, bread sauce and gravy. | Place the chicken directly on the turntable tray. |
| ROAST PORKStart temp.= Chilled | 1. Tie the joint into a neat shape. Place the pork directly onto the metal tray.2. Brush with a little oil.3. Cook on AUTO COOK ROAST PORK.4. Remove from the oven and drain off any excess juices.5. Let stand for 10 minutes before carving.6. Serve with APPLE SAUCE. | Place the pork directly on the turntable tray. |
| BAKED FISHStart temp.= Chilled | 1. All fish whether whole, filleted or steaks. (except battered or crumbed)2. Place the prepared fish in a buttered dish.3. Season with salt and pepper, sprinkle lemon juice and dot with butter. Do not cover the dish.4. Place on the high metal stand on the metal tray.5. Cook on AUTO COOK BAKED FISH. | Use a microwave heat proof shallow dish eg. Pyrex. |
| BAKED POTATOROAST PO-TATO | 1. Wash the potatoes thoroughly and prick with a fork.2. Place the potatoes directly on the low metal stand.3. Cook on AUTO COOK BAKED POTATO.1. Wash and dry the potatoes thoroughly.2. Cut into even pieces and place in dish. Place on low metal stand.3. Cook on AUTO COOK ROAST POTATO.4. Turn the potatoes when the oven beeps. | Place potatoes directly on the low metal stand.Use a microwave proof dish eg.Pyrex. |
| FRESH VEG. | 1. Wash and trim.2. Place the prepared vegetables in a suitable container.3. Sprinkle with 4-5 tablespoons of water4. Cover with pierced cling film or a lid.5. Place a dish on the metal tray.6. Cook on AUTO COOK FRESH VEGETABLES.7. For best results, cut the vegetables into similar sized pieces. | Use a microwave proof dish eg. Pyrex. |
| FROZEN VEG. | 1. Place the vegetables in a suitable container.2. Cover with pierced cling film or a lid.3. Place a dish on the metal tray.4. Cook on AUTO COOK FROZEN VEGETABLES.5. Frozen vegetables may be cooked without using water. | Use a microwave proof dish eg. Pyrex. |
| CASSEROLE | 1. Place all the ingredients into a large dish or bowl.2. Mix well and cover with a lid.3. Cook on AUTO COOK CASSEROLE.4. After cooking stir well before serving. | Use a large microwave proof bowl with a lid. |
Memory cook
If you often cook the same dish, you may store the cooking time and function in the oven's memory. This saves re-setting every time the dish is cooked. To set the memory, proceed as follows:

flowchart
graph TD
    A["Start/ Clear"] --> B["Stop/ Clear"]
    B --> C["Time Weight Quantity"]
    C --> D["Time Weight Quantity"]
    D --> E["Speedy Cook"]
    E --> F["Memory"]
    F --> G["Memory"]
- Set your favourite cooking programme as previously described.( Auto defrost, cake, crusty and auto cook programmes cannot be stored in memory)
- Press the memory button. The oven will beep and 0 or the clock are displayed. Your setting is now stored in memory.
- To store a different settings simply repeat the setting procedure.
To use the memory function proceed as follows:
- Press the memory button. The stored setting appears in the display.
- Press the start/speedy cook button. The oven light switches on and the tray starts rotating.
- Cooking commences and the remaining time is counted down in the display.
- At the end of the cooking period the oven will beep 3 times and OPEN DOOR will be displayed
- Open the door, remove the food and press the stop/clear button.
When there is no memory setting stored, DATA EMPTY SELECT FUNCTION will be displayed
Speedy cook
Selecting speedy cook, enables the oven to operate immediately at full power. Pressing the start/speedy cook button repeatedly increases the time by 30 second increments To set the memory, proceed as follows:

flowchart
graph TD
    A["Clear"] --> B["Speedy Cook"]
    C["Start/Stop"] --> D["Speedy Cook"]
    style A fill:#f9f,stroke:#333
    style B fill:#ccf,stroke:#333
    style C fill:#cfc,stroke:#333
    style D fill:#fcc,stroke:#333
- Press the start/speedy cook button. The microwave indicator and 30 seconds are displayed
- To increase the time by 30 second increments, press the start/speedy cook button repeatedly until the desired time is displayed.
- Cooking commences and the remaining time is counted down in the display.
- At the end of the cooking period the oven will beep 3 times and OPEN DOOR will be displayed
- Open the door, remove the food and press the stop/clear button.
Less and More buttons
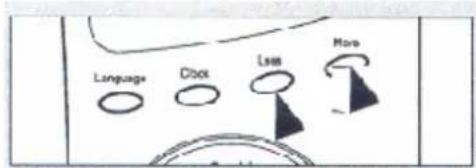
To alter the cooking or defrosting time while the oven is operating, press the less or more buttons. Times will be increased or decreased in increments of 1 minute every time respective button is pressed
-
During cooking, press the less button to decrease the cooking time by 1 minute. Repeated pressing will reduce the time by 1 minute every time the button is pressed.
-
During cooking, press the more button to increase the cooking time by 1 minute. Repeated pressing will increase the time by 1 minute every time the button is pressed.
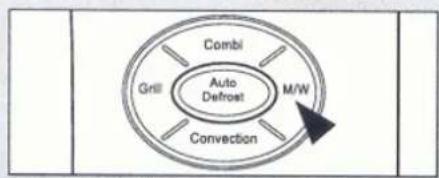
Manual cooling
If the oven is used to cook many meals, it will produce better results if it is allowed to cool down between operations. Proceed as follows:
flowchart
graph TD
    A["Combl"] --> B["Grill"]
    B --> C["Auto Defrost"]
    C --> D["M/W"]
    D --> E["Convection"]
    E --> C


-
Press and hold the m/w button for 3 seconds.
-
The oven will beep and the microwave indicator will switch off. COOLING and SET TIME are displayed.
-
Turn the dial knob to set the cooling time (10 minutes are recommended) The time and PRESS START are displayed.
-
Press the start/ speedy cook button.
-
Cooling begins and the time will be counted down in the display. The oven light and turntable will not be operational.
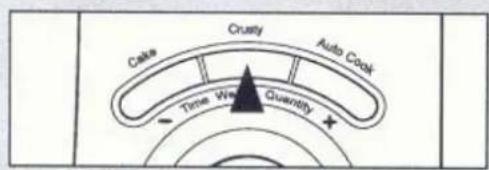
Scroll speed
The scrolling speed of the display may be adjusted to suit. Proceed as follows:

flowchart
graph TD
    A["Stop/ Clear"] --> B["Start/ Speedy Cook"]
    B --> C["Arrow pointing to the second step"]
-
Press the crusty button once. The microwave and convection indicators light up. 1 FRESH PIZZA and SET WEIGHT are displayed.
-
Select scroll speed by pressing the crusty button repeatedly.
Once = very slow. Twice = slow. 3 times = normal. 4 times = fast.
- Press the start/speedy cook button. The oven will beep and 0 or the clock will be displayed.
To stop the oven when it is operating
1 Open the door.
• The oven stops operating
- The oven may be re-started by closing the door and pressing the start/speedy cook button.
2 Press the stop/ clear button.
• The oven stops operating.
- If you wish to cancel the setting, press the stop /clear button once more.
- If not, pressing the start /speedy cook button will resume operation.
Warning messages
TEMPERATURE IS HIGH
ERROR 2
ERROR 3
- This message is displayed when the temperature in the oven is too high for selecting defrost or 40^ convection modes.
• The oven needs cooling. - This message is displayed if the temperature sensor inside the oven is faulty.
- Unplug the unit and call the nearest Defy Service Centre.
- This message is displayed if the temperature sensor inside the oven is disconnected.
- Unplug the unit and call the nearest Defy Service Centre.
General guide lines
Since microwave cooking differs from traditional cooking, the following guidelines should considered when using the oven.
If the food is undercooked.
Check if the correct power level was selected. Check that the time selected was sufficient. Remember, recipes are only approximate and times may differ depending on weight, density, initial temperatures and so forth. Check to see if the container was appropriate for the type of meal being cooked.
If the food is dried out, overcooked or burnt.
Check if the correct power level was selected. Check if the time selected was too long Remember, recipes are only approximate and times may differ depending on weight, density, initial temperatures and so forth.
Points to remember when defrosting.
The shape of the food alters defrosting time. Shallow rectangular shapes defrost faster than deep spherical shapes. Separate pieces or slices as they defrost to speed up the process. Shield sensitive food areas with thin strips of aluminium foil to prevent pre-mature cooking. Defrosting works best when the food is thawed in the oven and allowed to defrost completely during a standing time.
Quantity of food.
The more food you wish to cook, the longer it takes. Double the quantity takes nearly double the time. For example, a single potato might take four minutes to cook while two potatoes require seven minutes.
Continued on next page
General guide lines (continued)
Starting temperatures.
The lower the temperature of the food placed in the oven, the longer the time required to cook it. Food at room temperature will cook quicker than refrigerated food.
Composition of the food.
Food with a high fat or sugar content will heat up faster than food containing a lot of water. Fat and sugar will also achieve a higher temperature during the cooking process than water.
The more dense the food, the longer it takes to cook. Meat for example takes longer to heat than sponge cake.
Size and shape
Smaller pieces will cook faster than larger pieces and uniform pieces will cook more evenly than irregular pieces.
Thin parts will cook faster than thicker parts. Place the thinner chicken wings and legs nearer the centre of the tray.
Stirring and turning the food
Stirring and turning are techniques used in conventional as well as microwave cooking. It allows heat to distribute more quickly and avoids over-cooking at more exposed areas.
Covering the food
Covering the food with perforated cling wrap or pot lids, reduces splatter, shortens cooking times, and retains moisture. All materials which allow the passage of microwaves are suitable. (see utensil guide)
Releasing pressure in foods
Several foods are covered with a membrane. Steam builds up under the membrane and these foods should be pricked with a fork or cocktail stick to release pressure and prevent them from bursting. Typical examples of these foods are potatoes, Chicken livers, sausages, egg yolks, and certain fruits.
Standing time.
Experience has shown that standing time, after using the oven, always improves results as it allows heat to be evenly distributed prior to consumption.
In a microwave, food continues to cook even when the microwave energy is turned off. The reason for this is the transfer of heat from the food centre though a conduction process.
The length of standing time is dependent on the volume and density of the food and may range from 1 to 10 minutes. Generally the larger dense foods need more standing time.
Arranging the food
- Arranging the food in the oven contributes to the result.
- If several items of similar food are cooked at the same time, it is best to place them in a ring pattern around the tray. This will ensure uniform cooking.
- When cooking food of uneven shapes or thickness, arrange the denser, thicker food on the outside and the smaller, thinner pieces towards the centre of the tray where they will be heated last.
- Fish should be arranged with the tail sections towards the centre of the tray. When cooking whole fish, score the skin to prevent cracking and shield the tail with small pieces of aluminium foil.
- When re-heating a meal, arrange the smaller pieces in the centre and larger pieces towards the perimeter of the plate.
- Place thin slices of meat on top of one another. Thicker pieces such as sausages and meat loaf should be placed close together.
- Gravy, sauce or soup should be heated in a separate container. Choose a tall narrow container rather than a broad flat one and do not fill the container more than 2/3.
Cleaning and maintenance
natural_image
Line drawing of a microwave oven with open door and control panel (no text or symbols)Interior Floor.
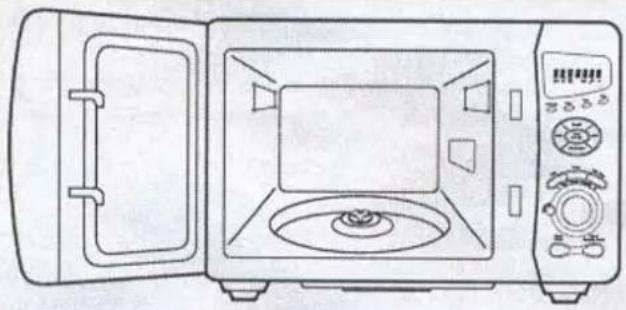
A grill element is located under the floor and there are holes in the floor above the element. The tray prevents serious soiling of the floor below it but if the floor needs to be cleaned, great care should be taken not to drop any water or detergent into these holes. Do not use a damp cloth but clean with a soft dry cloth.
Interior walls.
The oven interior is made of stainless steel. In order for it to retain it's natural shine and lustre. Spills and splatter should be cleaned as they occur, or soon after cooking.
Wipe with a mild liquid detergent and a damp cloth or sponge. Rinse with a clean damp cloth and dry.
More aggressive spills may be cleaned with a non abrasive detergent and a nylon scouring pad but be careful not to scratch the surface.
Interior Ceiling.
Two quartz grill elements are located in the ceiling of the oven. These are relatively fragile and should be handled with care. Do not remove the elements for cleaning.
Caution.
The oven can become hot during convection cooking and grilling. Always use oven gloves when handling food in the oven. Children and the infirm should be supervised at all times when using the oven.
Rotating base and steel tray.
These may be removed for cleaning. The tray is dishwasher proof. If food spills accumulate under the rotating tray, it could compromise the oven efficiency. Be sure to wipe up any spills in this area. Ensure proper installation after cleaning.
Note:
Do not use any other turntable tray in the oven. Do not operate the oven without the rotating base or turntable tray in position.
Door.
Wipe up any splatter while the door is still warm, using a soft damp sudsy cloth or sponge. Rinse with a clean damp cloth and dry.
Steam or condensation is generated during the cooking process. This is normal and not detrimental to the oven. If it proves hindersome however it may be wiped up with a clean cloth.
Note:
Although the oven is equipped with all the necessary safety features, it is still important to observe the following:
- Do not tamper with the door safety interlocks.
- Do not place any object between the door and the front face of the oven.
- Do not allow dirt to accumulate between the front face of the oven and the door.
- Wipe the sealing area frequently with a damp cloth. Never use abrasive powders or pads.
- Do not subject the opened door to any strain. A child swinging on the door could distort it or cause the oven to topple over.
- Do not operate the oven if it is damaged, if the door is bent, if the hinges are loose or broken or if the door does not seal properly.
- The door should never be adjusted by any other than a qualified service technician.
Exterior Control panel.
Exercise care when cleaning the control panel. Avoid scrubbing or using any household cleaner. Wipe with a slightly damp cloth and dry.
Exterior Cabinet
Clean with a damp sudsy cloth or sponge. Rinse with a damp cloth and dry. Do not use any abrasive cleaners.
IMPORTANT
Do not use a steam cleaner, scourers, abrasives, caustic cleaners, alcohol, thinners, volatile liquids or oven cleaners on any part of the appliance.
Problem solving
If you experience a problem, , please check the chart below. If the problem cannot be rectified in this manner, please consult your nearest Defy Service Centre for assistance.

flowchart
graph TD
    A["PROBLEM"] --> B["OVEN WILL NOT START"]
    B --> C["ARCING OR SPARKING"]
    C --> D["UNEVENLY COOKED FOOD"]
    D --> E["OVERCOOKED FOOD"]
    E --> F["UNDERCOOKED FOOD"]
    F --> G["INCOMPLETE DEFROSTING"]
    G --> H["SOLUTION"]
    H --> I["HAS THE START/SPEEDY COOK BUTTON BEEN PRESSED?"]
    I --> J["IS THE POWER CORD PLUGGED IN?"]
    J --> K["IS THE DOOR CLOSED?"]
    K --> L["SET THE COOKING TIME (CLOCK SET)"]
    L --> M["USE APPROVED COOKWARE ONLY"]
    M --> N["DO NOT OPERATE THE OVEN WHEN EMPTY"]
    N --> O["ONLY USE THE SUPPLIED TRAY"]
    O --> P["TURN OR STIR THE FOOD"]
    P --> Q["COMPLETELY DEFROST FOOD"]
    Q --> R["TURN THE DIAL KNOB OR PRESS CORRECT FUNCTION BUTTONS"]
    R --> S["CHECK TO SEE THAT THE OVEN VENTILATION SLOTS ARE NOT OBSTRUCTED"]
    S --> T["INITIATE MANUAL COOLING FOR 10 MINUTES"]
Note: It is normal for steam to escape and be visible around the door during the cooking cycle. The door is designed to prevent microwave leakage and is not intended to seal the oven cavity completely.
Caution: Do not attempt to operate an empty oven as this will damage the oven. Do not block the exhaust vent at the rear of the oven.
TECHNICAL SPECIFICATIONS
Power supply 230V -50Hz
Microwave power consumption 1500W
Microwave output power 1000W (IEC 705)
Microwave frequency 2450 MHz
Grill power consumption 1600W
Convection power consumption 2300W
Combination heating power consumption 3100W
Outside dimensions in mm. (W x H x D) 560 x 528.5 x 344
Oven cavity dimensions in mm. (W x H x D) 368.5 x 376.5 x 246
Net weight 21.5 Kg approx.
Timer 60 minutes
Select function Microwave, Grill, Convection, Combination
Microwave power levels 10 Stages
Questions and answers
I accidentally operated my microwave without any food in it. Is it damaged?
We do not recommend operating the oven without any food in it. However running it for a SHORT period should not damage the oven.
Can I open the door while the oven is operating?
The door may be opened at any time during the cooking process. Microwave energy will instantly be switched off and the time setting will be remembered until the door is closed again.
Does microwave energy pass through the door screen?
No. Light is allowed to pass through but not microwave energy.
My microwave oven causes TV interference. Is this normal?
Some TV and radio interference might occur when using the microwave oven. This is similar to the interference caused by mixers, vacuum cleaners, hair dryers etc. Try positioning the TV as far as possible from the microwave oven.
How do I know if the oven is operating or not?
The oven is operating when the door is closed and the interior light is on. At the end of a cooking cycle, the oven will beep, the light will go out and the cooling fan will run for an additional two minutes.
Why does my oven light dim?
When cooking at reduced power levels, the oven cycles to maintain these levels. Clicking noises may be heard and the light dims during cycling. This is normal.
When is the oven light on?
The oven light is on during a cooking cycle and when the door is opened.
Why does steam accumulate round the oven door?
During cooking steam is released from most foods. Some steam will condense on cooler surfaces and this is evident around the door. This occurrence is however completely normal and has no detrimental effect on the oven.
Sometimes warm air escapes from the oven vents. Why?
The vents are designed to carry hot air away from the oven during cooking. They do not allow microwave energy to escape. Ensure that the vents are not obstructed in any way.
Why does smoke exhaust from the rear of the oven?
Smoke may be produced when food is over-cooked. However it is normal for any smoke to be exhausted from the oven cavity similar to the hot air described above.
The Manufacturer strives for continuous improvements. The content of this book is therefore subject to change without notice.
Service Centres
If you have followed the instructions and still have a problem, contact the nearest Defy Service Centre for advice or help.
BLOEMFONTEIN
P.O.Box 1691 Bloemfontein. 9300.
160 Long Street, Hilton,
Bloemfontein 9301.
Tel. 051 400 3900.
CAPE TOWN
P.O.Box 953 Milnerton. 7435
5A Marconi Rd. Montague Gardens, Milnerton 7441.
Tel. 021 551 8314.
EAST LONDON
P.O.Box 7006 East London 5200.
16 Bowls Rd. Arcadia,
East London 5201.
Tel. 043 743 7100.
JOHANNESBURG
P.O.Box 27150 Benrose 2011.
Cnr. Mimetes & Kruger Sts. Denver ext.12.
Johannesburg. 2094.
Commercial Head Office, Tel. Sales,
Administration, Distribution, Commercial Head Office, National Groups, Contracts and Credit.
Tel. 011 621 0200 or 011 621 0300.
DURBAN
P.O.Box 12004 Jacobs 4026.
174 Teakwood Rd.
Jacobs 4052.
Tel. 031 460 9712.
POLOKWANE
P.O.Box 1719 Polokwane 0700.
87 Nelson Mandela Drive.
Superbia 0699.
Tel. 0152 92 1166 / 7 / 8 / 9.
PORT ELIZABETH
P.O.Box 2971 North End 6056.
3 Sidon Str. North End,
Port Elizabeth.6001.
Tel. 041 401 6400.
PRETORIA
P.O.Box 19768 Pretoria West 0117.
Block A1 Old Mutual Industrial Park.
Cnr. D.F.Malan Drive & Moot Str.
Hermanstad. 0082.
Tel. 012 377 0061.
OTHER AREAS ARE SERVICED BY OVER 200 AUTHORISED SERVICE AGENTS. PLEASE CONSULT THE NEAREST REGIONAL DEFY SERVICE CENTRE FOR DETAILS.
Warranty
This certificate is issued by DEFY APPLIANCES LIMITED manufacturers of Defy and Ocean products, hereinafter the Company, to the original purchaser only, of the appliance described on the certificate and shall constitute the only warranty given in respect of this appliance.
The Company warrants to the original purchaser that for a period of TWO YEARS from date of purchase the appliance is free from defect under normal domestic use, both in workmanship and material, subject to the following conditions.
- Repair or replacement of any part of this appliance, found by the Company to be defective, shall be at the election of the Company. The Company reserves the right to effect such service through any of its Service Divisions or Authorised Service Dealers. The cost of such service shall be borne by the Company in full, provided that the appliance is located no further than 50 km from a Company Service Centre or an Authorised Service Dealer. Where the appliance is located beyond the 50 km radius, the purchaser shall be liable for the standard travelling charges, as determined by the Company.
CARRY IN SERVICE Microwave ovens, Compact cookers and small appliances are repaired in our service centres and are not collected from the customers home. Faulty units should be delivered to the purchasing dealer or to the nearest Company Service Centre for warranty repairs. - Rusted or corroded solid plates, vitreous enamelware, fuses and lamps are specifically excluded from these warranties. It is an express condition of these warranties that the purchaser takes due care and attention in the use and maintenance of the appliance. Abuse, misuse in conflict with operating instructions, connection to incorrect voltages and subjection to commercial use shall release the Company from its obligations.
- This warranty shall become void and cease to operate if the appliance is dismantled by, or any repairs to the appliance are effected by any persons not duly authorised by the Company, or if substitute parts not approved by the Company are used in the appliance, or if the serial number of the appliance is removed.
- The Company shall not be responsible for damages resulting from fire, flood, civil disturbances or any Act of God. The Company shall not, in terms of these warranties be responsible nor held liable for any consequential loss or damage of any kind caused by or due to the failure or malfunction of the appliance.
- The Company shall not be responsible for transportation or other costs other than those incurred within the provisions of Point 1 of this Certificate.
- These warranties shall not apply to the appliance if it is purchased or used beyond the borders of the Republic of South Africa, Namibia, Botswana, Swaziland and Lesotho.
- Where service is requested under warranty and no fault or defect can be found by the Company, all costs incurred will be for the purchaser's account.
- This Certificate as well as your invoice will serve as proof of purchase. For the purpose of warranty, it will be essential to produce this Certificate and invoice. Failure to do so, will render the purchaser liable for service costs.
KEEP THIS CERTIFICATE AND SALES INVOICE AS PROOF OF PURCHASE FOR WARRANTY PURPOSES.


- YOU CAN RELY ON DEFY
- INDEX
- Introduction
- How Microwaves work
- Precautions
- Electrical installation
- Installation
- Safety tips and instructions
- The control panel
- THE DISPLAY WINDOW
- THE BUTTONS
- Accessories and their use
- The rotating base.
- The turntable tray.
- The metal stand.
- Selecting the language
- Setting the time of day
- Child lock
- To set power save mode
- Operational notes to remember
- Safety tip.
- At the end of the cooking cycle.
- Microwave cooking
- Grilling
- Convection cooking with pre-heat
- Convection cooking - Traditional cooking
- Combi 1 ( microwave and convection cooking )
- Combi 2 ( microwave, convection and lower grill cooking )
- Combi 3 ( convection, upper grill and lower grill cooking )
- Combi 4 ( microwave, and upper grill cooking )
- Combi 5 ( microwave , upper grill and lower grill cooking )
- Auto defrost
- Defrosting tips
- Cake
- Crusty (crispy)
- Auto cook
- Memory cook
- To use the memory function proceed as follows:
- Speedy cook
- Less and More buttons
- Manual cooling
- Scroll speed
- To stop the oven when it is operating
- Open the door.
- Press the stop/ clear button.
- Warning messages
- General guide lines
- If the food is undercooked.
- If the food is dried out, overcooked or burnt.
- Points to remember when defrosting.
- Quantity of food.
- General guide lines (continued)
- Starting temperatures.
- Composition of the food.
- Size and shape
- Stirring and turning the food
- Covering the food
- Releasing pressure in foods
- Standing time.
- Arranging the food
- Cleaning and maintenance
- Interior Floor.
- Interior walls.
- Interior Ceiling.
- Caution.
- Rotating base and steel tray.
- Note:
- Door.
- Exterior Control panel.
- Exterior Cabinet
- IMPORTANT
- Problem solving
- TECHNICAL SPECIFICATIONS
- Questions and answers
- I accidentally operated my microwave without any food in it. Is it damaged?
- Can I open the door while the oven is operating?
- Does microwave energy pass through the door screen?
- My microwave oven causes TV interference. Is this normal?
- How do I know if the oven is operating or not?
- Why does my oven light dim?
- When is the oven light on?
- Why does steam accumulate round the oven door?
- Sometimes warm air escapes from the oven vents. Why?
- Why does smoke exhaust from the rear of the oven?
- Service Centres
- BLOEMFONTEIN
- CAPE TOWN
- EAST LONDON
- JOHANNESBURG
- DURBAN
- POLOKWANE
- PORT ELIZABETH
- PRETORIA
- Warranty
Brand : Defy
Model : DMO 297
Category : Microwave