
7600 PRO - Browser COBRA - Free user manual and instructions
Find the device manual for free 7600 PRO COBRA in PDF.


| Product Type | Portable GPS Navigator |
| Brand | Cobra |
| Model | 7600 PRO |
| Dimensions (approx.) | 120 x 80 x 20 mm (4.7 x 3.1 x 0.8 in) |
| Weight (approx.) | 200 g (7.1 oz) |
| Power Source | Internal rechargeable lithium-ion battery; 12V vehicle charger |
| Battery Life (approx.) | Up to 3 hours continuous use |
| Display | 5-inch color touchscreen |
| Navigation Features | GPS navigation, turn-by-turn directions, voice guidance, Points of Interest (POI) |
| Map Coverage | Preloaded maps, lifetime map updates |
| Traffic | Compatible with optional real-time traffic receiver |
| Connectivity | USB for data transfer and charging |
| Mounting | Windshield suction cup mount included |
| Language Support | Multiple languages (English, French, Spanish, etc.) |
| Maintenance | Clean with a soft, dry cloth. Avoid liquids and abrasives. |
| Safety | Use only as a driver aid; do not operate while driving. Mount securely. |
| Spare Parts / Accessories | Car charger, USB cable, mount (available from Cobra or authorized dealers) |
| Repairability | Battery replacement by qualified technician; no user-serviceable parts inside |
| Warranty | Limited one-year warranty (see manual for details) |
Frequently Asked Questions - 7600 PRO COBRA
User questions about 7600 PRO COBRA
0 question about this device. Answer the ones you know or ask your own.
Ask a new question about this device
Download the instructions for your Browser in PDF format for free! Find your manual 7600 PRO - COBRA and take your electronic device back in hand. On this page are published all the documents necessary for the use of your device. 7600 PRO by COBRA.
USER MANUAL 7600 PRO COBRA
It is the user's responsibility to account for the vehicle's height, width, length, HAZMAT, and other restrictions while driving. Always follow posted road signs and be aware of road conditions when making driving decisions.
Please read the "Important Safety Information" included with your unit.
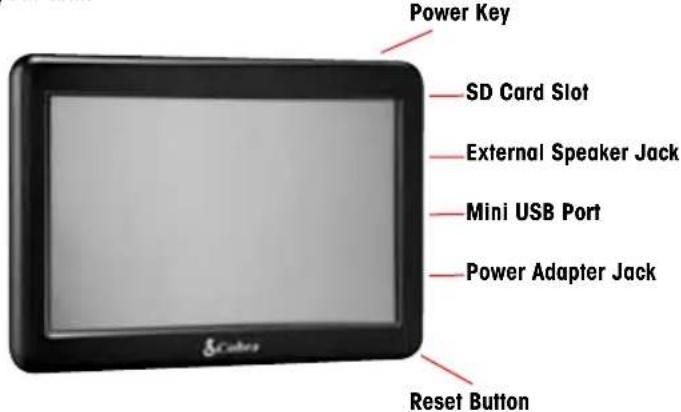
To charge the unit, connect either the AC or DC Power Adapter. The battery light will illuminate and will take approximately 3 hours to charge. When battery is fully charged, the red LED will turn green. Once fully charged the battery will last approximately 2 hours during normal use.
natural_image
Close-up of a hand holding a black object, possibly a camera or device (no visible text or symbols)NOTE: Turn the unit ON or OFF by pressing the Power Key for 2 seconds.
Mount the Unit
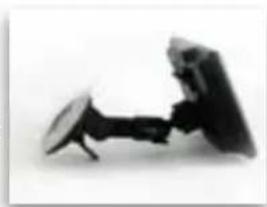
You can mount your unit to the inside of your vehicle's windshield using the windshield bracket provided.
- Do not place the mount in an airbag deployment area.
- Clean the area where you wish to position the bracket thoroughly with glass cleaner.
- Assemble the suction cup bracket. Slide the mount clip onto the end of the suction cup arm and tighten both plastic nuts.
- Place the suction cup and bracket on the windshield and push the locking lever towards the windshield to secure the bracket.
- Adjust the angle of the bracket so that when the unit is attached to it you can view the display and operate the controls safely.
natural_image
Black and white photo of a mechanical component with a cylindrical shaft and flanged end (no visible text or symbols)
natural_image
Hand holding a small black object with a circular lens (no visible text or symbols)NOTE: Mounting your unit in close proximity to a CB radio may interfere with GPS reception. Should you encounter such interference, position your unit as far away from your CB radio as possible.
Map Screen
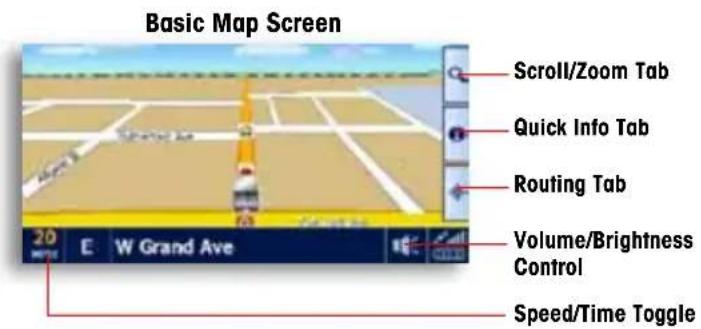
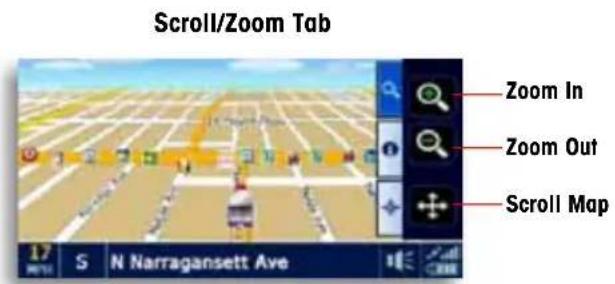
NOTE: Touch anywhere on the map to enter the Main Menu.
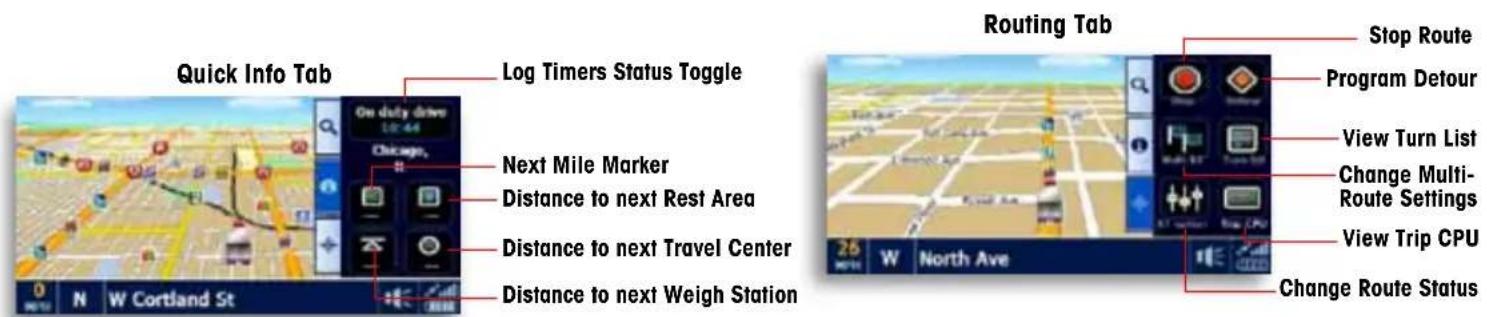
Main Menu
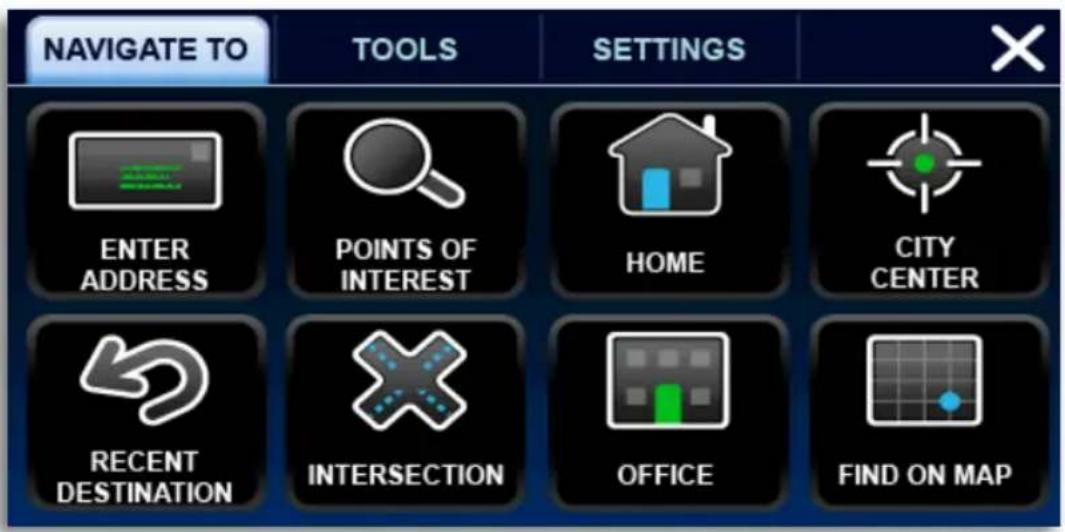
Navigate To:
- Enter Address
- Points of Interest
Home - City Center
- Recent Destination
- Intersection
- Office
- Find on Map
Tools:
- Address Book
- Multi-Route
- Trip Computer
- Calculator
- Hour Log
- Mileage Log
- GPS Status
- Backup/Restore
Settings:
• My Truck
- Map
- Device
• Volume/Brightness
- Alerts
- Language
- Calibration
Enter Truck Info
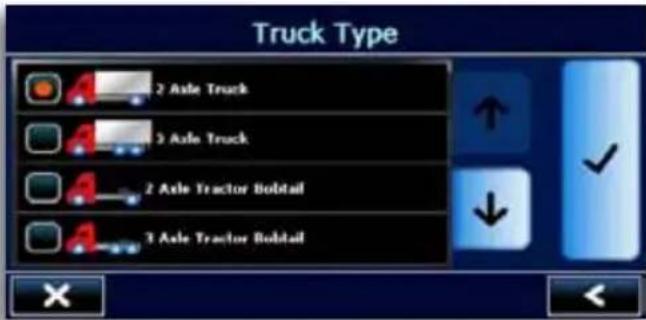
- Under the Settings tab in the main menu, tap the My Truck icon to input your truck type.
- Choose your axel configuration and press √
- Tap each box to enter your truck name and customize your vehicle's specifications.
- When finished, press Save. Now you are ready to navigate.
Find an Address
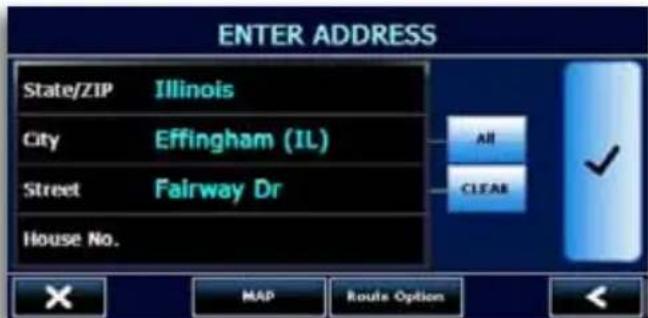
- Under the Navigate To tab in the main menu, tap the Enter Address icon to navigate to an address.
- Click the appropriate boxes to enter your destination's State/Zip, City, Street, and House Number.
- As you type using the keyboard, the list will automatically filter your results. You can press View List to scroll through the results or simply tap on your desired destination.
- When finished, press and then confirm your truck information and press again.
Route Option
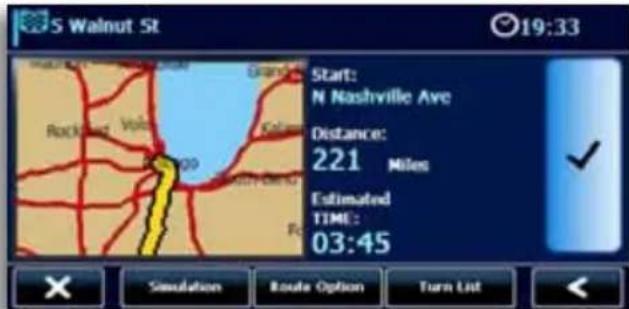
- The Route Option Page allows you to view and customize your route.
- Press Simulation for the unit to run a real time simulation of your route including turn instructions and warnings.
- Press Route Options to Customize your route. This page allows you to avoid tollways and freeways, give preference to STAA routes, avoid specific roads, add via locations, or change your starting point.
- Press Turn List for detailed turn instructions for your route.
- When you are comfortable with your route, press to begin navigating.
Find a POI
![Truck Stops Greater Chicago 1-55 A/T [2nd Ave] Balingbrenk Cr. Balingbrenk, Davis, UNITED STATES TA Gary Travel Center [3rd Ave] Mary St. Gary, Indiana, UNITED STATES Flying 3 Travel Plaza [4th Ave] Grant St. Gary, Indiana, UNITED STATES Petro Monee [5th Ave] Cleveland Ave, Monroe, Thrunk, UNITED STATES 1/3 KEYBOARD Amenities](/content/2026/05/989482/images/cd018f537b69f0eeda35a7002bdabfa285a9bdee0fdb1993a5e2df0990c9e7b8.jpg)
- The 7600 PRO has an extensive database of Truck Specific and Standard Points of Interest. Under the Navigate To tab, click the Point of Interest icon.
- Choose where you would like the 7600 PRO to center the search.
- For truck specific POI's tap ProMiles®/TruckDown® Truck Specific POI.
- For standard POIs choose the appropriate category or press All to do a keyboard search of all categories.
NOTE: If you see ⚠️ on your map screen it means that you are not on the STAA National Network. The 7600 PRO does not have truck specific data for these areas so be alert and follow local restrictions and posted signs.
Amenity Filter
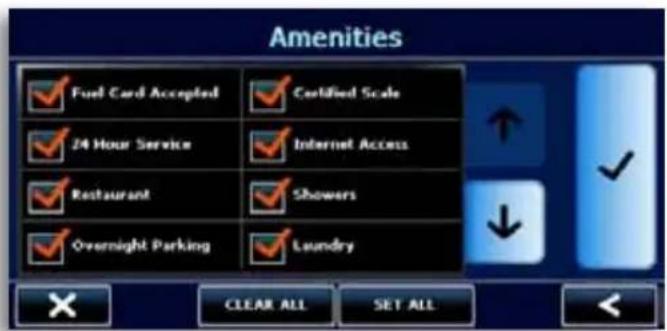
- When searching for Truck Stops the 7600 PRO gives you the ability to filter your results based on the amenities of the travel center.
- Enter a Point of Interest search, tap ProMiles®/TruckDown® Truck Specific POI, press the down arrow, select Truck Stops, then press the Amenities button.
- Select each amenity that you require and press the button.
- To turn off the amenity filter, press Clear All and then press the button.

Timers and Logs
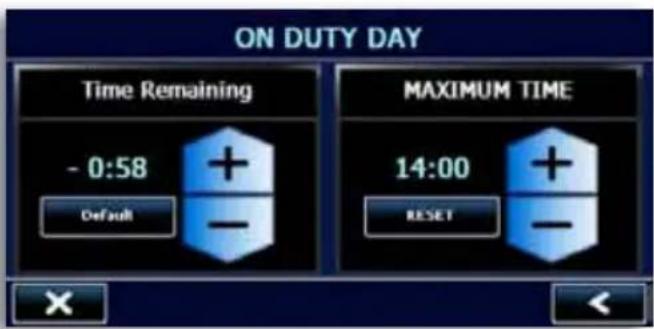
- The Hour Log and State Mileage Log can be found in the Tools menu.
• The Hour Log is a set of timers that will assist you in filling out your Hours of Service Log Book. - Reset your timers at the beginning of your work day. Set the maximum times to your preferred limits.
- Use the Log Timers Status Toggle in the Quick Info Tab on the Map Screen to change your status.
- The timers will count down and warn you when you are approaching your maximum limit.
- The State Mileage Log automatically records the number of miles that you drive in each state.
Configuration Options
- To reset unit to factory settings, go to the Settings Tab in the main menu, press Device, and scroll down to Reset.
- To toggle between the Truck, Car, RV, or Arrow icon go to the Settings Tab in the main menu, press Map, and scroll down to Vehicle.
- If you are having trouble with touch screen accuracy, calibrate your screen by tapping Calibration in the settings tab and follow the onscreen instructions.



Using and Updating

Your unit comes with 3 free months of AURA, the world's premier Red Light/Speed Camera database. Keeping your unit updated with AURA will insure that you receive the most accurate warnings of upcoming red light cameras, speed cameras, dangerous intersections, caution areas, and speed traps.
- To activate your free updates, go to http://aura.cobra.com and click on the 7600 PRO.
- Follow the on-screen instructions to update your unit.
For more information, view the full user manual at http://www.cobra.com/pages/product-manuals or call customer service at (773) 889-3087.
Brand : COBRA
Model : 7600 PRO
Category : Browser