
DPH 120S - Telephone D-LINK - Free user manual and instructions
Find the device manual for free DPH 120S D-LINK in PDF.


| Product Type | IP Phone |
| Model | DPH-120S |
| Brand | D-Link |
| Power Supply | 5V DC, 1A (included adapter) |
| Display | LCD (monochrome) |
| Network Interface | RJ-45 Ethernet (10/100 Mbps) |
| VoIP Protocol | SIP |
| Number of SIP Accounts | Up to 4 |
| Call Features | Call Hold, Call Transfer, 3-Way Conference, Call Forwarding (Unconditional, Busy, No Answer) |
| Phonebook | Yes (store, edit, delete contacts) |
| Speed Dial | Yes (up to 10 numbers, 00-09) |
| Redial | Yes (last number and call history) |
| Mute | Yes |
| Do Not Disturb | Yes |
| Anonymous Call | Yes (enable/disable) |
| Anonymous Call Rejection | Yes |
| Ring Tones | 4 selectable types |
| Language Support | English, Japanese |
| Time Format | 12-hour or 24-hour |
| Volume Adjustment | Ringer, speaker, and handset volume adjustable |
| MAC Address Display | Yes |
| Firmware Update | Automatic via TFTP/FTP |
| Cleaning | Wipe with a dry, soft cloth. Do not use liquids or abrasives. |
| Safety | Use only the provided power adapter. Avoid exposure to moisture. |
| Spare Parts and Repairability | Contact D-Link support for service; no user-replaceable parts. |
Frequently Asked Questions - DPH 120S D-LINK
User questions about DPH 120S D-LINK
0 question about this device. Answer the ones you know or ask your own.
Ask a new question about this device
Download the instructions for your Telephone in PDF format for free! Find your manual DPH 120S - D-LINK and take your electronic device back in hand. On this page are published all the documents necessary for the use of your device. DPH 120S by D-LINK.
USER MANUAL DPH 120S D-LINK
1.0 INTRODUCTION....4
2.0 PACKAGE CONTENT....4
3.0 LIST OF FIGURES....5
4.0 SUMMARY OF KEY FUNCTIONS 6
5.0 CONNECTING THE IP PHONE 7
6.0 IP PHONE SETUP 8
6.1 MENU SUMMARY....8
6.2 D ISPLAY NAME....10
6.3 ADSL IADUP....10
6.4 DHCP Y(DAMIC HOST CONFIGURATION PROTOCOL) 11
6.5 DNS ER\SER IP....13
6.6 SNTP ERSER IP 13
6.7 DO NOT DISTURB 14
6.8 CF ( CALL FORWARD) UNCONDITIONAL....14
6.9 CF CALL FORWARD) USER BUSY....14
6.10 CF (CALL FORWARD) NO ANSWER 14
6.11 ANONYMOUS CALL.... 15
6.12 ANONY CALL REJ (ANONYMOUS CALL REJECTION).... 15
6.13 RINGING TYPE 15
6.14 MAC DRESS 16
6.15 VERSION 16
6.16 L LANGUAGE SELECTION....16
6.17 TIME FORMAT.... 16
6.18 VOLUME ADJUSTMENT 17
6.18.1 Ringer Volume 17
6.18.2 Speaker Volume 17
6.18.3 Handset Volume 17
8.1.1 IP Address....31
8.1.2 SIP Number.... 31
8.2 S PEED DIALING....32
8.3 A ANSWERING A PHONE CALL 32
8.4 S WITCHING TO ANOTHER LINE 32
8.5 M UTE....32
8.6 CALL TRANSFER 33
8.7 REDIAL 33
8.7.1 Last Dialed Number 33
8.7.2 Through Call History.... 33
8.8 ON HOLD 34
8.9 CALL FORWARD....34
8.10 THREE WAY CONFERENCE....34
9.0 USING THE PHONEBOOK 35
9.1 DIALING FROM THE PHONEBOOK 35
9.2 STORING A NUMBER 35
9.3 EDITING A NUMBER 36
9.4 DELETING A NUMBER 36
10.0 TROUBLESHOOTING 37
1.0
INTRODUCTION
Voice over IP (also known as Internet Phone) is a technology that allows anyone to make a telephone call over the Internet. This is a quick user guide for the DPH-120S SIP Phone. It is intended to help you configure the telephone and have it ready to run within a few minutes. Please follow the user guide carefully as troubleshooting the telephone can be very difficult and time consuming.
2.0
PACKAGE CONTENT
The following materials are included in the package. Please check the package to ensure that all the materials are listed below. Contact your supplier immediately if an item is missing.
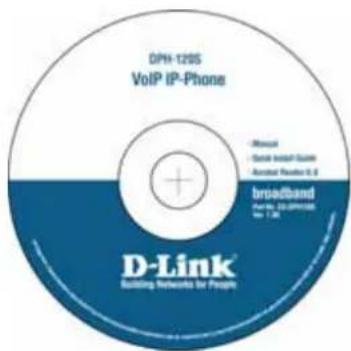
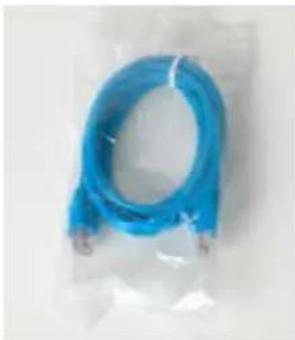
natural_image
Blue flexible cable wrapped in plastic wrap (no text or symbols visible)Ethernet Cable (1.8 metre) CD
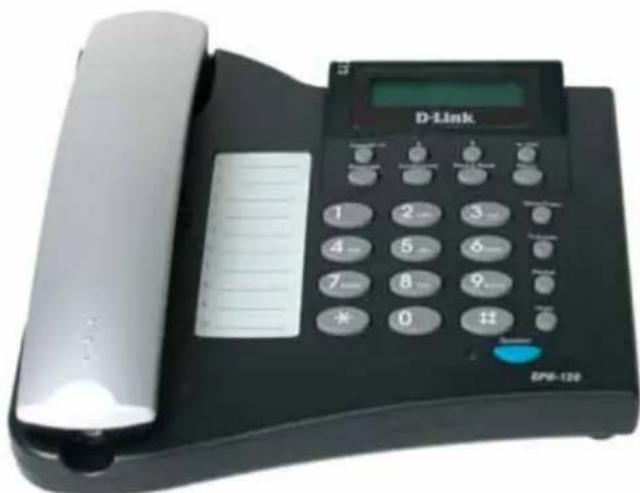
IP Phone (Model: DPH-120S)
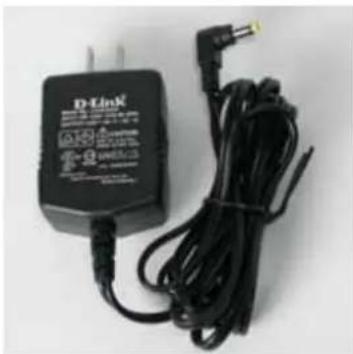
natural_image
Black D-Link 3.0 power adapter with attached black cable and terminal connector (no visible text or symbols on body)Power Adaptor (5V DC)
3.0 LIST OF FIGURES
Diagram for D-Link IP Phone (Model: DPH-120S)
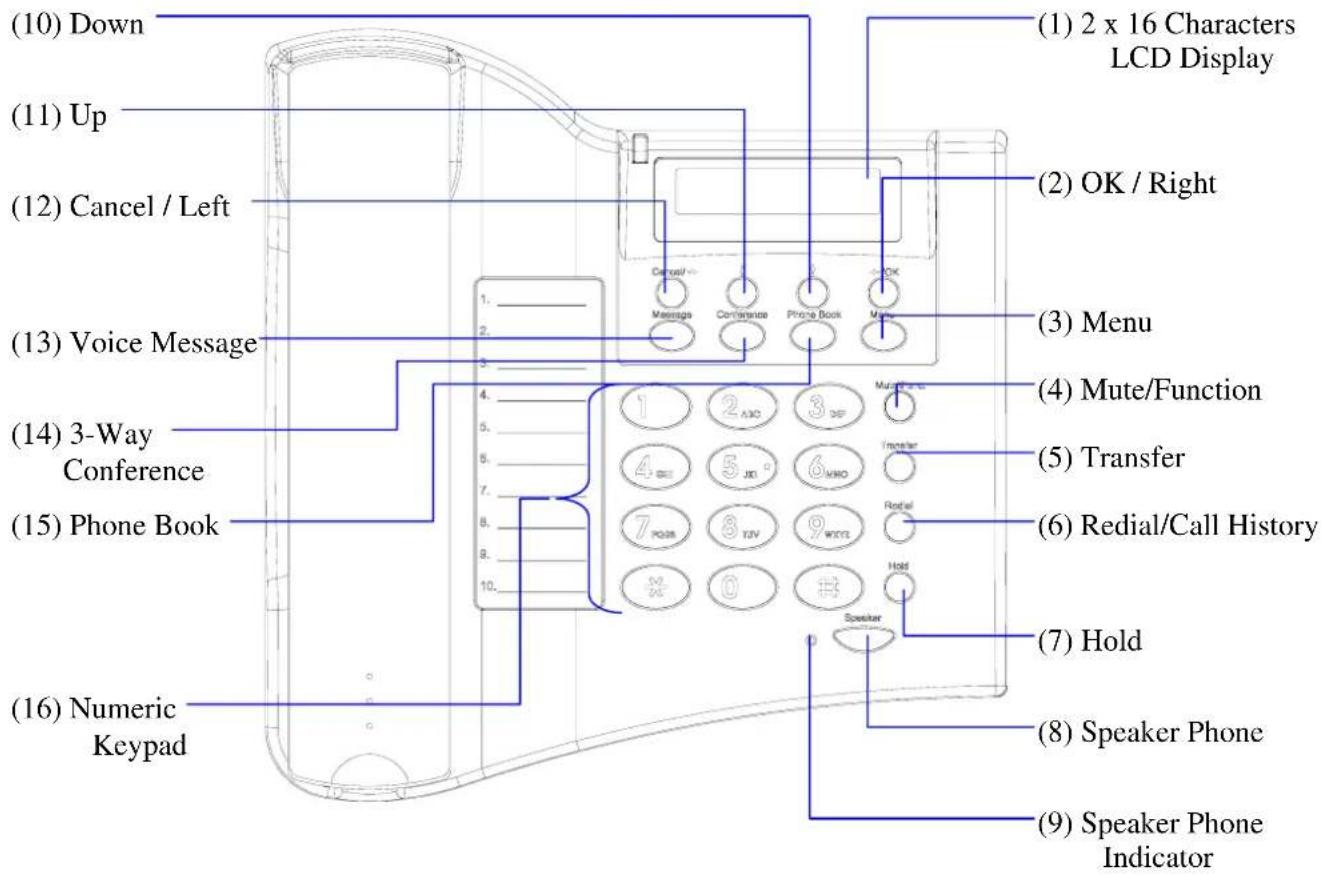
4.0 SUMMARY OF KEY FUNCTIONS
| Keys Functions | |
| (1) LCD Display Displays menu, time, clock, name, phone number, call status | |
| (2) OK/Right | Confirm setting change, exit menu, dial, save changes |
| (3) Menu Access the phone menu | |
| (4) Mute/Function Disable user's microphone so that the person on the other line can not hear anything, access the language selection, access the time format | |
| (5) Transfer Transfer the person you are currently having a conversation to another line | |
| (6) Redial/Call History Redial last dialed number, access redial menu | |
| (7) Hold Place the person on the other line on hold, answer call waiting | |
| (8) Speaker Phone Enable user to use the phone without using the handset | |
| (9) Speaker Phone Indicator Indicates that phone is currently in speaker phone mode | |
| (10) Down Cycle through the phone menu, adjust volume | |
| (11) Up Cycle through the phone menu, adjust volume | |
| (12) Cancel/Left | Deny changes, cancel phone calls, ignore phone calls, backspace |
| (13) Voice Message | Check voice message |
| (14) 3-Way Conference | Enable 3-way conference |
| (15) Phonebook | Access the phonebook |
| (16) Numeric Keypad | Input IP/phone number/alphabet characters |
5.0 CONNECTING THE IP PHONE
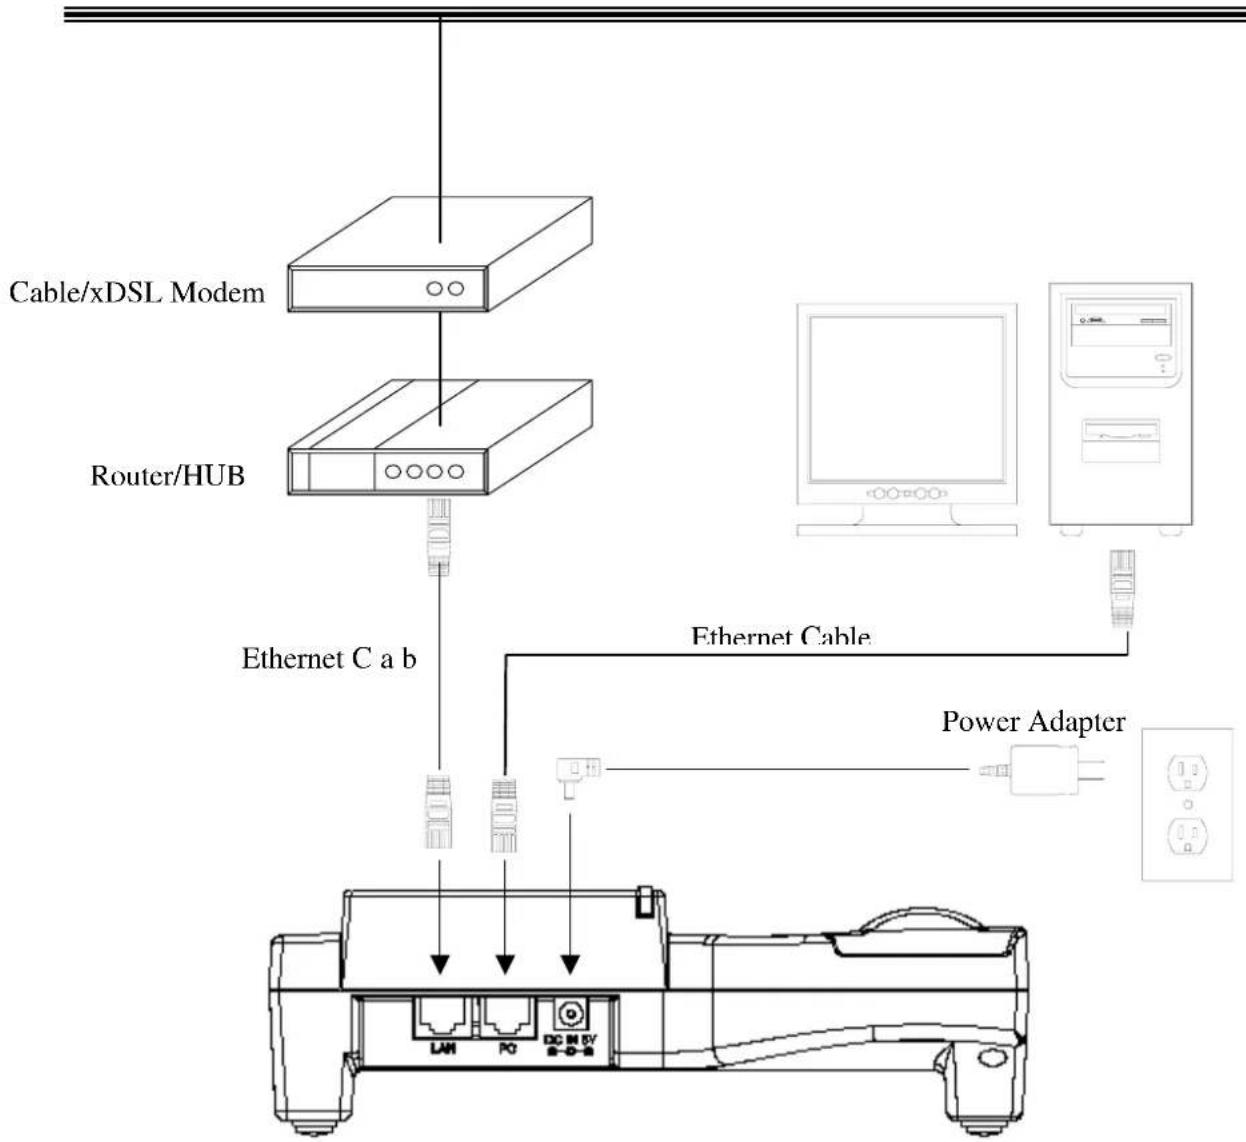
Connect the IP Phone as the following diagram:
Wide Area Network / Internet
6.1 Menu Summary
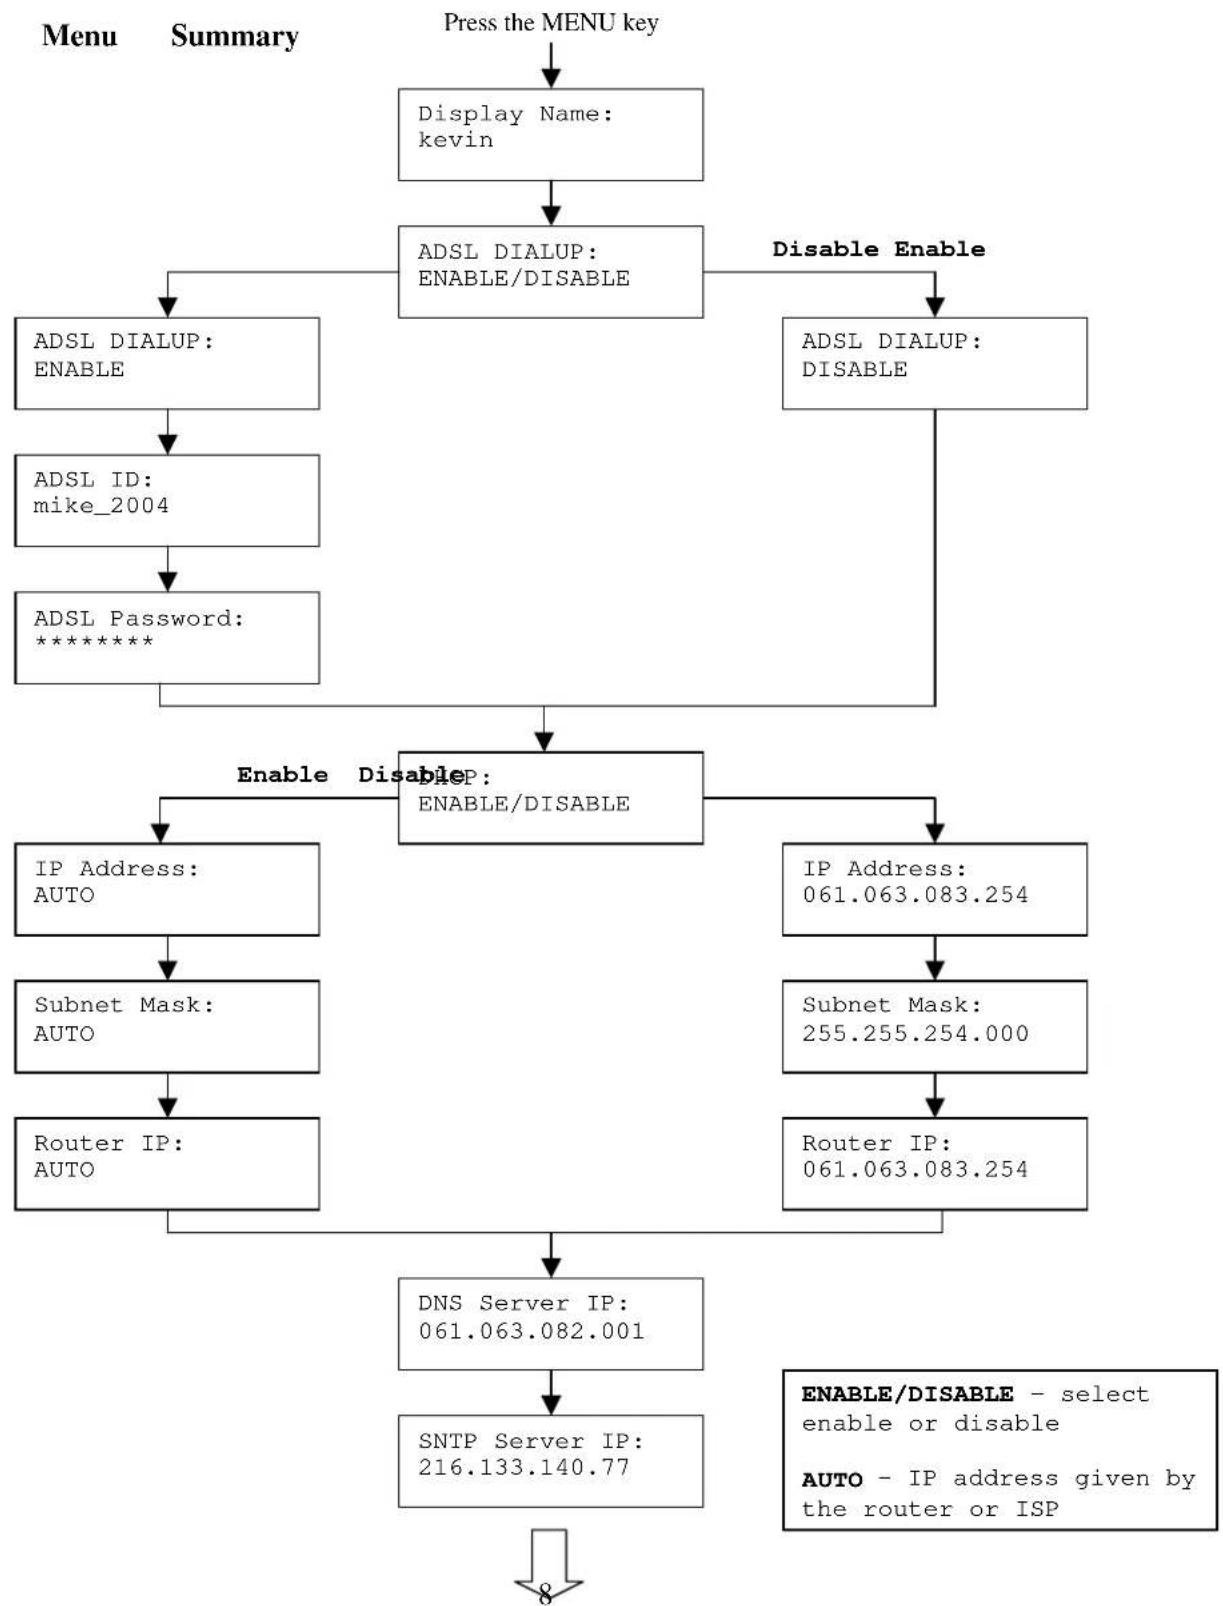
flowchart
graph TD
    A["Press the MENU key"] --> B["Display Name: kevin"]
    B --> C["ADSL DIALUP: ENABLE/DISABLE"]
    C --> D["ADSL DIALUP: ENABLE"]
    C --> E["ADSL DIALUP: DISABLE"]
    D --> F["ADSL ID: mike_2004"]
    F --> G["ADSL Password: *********"]
    E --> H["ADSL DIALUP: DISABLE"]
    G --> I["Enable Disable"]
    H --> J["IP Address: AUTO"]
    H --> K["IP Address: 061.063.083.254"]
    I --> L["Subnet Mask: AUTO"]
    L --> M["Router IP: AUTO"]
    J --> N["Subnet Mask: 255.255.254.000"]
    K --> O["Router IP: 061.063.083.254"]
    M --> P["DNS Server IP: 061.063.082.001"]
    O --> P
    P --> Q["SNTP Server IP: 216.133.140.77"]
    R["Enable DISABLE - select enable or disable\nAUTO - IP address given by the router or ISP"] --> P

flowchart
graph TD
    A["SNTP Cycle: 01"] --> B["Do Not Disturb: ENABLE/DISABLE"]
    B --> C["CF Unconditional: ENABLE/DISABLE"]
    C --> D["CF User Busy: ENABLE/DISABLE"]
    D --> E["CF No Answer: ENABLE/DISABLE"]
    E --> F["Anonymous Call: ENABLE/DISABLE"]
    F --> G["Anony Call Rej: ENABLE/DISABLE"]
    G --> H["Ring Type: Ringing1/2/3/4"]
    H --> I["MAC Address: 00D0E90137DB"]
    I --> J["Version: V: 1.0"]
    J --> K["Press the MENU key"]
    K --> L["UPDATE CHANGES? <OK> OR <CANCEL>"]
Ringing1/2/3/4 - select ringing1, 2, 3 or 4
NOTE 1: If you made any modifications, you may quit setup at any time by pressing MENU + OK to save and exit or MENU + CANCEL to quit without saving. The phone will automatically exit from the menu screen if there are no inputs from the user.
NOTE 2: Use

or

to select ENABLE or DISABLE.
NOTE 3: Left arrow key

can be used as Backspace key.
6.2 Display Name
- Press

- Enter the display name
Display Name: kevin
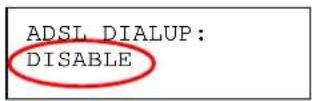
6.3 ADSL Dialup
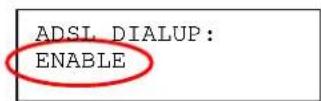
Some Internet Service Provider (mostly ADSL) uses PPPoE which requires that the user enter an ID and a password to access the Internet. In this case, enable ADSL DIALUP and enter the PPPoE ID and PPPoE password.
ENABLE ADSL Dialup
1
- Press

• Use

to select ENABLE
2
- Press

- Enter the ADSL ID
ADSL ID: My_ID
3
- Press

- Enter ADSL password
ADSL Password: *************************
DISABLE ADSL Dialup
- Press

- Press

to select DISABLE
6.4 DHCP (Dynamic Host Configuration Protocol)
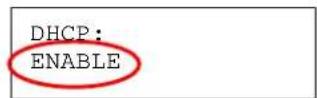
DHCP allows the network administrator to distribute IP addresses when a computer is plugged into a different place in the network. If your ISP provides static IP address, you must disable DHCP and enter the IP address provided.
ENABLE DHCP
1
- Press

- Use

or

to set DHCP to ENABLE
2
- Press

• IP address automatically acquired
IP Address: 61. 63. 83. 96
3
- Press

- Subnet mask automatically acquired
Subnet Mask: 255.255.254.0
4
- Press

- Router IP automatically acquired
Router IP: 61. 63. 83.254
DISABLE DHCP
1
- Press

- Use

or

to set DHCP to DISABLE
DHCP: DISABLE
2
- Press

• Enter the IP address
IP Address: 061.063.083.019
3
- Press

- Enter the subnet mask
Subnet Mask: 255.255.254.000
4
- Press

- Enter the router IP address
Router IP: 061.063.088.019
6.5 DNS Server IP
The domain name system (DNS) is the way that Internet domain names are located and translated into Internet Protocol addresses. There is probably a DNS server within close geographic proximity to your ISP that maps the domain names in your Internet requests or forwards them to other servers in the Internet.
- Press

• Enter DNS server IP
DNS Server IP: 061.063.082.001
6.6 SNTP Server IP
Simple Network Time Protocol (SNTP) is a protocol used to help match your system clock with an accurate time source. If you do not know your SNTP Server IP, please ignore this section. SNTP Server IP address can be either URL or IP.
- Press

- Enter SNTP server IP or URL
SNTP Server IP: 216.133.140.78
6.7 Do Not Disturb
This setting allows the user to reject all incoming phone calls.

6.8 CF (call forward) Unconditional
Enable CF Unconditional to forward all the incoming calls to another number. Otherwise set to disable. You will need to use a web-browser to input the forwarded phone number. Refer to section 7.0 for more information on call forwarding.

6.9 CF (call forward) User Busy
Forward all the incoming calls to another number when user is busy on the phone.

6.10 CF (call forward) No Answer
Forward all incoming calls to another phone number after a certain number of rings.

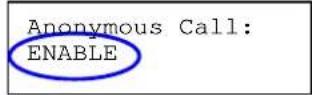
6.11 Anonymous Call
Enables the caller (user) to hide the name and phone number from the receiver.
- Press

- Use

or

to select ENABLE or DISABLE
6.12 Anony Call Rej (Anonymous Call Rejection)
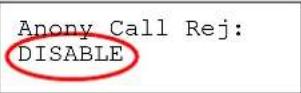
Reject any anonymous incoming calls.
- Press

- Use

or

to select ENABLE or DISABLE
6.13 Ringing Type
Select the ring tone. There are four ring tones in total.
- Press

- Use

or

to select the ring type
Ringing Type: Ringing4
NOTE: At this point, you may save the settings and exit. The next two sections explain how to obtain the MAC address and firmware version.
- Press

to exit menu
- When asked to save or cancel, press

to SAVE
6.14 MAC Address
This menu displays the MAC address. User cannot modify MAC address.
- Press

• MAC address is displayed on the screen
MAC Address: 00D0E9017DB
6.15 Version
Version menu displays the firmware version. You cannot modify the version number.
- Press
- Firmware

version is displayed on screen
Version: V: 1.0
6.16 Language Selection
The VoIP Phone (model no. DPH-120S) supports two languages: Japanese and English.
- Press

followed by

Language: English
- Use

or

to select the preferred language
- Press

when done
6.17 Time Format
You may select the 12hr or 24hr time format.
- Press

followed by

Time Format: 24Hours
- Use

or

to select the time format
- Press

when done
6.18.1 Ringer Volume
While the handset is in place,
- Press
to increase the ringer volume and
to decrease the
ringer volume


6.18.2 Speaker Volume
While the handset is in place,
- Press
- Press
to increase the speaker volume and
to decrease the
speaker volume


6.18.3 Handset Volume
• Pick up the handset and press

to increase the volume or press

to decrease the volume
The configuration menu can be accessed using a web browser. Some advanced features such as CF Unconditional, CF User Busy and CF No Answer must be setup from the web browser.
7.1 Accessing Configuration Menu
- Open the web browser (ie. Internet Explorer, Netscape...)
• Type in the IP Address of the phone followed by :9999
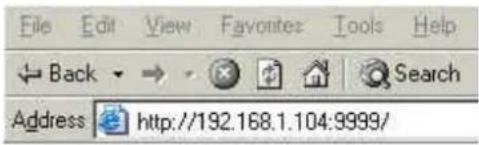
IP address is provided by your Internet Service Provider (ISP). If your ISP supports DHCP, you may obtain the IP address from you phone. Press MENU and scroll down to IP address.
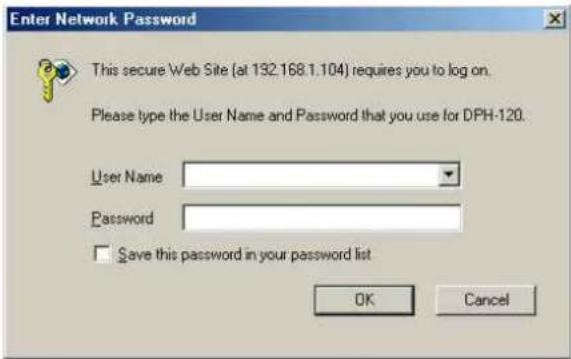
- Enter User Name and Password (leave User Name and Password blank if you are installing the phone for the first time)
- Click OK
7.2 Web Login Setting
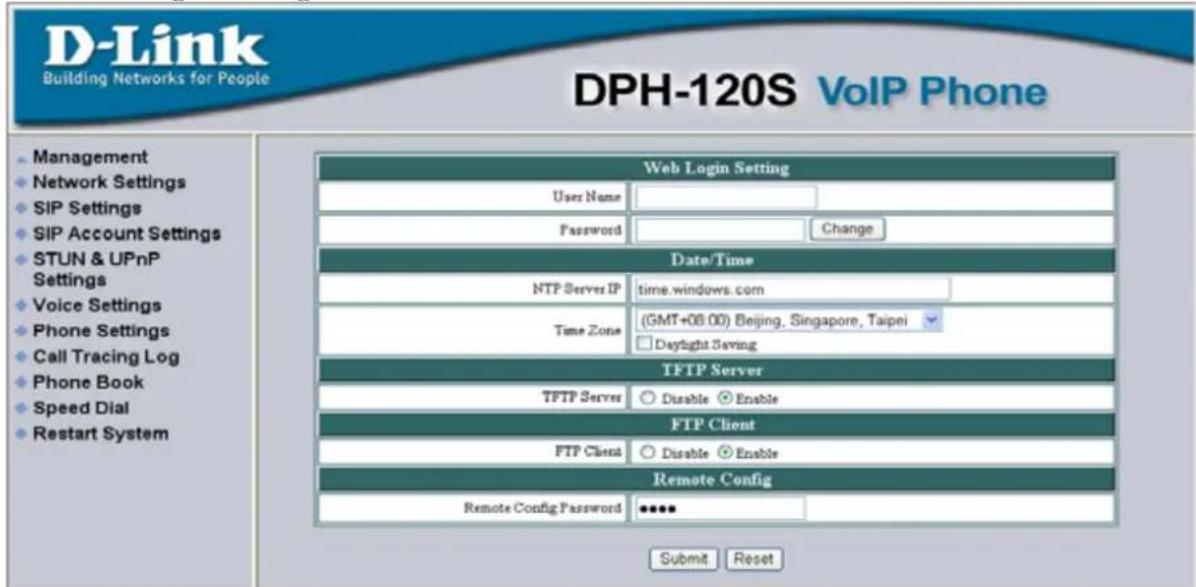
| User Name | Configuration menu login name. |
| Password | Configuration menu login password. |
| NTP Server IP | Network Time Protocol (NTP) is a protocol used to help match your system clock with an accurate time source (eg atomic clock, time server). It is good practice to have all your networked computers synchronized with one server. |
| Time Zone | Select your time zone. If there is daylight saving in your area, click the check box. |
| TFTP Server | Enable or disable TFTP server to allow transfer of firmware from a computer to the IP phone. |
| FTP Client | Enable or disable IP phone to download files from FTP server and update the firmware automatically. |
| Remote Config Password | Remote password to access the configuration menu from VoIP software (You may download this software from your supplier's website). Default password is 1234. |
7.3 Management Setting – Restore Factory Setting
![Management ◆ Memory key ◆ Firmware update Press [Restore] button to restore the default setting! Restore](/content/2026/05/989426/images/a8cb3389763f020ebb44224f67ab146e6e9701accd1934c7d359997d1b39ff3c.jpg)
Click on Management. Select Restore Factory Setting and the above screen will display on the screen.
Restore Factory Setting Restores all the settings back to factory default settings.
7.4 Management Setting – Firmware update
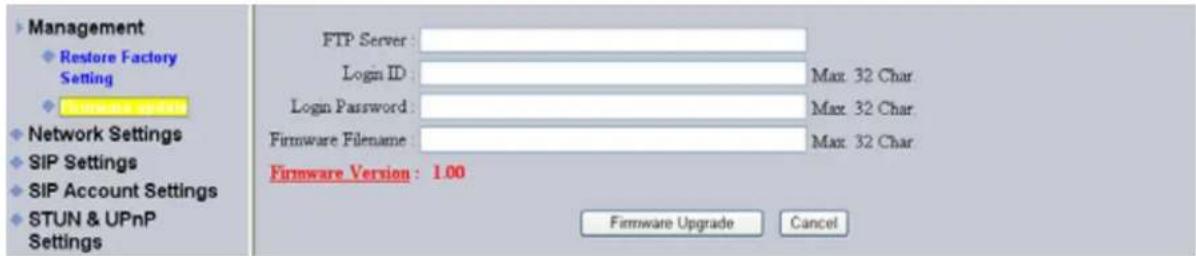
FTP server, login ID, login password and firmware filename are preset when you purchase the phone. These are required to download and update the firmware.
FTP Server
FTP Server address.
Login ID
Login ID provided by your supplier.
Login Password
Login password provided by you supplier.
Firmware Filename
Updated firmware filename. Do not change the file name unless specified by your supplier.
7.5 Network Setting - DHCP
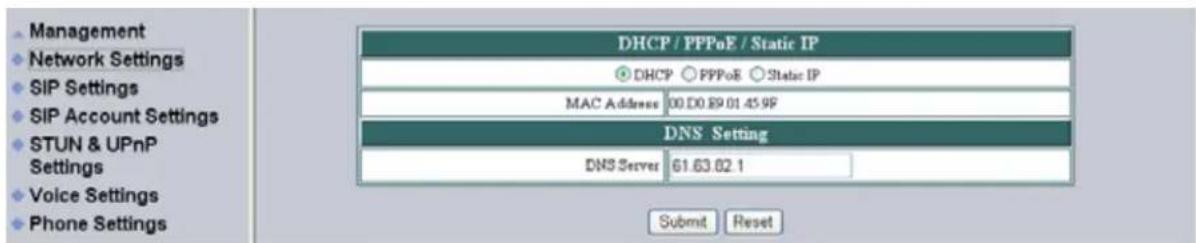
Select DHCP if you have cable internet.
DHCP Server
Dynamic Host Configuration Protocol (DHCP) Server address. This IP address information is obtained automatically from your ISP.
DNS Server
DNS address provided by your ISP.
7.6 Network Setting - PPPoE
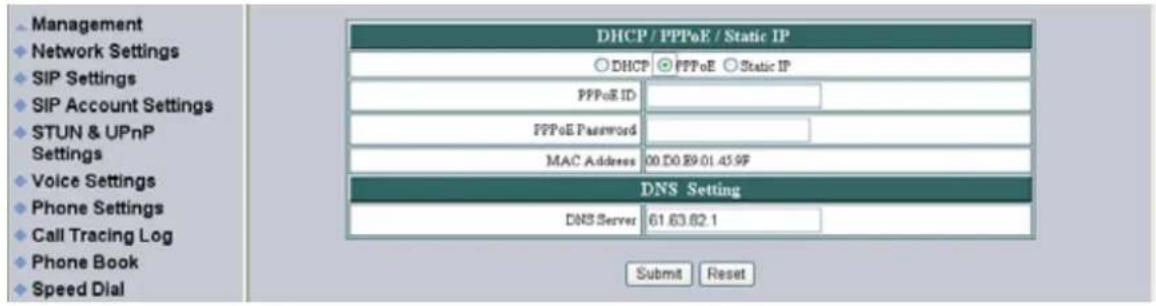
Choose PPPoE if your ISP uses PPPoE. Most DSL users use PPPoE.
PPPoE ID
PPPoE ID/username provided by your ISP.
PPPoE Password
PPPoE password.
DNS Server
DNS address provided by your ISP.
7.7 Network Setting - Static IP
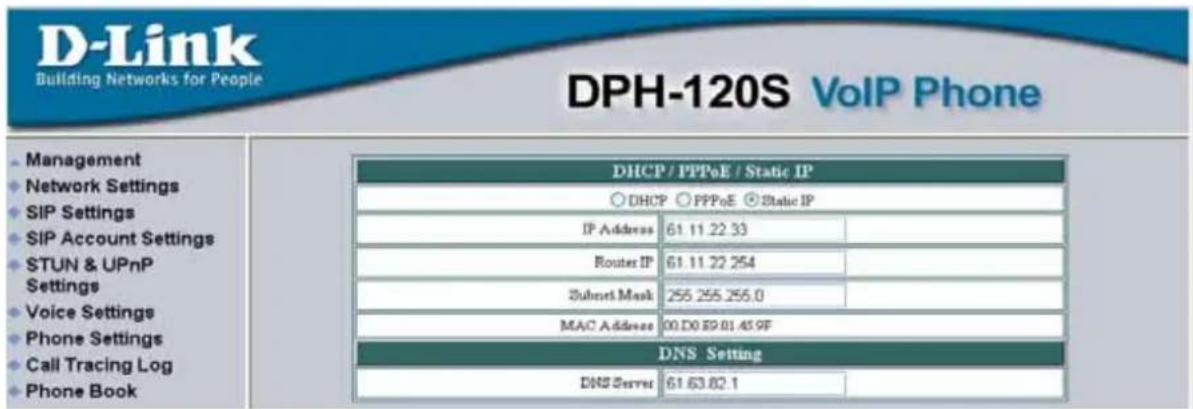
Choose Static IP network setting if all Wide Area Network IP is provided to you by your ISP.
IP Address
IP address assigned to you by your ISP.
Router IP
Router IP address.
Subnet Mask
Subnet mask address.
DNS Server
DNS server address provided by your ISP.
NOTE: RESTART the system for new settings to take effect after you modify the IP address.
7.8 SIP Setting – SIP Phone Setting, Registrar and Outbound Proxy Server
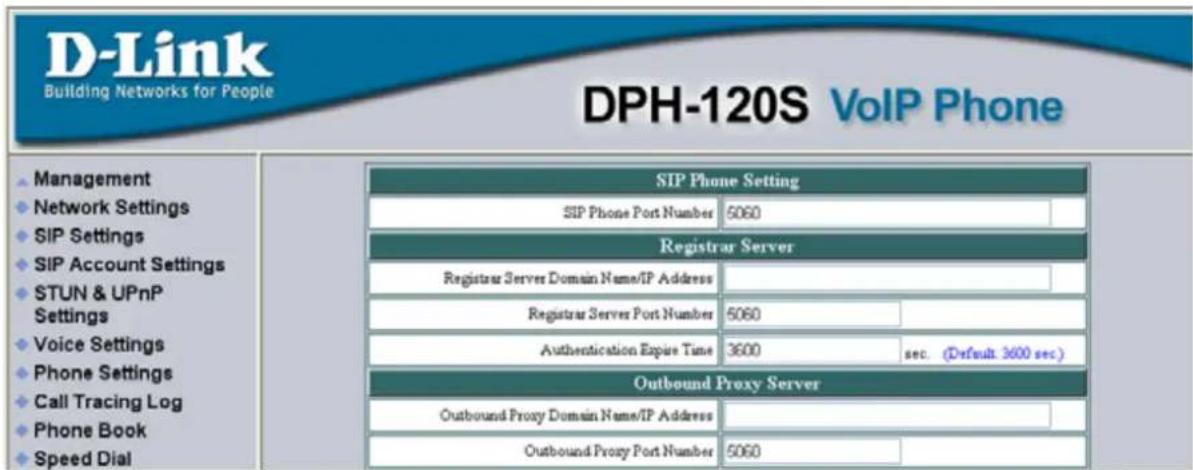
Session Initiation Protocol (SIP) is the most popular Voice over IP standard. It enables two or more people to make phone calls, share multimedia and make multimedia conference over the internet. Please have an administrator setup these settings for you or obtain this information from your SIP service provider.
| SIP Phone Port Number | SIP phone port number. |
| Registrar Server Domain Name/IP Address | Registrar server domain name or IP address. |
| Registrar Server Port Number | Registrar server port number. |
| Authentication Expire Time | The time that the phone waits to connect to the SIP server after the user dialed a number. If still not connected, the phone will disconnect and redial. |
| Outbound Proxy Domain Name/IP Address | Outbound proxy domain name or IP address. |
| Outbound Proxy Port Number | Outbound proxy port number. |
7.9 SIP Setting - Others
| Others | ||
| Session Timer | 1800 | sec. |
| Media Port | 41000 | |
| Prack | Disable Enable | |
| Session Refresher | None UAC UAS | |
| Session Timer Method | Invite Update | |
This section is for network administrators.
| Session Timer | The time interval in which the phone periodically refresh SIP sessions by sending repeated INVITE requests. These INVITE requests allow the user agent or proxies to determine the status of the SIP session. |
| Media Port | Real-time Transport Protocol port number. Provides end-to-end transfer of data with real-time audio. |
| Prack | Prack ensures that media information is exchanged and that network checks before connecting the call. Select Enable for a more reliable connection. |
| Session Refresher | Select None to disable SIP session timer support.Select UAC to initiate SIP request.Select UAS to receive SIP request and then return a response. |
| Session Timer Method | Select SIP request method. Default method is Invite. |
| UDP/TCP | Select SIP signal transmission method. Default method is UDP. |
7.10 SIP Account Settings
| SIP Account Setting | |
| Default Account | Account 1 |
| Account 1 Setting | |
| Account Active | Disable Enable |
| Display Name | Johnson |
| SIP User Name | 29102626 |
| Authentication User Name | 29102626 |
| Authentication Password | 29102626 |
| Register Status | UnRegister |
| Account 2 Setting | |
| Account Active | Disable Enable |
| Display Name | |
| SIP User Name | |
| Authentication User Name | |
| Authentication Password | |
| Register Status | UnRegister |
You may have up to 4 accounts. i.e., the IP phone can receive up to four different phone numbers.
| Default Account | When you dial a number, the default account is used to dial. User Name of default account is displayed on the receiver's IP phone. |
| Account Active | Enable or disable this account. |
| Display Name | Display name on the IP phone. |
| SIP User Name | User name. |
| Authentication User Name | Name used to access SIP server. |
| Authentication Password | User password to access SIP server. |
| Register Status | Displays if the current phone is registered or unregistered with SIP server. |
7.11 STUN Setting - STUN Server Setting, UPnP Setting
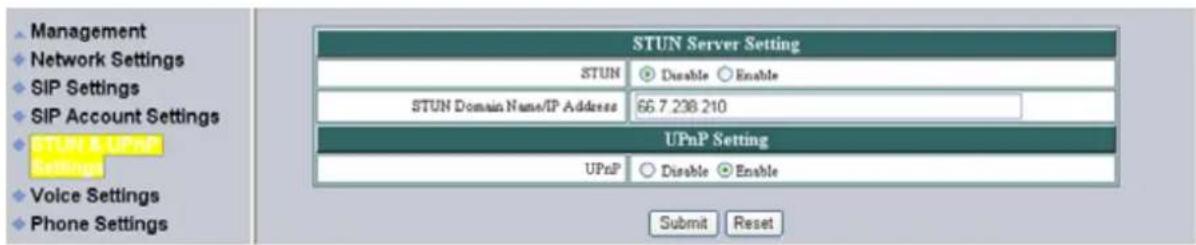
STUN
Simple Traversal of User Datagram Protocol through Network Address Translators is a protocol that allows applications to determine the types of NATs and firewalls are in between them and the internet. STUN also provides the ability for applications to determine the public IP addresses allocated to them by the NAT.
STUN Domain Name/IP Address
Enter STUN domain name or IP address if STUN is enabled.
UPnP
Enable or disable universal plug and play. Some NAT supports UPnP so STUN is not required and must be disabled.
7.12 Voice Setting and QoS
![Management Network Settings SIP Settings SIP Account Settings STUN & UPnP Settings Voice Setting Phone Settings Call Tracing Log Phone Book Speed Dial Restart System Voice Setting Codec (Priority 1) G.711 u-law Codec (Priority 2) G.729A Codec (Priority 3) G.723.1 Codec (Priority 4) non-used RTP Packet Length Q.711 μ-Law 20ms Q.711 A-Law 20ms Q.729A 20ms Q.723.1 30ms VAD On Off DTMF Method Out Band In Band SIP INFO QoS Voice TOS 5 [0 - 7] Warning: Enable/Disable VLAN might Caused Network Connection Problem! VLAN Disable Enable Submit Reset](/content/2026/05/989426/images/398697968971240069e9d38e97e18772bad1f778ef4d70aa3365a3e3ffc4df24.jpg)
Codec
Voice Compression Algorithm priority settings. Select from the most used codec to the least used codec.
RTP Packet Length
Real-Time Transfer Protocol (RTP) packet length.
VAD
VAD detects voice activity and adjusts the signal to a target power level. It ensures that background noise or echo does not get amplified to the target power level.
DTMF Method
Select the tone method for IP phone.
Voice TOS
Sets the type of service for this Internet datagram.
VLAN
Enable or disable virtual LAN.
VLAN Priority
Set the virtual LAN Priority.
VLAN ID
Virtual LAN ID.
7.13 Phone Settings – Phone Setting
| Phone Setting | |
| Ringer Type | RingType 4 |
| Hold Tone | ○ Melody ○ Tone |
| Do Not Disturb | ○ Disable ○ Enable |
| Call Waiting | ○ Disable ○ Enable |
| Anonymous Call | ○ Disable ○ Full URI ○ Display Name |
| Anonymous Call Reject | ○ Disable ○ Enable |
| Call Forward | □ No Answer |
| □ Busy | |
| □ Unconditional | |
Recall you can only enable or disable call forwarding from the IP phone MENU key. With the web-browser, you can enter the forwarded phone numbers in the Phone Setting menu.
| Tone Setting | Select the tone for particular country |
| Ringer Type | Select the type of ring (1 to 4). |
| Hold Tone | Select melody or tone when HOLD key is pressed. |
| Do Not Disturb | Reject all incoming calls. |
| Call Waiting | Enable or disable call waiting. |
| Anonymous Call | If DISABLE is selected, full URI and name are sent to the receiver's phone when the user makes a phone call. The URI and name of the caller are displayed on the receiver's phone.When Full URI is selected, only user name is displayed on the receiver's phone when the user makes a phone call.When Display Name is selected, only name is displayed on the receiver's phone when the user makes a phone call. |
| Anonymous Call Reject | Select Enable to reject anonymous calls. |
Call Forward
Click No Answer to enable call forward to another number when no one answers the phone after 180s (default). The timer can be changed from 0-600s. Refer to section 7.14 to change the timer.
Click Busy to enable call forward to another number when user is busy on the phone.
Click Unconditional to transfer all incoming calls to another number.
Enter the call forward number on the text box.
7.14 Phone Setting - Timer
| Timer | ||
| NTP Recycle Timer | 1 | hour [1 - 24] Network Time Adjustment Period |
| Inter Digit Timer | 5 | sec. [0 - 60] 0: Disable |
| Originating Not Accept Timer | 180 | sec. [0 - 600] 0: Disable |
| Incoming No Answer Timer | 180 | sec. [0 - 600] 0: Disable |
| Hold Recall Timer | 180 | sec. [0 - 600] 0: Disable |
| Auto Speaker Off Timer | 30 | sec. [0 - 600] 0: Disable |
NTP Recycle
NTP
recycle
time.
Inter Digit
The time interval that the IP phone waits to detect the end of DTMF digits. No more digits are accepted after this period and the phone begins to dial.
Originating Not Accept
The time interval that the caller's phone waits to establish a call. If the receiver fails to answer the phone during this time interval, the caller's phone will automatically disconnect.
Incoming No Answer
The time interval that the receiver's phone will ring. If the receiver fails to answer the phone during this time interval, the phone will automatically disconnect.
Hold Recall
The time interval that the caller is put on hold before the phone automatically disconnect.
7.15 Call Tracing Log
| No. | Trace Log |
| 000 | 10 FW Version 01.00.00 |
| 001 | 12 ReadSetupInfo: 0. |
| 002 | 16 Basic number for random: (61) |
| 003 | 10 Language (0) |
| 004 | 10 Remote Config Task Running |
| 005 | $ |
| 006 | 11 Err: invalid IP. |
| 007 | Upnp socket init successful |
Call Tracing Log keeps a record of all the phone activities. This log is used by our engineers to troubleshoot hardware problems.
7.16 Phone Book
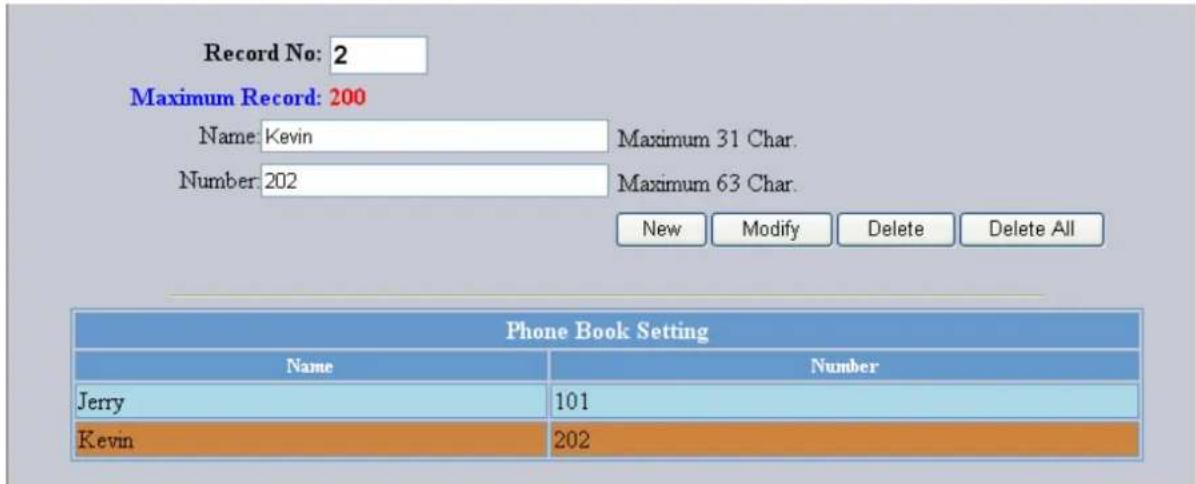
Phonebook menu allows the user to add, modify and delete phone numbers. To add, type in the name and number then click NEW to add. To modify/delete, select the name from the list and click modify/delete.
Name
Name that you would like to add.
Number
Phone number that corresponds to the name.
7.17 Speed Dial
| Speed Dial Setting (Maximum 63 Char.) | |||
| Number 00 | 29102627 | Number 01 | |
| Number 02 | Number 03 | ||
| Number 04 | Number 05 | ||
| Number 06 | Number 07 | ||
| Number 08 | Number 09 | ||
| Update Cancel | |||
Speed dial numbers can be accessed from the IP phone. Refer to section 8.2 for speed dial info.
Number 0x
Speed dial phone number. 0x is the speed dial number.
7.18 Restart System
Press [Restart] Button, IP Phone system will reboot!
Restart
Click Restart to update all the modifications and reboot the system.
- Press OK

or wait until the timer expires to dial.
8.1.2 SIP Number
Note: You have to register with SIP server to use SIP number.
- Lift handset

or wait until the timer expires.
8.2 Speed Dialing
- Lift handset

- Dial Speed Dial number.
For example: dialing speed dial number 08


8.3 Answering a Phone Call
Note: The CANCEL key may be used to reject a call.
When phone rings:
- Lift handset

8.4 Switching to Another Line
While having a conversation:
- Press Hold to switch to another line.
8.5 Mute
Note: While mute is activated, sound from the caller can be heard from your speaker but your sound can't be heard by the caller.
While having a conversation:
- Press Mute

. You may press Mute key again to resume conversation.
8.6 Call Transfer
While having a conversation:
- Press Hold ☐ to put the person on the other line on hold.
- Dial the IP address or the extension number where you like the call to be transferred.
- Press Transfer ☐ to transfer the call.
8.7 Redial
Note: To return to idle mode, press CANCEL key

8.7.1 Last Dialed Number
- Lift handset or press SPEAKER button

- Press Redial ☐ to dial the last dialed number.
8.7.2 Through Call History
- Press Redial ☐ . Do not lift the handset when you press Redial.
- Press Redial again to cycle through the dialed, missed and received calls.
- Press DOWN key to scroll down the dialed, missed or received lists until the number is displayed on the screen.
- Pickup the handset or press OK
8.8 On Hold
Note: To transfer a call while on hold, press the TRANS key. Dial the extension/phone number and press the TRANS key again to transfer the call.
While having a conversation:
- Press HOLD

(Press HOLD again to resume conversation)
8.9 Call Forward
Please refer to IP Phone Setup and Web Browser Configuration section to setup call forwarding.
8.10 Three Way Conference
- Pick up the handset and call Person A.



- After Person A pick up the phone, press Hold key ○ to place Person A on hold.
- Dial the extension or phone number of Person B and wait until Person B picks up the phone.
- Press Conference key to begin 3-way conference.


flowchart
graph TD
    A[" "] <--> B[" "]
    C[" "] <--> D[" "]
    E[" "] <--> F[" "]
    G[" "] <--> H[" "]

Person B
9.1 Dialing from the Phonebook
- Press the PHONE BOOK key

to access the phone book.
- Press
to scroll down the list until the name is displayed on the screen.
- Press OK

to dial.
9.2 Storing a Number
- Press and hold the PHONE BOOK key on the screen.

until "Name:" is displayed
- Enter a name then press OK

- Enter the number that corresponds to the name and press OK

- Press OK

again to save the phonebook.
- Repeat Step 1 to 4 to store another phone number.
9.3 Editing a Number
- Press the PHONE BOOK key

to access the phonebook.
- Press

until the name is displayed on the screen.
- Press the PHONE BOOK key

again.
- Select "Edit" and press OK

to edit.
- Enter a new name and press OK

- Enter the new phone number and press OK

- Press OK

to save and override the previous name and phone number.
9.4 Deleting a Number
- Press the PHONE BOOK key

to access the phonebook.
- Press

until the name you want to delete is selected.
- Press the PHONE BOOK key

again.
- Select "Delete" and press OK

to delete.
- Press OK

again to save the new list on the phonebook.
10.0 Troubleshooting
The following troubleshooting information can be used to help solve most common problems.
| QUESTION | RECOMMENDED |
| There are no DIAL tone | 1. Check if there are any loose connections. |
| Nothing is displayed on the LCD screen | 1. Check if power cord is connected properly.2. Check if there is 120V AC coming from the power outlet. |
| How to update Firmware? | 1. ATC IP Phone automatically updates firmware when it powers up (while connected to the internet). |
| Why can’t I dial my friend’s SIP number? | 1. Check Registrar Server Domain Name/IP address and Outbound Proxy Domain Name/IP Address (under SIP Settings in Configuration Menu). Make sure you have the right Name or IP Address.2. Check the LCD display on your phone to see if there is a name or number displayed on the screen. If the name or number is not displayed, use a web browser and access the configuration menu. Make sure that the Registrar Server Domain Name/IP Address is correct.3. Check the register status under SIP Account Settings in the configuration menu (from web browser). If your status is unregistered, it means you do not have a SIP account. Contact your SIP service provider to get an account. |
| Why isn’t my firmware updating? | 1. Your IP phone automatically detects for new firmware when you unplug the power. If new version is available the phone will automatically update the firmware.2. Check if FTP address is correct. |
ACTION
| 3. Check with your supplier if firmware filename is correct. | |
| I accidentally set DSL to enable and now the phone does not boot up | 1. Unplug the power cord from the IP phone. Wait 2 seconds and plug the power cord back in the IP phone. Press and hold MENU key. The system should bypass boot up and go straight into phone setup menu. Modify the phone setting and make sure you save it before you exit. |
| Why do I get “Can’t Upgrade Now” screen when I click [Submit] in the configuration menu? | 1. Make sure you exit setting mode (phonebook, menu, speed dial...) before you click [Submit] in the configuration menu. |
- USING THE PHONEBOOK 35
- TROUBLESHOOTING 37
- 1.0
- INTRODUCTION
- 2.0
- PACKAGE CONTENT
- LIST OF FIGURES
- SUMMARY OF KEY FUNCTIONS
- CONNECTING THE IP PHONE
- Display Name
- ADSL Dialup
- ENABLE ADSL Dialup
- 1
- 2
- 3
- DISABLE ADSL Dialup
- DHCP (Dynamic Host Configuration Protocol)
- ENABLE DHCP
- 4
- DISABLE DHCP
- DNS Server IP
- SNTP Server IP
- Do Not Disturb
- CF (call forward) Unconditional
- CF (call forward) User Busy
- CF (call forward) No Answer
- Anonymous Call
- Anony Call Rej (Anonymous Call Rejection)
- Ringing Type
- MAC Address
- Version
- Language Selection
- Time Format
- Ringer Volume
- Speaker Volume
- Handset Volume
- Accessing Configuration Menu
- Web Login Setting
- Management Setting – Restore Factory Setting
- Management Setting – Firmware update
- FTP Server
- Login ID
- Login Password
- Firmware Filename
- Network Setting - DHCP
- DHCP Server
- DNS Server
- Network Setting - PPPoE
- Network Setting - Static IP
- SIP Setting – SIP Phone Setting, Registrar and Outbound Proxy Server
- SIP Setting - Others
- SIP Account Settings
- STUN Setting - STUN Server Setting, UPnP Setting
- STUN
- STUN Domain Name/IP Address
- UPnP
- Voice Setting and QoS
- Codec
- RTP Packet Length
- VAD
- DTMF Method
- Voice TOS
- VLAN
- VLAN Priority
- VLAN ID
- Phone Settings – Phone Setting
- Call Forward
- Phone Setting - Timer
- NTP Recycle
- Inter Digit
- Originating Not Accept
- Incoming No Answer
- Hold Recall
- Call Tracing Log
- Phone Book
- Speed Dial
- Number 0x
- Restart System
- SIP Number
- Speed Dialing
- Answering a Phone Call
- Switching to Another Line
- Mute
- Call Transfer
- Redial
- Last Dialed Number
- Through Call History
- On Hold
- Call Forward
- Three Way Conference
- Dialing from the Phonebook
- Storing a Number
- Editing a Number
- Deleting a Number
- Troubleshooting
Brand : D-LINK
Model : DPH 120S
Category : Telephone