
M561 - Microwave IGNIS - Free user manual and instructions
Find the device manual for free M561 IGNIS in PDF.
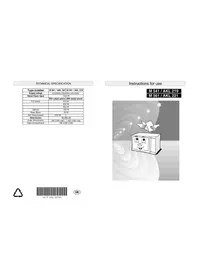


| Brand | IGNIS |
| Model | M561 / AKL 221 |
| Product Type | Microwave with Grill |
| Supply Voltage | 220V/60Hz, 230V/50Hz, 240V/50Hz |
| Rated Power Input | 1250 W |
| Microwave Output Power (Full) | 800 W |
| Microwave Output Power (Medium) | 650 W |
| Microwave Output Power (Low) | 450 W |
| Defrost Power | 160 W |
| Keep Warm Power | 90 W |
| Grill Output Power | 1000 W |
| Outer Dimensions (H x W x D) | 285 x 456 x 402 mm |
| Oven Compartment Dimensions | 196 x 292 x 295 mm |
| Turntable | Glass turntable included |
| Wire Rack | Included (for grill function) |
| Turntable Support | Included |
| Control Type | Manual knobs (multifunction, power, adjust) |
| Functions | Microwave, Grill, Defrost, Keep Warm |
| Safety Features | Door safety interlock; earthing required |
| Cleaning | Mild detergent and soft cloth; do not use abrasive cleaners |
| Installation Clearance | At least 20 cm above oven; stable, even surface |
| Ambient Temperature Range | +5°C to +35°C |
| Net Weight | Approx. 15 kg (estimated) |
Frequently Asked Questions - M561 IGNIS
User questions about M561 IGNIS
0 question about this device. Answer the ones you know or ask your own.
Ask a new question about this device
Download the instructions for your Microwave in PDF format for free! Find your manual M561 - IGNIS and take your electronic device back in hand. On this page are published all the documents necessary for the use of your device. M561 by IGNIS.
USER MANUAL M561 IGNIS
| Type number | M 561 / AKL 221 | M 541 / AKL 219 |
| Supply voltage | 220V/60Hz,230V/50Hz,240V/50Hz | |
| Rated Power Input | 1250 W | |
| MW output power | MW output power | |
| Full power | 800 W | |
| 650 W | ||
| 450 W | ||
| Defrost | 160 W | |
| Keep Warm | 90 W | |
| Grill Output power | 1000 W | |
| Dimensions: | H x W x D | |
| Outer dimensions: | 285 x 456 x 402 | 285 x 456 x 392 |
| Oven compartment: | 196 x 292 x 295 | |
Instructions for use
M 541 / AKL 219
M 561 / AKL 221


4619 652 60744
GB
Do not operate this appliance if it has a damaged mains cord or plug, if it is not working properly, or if it has been damaged or dropped. Do not immerse the mains cord or plug in water. Keep the cord away from hot surfaces. Electrical shock, fire or other hazards may result.
Ensure that the appliance is not damaged. Check that the oven door closes firmly against the door support and that the internal door seal is not damaged. Empty the oven and clean the interior with a soft, damp cloth.
+35°C.
There must be a space of at least 20 cm above the oven. Ensure the microwave oven feet are in place and ensure the space underneath the oven is empty to allow for proper airflow. The oven can operate in an ambient temperature ranging from +5°C to


stable, even surface.
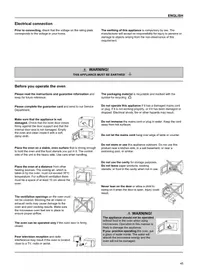
Place the oven on a
corresponds to the voltage in your home.
Check that the voltage on the rating plate
PRIOR TO CONNECTING
INSTALLATION
connected to the mains.
The packing box may be fully recycled as confirmed by the recycling symbol. Follow local disposal regulations. Keep potentially hazardous packaging (plastic bags, polylysene etc.) out of the reach of children.
Packing

Appliance
connected to the mains.
The appliance is built from reusable materials. If you decide to scrap the appliance, it must be disposed of in compliance with local waste disposal regulations. Before scraping, cut off mains cord so that the appliance can
Do not remove any cover.
is power available. • Wait for ten minutes and then try to operate the oven once more. • Open and then close the door before you try again. This is to avoid unnecessary calls for which you will be charged. When calling for Service, please give the serial number and type number of the oven (see Service label). Consult your warranty booklet for further advice. If the oven does not work, do not make a service call until you have made the following checks: • The Turntable and turntable support is in place. • The Plug is properly inserted in the wall socket. • The Door is properly closed. • Check your Fuses and ensure that there
Service only to be carried out by a trained service technician. It is hazardous for anyone other than a trained person to carry out any service or repair operation which involves the removal of any cover which gives protection against exposure to risks.
WARNING!
If the mains cord needs replacing it should be replaced by the original mains cord, which is available via our service organization. The mains cord may only be replaced by a trained service technician.
Important:

ENVIRONMENTAL HINTS
WARNING! THIS APPLIANCE MUST BE EARTHED!
THIS APPLIANCE MUST BE EARTHED!

The earthing of this appliance is compulsory. The manufacturer will accept no responsibility for injury to persons, animals or damage to objects arising from the non-observance of this requirement.

Poor television reception and radio interference may result if the oven is located close to a TV, radio or rental.
door is firmly closed.
The oven can be operated only if the oven
AFTER CONNECTING
NOUAY
| Test | Amount | Approx. time | Power level | Container |
| 12.3.1 | 750 g | 10 min | 800 W | Plex 3.220 |
| 12.3.2 | 475 g | 5 min | 800 W | Plex 3.827 |
| 12.3.3 | 900 g | 14 min | 800 W | Plex 3.838 |
| 12.3.4 | 1100 g | 18 - 20 min5 - 6 min | 800 WGrill | Plex 3.827Place on turntable |
| 13.3.0 | 500 g | 12 min | Defrost |
In accordance with IEC 705. The International Electrotechnical Commission, SC, 59H, has developed a standard for comparative testing of heating performance of different microwave ovens. We recommend the following for this oven:
DATA FOR TEST OF HEATING PERFORMANCE
MAINTENANCE & CLEANING
Cleaning is the only maintenance normally required. It must be carried out with the microwave oven disconnected.
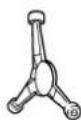

Glass turntable.

Wire rack. (M561 / AKL221)

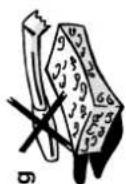
Do not use steel-wool
pads. This will scratch the surface.
WARNING!
The door seals and the door seal areas must be regularly inspected for damage. If these areas are damaged, the appliance should not be operated until it has been repaired by a trained service technician. Abrasive cleansers, steel-wool pads, gritty washcloths, etc. can damage the control panel, and the interior and exterior oven surfaces. Use a sponge with a mild detergent or a paper towel with spray glass cleaner. Apply spray glass cleaner to a paper towel. Do not spray directly on the oven.
READ CAREFULLY AND KEEP FOR FUTURE REFERENCE GENERAL

the door is open. Injury could
result.
WARNING!
Only allow children to use the oven
without supervision when adequate
instructions have been given so that the
child is able to use the oven in a safe way
and understands the hazards of improper
use.


oven, ove
beyond boiling point can
occur without evidence of
bubbling. This could result
in a sudden boil over of the
hot liquid.
To prevent this possibility the following
steps should be taken:
- Avoid using straight-sided containers
with narrow necks.
- Stir the liquid before placing the
container in the oven and let the
teaspoon remain in the container
- After heating, allow standing for a short
time, stirring again before carefully
removing the container.
WARNING!
CONTAINERS

Do not use your microwave
oven for heating anything in
airtight sealed containers. The
pressure increases and may ca
when opening or may explode.
WARNING!

EGGS
Do not use your microwave
oven for cooking or reheating whole eggs with or without shell.
DISHWASHER SAFE:
Turntable support.
At regular intervals, especially if spillovers have occurred, remove the turntable, the turntable support and wipe the base of the oven clean.
This oven is designed to operate with the turntable in place. Do not operate the microwave oven when the turntable has been removed for cleaning.
Use a mild detergent, water and a soft cloth to clean the interior surfaces, front and rear of the door and the door opening. Do not allow grease or food particles to build up around the door.
For stubborn stains, boil a cup of water in the oven for 2 or 3 minutes. Steam will soften the marks. Adding some lemon juice to a cup of water, placing this on the turntable and boiling for a few minutes can eliminate odours inside the oven.
The Grill element (M561 / AKL221) does not need cleaning since the intense heat will burn off any splashes, but the ceiling beneath it may need regular cleaning. This should be done with warm water, detergent and a sponge.
IMPORTANT SAFETY PRECAUTIONS
DEEP-FRYING
DEEP-FRYING Do not use your
microwave oven for deep-

be controlled.
WARNING!
Always refer to a microwave

Especially, if cooking
or reheating food that
contains alcohol.
parts, and pan after cooking.
ACCESSORIES
TURNTABLE SUPPORT Use the turntable support
Use the turntable support under the Glass turntable.
Never put any other utensils on the turntable support.

● Fit the turntable support in the oven.
GLASS TURNTABLE
Use the Glass turntable with

This is especially important with accessories made of metal or metal
particles that otherwise would
- Place the Glass turntable on the turntable
support.
WIRE RACK (M561 / AKL221)
Use the wire rack to put food on when using the Grill function
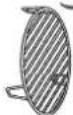
This will quickly give a pleasant brown surface to the food.
utensil.
HOW TO PAUSE OR STOP COOKING

opening the door.
To continue cooking: Close the door. The cooking is
resumed from where it was
paused.
4
GRILLING CHART
(M561 / AKL221)
GENERAL HINTS:
The Grill function is excellent for
browning the food after cooking with
microwaves.
IMPORTANT!
The Wire rack may be used to move foods closer to the grill element for quicker
closer to the grill element for quicker browning.
Browning.
Place thin foods such as toasts and
sausages on the wire rack and cook with
grill only.
Thicker foods such as gratins and chicken;
the grill to brown the top surface in order to
put some colour to it.
You may place vessels or gratins directly on the Glass turntable.
on the Glass turntable.
IMPORTANT!
Ensure that the utensils you use are heat resistant, ovenproof and allow microwaves to pass through them before Grilling with microwaves combined. Do not use plastic utensils when grilling. They will melt. Items of wood or paper are not suitable either.
(1)
| Type of food | Quantity | Setting | Time | Suggestions |
| Cheese toast | 3 pcs | Grill | 4-5 min | Place on grid |
| Sausages | 2 - 3 pcs(100 g each) | Grill | 10 - 12 min | Place on grid.Turn over midway thru cooking. |
| Chicken pieces | 1000 g | 800 WThen grill | 13 - 15 min8 - 9 min | Place with the skin up in a dish. |
| FrozenLasagne | 500 g | 650 WThen grill | 18 - 20 min5 - 6 min | Place vessel on the turntable |
| Frozenfish gratin | 600 g | 650 WThen grill | 15 - 18 min5 - 7 min | Place vessel on the turntable |
| Potato gratin | 4 portions | 800 WThen grill | 18 - 20 min5 - 6 min | Place vessel on the turntable |
| PommesDuchesse | 2 portions | Grill | 6-8 min | Place dish on grid |
Turn large joints halfway through the
defrosting process.
Boiled food, stews and meat sauces
defrost better if stirred during defrosting
time.
more quickly than a deep block.
(2) January 1, 2017
finish during standing time.
(1) 2 (2) 2 (3) 2
Standing time after defrosting always
improves the result since the temperature will then be evenly distributed throughout
will then be evenly distributed throughout the feed.
the food.
Shield areas of food with small pieces of
aluminium foil if they start to become warm
(e.g. chicken legs and wing tips).
- Select the desired power level or function by turning the MULTIFUNCTION KNOB.
- Select the desired power level by turning the POWER KNOB.

- Turn the ADJUST KNOB
clockwise to set the desired
cooking time. The oven
starts automatically.
DEFROSTING CHART

(M541 / AKL219)

(M561 / AKL221)

| Type of food | Quantity | Power level | Time | Standing time | Suggestions |
| Roast | 800 - 1000 g | Defrost | 20 - 22 min | 10 - 15 min | Turn halfway through defrosting. |
| Minced meat | 500 g | Defrost | 8 - 10 min | 5 min | Turn halfway, separate thawed parts. |
| Chops, cutlets, steaks | 500 g | Defrost | 7 - 9 min | 5-10 min | Turn halfway. |
| Chicken, whole | 1200 g | Defrost | 25 min | 10 - 15 min | Turn halfway. |
| Chicken pieces or fillets | 500 g | Defrost | 7 - 9 min | 5 - 10 min | Turn/separate halfway. Shield wingtips and legs with foil to prevent overheating |
| Fish, whole | 600 g | Defrost | 8 - 10 min | 5 - 10 min | Turn halfway shield the tail with foil to prevent over-heating. |
| Fish filets /steaks | 400 g | Defrost | 6 - 7 min | 5 min | Turn/separate half way. |
| Bread loaf | 500 g | Defrost | 4 - 6 min | 5 min | Turn halfway. |
| Rolls / Buns | 4 pcs (150 - 200 g) | Defrost | 11/2 - 2 min | 2-3 min | Place in a ring pattern. |
| Fruit/Berries | 200 g | Defrost | 2 - 3 min | 2-3 min | Separate during |
| Type of food | Quantity | Power level | Time | Standing time | Turn the chicken midway three cooking. |
| Chicken whole | 1000 g | 800 W | 18 - 20 min | 5 - 10 min | Check that the mealjuice is uncolored when the cooking is finished. |
| Chicken fillets or pieces | 500 g | 800 W | 8 - 10 min | 5 min | Check that the mealjuice is uncolored when the cooking is finished. |
| Meat loaf | 600 - 700 g | 650 W | 12 - 14 min | 5 min | |
| Bacon | 150 g | 800 W | 3 - 4 min | 1 - 2 min | Place on kitchen paper on a plate in 2 or 3 layers. Cover with kitchen paper. |
| Fish (whole) | 600 g | 650 W | 8 - 9 min | 4 - 5 min | Score the skin. Cook covered. |
| Fresh vegetables | 300 g | 800 W | 3 - 4 min | 1 - 2 min | Cook covered and add 2 - tbs water. |
| Frozen vegetables | 250 g | 800 W | 3 - 4 min | 1 - 2 min | Cook covered. |
| Jacket potatoes | 1 pcs | 4 pcs | 800 W | 4 - 6 min | 2 min Turn midway thru cooking. |
shaped foods.
than larger pieces and uniform pieces
Smaller pieces of food will cook faster and to prevent bursting.
work or cocktail stick to relieve the pressure
membrane e.g. potatoes, apples and egg
Some foods are covered by a skin or
same food, such as jacket potatoes, place them in a ring pattern for uniform cooking.
If you are cooking several items of the
room temperature cooks faster than food taken directly from the refrigerator.
The lower starting temperature, the longer cooking time is required. Food at
double the time.
The more food you want to cook, the longer it takes. A rule of thumb is that
GENERAL HINTS:
COOKING CHART
| Type of food | Quantity | Power level | Time | Standing time | Suggestions |
| Plated meal | 300 g450 g | 800 W | 3-4 min4-5 min | 1-2 min | Cover the plate. |
| Rice | 2 dl6 dl | 800 W | 1-2 min3-4 min | 1 min | Cover the dish. |
| Meat balls | 250 g | 800 W | 2 min | 1-2 min | Heat uncovered. |
| Hot dogs | 1 pcs2 pcs | 650 W | 1⁄2 - 1 min1-1⁄2 min | 1 min | |
| Laseagne | 500 g | 650 W | 5-6 min | 2-3 min | |
| Beverage | 2 dl | 800 W | 1-11⁄2 min | 1 min | Put a metal spoon in the cup to prevent over cooking. |
| Soup, clear | 2 1⁄2 dl | 800 W | 2-21⁄2 min | 1 min | Reheat uncovered in a soup plate or bowl. |
| Milkbased | 21⁄2 dl | 800 W | 2%-3 min | 1 min | Don't fill the container more than 3%. Stir once during heating. |
When reheating sauces or stews, it is better to stir once to distribute the heat evenly. Place thin slices of meat on top of each other or interleave them. Thicker slices such as meat loaf and sausages have to be placed close to each other. The best results are achieved if the food is arranged with the thicker food to the outside of the plate and the thinner food in the centre. As in traditional cooking methods, covering the food helps to keep the moisture inside the food, reduces stirring, and shortens the reheating time. Be heated until piping hot. GENERAL HINTS:
REHEATING CHART
- INSTRUCTIONS FOR USE
- INSTALLATION
- DO NOT REMOVE ANY COVER
- WARNING
- ENVIRONMENTAL HINTS
- WARNING! THIS APPLIANCE MUST BE EARTHED
- DATA FOR TEST OF HEATING PERFORMANCE
- MAINTENANCE & CLEANING
- IMPORTANT SAFETY PRECAUTIONS
- ACCESSORIES
- HOW TO PAUSE OR STOP COOKING
- GRILLING CHART
- (M561 / AKL221)
- IMPORTANT
- DEFROSTING CHART
- COOKING CHART
- REHEATING CHART
Brand : IGNIS
Model : M561
Category : Microwave