
VC-M46 - VCR SHARP - Free user manual and instructions
Find the device manual for free VC-M46 SHARP in PDF.


| Product Type | VHS Video Cassette Recorder (VCR) |
| Brand | Sharp |
| Model | VC-M46 |
| Dimensions (W x H x D) | Approx. 430 x 95 x 270 mm |
| Weight | Approx. 3.5 kg |
| Power Supply | 220-240 V AC, 50 Hz |
| Power Consumption | Approx. 20 W (standby <1 W) |
| Video System | VHS Hi-Fi (if supported) or standard VHS |
| Recording Format | VHS (SP, LP, EP modes) |
| Playback Format | VHS |
| Heads | 4-head video/audio |
| Timer Recording | Yes, with VCR Plus+ or manual programming |
| Remote Control | Infrared remote included |
| Audio Outputs | RCA (L/R) stereo, possibly Hi-Fi |
| Video Inputs/Outputs | RCA composite (in/out), RF in/out (antenna) |
| Other Connectors | SCART (EU version), S-Video (optional) |
| Maintenance | Clean video heads periodically with cleaning cassette; keep vents free of dust |
| Safety | Do not expose to moisture; unplug during storms; use polarized plug |
| Spare Parts Availability | Belts, pinch rollers, heads available from third-party suppliers; some parts may be obsolete |
| Repairability | Moderate; many mechanical components are replaceable with common tools |
| Supported Tapes | VHS tape (up to E-240) |
| Programmable Timer | Up to 8 events / 1 month |
| Operating Temperature | 5°C to 35°C |
| Included Accessories | Remote, RCA cable, antenna cable, manual |
Frequently Asked Questions - VC-M46 SHARP
User questions about VC-M46 SHARP
0 question about this device. Answer the ones you know or ask your own.
Ask a new question about this device
Download the instructions for your VCR in PDF format for free! Find your manual VC-M46 - SHARP and take your electronic device back in hand. On this page are published all the documents necessary for the use of your device. VC-M46 by SHARP.
USER MANUAL VC-M46 SHARP
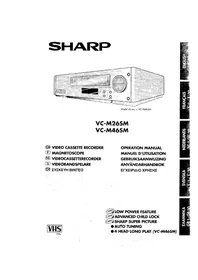
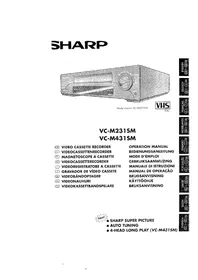
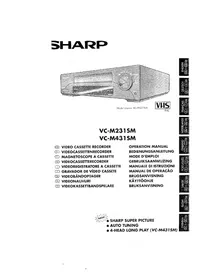
Model shown is VC-M465M
VC-M26SM
VC-M46SM
GB VIDEO CASSETTE RECORDER F MAGNETOSCOPE NL VIDEOCASSETTERECORDER S VIDEOBANDSPELARE GR ΣΥΣKEYH BINTEO
OPERATION MANUAL
MANUEL D'UTILISATION
GEBRUIKSAANWIJZING
ANVÄNDARHANDBOK
ΕΓΧΕΙΡΙΔΙΟ ΧΡΗΣΗΣ
VHS
PAL

LOW POWER FEATURE
ADVANCED CHILD LOCK
SHARP SUPER PICTURE
● AUTO TUNING ● 4 HEAD LONG PLAY (VC-M46SM)
F TELECOMMAND DU MAGNETOSCOPE
- STANDBY
- SELECT INPUT T.V.
- TIMER ON/OFF
- MENU
- SV/V + TIMER
- REWIND
- RECORD
- STOP
- PLAYBACK SPEED (On VC-M26SM, this key has no function)
- AM/PM OR
- TV/VCR
- SLOW
- DPSS ⊖/⊕
- BASIC TV CONTROLS
- VOLUME
- VALIDATION
- OPTION SELECTION KEYS ▲/▼/◄/►
- CLEAR
- FAST FORWARD
- PLAY/x2
- PAUSE/STILL
- AUDIO OUTPUT (On VC-M26SM, this key has no function)
- SCREEN DISPLAY MODE
- DISPLAY
- CHANNEL ⊕ / ⊖
- VCR INPUT
- REWIND TO ZERO
- JUMP SEARCH
- CHILD LOCK
VCR front panel/remote control equivalent functions.
If you prefer, or if remote control batteries fail, you will need to use the VCR front panel controls. The only differences in function are shown below:
| FUNCTION OSD | OPERATION WITH REMOTE CONTROL | OPERATION WITH VCR FRONT PANEL |
| Moving UP/DOWN menu Moving LEFT/RIGHT menu | [▲/▼] buttons [◀/▶] buttons | CHANNEL[▲/▼]buttons. Turn shuttle ring LEFT/RIGHT |

Dear SHARP Customer
Thank you for buying this SHARP VCR.
SHARP has established a worldwide reputation for unsurpassed quality and precision manufacturing techniques since it was founded in 1915. Your choice of VCR uses the very latest electronic circuitry and engineering advancements to give the best possible performance. Given proper care it will provide years of entertainment for the whole family.
Please read this operation manual carefully before attempting to operate the VCR.
Copyright
● Audio-visual material may consist of copyrighted works which must not be recorded without the authority of the owner of the copyright. Please refer to the relevant laws in your country.
- No part of this publication may be reproduced, stored or transmitted in any form without prior permission from SHARP ELECTRONICS (EUROPE) GmbH.

Dear SHARP Customer,




3. COUNTER: This shows the tape counter and the amount of remaining tape.
4.

2.
MANUAL TUNING
NOTES FOR INSTALLATION:
NOTE: FOLLOW THE CONTENT OF PAGES 24 AND 25.
| 6. Patitote [▲/▲] via va enlakëtë |
| DECODER. H apixki publom ieval OFE |
| Evi EXTE ouvozoeti to bivto iue |
| bopufopdo zekni, onws nepriyapfetai |
| on oszloa 27, afojote in publom |
| anokoumoniti om gezom OFE. Evi |
| exte ouvozoeti evav anokoukomonti, |
| ingw nepriyapfetai cmi oszloa 27, |
| nigreti va naitoite [▲/▲] fote n |
| publon anokoukomonti va nepodasi |
| on gezom ON. Avatopfei cmi oszloa 28 |
| via tn AETTOVPIA EINLOVIZ |
| KANALIN ANOKAOKONIOITH. |
| 5. Transporte [▲/▼] yia va enaléfeste FINE |
| TUNING: Transporte [▲/▼] kcel kappatois |
| to natrijeto escova lde doo neproodistro |
| to natrijeto escova lde doo neproodistro |
| excpivi Xpplato yvertai. |
| PAGE | INCORRECT TEXT | CORRECT TEXT |
| 2. | The main menu shown here has four sub- menus which list the functions of the sub-menus which list the functions of the VCR and the possible settings for each function (usually ON, OFF or AUTO). | The main menu shown here has threee sub-menus which list the functions of the VCR and the possible settings for each function (usually ON, OFF or AUTO). |
| 7. | 3. Tune the selected channel on your TV (refer to your TV manual) until the instruction menu appears on the screen. | 3. Tune the selected channel on your TV (refer to your TV manual) until the language menu appears on the screen. |
| 13. | The main menu has four options including MODE. For a brief description of these see page 2. | The main menu has threee options including MODE. For a brief description of these see page 2. |
| 13. | Colour. If the VCR is playing a poor quality recording, the picture may turn black and white. Selecting PAL may reduce this (depending on the recording), although coloured speckles will appear on black and white recording. | Colour. If the VCR is playing a poor quality recording, the picture may turn black and white. Selecting PAL/MESECAM may reduce this (depending on the recording), although colored speckles will appear on black and white recording. |
IMPORTANT: Pages 2, 7 and 13 should read:
SHARP
The following table is [A / (E)] do not have been
25 of your manual. For table of broadcast AND CATV CHANNELS and note on VCR channels, see page
- When you have finished tuning all the channels you wish, press MENU to leave this function.
- Press [◀/▶] to select ON or OFF for this option. Press SET to confirm.
The SKIP function determines whether the channel can be selected when using CHANNEL ▲/▼ instead of the NUMBER BUTTONS.
- Press [▲/▼] to select SKIP.

![IMPORTANT NOTE: 6. Press [▲/▲] to select DECORDER. This is preset to OFF. If you connect a satellite receiver to the VCR as shown on page 27, leave decoder OFF. If you connect a decoder as shown on page 27, you must use [▶/◀] to turn the decoder function ON. Refer to page 28 for DECODER SWITCHING OP…](/content/2026/05/989383/images/ffca01c34ea73152bc273c6d357478c10d13f9389af227700d75b92fad98f0c9.jpg)
- Press [▲/▼] to select FINE TUNING. Press and hold [◀/▶] until the sharpest colour picture is obtained.
Press [▲/▼] to select CHANNEL, then direction. Turning will stop when a programme is received. If it is not the desired programme, press [▶/▶] to continue tuning.
- Press MENU, then press [▲/▼] to select SET UP. Press SET to confirm.
- CHANNEL PRESET WILL BE HIGHLIGHTED. Press SET.
- Press [▲/▼] to select MANUAL. Press SET.
Normally it will not be necessary to manually tune broadcast programmes except in unusual circumstances such as poor signals, or unless you wish to change the order of your preset channels. Ensure that the video channel is selected on the TV.
MANUAL TUNING
IMPORTANT: Page 8, BASIC INSTALLATION should read:
CLOCK SETTING AND AUTO TUNING
This model automatically tunes the TV channels for your area.
- Ensure the VCR is connected as shown on page 6 and that the VCR RF channel is tuned if a SCART lead is not used (how to do this is shown on page 7). - Turn the TV and VCR on, and select the video channel on the TV.
The first screen displayed is the language menu. Press [▲/▼] to select your language. Press SET to confirm.
The second screen displayed is the clock setting menu.
- Press [▲/▼] to select either 12 or 24H clock.
- Press [◀/▶] to select TIME. Enter the time using the NUMBER BUTTONS or [▲/▼]. If the minutes are less than 10 enter the leading 0. If using the 12H clock enter AM or PM by pressing [AM/PM] on the remote control.

- Press [◀/▶] to select DATE. Enter the date using the NUMBER BUTTONS. For example, for 1st April enter 01 04.
- Press [◀/▶] to select YEAR. Enter the last two digits of the year using the NUMBER BUTTONS. For example, for 1997 enter 97. Then press SET to confirm.
- Press MENU. The main menu is now displayed. To auto tune your channels, press [▲/▼] to select SET UP. Press SET to confirm.
- CHANNEL PRESET will be highlighted. Press SET to confirm.
- AUTO will be highlighted. Press SET to confirm and to start the tuning.
- When the tuning operation has been completed, the VCR will programme tuned to channel 1.
- If you leave more than 2 minutes between pressing any buttons, the VCR will leave the MENU function. Press MENU to exit the menu function at any time. - If the VCR does not auto-tune due to poor reception, refer to MANUAL TUNING, (including SKIP) on page (II).
√ All the programmes should now be correctly tuned in.
Brand : SHARP
Model : VC-M46
Category : VCR