
0SU51012 - Cables for Computers and Peripherals Tripp Lite - Free user manual and instructions
Find the device manual for free 0SU51012 Tripp Lite in PDF.


| Product Type | USB 3.0 A-Male to B-Male Cable |
| Brand | Tripp Lite |
| Model | 0SU51012 |
| Length | 1 meter (3.3 feet) |
| Connector Type | USB 3.0 A Male to USB 3.0 B Male |
| Data Transfer Rate | Up to 5 Gbps (SuperSpeed) |
| Compatibility | Devices with USB 3.0, 2.0, or 1.1 ports; printers, scanners, external drives |
| Shielding | Foil and braid shielding for reduced interference |
| Connector Plating | Gold-plated contacts for corrosion resistance |
| Cable Jacket | PVC, black |
| Operating Temperature | 0°C to 50°C (32°F to 122°F) |
| Storage Temperature | -20°C to 70°C (-4°F to 158°F) |
| Weight | Approximately 50 grams (1.8 oz) |
| Power Source | Bus-powered; no external power required |
| Primary Functions | Connect USB-B peripherals to USB-A host devices for data transfer and power charging up to 900mA |
| Maintenance & Cleaning | Wipe with dry cloth; avoid liquids and abrasives |
| Safety | Compliant with USB 3.0 standards; overcurrent protection built into host |
| Spare Parts & Repairability | Non-repairable; replace cable if damaged |
| General Information | Lifetime warranty from Tripp Lite |
Frequently Asked Questions - 0SU51012 Tripp Lite
User questions about 0SU51012 Tripp Lite
0 question about this device. Answer the ones you know or ask your own.
Ask a new question about this device
Download the instructions for your Cables for Computers and Peripherals in PDF format for free! Find your manual 0SU51012 - Tripp Lite and take your electronic device back in hand. On this page are published all the documents necessary for the use of your device. 0SU51012 by Tripp Lite.
USER MANUAL 0SU51012 Tripp Lite
Phantom Specter Quick Installation Guide

natural_image
Close-up of server racks with multiple PhANTOM devices and cables (no visible text or symbols)International HQ
Jerusalem, Israel
Tel: +972 2 535 9666
minicom@minicom.com
North American HQ
Linden, New Jersey
Tel: +1 908 4862100
info.usa@minicom.com
European HQ
Dübendorf, Switzerland
Tel: +41 1 823 8000
info.europe@minicom.com
Italy
Rome
Tel: +39 06 8209 7902
info.italy@minicom.com
www.minicom.com Customer support - support@minicom.com
5UM20072 V2.4 11/03
QUICK INSTALLATION GUIDE

The Specter II SUN connections

The Specter II USB connections

The Specter II RS232 connections
PHANTOM SPECTER
1. What is the Phantom system?
The Phantom system from Minicom is a distributed KVM switching solution for 1 or more users. In the 1-User system a Manager controls the remote computers that are connected to Phantom Remote units. The Remote units can be either PCI cards or boxes called Specters. For multi-user functionality add a Phantom MX II.
ALL types of Phantom Manager and Remote units are compatible with each other.
This Quick Installation Guide illustrates the Phantom Specter, its cables, and how to install it. For further information please see the softcopy Guide on the Marketing & Documentation CD.
2. Pre installation instructions
Disconnect all computers from the electrical power supply.
Place cables away from fluorescent lights, air conditioners, and any machine that is likely to generate electrical noise.
3. Connecting the Specter PS/2 & Specter II PS/2, SUN, USB, RS232
Connect the Specters to computers and to the Phantom system as illustrated in the figures below.
Connect a Terminator to the System Out port of the last Specter in the daisy chain.

flowchart
graph LR
    A["To System Out port of previous unit"] --> B["Shielded CAT5 FTP System cables"]
    C["To System In port of next unit"] --> D["PHANTOM System"]
    B --> D
    D --> E["To Computer's Keyboard Port"]
    D --> F["To Computer's Mouse Port"]
    D --> G["To Computer's Video Card"]
The Specter PS/2 & Specter II PS/2 connections
1
PHANTOM SPECTER
4. The Specter RS232 Power Options
- USB connection for power only (illustrated above)
- Server without USB - connect a USB to PS/2 Adapter as illustrated below. Connect the adapter to the Keyboard port.

- External power - connect USB connector to an optional power adapter
5. Rack mounting
Specters can be mounted on racks. There are numerous types of racks, and some may need an extension bracket (to be ordered separately). Use the Mounting kit screw provided to attach the Specter to a rack as illustrated in the figure below.

Alternatively, attach the Specter to the side or back of the computer with the Velcro strips provided. For the strips to attach properly ensure that the surface is clean and dry.
6. What happens next?
See the Read This First (RTF) to assign ID numbers and configure keyboard settings. The Phantom system is then ready for use.
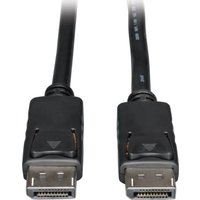
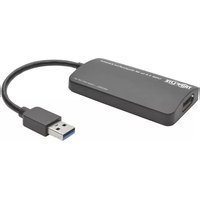

Brand : Tripp Lite
Model : 0SU51012
Category : Cables for Computers and Peripherals