
INN-721 - Food processor Innoliving - Free user manual and instructions
Find the device manual for free INN-721 Innoliving in PDF.


| Product Type | Food Processor |
| Brand | Innoliving |
| Model | INN-721 |
| Dimensions (L x W x H) | 25 x 20 x 30 cm |
| Weight | 3.5 kg |
| Power Consumption | 800 W |
| Voltage | 220-240 V ~ 50/60 Hz |
| Bowl Capacity | 1.5 liters |
| Material | Plastic body with stainless steel blades |
| Main Functions | Chopping, slicing, shredding, mixing, kneading, blending |
| Speeds | 2 speeds plus pulse function |
| Safety Lock | Lid safety lock prevents operation when open |
| Non-Slip Feet | Yes, for stability |
| Cord Length | 1.2 m |
| Dishwasher Safe Parts | Bowl, lid, blades (top rack recommended) |
| Cleaning | Hand wash recommended for motor base |
| Spare Parts Available | Bowls, blades, lid, pusher |
| Repairability Score | 7/10 (common parts available) |
| Certifications | CE, RoHS |
| Warranty | 2 years |
Frequently Asked Questions - INN-721 Innoliving
User questions about INN-721 Innoliving
0 question about this device. Answer the ones you know or ask your own.
Ask a new question about this device
Download the instructions for your Food processor in PDF format for free! Find your manual INN-721 - Innoliving and take your electronic device back in hand. On this page are published all the documents necessary for the use of your device. INN-721 by Innoliving.
USER MANUAL INN-721 Innoliving
innoliving easy tech, easy life
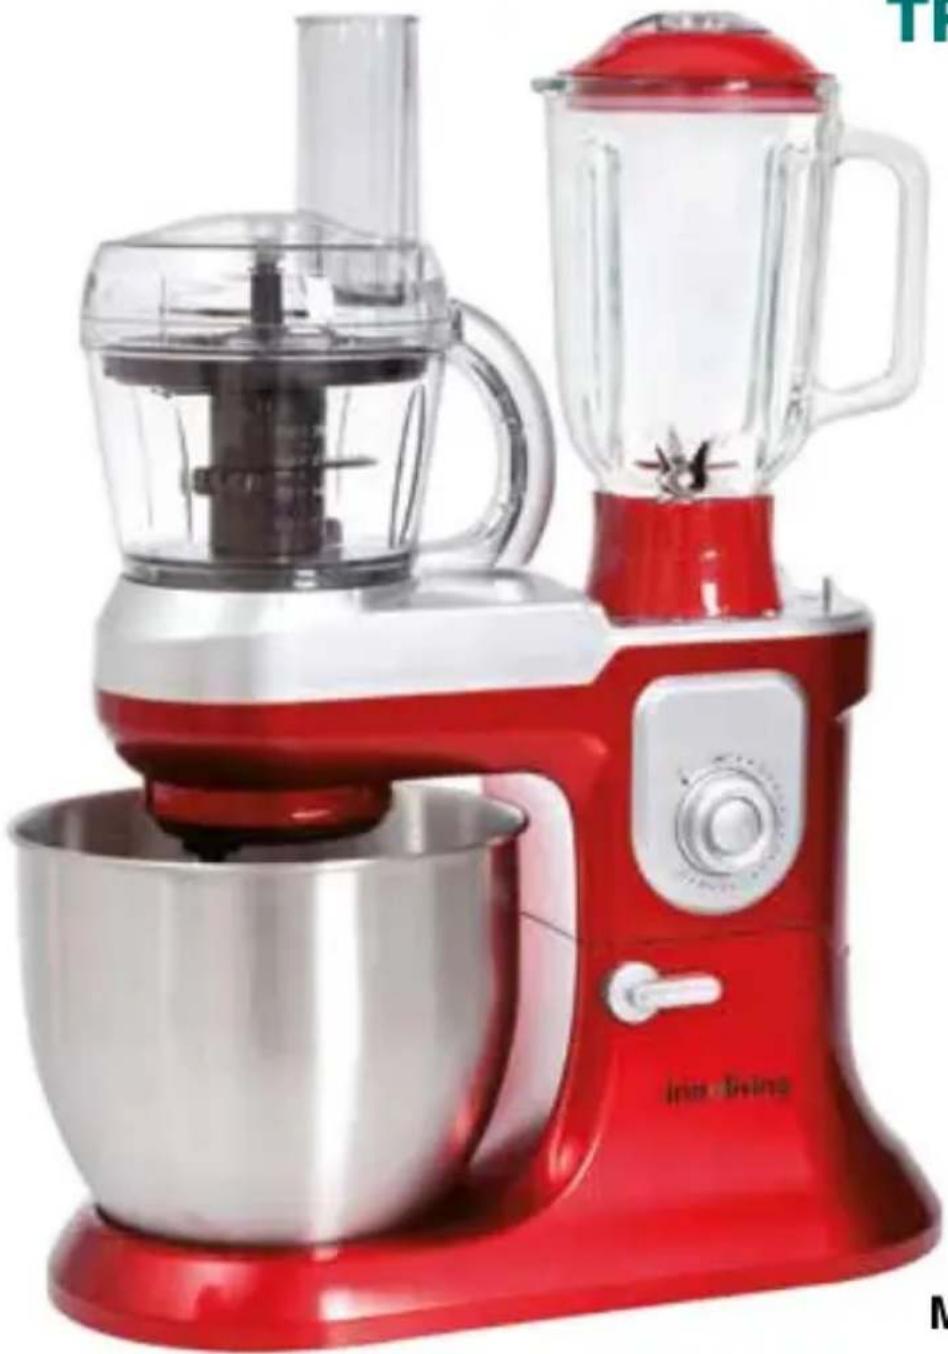
IMPASTATRICE CON FRULLATORE E TRITATUTTO
natural_image
Red brand mixer with a blender and plastic cup, no visible text or symbols on the device itself.INN-721
MANUALE D'USO
USER MANUAL
natural_image
Close-up of a red and silver beverage can with a black circle highlighting the lid area (no text or symbols visible)IMPORTANTE:
fig.1
Mixer/tritatutto
1.Tritare
flowchart
graph TD
    A["Start: Round阀"] --> B["Add pump to fan"]
    B --> C["Transfer to sink with liquid"]
    C --> D["Ordering into bowl with liquid"]
    D --> E["End: Stabilization with inlet/outlet"]
fig.2
2.Mescolare
fig.3
LISTA DEGLI INGREDIENTI
Impastatrice
Thank you for purchasing the mixer "INN-721" a very useful tool for preparing different types of dishes and mixes.
Before use:
Read all the instructions carefully and store this manual for future consultation. Wash the parts accessories: see "Cleaning and maintenance". Remove all the packaging materials.
SAFETY INSTRUCTIONS AND WARNINGS
- Read all the instructions carefully before using the appliance and store this manual for future consultations. Failure to follow the instructions may lead to accidents and will void the warranty, lifting the manufacturer from any liability.
- This appliance must be used only for the purpose for which it was designed that is as a POWER MIXER for home use. Any other use is improper and potentially dangerous.
- This appliance is for household use only, not professional or industrial use. Do not use the appliance outdoors.
- Keep all packing material (plastic bags, cardboard, polystyrene, etc.) out of reach of the children, since they are potential sources of danger and must be disposed of as provided by law
- After having removed the appliance from its packaging, verify its integrity based on the drawing and any presence of damage caused by transport. If in doubt, do not use the appliance and contact an authorized service centre.
- Do not use the appliance if the cable or plug is damaged.
- Ensure that the voltage indicated on the rating label matches the mains voltage before plugging in the appliance. The rating label is on the product.
- The appliance's plug must fit into the mains socket properly. Do not alter the plug. Do not use plug adaptors.
- Do not use or store the appliance outdoors.
- Do not use the appliance if it has fallen on the floor, if there are visible signs of damage or if it has a leak.
- Do not force the electrical connection wire. Never use the electric wire to lift up, carry or unplug the appliance.
- Ensure that the electric cable does not get trapped or tangled.
- Check the state of the electric cable. Damaged or knotted cables increase the risk of electric shock.
- Do not use the appliance with damp or wet hands or feet.
- If the power cable is damaged, it must be replaced by the manufacturer or by an authorized technical service centre, so as to prevent all risks.
- In case of fault or malfunctioning of the appliance, switch it off and do not tamper with it. If the device needs to be repaired, contact an authorized technical assistance centre.
- This appliance is not intended for use by persons with reduced physical, sensory or mental capabilities, or lack of experience and knowledge, unless they have been given supervision or instruction concerning use of the appliance by a person responsible for their safety and understand the hazards involved.
- This product must not be used by children. Keep the product and its cable out of reach of children.
- This product is not a TOY. Children should be supervised to ensure that they do not play with the appliance.
-
Never let the cord hang down where a child could it grab.
-
Do not turn the appliance over while it is in use or connected to the mains.
• Always unplug the mixer from the power outlet before removing or changing accessories. - Never leave the product unattended when in use.
- Store the appliance in a dry place, free from dust and out of direct sunlight, far from heating sources.
- Never immerse the appliance into water or other liquids and not place it under tap water.
- Always unplug the mixer from the power outlet before assembling, dismantling, coming close to the moving parts or cleaning the device.
- When in use, place the product on a flat and stable surface; ensure it cannot fall on the floor, in a sink or a container full of water.
• DO NOT use near the kitchen hob and/or other sources of heat.
- Be careful that the cable does not touch hot, incandescent surfaces, open flames, pans or other utensils.
- Do not touch the moving parts. CAUTION: Do not touch and/or remove accessories while the unit is in operation.
- All parts that come into contact with food during the use of the device must be well washed before use.
- Do not use accessories not original, or more than one accessory at once.
- During use do not obstruct the ventilation grills.
- Do not let water or objects inside the air grills
- Handle blades carefully when you proceed with the cleaning of the product; improper use of blades may result in a potential hazard.
- Pick up the product with caution. Make sure that the top of the bowl and the power cable are locked before you lift the product.
- Noise level: Lc>70dB
- Be careful with the sharp blades when handling the product, emptying the basket, and while cleaning.
- Be careful when a hot liquid is poured into the product as they could be expelled because of a sudden vaporization.
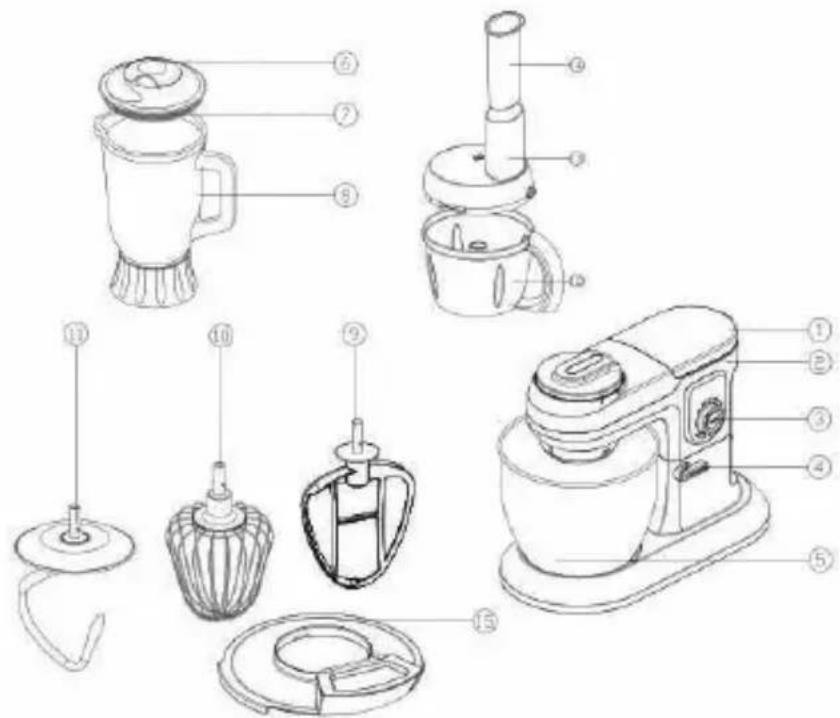
PRODUCT DESCRIPTION
1 Botton to remove the cover
2 Main unit
3 Speed Control
4 Release Knob
5 Stainless Steel Bowl
6 Measuring Cup
7 Blender Jug Cover
8 Blender Jug
9 H-beater
10 Whisk
11 Dough Hook
12 Mixing Bowl
13 Mixing Bowl Cover
14 Measuring tube
15 Stainless Steel Bowl Cover
NOTE: The maximum time of continuous operation of the power mixer cannot exceed 5 minutes, after that you should make a break of at least 3 minutes before resuming the normal use of the appliance.
NOTE: The time of continuous operation of the blender and mixer cannot exceed 2 minutes, after that, you should make a break of at least 3 minutes before resuming the normal use of the appliance.
NOTE: The tools ( mixer, blender & chopper) must not be used together because it could lead to overheating. Before using the food processor/blender, make sure that you removed any tools and food residue from the steel bowl to avoid overheating the engine and prevent proper operation of the product.
NOTE: When using the stand mixer, never leave the blender and the food processor mounted even if they are empty.
HOW TO USE
The Mixer
H-beater: For making cakes, biscuits, pastry and icings.
Whisk: For eggs, cream, fatless sponges, meringues, cheesecakes, mousses, souffles.
Do not use the whisk for heavy mixtures; it could damage the appliance.
Dough Hook: For yeast mixtures
- Turn the release knob clockwise and raise the mixer head till it locks.
- Insert a tool, push up till it stops then turn it anti-clockwise.
- Fit the bowl onto the base, press down and turn it anti-clockwise
- Turn the release knob clockwise and lower the mixer head till it locks.
- Switch on by turning the switch to the desired setting.
- Turn the tool clockwise to remove it and pull.
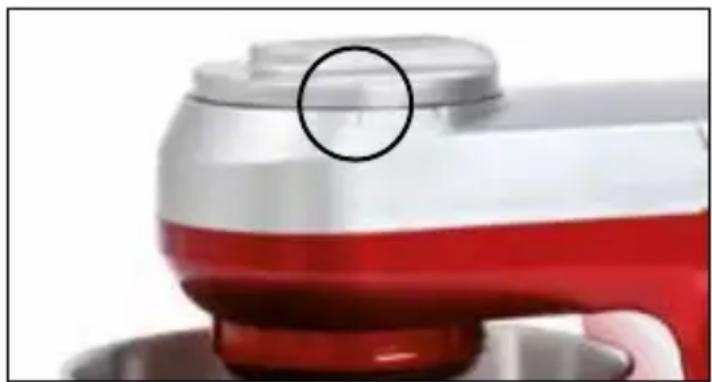
NOTE: The device does not turn on if the lid of the chopper, placed on the front of the main unit, is not properly locked. Make sure that the alignment marks, placed both on the lid and on the main unit, fit together as shown in the figure below.
natural_image
Close-up of a red and silver beverage can with a circular highlight on top (no text or symbols visible)IMPORTANT
- When operating, check frequently that food debris does not accumulate on the sides of the bowl, remove them with a spatula making sure that you have first turned off the appliance.
- Eggs at room temperature are best for whisking.
- Before whisking egg whites, make sure that the whip or the bowl are not greasy or dirty yolk.
- Use cold ingredients to prepare the pastry or the like, unless the recipe says otherwise
Knead
-
Do not exceed the maximum capacity of the bowl, otherwise you will overload the unit.
-
If you notice that the device works with effort, remove half of the dough from the bowl and work each part separately.
-
The ingredients mix best if you pour the liquid first.
Cleaning
- Turn off and unplug the appliance, allow the device to cool down before cleaning.
- Do not immerse the main unit in water and make sure no water enters.
- Clean the main unit with a soft damp cloth.
- Do not use brushes, steel wool or solvents to clean the unit as they could damage it.
- Remove accessories from the mixer and wash them separately. Clean all the accessories with a mild detergent.
- Dry all parts thoroughly before using again.
- Cover the sides with a protective film after being washed and dried thoroughly.
Blender Jug
- Remove the cap from the main unit by pushing the button on the back, see Fig.1.
- Put food in the blender, close tightly the lid and place it directly on the main unit.
- Turn the blender clockwise to secure it to the base.
- Connect the appliance to the power outlet and select the speed setting desired.
- You can add liquid components (eg. Oil, cream or other) while the blender is in operation by using the appropriate opening in the upper part. Turn the cap clockwise to remove.
- Once you have finished processing, set the speed 0 and disconnect the device from the power outlet. Attention: Big pieces food needs to be cut into small pieces (more or less 2cmx2cmx2cm)
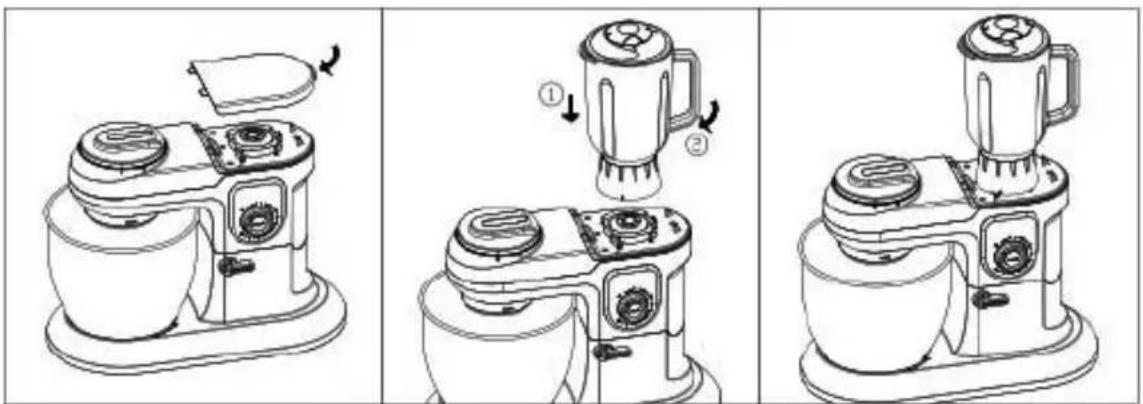
fig.1
Mixing Bowl
1. Chopping Function
- Remove the cover from the main unit, turning it counterclockwise.
- Insert the turn axis onto the body tightly see fig 2.
- Place the chopper on the axis turning it clockwise to secure the unit.
- Insert the blades at the center of the plastic bowl.
- Insert the food inside the bowl, taking care to cut it into cubes before.
- Place the lid on the bowl by turning it clockwise.
- Insert the plug into the socket, select the desired processing speed (speed increases according to the level selected. PULSE is the highest level. Select the speed pulse at intervals)
• After processing, select the speed 0 and remove the food from the bowl, making sure that the blades have stopped.
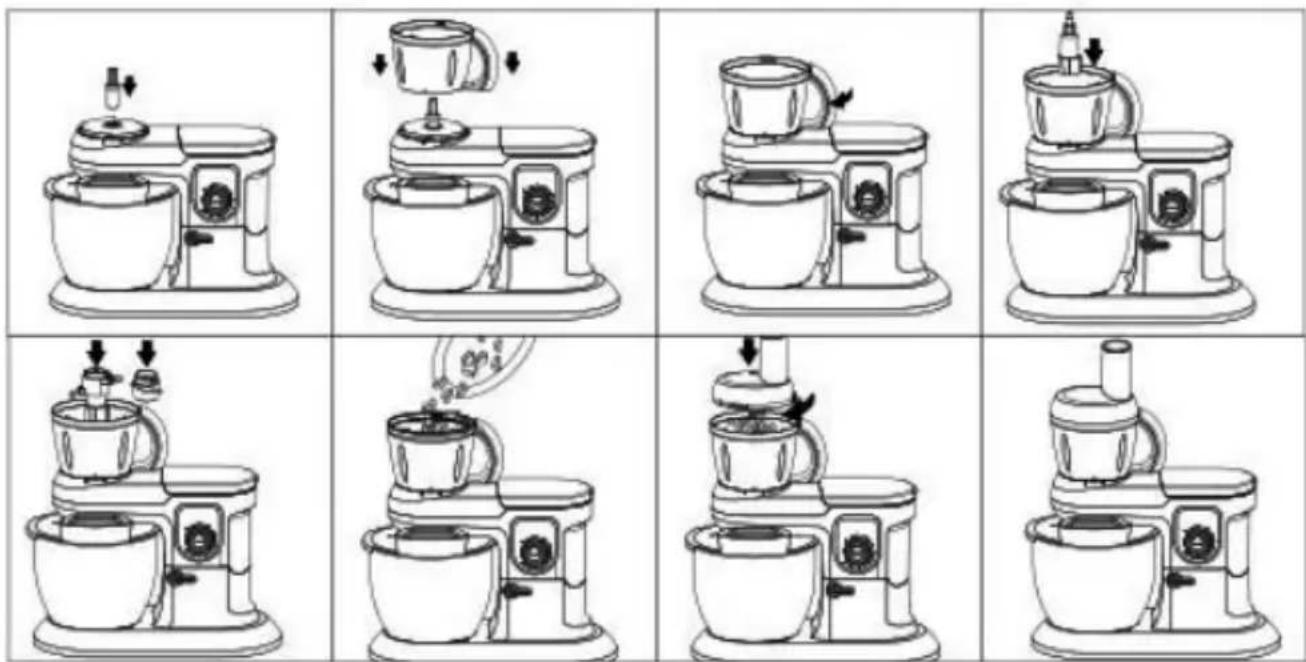
fig.2
2.Mixer
- For the mixer function, follow the same steps above to mix the food, beat eggs etc.
3.Slicing
- Place the turn axis and the bowl in the space provided.
- Insert one of the two blades included in the disk and place it over the bowl, see Fig 3.
- Put the lid on the bowl by turning it clockwise.
- Connect the device to the power outlet and select the desired speed.
- Insert the food into the tube by pressing with the pestle.
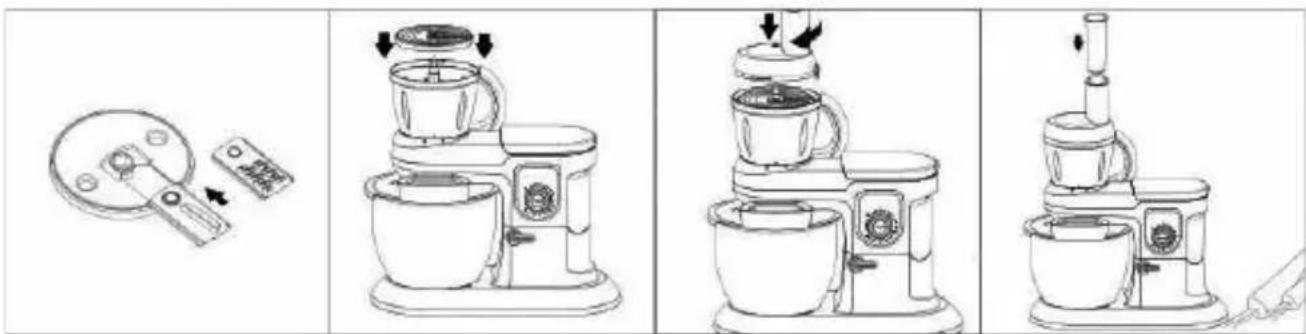
fig.3
INGREDIENTS LIST
Mixer
| Material Max. Quantity Suggest Tool | ||||
| Stiff yeast dogh 1600g | Flour and water at a ratio of 5:3 Pre-treatment of dough: speed 1-2 for 10 seconds Operation period: speed 3-4 for 180 seconds | Dough Hook |  | |
| Stiff yeast dogh 1600g | Flour and water at a ratio of 5:3 Pre-treatment of dough: speed 1-2 for 10 seconds Operation period: speed 3-4 for 180 seconds | Dough Hook |  | |
| Soft yeast dough | 2000g | Flour and water at a ratio of 1:1 Pre-treatment of dough: speed 1-2 for 30 seconds Operation period: speed 8-10 for 120 seconds | H-beate |  |
| Eggs 16 eggs | Speed 8-10; whip the egg whites for 4-5 minutes without stopping. | Whisk | 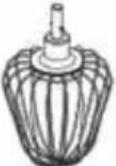 | |
| Whipped cream 300ml fresh cream | From speed 8 to 10 for about 5 minutes | Whisk | 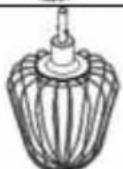 | |
| Shakes, cocktails or other liquids | 1 L | Beating eggs into creamed mixtures from speed 1-2 for about 4 minutes | H-beate |  |
Remark: After processing one batch, let the appliance cool down to room temperature before you continue processing.
Blender Jug
| Material Max. Quantity Remark | |
| Apple 300g | |
| Orange 300g | |
| Eggs 300g | |
| Strawberries 300g |
Material volume: 20x20x20mm ^3 /pc, water: 450ml
Mixing Bowl
| Function Ingredients Max. Quantity Max. Time | ||||
| Slicing Shredding | ||||
| Slicing and Shredding | Melon 400g 50s | 30s | ||
| Carot 400g 50s | 30s | |||
| Chopping and whisking | Meat 300g | (about 10g/piece) | 30s | |
| Ham 300g | (about 15g/piece) | 30s | ||
| Onion 400g | (about 20g/piece) | 30s | ||
| Egg 6 tuorli 25s | ||||
| Strawberries 200g | 25s | |||
| Cheese 100g | 20s | |||
| Almonds 100g | 20s | |||
| Hazelnuts | 100g | 20s | ||
| Walnuts | 100g | 20s | ||
RATING LABEL:
Innoliving Spa
Via Merloni, 9 - 60131 Ancona - Italy
INN-721 IMPASTATRICE - POWER MIXER
220-240V\~50/60Hz 1200W
MADE IN CHINA
LOT n.



natural_image
Silhouette of a person reading a book inside a black circle (no text or symbols)


This product complies with all the applicable European regulations

Read carefully the user manual

Food contact

Class II insulated electrical appliance
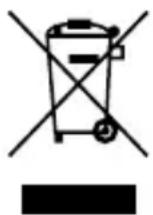
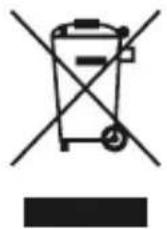
INFORMATION TO USERS according to Legislative Decree No. 49 of March 14, 2014 "2012/19/UE Implementation of the Directive on Waste Electrical and Electronic Equipment (WEEE)"
The crossed-out dustbin symbol indicates that the product at the end of its life must be collected separately from other waste. The user should, therefore, take the equipment with the essential components at the end of its useful life to the separate collection center of electronic and electrical waste, or return it to the retailer when purchasing new equipment of equivalent type, in ratio of one to one, or one to zero for devices with larger side less than 25 CM. The separate collection for the decommissioned equipment for recycling, treatment and environmentally compatible disposal contributes to avoid possible negative effects on the environment and human health and promotes recycling of the materials. Improper disposal of the product by the user entails the application of administrative sanctions according to Legislative Decree No. 49 of 14 March 2014.
innoliving easy tech, easy life
Innoliving Spa
Via Merloni, 9
60131 Ancona Italy
Tel 199.188.335
www.innoliving.it
MADE IN CHINA
CE
- innoliving easy tech, easy life
- IMPASTATRICE CON FRULLATORE E TRITATUTTO
- IMPORTANTE:
- Mixer/tritatutto
- 1.Tritare
- 2.Mescolare
- LISTA DEGLI INGREDIENTI
- Impastatrice
- Before use:
- SAFETY INSTRUCTIONS AND WARNINGS
- PRODUCT DESCRIPTION
- HOW TO USE
- The Mixer
- Dough Hook: For yeast mixtures
- IMPORTANT
- Knead
- Cleaning
- Blender Jug
- Mixing Bowl
- Chopping Function
- 2.Mixer
- 3.Slicing
- INGREDIENTS LIST
- Mixer
- RATING LABEL:
Brand : Innoliving
Model : INN-721
Category : Food processor