
WD-65738 - Video projector MITSUBISHI - Free user manual and instructions
Find the device manual for free WD-65738 MITSUBISHI in PDF.


| Product Type | 3D DLP Home-Cinema Rear-Projection Television |
| Screen Size | 65 inches (diagonal) |
| Display Technology | 1080p DLP (Digital Light Processing) with Plush 1080p 5G upscaling |
| Resolution | 1920 x 1080 pixels (1080p) |
| 3D Technology | Active shutter 3D (supports Frame Packing, Side-by-Side, Top-Bottom, Checkerboard formats) |
| Inputs | 3x HDMI (with HDCP, Deep Color up to 36-bit, x.v.Color), 1x Component (Y Pb Pr), 1x Composite, 1x ANT (RF), 1x USB (for service and media on 838 series), 1x LAN (Ethernet), 1x DVI/PC Audio Input, 1x 3D Glasses Emitter jack |
| Audio Outputs | Digital Audio Output (optical), Analog Audio Output (RCA), Subwoofer Output (on 838 series) |
| Audio Features | Sound Projector virtual surround (838 series), Center Channel input, external subwoofer support |
| TV Tuner | Integrated ATSC/NTSC tuner (over-the-air and non-scrambled digital cable) |
| Smart Features | StreamTV internet content (VUDU, etc.), NetCommand IR control for external devices (838 series), HDMI CEC |
| Power Consumption | Typical: 300-350W (estimated for 65-inch DLP) |
| Weight | Approximately 80 lbs (36 kg) without stand |
| Dimensions (W x H x D) | Approx. 58 x 37 x 18 inches (147 x 94 x 46 cm) without stand |
| Stand Compatibility | Mitsubishi model MB-S60/65A (sold separately) |
| Lamp Type | Replaceable lamp cartridge (part number 915B441001) |
| Warranty | 1 year parts and labor (excluding lamp and screen) |
| Energy Star Qualified | Yes (for WD-65738 model) |
| Remote Control | IR remote with learning capability and NetCommand support |
Frequently Asked Questions - WD-65738 MITSUBISHI
User questions about WD-65738 MITSUBISHI
0 question about this device. Answer the ones you know or ask your own.
Ask a new question about this device
Download the instructions for your Video projector in PDF format for free! Find your manual WD-65738 - MITSUBISHI and take your electronic device back in hand. On this page are published all the documents necessary for the use of your device. WD-65738 by MITSUBISHI.
USER MANUAL WD-65738 MITSUBISHI
3D DLP™ HOME-CINEMA TELEVISION MODELS
738 Series
838 Series
OWNER'S GUIDE
- For questions:
- Visit our website at www.mitsubishi-tv.com.
- E-mail us at MDEAservice@mdea.com.
-
Call Consumer Relations at 800-332-2119.
-
For information on System Reset, please see the back cover.
- To order replacement or additional remote controls or lamp cartridges, visit our website at www.mitsuparts.com or call 800-553-7278.
- 838 Series. IR emitter cables for NetCommand home-theater control are available for purchase from Mitsubishi. Call 800-553-7278 and request either part number 242D483020 (two-ended cable) or part number 299P254020 (four-ended cable).

HDMI®
HIGH-DEFINITION MULTIMEDIA INTERFACE



CAUTION
RISK OF ELECTRIC SHOCK DO NOT OPEN

CAUTION: TO REDUCE THE RISK OF ELECTRIC SHOCK, DO NOT REMOVE COVER (OR BACK). NO USER SERVICEABLE PARTS INSIDE. REFER SERVICING TO QUALIFIED SERVICE PERSONNEL.

The lightning flash with arrowhead symbol within an equilateral triangle is intended to alert the user of the presence of uninsulated “dangerous voltage” within the product’s
enclosure that may be of sufficient magnitude to constitute a risk of electric shock to persons.

The exclamation point within an equilateral triangle is intended to alert the user to the presence of important operating and maintenance (servicing) instructions in the literature accompanying the product.
MAINS DISCONNECTION: The mains plug is used as the disconnect device. The mains plug shall remain readily operable.
Stand Requirement
CAUTION: Use these Mitsubishi TV models only with the Mitsubishi stand models shown here. Other stands can result in instability and possibly cause injury.
TV Model Stand Model
| WD-60738, WD-65738WD-65838 | MB-S60/65A |
| WD-73738WD-73838 | MB-S73A |
82-inch TVs. Mitsubishi does not design, manufacture, or sell matching bases for 82-inch televisions (WD-82738, WD-82838). When selecting a stand, base, or other furniture to support the TV, please make sure it is designed with the appropriate dimensions for stability and to support the TV's total weight as well as the weight of any additional equipment you plan to store.
TV WEIGHT: This TV is heavy. Exercise extreme care when lifting or moving it. Lift or move the TV with a minimum of two adults. To prevent damage to the TV, avoid jarring or moving it while it is turned on. Always power off your TV, unplug the power cord, and disconnect all cables before moving it.
WARNING: To reduce the risk of fire or electric shock, do not expose this apparatus to rain or moisture.
WARNING: This product contains chemicals known to the State of California to cause cancer and/or birth defects or other reproductive harm.
FCC Declaration of Conformity
Product: Projection Television Receiver
Models: WD-60738, WD-65738, WD-73738,
WD-82738
WD-65838, WD-73838, WD-82838
Responsible Mitsubishi Digital Electronics
Party: America, Inc.
9351 Jeronimo Road
Irvine, CA 92618-1904
Telephone: (8 00) 332-2119
This device complies with Part 15 of the FCC Rules. Operation is subject to the following two conditions:
(1) This device may not cause harmful interference, and
(2) This device must accept any interference received, including interference that may cause undesired operation.
Note: This equipment has been tested and found to comply with the limits for a Class B digital device, pursuant to part 15 of the FCC Rules. These limits are designed to provide reasonable protection against harmful interference in a residential installation. This equipment generates, uses and can radiate radio frequency energy and, if not installed and used in accordance with the instructions, may cause harmful interference to radio communications. However, there is no guarantee that interference will not occur in a particular installation. If this equipment does cause harmful interference to radio or television reception, which can be determined by turning the equipment off and on, the user is encouraged to try to correct the interference by one or more of the following measures:
- Reorient or relocate the receiving antenna.
- Increase the separation between the equipment and the receiver.
- Connect the equipment into an outlet on a circuit different from that to which the receiver is connected.
- Consult the dealer or an experienced radio/TV technician for help.
Changes or modifications not expressly approved by Mitsubishi could cause harmful interference and would void the user's authority to operate this equipment.
Note: Features and specifications described in this owner's guide are subject to change without notice.
Contents
Important Information About Your TV
Installation and Operating Notes 4
Important Safety Instructions....5
1 Basic Setup and Operation
Package Contents 7
Before You Begin 8
First-Time Power-On. 8
TV Controls 9
Remote Control 9
The TOOLS Key and Menu 10
TV Control Panel 11
The STATUS Indicator.... 11
Setting Up TV Inputs. 12
Basic TV Operation.... 14
Using the TV with a Personal Computer ..... 17
2 TVConnections
Before You Begin 19
Connection Types and Audio/Video Quality .... 19
Inputs and Outputs.... 20
HDMI Device 22
Y Pb Pr Component Video Device 23
DVI Video Device 23
Antenna or Cable TV Service....24
Composite Video Device 24
VCR or DVD Recorder to an Antenna or Wall Outlet Cable 24
A/V Receiver 25
A/V Receiver with HDMI Output. 25
Supplemental Audio Connections 26
3 TVFeatures
Sleep Timer 28
FAV (Favorite Channels)....28
ChannelView Channel Listings.... 29
Status Display 30
Using an External Sound System....31
Picture Shape and Display Formats 32
3D Video 33
Enhanced 3D Video Options 33
Earlier 3D Video Options .... 35
Camera Images and Music Files 37
USB Source Devices (838 Series).... 37
Photos and Motion Video as Composite Video 39
Using an Audio-Only Device 39
Wireless Audio Playback 40
Sound Projector (838 Series) 41
StreamTV™ Internet Media 45
Introduction to Home-Theater Control ..... 48
4 TV Menus
Main Menu. 49
Picture. 49
Sound 53
Captions 55
Setup 56
Inputs 59
Lock 61
5 NetCommand IR Control
About NetCommand IR Control 64
IR Emitters....65
NetCommand Setup.... 66
Operating NetCommand-Controlled Devices ... 67
6 NetCommand IR Control of an A/V Receiver
Controlling an A/V Receiver after NetCommand Setup 70
Setting Up A/V Receiver Control Power and Volume 71
Automatic Audio/Video Switching Over an HDMI Connection. 72
Appendices
Appendix A: Programming the Remote Control . 77
Appendix B: Bypassing the Parental Lock ..... 83
Appendix C: HDMI Control of CEC Devices .... 85
Appendix D: TV Care Lamp-Cartridge Replacement ..... 88
Cleaning Recommendations 90
Care of the Remote Control....90
Appendix E: Troubleshooting 91
Trademark and License Information 98
Network Service Disclaimer 98
Warranty 105
Index 107
Important Information About Your TV
For Your Records
Record the model number, serial number, and purchase date of your TV. The model and serial numbers are on the back of the TV. Refer to this page when requesting assistance with the TV.
MODEL NUMBER ____
SERIAL NUMBER ____
PURCHASE DATE ____
RETAILER NAME ____
LOCATION ____
Installation and Operating Notes
Custom cabinet installation must allow for proper air circulation around the television.
NOTE TO CATV SYSTEM INSTALLER: THIS REMINDER IS PROVIDED TO CALL THE CATV SYSTEM INSTALLER'S ATTENTION TO ARTICLE 820-40 OF THE NEC THAT PROVIDES GUIDELINES FOR THE PROPER GROUNDING AND, IN PARTICULAR, SPECIFIES THAT THE CABLE GROUND SHALL BE CONNECTED TO THE GROUNDING SYSTEM OF THE BUILDING, AS CLOSE TO THE POINT OF CABLE ENTRY AS PRACTICAL.
TV Software
Do not attempt to update the software of this TV with software or USB drives not provided by or authorized by Mitsubishi Digital Electronics America, Inc. Non-authorized software may damage the TV and will not be covered by the warranty.
Internal Fans
Internal cooling fans maintain proper operating temperatures inside the TV. It is normal to hear the fans when you first turn on the TV, during quiet scenes while viewing the TV, and for a short time after shutting off the TV. You may notice louder fan noise about 30 seconds after shutting off the TV and while using the Bright Lamp Energy setting.
Lamp Replacement
For lamp-replacement instructions, see Appendix D.
To Order a Replacement Lamp Under Warranty Call (800) 553-7278. Please have model number, serial number, and TV purchase date available.
To Purchase a Replacement Lamp After Warranty Visit our website at www.mitsuparts.com or call (800) 553-7278. Order new lamp part number 915B441001.
Children and TV Viewing
The American Academy of Pediatrics discourages television viewing for children younger than two years of age.
Important Safety Instructions
Please read the following safeguards for your TV and retain for future reference. Always follow all warnings and instructions marked on the television.
1) Read these instructions.
2) Keep these instructions.
3) Heed all warnings.
4) Follow all instructions.
5) Do not use this apparatus near water.
6) Clean only with dry cloth.
7) Do not block any ventilation openings. Install in accordance with the manufacturer's instructions.
8) Do not install near any heat sources such as radiators, heat registers, stoves, or other apparatus (including amplifiers) that produce heat.
9) Do not defeat the safety purpose of the polarized or grounding-type plug. A polarized plug has two blades with one wider than the other. A grounding type plug has two blades and a third grounding prong. The wide blade or the third prong are provided for your safety. If the provided plug does not fit into your outlet, consult an electrician for replacement of the obsolete outlet.
10) Protect the power cord from being walked on or pinched particularly at plugs, convenience receptacles, and the point where they exit from the apparatus.
11) Only use attachments/accessories specified by the manufacturer.
12) Use only with the cart, stand, tripod, bracket, or table specified by the manufacturer, or sold with the apparatus. When a cart is used, use caution when moving the cart/apparatus combination to avoid injury from tip-over.

natural_image
Silhouette of a person pushing a ladder inside a circular frame (no text or symbols)13) Unplug this apparatus during lightning storms or when unused for long periods of time.
14) Refer all servicing to qualified service personnel. Servicing is required when the apparatus has been damaged in any way, such as power-supply cord or plug is damaged, liquid has been spilled or objects have fallen into the apparatus, the apparatus has been exposed to rain or moisture, does not operate normally, or has been dropped.
EXAMPLE OF ANTENNA GROUNDING
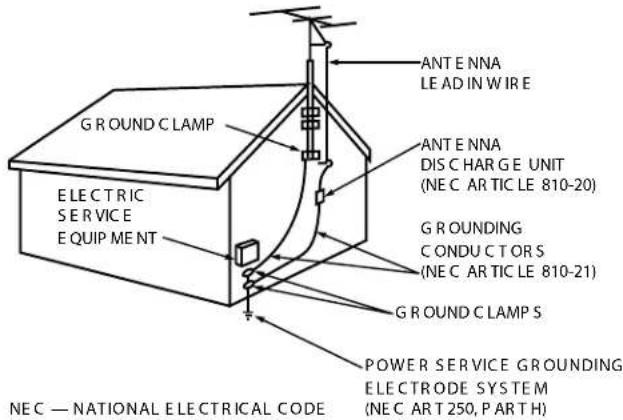
Outdoor Antenna Grounding
If an outside antenna or cable system is connected to the TV, be sure the antenna or cable system is grounded so as to provide some protection against voltage surges and built-up static charges.
Replacement Parts
When replacement parts are required, be sure the service technician has used replacement parts specified by the manufacturer or have the same characteristics as the original part. Unauthorized substitutions may result in fire, electric shock or other hazards.
Special Features of Your TV
Your new high-definition widescreen television has many special features that make it the perfect center of your home entertainment system, including:
1080p High-Definition DLP Display System
Your Mitsubishi HDTV uses Texas Instruments Digital Light Processing™ technology for rear-projection TVs to create the picture you see on screen. All images are displayed at 1080p. The TV uses Plush 1080p® 5G to convert lower-resolution signals to 1080p for display. The TV can also accept 1080p original signals and maintain them at 1080p through all processing until displayed.
3D Television
All Mitsubishi 738 and 838 1080p home-Cinema HDTV's can display 3D content originating in several different formats. This feature lets you experience the new 3D technologies applied to many recent movies and video games. Immerse yourself in your favorite video game, movie, or sporting event displayed in 3D.
16:9 Widescreen Picture Format
Enjoy a full theatrical experience in the comfort of your home. View pictures as film directors intended them. Digital TV broadcasts, DVDs and newer video game consoles support this widescreen format.
Integrated HDTV Tuner
Your widescreen Mitsubishi HDTV has an internal HDTV tuner able to receive both over-the-air HDTV broadcasts (received via an antenna) and non-scrambled digital cable broadcasts, including non-scrambled HDTV cable programming.
High-Definition Video Inputs
- Component Video Inputs. Also called Y/Pb/Pr inputs, these inputs receive standard analog video formats of 480i, 480p, plus 720p and 1080i high-definition signals. This provides a high level of flexibility when connecting DVD players/recorders, cable boxes, and satellite receivers.
- HDMI Inputs. HDMI® inputs provide additional high-performance, high-definition connections for maximum flexibility in your choice of home theater products. These inputs accept digital 480i, 480p, 720p, 1080i, and 1080p video signals plus PCM digital stereo signals. The HDMI inputs can also accept a variety of PC signals and resolutions. These inputs support Deep Color (up to 36 bits) and the x.v.Color™ extended color gamut. Used with an adapter, these HDMI inputs also accept compatible digital DVI video signals. The HDMI inputs are HDCP copy-protection compatible.
Easy Connect Auto Input Sensing
Easy Connect™ Auto Input Sensing automatically recognizes when you plug in a device and prompts you to assign a name to it. The TV ignores any unused inputs, so the result is an uncluttered menu where you can easily select devices by name.
Home-Theater Control
HDMI Control
All models. HDMI devices with Consumer Electronics Control (CEC) capabilities may be compatible with the TV's HDMI Control feature. Compatible devices can receive control signals through the HDMI connection, allowing the TV's remote control to operate some functions of these devices.
NetCommand with IR Learning
838 Series. Your Mitsubishi HDTV offers a new level of networking that seamlessly integrates selected older A/V products with new and future digital products. NetCommand® supports IR (infrared) control of products such as DVD players, cable boxes, satellite receivers, and VCRs. The necessary IR emitter cables are available for purchase separately from Mitsubishi.
Immersive Sound Technology
838 Series. Sound Projector technology uses the TV's bank of speakers to create a simulated surround sound effect by reflecting sound off the room walls.
StreamTV Internet
StreamTV TM brings many popular internet applications to your TV. Among them is the VUDU TM movie service, offering the largest on-demand HD movie selection anywhere, featuring full 1080p and 5.1 surround sound. VUDU allows you to enjoy movies with no store visits, no mailing, no late fees and no subscriptions.

ENERGY STAR
The following TV models are ENERGY STAR ® qualified: WD-65738, WD-73738, WD-82738 WD-65838, WD-73838, WD-82838
Products that earn the ENERGY STAR prevent greenhouse gas emissions by meeting strict energy efficiency guidelines set by the U.S. Environmental Protection Agency and the U.S. Department of Energy.
1
Basic Setup and Operation
Package Contents
Please take a moment to review the following list of items to ensure that you have received everything.
| Remote Control | 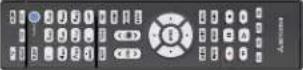 |
| Two AA Batteries |  |
| Basic Owner's Guide |  |
| Quick Setup Guide |  |
| Product Registration Card |  |
| 838 Series. Calibration Microphone | 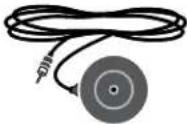 |
Installing the Remote Control Batteries
- Remove the remote control's back cover by gently pressing in the tab and lifting off the cover.
- Load the batteries, making sure the polarities (+) and (-) are correct. For best results, insert the negative (-) end first.
- Snap the cover back in place.

natural_image
Diagram of a mechanical device with a lever and curved base, no text or symbols presentThe remote control requires two AA alkaline batteries.

Before You Begin
- Review the important safety, installation, and operating information at the beginning of this book.
-
Choose a location for your TV.
-
Allow at least four inches of space on all sides of the TV to help prevent overheating. Overheating may cause premature failure of the TV as well as shortened lamp life.
-
Avoid locations where light may reflect off the screen.
• See the stand requirements on page 2. -
Install the batteries in the remote control.
- Plug the TV into an AC power outlet.
First-Time Power-On
- Press the TV key to ensure that the remote control is in TV mode.

- Aim the bulb end of the remote control at the TV and press the POWER key ⏻ Wait for the Welcome screen.

natural_image
Illustration of a mobile phone with a power button and control knob (no text or symbols)- If you wish to change the menu language to Español, press ▼
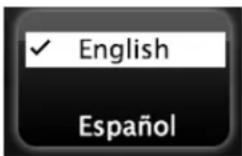
- Press ▶ to highlight EXIT. Press ENTER to clear the menu.

TV Tips
Turning the TV On or Off
- Point the bulb end of the remote control at the front of the TV and press the POWER key.
- Press the POWER button on the TV control panel.
If You Turn Off the TV by Mistake
- Press POWER again, within about 60 seconds, to have the TV come back on immediately.
- If the STATUS indicator is flashing green, (about 60 seconds after you shut off power), wait a few moments for the indicator to stop flashing and press POWER to turn the TV on again.
• Controlling Sound Volume - Press VOL to adjust the sound level.
- See also “Controlling A/V Receiver Sound Volume” on page 31.
Changing Channels (antenna sources)
NOTE: Perform a channel scan to enable reception of digital channels. See Setup > Channel, page 57.
- Enter the channel number using the number keys on the remote control and press ENTER. For a two-part digital channel, such as 3-1, press 3 CANCEL 1 to include a dash (separator).
- Press CH to change channels one channel at a time.
- Press and hold CH to move quickly through channels.
- Press LAST to return to the previously tuned channel.
- Press GUIDE to display ChannelView channel listings, highlight a channel, and press ENTER.
- Use the Fav (Favorites) feature to tune to up to nine favorite channels. See page 28.
- Use the CH key to tune to preselected groups of channels using ChannelView custom channel banks. See page 29.
TV Controls
Remote Control
For more on use and care of the remote control, see page 90.

Note: To operate other audio/video devices using the TV's remote control:
- See Appendix A, "Programming the Remote Control."
- For HDMI devices compatible with the TV's HDMI Control feature, see Appendix C.
838 Series
- See page 64 for NetCommand IR "Learning" of device keys.
- For use of specific keys with NetCommand-controlled devices, see "Special Operation Methods," page 67.
TV Controls, continued

The TOOLS Key and Menu
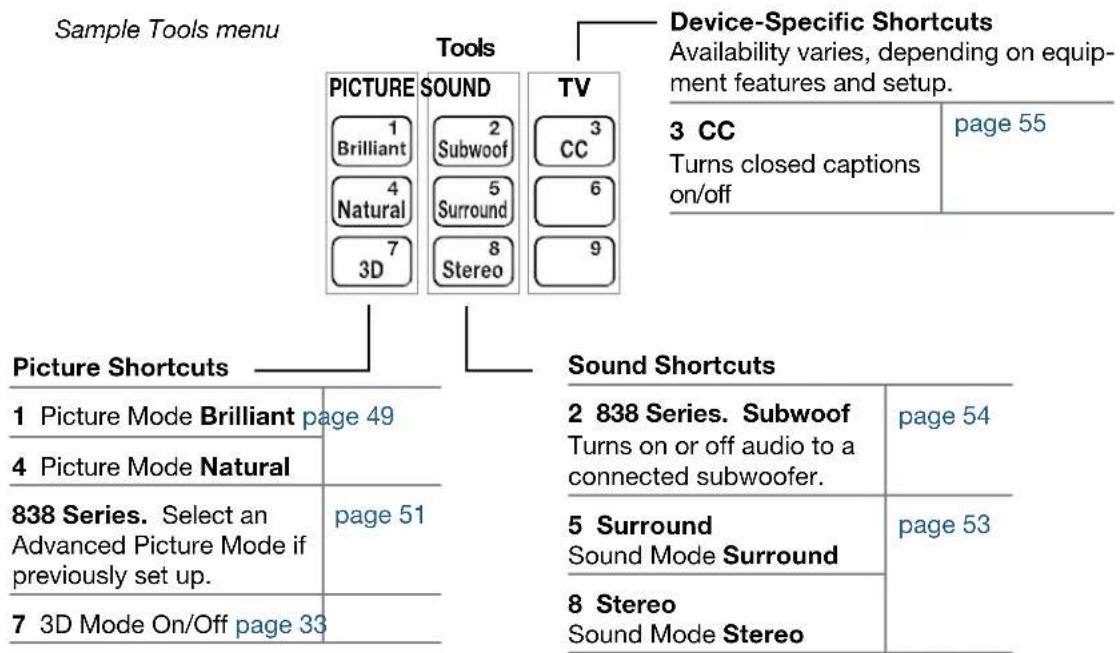
Press the TOOLS key to check for shortcuts. The Tools menu lists shortcut keys for common functions. Press the number key to activate the shortcut. See the sample menu below.
- Shortcuts specific to the current device are in the third column.
- Shortcuts may be available for a CEC-enabled device. See Appendix C, "HDMI Control of CEC Devices," page 85.
- 838 Series. After setting up NetCommand control for a device, check the Tools menu for shortcuts. See page 66.
flowchart
graph TD
    A["Sample Tools menu"] --> B["Tools"]
    B --> C["Picture Mode Brilliant"]
    B --> D["SOUND"]
    B --> E["TV"]
    C --> F["1 Brilliant"]
    C --> G["2 Subwoofer"]
    C --> H["3 Natural"]
    C --> I["4 Natural"]
    C --> J["5 Surround"]
    C --> K["6 3D"]
    C --> L["7 Stereo"]
    D --> M["8 Stereo"]
    E --> N["9"]
    B --> O["Device-Specific Shortcuts"]
    O --> P["Availability varies, depending on equipment features and setup."]
    O --> Q["Turns closed captions on/off"]
    O --> R["page 55"]

    S["Picture Shortcuts"] --> T["1 Picture Mode Brilliant page 49"]
    S --> U["4 Picture Mode Natural"]
    S --> V["838 Series. Select an Advanced Picture Mode if previously set up."]
    S --> W["7 3D Mode On/Off page 33"]

    X["Sound Shortcuts"] --> Y["2 838 Series. Subwoofer Turns on or off audio to a connected subwoofer."]
    X --> Z["5 Surround Sound Mode Surround"]
    X --> AA["8 Stereo Sound Mode Stereo"]
TV Controls, continued
TV Control Panel
Buttons on the control panel duplicate some keys on the remote control.
- To display the main menu, press INPUT and VOL+ simultaneously for about 10 seconds. Press and hold INPUT and VOL+ for 10 seconds to clear the menu.
- Refer to upper labels when no TV menus are displayed.
- Refer to lower labels when using TV menus or after activating a special function.

Sample TV controls and STATUS indicator
System Reset
If the TV fails to respond to the remote control, the control-panel buttons, or will not power on/off, perform System Reset. Recent setting changes made before using System Reset may be lost.
To perform System Reset, press and hold the POWER button on the control panel for ten seconds.
Panel-Lock Release
- To release the Panel Lock using the TV control panel, press and hold the INPUT button on the control panel for ten seconds. If the TV is off, press the POWER button to have it power on.
- To activate the Panel Lock, use the Lock menu, page 63.
The STATUS Indicator

| LED Color TV Condition | |
| None | TV is powered off. Normal operation. |
| Green | TV is powered on. Normal operation. |
| Green | TV powered off, auto-on TV Timer is set.Normal operation. TV can be turned on at any time. |
| Green | TV just powered off and lamp is cooling.Sixty seconds after turning off TV, LED will start to flash. TV can be turned back on before flashing starts or after flashing stops, but not while the indicator is flashing. Normal operation. |
| Yellow | TV is too hot. The TV will display a warning message and shut off if it overheats.Ambient room temperature may be too high. Turn off the TV and let the room temperature drop.Clear blocked air vents. Ensure at least a four-inch clearance on all sides of the TV. |
| Yellow | Lamp access door is not secure or no lamp installed.TV will not operate until lamp access door is secured. See Appendix D. |
| Red | Lamp failure. Replace the lamp. See Appendix D. |
| Red/Yellow | TV may require service.Hold power button on front panel for 10 seconds to reset TV.If LED continues to flash red and yellow after reset, turn off the TV and unplug it from the AC power source. Wait one minute and then plug the set back in.If LED continues to flash red and yellow, go to www.mitsubishi-tv.com or call 1-800-332-2119 to receive Authorized Service Center information.You may be asked to count how many times the LED flashes each color to aid in troubleshooting. |
Setting Up TV Inputs
Using the ANT (Antenna) Input
If using an antenna or direct cable service (no cable box), connect the incoming coaxial cable to the TV's ANT input. Refer to page 24.
You must perform a channel scan to enable reception of digital channels. If you skip this step, the TV will receive only analog channels. The channel scan will search for high-definition and standard-definition channels available in your area.
Memorizing Channels with Channel Scan
For the ANT input
To start channel memorization
- Power on the TV.
- Press MENU and open the Setup > Channel menu.


Start channel memorization from the Setup > Channel menu.
- Press ▼to enter the Channel menu.
- Highlight Ant Air if connected to an over-the-air antenna. Highlight Ant Cable for service over direct cable (no cable box). Press ENTER to add a check.
- Select the scan type.
• For first-time setup, highlight All channels.
- To scan for channels not already in memory, highlight Add only new channels. Press ENTER to add a check.

- Highlight Scan and press ENTER. Channel memorization may take up to 15 minutes to complete.
To stop channel memorization before completion, press CANCEL.
At any time after Channel Scan,
- Use the Setup > Channel > Edit menu (page 57) to add or delete individual channels from memory.
- Perform an additive scan with the New only option to add channels not already in memory.
- Repeat the All channels scan if you move the TV to a new geographic area with a different channel line-up or reposition the antenna.
Setting Up Inputs with Auto Input Sensing
- Power on the TV.
- Power on the devices to ensure detection.
- Connect one device to the TV, making note of the TV input jack.
The TV will display the New Device Found screen if the connection type is detectable.
- Highlight the device type in the on-screen list and press ENTER. The name you select here will appear in the Input Selection menu.

Important Note for NetCommand Users
838 Series. Be sure to select the correct device type here. Although you can change the device type later using the Inputs > Name menu, any "learned" NetCommand IR codes will be erased when you make the change.
- Press EXIT to close the New Device Found screen.
- Repeat the preceding steps for each for each additional device you want to add.
Setting Up TV Inputs, continued
About Auto Input Sensing
This TV's Easy Connect™ Auto Input Sensing feature detects the following connections automatically:
• Analog video jacks from inputs 1, 2, and 3
• HDMI inputs (when powered on)
- 838 Series. USB device containing photo and music files (JPG and MP3 formats).
Auto Input Sensing for Most Devices
When you first connect a device, the TV will:
a. Detect the connected device and automatically switch to it.
b. Prompt you to identify the device type.
c. Repeat these steps for other newly detected devices.
When You First Connect a Device
- Most Device Types. Select the device type from the on-screen list. The device type you select here will appear as an icon in the Input Selection menu.
- A/V Receiver. For an HDMI-equipped A/V receiver, select AVR from the list of device types if the A/V receiver is not recognized automatically.
- HDMI CEC Devices Compatible with the TV's HDMI Control Feature. Compatible CEC-enabled HDMI-equipped devices are often recognized automatically by the TV. HDMI Control may allow you to control some functions of a CEC-enabled device. See Appendix C, "HDMI Control of CEC Devices."

New Device Found screen for a device with HDMI control enabled. Select On if you want to enable the TV's HDMI control of the device. In some cases, as in the example above, you will also be prompted to select a device name.
Tips on Auto Sensing
- Choose a different name for each input.
- The antenna input (ANT) is never detected, although you can turn off the unused antenna input in the Inputs > Name menu.
- Change the device type displayed in the Input Selection menu by using the Inputs > Name menu (page 59).
- Some HDMI devices can automatically tell the TV what name to use in the Input Selection menu and you will be unable to change the name.
- The TV is unable to detect a new connection if the current input is USB, Bluetooth® (838 Series), or internet. Switch to a different input before connecting.
- 838 series. Any "learned" NetCommand IR codes will be erased if you change the device type in the Inputs > Name menu.
Reactivating Auto Input Sensing for an HDMI Input
After you disconnect an HDMI device, Auto Input Sensing is temporarily disabled for that HDMI jack. Perform these steps:
- Disconnect the HDMI device.
- Delete the removed HDMI device in the Inputs > Name menu (see "Removing an HDMI Device," page 87).
- Connect the new device and the New Device Found screen will display.
Basic TV Operation
Selecting an Input to Watch
- Press INPUT.

- Press ◀ and to highlight an input icon.

Sample Input selection menu, DVD input selected
- Press ENTER to switch to the input.
- To control the input device, use the device's remote control or see "Introduction to Home-Theater Control," page 48.
Note: In most cases, to see a named icon for a connected device (as in the samples), you must first assign a name either
- When the device is first connected and the New Device Found menu offers a choice of names.
- By using the Inputs > Name menu to assign or change a name at any time after the TV has detected the connection.
More About the Input Selection Menu
- To assign helpful names to the icons, see the Inputs > Name menu, page 59.
- To remove unwanted Antenna, Bluetooth®, or HDMI device icons from the Input Selection menu, see the Inputs > Name menu, page 59.
- To rearrange the icons, see the Inputs > Order menu, page 60.
Watching Broadcast TV
TV Connected to an Antenna or Direct Cable Service (no cable box)
Note: Perform channel memorization to enable reception of digital channels. See page 12.
- Press INPUT to display the Input Selection menu.
- Highlight the antenna or cable icon and press ENTER.

Sample Input Selection menu, antenna input selected
-
To tune to a channel from the ANT input, use any of these methods.
-
Enter the channel number using the number keys on the remote control and press ENTER. For a two-part digital channel, such as 3-1, press 3 CANCEL 1 ENTER.
- Press CH to change channels one channel at a time.
- Press and hold CH to speed through channels.
- Press LAST to return to the previous channel.
- Use the Fav (Favorites) feature to tune to up to nine favorite channels. See page 28.
- Press GUIDE to display ChannelView channel listings, highlight a channel number, and press ENTER to tune.
- Set up ChannelView custom channel banks and use the CH key to tune to predefined groups of channels. See page 29.
Basic TV Operation, continued
Picture Settings
- To get the best picture under different viewing conditions, set the Picture Mode first before changing other video settings. See page 49.
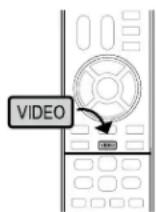
a. Press VIDEO.
b. Press ▼▲ until Picture Mode displays.
c. Press ◀▶ to make one of these selections:
| Name When to Use | |
| Brilliant | Under bright light |
| Game | With gaming consoles (inputs named Game or PC only) |
| Bright For most daytime viewing | |
| Natural For most nighttime viewing | |
- Press ▼▲ display the name of another adjustment.
- Press ◀ to make the adjustment.
- Press EXIT to clear the display.
Additional picture options are available through these menus:
| Picture > Video 49 | General picture appearance. | |
| Picture > Picture Plus | 50 | Screensaver control and adjustments for movies |
| Picture > Perfect (838 series) | 51 | Color fine-tuning |
| Picture > Advanced 51 | Advanced ISF color controls | |
| Picture > 3D Mode | 52, 33 | 3D video settings |
Basic Audio Controls
Controlling Sound Volume
- Press VOL to adjust the sound level of the TV speakers.
• See also “Controlling A/V Receiver Sound Volume” on page 31. - 838 Series. Control subwoofer volume with an on-screen slider. See page 53. Set Sound > Global > Subwoofer to On to make this adjustment available.

Changing Audio Settings (TV Speakers Only)
- Press AUDIO.
- Press ▼ find the adjustment you want. See page 53.
- Press ◀ to change.

Changing the Audio Output
To switch from the internal TV speakers to an external sound system,
- Press AUDIO.
- Press ▼▲ to display the TV Speakers option.
- Press ◀▶ to change to Off.
TV Care
- Lamp Cartridge. When the lamp cartridge needs replacement, replace the lamp yourself and save the cost of a service call. See Appendix D for instructions.
- General Cleaning. See "Cleaning Recommendations," page 90.
Assistance
- For troubleshooting, service, and product support, see Appendix E, starting on page 91.
• For warranty information, see page 105.
Basic TV Operation, continued
The FORMAT Key and Picture Shape

Repeatedly press the FORMAT key to cycle through displays for the current program. The TV will remember the format you last used on each input.
For details, see page 32
Important
Black bars at the edges of the screen are common in HD pictures. Black bars are not a defect of the TV.
- Black bars are added by broadcasters to fill the 16:9 screen area while preserving the original aspect ratio of the picture.
- Your cable box, satellite receiver, or other device may also be altering the broadcast picture. If your device offers output in native format, try using it with Mitsubishi picture formats.
Sample Uses of the FORMAT Key
If you prefer to reduce of eliminate black areas at the edges of the picture, use the FORMAT key.

natural_image
Child standing beside a large ball with stars, no text or symbols visible
natural_image
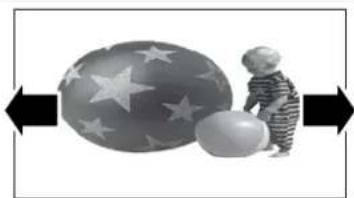
Child interacting with a large sphere made of stars, shown with bidirectional arrows (no text or symbols)Squarish 4:3 image is narrower than the 16:9 screen; unused areas at the sides are filled with black.
Wide Expand mode stretches the picture sideways to fill the screen.

natural_image
Black-and-white photo of a child standing beside a large star-patterned sphere (no text or symbols visible)

natural_image
Black-and-white illustration of a child standing beside a large sphere with stars, surrounded by directional arrows (no text or symbols)Wide 2.35:1 anamorphic DVD image; unused areas at the top and bottom are filled with black (letterbox effect).
Zoom mode. The picture fills the screen. All four edges are cropped in this mode.
More TV Features
| Feature | Page |
| Parental controls (Lock menu) | 61 |
| Audio Lock (controls your sound system with the TV's remote control left in TV mode.) | 78 |
| TV Clock. Set the TV Clock if you plan to use the TV Timer (page 56) or ChannelView (page 29). | 56 |
| Favorite channels or sources 28 | |
| ChannelView and custom channel collections 29 | |
| Changing the input names that appear in the Input Selection menu (Inputs > Name menu) | 59 |
| 3D Video 33 | |
| StreamTVTM internet access 45 | |
| Programming the remote control to operate other A/V devices | 77 |
| Feature | Page |
| Digital camera images as composite video 39 | |
| Controlling compatible devices using HDMI CEC control | 85 |
| 838 Series. Controlling A/V devices with Net-Command | 64 |
| 838 Series. Listening to a wireless audio device with the TV speakers | 40 |
| 838 Series. Using an external subwoofer. 26 | |
| 838 Series. Center and rear channel audio output | 27 |
Using the TV with a Personal Computer
Connecting a Computer to the TV
Use one of the connection methods listed below based on your computer's video output.
| Computer Video Output | Video Connection | Audio Connection |
| Digital DVI | DVI-to-HDMI cable or an HDMI cable with a DVI-to-HDMI adapter | Stereo audio cables |
| HDMI | HDMI-to-HDMI cable | No additional audio connection is required. |
IMPORTANT
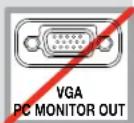
This TV accepts digital computer video signals only. This TV is not compatible with VGA (analog) computer video.
- Connect the computer's digital video output to one of the TV's HDMI jacks. See the connection diagrams on this page for the method suited to your equipment.
- Connect the computer's audio output using one of these options:
- For digital DVI video signals, connect the analog audio output to the TV's DVI/PC AUDIO INPUT jack.
- For HDMI signals, no additional audio connection is required.
Note: If you are unable to hear audio from the computer, there may be an incompatibility in the computer's hardware, software, or internal settings. Consult a trained computer technician for advice.
- Power on the TV and computer. The TV will detect the connection and display the New Device Found screen.
- In the New Device Found screen, press ▲▼ to highlight PC in the list of device types. It is important to use the name PC so that the TV processes the PC signal correctly.
- Highlight EXIT and press ENTER to close the New Device Found screen.
Note: If your computer provides digital audio output (coaxial or optical), you can connect it directly to a digital A/V receiver and bypass the TV.
HDMI Connection
Mitsubishi recommends using high-speed HDMI cables to connect newer devices incorporating HDMI technology.
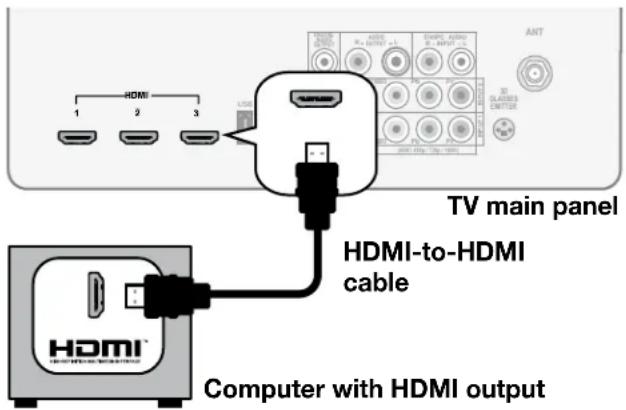
An HDMI-to-HDMI connection carries all video and audio on a single cable.
HDMI and Digital Surround Sound
838 Series. The TV's HDMI inputs can receive digital surround sound from an HDMI device. Use an HDMI connection if you want to hear digital surround sound from the TV's internal speaker array.
DVI Video Connection

A DVI connection from a personal computer requires a separate audio connection.
Using the TV with a Personal Computer
Computer Video Adjustments
- Power on the computer.
-
Select PC from the Input Selection menu. To do this, press INPUT to open the Input Selection menu, move the highlight to the PC icon, and press ENTER.
-
Working from the computer, change the resolution of the computer image. View the computer image on the TV and maximize the computer resolution while maintaining a suitable aspect ratio for the image.
-
Perform TV video adjustments. Press VIDEO repeatedly to access video-adjustment options.
-
Press FORMAT repeatedly to find the picture shape best suited to the image. See the chart on this page showing how different computer resolutions can be displayed on the TV.
Distortion in Computer Images
Computer images may show distortion when viewed on the TV, e.g., lines that should be straight may appear slightly curved.
Image Resolution
Your Mitsubishi TV can display the resolutions shown in the chart from standard VGA (640 x 480) through 1920 x 1080 signals at a refresh rate of 60 Hz.
In most cases, the computer will select the best resolution match to display on the TV. You can override this setting if you wish. Refer to your computer operating system's instructions for information on changing the screen resolution.
You may need to restart the computer for changes to take effect.
Tip
Set the computer's screen saver to display a pattern after several minutes of inactivity. This acts as a reminder that the TV is powered on and the lamp is in use. The lamp is in use whenever the TV is powered on, even if the screen appears dark.
Computer Display Formats
Press FORMAT repeatedly to cycle through the TV displays available for your computer's video signal.
| Computer Signal | As Displayed on TV Screen | |||
| Original Format | 4 X 3 Standard | 16 X 9 Standard | Zoom | |
| VGA640 X 480 | ||||
| SVGA800 X 600 | ||||
| Original Format Standard Zoom | |||
| XGA1024 X 768 | |||
| PC 720p1280 X 720 | |||
| WXGA1360 X 768 | |||
| SXGA1280 X 1024 | |||
| Original Format Standard Reduce | ||
| PC 1080p1920 X 1080 | ||
2
TV Connections
Before You Begin
Auto Input Sensing
The TV's Auto Input Sensing feature automatically recognizes many connections and prompts you to identify the type of device connected. See page 13 for more on Auto Input Sensing.
Connection Types
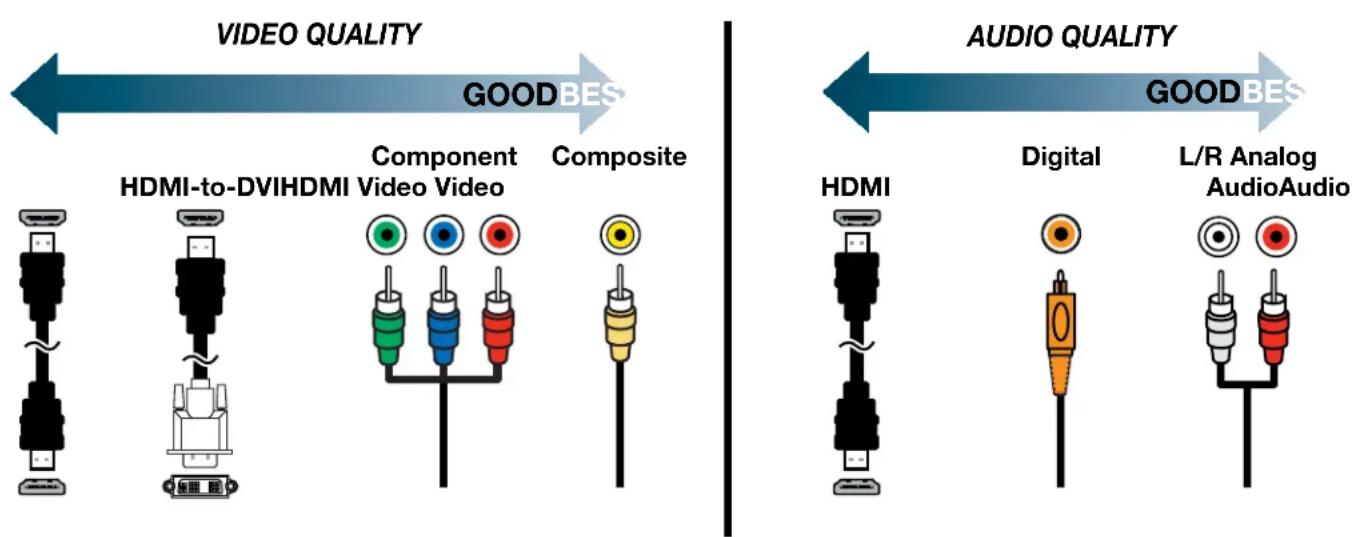
Use the connection types available on your input devices that will give the best video quality. For example, choose HDMI over component video; choose component video over composite video.
Picture Quality
For best picture quality, route signals directly from the source device to the TV whenever possible.
Surround Sound
- For best surround sound audio quality from an external sound system, route audio-carrying cables from the source device directly to your sound system.
- 838 Series. To use the surround sound capabilities of the TV's speaker array, you must connect your digital surround sound source to the TV on either
- An HDMI input
- The ANT antenna input
IMPORTANT
Accessory items such as cables, adapters, splitters, or combiners required for TV connections are not supplied with the TV. These items are available at most electronics stores.
Connection Types and Audio/Video Quality
Inputs and Outputs
Main Connection Panel
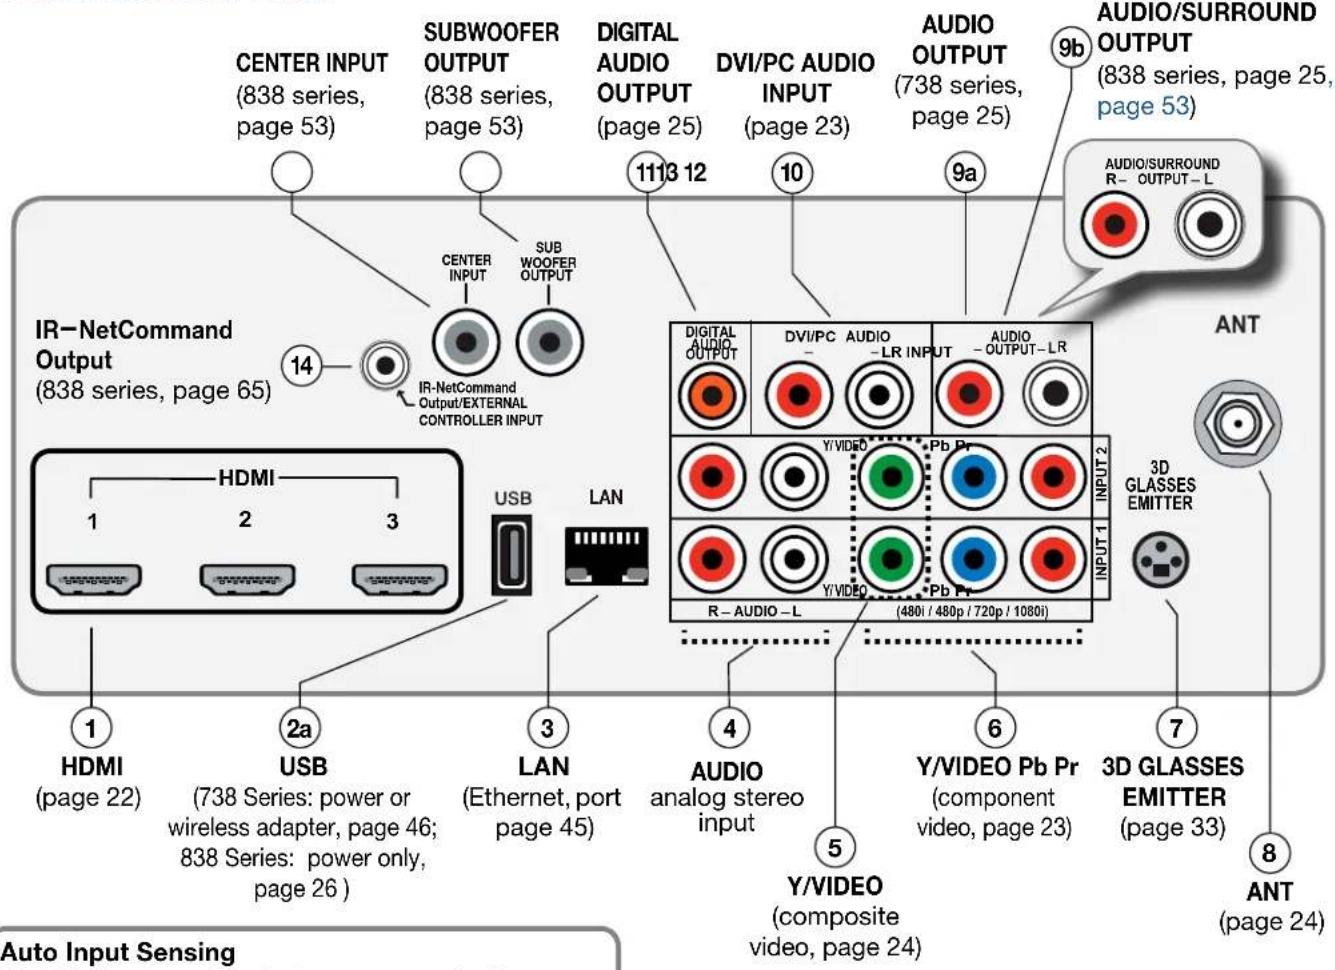
Auto Input Sensing
The TV's Auto Input Sensing feature automatically recognizes some connections and prompts you to identify the device type. See page 13.
Side Inputs
838 Series. A set of jacks is provided for a camcorder, game, or other audio/video device.
If you connect a DVI device to the side HDMI input, use the nearby audio jacks to send sound from the device to the TV.

Inputs and Outputs, continued
1. HDMI® Inputs (High-Definition Multimedia Interface)
The HDMI inputs support uncompressed standard and high-definition digital video formats, bitstream Dolby Digital 5.1, and PCM digital stereo audio. These inputs are HDCP (High-Bandwidth Digital Copy Protection) compliant.
Mitsubishi recommends you use high-speed HDMI cables to connect newer source devices incorporating HDMI technology. High-speed cables bring you the full benefits of Deep Color and x.v.Color.
These HDMI inputs can also accept digital DVI video signals. To connect a device's DVI output to the TV's HDMI input, use an HDMI-to-DVI adapter or cable plus an analog audio. Connect the audio cable to the DVI/PC AUDIO INPUT jack on the TV to receive audio from your DVI device.
Use the HDMI inputs to connect to CEA-861 HDMI compliant devices such as a high-definition receiver or DVD player. These inputs support 480i, 480p, 720p, 1080i, and 1080p video formats.
The TV's HDMI inputs are compatible with many DVI-D and HDMI computer video signals.
HDMI Cable Categories
HDMI cables are available as Standard and High-Speed types.
- High-Speed HDMI Cables. Newer DVD players, video games, and set-top boxes require High-Speed HDMI cables, suitable for clock frequencies up to 340 MHz or data rates of up to 10.2 gigabits per second. Use high-speed cables for 1080p HD signals carrying extended color encodings (i.e., 30 or more bits, also called Deep Color). High-Speed HDMI cables are also suitable for standard HDTV signals.
- Standard HDMI Cables. Standard HDMI cables may be unmarked. They are suitable for standard HDTV 720p, 1080i, and 1080p signals with 8-bit color depth. Use Standard HDMI cables for clock frequencies up to 74.25 MHz or data rates of up to 2.23 gigabits per second.
2a. USB (limited use)
Standard USB 5-volt, 500-milliamp power output you can use to supply power to an accessory device.
738 Series. Use this port for a wireless network adapter. See page 46.
2b. USB (838 Series)
- The TV can read JPEG photo files and mp3 music files from a USB storage device connected to this input.
- Connect a compatible wireless adapter to stream internet content to the TV (page 45).
- This USB port can be used to power accessory devices.
3. LAN
Use the LAN Ethernet jack for streaming internet video to the TV. See page 45 for setup.
4. AUDIO
Analog stereo inputs for use in conjunction with adjacent composite or component video jacks.
5. Y/VIDEO (Composite Video)
Analog standard-definition video inputs. Use the adjacent AUDIO R and L inputs if you wish to send audio to the TV speakers.
6. Y/VIDEO Pb Pr (Component Video)
Analog video inputs able to accept high-definition video from a high-definition source device. Use the adjacent AUDIO R and L inputs if you wish to send audio to the TV speakers.
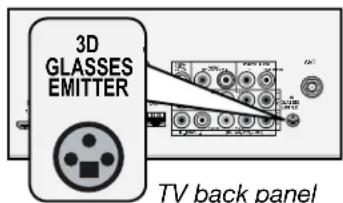
7. 3D GLASSES EMITTER
Use this jack for the special IR emitter supplied with some 3D glasses. The emitter sends out an infrared signal that synchronizes your 3D glasses with the screen display. See page 33.
8. ANT (Antenna)
Connect your main antenna or direct cable service (without a cable box) to ANT. The ANT input can receive digital and analog over-the-air channels from a VHF/UHF antenna or non-scrambled digital/analog cable source.
Inputs and Outputs, continued
9a. AUDIO OUTPUT
Sends analog audio of the current program to an analog A/V surround sound receiver or stereo system. Digital audio from digital channels and HDMI devices is converted to analog audio by the TV for output on this jack. This is the only audio connection needed to the TV if using an analog A/V receiver or stereo system.
Note: If connecting headphones, set Sound > Global > Analog Audio Out to Variable.
9b. AUDIO/SURROUND OUTPUT
838 Series. Sends out analog audio as described for other models or can be set for rear surround sound. Connect external rear speakers to this output for a fuller surround sound effect from the TV's speaker array, Set Sound > Global > Analog Audio Out to Rear (see "External Rear Speakers" on page 44).
10. DVI/PC AUDIO INPUT
Connect a DVI device to one of the TV's HDMI inputs and use this jack to send analog audio to the TV.
11. DIGITAL AUDIO OUTPUT
This output sends Dolby Digital or PCM digital audio to your digital A/V surround sound receiver. Incoming
analog audio is converted by the TV to PCM digital audio. If you have a digital A/V receiver, this is the only audio connection needed between the TV and your A/V receiver.
12. SUBWOOFER OUTPUT
838 Series. Connect a powered subwoofer to this input to complement effects from the TV's speakers. Set Sound > Global > Subwoofer to On to enable this output (see "Adding a Subwoofer," page 26).
13. CENTER INPUT
838 Series. Connect your A/V receiver's center channel output to this input to make the TV speakers output center-channel sound. Set Sound > Global > Center Channel to On to enable this input. See "Using the TV Speakers as a Center Channel," page 27.
14. IR-NetCommand Output
838 Series
As an output: Connect IR emitters to this jack to send NetCommand control signals to external IR-controlled devices.
As an input: Accepts control signals from an external controller when set up by your professional installer.
HDMI Device
Commonly used with an HDTV Cable Box, Satellite Receiver, or DVD/Blu-ray Player
Required: HDMI-to-HDMI cable.
Mitsubishi recommends using high-speed HDMI cables to connect newer devices incorporating HDMI technology. See “HDMI Cable Categories” on the previous page for more on HDMI cable types.
Connect an HDMI cable from the TV to the device's HDMI output. HDMI-connectable devices provide video and audio through a single cable.
Note: The HDMI connection supports copy protection (HDCP).
HDMI and Digital Surround Sound
738 Series. The TV's HDMI inputs can receive digital stereo audio signals only when using the TV speakers.
838 Series. The TV's HDMI inputs can receive digital surround sound from an HDMI device. Use an HDMI connection if you want to hear digital surround sound from the TV's internal speaker array.
For assistance call 1(800) 332-2119

Y Pb Pr Component Video Device
Commonly used with an HDTV Cable Box, Satellite Receiver, or DVD/Blu-ray Player
If your source device has an HDMI output, use the connections for HDMI devices described on the opposite page instead of component video.
Required:
• RCA-type component video cables
• Left/right analog audio cables.
Note: To hear digital surround sound from an A/V receiver, connect the digital audio output from the device directly to your digital A/V receiver.

DVI Video Device
Commonly used with a Cable Box, Satellite Receiver, or DVD Player
Connect a DVI device (digital only) to one of the TV's HDMI input jacks.
Required:
• Analog stereo audio cables
• DVI-to-HDMI cable or DVI/HDMI adapter and HDMI cable
If you are using a DVI/HDMI adapter, it is important to connect the adapter to the DVI device for best performance.
Some devices require connection to an analog input first in order to view on-screen menus and to select DVI as the output. Please review your equipment instructions for DVI connectivity and compatibility.
Note: The HDMI connection supports copy protection (HDCP).

Antenna or Cable TV Service
Connect the incoming cable to the TV's ANT input.

flowchart
graph TD
    A["Cable TV service"] --> B["In"]
    B --> C["OUT"]
    C --> D["Antenna"]
    D --> E["ANT"]
    E --> F["TV main panel"]
    G["Older cable box"] --> B
    H["Direct cable (no cable box)"] --> C
    I["Not recommended. Other connection types provide better quality audio and video."] --> E
    J["or"] --> E
Composite Video Device
VCR or other device with composite video output
Required:
• Composite video cable (usually yellow)
• Analog stereo audio cables.

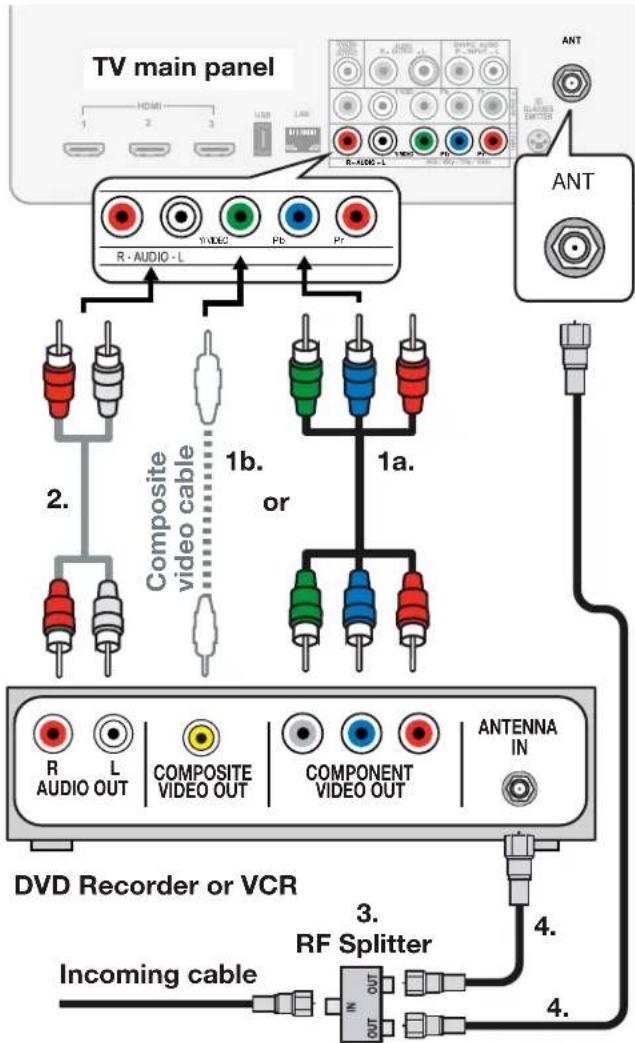
VCR or DVD Recorder to an Antenna or Wall Outlet Cable
Required:
- Video cables
1a. Component video cables (red/blue/green) or
1b. Composite video cable (usually yellow)
- Left/right analog audio cables.
- Two-way RF splitter
- Two coaxial cables
Note:
- Use composite video only if component video or HDMI are unavailable.
- If your recording device has an analog-only tuner, you must use a digital converter box to enable recording of digital broadcasts.
A/V Receiver
Most setups require either a digital audio cable or analog stereo audio cables. To send audio from TV channels received on the ANT input or devices connected directly to the TV, you must use one of the connections shown below.
The TV makes all audio available in digital and analog formats:
- Analog audio coming into the TV is available as output in digital stereo format on the DIGITAL AUDIO OUTPUT jack.
- Digital incoming audio is available as analog output on the AUDIO OUTPUT L and R jacks.

Note:
- On rare occasions, an HDMI signal may be copy-restricted and cannot be output from the TV as a digital signal. To hear these copy-protected signals through the A/V receiver, use the connection for an analog A/V receiver.
- Check the A/V receiver's Owner's Guide for information concerning use of the digital input and switching between digital sound and analog stereo sound from the TV.
A/V Receiver with HDMI Output
Required: One HDMI-to-HDMI cable
This option allows you to view content from devices connected to an A/V receiver. The A/V receiver can send audio and video to the TV over a single HDMI cable. You can use an HDMI connection as described here in addition to an audio connection from the TV's audio output. The optional audio connection allows you to hear, through the A/V receiver, devices connected to the TV only, e.g., an antenna on the ANT input.
- You may be able to use the TV's remote control (in TV mode) to operate connected CEC-enabled HDMI devices. Experiment with your equipment to determine which functions are available to the TV's remote control. See Appendix C, page 85.
- 838 Series: This setup allows you to use NetCommand-controlled audio and video switching over the HDMI cable. See "Automatic Audio/Video Switching Over an HDMI Connection" on page 72.
To use NetCommand to supplement HDMI control of a CEC-enabled A/V receiver, note the recommendations under "More About Using an HDMI Connection," page 72.

Supplemental Audio Connections
838 Series. Add a subwoofer to complement the TV's speaker array or use the TV's speakers as a center channel for your external sound system.
Adding a Subwoofer
Add a subwoofer to complement the TV speakers with a fuller bass sound.
- After connecting a subwoofer, you must enable the TV's subwoofer output in the TV's Sound menu. Go to Sound > Global > Subwoofer and set it to On.

- To control subwoofer volume, press the AUDIO key and then press ▼ to find the subwoofer volume slider. Press ◀ to change the volume.
Subwoofer with Audio Cable
Connect the subwoofer directly to the TV's SUBWOOFER OUTPUT.
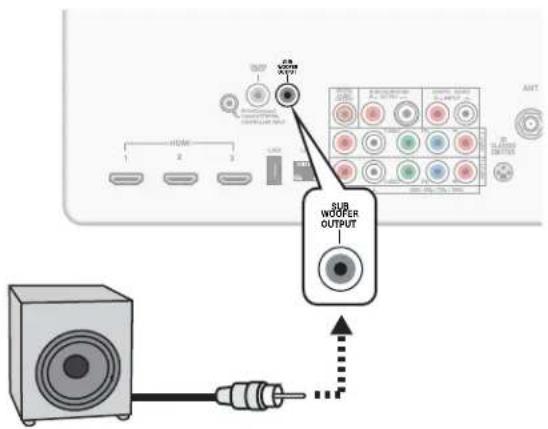
Subwoofer with audio connection to TV.
Wireless Subwoofer
Mitsubishi recommends Polk Audio Wireless Subwoofer model PSW i8m. The transmitter module can be conveniently powered from the TV's USB power port. Connect an audio cable to the transmitter to supply audio from the TV's SUBWOOFER OUTPUT.

flowchart
graph TD
    A["Power-only USB port"] --> B["USB"]
    B --> C["TV"]
    D["USB/USB mini-plug power cable"] --> E["USB"]
    E --> F["RCA/RCA audio cable"]
    F --> G["Polk Audio PSW i8m powered wireless subwoofer"]
Setup to send audio signals wirelessly to the subwoofer.
Supplemental Audio Connections, continued
Using the TV Speakers as a Center Channel
If using an external surround sound system, you can make the TV's speakers provide center channel sound. Your A/V receiver must have a center channel pre out that can supply an amplified center-channel signal to the TV.
- Connect your A/V receiver's HDMI output and center channel pre out to the TV as shown.
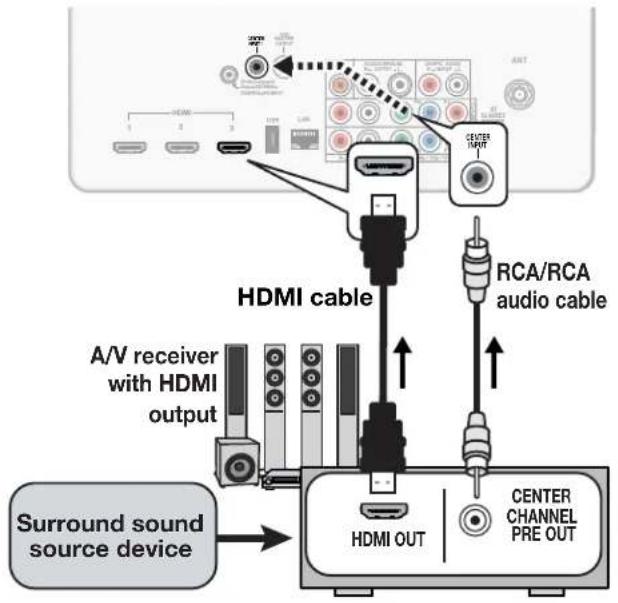
- Turn on the A/V receiver's center channel pre out if needed. See the A/V receiver's instruction manual.
-
Press the VOL key to adjust TV volume to about level 30.
-
Enable the TV's center channel mode:
a. Go to Sound > Global and set Center Channel to On.

b. Press the AUDIO key and press ▼ to display the TV Speakers option. Press ▶ to select Center.
- To balance volume:
a. Power on the A/V receiver and TV. b. Compare the volume of the TV's center channel with the rest of the sound system. If the TV volume needs adjustment,
i. Turn on the TV speakers. Press AUDIO and press ▼ to display the TV Speakers option. Press ▶ to select On.
ii. Adjust TV volume using the VOL key.
iii. Return the TV to center channel mode. Press AUDIO and press ▼ to display the TV Speakers option. Press ▶ to select Center.
iv. Compare the sound volume. Repeat this adjustment if needed.
3
TV Features
Sleep Timer
The Sleep Timer turns the TV off after the length of time you set. To set the TV to turn on at a certain time of day, see the Setup >Timer menu on page 56.
Setting the Sleep Timer
- Press SLEEP.

- Press SLEEP additional times to increase the time in 30-minute increments up to the maximum of 120 minutes.
- Press EXIT to clear the screen immediately. Otherwise the screen will clear after five seconds of inactivity.
Viewing or Changing the Sleep Timer
- Press SLEEP to display the on-screen message.
- Press SLEEP additional times to change the time before the TV powers off. To cancel the Sleep Timer, press SLEEP repeatedly until OFF is displayed.
FAV (Favorite Channels)
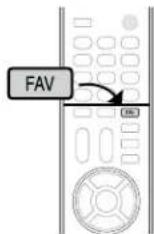
The FAV key gives you quick access to favorite program sources. Sources can be channels from the ANT input or devices connected to the TV. You can store up to nine favorites.
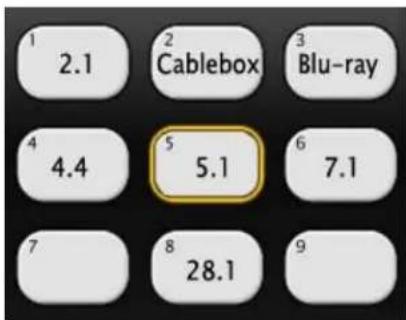
Sample Favorites menu. Switch to favorite channels or inputs using number keys.
Adding
- Press INPUT and switch the TV to the input you want to add. If adding a channel, switch to the ANT input and tune to the channel.
- Press the FAV key.
- Move the highlight to the number position you want to assign to the channel or input.
- Press ENTER.
Removing
- While watching TV, press the FAV key.
- In the Favorites menu, highlight the channel or input you want to remove.
- Press CANCEL.
Selecting
- While watching TV, press the FAV key.
- Move the highlight to the item you want and press ENTER. For a shortcut, just press the number key for the channel or input.
ChannelView Channel Listings
ChannelView displays program descriptions sent by broadcasters. This information may be unavailable in some areas.
About ChannelView
ChannelView™ shows memorized channels on the ANT input. It displays channel names and program information for digital channels. No program information is displayed for analog channels. See “Memorizing Channels with Channel Scan,” page 12 if needed.
ChannelView allows you to set up three banks of custom channels for convenient access. You can save groups of channels by content (e.g., news, sports, children's programming) or by TV user.
Note: You must first set the TV Clock (page 56) to receive ChannelView listings.
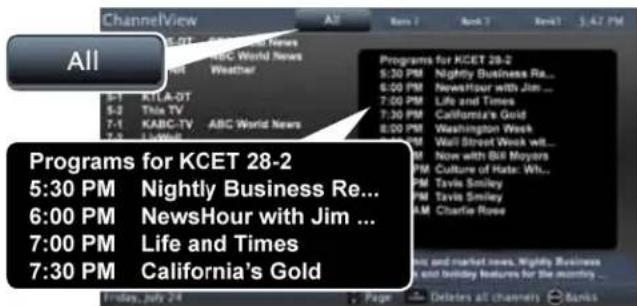
ChannelView, "All" tab. Programs are listed on the right.
Using ChannelView Listings
| Task Action | |
| Display/hide ChannelView listings (ANT input only). | Press GUIDE. |
| Move through channels one by one. | Press ▲ or ▼ |
| Move through channels quickly. | Press CH. |
| Jump to listings for a specific channel. | Enter the channel number. Press CANCEL to add a dash; press twice to clear the channel number. |
| Tune to a highlighted channel. | Press ENTER. |
| Update program information for a highlighted digital channel. | Press the INFO key (the screen may briefly go blank). |
| Display program descriptions, if available. The description will appear at the bottom of the screen. | 1. Press ▶ to move into the program area.2. Press ▲tomove between programs. |
| Display more program description for the current channel (if available). | Press INFO. |
ChannelView Custom Channel Banks

Select a channel bank to customize.
- Press GUIDE to display ChannelView.
- Press MENU to move the highlight to the bank header.
- Press ◀ to select Bank 1, 2, or 3.
- With the bank name highlighted, press ENTER to enter setup mode where you can select channels to include in the bank.
- Press EXIT when finished with setup.
| Task Action | |
| Move between banks | Press ◀ ▶. |
| Move into the channel list | Press ▼. |
| Add or delete a channel from the bank | Highlight the channel and press ENTER. A check indicates the channel has been added.Press ENTER again to clear the check and remove the channel. |
| Remove all channels from the selected bank | Press CANCEL. |
| Enter or exit setup mode Press MENU. | |
Using Custom Channel Banks
-
While watching TV, press CH. The TV will tune only to channels stored in the current bank.
• To change to a different channel bank: -
Press GUIDE.
-
Press MENU.
-
Press ◀▶
-
Press EXIT.
- To allow tuning to any channel in memory, select the All bank.
Status Display
Press the INFO key to see the on-screen status display. The most common displays are shown here.
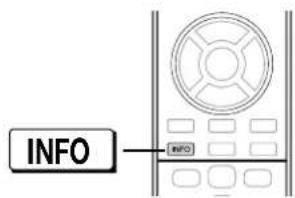

About Channel Numbers
Channel Numbers for Over-the-Air Reception or Reception by Direct Cable
Note: All signals are automatically converted to 1080p for display.
Standard-Definition Analog Channels

Receiving Standard-Definition Analog Signal (480i)
Standard-Definition Digital Channels
Over-the-Air Antenna Reception Main Channel 7 Sub-Channel 1


Receiving Standard-Definition Digital Signal (SD)
High-Definition Digital Channels
Over-the-Air Antenna Reception Main Channel 7 Sub-Channel 1


Receiving High-Definition Digital Signal (HD)
-
Current Input
-
Audio Indicator. Key:
TV speakers External sound system Mute
-
Channel number (antenna source only) Digital channel includes major and sub-channel numbers.
-
Digital channel name (if broadcast); antenna source only.
-
V-Chip rating
- Antenna source only for digital signal
-
Antenna or VIDEO composite jack for analog signal
-
Program name (if broadcast); digital source only
-
Program description (if broadcast); digital source, antenna only. Press the INFO key additional times to see more of the description.
-
Sleep Timer remaining time
-
Day and time
-
Signal type being received. See “Signal Definitions” on this page.
-
Screen format in use
-
Program audio indicator (antenna source only)
-
Available language (digital source, antenna only)
-
Signal-strength indicator (digital source, antenna only)
Signal Definitions
480i: Standard-definition, older type interlaced signals from the ANT input, composite VIDEO, component Y Pb Pr, or HDMI jacks.
480p: Standard-definition progressive-scan DVD signals on component Y Pb Pr or HDMI jacks.
720p and 1080i: High-definition signals received through component Y Pb Pr or HDMI jacks. These signals are always 16:9 (widescreen).
1080p: High-definition signals from a PC or Blu-ray player; HDMI inputs only.
SD 4:3: Standard-definition squarish-screen-format signals from digital channels on the ANT input.
SD 16:9: Standard-definition widescreen-format signals from digital channels on the ANT input.
HD 16:9: High-definition 16:9 widescreen signals from digital channels on the ANT input.
Using an External Sound System
Redirecting Audio Output
Selecting the Audio Output
- Press AUDIO.
- Press ▲ to show the TV Speakers option.
- Press ▶ to select either On (to hear sound from the TV speakers) or Off (to hear sound from an external sound system).
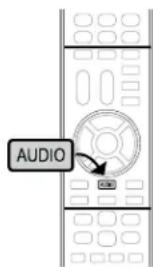
838 Series. Choose Center if using the TV speakers to supplement audio from an external sound system. See page 27.
Disconnecting an A/V Receiver
When you disconnect an A/V receiver, change the TV Speakers setting to On to hear sound from the TV speakers. Use either the remote control's AUDIO key or the Sound >Audio >TV Speakers menu (page 53).
Controlling A/V Receiver Sound Volume
Use one of the methods below to control sound volume from an A/V receiver.
With a Standard TV Setup
- Recommended Method: Program the TV's remote control for your A/V receiver and enable the Audio Lock feature. See page 78.
- Program the TV's remote control for your A/V receiver and set the control mode to AUDIO. Return the control mode to TV to control the TV.
- Use the remote control that came with the A/V receiver.
With HDMI Control (CEC-Enabled HDMI A/V Receiver)
The TV's remote control may control some functions of the A/V receiver. See Appendix C, "HDMI Control of CEC Devices," page 85.
With NetCommand IR Control
838 Series. Set up NetCommand control of the A/V receiver's volume functions in the Inputs > AVR menu. The TV's remote will then control A/V receiver volume. See page 71.
Picture Shape and Display Formats
Format Definitions
Note: See page 16 for use of the FORMAT key to apply the formats described here.
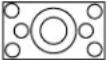
Standard: The full-screen format used by HDTV signals. Use this format to display anamorphic DVDs with a 1.78:1 or 1.85:1 aspect ratio. Anamorphic DVDs with a 2.35:1 aspect ratio are displayed correctly but with top and bottom black bars. Squarish (4:3) images are stretched evenly from side to side. Available for all signals.
Expand: Enlarges the picture to fill the screen by cropping the top and bottom; useful for reducing the letter box top and bottom bars of non-anamorphic DVD images.
Effect of Mitsubishi Formats on Picture Types
| TV Display Format ↓ | Original Signal  Non-anamorphic or SD 4:3 Non-anamorphic or SD 4:3 | Original Signal  Anamorphic DVD Anamorphic DVD | ||
| Standard |  | Distorted; Not recommended. |  | Recommended |
| Expand |  | Recommended for letterbox. See Note 1. | 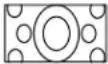 | Distorted; not recommended. See Note 1. |
| Zoom |  | Distorted; Not recommended. See Note 1. |  | Recommended for anamorphic 2.35:1 images. See Note 1. |
| Stretch | 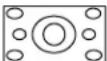 | Recommended for standard broadcasts. See Note 1. | 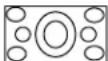 | Distorted; not recommended. See Note 1. |
| Stretch Plus |  | Recommended for standard broadcasts. See Note 1. |  | Distorted; not recommended. See Note 1. |
| Narrow | 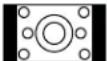 | See Note 1 Distorted |  | mended. See Note 1. |
Note 1: Available for 480i, 480p, and digital SD 4:3 signals only.
| Original Signal Display Formats | ||||
| SD 16:9 or HD Digital 720p, 1080i, 1080p Signal |  |  | Wide Expand | Recommended to remove side bars. |
 |  | Zoom | Recommended to remove bars from the top, bottom, and sides. | |
TV Display Formats. Press the FORMAT key repeatedly to see different displays for the current program. Press the INFO key to see the name of the format in use.
Zoom: Enlarges the picture to fill the screen by cropping the sides, top, and bottom to eliminate black bars.
- 480i/480p and SD 4:3 signals: Eliminates top and bottom bars on anamorphic DVDs with a 2.35:1 aspect ratio.
- 720p, 1080i, SD 16:9, and HD signals: Eliminates bars added to squarish 4:3 images.
Stretch: Stretches a squarish 4:3 image across the screen to display the entire image with less distortion than the Standard format.
Stretch Plus: Similar to Stretch, but minimizes distortion on the sides by expanding the picture to crop off portions of the top and bottom. Use ▲▼to adjust the vertical position of the picture.
Narrow: Displays narrow 4:3 images in their original shape. Adds black side bars to fill the screen.
Wide Expand: Enlarges the picture, cropping the image on both sides. Removes or reduces black side bars added to narrow images converted to 16:9 signals for digital broadcast.
Note: All high-definition channels send wide-screen (16:9) signals, but not all programming was created for the widescreen format. The broadcaster may stretch the image or add side bars to fill the widescreen area.
DVD Image Definitions
Image information may be stated on the DVD case. Some DVDs support both formats described below.
Anamorphic (or Enhanced for WideScreen TV) Indicates DVDs recorded to show widescreen images properly on 16:9 TV sets using the TV's Standard format mode (recommended).
Non-Anamorphic (or 4:3, 1.33:1, Letter Box, or Full Screen)
Indicates DVDs recorded for viewing on squarish TV screens. They may be full screen (4:3 or 1.33:1) which crops movies to fit the narrow TV, or letter box, which adds black top and bottom bars.
3D Video
Important
This page describes enhanced 3D options offered with TV software versions 012.06 and later. Instructions for earlier software are on page 33.
Enhanced 3D Video Options
(TV Software Versions 012.06 and later)
To display 3D gaming or 3D cinema content, your Mitsubishi TV requires:
- A compatible 3D source device outputting a 3D signal in one of these formats:
- Frame Packing 1080p/24 Hz or 720p/60 Hz
- Top-Bottom 1080p/24Hz or 720p/60 Hz
- Side-by-Side format, 1080p, 24/30/60 Hz; 720p, 60 Hz
- Checkerboard format, 1080p, 60-Hz; (lower resolutions may be supported but will not fill the screen)
• Active-shutter 3D glasses, DLP link type or IR emitter type with matching emitter
Automatic
- When the TV detects a 3D signal from an HDMI 1.4a-compliant device, it switches automatically to 3D mode and selects the correct 3D format.
- When receiving a normal 2D signal, the TV automatically exits 3D mode.
Which Software Version Is in My TV?
Press MENU to see your TV's software version displayed in the lower left corner of the main menu. Versions 012.06 and later carry enhanced 3D video options.

Initial Setup
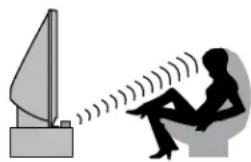
- If your 3D glasses came with an emitter box, connect the emitter box to the 3D GLASSES EMITTER jack. Place the box in front of the TV where there is a clear path to the glasses.
Note: If your glasses are marked DLP Link, skip this step; no emitter box is required with DLP Link technology.
natural_image
Illustration of a person sitting on a couch with sound waves, next to a monitor (no text or symbols)-
Power on the TV and the source device.
-
Connect the source device to the TV's HDMI input.
-
When the New Device Found screen displays, name the input.
-
Press EXIT to close the New Device Found screen.
Off
- Turns off 3D images.
- Restores normal TV operation when viewing a normal 2D signal.
Source Format
√ Off
Glasses L-R
√Standard
Glasses Control
√ IR Emitter
Automatic
Reverse
DLP Link
Side by Side
Top/Bottom
Checkerboard
Menu showing enhanced 3D options
Choice of Source Formats
If your device is non-HDMI 1.4a compliant, you must choose the correct setting from this list.
3D Video, continued
Watching 3D Video
Note: Active 3D glasses are required
- Switch the TV to the 3D video device. Press INPUT then highlight the icon for the 3D video device. Press ENTER.
- Press MENU and select the Picture > 3D Mode menu.
- For Glasses Control, select the control type for your 3D glasses, either IR Emitter or DLP Link.
-
For Source Format, select Automatic and press ENTER. Press EXIT to close the menu.
-
If the image looks correct, the device is HDMI 1.4a compliant. Always keep the setting at Automatic for this device.
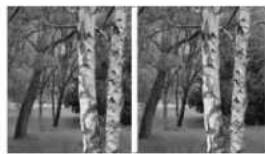
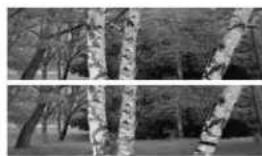
- For non-compliant 3D sources, open the Picture > 3D Mode menu and select a source format based on how the picture looks:
Side by Side
Screen split vertically
natural_image
Black-and-white photo of birch trees in a forest, showing tall trunks and sparse trees (no text or symbols)Top/Bottom
Screen split
horizontally
natural_image
Black-and-white photo of birch trees in a forest, no visible text or symbolsCheckerboard
Blurry double image
(Checkerboard
setting is always
required for check-
erboard signals)

natural_image
Black-and-white photo of a forest scene with trees and a white circle highlighting a specific tree (no text or symbols)- Press EXIT to close the menu.
- If the image does not appear correct (e.g., objects appear to be moving in instead of out), open the Picture > 3D Mode menu and set Glasses L-R to Reverse.
-
When finished watching 3D video:
-
If you manually selected a source format in the Picture > 3D menu, open the menu and select Automatic or Off.
- If your 3D video device is HDMI1.4a compliant, keep the setting on Automatic.
Notes on Using 3D Video Settings
3D signals and 3D settings affect some TV functions. Switch to a non-3D source to regain full TV operation. If Source Format is set to Automatic or one of the named 3D formats OR Source Format is set to Off and the 3D video source is HDMI 1.4a compliant (picture may appear as 2D), the following limitations apply:
- Picture adjustments are limited. To make picture adjustments while watching normal 2D images from the device, temporarily set Source Format to Off to make the full range of adjustments accessible.
• The FORMAT key is disabled.
• The INTERNET key is disabled.
Notice Concerning 3D Format Compatibility
(TV Software Versions 012.06 and later)
Mitsubishi 738 series and 838 series 3D televisions (the "TVs") will no longer require the use of an adapter when loaded with the software version of 012.06 (the "Software Update"). After the Software Update, the TVs will support the mandatory HDMI 1.4a 3D signals intended for the United States. Specifically, the TVs will support the 3D signals known as Frame Packing 1080p/24Hz and 720p/60Hz (primarily from Blu-ray players and gaming consoles), Side-by-Side in 1080i/60Hz, 1080p/24Hz/30Hz/60Hz
and 720p/60Hz, Top/Bottom in 1080p/24Hz and 720p/60Hz, and Checkerboard 1080p/60Hz. However, there may be some 3D sources that are not compatible with the TVs even after the Software Update. In all cases: (1) 3D sources must connect to the TVs using the HDMI inputs; and (2) Active Shutter 3D glasses with matching synchronization emitter or DLP Link Active Shutter 3D glasses are required in order to view 3D content.
3D Video, continued
Original 3D Video Options
(TV Software Versions 012.05 and earlier)
Important
This page describes 3D options offered with TV software versions 012.05 and earlier.
- To upgrade earlier software to the current version, visit http://www.mitsubishi-tv.com/3Dupgrade.html
• Instructions for later software are on page 35.
To display 3D gaming or 3D cinema content, your Mitsubishi TV requires:
- A compatible 3D source device outputting a 3D signal in one of these formats:
- Checkerboard format, 1080p, 60-Hz; (lower resolutions may be supported but will not fill the screen)
- Side-by-Side format, 1080p, 24/30/60 Hz; 720p, 60 Hz
• Active-shutter 3D glasses, DLP link type or IR emitter type with matching emitter
Initial Setup
See the instructions on page 33.
Watching 3D Video
Note: Active 3D glasses are required.
- Press INPUT.
- Highlight the icon for the 3D video device and press ENTER.
- Press MENU and select the Picture > 3D Mode menu.
- Select On for 3D Mode. The On setting will be memorized for the current input when you exit this menu.
Which Software Version Is in My TV?
Press MENU to see your TV's software version displayed in the lower left corner of the main menu. Versions 012.05 and earlier carry a limited choice of 3D video options.

- Select the Source Format. If your source device outputs an unsupported signal format see "Notice Concerning 3D Format Compatibility" on this page.
- For Glasses Control, select the control type for your 3D glasses, either IR Emitter or DLP Link.

Use the Picture > 3D Mode menu to enable 3D video.
- Press EXIT to close the menu.
- If the image does not appear correct (e.g., objects appear to be moving in instead of out), open the Picture > 3D Mode menu and set Glasses L-R to Reverse.
Watching Regular (non-3D) Video
The 3D Mode setting is memorized for each input. When you want to watch non-3D video on the input selected above, you can
- Open the Picture > 3D Mode menu and set 3D Mode to Off.
- Press the TOOLS key and select 3D option 7.
Notice Concerning 3D Format Compatibility (TV Software Versions 012.05 and earlier)
Mitsubishi 3DTVs (738 and 838 series) currently support the side-by-side 3D signal format. For support of other 3D formats, such as top-bottom and frame packing (3D Blu-ray standard), Mitsubishi 3D TVs will require the use of a 3D source device that outputs the 3D checkerboard format or a 3D source device coupled with the Mitsubishi 3D adapter. In all cases an emitter and matching 3D active shutter glasses or DLP Link active shutter glasses are required in order to view 3D content.
3D Video, continued
3D Safety Requirements
- 3D Glasses are NOT designed as sunglasses or safety glasses and do not provide protection. 3D glasses should be worn only when viewing 3D material.
- Do not wear the wireless glasses in any situations that require unimpaired visual perception.
- Children under the age of 5 should not view 3D programming.
Under normal conditions, 3D viewing is safe for your movies or games. Some people may experience discomfort, however. To minimize the potential for experiencing visual problems or any adverse symptoms:
- Read and follow any and all safety warnings that accompany your 3D glasses or 3D source devices.
- Maintain a distance of no less than 2 to 2.5 times the screen height measurement away from the display. Viewing from too short a distance can strain your eyes.
- Take regular breaks, at least 5 minutes after every hour of 3D viewing.
If you experience any of the following symptoms, discontinue 3D viewing until the symptoms go away:
• nausea, dizziness, or queasiness,
• headache, or eyestrain,
- blurry vision,
• double vision that lasts longer than a few seconds,
Do not engage in any potentially hazardous activity (for example, driving a vehicle) until your symptoms have completely gone away. If symptoms persist, discontinue use and do not resume 3D viewing without discussing your symptoms with a physician.
Do not use the glasses where loss of balance or limiting your field of vision may be dangerous to you.
Do not use near staircases, ledges or balconies. You may risk falling during or after use.
Epilepsy
WARNING! IF YOU OR ANY MEMBER OF YOUR FAMILY HAS A HISTORY OF EPILEPSY, CONSULT A PHYSICIAN BEFORE USING 3D VIDEO OR GAME PRODUCTS.
A small percentage of the population may experience epileptic seizures when viewing certain types of TV images or video games that contain flashing patterns of light.
The following people should consult a physician before viewing 3D Games or Video:
- Anyone with a history of epilepsy, or who has a family member with a history of epilepsy
- Anyone who has ever experienced epileptic seizures or sensory disturbances triggered by flashing light effects.
WARNING! SOME LIGHT PATTERNS MAY INDUCE SEIZURES IN PERSONS WITH NO PRIOR HISTORY OF EPILEPSY. DISCONTINUE 3D VIEWING IF YOU EXPERIENCE ANY OF THE FOLLOWING SYMP-TOMS:
• Involuntary movements, eye or muscle twitching
- Muscle cramps
• Nausea, dizziness, or queasiness
- Convulsions
- Disorientation, confusion, or loss of awareness of your surroundings
Do not engage in any potentially hazardous activity (for example, driving a vehicle) until your symptoms have completely gone away.
Do not resume 3D viewing without discussing the symptoms with your physician.
Camera Images and Music Files
- All Models. The TV can display still images or motion video from a camera through the Y/VIDEO port. See page 39.
- All Models. To play music through the TV speakers from an audio-only device, see "Using an Audio-Only Device," page 39.
- 838 Series. The TV can read photo and music files from a USB device. Photos must be in JPEG format and music files must be in mp3 format. To play music files while displaying a photo slide show, see "USB Media Setup Menu" on the next page.
- 838 Series. The TV can play music wirelessly using Bluetooth® technology. See page 40.
USB Source Devices (838 Series)
The USB Media Player Menu

USB Media menu, Photos option selected
Displaying the Menu
- Back up the data on your USB drive before connecting it to the TV. Mitsubishi is not responsible for any file damage or data loss.
- Connect your USB drive to the TV's USB port. The USB Media Player menu displays while files are being read. Wait until icons appear in the menu before continuing.

838 series. The TV can read photo and music files from the USB port.
- When the USB Media Player icons display, highlight one of these choices and press ENTER.
Photos
View photos or play a slide show

Audio
Listen to audio tracks or a playlist.

Setup
Perform setup for a slide show or playlist. If music and image files are both present, lets you play a slide show with music.
Notes on Using the USB Port
• The TV ignores all commands while reading files.
• Large files or high-capacity storage devices may take a long time to display.
- The TV can read files up to 10 MB in size with a maximum of 2,500 files stored on the device. The FAT16 or FAT32 file system is recommended.
• Use a USB drive instead of a card reader.
- Back up the data on your USB drive before connecting it to the TV. Mitsubishi is not responsible for any file damage or data loss.
Note: Some manufacturers' devices may be incompatible with the TV. If the TV is unable to display your photos, you can:
• Transfer files to a different USB device.
- Use your digital camera's composite video output. See page 39.
Picture Files Compatible with the USB Port
- Still images recorded on digital cameras using the Exchangeable Image File Format, version 2.1 (EXIF 2.1) standard for digital still cameras and Design Rules for Camera File Systems version 1.0 (DCF 1.0)
- Some images opened and resaved on a computer may not play back or may not display in the thumbnail list. This happens if the files were resaved in an incompatible format.
- Full path file names can be no longer than 50 characters and must end in a .jpg extension. Only the first 20 of the 50 characters will display.
The TV can read JPEG files as created by the camera. If you edit a picture file on a computer and resave the image, the TV may be unable to read the resaved file.
Camera Images and Music Files, continued


Using the Photos and Audio Menus
Use these keys with your photo and audio files.
| Key For | Photos or Audio Tracks |
| ▲▼◀▶ | Moves the highlight left/right through icons to selectPhotos, Audio, or Setup.Moves the highlight from item to item. |
| ▷or ENTER | Plays the slide show or playlist starting from the highlighted item. |
| || | Pauses a slide show or playlist. |
| ■ | Stops a slide show or playlist. |
| ◀◀ ▶▶ | Highlights the first or last item on the current page.Skips to the previous or next item during play. |
| CHPAGE | Displays the previous or next page of items.Skips immediately to the previous or next item during play. |
| GUIDE | Rotates an image clockwise in 90° increments. |
| INFO | Displays the item name during play. Press EXIT to clear. |
| EXIT | Clears file information from the screen. |
| MENU | Displays the main menu; stops play. |
| INPUT | Displays theInput Selectionmenu; stops play. |

USB Media Setup Menu
Use the USB Media Setup menu to set up play of a slide show or playlist.

- If JPEG image files and mp3 files are both on the USB device, choose from:
- Slideshow + Music
- Slideshow only
-
Music only
-
Interval. Select the type of time interval for display of each slide. The intervals may be longer for larger files than for smaller ones.
- Frequency. Select the number of times (frequency) to play the complete slide show and/or playlist.
• Show File Names. Choose Automatic or Off. - Press EXIT to close the USB Media Setup menu and return to the USB Media Player menu.
IMPORTANT
Always stop playback with ■(STOP) or change to a different TV input before disconnecting your USB device.
Camera Images and Music Files, continued
Photos and Motion Video as Composite Video
All Models. Connect the camera to the TV using a composite video cable and control the slide show or movie through the camera. The display resolution will be standard-definition (480i).
- Refer to the owner's manual supplied with the camera for instructions needed for this setup.
- Set the camera's output signal type to NTSC and put the camera into playback mode.
- With the camera still turned on, connect your digital camera's composite video cable (usually yellow) to the TV's Y/VIDEO jack. To hear audio, connect the camera's audio output cable to the AUDIO L jack.

Camera connection using a composite video cable
- When the New Device Found screen displays, assign the name Camcorder.
- Press EXIT to close the New Device Found screen.
- Highlight the icon for the camera input and press ENTER.

- If viewing photos, control the slideshow from the camera. Advance through the images manually or check if the camera can advance automatically.
Using an Audio-Only Device
All Models. To use the TV speakers with an audio device such as an MP3 or CD player with analog output, follow these steps.
- Insert an unused RCA-style connector into the Y/VIDEO jack associated with the TV's analog audio input. The presence of this connector activates the TV's auto-detection.
- When the TV detects the Y/VIDEO connector, it will display the New Device Found screen. Name the new input CD/Audio or MP3 Player.
- Connect left (white) and right (red) audio cables from AUDIO OUT on the device to AUDIO L and R on the TV.
- Keep the connector in the VIDEO/Y jack while using the audio-only device.

Camera Images and Music Files, continued
Wireless Audio Playback
838 Series. The TV's built-in speaker array can play audio from a handheld device using Bluetooth® A2DP (stereo audio) wireless technology. The TV can be paired with only one device at a time.
Pairing the TV with an Audio Playback Device
- Turn on the wireless device you wish to use for playback.
- Press INPUT to display the Input Selection menu.
Bluetooth icon in Input Selection Menu


- Highlight the Bluetooth icon and press ENTER.
- Wait for the pairing menu to display. Pair your device with the TV and then connect. Some devices pair and connect automatically, while others require you to enter the TV pass code displayed.
Note: If you have difficulty pairing, turn off all other Bluetooth wireless devices in the area.
- Use keys on the TV's remote control to control play-back. Not all keys work for all devices.

Resetting Bluetooth Pairing or Connection
Perform this reset if the audio device does not connect properly to the TV.
- If the audio device has been previously paired with the TV, delete the TV from the device's paired list.
- Go to the TV's Inputs > Name menu and highlight the Bluetooth icon. Press ENTER to select Off.
- Press EXIT.
- Go to the Inputs > Name menu and highlight the Bluetooth icon. Press ENTER to select On.
- Press EXIT.
Tips for Wireless Playback
- Selecting the Bluetooth icon at a later time will connect the TV again to the paired device.
- If the paired device is not available, the TV will accept pairing from a different device.
- Once connection is lost, the TV will power off after five minutes without receiving a signal.
- To clear a paired device, turn off the Bluetooth icon (Inputs > Name menu) or pair the TV with a different device.
- To remove the Bluetooth icon from the Input Selection menu, turn off the icon in the Inputs > Name menu.

Remove the Bluetooth icon from the Input Selection menu by turning off Bluetooth in the Input > Name menu.
Sound Projector (838 Series)
This setup is unnecessary if using the TV speakers as a center channel. See page 27.
Sound Projector Technology
838 Series. The TV's built-in speaker array can be adjusted to reflect sound off the room walls to create a surround sound effect. Setup can be performed either manually or automatically.
- To create the surround sound effect, the room walls must reflect sound and not be covered with sound-absorbent material.
- Repeat the setup procedure if you reconfigure the room's walls or furnishings.
Before You Begin
Positioning the TV
- Center the seating area in front of the TV and at least six feet away from it.
• Arrangements that give good results:

flowchart
graph TD
    A["Top Node"] --> B["Central Node"]
    B --> C["Left Node"]
    B --> D["Right Node"]
    B --> E["Left Node"]
    B --> F["Right Node"]
    style A fill:#f9f,stroke:#333
    style B fill:#ccf,stroke:#333
    style C fill:#cfc,stroke:#333
    style D fill:#fcc,stroke:#333
    style E fill:#cff,stroke:#333
    style F fill:#ffc,stroke:#333
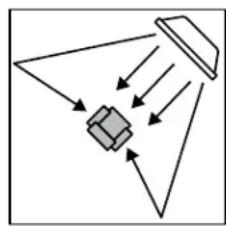
flowchart
graph TD
    A["Input Source"] --> B["Central Processing Unit"]
    B --> C["Output"]
    style A fill:#f9f,stroke:#333
    style B fill:#ccf,stroke:#333
    style C fill:#cfc,stroke:#333
- If the room is an odd shape, locate the TV to take best advantage of wall reflections.

flowchart
graph TD
    A["Central Unit"] --> B["Output"]
    A --> C["Process Unit"]
    A --> D["Feedback Loop"]
    A --> E["Feedback Loop"]
    A --> F["Feedback Loop"]
    A --> G["Feedback Loop"]
    A --> H["Feedback Loop"]
    A --> I["Feedback Loop"]
    A --> J["Feedback Loop"]
    A --> K["Feedback Loop"]
    A --> L["Feedback Loop"]
    A --> M["Feedback Loop"]
    A --> N["Feedback Loop"]
    A --> O["Feedback Loop"]
    A --> P["Feedback Loop"]
    A --> Q["Feedback Loop"]
    A --> R["Feedback Loop"]
    A --> S["Feedback Loop"]
    A --> T["Feedback Loop"]
    A --> U["Feedback Loop"]
    A --> V["Feedback Loop"]
    A --> W["Feedback Loop"]
    A --> X["Feedback Loop"]
    A --> Y["Feedback Loop"]
    A --> Z["Feedback Loop"]
    A --> AA["Feedback Loop"]
    A --> AB["Feedback Loop"]
    A --> AC["Feedback Loop"]
    A --> AD["Feedback Loop"]
    A --> AE["Feedback Loop"]
    A --> AF["Feedback Loop"]
    A --> AG["Feedback Loop"]
    A --> AH["Feedback Loop"]
    A --> AI["Feedback Loop"]
    A --> AJ["Feedback Loop"]
    A --> AK["Feedback Loop"]
    A --> AL["Feedback Loop"]
    A --> AM["Feedback Loop"]
    A --> AN["Feedback Loop"]
    A --> AO["Feedback Loop"]
    A --> AP["Feedback Loop"]
    A --> AQ["Feedback Loop"]
    A --> AR["Feedback Loop"]
    A --> AS["Feedback Loop"]
    A --> AT["Feedback Loop"]
    A --> AU["Feedback Loop"]
    A --> AV["Feedback Loop"]
    A --> AW["Feedback Loop"]
    A --> AX["Feedback Loop"]
    A --> AY["Feedback Loop"]
    A --> AZ["Feedback Loop"]
    A --> BA["Feedback Loop"]
    A --> BB["Feedback Loop"]
    A --> BC["Feedback Loop"]
    A --> BD["Feedback Loop"]
    A --> BE["Feedback Loop"]
    A --> BF["Feedback Loop"]
    A --> BG["Feedback Loop"]
    A --> BH["Feedback Loop"]
    A --> BI["Feedback Loop"]
    A --> BJ["Feedback Loop"]
    A --> BK["Feedback Loop"]
    A --> BL["Feedback Loop"]
    A --> BM["Feedback Loop"]
    A --> BN["Feedback Loop"]
    A --> BO["Feedback Loop"]
    A --> BP["Feedback Loop"]
    A --> BQ["Feedback Loop"]
    A --> BR["Feedback Loop"]
    A --> BS["Feedback Loop"]
    A --> BT["Feedback Loop"]
    A --> BU["Feedback Loop"]
    A --> BV["Feedback Loop"]
    A --> BW["Feedback Loop"]
    A --> BX["Feedback Loop"]
    A --> BY["Feedback Loop"]
    A --> BZ["Feedback Loop"]
    A --> CA["Feedback Loop"]
    A --> CB["Feedback Loop"]
    A --> CC["Feedback Loop"]
    A --> CD["Feedback Loop"]
    A --> CE["Feedback Loop"]
    A --> CF["Feedback Loop"]
    A --> CG["Feedback Loop"]
    A --> CH["Feedback Loop"]
    A --> CI["Feedback Loop"]
    A --> CJ["Feedback Loop"]
    A --> CK["Feedback Loop"]
    A --> CL["Feedback Loop"]
    A --> CM["Feedback Loop"]
    A --> CN["Feedback Loop"]
    A --> CO["Feedback Loop"]
    A --> CP["Feedback Loop"]
    A --> CQ["Feedback Loop"]
    A --> CR["Feedback Loop"]
    A --> CS["Feedback Loop"]
    A --> CT["Feedback Loop"]
    A --> CU["Feedback Loop"]
    A --> CV["Feedback Loop"]
    A --> CW["Feedback Loop"]
    A --> CX["Feedback Loop"]
    A --> CY["Feedback Loop"]
    A --> CZ["Feedback Loop"]
    A --> DA["Feedback Loop"]
    A --> DB["Feedback Loop"]
    A --> DC["Feedback Loop"]
    A --> DV["Feedback Loop"]
    A --> DW["Feedback Loop"]
    A --> DX["Feedback Loop"]
    A --> DXB["Feedback Loop"]

natural_image
Simple line drawing of a tilted rectangular object with arrows indicating direction, no text or symbols present.- Avoid locations that may distort sound reflections.

flowchart
graph TD
    A["Central Unit"] --> B["Component 1"]
    A --> C["Component 2"]
    A --> D["Component 3"]
    A --> E["Component 4"]
    A --> F["Component 5"]
    A --> G["Component 6"]
    A --> H["Component 7"]
    A --> I["Component 8"]
    A --> J["Component 9"]
    A --> K["Component 10"]
    A --> L["Component 11"]
    A --> M["Component 12"]
    A --> N["Component 13"]
    A --> O["Component 14"]
    A --> P["Component 15"]
    A --> Q["Component 16"]
    A --> R["Component 17"]
    A --> S["Component 18"]
    A --> T["Component 19"]
    A --> U["Component 20"]

flowchart
graph TD
    A["Top Box"] --> B["Central Unit"]
    B --> C["Output"]
    B --> D["External Process"]
    D --> E["Final Output"]
Connecting the TV
To hear digital surround sound, the TV must be connected to a digital surround sound source. The TV can receive digital surround sound from:
- Any HDMI jack
• The ANT input (from some digital broadcasts)
Other stereo connections will provide Dolby Pro Logic surround sound.
Basic Manual Setup
Note: If you have already performed Auto setup, do not make manual adjustments. Doing so will erase all settings created during Auto setup.
- Press MENU and go to Sound > SoundPro.

- Enter the room dimensions and layout information requested in the screen. To change measurements, press ▲▼

-
Press EXIT to exit and save settings.
-
Play some sample audio to check sound quality. If further adjustment is needed, use the Custom menu as described next.
Custom Menu
Use the Custom menu after defining the room layout.
For a room with large areas of curtains that might affect sound reflection, do the following:
a. Open the curtains fully to improve sound reflection.
b. Set angles by performing the procedure in "Adjusting Beam Angles."
c. Close the curtains.
d. Set levels by performing the procedure in "Adjusting Levels."
- From the Sound > SoundPro menu go to the CUSTOM menu.
Sound Projector (838 Series), continued

- Position yourself in your usual viewing location. Remain in this position, looking at the TV, while making the following adjustments.
- Adjusting Beam Angles
a. Adjust Center Beam Angle until sound is about equal in both ears.
b. Adjust Left Beam Angle to maximize sound heard from the front left side.
c. Adjust Right Beam Angle to maximize sound heard from the front right side.
d. Adjust Left Surround Beam Angle to where the sound seems to come from the left rear side. If this cannot be achieved, make the setting the same as that for Left Beam Angle.
e. Adjust Right Surround Beam Angle to where the sound seems to come from the right rear side. If this cannot be achieved, make the setting the same as that for Right Beam Angle.
- Adjusting Levels
a. Adjust Center Level to the mid level.
b. Adjust the following levels one at a time so that each one sounds about the same as the center level:
Left Level
Right Level
Left Surround Level
Right Surround Level
c. Check all sound levels by quickly switching between them using ▲.▼
d. Readjust individual levels in small increments and recheck as above until all sound levels seem about the same.
- Adjusting an External Subwoofer
Note: Set Sound > Global > Subwoofer to On to make this adjustment available.
a. Play sample video or music containing low-frequency bass sound.
b. Press AUDIO. Use ▲ to display the Subwoofer option.
c. Press ◀t▶ adjust the subwoofer volume.
How to Make Adjustments in the Custom Menu
- Press ▲▼ to select an audio beam; colors of the adjusters correspond to audio beams in the on-screen diagram.
- Press ◀▶ to redirect the audio beam or change the sound level.
| Left Beam Angle | (56) | |
| Right Beam Angle | (56) |
| Center Beam Angle | (0) |
| Left Surround Beam Angle | (46) |
| Right Surround Beam Angle | (46) |

natural_image
Abstract geometric pattern composed of interlocking colored lines forming a diamond shape (no text or symbols)Controls in the SoundPro
Custom menu adjust the
direction and focus of the TV's sound output.
At extreme beam angles, adjustment may be limited and the image on screen may not accurately represent the sound beams.
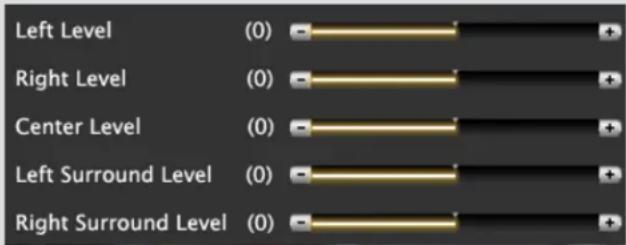
Adjust the volume level of individual audio beams using sliders in the SoundPro > Custom menu.
Resetting Angle and Level Values in the Custom Menu
Follow these steps to return settings to the default values.
- Press EXIT to clear all menus.
- Press MENU. Go to the Sound > SoundPro menu and press ENTER.
- Change any setting (e.g., TV Location).
- Press EXIT to clear all menus.
- Press MENU. Go to the Sound >SoundPro menu and press ENTER.
- Enter the correct values for the room layout.
- Return to the CUSTOM menu to adjust angles and levels.
Sound Projector (838 Series), continued
Auto Setup
Auto setup uses the included calibration microphone to optimize Sound Projector performance for most room conditions.
Initial Preparation
- Position and connect the TV as described under "Before You Begin," page 41.
- Power on the TV and external subwoofer, if any.
- Plug the microphone cable into the TV's INPUT 3 audio jack.

- Place the microphone as described in the guidelines on this page.
Start Auto Setup
- Press MENU and go to Sound > AutoSP.

- Highlight START and press ENTER.

- Quietly exit the room right away. The calibration sequence will start in a few seconds and may be loud. It is important to leave the room as your presence will interfere with the calibration process.
- Wait for completion of setup before returning to the room.
- Play some sample audio material to check the sound quality.
Note: Do not perform manual adjustments after running Auto setup, as this will erase all settings defined during Auto setup.
- Store the microphone out of direct sunlight and away from heat.
Microphone Placement
• Make sure there are no large obstacles between the TV and microphone.
- Place the microphone
- On a flat, level surface at least six feet away from the front of the TV.
- On a tripod or on the backrest of your seating.
- At the same height your ears would be when watching TV. The height must be within 3 vertical feet of the height of the TV's speaker array.
- Centered in front of the TV, not off to the side.

Microphone
Set the microphone on a level surface at ear height at least six feet from the TV. Use a seat backrest or tripod so as to pick up sound from all directions.

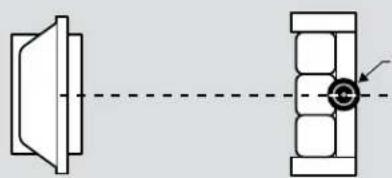
natural_image
Diagram showing a speaker emitting sound waves into a block, with no text or symbols present.Microphone
Center the micro- phone in front of the TV.
Sound Projector (838 Series), continued
External Rear Speakers
You may wish to supplement surround sound from the TV with external rear speakers. External speakers can fill in rear sound if your room lacks a rear wall suitable for reflecting sound. Mitsubishi recommends Polk Audio's F/X Wireless Surround system.

Polk Audio F/X Wireless Surround speaker unit
Sample room layout without a back wall suitable for rear sound reflections
- Position the external speakers as needed for rear sound.
- Connect analog audio output from the TV to the Polk Audio F/X Wireless Surround transmitter.
- Power on the TV, speakers, and transmitter.
- Set Sound > Global > Analog Audio Out to Rear.
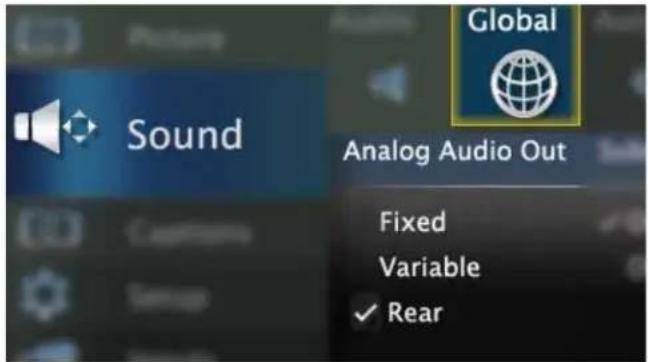
- Adjust the sound output. Go to the Sound > SoundPro > CUSTOM menu. Review the instructions in "Custom Menu," page 41.
a. Adjust beam angles for the left, right, and center beams. Because the external speakers output left and right surround beams and they do not appear in the adjustment image.
b. Adjust volume levels for all audio beams., including the left and right surround beams.
- Play sample audio to check the sound. Repeat any of the adjustments as needed.
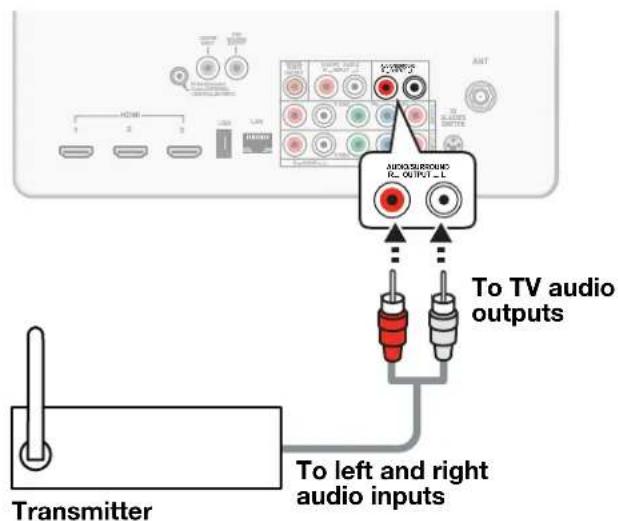
Connecting the transmitter to the TV

Sound Projector adjustments when using external rear speakers.
StreamTV™ Internet Media
Internet services provided by VUDU TM Apps let you access many popular on-line applications. In addition to free content, VUDU's movie service lets you buy and rent movies through the TV. Visit www.VUDU.com to learn more about available movie titles, prices, and services offered. For a list of recommended routers and switches, see the Support > Knowledge Database section at VUDU.com.
Note: From time to time you may notice changes to the internet interface as new features are added.
Home Network Setup
Before using StreamTV internet media, you must connect the TV to the internet using one of these methods.
Note: Make sure the TV is on any input other than the USB port or Bluetooth®. Press the INPUT key to change.
Ethernet Connection
DHCP (automatic)
- Connect the TV to your network router with a Category-5 Ethernet cable (not supplied).

Required for StreamTV internet media:
- Broadband internet service (at least 2 Mbps for SD, 4 Mbps for HD, and 8 Mbps for 1080p HDX)
- Ethernet cable or to connect wirelessly, an Azure-Wave AW-NU231 USB wireless adapter.
- Computer access to the VUDU.com website (required for initial account activation).
-
A credit card for rental and purchase transactions from VUDU's movie service.
-
Open the Setup > Network menu to review settings.

Setup > Network, DHCP connection
- Press EXIT to clear the menu.
Manual
Note: Manual setup is available only for a wired connection.
- Connect the TV to your network router with a Category-5 Ethernet cable (not supplied).
- In the Setup > Network menu, highlight Manual and press ENTER.
- Press ▶ to move to the Connection Data area.
- Input the connection data.
- After entering connection data, press ENTER to connect.
- Change any of the following if needed:
- Default Gateway
DNS - Subnet Mask
- Default Gateway
- DNS
- Subnet Mask
StreamTV™ Internet Media, continued
Wireless Connection
The TV requires an AzureWave AW-NU231 USB wireless adapter. The adapter is available from your Mitsubishi dealer.
- Disconnect the Ethernet cable if present.
- Connect the wireless adapter to the TV's USB port as shown for your TV model.
- Open the Setup > Network menu. After a few moments, detected networks will appear listed on the screen in order of signal strength.

Setup > Network menu, manual connection
- Highlight the desired network and press ENTER to connect. A check will appear next to the connected network. Press CH/PAGE to see more networks if the list fills more than one screen.

IEEE 802.11n-compliant wireless network router providing high-speed internet service
Incoming internet cable

Setup > Network menu after connecting. The active network is checked and connection data displays.
- If connecting to a secure network, enter the network key or password when prompted. Special remote control keys you may need:
| Key Use for | |
| 1 | Digit 1 and special characters!@#$%^*_-+=.SPACE? |
| CANCEL | Clears the password box of an old entry from a prior session.Deletes one character during pass-word entry. |
| LAST | Toggles between upper and lower case |
- Press ENTER to connect.
Note: If you notice interference from the TV's internal wireless components, turn off the TV's transmitter. Open the Setup > Network menu. Select Off and press ENTER.
To reconnect later, open the Setup > Network menu, highlight the network, and press ENTER.
StreamTV™ Internet Media, continued
Using StreamTV Internet Media
- After establishing internet connectivity as described in "Home Network Setup," page 45, switch the TV to any input other than Bluetooth® or USB.
- Press the INTERNET key to display services from VUDU Apps.
- Highlight an application and press ENTER to launch it.
Getting Started with VUDU Movies
- After establishing internet connectivity as described in "Home Network Setup," page 45, switch the TV to any input other than Bluetooth® or USB.
- Press the INTERNET key to display services from VUDU Apps.
- Highlight the VUDU movie service and press ENTER.
- Browse the VUDU movie catalog and offerings.
- When you are ready to rent or buy a movie, you will be prompted to activate your VUDU account. Follow the on-screen instructions and use a computer to go to www.VUDU.com/activation. A credit card is required for activation.
Once your account is activated, you can rent and buy movies using only the TV and the TV's remote control.
Troubleshooting
If You Are Unable to Connect to the Internet
- Check all power and data connections.
- If you can reach the internet with a computer or other device on the same internet service used by the TV, consult the router or modem owner's guide for reset instructions.
- If you cannot reach the internet, contact your service provider. You may be asked for network information such as the TV's IP address. Go to the Setup > Network menu to see connection data.
For Further Assistance
- If you are having trouble connecting your TV or accessing internet applications, contact Mitsubishi Customer Care at 1-800-332-2119.
- If you are having difficulty with your VUDU account, contact VUDU Customer Care at www.VUDU.com/support.
• See more troubleshooting tips on page 93.
Using VUDU Apps and VUDU Movies
Navigate VUDU's menus with the keys on the TV's remote control. Browse the movie catalog, watch movie previews, set parental controls, and rent or buy movies.
CANCEL. Acts like the backspace key during text entry.
ENTER
- Selects a menu item.
- Launches an application from the VUDU Apps menu.
- In VUDU's movie service, use during video playback to see options.

• Directional navigation
- In VUDU Apps, press ▲ to display more applications.
GUIDE. In VUDU's movie service, returns to the VUDU home menu.
INFO. In VUDU's movie service, works like the VUDU MORE key. Displays more options for the current selection if available.
F2. Displays the VUDU system menu if available.

TOOLS. Use the Tools menu to perform A/V reset while in VUDU movies or some VUDU Apps.
LAST
- Goes to the previous screen.
- Stops video playback and returns to the previous menu.
CH/PAGE. Jumps to the previous or next page of menu items.
INTERNET. Displays the VUDU Apps internet menu. Switch the TV to any input other than Bluetooth® or USB before connecting to the internet.
EXIT. Depending on context:
- Closes the internet menu.
- Goes to the VUDU home page.
In VUDU's movie service:
PLAY/PAUSE
Starts or pauses video playback.
FAST FORWARD/REVERSE
- Press to search scenes forward or back.
- Press additional times to speed up search.
- Press opposite key to slow and pause search.
STOP
Stops video playback and returns to the previous menu.
Introduction to Home-Theater Control
This TV offers a choice of home-theater-control systems. This summary offers some examples of the control methods available using the TV's remote control. You may wish to use one or more of these methods in your home theater after completing Auto Input Sensing.
Source device connected directly to the TV
Remote Control Programming (Any Connection Type)
Program the remote control to operate the A/V device. To control the device, set the remote control to the correct mode for the device type. See Appendix A, "Programming the Remote Control." In the case of an A/V receiver, use the Audio Lock feature, page 78.

CEC-Enabled HDMI Device (HDMI Connection Only)
See Appendix C, "HDMI Control of CEC Devices," page 85.
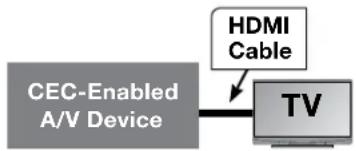
flowchart
graph LR
    A["CEC-Enabled A/V Device"] --> B["TV"]
    B --> C["HDMI Cable"]
838 Series. NetCommand IR Control (Any Connection Type)
Set up NetCommand IR control of the device's keys as desired. See "IR Emitters," page 65, and "Initial NetCommand Setup," page 66.

Source device connected to an A/V receiver connected to the TV
CEC-Enabled HDMI A/V Receiver
The TV's remote control may operate some functions of a connected A/V device. You can switch to the device by selecting its icon in the TV's Input Selection menu. See Appendix C, "HDMI Control of CEC Devices," page 85.

flowchart
graph TD
    A["CEC-Enabled Source Device"] --> B["A/V Receiver"]
    B --> C["TV"]
    D["HDMI Cable"] --> B
    E["HDMI Cable"] --> B
838 Series: A/V Receiver with HDMI Output (no CEC)
- Set up NetCommand IR control of the A/V receiver's keys as desired. See "IR Emitters," page 65, and "Setting Up A/V Receiver Control," page 71.
- Set up NetCommand IR control of the source device's keys as desired. See "NetCommand Control of a Device Connected to an HDMI A/V Receiver," page 74.

flowchart
graph TD
    A["Source Device"] --> B["A/V Receiver"]
    B --> C["TV"]
    D["Any Connection Type"] --> B
    E["HDMI Cable"] --> C
4
TV Menus
Main Menu
Press MENU on the remote control to open the main menu.

Picture
Picture settings. 49

Sound
Sound settings. 53

Captions
Closed captions on/and off; caption displays.
55

Setup
Basic TV setup. 56

Inputs
Name assignments for TV inputs, HDMI Control setup 838 Series. NetCommand IR "learning."

Lock
Setting a pass code and restrictions TV use. Disabling the control-panel buttons.

Picture
Assign a name to the TV input before making video adjustments (use the New Device Found or Inputs > Name menu). Adjustments will be reset to the defaults if you rename the input after making adjustments.
Picture Video


Settings in this menu are saved for the current input only.
To make Video adjustments while watching TV and without using the menu:
- Press the VIDEO key.
- Press ▲to▼select a video option.
- Press ◀▶ to change the setting.
| Picture Mode | Brilliant | For use under bright light; unavailable when the current input is named Game or PC. | Set the Picture Mode first before changing other video settings, as some settings are stored independently for each Picture Mode. Use Picture Modes to get the best image under different viewing conditions. |
| Game | Optimizes video processing for gaming consoles. Available only when the name of the input is Game or PC. | ||
| Bright | For most daytime viewing and x.v.Color sources | ||
| Natural | For most nighttime viewing and x.v.Color sources | ||
| Advanced | Contact your professional installer for setup or see page 51.738 series: Special/ADV838 series: ISF Day/ADV1, ISF Night/ADV2 | ||

Picture, continued
| Contrast | Low contrast shows a variety of shades in darker imagesIn most home lighting situations, medium contrast looks best.High contrast shows darker images more uniformly black and makes colors appear more vibrant. High contrast is good for brightly lit environments. | Adjusts the white-to-black level Settings are stored independently for each Picture Mode. | |
| Brightness | Adjusts overall picture brightness. Settings are stored independently for each Picture Mode. | ||
| Color | Adjusts overall color intensity from monochromatic to fully saturated. | ||
| Tint | Adjusts the red-to-green ratio. | ||
| Sharpness | Adjusts picture detail and clarity. | ||
| Color Temp | High | Gives white images a cool cast. May provide the most realistic picture under bright lighting. | Adjusts the white balance. Settings are stored independently for each Picture Mode. |
| Low Gives | white images a warm cast. Natural/Color Temp at the low setting displays video at approximately the 6500K industry standard for NTSC pictures. | ||
| Video Noise | High, Medium, Low, Off | High. For poor-quality signals.Medium. For moderate noise reduction.Low. For good-quality signals.Off. Leaves the picture unaltered. | Reduces minor noise (graininess) in the picture. |
| EdgeEnhance | On, Off EdgeEnhanceTM adds special edge enhancements to make the image appear sharper. | ||
| DeepField Imager | On, Off DeepFieldTM Imager dynamically enhances black levels in portions of the screen to provide strong contrast with detail over mixed screen content. | ||
| Demo | For comparison, displays a split picture to show On (right side) and Off (left side). | ||
Picture Picture+ (Picture Plus)


| Screensaver | On, Off | Select On to display a screensaver pattern while playing an audio-only input. To use this feature, the input must eitherBe named as an audio source (e.g., CD, MP3 Player, Bluetooth)orBe the antenna input tuned to an audio-only signal. |
| Film Mode | Auto, Off | 480i and 1080i signals only. In Auto, the TV automatically detects and applies film-de-coding correction to movies filmed at 24 frames per second. Try the Off setting if images show many jagged edges. Setting saved by input. |
| Smooth 120 | On, Off | When active, reduces motion blur in action scenes but may show pixel structure during slower motion or in still images. Works in conjunction with Film Mode. |
Test Picture
Displays a test picture.

Picture, continued
Picture Reset


- Resets sound and picture adjustments for the current input. Highlight the Reset icon and press ENTER twice to perform reset.
- Reset has no effect on universal settings (Balance, Listen To, Language) or on Advanced picture settings.
Picture Perfect


(PerfectColor/PerfecTint, 838 series)
PerfectColor Sliders
Adjusts the saturation (intensity) of six colors for the current image source.
PerfecTint Sliders
Adjusts six hues for the current image source
Using PerfectColor:
Highlight the Perfect icon and press ENTER to display the PerfectColor menu. Settings are retained independently for each TV input.
Using PerfecTint:
- To switch between PerfectColor™ and PerfecTint™ adjustments, highlight PerfectColor/PerfecTint and press ◀▶.
- Press ▲▼to move from one color bar to the next.
- Press ◀▶ to change settings.
- Press CANCEL to restore default settings.
- Press MENU to return to the main menu.
Picture Advanced


Picture > Advanced allows you to save highly customized picture adjustments for each input. Mitsubishi recommends these adjustments be made only by a trained professional installer.

- Press MENU. Under Picture, highlight the Advanced icon and press ENTER.
- With Picture Mode (the first option) highlighted, press ENTER to change from blank (undefined) to ADV. 838 Series: Choose ADV1 (daytime settings) or ADV2 (nighttime settings).
- Use ▲▼to highlight an option you wish to change and press ENTER to see the adjustment display.
- Press ◀▶ to change settings.
- Use ▲▼to navigate to additional options and press ◀▶to change settings .
- Press MENU to return to the Picture > Advanced menu and save the adjustments for the current input. Press EXIT to close the menu.
To use the custom Picture Mode at a later time
Press MENU and go to Picture > Video > Picture Mode and:
738 Series
- Select SPECIAL if settings were saved by your professional installer.
• Otherwise select ADV.
838 Series
- Select ISF Day or ISF Night if settings were saved by your professional installer.
• Otherwise select ADV1 or ADV2.

Picture, continued
To return to the default values for Advanced
Display the Picture > Advanced menu and:
| 738 Series 838 SeriesHighlight RESET Pic Mode and press ENTER. | 1. Highlight the Advanced mode to change.2. Highlight RESET Pic Mode and press ENTER. You must perform the reset separately for both ADV1 and ADV2 |
See page 33 for use of this menu.
TV Software Version 012.06 and Later
| Source Format | Off, Automatic, Side by Side, Top/Bottom, Checkerboard | Enables or disables 3D mode for the current input. |
| Glasses L-R | Standard, Reverse | Synchronizes left/right images to work with your 3D glasses. |
| Glasses Control | IR Emitter, DLP Link | Switches between control methods for 3D glasses. |
TV Software Version 012.05 and Earlier
| 3D Mode | Off, On Enables | or disables 3D mode for the current input. |
| Source Format | Checkerboard Side-by-Side | 3D formats supported by the TV. |
| Glasses L-R | Standard, Reverse | Synchronizes left/right images to work with your 3D glasses. |
| Glasses Control | IR Emitter, DLP Link | Switches between control methods for 3D glasses. |

Sound
Sound Audio


Settings in this menu are saved for the current input only with the exception of Balance and Subwoofer, which apply to all inputs.
To make Audio adjustments while watching TV and without using the menu:
- Press the AUDIO key.
- Press ▲to▼select an audio option.
- Press ◀▶ to change the setting.
TV Speakers On Turns on the internal TV speakers.
| Off | Turns off the internal TV speakers so you hear sound only from a connected A/V receiver.Note:When you disconnect an A/V receiver, be sure to change theTV Speakers setting toOnto hear sound from the TV speakers. | |
| Center(838 Series) | Makes the TV's speaker array act as a center channel. See “Using the TV Speakers as a Center Channel,” page 27.Notes:SetSound > Global > Center Channel to Onto make this setting available.To de-activate the center channel, change this setting toOnor Off. | |
| Bass | Controls volume of low-pitched sound from the TV speakers. | |
| Treble | Controls volume of high-pitched sound from the TV speakers. | |
| Balance | Controls audio balance between the right and left TV speakers | |
| Subwoofer(838 Series) | [Subwoofer level adjustment] | Adjusts the volume level of a connected subwoofer.Note:SetSound > Global > Subwoofer to Onto make this adjustment avail-able. |
| Sound Mode | Stereo | No special audio effects from the TV speakers |
| Surround | Modifies audio from the TV speakers.For monaural (non-stereo) programs, creates a simulated stereo effect.For stereo programs, creates a simulated surround sound effect.838 Series.The TV's speaker array plays 5.1 surround sound if available. | |
| Music(838 Series) | Optimizes the TV's speaker array for music listening. | |
| Night(838 Series) | Focuses the TV's speaker array to a single point to limit sound heard by others outside the room. PressENTERto adjust the focal point (Night Angle). | |
| Level Sound | On, Off | Reduces differences in sound volume between programming segments, such as the difference between regular broadcast programs and commercial segments. |
| Listen To(applies only to analog channels from the ANT input) | Stereo | The TV plays stereo broadcasts in stereo and mono broadcasts in mono. The wordStereois displayed when you tune to a channel broadcasting in stereo. |
| Mono | Reduces background noise. Use when receiving a weak stereo audio signal. All audio is played as mono. | |
| SAP(Second Audio Program) | Selects an additional monaural sound track not audible during normal TV viewing. The SAP signal might be related to the program (such as a sound track in a foreign language), or it might be unrelated (such as a weather report). If an SAP signal is broadcast, the lettersSAPare displayed when you tune to the channel. | |

Sound, continued
Sound Global



Settings in this menu apply to all left and right inputs.
Analog Audio Out
| These settings affect audio from the AUDIO OUTPUT jacks. | |
| Fixed Use with an analog A/V receiver. Control volume from the A/V receiver. The volume of the audio output signal is fixed and is unaffected by the TV's volume control. | |
| Variable | Use with headphones. Adjust headphone volume using the TV's volume controls. When set to Variable, the audio output signal is adjustable from the TV's volume controls. |
| Rear | 838 Series. Sends left and right rear audio to external speakers. Use when supplementing the TV's speaker array with external rear speakers. See “External Rear Speakers,” page 44. |
| 838 Series. Select On to turn on audio to a connected subwoofer. Set to Off if no subwoofer is connected. | |
| 838 Series. On allows the TV's speakers to complement your external sound system as a center channel. Set to Off if not in use. See “Using the TV Speakers as a Center Channel,” page 27. | |
Sound Auto SP


838 Series. Performs auto calibration of the Sound Projector speaker array. See "Auto Setup," page 43.
Sound SoundPro



838 Series. Lets you set up the Sound Projector speaker array manually. See page 41.

Captions
Captions on Digital Channels
The TV can decode captions from the ANT input only. Broadcasters can send up to six different captioning selections or can send analog captions for a program that originated in analog format. A TV station may broadcast only one or two types of captions or none at all.
Captions on Analog Channels
The TV can decode captions from the ANT input and the composite VIDEO jacks. Broadcasters can send either standard closed captions or text service. Standard closed captions follow the dialogue of the program and display in a small section of the screen. Text-service closed captions often contain information such as weather or news and cover a large portion of the screen.
IMPORTANT
- The content of captions is determined by the broadcaster. If captions show strange characters, misspellings, or odd grammar, it is not a malfunction of the TV.
- Closed-caption signals are not available through HDMI or component jacks. See the menus for devices connected to these inputs for closed-caption decoding.
- The Captions menu has no effect on captions displayed in programming received over the internet.
Captions Services


| Service | On if Mute, On, Off | On if Mute: Displays digital closed-caption signal Caption 1 (digital) or CC1 (analog) when audio from the TV speakers is muted. While watching TV, press MUTE to turn closed captions on/off. |
| Digital | Caption 1-Caption 6 | Caption signals sent by the broadcaster. |
| Analog | CC 1-CC 4Text 1-Text 4 | • CC 1-CC 4. Standard closed-caption signals• Text 1-Text 4. Text-service signals |
Captions Font


| Style | As Broadcast or choice of font styles | As Broadcast changes settings to those selected by the captions provider, or, if none, to the TV’s own caption defaults. Use one of the font styles to give digital captions a custom appearance. |
| Size | Large, Medium, Small | Large is recommended. |
Captions Color


| Font | White, Black, Magenta, etc. | Recommendations for digital captions: |
| Opacity | Translucent, Opaque, Flashing, Transparent | A white font on a black translucent back-ground makes an easy-to-read combination. |
| Background | White, Black, Magenta, etc. | Use contrasting colors for captions and back-ground. |
| Opacity(Background) | Translucent, Opaque, Flashing, Transparent |

Setup
Setup Language
| Menu | English Spanish | Displays on-screen menus in either English or Spanish. |
| Antenna Digital Audio | Selects the current language for a digital program from the ANT input. Each digital program may include up to seven language choices or there may be no language choice offered. | |
Setup Clock
Set the TV clock to:
• Use the TV Timer to power on the TV automatically at a preset time
• Receive correct updates to ChannelView listings
Note: When the Daylight Saving Time change occurs, you must open this menu and set the TV's clock ahead or back.
| Time | Highlight the Clock icon and press ENTER or ▼ to highlight the time. To edit time and date:Press ENTER to select the item to change. | |
| Date | Press ▲ ▼ o change values.Press ◀ ▶ to move to another column. | |
| Time Zone | Eastern, Central, Mountain, Pacific, etc. The correct time zone is required for accurate ChannelView updates. | |
| Daylight Savings | Off, On Select the setting for your area (required for accurate ChannelView updates). | |
Setup Timer
The Timer tells the TV to power on automatically at a time you set. Use this menu to set a day, time, input, and channel for the Timer. If the TV is already on at the set time, the TV will automatically change to the designated channel or input.
• The TV clock must be set before you can use the Timer feature.
• As a reminder that the TV Timer is set, the TV POWER indicator flashes slowly while the TV is powered off.
- When the Timer turns on the TV, press any key on the remote control to keep it from turning off after five minutes.
| Timer Day | On, Off | Select On to enable the Timer. | |
| Daily, Mon-Fri, (every) Sunday, (every) Monday, (every) Tuesday, etc. | Select the day or days of the week for the Timer to turn on the TV. | ||
Time To set the time for the TV to come on:
- Highlighted the time and press ENTER.
- Press ▲▼ o change values. Press ENTER to confirm entries.
| Device Ant, DVD, VCR, etc.Select the input you want displayed when the TV comes on. Choose from the defined and enabled inputs that appear in the Input Selection menu. |
Channel If the source is the ANT input, press ▲▼ to select a channel number or press and hold to scroll quickly.

Setup, continued
Setup Channel


| Ant Air,Ant Cable | You must perform a channel scan to receive digital channels. The scan searches for broadcast channels and adds them to TV memory. To start channel scan: |
| All Channels,Add only new channelsScan | 1. Highlight one of the input selections based on your connection to the ANT input:Air when connected to an indoor or outdoor antenna.Cable when connected to direct cable (no cable box)2. Select the scan type.Select All Channels for an initial scan or after moving the TV to an new area with a different channel line-up.Select Add only new channels to search for channels newly broadcasting since the previous scan.3. Press▶ to highlight SCAN.4. Press ENTER to start channel memorization.See below for additional notes on Scan. |
| Edit | After channel scan, Edit lets you add and delete memorized channels. Memorized channels are those you can tune using the CH key. Edit the channel list to limit tuning to channels you watch.Press CH/PAGE to jump to the next or previous page of channel numbers.Press ▲▼◀t▶move through all channel numbers, one at a time. |
Adding/Deleting Channels Using the Channel Edit Menu
• Channels marked with a check are in memory.
- To add or delete a channel from memory, highlight the channel number and press ENTER.
- To add a single digital channel not in the list, see the notes under Scan on this page.
- Digital channels are listed by virtual channel number with the physical channel number shown in small gray text.
- Virtual Channel Number (digital channels only). A channel number sent by a local broadcaster.
- Physical Digital Channel Number. The channel number officially assigned to the actual broadcast frequency; shown on screen in gray text.
Notes on Scan and Channel Memorization
- Channel memorization may take up to 15 minutes to complete.
- To stop channel memorization before completion, press CANCEL. Channels already added are retained.
- When watching TV, press CH to move through memorized channels. Press and hold CH to speed through channels.
• To add a digital channel that does not appear in the Edit menu without performing channel memorization:
- Look up the physical channel number for the new digital channel. See the website www.antennaweb.org for help.
- Press INPUT and select the ANT input.
- Use the number and CANCEL keys to enter the physical channel number followed by "-1" and ENTER. For example, for physical channel 36,
3 6 CANCEL 1 ENTER.
The TV will search for a digital channel on the channel 36 frequency. When it finds the channel, it will:
a. Add the channel to memory.
b. Change the channel number to the virtual channel number sent by the broadcaster.
c. Add to memory any associated sub-channels.
- Rememorize channels if you move the TV to a different geographic area with a different channel line-up.

Setup, continued
Setup Energy

| Lamp Energy | Standard, Bright | Standard is for most viewing conditions. UseBrightin brightly lit rooms. You may notice increased fan noise when using theBrightsetting. |
| Blue Glow (838 series) | On, Off | SelectOnto see blue accent lighting when the TV is powered on. |
Setup Network

| Ethernet Connection | DHCP (automatic), Manual |
| [Connection Data] | |
| Wireless Connection | [Network ID] |
| [Connection Data] | |
| Off. Turns off the radio receiver. Use this option if there is RF interference with other devices. |

Inputs
Inputs Name


INPUT and HDMI jacks: Cable box, Cam(corder), CD, DVD (DVD, DVD2, Blu-ray), DVR, Game (Game, PS, Xbox, Wii), Media Box, PC, Satellite, AVR On/Off (ANT, Bluetooth only)
INPUT jacks only: CD/Audio, MP3 Player, VCR
HDMI jacks only: PC, AVR, Delete
- Lets you assign or change names of inputs appearing in the Input Selection menu. Highlight an input and press ENTER multiple times to cycle through the name choices.
- Lets you turn the Ant and Bluetooth inputs On/Off to display or hide them in the Input Selection menu; highlight the input and press ENTER to switch between On and Off. A paired device is cleared from memory when the Bluetooth icon is turned off.
- Lets you delete unused HDMI inputs from the Input Selection menu.
• A CEC-enabled tuner can be named either Cable Box or Satellite.
• A CEC-enabled DVD player can be named DVD, DVD2, or Blu-ray.
General Notes for the Inputs > Name Menu
When you change an input name and then exit the Name menu:
• The name is changed
• The icon in the Input Selection menu is changed
- Audio and video settings are changed to the defaults for the new device type.
- 838 Series: All previous NetCommand IR "learning" for the input is erased.
Notes for HDMI devices
- Disconnecting an HDMI device: When you disconnect an HDMI device, the icon remains in the Input Selection menu until you remove it. Select Delete in the Inputs > Name menu to remove an unwanted icon for an HDMI input.
- If the New Device Found screen does not display as expected when you connect an HDMI device, see "Reactivating Auto Input Sensing for an HDMI Input," page 13.
- HDMI Control and CEC-Enabled Devices: See Appendix C, "HDMI Control of CEC Devices," page 85.
- In case of CEC conflicts: Turn off CEC signals in these ways:
- Turn off the TV's HDMI Control signals to the device (Inputs > HDMI Control menu).
- Turn off each device's internal CEC capability.
See Appendix C for the TV's HDMI Control or, to turn on/off a specific device's response to CEC signals, see the device owner's manual.
Inputs Learn


838 Series. Sets up or changes NetCommand IR control of the current device.
See "About NetCommand IR Control," page 64.
Inputs AVR


838 Series. Sets up or changes NetCommand IR control of an A/V receiver.
See "NetCommand IR Control of an A/V Receiver" on page 70.
Inputs



On, Off
Select On or Off to enable or disable the TV's control of a CEC-enabled device. See Appendix C for use of this feature.

Inputs, continued
Inputs Order


Lets you rearrange icons in the Input Selection menu.
- Press ▲▼◄t►highlight an input icon.
- Press ENTER to confirm the selection.
- Press ▲▼◀▶ to drag the icon to the desired position.
- Press ENTER to confirm the new position.
Inputs Demo


See demonstrations showcasing selected TV features.

Lock
TV Locks
Parental | Lock by Program RatingsRestricts access using U.S.-based ratings sent by broadcasters. |
Time | Lock by TimeRestricts TV use by time of day. |
Channel  | Lock by ChannelBlocks access to the channels you specify. |
Panel | Lock Control PanelDisables the buttons on the TV's control panel. Use this feature if small children in the home try to press buttons on the control panel. |
Other | Lock by Other Program RatingsRestricts access using new or non-U.S.-based ratings sent by broadcasters. |
Pass Code
Setting a Pass Code
You are prompted to enter a pass code whenever you select Lock on the main menu. To set a pass code for the first time:
- Press MENU. Highlight Lock and press ENTER. A screen prompting you for a pass code will display.
-
Input a four-digit pass code using the number keys on the remote control.
-
Press CANCEL to delete a number and move back one space.
-
Press MENU or EXIT to close the menu without setting a pass code.
-
Press ENTER to confirm the pass code.
Resetting a Pass Code
See the procedure in Appendix B.
Parental Menu
The TV comes from the factory with the rating locks turned off and with pre-set U.S. ratings TV-PG and movie rating PG. You must turn on blocking for U.S. ratings to activate these rating restrictions. Use the Lock > Parental menu to change the level of blocking with U.S. ratings.
Any time you change the channel or device, it may take up to five seconds for the rating restrictions to take effect.
Note: To set parental controls for programs from the VUDU TM movies service, use the VUDU Info & Settings menu. The TV's Parental menu does not control content received through VUDU.
Other Menu (Alternate Rating System)
This TV can recognize new rating systems that may come into effect in the future. The Other menu allows you to block digital programming when such systems come into effect. The Start Time and Stop Time options in the Parental menu apply to U.S.-based ratings only and do not affect alternate rating systems.
The first time you tune to a channel broadcasting an alternate rating system, the TV defaults to the most restrictive setting if the Lock menu > Other Lock option is set to On. Use this menu to change the allowed rating if you are unable to watch a program rated with an alternate system.
Bypassing TV Locks
- If you try to watch a blocked program or channel or the TV is locked by time, a notice will appear prompting you for a pass code. To use the TV, input your four-digit pass code and press ENTER.
- To reactivate the locks after using a pass code, power the TV off and then on.
- To reactivate only the parent ratings lock, change to a different channel or device.
- If a program is blocked, you can still use the TV without entering a pass code. Change to a channel airing an allowed program or change to another device.
Important Notes on Rating Locks
- Parental menu rating locks apply only to channels and signals received on the ANT and composite VIDEO jacks.
- Other menu rating locks apply only to digital channels received on ANT.
- When viewing a cable box, satellite receiver, or other device connected to the component Y Pb Pr or HDMI inputs, check the device's owner's guide for parental locks.

Lock, continued
Lock Parental


Lock
TV Rating
Disables or enables blocking based on V-Chip signals and the U.S. rating system.
Highlight the rating level you wish to change and press ENTER to block it ( ) or allow it ( ).
You can apply supplemental content blocking to the age-based ratings by using the TV content categories. (FV, D, L, S, V)

Movie Rating
Highlight the rating level you wish to change and press ENTER to block it () or allow it (). You can apply supplemental blocking to the age-based ratings by using the TV content categories below.
Start Time/Stop Time
Sets the time of day for enforcement of rating restrictions chosen in the Parental menu. To make rating restrictions active 24 hours a day, make Start Time and Stop Time the same.
- Highlight the start time or stop time.
- Press ENTER to start editing.
- Press ▲▼ to make changes.
- Press ENTER to confirm changes.
| TV Program Ratings | ||
| TV Age-Based Ratings | TV-Y | Youth. For children under 7. |
| TV-Y7 | Youth 7 and older. | |
| TV-G | General Audience. For the entire family. | |
| TV-PG | Parental Guidance. Parental Guidance recommended; may not be suitable for some children. | |
| TV-14 | Adolescent 14 and older. Not recommended for children under 14. | |
| TV-MA | Mature Audience. For adults only. | |
| TV Content Categories | FV | Fantasy Violence. Applies to TV-Y7 only. |
| D | Sexual Dialog. Applies in differing degrees to TV-PG and TV-14. | |
| L | Adult Language. Applies in differing degrees to TV-PG, TV-14, and TV-MA. | |
| S | Sexual Situations. Applies in differing degrees to TV-PG, TV-14, and TV-MA. | |
| V | Violence (graphic or realistic). Applies in differing degrees to TV-PG, TV-14, and TV-MA. | |
| Movie Ratings | |
| G | General Audience. Designed for the entire family. |
| PG | Parental Guidance. Parental Guidance recommended; may not be suitable for some children. |
| PG-13 | Parental Guidance, 13 and Older.Not recommended for children under 13. |
| R | Restricted. Restricted in theaters to 17 years old and older unless accompanied by an adult. |
| NC-17 | No Children 17 or Under. Restricted in theaters to 18 years old and older. |
| X | Adult. Designed for and restricted in theaters to adult audiences only. |
| Not Rated | No MPAA rating assigned |

Lock, continued
Lock Time


Blocks all use of the TV during the time period you specify. You must enter a pass code to use the TV when the time lock is in effect. After releasing the lock with the pass code, the lock does not go back into effect until the next time the TV is powered on.
Lock by Time Enables/disables Lock by Time.
Lock Time, Unlock Time
To set the lock and unlock times:
- Highlight the lock or unlock time.
- Press ENTER to start editing.
- Press ▲to make changes.
- Press ◀▶to move to another column.
Note: To make Lock by Time active 24 hours a day, make Start Time and Stop Time the same.
Lock Channel


The Channel Lock menu lists channels currently in memory (see page 57). Highlight a channel and press ENTER to lock () or allow () the channel. Channels locks will be cleared the next time you perform a channel scan.
Lock


Panel

Off, On
On locks and Off unlocks the buttons on the TV's control panel. Use this option if small children try to press TV buttons.
- To release the Panel Lock using the TV's control panel, press and hold the INPUT button for ten seconds. If the TV is powered off, press and hold INPUT for ten seconds and then press POWER to make the TV power on.
• To reactivate the lock, return to this menu and change the setting to On.
Lock Other


Other Menu Options (alternate rating system)
This TV can recognize new rating systems that may come into effect in the future. Such alternate rating systems will apply only to digital programming received on the ANT input.
Lock On, Off Enables/disables program blocking.
System The rating system available for the channel
Group Rating groups available in the rating system shown on the screen. Rating groups are defined by the rating system in effect.
Rating Rating restrictions available in the selected rating system and group. Highlight the rating and press ENTER to check (block) or uncheck (allow) rated content.
5
NetCommand IR Control
About NetCommand IR Control
- NetCommand IR home-theater control is available on 838 series TVs.
- IR emitter cables are available for purchase from Mitsubishi. Visit www.mitsuparts.com or call 800-553-7278 and request one of the following:
- 242D483020 (two-ended cable)
- 299P254020 (four-ended cable).
• NetCommand setup is optional. - You can perform NetCommand setup for a device any time after the TV has detected the device.
- NetCommand operates by sending remote control signals from the TV to your other devices via the
IR (infrared) emitters, telling the devices to play, record, change inputs, adjust volume, change channels, or perform other functions. All this is accomplished with the TV's remote control left in TV mode.
- You may wish to use NetCommand IR control to supplement control of CEC-enabled devices.
Important Note on NetCommand
Be sure to connect the IR emitter cable to the TV and properly place the emitters so that NetCommand can control your devices.
IR Emitters
Placement
The NetCommand system uses emitters connected to the IR-NetCommand Output jack to control other devices such as DVD players, cable boxes, satellite receivers, and VCRs.
IR emitter cables are available for purchase from Mitsubishi. Request either part number 242D483020 (two-ended cable) or part number 299P254020 (four-ended cable).
- Connect the plug end of the IR emitter cable to the IR—NetCommand Output jack on the TV back panel.
- When the New Device Found screen displays, highlight IR—NetCommand Output.
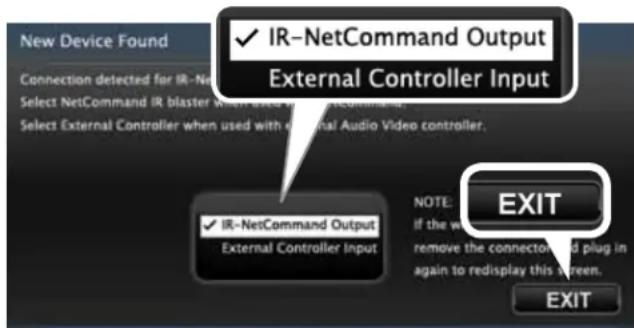
The New Device Found screen displays when you connect the IR emitter.
- Highlight EXIT and press ENTER.
- Position the emitter end with the emitter bulb facing the device's remote control sensor. The bulb emits infrared light in a cone-shaped pattern. Place the bulb far enough from the sensor to allow the cone pattern to reach the sensor.
In some cases, the emitter works better facing downward from the top of the device. Experiment to find what works best.
- Secure the emitter ends in place using double-sided tape.
IMPORTANT
Position IR emitters so that each device's sensor "sees" the signal from only one emitter. Otherwise, a device receiving signals from multiple sources (remote controls, IR emitters) may not respond at all.
- Place any unused ends behind the devices to prevent stray signals from reaching the IR sensors.

Connecting IR-NetCommand Output

Place IR emitters so the signal can be "seen" by the IR sensor on each device.
If You are Unable to Locate a Device's IR Sensor
- The IR sensor is usually behind the plastic window of the front display panel. Using a flashlight, you may be able to see it as a round or square cutout.
-
If you cannot see the sensor and the device's Owner's Guide does not specify the location, do the following using the device's remote control.
-
Starting at one end of the plastic window, hold the device's remote control about one-half inch from the front of the device and press the POWER key.
- If the device does not respond, move the remote control one inch toward the center and try again. Repeat until the device responds.
- Repeat the previous steps starting at the other end of the window. The sensor is between these two points.
NetCommand Setup
Initial NetCommand Setup
To perform this procedure, you need:
- The remote controls for both the TV and the device you want to control.
• An IR emitter cable available from Mitsubishi.
Note: To set up an A/V receiver, see "Setting Up A/V Receiver Control," page 71.
- Connect and position the IR emitters for the devices you wish to control. See "IR Emitters" on the previous page.
- Set the TV's remote control to TV mode and power on the TV.
NetCommand and Device-Specific Keys
Device-specific keys are those which have no equivalent on the TV's remote control. Use any of these methods to set up NetCommand control for these keys.
- TOOLS Menu. In some cases, the TV will, by default, assign a key to the TOOLS menu. See the table below.
| Examples of Default NetCommand Assignments in the TOOLS Menu | ||
| Cable Box, Satellite Receiver | 3 | MENU |
| 9 | ON DEMAND | |
| DVD, DVR, Blu-ray | 3 | SETUP |
| 6 | TOP MENU | |
| 9 | ANGLE | |
| VCR 3 | MENU | |
| 6 | INPUT | |
| A/V Receiver 3 | MENU | |
| 6 | SURROUND | |
NetCommand's default setup assigns some device-specific keys to the TOOLS menu when "learned." These key functions are accessible only with the TOOLS key.
- F Keys. There are four F keys, F1 through F4, which you can assign to any function on the device's remote control. For a cable box, "learn" the F keys as the A, B, C, D keys.
-
Arbitrary Key Assignment. You can assign a device key arbitrarily to any “unlearned” key on the TV’s remote control. Make a note of the key name and function for later reference.
-
Switch the TV to the desired input to control. Press INPUT, highlight the input icon, and press ENTER.
- Open the NetCommand Inputs > Learn menu.
- The first function highlighted in the Learn screen is always Power On. Aim the TV's remote control at the TV and press ENTER to begin learning for that function.
- When the Power On text starts flashing, aim the device's remote control at the TV and hold the POWER key until a check mark appears next to Power On.
- If the text stops flashing before the check mark appears, repeat the previous step.
- To remove the key from NetCommand control, press the CANCEL key while the key name is highlighted.
- To verify the device's response to the IR code, press ENTER to send out the code.
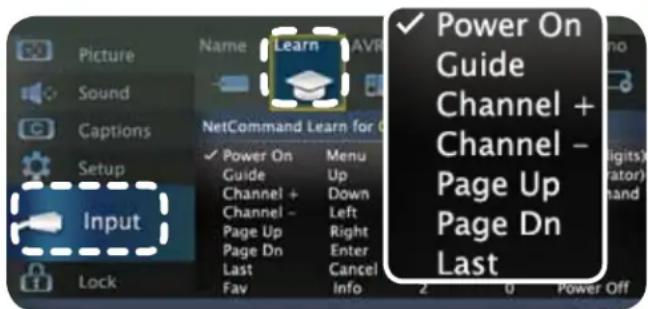
Inputs > Learn screen. Key names marked with a check have been "learned."
Some device-specific keys, such as MENU, are available only from the TOOLS menu after "learning."
- Use navigation keys on the TV's remote control to highlight other keys on the list. Repeat steps 5 and 6 for each additional function you wish to control through NetCommand.
-
If the device has a separate POWER OFF key, use navigation keys on the TV's remote to highlight Power Off. Repeat the earlier steps to "learn" the POWER OFF key. If the device has no POWER OFF key, skip this step.
-
Press EXIT to finish NetCommand "learning" for the current device.
NetCommand Setup, continued
Adding or Removing Device Keys from NetCommand Control
After performing initial setup, you can add or remove individual keys under NetCommand control.
- Switch the TV to the device. Press INPUT, highlight the device's icon, and press ENTER.
- Open the Inputs menu and highlight the Learn icon.
- When the Learn screen displays:
- To add keys: Continue as described earlier under "Initial NetCommand Setup" on the opposite page.
- To delete keys: Highlight the name of the key you wish to delete and press CANCEL on the TV's remote control. Clears the check mark.
Operating NetCommand-Controlled Devices
Controlling Most Device Types
As an example of NetCommand control, if you are watching your cable box and you wish to tune to the next channel higher, press CHANNEL UP. NetCommand then sends the "learned" channel-up control signal to the cable box.
- Perform NetCommand setup for the device as described in this chapter.
- When you wish to use the device, press INPUT.
- Highlight the icon for the device.
- Press ENTER to switch the TV to the device.
Note: if you have set up automatic input switching for the A/V receiver, the A/V receiver will automatically switch to the correct input for the device.
- To operate the device using the TV's remote control, press the TV key to put the remote control into TV mode.
- Point the remote control at the TV (not the device) and press the key for the desired function.
- Press the TOOLS key to access additional key functions you may have "learned" for the device.
Special Operation Methods
| Key Name in Learning Screen | Special Operation Description and Setup How to Use | |
| Power On Manual Power On/OffUse for devices that have only one POWER key. | 1. Press INPUT.2. Highlight the icon for the device to be powered on or off.3. With the Input Selection menu still displayed, press POWER to send the power signal; you may need to press POWER twice.Note: If you press POWER without the Input Selection menu displayed, the TV will turn off.4. Press ENTER to switch the TV to the device. | |
| Power OnPower Off | Automatic Power On/OffThis feature is only for devices that have separate POWER ON and POWER OFF keys on their original remote controls. If your device does not have a separate POWER OFF key, do not use the Power Off learning position; use only the Manual Power ON/OFF method described above.In the NetCommand Learn screen:a. “Learn” the Power On command in the Power On learning position.b. “Learn” the Power Off command in the Power Off learning position. | To Power On the Device1. Press INPUT.2. Highlight the icon for the device to be powered on or off.3. Press ENTER to switch the TV to the device and NetCommand will send the Power On command to the device.To Power Off the DeviceWhen you turn the TV off, the TV sends all learned Power Off commands to all devices. |
| Menu Displaying a Menu for the Current Device“Learn” theMENUkey on the original remote in theMenulearning position. | PressTOOLSand number 3 to send the menu signal to the device. | |
| Guide Displaying the On-Screen Program Guide(cable box or satellite receiver)1. “Learn” theGUIDEkey on the original remote in theGuidelearning position.2. Learn thePAGE UP and PAGE DOWNkeys of the original remote in thePage Up and Page Downlearning positions. | 1. While watching the device, pressGUIDEto display the guide.2. PressCH/PAGEto send thePage Up/Dn commands for the guide. | |
| Enter ENTER-Key Functions (cable boxes, satellite receivers, etc.)Some devices have two keys that have “enter” functions. One key is for menus and is often labelled SELECTorOK. A second key is for use with number keys for direct channel selection. NetCommand uses the sameENTERkey for both operations. | ||
| Enter (digits) | WhenENTERhas a menu or guide function or when the original remote control uses the same key for menus and channel selection:Learn theENTER, SELECT, orOKkey in theNetCommandEnterlearning position. | 1. PressMENUorGUIDEto display the device’s menu or guide.2. PressENTERwithin the menu and NetCommand will send theEntersignal for menus. |
| Cancel CANCEL as the Cancel or Exit Function“Learn” theCancel orExitfunction in the NetCommandCancel learning position | Press digit key(s) and then pressENTER.NetCommand will send theEntersignal for channel selection. | |
| —(separator) | The symbol “—” can serve as the separator between a digital channel’s main and sub-channel digits, e.g., digital channel 12-1 (main channel is 12, sub-channel is 1).“Learn” the channel separator function in the NetCommand –(separator)learning position. | 1. PressMENUorGUIDEto display the menu or guide.2. PressCANCELand NetCommand will send theCancelorExitsignal. |
Operating NetCommand-Controlled Devices, continued
NetCommand Specialized Device Keys
Refer to this chart when “learning” device keys. See page 67 for more on keys marked in the “Special Operation Method” column.
| Key Name in Learning Screen | Function | Name on TV Remote Control | See Special Operation Method Table |
| Power On Power On or Power ON/OFF (toggle) |  | √ | |
| Guide On-Screen Program Guide or DVD Disc Menus | GUIDE | √ | |
| Channel +/Skip + Next Channel Higher/Skip Forward (Disc) |  | ||
| Channel -/Skip - Next Channel Lower/Skip Backward (Disc) | |||
| Page Up Page Up in Guides | |||
| Page Dn Page Down in Guides | |||
| Last Last Channel Recall | LAST | ||
| Fav Favorites |  | ||
| Menu/Top Menu Menu | TOOLS | See TOOLS menu. | |
| Up, Down, Left, Right Arrow up, arrow down, arrow left, arrow right | ▲,▼▲▲ | ||
| Enter | Enter or Select (menus) |  | √ |
| Cancel | Cancel or exit (menus) | CANCEL | √ |
| Info | On-screen status display or information display |  | Two keypresses |
| Play | Start playback | ||
| Stop | Stop playback |  | |
| Forward Fast Forward | |||
| Rewind | Rewind/Fast Reverse |  | |
| Pause | Pause playback | ||
| Record | Start Recording |  | |
| 1, 2, 3, 4, 5, 6, 7, 8, 9, 0 | Digits | Digits 0-9 | |
| Enter (digits) | Use after entering digits to tune to a channel by number |  | √ |
| - (separator) | Adds channel separator between digital main and sub-channel numbers | CANCEFL | √ |
| On Demand | On Demand (Cable/Satellite) | TOOLS | See TOOLS menu. |
| Setup | Setup (DVD player) |  | See TOOLS menu. |
| Angle | Angle (DVD player) |  | See TOOLS menu. |
| Input | VCR |  | See TOOLS menu. |
| List | List (Cable/Satellite) | [AG5H] | See TOOLS menu. |
| Surround | Surround (A/V Receiver) | [2C2A] | See TOOLS menu. |
| F1 | Assign your |  | |
| F2 | choice of |  | |
| F3 | device-specific |  | |
| F4 | functions. |  | |
| Power Off | Power Off | [2Y6T] | √ |
6
NetCommand IR Control of an A/V Receiver
NetCommand IR home-theater control is available on 838 series TVs. See the description of NetCommand on "About NetCommand IR Control," page 64.
Two levels of NetCommand A/V receiver control are available through the Inputs > AVR menu.
• Power and volume. See the opposite page.
- Automatic audio and video switching over HDMI. See “Setup to Control Automatic Audio and Video Switching via HDMI,” page 73.
Note: To set up control of other device types, see "Initial NetCommand Setup," page 66.
Controlling an A/V Receiver after NetCommand Setup
Switching Audio to and from the A/V Receiver
- Press AUDIO.
- Press ▲ to show the TV Speakers option.
- Press ▶ to select either On (sound through TV speakers) or Off (sound through A/V receiver).
Controlling A/V Receiver Power
Set up NetCommand control of the A/V receiver's POWER key or keys to enable these methods.
With Any Connection Type
- Press AUDIO.
- Press ▲▼ to show the TV Speakers option.
- Press ▶ to select Off.
- While the audio display is still on screen, point the remote control at the TV (not the A/V receiver) and press POWER to power the A/V receiver on or off.
With an HDMI Connection
- Press INPUT.
- Highlight the A/V receiver icon.
- Press POWER.
Controlling Other A/V Receiver Functions
- With the A/V receiver powered on and selected, the TV's remote control operates the volume and mute functions.
- If you have performed setup to control A/V receiver switching over HDMI, when you switch to a device in the Input Selection menu, the A/V receiver will automatically switch to the correct audio input for the device.
- Press the TOOLS key for functions that may be available only form the Tools menu.
Note: Connect the HDMI cable between the TV and A/V receiver first before performing NetCommand setup for the A/V receiver. If you perform NetCommand setup and then later connect the cable, the NetCommand setup will be lost.
Setting Up A/V Receiver Control
Power and Volume
Perform this setup to control A/V receiver power and volume with the TV's remote control.
To perform this setup you need:
- The remote controls for both the TV and the AV receiver.
• An IR emitter cable available from Mitsubishi.
Before You Begin
- Connect your A/V receiver to the TV and any additional devices.
- Connect the IR emitter cable to the TV and position the IR emitter where it can send signals to the A/V receiver. See "IR Emitters," page 65.
- Set the TV's remote control to TV mode.
Setup to Control A/V Receiver Power and Volume
- Open the Inputs > AVR menu.
- The first function highlighted in the AVR screen is always Power. Aim the TV's remote control at the TV and press ENTER to begin learning for Power.

Inputs > AVR screen. Perform NetCommand IR "learning" for A/V receiver power and volume keys.
-
When the Power text starts flashing, aim the A/V receiver's remote control at the TV and hold the POWER or POWER ON key until a check mark appears next to Power.
-
If the text stops flashing before the check mark appears, repeat this step.
-
To remove the key from NetCommand control, press the CANCEL key while the key name is highlighted.
-
Press the ▼ key on the TV's remote control to highlight other keys in the list. Repeat steps 2 and 3 for each additional function you wish to control through NetCommand.
- If the A/V receiver has a separate POWER OFF key, press ▼ on the TV's remote to highlight Power Off. Repeat steps 2 and 3 to "learn" the POWER OFF key. If the device has no POWER OFF key, skip this step.
- When finished "learning" the power and volume keys, press EXIT to watch TV or continue NetCommand setup if using an HDMI connection. See "Automatic Audio/Video Switching Over an HDMI Connection" on the next page
Setting Up A/V Receiver Control, continued
Automatic Audio/Video Switching Over an HDMI Connection
If your A/V receiver has an HDMI output, it may be convenient to send video to the TV over a single HDMI cable through the A/V receiver. The following setup enables the A/V receiver to switch automatically to the correct input when you select a device in the TV's Input Selection menu. Depending on the capabilities of the A/V receiver, the connected source devices can be analog, digital, or a mixture or the two.

flowchart
graph TD
    A["Blu-ray player"] --> D["A/V Receiver"]
    B["Cable box"] --> D
    C["DVD player"] --> D
    E["VCR"] --> D
    F["HDMI Cable"] --> G["TV"]
    D --> H["HDMI Output"]
    G --> I["Speaker with musical note"]
    style D fill:#f9f,stroke:#333
    style G fill:#ccf,stroke:#333
Use NetCommand to switch an A/V receiver automatically to the correct audio and video inputs for a device (available only with an HDMI output to the TV as shown).
More About Using an HDMI Connection
- Audio from devices connected directly to the TV can be heard from the TV speakers only. To send audio to the A/V receiver from such devices, use one of the optional audio connections shown in the diagram on the opposite page. For example, use an optional audio connection if you wish to use the A/V receiver speakers to hear audio from:
- The ANT input
- A game or camcorder connected directly to the TV.
- To use NetCommand to supplement HDMI control of a CEC-enabled A/V receiver, the recommended setup sequence is:
- Connect the HDMI cable.
- Enable HDMI control (New Device Found screen).
- Connect the secondary digital audio cable, if desired.
- Perform NetCommand setup.
If you perform A/V receiver NetCommand setup first and then later connect an HDMI cable, the NetCommand setup will be lost. - In some cases, audio from a device connected to the A/V receiver may not be passed over the HDMI cable to the TV speakers. In these cases you must use the A/V receiver speakers to hear audio.
Setting Up A/V Receiver Control, continued
Before You Begin
To complete these steps you will need:
- The remote controls for both the TV and the AV receiver.
• An IR emitter cable available from Mitsubishi. -
An HDMI-to-HDMI cable to connect the A/V receiver to the TV and cables necessary to connect devices to the A/V receiver.
-
Connect the A/V receiver to the TV with an HDMI-to-HDMI cable. Do not connect the optional audio cable at this time.
- If desired, enable HDMI Control of a CEC-enabled A/V receiver. See Appendix C, "HDMI Control of CEC Devices."
- Connect your audio/video devices to the A/V receiver. Note the name of the device connected

Multiple video inputs through a single HDMI cable. The optional audio connection allows you to hear, through the A/V receiver, devices connected to the TV only, e.g., an antenna on the ANT input.
to each A/V receiver input. This information will be needed later to set up NetCommand's automatic input switching.
- If using an optional audio cable between the TV and A/V receiver, connect it. Set up NetCommand control of the A/V receiver's TV audio input when setting up automatic switching in the next procedure.
- Connect the IR emitter cable to the TV and position the IR emitter where it can send signals to the A/V receiver. See "IR Emitters," page 65.
Setup to Control Automatic Audio and Video Switching via HDMI
When this setup is complete, the "learned" A/V receiver input will appear in the TV's Input Selection menu as a selectable input.
- Set the TV's remote control to TV mode.
- Navigate to the Inputs > AVR menu.

To set up A/V switching over HDMI, choose your A/V receiver input from a list.
- In the Inputs > AVR menu, highlight the name of the A/V receiver input to control. In this example, it is the DVD input.
- Press ENTER on the TV's remote control.
- While the text DVD is flashing, press and hold the DVD INPUT key on the A/V receiver's remote control.
- When a check appears next to DVD, release the DVD INPUT key.
- If the text stops flashing before the check mark appears, repeat this step.
- To erase the IR code just "learned," press CANCEL while the name is highlighted.
- If using an optional audio cable between the TV and A/V receiver, "learn" the TV AUDIO OUT key to enable automatic switching of audio from sources connected to the TV only.
- If there are no more devices to set up, highlight EXIT and press ENTER or continue to set up additional A/V receiver audio/video sources.
Setting Up A/V Receiver Control, continued
NetCommand Control of a Device Connected to an HDMI A/V Receiver
Use this setup to have NetCommand control a device sending audio and video through the A/V receiver to the TV via HDMI.
You must have already completed the procedure under "Setup to Control Automatic Audio and Video Switching via HDMI" on the previous page. That procedure placed an icon in the Input Selection menu for the device (input) connected to the A/V receiver.
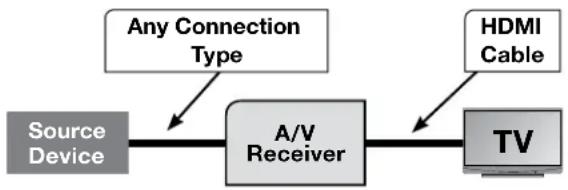
flowchart
graph LR
    A["Source Device"] --> B["A/V Receiver"]
    C["Any Connection Type"] --> B
    D["HDMI Cable"] --> E["TV"]
- Set up NetCommand control of A/V receiver audio/video switching via HDMI as described on the previous page.
- Press EXIT to close any open menus and return to normal TV viewing.
- Press INPUT.
- Highlight the icon for the device connected to the A/V receiver input you wish to control.
- Press ENTER to switch the TV to the A/V receiver and the A/V receiver to the input.
- Open the Inputs > Learn menu.
- Perform NetCommand "learning" for the connected device by following the steps in "Initial NetCommand Setup," page 66.
Appendices
Appendix A: Programming the Remote Control ..... 77
Appendix B: Bypassing the Parental Lock 83
Appendix C: HDMI Control of CEC Devices....85
Appendix D: TV Care 88
Appendix E: Troubleshooting 91
Appendix A: Programming the Remote Control
This appendix explains programming the TV's remote control to operate other A/V devices. This is distinct from NetCommand or HDMI CEC.
Functions Available for Other A/V Devices
The TV's remote control can be programmed to operate other types and brands of A/V products. The functions performed in each device mode vary depending on the product. Not all functions work for all models. The most common functions available are listed on this page.
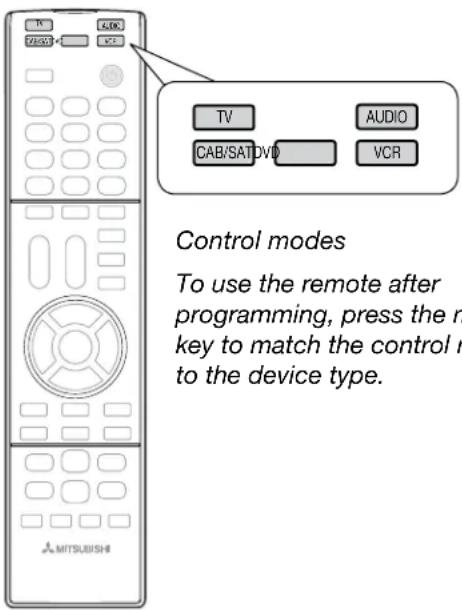
IMPORTANT
Some manufacturers may change their products or they may use more than one remote control system. The TV's remote control may be unable to operate your A/V equipment in these cases.
VCRs and DVRs
| CHANNEL UP/DNPOWERSLEEPFAST FORWARD)PAUSE)PLAY) | (RECORD)REVERSE)STOP)GUIDE (DVR only)MENU(DVR only)0-9 Number Buttons |
Mitsubishi VCRs are compatible with some additional keys.
Cable Boxes and Satellite Receivers
| (not all functions for all models) | |
| PAGE UP/DOWNCANCELCHANNEL UP/DNENTERGUIDEPOWER▲▼◄►LAST (ENTER; for channels on some models)0-9 Number KeysF1-F4 (A, B, C, D keys on some models) | The record/playback keys:(▶ FAST FORWARD)(■ PAUSE)(▶ PLAY)(● RECORD)(◀ REVERSE)(■ STOP) |
A/V Receivers
| MUTEPOWERSLEEPVOLUME0-9 Number Buttons | Direct Input Selection buttons: numbers and LAST(on some Mitsubishi models) |
CD Players
| (not all functions for all models) | |
| SLEEPFAST FORWARD)PAUSE)PLAY) | (REVERSE)STOP0-9 Number Buttons |
DVD Players
| (not all functions for all models) | |
| CANCEL (on some models)CHANNEL UP/DN (for track skip on some models)ENTERMENUPOWERSLEEP▲▼◄► | FAST FORWARD)PAUSE)PLAY)RECORD)REVERSE)STOP)0-9 Number Keys |
Appendix A: Programming the Remote Control, continued
Programming the Remote Control
- Press one of the upper buttons on the remote control to change to the correct mode for the product you want to control. Refer to the table below. Only one of each device type can be controlled in each mode.
| Mode Affected Device | |
| CAB/SAT | Cable BoxDTV ReceiverSatellite Receiver |
| VCR | VCRDVRDVD Player/Recorder |
| DVD | DVD Player/RecorderDVRVCR |
| AUDIO | A/V ReceiverAudio AmplifierCD Player |
- Press and hold POWER on the remote control for several seconds until the key flashes twice and goes off.
- Release the POWER key.
- Enter the first five-digit code listed for your equipment in the reference tables that follow. If you need to start over or wish to exit programming mode, temporarily change to a different device mode.
- Point the remote control at the equipment and press POWER. If the product has no power on/off function, press a different key, such as (PLAY), (STOP), VOLUME UP, or MUTE.
- If the equipment responds, the remote control is properly programmed.
- If the equipment does not respond, repeat steps 4 and 5 with the next five-digit code listed for your equipment.
- Once you have found the correct code, write it in the space below for future reference.
| Mode | Device Type Code |
| CABLE/SAT | |
| VCR | |
| DVD | |
| AUDIO |
IMPORTANT
You may need to reprogram the remote control after changing the batteries. Record the codes for each mode in the space provided to make this faster.
Code Verification
To determine the code programmed for any mode:
- Set the mode to the one you wish to verify.
- Press and hold POWER on the remote control for several seconds until the key flashes twice and goes off.
- Press keys 9 9 0
- Press 1 and count the flashes of the power key. Write down the number of flashes as the first digit of the code.
- Repeat step 4 for the other digits of the code. Press 2 to see flashes for the second digit, press 3 for the third digit, 4 for the fourth digit, and 5 for the fifth digit.
Audio Lock: Universal A/V Receiver Control
With Audio Lock enabled, the remote control operates volume and mute on an A/V receiver in all control modes. Activate Audio Lock if you always use an A/V receiver with your TV and other A/V equipment.
- Program AUDIO mode for your A/V receiver as described in "Programming the Remote Control" on this page.
- With the remote control in AUDIO mode, hold POWER on the remote control for several seconds until the key flashes twice and goes off.
- Press keys 9 9 3 ENTER The POWER key will flash twice to indicate Audio Lock is active.
To Reset the Remote Control to Operate Volume and Mute for the TV Speakers
- Press and hold POWER for several seconds until it flashes twice and goes off.
- Press keys 9 9 3 VOLUME UP. The POWER key will flash four times to indicate Audio Lock has cleared.
Appendix A: Programming the Remote Control, continued
Audio Amplifiers
| Altec Lansing | 41742 |
| Anthem 42220 | |
| Bel Canto Design | 41583 |
| Cary Audio Design | 41879 |
| Classe 41461 | |
| Denon 42134 | |
| Durabrand 41561 | |
| Flextronics 41879 | |
| Halcro 41934 | |
| Harman/ Kardon | 40892 |
| Krell 42463, 41837 | |
| Left Coast 40892 | |
| Lenoxx 41561 | |
| Lexicon 41802, 41145 | |
| Marantz 42138, 40892 | |
| Mark Levinson | 42405, 41483 |
| Parasound | 42245, 41934 |
| Philips 40892 | |
| Polk Audio 42242, 40892 |
Cable Boxes
| Rogers 11877 | |
| Scientific Atlanta | 11877, 10877 |
| Sejin | 11602 |
| Shaw | 11376 |
| Sony | 11006 |
| Suddenlink | 11877, 11376 |
| Time Warner | 12187, 11877, 11376 |
| Tivo | 12576 |
CD Players
| Victor | 40072 |
| Wards | 40053 |
| Yamaha | 41292, 40490, 40036 |
CD Players
| Burmester 40420 | |
| California Audio Labs | 40029 |
| DKK | 40000 |
| Garrard 40420 | |
| Harman/ Kardon | 41202, 40173, 40083 |
| Integra | 40101 |
| JVC | 41294, 40072 |
| Kenwood | 40626, 40028 |
| KLH | 41318 |
| Koss | 41317 |
| LG | 41208 |
| Magnavox | 40038 |
| Marantz 40626, 40038, 40029 | |
| McIntosh | 41703 |
| MCS | 40029 |
| MGA | 40083 |
| Miro 40000 | |
| Mitsubishi | 40098, 40083 |
| MTC | 40420 |
| NAD | 41208 |
| Onkyo | 41327, 40101 |
| Optimus | 40420, 40000 |
| Panasonic 40752, 40388, 40029 | |
| Parasound | 40420 |
| Philips 40626 | |
| Pioneer | 41087 |
| Proceed | 40420 |
| Quasar 40029 | |
| RCA 40420, 40053 | |
| Realistic | 40420 |
| Rotel | 40420 |
| Sherwood | 41950 |
| Sony | 41364, 40490, 40185, 40100, 40000 |
| Tascam 40420 | |
| TDK | 41208 |
| Teac | 40420 |
| Technics | 40029 |
Audio Accessories
| Apple | 41115 |
| Denon 42502 | |
| Vizio | 42454 |
| Yamaha | 42458 |
Video Accessories
| ADB | 12586, 12254 |
| Amino | 12482, 11673, 11615, 11481 |
| AT&T | 10858 |
| Cisco | 12517, 12345 |
| KoolConnect | 11481 |
| Motorola | 12378, 10858 |
| Scientific Atlanta | 12517, 12345, 10858 |
| SureWest | 11481 |
| Verizon | 12378 |
Cable Boxes
| Amino | 11822, 11602 |
| Bright House | 11877, 11376 |
| Cable One | 11877, 11376 |
| Cablevision | 11877, 11376 |
| Charter | 12187, 11877, 11376 |
| Cisco | 11982, 11877, 10877 |
| Comcast | 12576, 11982, 11877, 11376 |
| Cox | 11877, 11376 |
| Digeo | 12187, 11187 |
| Director | 10476 |
| General Instrument | 10476 |
| Homecast | 12301 |
| i3 Micro | 11602 |
| Insight | 11877, 11376 |
| Jerrold | 10476 |
| Knology 11877 | |
| Mediacom | 11877, 11376 |
| Motorola | 11376, 11187, 10476 |
| Myrio | 11822, 11602 |
| Pace | 11982, 11877, 11376 |
| Panasonic 11982 | |
| Pioneer | 11877, 10877 |
| RCN | 11376 |
A/V Receivers
| Aiwa | 41641, 41405, 41388 |
| Alco 41390 | |
| AMC | 41077 |
| Anam | 41609 |
| Arcam 41189 | |
| Audiotronic | 41189 |
| Audiovox | 41390 |
| B & K | 40820 |
| Bose | 41933, 41841, 41629, 41253, 41229, 40639 |
| Carver | 41189 |
| Denon 42857 | 42279 |
| Electrohome | 42026 |
| Harman/ Kardon | 42443, 42241, 41306, 41304, 40891 |
| iLive 42013 | |
| Insignia | 42175, 42169, 41893, 41077, 41030 |
| Integra | 41805, 41320, 41298 |
| iSymphony | 42258, 42018 |
| JBL | 41306 |
| JVC | 42331, 42239, 42040, 41495, 41374 |
| Kenwood | 41570, 41569, 41313 |
| KLH | 41428, 41412, 41390 |
| LG | 42284, 42197, 41293 |
| Magnavox | 41514, 41269, 41189 |
Appendix A: Programming the Remote Control, continued
| A/V Receivers | |
| Marantz 4211 | 4, 41289, 41269, 41189 |
| McIntosh 41289 | |
| Micromega 41189 | |
| Mitsubishi 41957 | 41922, 41921, 41920, 41393 |
| Myryad 41189 | |
| Nakamichi 41313 | |
| Onkyo 41805 | 41531, 41320, 41298, 40842 |
| Optimus | 41023 |
| Panasonic | 41763, 41633, 41548, 41518, 41316, 41308, 41288, 41275, 42967, 42452, 42221, 41764 |
| Philips | 42470, 42459, 42311, 41269, 41266, 41189, 40891 |
| Pioneer | 41935, 41384, 41023, 40630 |
| Polk Audio | 42270, 41289 |
| Proscan | 41254 |
| RCA | 42041, 41609, 41511, 41390, 41254, 41023 |
| Samsung | 41868, 41500, 41304, 41295 |
| Sherwood | 42169, 41905, 41653, 41077 |
| Sherwood Newcastle | 42169 |
| Sony | 41759, 41758, 41658, 41622, 41558, 41441, 41258, 41058, 42522, 42216, 42172, 41858, 41822 |
| Stereophonics | 41023 |
| Sunfire | 41313 |
| Teac | 41390 |
| Technics | 41518, 41308 |
| Thorens 41189 | |
| Toshiba | 41788 |
| Venturer | 41390 |
| Yamaha | 41476, 41376, 41375, 41331, 41276, 41176, 40376, 40176, 42471, 42467, 42061, 41815 |
| Zenith | 41293 |
| Satellite Receivers | |
| BellExpressVu | 10775 |
| Crossdigital | 11109 |
| Satellite Receivers | |
| DirecTV | 11749, 11377, 11142, 10749, 10639, 10566, 10392, 10247, 1856, 11609, 11442, 11414, 11109, 11076 |
| Dish Network System | 11775, 11505, 10775 |
| Dishpro | 11775, 11505, 10775 |
| Echostar | 11775, 11505, 10775 |
| Expressvu | 11775, 10775 |
| GE | 10566 |
| General Instrument | 10869 |
| GOI | 11775, 10775 |
| HTS | 11775, 10775 |
| Hughes Network Systems | 11749, 11442, 11142, 10749 |
| Jerrold | 10869 |
| JVC | 11775, 10775 |
| LG | 11414 |
| Mitsubishi 10749 | |
| Motorola | 10869 |
| Next Level | 10869 |
| Panasonic | 10701, 10247 |
| Philips | 11749, 11442, 11142, 11076, 10749 |
| Proscan | 10566, 10392 |
| RadioShack | 10869 |
| RCA | 10566, 10392, 10143 |
| Samsung | 11609, 11442, 11377, 11276, 11109 |
| Sony | 10639 |
| Star Choice | 10869 |
| Tivo | 11442, 11142 |
| Toshiba | 11749, 10790, 10749 |
| Voom | 10869 |
| Zenith | 11856 |
| VCRs | |
| ABS | 21972 |
| Accurian | 20000 |
| Admiral | 20048 |
| Adventura | 20000 |
| Aiko | 20278 |
| Aiwa | 20037, 20000 |
| Alienware | 21972 |
| Allegro | 20039 |
| America Action | 20278 |
| American High | 20035 |
| VCRs | |
| Audiovox | 20278, 20037 |
| Calix | 20037 |
| Canon | 20035 |
| Carver | 20081 |
| CCE | 20278 |
| Citizen | 20278, 20037 |
| Craig | 20037 |
| Crosley | 20081, 20000 |
| CurtisMathes | 20278, 20162, 20060, 20035 |
| CyberPower | 21972 |
| Daewoo 20278, 20045 | |
| Dell | 21972 |
| Denon | 20042 |
| DirecTV | 20739 |
| Durabrand | 20039, 20038 |
| Dynatech | 20000 |
| Electrohome | 20043, 20037 |
| Electrophonic | 20037 |
| Emerex | 20032 |
| Emerson | 21593, 20593, 20278, 20043, 20037, 20000 |
| Fuji | 20035, 20033 |
| Funai | 21593, 20593, 20000 |
| Garrard | 20000 |
| Gateway | 21972 |
| GE | 20060, 20035 |
| GFM | 21593 |
| Go Video 20614 | |
| GoldStar | 20038, 20037 |
| Gradiente | 20000 |
| HarleyDavidson | 20000 |
| Harman/Kardon | 20081, 20038 |
| Headquarter | 20046 |
| HewlettPackard | 21972 |
| Hitachi | 20042, 20000 |
| HowardComputers | 21972 |
| HP | 21972 |
| HughesNetworkSystems | 20739, 20042 |
| Humax | 20739 |
| Hush | 21972 |
| iBUYPOWER | 21972 |
| InstantReplay | 20035 |
| JVC | 20067 |
| KEC | 20278, 20037 |
| Kenwood | 20067, 20038 |
Appendix A: Programming the Remote Control, continued
VCRs
| Kodak 20037, 20035 | |
| Linksys 21972 | |
| Lloyd's 20000 | |
| LXI 20037 | |
| Magnasonic 20593 | |
| Magnavox 21593, 20593, 20081, 20039, 20035, 20000 | |
| Marantz 20081, 20035 | |
| Marta 20037 | |
| Matsushita 20162, 20035 | |
| Media Center PC | 21972 |
| MEI 20035 | |
| Memorex | 20162, 20048, 20046, 20039, 20037, 20035, 20000 |
| MGA | 20043 |
| Microsoft | 21972 |
| Mind | 21972 |
| Minolta | 20042 |
| Mitsubishi | 20173, 20067, 20043 |
| Motorola | 20048, 20035 |
| MTC | 20000 |
| Multitech | 20000 |
| NEC | 20067, 20038 |
| Nikko | 20037 |
| Niveus Media | 21972 |
| Northgate | 21972 |
| Olympus | 20035 |
| Optimus | 21062, 20593, 20162, 20048, 20037 |
| Panasonic 21062, 20616, 20614, 20162, 20035 | |
| Penney 20042, 20038, 20037, 20035 | |
| Pentax | 20042 |
| Philco | 20035 |
| Philips | 21181, 21081, 20739, 20618, 20081, 20035 |
| Pilot | 20037 |
| Pioneer | 20067 |
| Polk Audio | 20081 |
| Portland | 20278 |
| Presidian | 21593 |
| Proscan | 20060 |
| Pulsar | 20039 |
| Quarter | 20046 |
| Quartz | 20046 |
| Quasar | 20162, 20035 |
| RadioShack | 20000 |
| Radix | 20037 |
| Randex | 20037 |
VCRs
| RCA | 20880, 20060, 20042 |
| Realistic | 20048, 20046, 20037, 20035, 20000 |
| ReplayTV | 20616, 20614 |
| Ricavision | 21972 |
| Runco | 20039 |
| Samsung | 20739, 20045 |
| Sanky | 20048, 20039 |
| Sansui | 20067, 20000 |
| Sanyo | 20046 |
| Scott | 20045, 20043 |
| Sears | 20046, 20042, 20037, 20035, 20000 |
| Sharp | 20848, 20048 |
| Sonic Blue | 20616, 20614 |
| Sony | 21972, 21032, 20636, 20035, 20033, 20032, 20000 |
| Stack 9 | 21972 |
| STS | 20042 |
| Sylvania | 21593, 20593, 20081, 20043, 20035, 20000 |
| Symphonic | 21593, 20593, 20000 |
| Systemax | 21972 |
| Tagar Systems | 21972 |
| Tashiko | 20037 |
| Teac | 20000 |
| Technics | 20162, 20035 |
| Teknika | 20037, 20035, 20000 |
| Thomas | 20000 |
| Tivo | 20739, 20636, 20618 |
| Toshiba | 21972, 21008, 20045, 20043 |
| Totevision | 20037 |
| Touch 21972 | |
| Vector 20045 | |
| Vector Research | 20038 |
| Video Concepts | 20045 |
| Videomagic | 20037 |
| Viewsonic | 21972 |
| Villain | 20000 |
| Voodoo | 21972 |
| Wards | 20081, 20060, 20048, 20042, 20035, 20000 |
| XR-1000 | 20035, 20000 |
| Yamaha | 20038 |
| Zenith | 21139, 20039, 20037, 20033, 20000 |
| ZT Group | 21972 |
DVD Players
| Accurian | 30675 |
| Adcom | 31094 |
| Aiwa | 30641 |
| Akai | 31089, 30770, 30695 |
| Alco | 30790 |
| Allegro | 30869 |
| Apex Digital | 31061, 31056, 31020, 31004, 30797, 30796, 30794, 30755, 30672 |
| Arrgo | 31023 |
| Astar | 31489 |
| Audiovox | 31041, 30790 |
| B & K | 30662 |
| BBK | 31224 |
| Bel Canto Design | 31571 |
| Blue Parade | 30571 |
| Broksonic | 30695 |
| California Audio Labs | 30490 |
| Cinea | 30831 |
| CineVision | 30869, 30833 |
| Citizen | 32116, 31587, 31277, 30695 |
| Coby | 31628, 31351, 31177, 31165, 31107, 31086, 30852, 30778 |
| Craig | 30831 |
| Curtis Mathes | 31087 |
| CyberHome | 31537, 31502, 31129, 31024, 31023, 30874, 30816 |
| Daewoo 3117 | 2, 31169, 30869, 30833, 30784 |
| Denon | 32258, 30634, 30490 |
| Disney | 31270, 30675 |
| Durabrand | 31127, 31023 |
| DVD2000 | 30521 |
| Electrohome | 32116 |
| Emerson | 30675, 30591 |
| Enterprise | 30591 |
| Fisher | 30670 |
| Funai | 30675 |
| Gateway | 31077 |
| GE | 30815, 30522 |
| GFM | 30675 |
| Go Video | 31075, 31044, 30869, 30833, 30744, 30741, 30715 |
| GoldStar | 30869, 30741 |
| Grundig | 30539 |
Appendix A: Programming the Remote Control, continued
| DVD Players | |
| Harman/Kardon | 31229, 30702, 30582 |
| Helios 32192, | 32080 |
| Hello Kitty 30831 | |
| Hitachi 30664, | 30573 |
| Hiteker 30672 | |
| Humax 31588, | 31500 |
| iLo 31472, 31348 | |
| Initial 31472 | |
| Insignia 32596, | 32428, 32095,30675 |
| Integra 32147, | 31769, 30627,30571 |
| JBL 30702 | |
| JVC 32365, 31602, | 31550,31275, 31164, 30867,30623, 30558 |
| jWin | 31049 |
| Kawasaki | 30790 |
| Kenwood | 30534, 30490 |
| KLH | 31020, 30790 |
| Lenoxx | 31127 |
| LG | 31602, 30869, 30741,30591 |
| LiteOn | 31656, 31058 |
| Magnavox | 31506, 31472, 31354,31177, 30675, 30646,30539, 30503 |
| Marantz | 32414, 30539 |
| McIntosh | 31273 |
| Memorex | 32213, 31270, 30831,30695 |
| Microsoft | 32083, 30522 |
| Mintek | 31472 |
| Mitsubishi | 31521, 30521 |
| Myryad | 30894 |
| NAD | 32572, 30741 |
| Norcent | 31107, 31003 |
| Olevia 32331 | |
| Onkyo | 32147, 31769, 30627,30503 |
| Oppo | 32545, 32185, 31224,30575 |
| Panasonic 31762, | 31641, 31579,30703, 30632, 30503,30490 |
| Philco | 30675 |
| Philips | 32084, 32056, 31340,,31267, 30675, 30646,30539, 30503, 32434,31506, 31354 |
| PianoDisc | 31024 |
| DVD Players | |
| Pioneer 31571 | 31512, 31460,30632, 30631, 30571,30525, 30142 |
| 32442 | |
| Polaroid | 31086, 31061, 31020 |
| Polk Audio | 30539 |
| Portland | 30770 |
| Presidian | 30675 |
| Proceed | 30672 |
| Proscan | 30522 |
| ProVision | 30778 |
| RCA | 32213, 31769, 30822,30790, 30571, 30522 |
| Rio | 30869 |
| Rotel | 31178, 30623 |
| Sampo 30752 | |
| Samsung | 32069, 31470, 31075,31044, 30820, 30573,30490, 30199 |
| 32556, 32489, 32369,32329 | |
| Sansui | 30695 |
| Sanyo 30873 | 30695, 30670 |
| Schneider | 30646 |
| Sharp | 32250, 31256, 30752,30675, 30630 |
| Sherwood 31077, 31043, 30770,30633 | |
| SherwoodNewcastle | 31077 |
| Shinsonic | 30533 |
| Sonic Blue | 30869 |
| Sony | 31633, 31536, 31516,31431, 31070, 31033,30864, 30533 |
| Sylvania | 30675 |
| Symphonic | 30675 |
| TAGMcLaren | 30894 |
| Teac | 30790 |
| Technics | 30703, 30490 |
| Theta Digital | 30571 |
| Tivo 31512, 31503 | |
| Toshiba | 31769, 31588, 31515,31510, 31503, 31154,30695, 30503 |
| 32277, 32006, 31608 | |
| Urban Concepts | 30503 |
| Venturer | 30790 |
| Vizio | 32563, 31226, 31064 |
| Xbox | 32083, 30522 |
| DVD Players | |
| Yamaha | 32558, 32298, 30817, 30646, 30545, 30539, 30490 |
| Zenith 30869, | 30741, 30591, 30503 |
| Blu-ray and HD-DVD | |
| Denon | 32258 |
| Insignia 32596, 32428, 30675 | |
| Integra 32147, 31769 | |
| JVC 32365 | |
| LG | 31602, 30741 |
| Magnavox | 30675 |
| Marantz | 32414 |
| Microsoft | 32083 |
| NAD | 32572 |
| Olevia 32331 | |
| Onkyo | 32147, 31769 |
| Oppo | 32545 |
| Panasonic 31641 | |
| Philips | 32434, 32084 |
| Pioneer 32442, 30142 | |
| RCA | 31769 |
| Samsung | 30199 |
| Sharp | 32250 |
| Sony | 31516 |
| Sylvania | 30675 |
| Toshiba | 31769, 31515 |
| Vizio | 32563 |
| Xbox | 32083 |
| Yamaha | 32298 |
Appendix B: Bypassing the Parental Lock
Mitsubishi Home Theater TV
738 Series
838 Series
Bypassing the Parental Lock
After you set the lock, you must use your pass code to:
• View a locked program
• View a locked channel
• View the locked TV
- Cancel the lock
• Enter the Lock menus
If you forget your pass code, you can view the locked TV without entering your pass code. When prompted for the pass code, press the number 9 and LAST keys on the TV remote control at the same time. This process temporarily unlocks the TV.
When entering the Lock menu, you will be prompted to enter a pass code.
- To change the pass code, press 9 and LAST at the same time. Either enter a new pass code to open the Lock menu and make changes or press EXIT to close the menu.
- If any of the locks are turned on and you exit the menus when prompted for a new code, the old code and all lock settings will be retained.
- If all locks are turned off and you exit the menus when prompted for a new code, then the previous code will be erased.
IMPORTANT
When changing or deleting your pass code, you must use the remote control included with this TV. You cannot use a Mitsubishi remote control from another component or a "universal" remote.
IMPORTANT
Cut along the dotted line and file bypass instructions in a safe place for future reference.
This page intentionally left blank
Appendix C: HDMI Control of CEC Devices
Many new HDMI devices have a feature called Consumer Electronics Control (CEC) or HDMI Control. HDMI Control allows one device, such as the TV, to control other devices, such as an A/V receiver or disc player. Use of CEC is optional.
Each manufacturer chooses which CEC functions to support so it is difficult to predict which devices and features are compatible with Mitsubishi's HDMI Control. You may find that CEC functions for a specific device are limited.
To use HDMI Control, you must enable it in both the TV and the device.
- In the TV. Enable HDMI control from the New Device Found screen or from the Inputs > HDMI Control menu.
- In the Device. Most devices with HDMI CEC compatibility let you turn it on or off in the device menus, where it is typically listed as "HDMI Control."
Enabling HDMI Control of CEC Devices
To ensure proper detection
- Power on HDMI devices before connecting them to the TV.
-
Connect and set up HDMI devices one at a time.
-
Power on the device and allow it to complete the power-on sequence (boot up). Stop any playback.
-
Connect the device to one of the TV's HDMI inputs.
-
When the TV detects the connection, the New Device Found screen will appear.
Note: See “If the New Device Found Screen Has No HDMI Control Option” on this page if there is no HDMI Control option.

New Device Found screen with HDMI Control option. This screen displays only if the device's HDMI Control is enabled.
- If prompted for a name, highlight a name for the device and press ENTER to add a check. The device itself may later override the name assigned.
- Highlight On and press ENTER to add a check.


- Highlight EXIT and press ENTER to close the New Device Found screen.
Note: At any time after completing Auto Input Sensing, you can set the TV's HDMI control on or off in the Inputs > HDMI Control menu.
- 838 Series. To supplement HDMI control with NetCommand IR control, see page 64.
If the New Device Found Screen Has No HDMI Control Option
If the New Device Found screen shows no option for HDMI Control, one of these conditions applies:
- HDMI Control is turned off in the menus of the new device
Action:
a. Highlight EXIT and press ENTER to close the New Device Found screen.
b. Display the device's setup menus and enable the device's CEC capabilities.
c. Wait for the TV's New Device Found screen to appear again.
d. If the New Device Found screen does not appear, power off the device. Power on the device and wait for the New Device Found screen to display with the HDMI Control option.
• The HDMI cable cannot support CEC
Action:
Upgrade your HDMI cable to one that supports CEC.
- The device does not have CEC compatibility Action:
- Control the device with its own remote control or program the TV's remote control to operate the device.
- 838 Series. Use the TV's NetCommand IR control (page 64).
Appendix C: HDMI Control of CEC Devices, continued
HDMI Control of an HDMI A/V Receiver and Connected Devices
Note: Connect the A/V receiver to the TV with an HDMI cable before making other connections.
- Enable HDMI Control for the A/V receiver as described in "Enabling HDMI Control of CEC Devices" on the previous page.
- Power on the HDMI device you wish to connect to the A/V receiver (such as a disc player, cable box, or satellite receiver). Allow the device to complete the power-on sequence (boot up). Stop playback if the device starts playing.
- Connect the device to the A/V receiver with an HDMI cable.
- Select the device's HDMI input on the A/V receiver's front panel controls or remote control.
- When the TV detects the connection, the New Device Found screen will appear.
Note: If the TV is unable to detect the device, either the device's CEC capability is not enabled or the device is not CEC compatible. Enable HDMI control through the device's menus before continuing. You may need to temporarily connect the device directly to the TV to view device menus.
- Highlight On and press ENTER to add a check.

- Highlight EXIT and press ENTER to close the New Device Found screen.
- Optional: Connect the TV's DIGITAL AUDIO OUTPUT to an input on the A/V receiver. Use this additional connection if:
- You want the ability to switch between the A/V receiver speakers and the TV speakers.
- You want to use the A/V receiver to listen to devices connected to the TV only, e.g., an antenna input or camcorder.
- 838 Series. If desired, perform NetCommand IR Learning to supplement CEC functions. You must first connect and place IR emitters for the devices. See page 64.

flowchart
graph TD
    A["TV"] --> B["HDMI cable"]
    B --> C["A/V receiver with HDMI output"]
    C --> D["Any connection types"]
    D --> E["High-definition DVD player"]
    D --> F["Cable box"]
    G["DIV player"] --> H["VCR"]
    G --> I["DVD player"]
    J["DIGITAL AUDIO OUTPUT"] --> K["Optional analog or digital audio connection"]
    K --> L["HDMI OUT"]
Connecting HDMI devices. The optional digital audio connection allows you to hear audio through the A/V receiver from devices connected to the TV only.
Appendix C: HDMI Control of CEC Devices, continued
Resolving CEC Conflicts
Because each manufacturer selects which CEC functions to support, some devices can conflict with other devices. If control conflicts arise, you can:
- Turn off TV control of an individual CEC-enabled device (see below).
- Turn off CEC in the setup menu of one of the devices.
Turning Off the TV's HDMI Control of a CEC Device
- Press MENU on the TV remote control.
- Highlight Inputs > HDMI Control.
- Move to the device name and press ENTER to select Off to turn off the TV's ability to control the device.
- Press EXIT to clear the menu.

Inputs > HDMI Control menu
Removing an HDMI Device
- Power off the device.
- Disconnect the HDMI cable.
- Press MENU on the TV remote control to enter the TV main menu.
- Go to Inputs > Name.
- Highlight the HDMI input name and press ENTER to select Delete.
- Press EXIT to clear the menus.
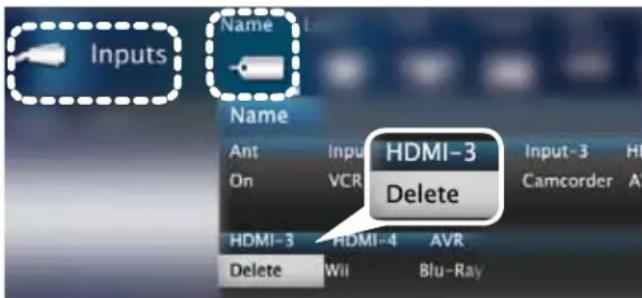
Inputs > Name menu with Delete selected for HDMI-3.
Using HDMI Control
As an example of using HDMI Control, press PLAY on the device itself to:
• Power on the TV
- Switch to the device (no need to display the Input Selection menu)
- Begin play of the device
Direct Keys
Test your equipment with the TV's remote control to find additional supported commands. See the table below for commands that may be available, depending on the individual device.
CEC-enabled VCR, DVD, and DVR functions that may be available:
| Record/Playback | Menu Navigation | Channel Tuning | Other | ||||
 |  | CH GUIDE | |||||
| ENTER | Digits 0-9, CANCEL | TOOLS Check the TOOLS menu for supported functions. | |||||
| CANCEL(to cancel) | ENTER | ||||||
If you have a CEC-enabled A/V receiver, CEC-enabled devices connected to the A/V receiver with an HDMI cable may also be controllable. They can be selected from the TV's Input Selection menu.
CEC-enabled A/V receiver functions that may be available:
• Try the VOL, MUTE, and menu-navigation keys.
• To open the A/V receiver menu, follow these steps:
1. While watching TV, press AUDIO.
2. Press ▲ until the TV Speakers option displays.
3. Press ▶ to select Off (to send audio to the A/V receiver).
4. Press INPUT and highlight the A/V receiver icon in the Input Selection menu.
5. Press TOOLS.
6. Select Menu from the Tools menu.
Appendix D: TV Care
Lamp-Cartridge Replacement
CAUTION: If the television is on, press POWER to turn it off. Unplug the television and allow it to cool for at least one hour before attempting to replace the lamp cartridge.
Lamp
The light source for this television is a lamp, which is part of a lamp cartridge assembly. The life of the lamp can vary, based on the lamp itself, the air temperature around the TV while it is operating, the selected lamp mode, and your viewing patterns. Warmer air or poor ventilation shorten the lamp life, as does setting Lamp Energy to Bright and turning the television on and off frequently.
Mitsubishi warrants the lamp for one (1) year from the date of original TV purchase at retail.
To Order a New Lamp
To Receive a Replacement Lamp Under Warranty
- Visit our website at www.mitsuparts.com.
- Call (800) 553-7278. Please have model number, serial number, and TV purchase date available.
To Purchase a Replacement Lamp After Warranty
Visit our website at www.mitsuparts.com or call (800) 553-7278. Order the following:
CAUTION


Touch lamp cartridge handle only. Do not touch lamp or lamp cartridge housing. Keep lamp cartridge horizontal during removal. Do not tilt as glass may come out and cause injury. Replace lamp cartridge only with the same part number 915B441001.
WARNING
THE ACCESS PANEL IS PROVIDED WITH AN INTERLOCK TO REDUCE THE RISK OF EXCESSIVE ULTRAVIOLET RADIATION. DO NOT DEFEAT ITS PURPOSE OR ATTEMPT TO SERVICE WITHOUT REMOVING PANEL COMPLETELY.
Lamp Part Number 915B441001
Lamp-Substitution Alert
MDEA recommends that you use only genuine Replacement Lamp Assemblies purchased directly from Mitsubishi or a Mitsubishi Authorized Dealer or Mitsubishi Authorized Service Center. MDEA advises that replacement lamps obtained separately from the Lamp Cartridge and/or Lamp Assemblies obtained from unauthorized sellers may be incorrect for your television, may not fit or perform properly and may even damage your television. MDEA can not be responsible for the performance, reliability or safety of any replacement lamps that are obtained from unauthorized sources.
WARNING
- Do not remove the lamp cartridge immediately after turning off the television. You may get burned because the lamp is very hot. Allow the television to cool for at least one hour before replacing the lamp cartridge.
- Do not remove the lamp cartridge except when replacing it. Careless treatment can result in injury or fire.
- Do not touch the lamp glass element. It may be very hot and break, causing injuries or burns.
- Be sure not to insert any metal or flammable object into the lamp cartridge opening, as it may cause fire or electrical shock. If a foreign object is inserted into the opening, unplug the AC cord of the TV and contact your dealer for service.
• Install the lamp cartridge securely. Failure to do so may cause a fire. - Do not touch the lamp glass elements. Oils from your fingers may cause premature lamp failure.
Hg = MERCURY
THE LAMP INSIDE THIS PRODUCT CONTAINS MERCURY AND MUST BE RECYCLED OR DISPOSED OF ACCORDING TO LOCAL, STATE OR FEDERAL LAWS. For disposal or recycling information, please contact your local authorities or the Electronic Industries Alliance at www.eiae.org
Appendix D: TV Care, continued
Lamp-Cartridge Replacement
Removing the Old Lamp Cartridge
- Turn off TV power and unplug the TV. Allow the lamp to cool for at least one hour before proceeding.
- After the lamp has cooled, remove the cover of the lamp compartment, located on the back of the TV. Refer to figures 1 and 2. Use a #2 (medium) Phillips screwdriver to loosen the screw securing the cover. Keep the screw and cover for re-installation
- With a medium Phillips screwdriver, loosen the two screws securing the lamp cartridge until they disengage from the mating threads. These are captive screws and cannot be separated from the lamp cartridge.
- Fully open the bag supplied with the replacement lamp and set the opened bag aside.
- Gently grasp the handle of the lamp cartridge and pull the old cartridge straight out. See figure 3.
CAUTION: Do not tilt or rotate the cartridge, as small glass fragments may fall out. - Without tilting or putting down the lamp cartridge, insert it into the opened bag. Close the bag while being careful not to let any glass particles fall out.
Installing the New Lamp Cartridge
- Do not touch the glass parts of the new lamp cartridge. Insert the new cartridge into the TV in the same orientation as the old cartridge. Push on the cartridge housing until it is fully seated.
- Gently tighten the screws with the screwdriver. AVOID OVERTIGHTENING!
- Replace the plastic cover and retaining screws.
- WASH YOUR HANDS THOROUGHLY, AS THIS LAMP CONTAINS MERCURY.


natural_image
Diagram showing a mechanical component with a downward arrow, labeled Figure 3 (no text or symbols on the diagram itself)Use only replacement lamp part number 915B441001.
Disposal of the Old Lamp Cartridge
Contact your local authorities or the Electronic Industries Alliance at www.eiae.org for lamp-disposal or recycling instructions. Do not dispose of the old lamp with common trash.
Appendix D: TV Care, continued
Cleaning Recommendations
Normally, light dusting with a dry, non-scratching duster will keep your TV clean. If cleaning beyond this is needed, please use the following guidelines:
First, turn off the TV and unplug the power cord from the power outlet.
Occasionally clean dust build-up from the air-intake grilles on the back and sides of the TV. Clean using a vacuum cleaner with a brush attachment.
Top and Sides of the TV
- Gently wipe down your TV with a soft, non-abrasive cloth such as cotton flannel, microfiber, or a clean cloth diaper, lightly moistened with water. Dry with a second dry, soft, non-abrasive cloth.

- For oily dirt, add a few drops of mild liquid detergent, such as dishwashing detergent, to the water used to moisten the cloth. Rinse with a second cloth moistened only with water. Dry with a third dry, soft, non-abrasive cloth.
Screen
- Follow the instructions for the top and sides, wiping gently in an up and down motion.
- Clean the entire screen evenly, not just sections of the screen.
- Do not allow liquid to drip down the screen, as some liquid may enter the TV through the gap between the screen and screen frame.
- You may purchase Mitsubishi Screen Cleaner, part number CLEANER-VSS, by calling (800) 553-7278.
General Cleaning Precautions
- DO NOT allow liquid to enter the TV through the ventilation slots or any crevice.
- DO NOT use any strong or abrasive cleaners, as these can scratch the surfaces.
- DO NOT use any cleaners containing ammonia, bleach, alcohol, benzene, or thinners, as these can dull the surfaces.
- DO NOT spray liquids or cleaners directly on the TV's surfaces.
• DO NOT scrub or rub the TV harshly. Wipe it gently.
Care of the Remote Control
Remote Control Tips
• For longer life, use alkaline batteries.
- Do not mix old and new batteries.
- Be within 20 feet of the equipment.
- Do not press two or more keys at the same time unless instructed to do so.
- Do not allow the unit to get wet or become heated.
- Keep the unit out of direct sunlight.
- Avoid dropping on hard surfaces.
- Do not use harsh chemicals to clean. Use only a soft, lightly moistened cloth.
Resetting the Remote Control
If TV mode is selected and the TV does not respond properly, reset the remote control.
- Press and hold POWER for several seconds until the indicator flashes twice and goes off.
- Release the POWER key.
- Press keys 0 0 9 3 5 and the indicator will flash twice when you finish entering the code. When entering the code, pause for a moment between each key press to ensure it is recognized.
Low-Battery Indicator
If you press a key and the indicator flashes five times, replace the remote control's batteries.
Appendix E: Troubleshooting
TV Reset Comparison Guide
You can resolve many common TV problems using the reset functions described in the following table. See also the troubleshooting suggestions later in this appendix.
IMPORTANT
Before you change sound or picture settings: If picture or sound settings seem wrong for a broadcast
channel (a channel from the ANT input, a cable box, or satellite receiver), first check other channels from the same input before changing settings. If most other channels from the same input seem correct, there is likely a problem with the broadcast rather than with the TV. Use care in this case, as changes you make to fix problems on individual channels also affect all other channels on the same input.
| Reset Name When to Use How to Use Resulting Action | |||
| Format If the picture shape seems incorrect, use the FORMAT key to change the shape of the picture. | Press FORMAT to cycle through the aspect ratios available for the signal. | The last-used format for a signal type is memorized for each input. The next time the same input and signal type are viewed, the last-used format will be recalled. | |
| PerfectColorTM/PerfecTintTM Reset (838 Series) (for the single input currently being watched) | When the color intensities seem out of balance, use the PerfectColor/PerfecTint reset to reset the color balances to the original factory settings. Both PerfectColor and PerfecTint are reset at the same time. | 1. While viewing the input being reset, press MENU and go to Picture > Perfect.2. Press ENTER to display the PerfectColor adjustment screen.3. Press CANCEL to reset the colors. | All PerfectColor/PerfecTint sliders are reset to the original center position. The PefectColor/PerfecTint settings for other inputs remain unchanged. |
| A/V Memory Reset (for the single current input) | When audio and/or video settings for a single input seem incorrect, use A/V Memory Reset to return the input to the original factory settings. | During General TV Viewing1. While viewing the input to reset, press MENU and go to Picture > Reset.2. Press ENTER to highlight Reset.3. Press ENTER again to reset.While Using VUDU Movies and Some VUDU AppsPress TOOLS and 3. | All Audio and Video settings for the individual input are reset except for the global settings for audio Balance, Listen To, Language, and settings in the Picture > Advanced menu. |
Service and Customer Support
Service
If you are unable to correct a problem with your TV, consult your Mitsubishi dealer or Mitsubishi Consumer Relations at (800) 332-2119.
- DO NOT adjust any controls other than those described in this Owner's Guide.
- DO NOT remove the protective back cover of your TV.
Customer Support
- To order replacement or additional remote controls or lamp cartridges, visit our website at www.mitsuparts.com or call (800) 553-7278.
- For questions:
◆ Call Consumer Relations at 800-332-2119.
E-mail: MDEAservice@mdea.com
Website: www.mitsubishi-tv.com
Appendix E: Troubleshooting, continued
| Reset Name When to Use How to Use Resulting Action | |||
| A/V Reset(for all inputs) | To reset audio and video adjustments for all inputs to the original factory settings. | While viewing the TV, press the control-panel buttons INPUT and VOLUME DOWN at the same time for at least two seconds. | All Audio and Video settings are returned to the original factory settings, including global settings including global settings not affected by Picture > Reset.Does not affect settings in thePicture > Advancedmenu. |
| Channel Memorization | To erase and re-memorize channels on the ANT input. | 1. While viewing the TV, press MENU to display the main menu.2. Navigate to the Setup > Channel menu.3. Highlight the reception mode, e.g. Ant Air.4. Select All channels.5. Highlight Scan.6. Press ENTER to start channel memorization. | All previously memorized channels for the antenna input are erased and a new set of memorized channels is created. All custom channel banks are cleared. To add or delete individual channels, see the Setup > Channel > Edit menu instructions on page 57. |
| Lock Menu Pass Code | To change your Lock menu pass code | See the cutout page from Appendix B, page 83. | Allows establishment of a new code. |
| Control-Panel Lock Release | To re-enable the control-panel buttons after activation of the Control-Panel Lock | Press and hold the INPUT button on the control panel for ten seconds. If the TV is powered off, you can then press the POWER button to turn it on. | Allows the control panel to be unlocked if the remote control is misplaced. |
| Auto Input Sensing for HDMI | If the New Device Found screen does not appear when you connect an HDMI device. | 1. Disconnect the HDMI device.2. Delete the HDMI input in the Inputs > Name menu (see page 59).3. Power on and connect the new device. | The New Device Found screen will display. |
| System Reset If the TV does not turn on or off, does not respond to the remote control or control-panel buttons, or has audio but no video. | Press and hold the POWER button on the control panel for ten seconds. | The TV will turn off. Power on the TV and the green LED will flash quickly for about one minute. The changes you made most recently, before using SYSTEM RESET , may be lost. | |
| TV Reset IMPORTANT:Use this reset only if other troubleshooting has been unsuccessful. | To reset all consumer-accessible settings and all memories to the original factory defaults.Use TV Reset if the TV can respond to controls but TV behavior is abnormal.CAUTION: All owner-performed setups and adjustments will be erased. | 1. While viewing the TV, press MENU to display the TV main menu.2. With the main menu displayed, press number keys 1 2 3 to display the Reset menu.3. READ THE ON-SCREEN WARNING AND INSTRUCTIONS.If you do not wish to use this reset, press EXIT or MENU to back out.If you do wish to use the reset, press ENTER to erase all memories and settings. | The TV will start the initialization process and then turn off. Power on the TV and the front green LED will start flashing. All memory and settings outlined in this Owner's Guide will need to be set again. |
| Reset Name When to Use How to Use Resulting Action | |||
| VUDUReset VUDU Account Pass-word | You have forgotten your account pass-word. | Using a computer, go to www.VUDU.com. | Reset your account password from the VUDU website (requires access to e-mail). |
| VUDUReset Parental Controls Pass Code | You have forgotten your pass code. | Call VUDU Customer Care at 1-888-554-VUDU (8838). | VUDU Customer Care will reset your pass code. |
| General TV Operation | ||
| Symptom Remarks | ||
| 1. | A fan has continued running more than two minutes after the TV was powered off. | The room is too warm. When the TV is off, internal components continue to draw power and must be cooled by the fan. |
| 2. | The fan gets louder after the TV is shut off. | Normal operation. The fan speeds up to cool the lamp quickly after the TV has been shut off. |
| 3. | The TV remote control does not work. | Check that the batteries are fresh and installed correctly.Check that the control mode on the remote is set to TV.Be no more than 20 feet from the TV when using the remote control.Program the remote control to operate the TV or other device.Reset the remote control. See “Resetting the Remote Control,” page 90. |
| 4. | When I try to use the remote control, the POWER key flashes five times. | Replace the batteries. |
| 5. | TV does not respond to the remote control or to control-panel buttons and TV will not power on or off. | Unplug the AC power cord for 10 seconds.Press and hold the POWER button on the control panel for 10 seconds to perform system reset. |
| 6. | When a device is selected from the Input Selection menu, the screen is blue or black (no signal source). | Make sure the selected device is turned on.Begin play of the device. |
| 7. | You have forgotten your Lock menu pass code. | See “Bypassing the Parental Lock”, Appendix B. |
| 8. | Rating restrictions are not working. | Open the Lock > Parental menu and:Verify that the ratings locks are active.Check the Lock Time/Unlock Time to check if rating restrictions are disabled.Rating restrictions apply only to content on the ANT input. |
| 9. | On-screen displays appear each time you change a function. | Normal TV operation. |
| 10. | A warning message appeared on screen stating, “TV will shut down in a few seconds. Please check if the air flow is blocked.” | Internal TV temperature has exceeded proper levels. Cool the room.The TV has overheated. Clear blocked air vents and ensure at least four inches of clearance on all sides of the TV. |
Appendix E: Troubleshooting, continued
| General TV Operation | ||
| Symptom Remarks | ||
| 11. | I have turned on CEC for my HDMI devices but control is erratic and I wish to disable it. | First turn off the TV’s HDMI control for the specific device.Open theInputs >HDMI Controlmenu, select the device, selectOff.Disable CEC on the device itself. See the device’s instructions.If the problem persists, do the following:Disconnect the device from the TV.Open theInputs >Namemenu and selectDeletefor the device.Reconnect the device to the TV and Auto Input Sensing will recognize the device with CEC disabled. |
| TV Channels | ||
| Symptom Remarks | ||
| 1. | The TV takes several seconds to respond to channel changes. | It is normal for digital channels to take longer to tune in.Press ENTER after entering a channel number to minimize delays.Use a 4-digit number for an over-the-air digital channel.Use a 6-digit number for digital cable channels if your cable service is able to recognize 6-digit channel numbers. |
| 2. | You cannot access a channel. | Use number keys instead of CH.Be sure the channel you want to view is in memory.Check that the TV is switched to the correct device or antenna for that channel by pressing the INPUT key.Make sure the Lock > Parental menu lock is set to Off.If you cannot tune to a virtual digital channel even though the TV has already memorized digital channels, tune to the physical channel number used by the broadcaster. The virtual channel will then be automatically added to memory.You may be trying to tune to an analog channel that is no longer broadcasting. |
| 3. | When ChannelView list is displayed, information appears incomplete | Press INFO to update the display for the highlighted channel.Make sure the TV clock is set correctly. Program information is displayed only for the currently tuned channel.Available information is sent from the broadcaster or cable provider. No other data is available. |
Appendix E: Troubleshooting, continued
TV Power On/Off
| Symptom Remarks | ||
| 1. | TV takes an excessively long time to power on. | When powered on, the TV needs time to boot up, just as a computer does. |
| 2. | You cannot program the TV to turn on automatically (Timer function) | The TV may be locked.The clock may not be set. |
| 3. | TV turned itself off and the light on the front panel started to flash. | Momentary power fluctuation can cause the TV to turn off to prevent damage. Wait for the green light to stop flashing and turn the TV on again.If the TV does not stay on, press the POWER button on the control panel for ten seconds to perform System Reset. If this happens frequently, obtain an AC line power conditioner/surge protector.An unusual digital signal may have been received, triggering a protection circuit. Wait for the light to stop flashing and turn TV on. |
| 4. | TV will not power off. Press the | POWER button on the control panel for ten seconds to perform System Reset. |
Picture
| Symptom Remarks | ||
| 1. | Picture does not look like a high-definition picture. | Compare the picture to the TV's test picture (Picture > Picture+ > Test Picture) to check if the source signal is supplying a lesser-quality image.Not all signals are high-definition signals. To receive high-definition programming from your cable or satellite provider, you must subscribe to the provider's high-definition service. Some over-the-air broadcasts are in high-definition and can be received with a high-quality antenna suited to your location. |
| 2. | TV has sound but no picture. | Press MENOn the remote control. If the menu displays, then there is a problem with the incoming signal.Check that all video inputs are plugged in firmly to the correct input jacks.Press and hold the POWER button on the control panel for ten seconds to perform System Reset. |
| 3. | Picture has become dimmer. | The lamp is nearing the end of its life. Order a new lamp.Adjust picture brightness and contrast to maximum levels.Change Lamp Energy from Standard to Bright. |
| 4. | You cannot view a picture when playing a VHS tape. | Check your VCR's owner's guide for further troubleshooting. |
| 5. | VCR or DVD player's on-screen menus jitter up and down. | Stop playback. Possible cause: Many VCRs and DVD players provide on-screen menus at only half-resolution that may appear to jitter up and down. |
| 6. | When viewing a stopped VCR, white lines are rolling on the screen. | Turn off video mute for the VCR.Begin playing the tape.Change the VCR input from Line 1 to the VCR antenna input. |
Appendix E: Troubleshooting, continued
| 7. A color program appears as a black and white image, or the colors are dim, or the screen is black. | ·If using component video, check that the red, green, and blue input cables are correctly connected to the red, green, and blue component video jacks.·If using composite video, check that the incoming cable is connected the TV's green Y/VIDEO jack.·838 Series. The PerfectColor color balance has been incorrectly set. Reset the PerfectColor balance. |
| 8. Picture from an HDMI input is noisy (poor quality). | ·Compare the picture to the TV's test picture (Picture > Picture+ > Test Picture) to check if the noise is internal or external to the TV.·Upgrade a Category 1 (unmarked) HDMI cable to a newer type of high-speed HDMI cable. |
| 9. The image from a computer appears distorted when viewed on the TV. | ·Normal TV operation. The TV does not correct distortion in the picture from a computer because the correction process may cut off the edges of the image.·The aspect ratio may be wrong for the image. Press FORMAT to change. |
| Sound | ||
| Symptom Remarks | ||
| 1. | There is no sound even when the volume is turned up. | Check if the MUTE key is on.The TV's analog Listen to setting may be set to SAP (analog program from the ANT input) but no SAP is being broadcast.Check that the Sound >Audio >TV Speakers option is set to On to hear sound from the TV speakers. Possibly the TV Speakers option is Off or set to Center but there is no A/V receiver connected.If using an A/V receiver, check that the Sound >Audio >TV Speakers option is set to Off to hear sound from the A/V receiver speakers.Press and hold the POWER button on the control panel for 10 seconds to perform System Reset.The language selected in the Setup >Antenna Digital Audio menu is not being broadcast for the current program. |
| 2. | The sound does not match the screen picture. | The TV's analog Listen to setting may be set to SAP (analog program from the ANT input). |
| 3. | The sound from my A/V receiver does not match the screen picture (I should hear the correct audio from my A/V receiver). | Check that DIGITAL AUDIO OUTPUT and/or AUDIO/SURROUND OUTPUT on TV's connection panel is connected to the A/V receiver.Without this connection, devices connected only to the TV (and not the A/V receiver) can be heard only from the TV speakers.Note that this includes the ANT input, a device (such as a camcorder) connected to the TV, and any other device sending audio to the TV only.If using a NetCommand-controlled A/V receiver, NetCommand may be selecting the wrong A/V receiver audio input. Check the A/V receiver's NetCommand setup in the Inputs >AVR menu. |
| 4. | Cannot select an audio-only device; it does not appear in the Input Selection menu. | Plug an unused video plug into the Y/VIDEO jack to activate Auto Input Sensing. Assign the name CD/Audio or MP3 to make the audio device selectable in the Input Selection menu. |
| 5.. | Sound is coming from the TV speakers instead of the A/V receiver. | Connect the TV's AUDIO OUT to the A/V receiver.Change TV Speakers setting to Off or Center. |
Appendix E: Troubleshooting, continued
| Home Network | ||
| Symptom Remarks | ||
| 1. I cannot connect the TV to the network. | Go to the Setup > Network menu. Obtain the TV MAC address and provide it to the router. | |
| 2. I plugged in a wireless USB adapter, but the wireless connection is not working. | The network may be locked. Go to Setup > Network. Highlight the network name and supply the pass code. | |
| 3. The INTERNET key only goes to VUDU. | Normal operation. The TV receives all internet services through VUDU Apps. The TV does not provide full internet access as does a web browser on a computer. | |
| NetCommand IR Control (NetCommand-equipped models only) | ||
| Symptom Remarks | ||
| 1. | NetCommand unable to learn specific device keys. | A/V Device does not use IR format for remote control signal. ITT and RF formats cannot be learned.Room lighting may affect the signal. Have the remotes very close (6 inches or less) to the TV during Learning.Some, but not all, device key functions can be learned by NetCommand. For example, POWER and PLAY may be learned, but other functions may not.The signal from the remote control may not be strong enough. Insert fresh batteries and try Learning again.The key was “learned” correctly but can be accessed only from theToolsmenu. |
| 2. | The A/V receiver is the selected audio source but there is no sound. | A/V Receiver Set Up for Audio and Video Switching over HDMI- Check to see if the A/V Receiver power is turned on.- If the device is connected only to the TV (e.g., on ANT or a front panel input), verify that the TV’sAUDIO OUTPUTis connected to the A/V receiver and the correct key has been “learned.”- The A/V receiver is not switching properly because you have not learned the IR codes for the A/V receiver inputs to which your devices are connected. |
| 3. | There is no sound or picture from the A/V receiver for my DVD player or other device connected to the A/V receiver; the A/V receiver should be sending video to the TV over an HDMI cable.(A/V Receiver Set Up for Audio and Video Switching over HDMI) | The NetCommand A/V receiver setup is not switching audio and video inputs properly because you did not “learn” the A/V receiver’s IR codes for the device inputs. See “Automatic Audio/Video Switching Over an HDMI Connection,” page 72. |
| 4. | I’ve selected my DVD player or other surround sound device in combination with the TV speakers but hear no sound from the TV speakers. | A/V Receiver Set Up for Audio and Video Switching over HDMI With your DVD player connected to the A/V receiver, only video is passed from the A/V receiver to the TV because of copy-protection restrictions on the HDMI signal |
| 5. | “learned” theRECORDkey for my VCR/DVR but when I pressed theRECORDkey, the VCR/DVR did not record anything. | Check that the VCR or DVR is receiving a signal directly from your cable box or satellite receiver. |
Trademark and License Information
Trademark and License Information
LICENSOR'S SUPPLIERS DO NOT MAKE OR PASS ON TO END USER OR ANY OTHER THIRD PARTY, ANY EXPRESS, IMPLIED OR STATUTORY WARRANTY OR REPRESENTATION ON BEHALF OF SUCH SUPPLIERS, INCLUDING, BUT NOT LIMITED TO THE IMPLIED WARRANTIES OF NON-INFRINGEMENT, TITLE, MERCHANTABILITY OR FITNESS FOR A PARTICULAR PURPOSE.
1 Manufactured under license from Cambridge Mechatronics Ltd. Rapidfire and the 1... logo are trademarks of Cambridge Mechatronics Ltd
The Bluetooth ® word mark and logos are registered trademarks owned by Bluetooth SIG, Inc. and any use of such marks by Mitsubishi Electric is under license. Other trademarks and trade names are those of their respective owners. Digital Light Processing ® and DLP ® are registered trademarks of Texas Instruments.
Manufactured under license from Dolby Laboratories. Dolby is a trademark of Dolby Laboratories.
ENERGY STAR® and the ENERGY STAR mark are registered U.S. marks. ENERGY STAR is a registered mark owned by the U.S. government.
HDMI ® , the HDMI Logo, and High-Definition Multimedia Interface are trademarks or registered trademarks of HDMI Licensing LLC in the United States and other countries.

Imaging Science Foundation Certified Calibration Controls
The software in this TV is based in part on the work of the Independent JPEG Group, copyright © 1991-1998, Thomas G. Lane, all rights reserved.
“x.v.Color” and the “x.v.Color” logo are trademarks of Sony Corporation.
VUDUTM is a trademark of VUDU, Inc.
ChannelView™, DeepField™ Imager, Easy Connect™, EdgeEnhance™, NetCommand®, PerfectColor™, PerfecTint™, Plush 1080p® 5G, Smooth120™, StreamTV™ are trademarks of Mitsubishi Digital Electronics America, Inc.
Network Service Disclaimer
Third party content and services, including without limitation home entertainment services by VUDU, Inc., are provided in accordance with whatever terms and conditions are established by the third party providers and agreed to by you. Mitsubishi Digital Electronics America (“MDEA”) has no control over any such third parties or any agreement you reach with them. MDEA has no control over the networks or transmission facilities by which content and services are provided by third parties. Your connection to the internet may vary in availability and quality. Customer service questions are to be directed to the third-party provider, not MDEA.
MDEA DOES NOT WARRANT CONTENT OR SERVICES PROVIDED BY ANY THIRD PARTY, EITHER EXPRESSLY OR IMPLIEDLY, FOR ANY PURPOSE. MDEA DOES NOT WARRANT THAT ANY THIRD PARTY SERVICE WILL REMAIN AVAILABLE FOR ANY PERIOD OF TIME OR THAT IT WILL BE SATISFACTORY, UNINTERRUPTED OR ERROR FREE. MDEA EXPRESSLY DISCLAIMS ANY IMPLIED WARRANTIES, INCLUDING BUT NOT LIMITED TO, WARRANTIES OF MERCHANTABILITY OR FITNESS FOR A PARTICULAR PURPOSE WITH RESPECT TO ANY THIRD PARTY CONTENT AND SERVICES.
MDEA WILL NOT, UNDER ANY CIRCUMSTANCES, BE LIABLE, WHETHER IN CONTRACT OR TORT OR OTHER LEGAL THEORY, FOR ANY DIRECT, INDIRECT, INCIDENTAL, SPECIAL OR CONSEQUENTIAL DAMAGES, ATTORNEY FEES, EXPENSES, OR ANY OTHER DAMAGES ARISING OUT OF, OR IN CONNECTION WITH, YOUR USE OF ANY CONTENT OR SERVICE THAT IS PROVIDED TO YOU BY ANY THIRD PARTY, EVEN IF ADVISED OF THE POSSIBILITY OF SUCH DAMAGES.
Mitsubishi TV Software
END-USER LICENSE AGREEMENT FOR EMBEDDED SOFTWARE
IMPORTANT – READ CAREFULLY: This License Agreement is a legal agreement between you (either an individual or an entity) and Mitsubishi Digital Electronics America, Inc. (MDEA) for all software pre installed and/or provided along with this television (“Software”). By utilizing this television and Software, you agree to be bound by the terms of this License Agreement.
The Software is protected by United States copyright laws and international treaty provisions, as well as other intellectual property laws and treaties. The Software is licensed, not sold.
-
LICENSE GRANT. MDEA grants you a non-exclusive, non-transferable, limited right and license to use one copy of the Software only with the Mitsubishi television model that included this owner's guide and owned by you.
-
RIGHTS AND LIMITATIONS.
Software Not for Resale. You may not resell or otherwise transfer for value the Software, except in conjunction with a sale of the TV that Software has been pre installed.
Prohibition on Reverse Engineering, Decompilation and Disassembly. The Software contains trade secrets or other proprietary material in its human perceivable form and to protect them, you may not reverse engineer, decompile, or disassemble, or otherwise reduce the Software to any human perceivable form, except to the extent that the foregoing restriction is expressly prohibited by applicable law.
Separation of Components. The Software is licensed as a single product. Its component parts may not be separated for use on more than one TV.
No Rental. You may not rent, lease, lend, or sublicense the Software.
Trademarks. This License Agreement does not grant you any rights to any trademarks of MDEA.
-
VIOLATIONS. You understand that any use, copying or transfer of the Software, except as permitted pursuant to this License, may subject you to serious criminal and civil penalties including damages and an award to MDEA of attorneys' fees in connection with any violation of this License. You further understand that you may be held legally responsible for any copyright infringement or other violation of intellectual property rights that is caused, encouraged, or induced by your failure to abide by the terms of the License. This license is effective until terminated, and will terminate immediately without notice from MDEA or judicial resolution if you fail to comply with any provision of this License.
-
COPYRIGHT. All title and intellectual property rights in and to the Software (including but not limited to any images, photographs, animations, video, audio, music, text, and "applets" incorporated into the Software), and any accompanying printed materials are owned by or licensed to MDEA. All title and intellectual property rights in and to the content which may be accessed through use of the Software is the property of the respective content owner and may be protected by applicable copyright or other intellectual property laws and treaties. This License Agreement grants you no rights to use such content, except that you own the media on which the Software is recorded, but MDEA and its licensors retain ownership of the Software itself. All rights not expressly granted are reserved by MDEA.
-
EXPORT RESTRICTIONS. MDEA is licensing the Software for use within the United States. You agree that you will not export or re-export the Software. You specifically agree not to export or re-export the Software: (i) to any country to which the U.S. has embargoed or restricted the export of goods or services, which currently include, but are not necessarily limited to Cuba, Iran, Iraq, Libya, North Korea, Sudan, and Syria, or to any national of any such country, wherever located, who intends to transmit or transport the Software back to such country; (ii) to any person or entity who you know or have reason to know will utilize the Software in the design, development, or production of nuclear, chemical, or biological weapons; or (iii) to any person or entity who has been prohibited from participating in U.S. export transactions by any federal agency of the U.S. government. You warrant and represent that neither the BXA nor any other U.S. federal agency has suspended, revoked, or denied your export privileges.
-
DISCLAIMER OF WARRANTY. EXCEPT AS OTHERWISE PROVIDED IN THIS LICENSE OR IN THE LIMITED WARRANTY APPLICABLE TO THE TV, MDEA MAKES NO OTHER WARRANTIES OF ANY KIND WHATSOEVER REGARDING THE SOFTWARE AND HEREBY EXPRESSLY DISCLAIMS ALL WARRANTIES OF ANY KIND WHATSOEVER, EXPRESS OR IMPLIED, WITH RESPECT TO THE SOFTWARE. ALL IMPLIED WARRANTIES, INCLUDING, WITHOUT LIMITATION, THE IMPLIED WARRANTIES OF MERCHANTABILITY AND FITNESS FOR A PARTICULAR PURPOSE ARE HEREBY EXPRESSLY DISCLAIMED BY MDEA. IN NO EVENT SHALL MDEA BE LIABLE TO YOU OR ANY THIRD PARTIES, IN CONTRACT, IN TORT OR OTHERWISE, FOR ANY DIRECT, INDIRECT, SPECIAL, INCIDENTAL OR CONSEQUENTIAL DAMAGES OF ANY KIND OR NATURE. BECAUSE SOME JURISDICTIONS DO NOT ALLOW THE EXCLUSION OR LIMITATION OF IMPLIED WARRANTIES, THE ABOVE LIMITATION MAY NOT APPLY TO YOU.
-
LIMITATION OF LIABILITY. MDEA SHALL NOT, UNDER ANY CIRCUMSTANCES BE LIABLE TO YOU OR ANY THIRD PARTIES FOR ANY DAMAGES OF ANY NATURE, WHETHER INDIRECT, SPECIAL, INCIDENTAL, CONSEQUENTIAL OR OTHERWISE, INCLUDING, BUT NOT LIMITED TO, ANY CLAIMS FOR LOST PROFITS, LOSS OF GOOD WILL OR EXPENDITURES MADE OR COMMITTED FOR IN RELIANCE ON THE CONTINUATION OF THIS LICENSE. YOU AGREE THAT NEITHER MDEA'S BREACH OF THIS LICENSE NOR ITS FAILURE TO REPAIR A DEFECT, ERROR OR BUG SHALL CONSTITUTE A FAILURE OF THE ESSENTIAL PURPOSE OF THIS LICENSE. BECAUSE SOME JURISDICTIONS DO NOT ALLOW THE EXCLUSION OR LIMITATION OF LIABILITY FOR CONSEQUENTIAL OR INCIDENTAL DAMAGES, THE ABOVE LIMITATIONS MAY NOT APPLY TO YOU. MDEA's liability to you for direct damages for any cause whatsoever and regardless of the form of the action, will be limited to the money paid by you for the TV (based on fair market value of the TV) that caused the damages.
-
GENERAL. This License Agreement will be governed by the laws of the State of California.
WARNING: This product contains chemicals known to the State of California to cause cancer and/or birth defects or other reproductive harm.
GNU GENERAL PUBLIC LICENSE
Version 3, 29 June 2007
Copyright © 2007 Free Software Foundation, Inc. http://fsf.org/
Everyone is permitted to copy and distribute verbatim copies of this license document, but changing it is not allowed.
Preamble
The GNU General Public License is a free, copyleft license for software and other kinds of works.
The licenses for most software and other practical works are designed to take away your freedom to share and change the works. By contrast, the GNU General Public License is intended to guarantee your freedom to share and change all versions of a program--to make sure it remains free software for all its users. We, the Free
Software Foundation, use the GNU General Public License for most of our software; it applies also to any other work released this way by its authors. You can apply it to your programs, too.
When we speak of free software, we are referring to freedom, not price. Our General Public Licenses are designed to make sure that you have the freedom to distribute copies of free software (and charge for them if you wish), that you receive source code or can get it if you want it, that you can change the software or use pieces of it in new free programs, and that you know you can do these things.
To protect your rights, we need to prevent others from denying you these rights or asking you to surrender the rights. Therefore, you have certain responsibilities if you distribute copies of the software, or if you modify it: responsibilities to respect the freedom of others.
For example, if you distribute copies of such a program, whether gratis or for a fee, you must pass on to the recipients the same freedoms that you received. You must make sure that they, too, receive or can get the source code. And you must show them these terms so they know their rights.
Developers that use the GNU GPL protect your rights with two steps: (1) assert copyright on the software, and (2) offer you this License giving you legal permission to copy, distribute and/or modify it.
For the developers' and authors' protection, the GPL clearly explains that there is no warranty for this free software. For both users' and authors' sake, the GPL requires that modified versions be marked as changed, so that their problems will not be attributed erroneously to authors of previous versions.
Some devices are designed to deny users access to install or run modified versions of the software inside them, although the manufacturer can do so. This is fundamentally incompatible with the aim of protecting users' freedom to change the software. The systematic pattern of such abuse occurs in the area of products for individuals to use, which is precisely where it is most unacceptable. Therefore, we have designed this version of the GPL to prohibit the practice for those products. If such problems arise substantially in other domains, we stand ready to extend this provision to those domains in future versions of the GPL, as needed to protect the freedom of users.
Finally, every program is threatened constantly by software patents. States should not allow patents to restrict development and use of software on general-purpose computers, but in those that do, we wish to avoid the special danger that patents applied to a free program could make it effectively proprietary. To prevent this, the GPL assures that patents cannot be used to render the program non-free.
The precise terms and conditions for copying, distribution and modification follow.
TERMS AND CONDITIONS
0. Definitions.
"This License" refers to version 3 of the GNU General Public License.
"Copyright" also means copyright-like laws that apply to other kinds of works, such as semiconductor masks.
"The Program" refers to any copyrightable work licensed under this License. Each licensee is addressed as "you". "Licensees" and "recipients" may be individuals or organizations.
To “modify” a work means to copy from or adapt all or part of the work in a fashion requiring copyright permission, other than the making of an exact copy. The resulting work is called a “modified version” of the earlier work or a work “based on” the earlier work.
A "covered work" means either the unmodified Program or a work based on the Program.
To “propagate” a work means to do anything with it that, without permission, would make you directly or secondarily liable for infringement under applicable copyright law, except executing it on a computer or modifying a private copy. Propagation includes copying, distribution (with or without modification), making available to the public, and in some countries other activities as well.
To “convey” a work means any kind of propagation that enables other parties to make or receive copies. Mere interaction with a user through a computer network, with no transfer of a copy, is not conveying.
An interactive user interface displays “Appropriate Legal Notices” to the extent that it includes a convenient and prominently visible feature that (1) displays an appropriate copyright notice, and (2) tells the user that there is no warranty for the work (except to the extent that warranties are provided), that licensees may convey the work under this License, and how to view a copy of this License. If the interface presents a list of user commands or options, such as a menu, a prominent item in the list meets this criterion.
1. Source Code.
The "source code" for a work means the preferred form of the work for making modifications to it. "Object code" means any non-source form of a work.
A “Standard Interface” means an interface that either is an official standard defined by a recognized standards body, or, in the case of interfaces specified for a particular programming language, one that is widely used among developers working in that language.
The “System Libraries” of an executable work include anything, other than the work as a whole, that (a) is included in the normal form of packaging a Major Component, but which is not part of that Major Component, and (b) serves only to enable use of the work with that Major Component, or to implement a Standard Interface for which an implementation is available to the public in source code form. A “Major Component”, in this context, means a major essential component (kernel, window system,
and so on) of the specific operating system (if any) on which the executable work runs, or a compiler used to produce the work, or an object code interpreter used to run it.
The “Corresponding Source” for a work in object code form means all the source code needed to generate, install, and (for an executable work) run the object code and to modify the work, including scripts to control those activities. However, it does not include the work's System Libraries, or general-purpose tools or generally available free programs which are used unmodified in performing those activities but which are not part of the work. For example, Corresponding Source includes interface definition files associated with source files for the work, and the source code for shared libraries and dynamically linked subprograms that the work is specifically designed to require, such as by intimate data communication or control flow between those subprograms and other parts of the work.
The Corresponding Source need not include anything that users can regenerate automatically from other parts of the Corresponding Source.
The Corresponding Source for a work in source code form is that same work.
2. Basic Permissions.
All rights granted under this License are granted for the term of copyright on the Program, and are irrevocable provided the stated conditions are met. This License explicitly affirms your unlimited permission to run the unmodified Program. The output from running a covered work is covered by this License only if the output, given its content, constitutes a covered work. This License acknowledges your rights of fair use or other equivalent, as provided by copyright law.
You may make, run and propagate covered works that you do not convey, without conditions so long as your license otherwise remains in force. You may convey covered works to others for the sole purpose of having them make modifications exclusively for you, or provide you with facilities for running those works, provided that you comply with the terms of this License in conveying all material for which you do not control copyright. Those thus making or running the covered works for you must do so exclusively on your behalf, under your direction and control, on terms that prohibit them from making any copies of your copyrighted material outside their relationship with you.
Conveying under any other circumstances is permitted solely under the conditions stated below. Sublicensing is not allowed; section 10 makes it unnecessary.
3. Protecting Users' Legal Rights From Anti-Circumvention Law.
No covered work shall be deemed part of an effective technological measure under any applicable law fulfilling obligations under article 11 of the WIPO copyright treaty adopted on 20 December 1996, or similar laws prohibiting or restricting circumvention of such measures.
When you convey a covered work, you waive any legal power to forbid circumvention of technological measures to the extent such circumvention is effected by exercising rights under this License with respect to the covered work, and you disclaim any intention to limit operation or modification of the work as a means of enforcing, against the work's users, your or third parties' legal rights to forbid circumvention of technological measures.
If you are interested in obtaining open source code for this product, please contact Mitsubishi at (800) 332-2119. A nominal handling and mailing charge may apply.
For assistance call 1(800) 332-2119
4. Conveying Verbatim Copies.
You may convey verbatim copies of the Program's source code as you receive it, in any medium, provided that you conspicuously and appropriately publish on each copy an appropriate copyright notice; keep intact all notices stating that this License and any non-permissive terms added in accord with section 7 apply to the code; keep intact all notices of the absence of any warranty; and give all recipients a copy of this License along with the Program.
You may charge any price or no price for each copy that you convey, and you may offer support or warranty protection for a fee.
5. Conveying Modified Source Versions.
You may convey a work based on the Program, or the modifications to produce it from the Program, in the form of source code under the terms of section 4, provided that you also meet all of these conditions:
a) The work must carry prominent notices stating that you modified it, and giving a relevant date.
b) The work must carry prominent notices stating that it is released under this License and any conditions added under section 7. This requirement modifies the requirement in section 4 to "keep intact all notices".
c) You must license the entire work, as a whole, under this License to anyone who comes into possession of a copy. This License will therefore apply, along with any applicable section 7 additional terms, to the whole of the work, and all its parts, regardless of how they are packaged. This License gives no permission to license the work in any other way, but it does not invalidate such permission if you have separately received it.
d) If the work has interactive user interfaces, each must display Appropriate Legal Notices; however, if the Program has interactive interfaces that do not display Appropriate Legal Notices, your work need not make them do so.
A compilation of a covered work with other separate and independent works, which are not by their nature extensions of the covered work, and which are not combined with it such as to form a larger program, in or on a volume of a storage or distribution medium, is called an “aggregate” if the compilation and its resulting copyright are not used to limit the access or legal rights of the compilation’s users beyond what the individual works permit. Inclusion of a covered work in an aggregate does not cause this License to apply to the other parts of the aggregate.
6. Conveying Non-Source Forms.
You may convey a covered work in object code form under the terms of sections 4 and 5, provided that you also convey the machine-readable Corresponding Source under the terms of this License, in one of these ways:
a) Convey the object code in, or embodied in, a physical product (including a physical distribution medium), accompanied by the Corresponding Source fixed on a durable physical medium customarily used for software interchange.
b) Convey the object code in, or embodied in, a physical product (including a physical distribution medium), accompanied by a written offer, valid for at least three years and valid for as long as you offer spare parts or customer support for that product model, to give anyone who possesses the object code either (1) a copy of the Corresponding Source for all the software in the product that is covered by this License, on a durable physical medium customarily used for software interchange, for a price no more than your reasonable cost of physically performing this conveying of source, or (2) access to copy the Corresponding Source from a network server at no charge.
c) Convey individual copies of the object code with a copy of the written offer to provide the Corresponding Source. This alternative is allowed only occasionally and noncommercially, and only if you received the object code with such an offer, in accord with subsection 6b.
d) Convey the object code by offering access from a designated place (gratis or for a charge), and offer equivalent access to the Corresponding Source in the same way through the same place at no further charge. You need not require recipients to copy the Corresponding Source along with the object code. If the place to copy the object code is a network server, the Corresponding Source may be on a different server (operated by you or a third party) that supports equivalent copying facilities, provided you maintain clear directions next to the object code saying where to find the Corresponding Source. Regardless of what server hosts the Corresponding Source, you remain obligated to ensure that it is available for as long as needed to satisfy these requirements.
e) Convey the object code using peer-to-peer transmission, provided you inform other peers where the object code and Corresponding Source of the work are being offered to the general public at no charge under subsection 6d.
A separable portion of the object code, whose source code is excluded from the Corresponding Source as a System Library, need not be included in conveying the object code work.
A "User Product" is either (1) a "consumer product", which means any tangible personal property which is normally used for personal, family, or household purposes, or (2) anything designed or sold for incorporation into a dwelling. In determining whether a product is a consumer product, doubtful cases shall be resolved in favor of coverage. For a particular product received by a particular user, "normally used" refers to a typical or common use of that class of product, regardless of the status of the particular user or of the way in which the particular user actually uses, or expects or is expected to use, the product. A product is a consumer product regardless of whether the product has substantial commercial, industrial or non-consumer uses, unless such uses represent the only significant mode of use of the product. "Installation Information" for a User Product means any methods, procedures, authorization keys, or other information required to install and execute modified versions of a covered work in that User Product from a modified version of its Corresponding Source. The information must suffice to ensure that the continued functioning of the modified object code is in no case prevented or interfered with solely because modification has been made.
If you convey an object code work under this section in, or with, or specifically for use in, a User Product, and the conveying occurs as part of a transaction in which the right of possession and use of the User Product is transferred to the recipient in perpetuity or for a fixed term (regardless of how the transaction is characterized), the Corresponding Source conveyed under this section must be accompanied by the Installation Information. But this requirement does not apply if neither you nor any third party retains the ability to install modified object code on the User Product (for example, the work has been installed in ROM).
The requirement to provide Installation Information does not include a requirement to continue to provide support service, warranty, or updates for a work that has been modified or installed by the recipient, or for the User Product in which it has been modified or installed. Access to a network may be denied when the modification itself materially and adversely affects the operation of the network or violates the rules and protocols for communication across the network.
Corresponding Source conveyed, and Installation Information provided, in accord with this section must be in a format that is publicly documented (and with an implementation available to the public in source code form), and must require no special password or key for unpacking, reading or copying.
7. Additional Terms.
“Additional permissions” are terms that supplement the terms of this License by making exceptions from one or more of its conditions. Additional permissions that are applicable to the entire Program shall be treated as though they were included in this License, to the extent that they are valid under applicable law. If additional permissions apply only to part of the Program, that part may be used separately under those permissions, but the entire Program remains governed by this License without regard to the additional permissions.
When you convey a copy of a covered work, you may at your option remove any additional permissions from that copy, or from any part of it. (Additional permissions may be written to require their own removal in certain cases when you modify the work.) You may place additional permissions on material, added by you to a covered work, for which you have or can give appropriate copyright permission.
Notwithstanding any other provision of this License, for material you add to a covered work, you may (if authorized by the copyright holders of that material) supplement the terms of this License with terms:
a) Disclaiming warranty or limiting liability differently from the terms of sections 15 and 16 of this License; or
b) Requiring preservation of specified reasonable legal notices or author attributions in that material or in the Appropriate Legal Notices displayed by works containing it; or
c) Prohibiting misrepresentation of the origin of that material, or requiring that modified versions of such material be marked in reasonable ways as different from the original version; or
d) Limiting the use for publicity purposes of names of licensors or authors of the material; or
e) Declining to grant rights under trademark law for use of some trade names, trademarks, or service marks; or
f) Requiring indemnification of licensors and authors of that material by anyone who conveys the material (or modified versions of it) with contractual assumptions of liability to the recipient, for any liability that these contractual assumptions directly impose on those licensors and authors.
All other non-permissive additional terms are considered “further restrictions” within the meaning of section 10. If the Program as you received it, or any part of it, contains a notice stating that it is governed by this License along with a term that is a further restriction, you may remove that term. If a license document contains a further restriction but permits relicensing or conveying under this License, you may add to a covered work material governed by the terms of that license document, provided that the further restriction does not survive such relicensing or conveying.
If you add terms to a covered work in accord with this section, you must place, in the relevant source files, a statement of the additional terms that apply to those files, or a notice indicating where to find the applicable terms.
Additional terms, permissive or non-permissive, may be stated in the form of a separately written license, or stated as exceptions; the above requirements apply either way.
8. Termination.
You may not propagate or modify a covered work except as expressly provided under this License. Any attempt otherwise to propagate or modify it is void, and will automatically terminate your rights under this License (including any patent licenses granted under the third paragraph of section 11).
However, if you cease all violation of this License, then your license from a particular copyright holder is reinstated (a) provisionally, unless and until the copyright holder explicitly and finally terminates your license, and (b) permanently, if the copyright holder fails to notify you of the violation by some reasonable means prior to 60 days after the cessation.
Moreover, your license from a particular copyright holder is reinstated permanently if the copyright holder notifies you of the violation by some reasonable means, this is the first time you have received notice of violation of this License (for any work) from that copyright holder, and you cure the violation prior to 30 days after your receipt of the notice.
Termination of your rights under this section does not terminate the licenses of parties who have received copies or rights from you under this License. If your rights have been terminated and not permanently reinstated, you do not qualify to receive new licenses for the same material under section 10.
9. Acceptance Not Required for Having Copies.
You are not required to accept this License in order to receive or run a copy of the Program. Ancillary propagation of a covered work occurring solely as a consequence of using peer-to-peer transmission to receive a copy likewise does not require acceptance. However, nothing other than this License grants you permission to propagate or modify any covered work. These actions infringe copyright if you do not accept this License. Therefore, by modifying or propagating a covered work, you indicate your acceptance of this License to do so.
10. Automatic Licensing of Downstream Recipients.
Each time you convey a covered work, the recipient automatically receives a license from the original licensors, to run, modify and propagate that work, subject to this License. You are not responsible for enforcing compliance by third parties with this License.
An “entity transaction” is a transaction transferring control of an organization, or substantially all assets of one, or subdividing an organization, or merging organizations. If propagation of a covered work results from an entity transaction, each party to that transaction who receives a copy of the work also receives whatever licenses to the work the party’s predecessor in interest had or could give under the previous paragraph, plus a right to possession of the Corresponding Source of the work from the predecessor in interest, if the predecessor has it or can get it with reasonable efforts.
You may not impose any further restrictions on the exercise of the rights granted or affirmed under this License. For example, you may not impose a license fee, royalty, or other charge for exercise of rights granted under this License, and you may not initiate litigation (including a cross-claim or counterclaim in a lawsuit) alleging that any patent claim is infringed by making, using, selling, offering for sale, or importing the Program or any portion of it.
11. Patents.
A “contributor” is a copyright holder who authorizes use under this License of the Program or a work on which the Program is based. The work thus licensed is called the contributor’s “contributor version”.
A contributor's "essential patent claims" are all patent claims owned or controlled by the contributor, whether already acquired or hereafter acquired, that would be infringed by some manner, permitted by this License, of making, using, or selling its contributor version, but do not include claims that would be infringed only as a consequence of further modification of the contributor version. For purposes of this definition, "control" includes the right to grant patent sublicenses in a manner consistent with the requirements of this License.
Each contributor grants you a non-exclusive, worldwide, royalty-free patent license under the contributor's essential patent claims, to make, use, sell, offer for sale, import and otherwise run, modify and propagate the contents of its contributor version.
In the following three paragraphs, a “patent license” is any express agreement or commitment, however denominated, not to enforce a patent (such as an express permission to practice a patent or covenant not to sue for patent infringement). To “grant” such a patent license to a party means to make such an agreement or commitment not to enforce a patent against the party.
If you convey a covered work, knowingly relying on a patent license, and the Corresponding Source of the work is not available for anyone to copy, free of charge and under the terms of this License, through a publicly available network server or other readily accessible means, then you must either (1) cause the Corresponding Source to be so available, or (2) arrange to deprive yourself of the benefit of the patent license for this particular work, or (3) arrange, in a manner consistent with the requirements of this License, to extend the patent license to downstream recipients. "Knowingly relying" means you have actual knowledge that, but for the patent license, your conveying the covered work in a country, or your recipient's use of the covered work in a country, would infringe one or more identifiable patents in that country that you have reason to believe are valid.
If, pursuant to or in connection with a single transaction or arrangement, you convey, or propagate by procuring conveyance of, a covered work, and grant a patent license to some of the parties receiving the covered work authorizing them to use, propagate, modify or convey a specific copy of the covered work, then the patent license you grant is automatically extended to all recipients of the covered work and works based on it.
A patent license is “discriminatory” if it does not include within the scope of its coverage, prohibits the exercise of, or is conditioned on the non-exercise of one or more of the rights that are specifically granted under this License. You may not convey a covered work if you are a party to an arrangement with a third party that is in the business of distributing software, under which you make payment to the third party based on the extent of your activity of conveying the work, and under which the third party grants, to any of the parties who would receive the covered work from you, a discriminatory patent license (a) in connection with copies of the covered work conveyed by you (or copies made from those copies), or (b) primarily for and in connection with specific products or compilations that contain the covered work, unless you entered into that arrangement, or that patent license was granted, prior to 28 March 2007.
Nothing in this License shall be construed as excluding or limiting any implied license or other defenses to infringement that may otherwise be available to you under applicable patent law.
12. No Surrender of Others' Freedom.
If conditions are imposed on you (whether by court order, agreement or otherwise) that contradict the conditions of this License, they do not excuse you from the conditions of this License. If you cannot convey a covered work so as to satisfy simultaneously your obligations under this License and any other pertinent obligations, then as a consequence you may not convey it at all. For example, if you agree to terms that obligate you to collect a royalty for further conveying from those to whom you convey the Program, the only way you could satisfy both those terms and this License would be to refrain entirely from conveying the Program.
13. Use with the GNU Affero General Public License.
Notwithstanding any other provision of this License, you have permission to link or combine any covered work with a work licensed under version 3 of the GNU Affero General Public License into a single combined work, and to convey the resulting work. The terms of this License will continue to apply to the part which is the covered work, but the special requirements of the GNU Affero General Public License, section 13, concerning interaction through a network will apply to the combination as such.
14. Revised Versions of this License.
The Free Software Foundation may publish revised and/or new versions of the GNU General Public License from time to time. Such new versions will be similar in spirit to the present version, but may differ in detail to address new problems or concerns.
Each version is given a distinguishing version number. If the Program specifies that a certain numbered version of the GNU General Public License “or any later version” applies to it, you have the option of following the terms and conditions either of that numbered version or of any later version published by the Free Software Foundation. If the Program does not specify a version number of the GNU General Public License, you may choose any version ever published by the Free Software Foundation. If the Program specifies that a proxy can decide which future versions of the GNU General Public License can be used, that proxy’s public statement of acceptance of a version permanently authorizes you to choose that version for the Program.
Later license versions may give you additional or different permissions. However, no additional obligations are imposed on any author or copyright holder as a result of your choosing to follow a later version.
15. Disclaimer of Warranty.
THERE IS NO WARRANTY FOR THE PROGRAM, TO THE EXTENT PERMITTED BY APPLICABLE LAW. EXCEPT WHEN OTHERWISE STATED IN WRITING THE COPYRIGHT HOLDERS AND/OR OTHER PARTIES PROVIDE THE PROGRAM "AS IS" WITHOUT WARRANTY OF ANY KIND, EITHER EXPRESSED OR IMPLIED, INCLUDING, BUT NOT LIMITED TO, THE IMPLIED WARRANTIES OF MERCHANTABILITY AND FITNESS FOR A PARTICULAR PURPOSE. THE ENTIRE RISK AS TO THE QUALITY AND PERFORMANCE OF THE PROGRAM IS WITH YOU. SHOULD THE PROGRAM PROVE DEFECTIVE, YOU ASSUME THE COST OF ALL NECESSARY SERVICING, REPAIR OR CORRECTION.
16. Limitation of Liability.
IN NO EVENT UNLESS REQUIRED BY APPLICABLE LAW OR AGREED TO IN WRITING WILL ANY COPYRIGHT HOLDER, OR ANY OTHER PARTY WHO MODIFIES AND/OR CONVEYS THE PROGRAM AS PERMITTED ABOVE, BE LIABLE TO YOU FOR DAMAGES, INCLUDING ANY GENERAL, SPECIAL, INCIDENTAL OR CONSEQUENTIAL DAMAGES ARISING OUT OF THE USE OR INABILITY TO USE THE PROGRAM (INCLUDING BUT NOT LIMITED TO LOSS OF DATA OR DATA BEING RENDERED INACCURATE OR LOSSES SUSTAINED BY YOU OR THIRD PARTIES OR A FAILURE OF THE PROGRAM TO OPERATE WITH ANY OTHER PROGRAMS), EVEN IF SUCH HOLDER OR OTHER PARTY HAS BEEN ADVISED OF THE POSSIBILITY OF SUCH DAMAGES.
17. Interpretation of Sections 15 and 16.
If the disclaimer of warranty and limitation of liability provided above cannot be given local legal effect according to their terms, reviewing courts shall apply local law that most closely approximates an absolute waiver of all civil liability in connection with the Program, unless a warranty or assumption of liability accompanies a copy of the Program in return for a fee.
GNU General Public License
Version 2, June 1991
Copyright (C) 1989, 1991 Free Software Foundation, Inc.
675 Mass Ave, Cambridge, MA 02139, USA
Everyone is permitted to copy and distribute verbatim copies of this license document, but changing it is not allowed.
Preamble
The licenses for most software are designed to take away your freedom to share and change it. By contrast, the GNU General Public License is intended to guarantee your freedom to share and change free software--to make sure the software is free for all its users. This General Public License applies to most of the Free Software Foundation's software and to any other program whose authors commit to using it. (Some other Free Software Foundation software is covered by the GNU Library General Public License instead.) You can apply it to your programs, too.
When we speak of free software, we are referring to freedom, not price. Our General Public Licenses are designed to make sure that you have the freedom to distribute copies of free software (and charge for this service if you wish), that you receive source code or can get it if you want it, that you can change the software or use pieces of it in new free programs; and that you know you can do these things.
To protect your rights, we need to make restrictions that forbid anyone to deny you these rights or to ask you to surrender the rights. These restrictions translate to certain responsibilities for you if you distribute copies of the software, or if you modify it.
For example, if you distribute copies of such a program, whether gratis or for a fee, you must give the recipients all the rights that you have. You must make sure that they, too, receive or can get the source code. And you must show them these terms so they know their rights.
We protect your rights with two steps: (1) copyright the software, and (2) offer you this license which gives you legal permission to copy, distribute and/or modify the software.
Also, for each author's protection and ours, we want to make certain that everyone understands that there is no warranty for this free software. If the software is modified by someone else and passed on, we want its recipients to know that what they have is not the original, so that any problems introduced by others will not reflect on the original authors' reputations.
Finally, any free program is threatened constantly by software patents. We wish to avoid the danger that redistributors of a free program will individually obtain patent licenses, in effect making the program proprietary. To prevent this, we have made it clear that any patent must be licensed for everyone's free use or not licensed at all.
The precise terms and conditions for copying, distribution and modification follow.
GNU GENERAL PUBLIC LICENSE
TERMS AND CONDITIONS FOR COPYING, DISTRIBUTION AND MODIFICATION
- This License applies to any program or other work which contains a notice placed by the copyright holder saying it may be distributed under the terms of this General Public License. The "Program", below, refers to any such program or work, and a "work based on the Program" means either the Program or any derivative work under copyright law: that is to say, a work containing the Program or a portion of it, either verbatim or with modifications and/or translated into another language. (Hereinafter, translation is included without limitation in the term "modification".) Each licensee is addressed as "you".
Activities other than copying, distribution and modification are not covered by this License; they are outside its scope. The act of running the Program is not restricted, and the output from the Program is covered only if its contents constitute a work based on the Program (independent of having been made by running the Program). Whether that is true depends on what the Program does.
- You may copy and distribute verbatim copies of the Program's source code as you receive it, in any medium, provided that you conspicuously and appropriately publish on each copy an appropriate copyright notice and disclaimer of warranty; keep intact all the notices that refer to this License and to the absence of any warranty; and give any other recipients of the Program a copy of this License along with the Program.
You may charge a fee for the physical act of transferring a copy, and you may at your option offer warranty protection in exchange for a fee.
- You may modify your copy or copies of the Program or any portion of it, thus forming a work based on the Program, and copy and distribute such modifications or work under the terms of Section 1 above, provided that you also meet all of these conditions:
a) You must cause the modified files to carry prominent notices stating that you changed the files and the date of any change.
b) You must cause any work that you distribute or publish, that in whole or in part contains or is derived from the Program or any part thereof, to be licensed as a whole at no charge to all third parties under the terms of this License.
c) If the modified program normally reads commands interactively when run, you must cause it, when started running for such interactive use in the most ordinary way, to print or display an announcement including an appropriate copyright notice and a notice that there is no warranty (or else, saying that you provide a warranty) and that users may redistribute the program under these conditions, and telling the user how to view a copy of this License. (Exception: if the Program itself is interactive but does not normally print such an announcement, your work based on the Program is not required to print an announcement.)
These requirements apply to the modified work as a whole. If identifiable sections of that work are not derived from the Program, and can be reasonably considered independent and separate works in themselves, then this License, and its terms, do not apply to those sections when you distribute them as separate works. But when you distribute the same sections as part of a whole which is a work based on the Program, the distribution of the whole must be on the terms of this License, whose permissions for other licensees extend to the entire whole, and thus to each and every part regardless of who wrote it.
Thus, it is not the intent of this section to claim rights or contest your rights to work written entirely by you; rather, the intent is to exercise the right to control the distribution of derivative or collective works based on the Program.
In addition, mere aggregation of another work not based on the Program with the Program (or with a work based on the Program) on a volume of a storage or distribution medium does not bring the other work under the scope of this License.
- You may copy and distribute the Program (or a work based on it, under Section 2) in object code or executable form under the terms of Sections 1 and 2 above provided that you also do one of the following:
a) Accompany it with the complete corresponding machine-readable source code, which must be distributed under the terms of Sections 1 and 2 above on a medium customarily used for software interchange; or,
b) Accompany it with a written offer, valid for at least three years, to give any third party, for a charge no more than your cost of physically performing source distribution, a complete machine-readable copy of the corresponding source code, to be distributed under the terms of Sections 1 and 2 above on a medium customarily used for software interchange; or,
c) Accompany it with the information you received as to the offer to distribute corresponding source code. (This alternative is allowed only for noncommercial distribution and only if you received the program in object code or executable form with such an offer, in accord with Subsection b above.)
The source code for a work means the preferred form of the work for making modifications to it. For an executable work, complete source code means all the source code for all modules it contains, plus any associated interface definition files, plus the scripts used to control compilation and installation of the executable. However, as a special exception, the source code distributed need not include anything that is normally distributed (in either source or binary form) with the major components (compiler, kernel, and so on) of the operating system on which the executable runs, unless that component itself accompanies the executable.
If distribution of executable or object code is made by offering access to copy from a designated place, then offering equivalent access to copy the source code from the same place counts as distribution of the source code, even though third parties are not compelled to copy the source along with the object code.
-
You may not copy, modify, sublicense, or distribute the Program except as expressly provided under this License. Any attempt otherwise to copy, modify, sublicense or distribute the Program is void, and will automatically terminate your rights under this License. However, parties who have received copies, or rights, from you under this License will not have their licenses terminated so long as such parties remain in full compliance.
-
You are not required to accept this License, since you have not signed it. However, nothing else grants you permission to modify or distribute the Program or its derivative works. These actions are prohibited by law if you do not accept this License. Therefore, by modifying or distributing the Program (or any work based on the Program), you indicate your acceptance of this License to do so, and all its terms and conditions for copying, distributing or modifying the Program or works based on it.
-
Each time you redistribute the Program (or any work based on the Program), the recipient automatically receives a license from the original licensor to copy, distribute or modify the Program subject to these terms and conditions. You may not impose any further restrictions on the recipients' exercise of the rights granted herein. You are not responsible for enforcing compliance by third parties to this License.
-
If, as a consequence of a court judgment or allegation of patent infringement or for any other reason (not limited to patent issues), conditions are imposed on you (whether by court order, agreement or otherwise) that contradict the conditions of this License, they do not excuse you from the conditions of this License. If you cannot distribute so as to satisfy simultaneously your obligations under this License and any other pertinent obligations, then as a consequence you may not distribute the Program at all. For example, if a patent license would not permit royalty-free redistribution of the Program by all those who receive copies directly or indirectly through you, then the only way you could satisfy both it and this License would be to refrain entirely from distribution of the Program.
If any portion of this section is held invalid or unenforceable under any particular circumstance, the balance of the section is intended to apply and the section as a whole is intended to apply in other circumstances.
It is not the purpose of this section to induce you to infringe any patents or other property right claims or to contest validity of any such claims; this section has the sole purpose of protecting the integrity of the free software distribution system, which is implemented by public license practices. Many people have made generous contributions to the wide range of software distributed through that system in reliance on consistent application of that system; it is up to the author/ donor to decide if he or she is willing to distribute software through any other system and a licensee cannot impose that choice.
This section is intended to make thoroughly clear what is believed to be a consequence of the rest of this License.
-
If the distribution and/or use of the Program is restricted in certain countries either by patents or by copyrighted interfaces, the original copyright holder who places the Program under this License may add an explicit geographical distribution limitation excluding those countries, so that distribution is permitted only in or among countries not thus excluded. In such case, this License incorporates the limitation as if written in the body of this License.
-
The Free Software Foundation may publish revised and/or new versions of the General Public License from time to time. Such new versions will be similar in spirit to the present version, but may differ in detail to address new problems or concerns.
Each version is given a distinguishing version number. If the Program specifies a version number of this License which applies to it and "any later version", you have the option of following the terms and conditions either of that version or of any later version published by the Free Software Foundation. If the Program does not specify a version number of this License, you may choose any version ever published by the Free Software Foundation.
- If you wish to incorporate parts of the Program into other free programs whose distribution conditions are different, write to the author to ask for permission. For software which is copyrighted by the Free Software Foundation, write to the Free Software Foundation; we sometimes make exceptions for this. Our decision will be guided by the two goals of preserving the free status of all derivatives of our free software and of promoting the sharing and reuse of software generally.
NO WARRANTY
-
BECAUSE THE PROGRAM IS LICENSED FREE OF CHARGE, THERE IS NO WARRANTY FOR THE PROGRAM, TO THE EXTENT PERMITTED BY APPLICABLE LAW. EXCEPT WHEN OTHERWISE STATED IN WRITING THE COPYRIGHT HOLDERS AND/OR OTHER PARTIES PROVIDE THE PROGRAM "AS IS" WITHOUT WARRANTY OF ANY KIND, EITHER EXPRESSED OR IMPLIED, INCLUDING, BUT NOT LIMITED TO, THE IMPLIED WARRANTIES OF MERCHANTABILITY AND FITNESS FOR A PARTICULAR PURPOSE. THE ENTIRE RISK AS TO THE QUALITY AND PERFORMANCE OF THE PROGRAM IS WITH YOU. SHOULD THE PROGRAM PROVE DEFECTIVE, YOU ASSUME THE COST OF ALL NECESSARY SERVICING, REPAIR OR CORRECTION.
-
IN NO EVENT UNLESS REQUIRED BY APPLICABLE LAW OR AGREED TO IN WRITING WILL ANY COPYRIGHT HOLDER, OR ANY OTHER PARTY WHO MAY MODIFY AND/OR REDISTRIBUTE THE PROGRAM AS PERMITTED ABOVE, BE LIABLE TO YOU FOR DAMAGES, INCLUDING ANY GENERAL, SPECIAL, INCIDENTAL OR CONSEQUENTIAL DAMAGES ARISING OUT OF THE USE OR INABILITY TO USE THE PROGRAM (INCLUDING BUT NOT LIMITED TO LOSS OF DATA OR DATA BEING RENDERED INACCURATE OR LOSSES SUSTAINED BY YOU OR THIRD PARTIES OR A FAILURE OF THE PROGRAM TO OPERATE WITH ANY OTHER PROGRAMS), EVEN IF SUCH HOLDER OR OTHER PARTY HAS BEEN ADVISED OF THE POSSIBILITY OF SUCH DAMAGES.
Mitsubishi Home-Cinema Television Limited Warranty
MITSUBISHI DIGITAL ELECTRONICS AMERICA, INC. ("MDEA") warrants as follows to the original purchaser of this television from an authorized MITSUBISHI Audio/Video Dealer, should it prove defective by reason of against defects arising from improper workmanship and/or material:
a. Parts. The lenticular (i.e. front picture) screen is warranted against defects in materials and workmanship for a period of thirty (30) days from the date of the original purchase at retail. The lamp and all other parts (except any software incorporated into this television) are warranted for a period of one (1) year from the date of the original purchase at retail. We will repair or replace, at our option, any defective part without charge for the part. Parts used for replacement may be replaced with those of like kind and quality and may be new or remanufactured. Parts used for replacement are warranted for the remainder of the original warranty period.
b. Embedded Software. MDEA warrants that all software incorporated into this television set (the “Embedded Software”) will perform in accordance with the functional description of Embedded Software in all material respects, but MDEA does not warrant that the Embedded Software is error-free. The limited warranty contained in this section shall continue for a period of one (1) year from the date of the original purchase at retail. If, after prompt notice within the warranty period, MDEA determines that the Embedded Software has failed to perform in accordance with such functional description in all material respects and if such failure is not due to accident, misuse, modification or misapplication of the Embedded Software, then MDEA shall modify or replace the nonconforming Embedded Software at no charge to you, which at MDEA’s sole discretion may be fulfilled by means of modification or replacement software contained on a replacement memory card for Customer installation. The foregoing shall be MDEA’s sole obligation to you under this limited warranty. All rights under this limited warranty on the Embedded Software also subject to your acceptance of and compliance with the terms of the Software License Agreement applicable to this television, and this limited warranty on the Embedded Software shall be null and void if the Embedded Software is modified or changed in any manner except as specifically authorized by MDEA.
c. Labor. For thirty (30) days after the original purchase at retail, we will repair or replace, at our option, the lenticular screen if it proves defective. For certain items that are designed to be replaced by the consumer, including (but not limited to) some Embedded Software, the consumer is solely responsible for any replacement labor. For all other parts, we will provide the labor for a warranty repair by an authorized MITSUBISHI service center without charge for one (1) year from the original date of purchase at retail.
d. Notice. To obtain warranty service, you must notify an authorized MITSUBISHI service center of any defect within the applicable warranty time period.
e. This DLP Projection Television uses a single DLP chip to create the screen image. This technology creates the image using small dots, or picture elements (pixels). Your DLP Projection TV is manufactured to a high level of performance and quality, in fact, 99.99% perfect in the number of properly functioning pixels. As in other display technology, sometimes a pixel is continuously active, inactive or the incorrect color. Our standard is clear; MDEA warrants only that the percentage of properly functioning pixels will be not less than 99.99% of all pixels.
BEFORE REQUESTING SERVICE, please review the instruction booklet to insure proper installation and correct customer control adjustment. If the problem persists please arrange for warranty service.
1. TO OBTAIN WARRANTY SERVICE:
a. Contact your nearest authorized MITSUBISHI service center, whose name and address can be obtained from your MITSUBISHI dealer, by writing at the address provided below, calling MDEA at the 800-332-2119, or by using the support feature of our website at www.Mitsubishi-tv.com.
b. Warranty service will be provided in your home or, if required, at an authorized service shop, provided that your television is located within the geographic territory customarily covered by an authorized MITSUBISHI service center. If not, you must either deliver your television to an authorized service location at your own expense, or pay for any travel and/or transportation costs the service center may charge to and from your home. Actual service labor will be provided without charge.
c. Proof of purchase date from an authorized MITSUBISHI dealer is required when requesting warranty service. Present your sales receipt or other document which establishes proof and date of purchase. THE RETURN OF THE OWNER REGISTRATION CARD IS NOT A CONDITION OF COVERAGE UNDER THIS LIMITED WARRANTY. However, please return the Owner Registration Card so that we can contact you should a question of safety arise which could affect you.
d. To obtain a replacement lamp, order the lamp directly from the MDEA Parts Department at (800) 553-7278.
2. THIS LIMITED WARRANTY DOES NOT COVER:
a. Up to .01% pixel outages (small dot picture elements that are dark or incorrectly illuminated).
b. Damage to the lenticular screen or Fresnel lens, screen frame, cosmetic damage or to any other damage where such damage is caused by unauthorized modification, alteration, repairs to or service of the product by anyone other than an authorized MITSUBISHI service center; physical abuse to or misuse of the product (including any failure to carry out any maintenance as described in the Owner's Guide including air vent cleaning or any product damaged by excessive physical or electrical stress); any products that have had a serial number or any part thereof altered, defaced or removed; product use in any manner contrary to the Owner's Guide; freight damage; or any damage caused by acts of God or other factors beyond the reasonable control of MDEA, such as power surge damage caused by electrical system or lightning. This limited warranty also excludes service calls where no defect in the product covered under this warranty is found, service calls related to unsatisfactory audio or visual reception or signal unless caused by a defect in the product that is covered under this limited warranty, all costs, expenses or any other damages arising from product installation, or set-ups, any adjustments of user controls (including contrast, brightness, color, tint, fine tuning, sharpness), other adjustment necessary to prepare the unit for display or use, connection with any external audio receiver, antenna, cable or satellite systems, or service of products purchased or serviced outside the U.S.A. Please consult the operating instructions contained in the Owner's Guide furnished with the product for information regarding user controls.
3. ANY EXPRESS WARRANTY NOT PROVIDED HEREIN, AND ANY REMEDY WHICH, BUT FOR THIS PROVISION, MIGHT ARISE BY IMPLICATION OR OPERATION OF LAW, IS HEREBY EXCLUDED AND DISCLAIMED. THE IMPLIED WARRANTIES OF MERCHANTABILITY AND OF FITNESS FOR ANY PARTICULAR PURPOSE ARE EXPRESSLY LIMITED TO A TERM OF ONE YEAR.
4. UNDER NO CIRCUMSTANCES SHALL MDEA BE LIABLE TO PURCHASER OR ANY OTHER PERSON FOR ANY INCIDENTAL, SPECIAL OR CONSEQUENTIAL DAMAGES, WHETHER ARISING OUT OF BREACH OF WARRANTY, BREACH OF CONTRACT, OR OTHERWISE.
5. Some states do not allow limitations on how long an implied warranty lasts, or the exclusion or limitation of incidental, special, or consequential damages, so the above limitations or exclusions may not apply to you.
6. This limited warranty gives you specific legal rights, and you may also have other rights which vary from state to state.
7. In the event of any dispute under this limited warranty, jurisdiction and venue for resolving that dispute will be in the state where the television was purchased and the laws of such state will govern.

MITSUBISHI
MITSUBISHI DIGITAL ELECTRONICS AMERICA, INC.
9351 Jeronimo Road
Irvine, CA 92618-1904
Index
A
Accent Lighting 58
Anamorphic Picture Format 32
Antenna Input (ANT) 20, 21 Setting Up 12
Signal Strength for Digital Channels 30
Antennaweb.org 57
Audio Lock (A/V receiver control) 78
Audio Output Jacks 20
Auto Input Sensing 13
Auto-Off (Sleep Timer) 28
Auto-On (Timer) 56
A/V Receiver
and TV's Remote Control 77
Audio Lock 78
Center Channel 27
Connecting 22, 25
Controlling Sound Volume 31
Disconnecting 31
NetCommand IR Control 70, 71
Controlling a Device Connected to the A/V Receiver 48, 74
Video and Audio Switching via HDMI 73
B
Batteries 7
Blue Glow 58
Bluetooth Audio Playback 40
Bright (Lamp Mode) 58
Brightness (picture adjustment) 50
C
Cable Box
and TV's Remote Control 77
Connecting 23
Captions Menu 55
CD Player 39
CEC (Consumer Electronics Control) 48, 85
A/V Receiver 31, 86
Troubleshooting 94
Center Channel 27
Channels
antennaweb.org 57
Changing Channels 8
Favorites (Fav) 28
Physical/Virtual Channel Numbers 57
Scan (memorize) 12, 57
Troubleshooting 94
Tuning 14
ChannelView™ Channel Listings 29
Cleaning 90
Clock, Set Date and Time 56
Closed Captions 55
Color Adjustments
Menu Controls 50
Reset Color 51, 91
Computer 17, 18
Contrast 50
Control Panel 11
Control Panel Lock 11, 63
D
Date. See Clock
Default Settings, Returning to 91
DIGITAL AUDIO OUTPUT 22
DVD Player
and TV's Remote Control 77
Connecting 22, 23
DVI Device, Connecting 17, 23
E
Energy Settings 58
ENERGY STAR 6
F
Fan Noise 4
FAV (Favorite Channels) 28
Film Mode 50
FORMAT (picture shape) 16
Freeze Picture (PAUSE key) 9
Front Panel
Blue Glow Accent Lighting 58
Controls 11
G
Game
3D Video 33
Game Picture Mode 49
HDMI Cables for Games 21
GUIDE Key
ChannelView 29
HDMI Control 87
NetCommand Control 68, 69
H
HD (High-Definition) Signal) 30
HDMI
A/V Receiver with HDMI 25
Changing Out an HDMI Device and Auto Input Sensing 13
Connecting an HDMI Device 17, 22
HDMI Cable Types 21
HDMI Control of CEC Devices 85
HDMI Jack 21
Removing an HDMI Device from the Activity Menu 59
Headphones 54
|
INFO Key
ChannelView 29
Status Display 30
INPUT Key/Input Selection Menu
Change Input Name 59
Choose Viewing Source 14
NetCommand-Controlled Switching of A/V Receiver Inputs 67
Removing a Disconnected HDMI Device 59
Internet 45
IR Emitter Placement 65
L
Lamp Cartridge Replacement 88
Lamp Energy 58
Language
Changing the Menu Language 56
In Digital Programs 56
SAP (Second Audio Program) 53
Learn 59. See also NetCommand IR Control
Letter Box Image Display 32
Level Sound 53
Listen To 53
Listings 29
Lock TV
Bypassing the Lock 83
Lock by Channel 63
Lock by Ratings 62
Lock by Time 63
Lock Control Panel 63
Preset V-Chip Blocking 61
M
Memorizing Channels 12, 57
Add Single Channel to Memory 57
MP3 Player (audio-only connection) 39
Mute
MUTE Key 9
N
NetCommand IR Control
About 64
A/V Receiver Control 71
Initial Setup for Most Devices 66
Operating 67
Troubleshooting 97
P
Pass Code
Resetting 83
Setting 61
VUDU Password 93
PerfectColor 51
Photo Viewing 38
Picture
Picture Menu Adjustments 49
Picture Quality and Film Mode 50
Shape (format) 16, 18, 32
Troubleshooting 95
Power On/Off 8
Troubleshooting 95
R
Ratings (TV and Movie) 62
Rear Speakers 44
Remote Control
Keys and Functions 9
Programming Instructions 78
Reset 90
Reset
A/V Memory Reset (for the current input) 91
A/V Reset (for all inputs) 92
HDMI Auto Input Sensing 13
Pass Code 83
PerfectColor/PerfectTint 91
Remote Control 90
Remote Control Audio Lock 78
System Reset 11
TV Reset Comparison Guide 91
s
Safety Instructions 5
SAP (second audio program) 53
Satellite Receiver
and the Remote Control 77
Connecting 17, 22, 23
Scan (memorize channels) 57
ScreenSaver 50
SD (Standard-Definition Signal) 30
Service and Support 91
Signal Definitions 30
Signal Strength Indicator 30
Sleep Timer 28
Sound
Controlling A/V Receiver Volume
(NetCommand) 71
Audio Lock 78
Level Sound 53
Menu Adjustments 53
Sound Mode (audio effects) 53
Sound Projector 41
Standard-Definition Signal 30
Standard Lamp Mode 58
Stand Part Number 4
Status Display 30
Stereo System. See A/V Receiver
Stream TV 45
Subwoofer 26, 53, 54
Surround Sound
Rear Speakers 44
Simulated Surround Sound 53
Sound Projector 41
TV Audio Outputs 22
System Reset 11, 92
T
3D GLASSES EMITTER Jack 21
3D Video 33, 52
Time. See Clock
Timer (auto-on) 56
Time Zone. See Clock
Tools Menu 10
Troubleshooting 91
U
USB Port 21
Auto Detection 13
File Types 37
USB Media Player Menu 38
Wireless Network Adapter 46
Wireless Subwoofer 26
V
V-Chip Ratings
Definitions 62
In Status Display 30
VCR
Connecting 24
Troubleshooting 95
Video from a Digital Camera 39
Video Game. See Game
VUDU Movie Service 47, 93
W
Wireless Network 46
Wireless Subwoofer 26
Website:
www.mitsubishi-tv.com
E-mail:
MDEAservice@mdea.com
Call Consumer Relations for operational or connection assistance at
800-332-2119
To order replacement or additional remote controls, lamp cartridges, or NetCommand IR emitters,
Visit our website www.mitsuparts.com
or call
800-553-7278
SYSTEM RESET
If the TV does not respond to the remote control, control-panel buttons, or will not power on/off, press and hold the POWER button on the control panel for ten seconds.
The TV will turn off. Power on the TV and the green LED will flash quickly for about one minute. Recent settings changes may be lost.

- 3D DLP™ HOME-CINEMA TELEVISION MODELS
- Series
- Series
- OWNER'S GUIDE
- CAUTION
- Stand Requirement
- FCC Declaration of Conformity
- Contents
- Important Information About Your TV
- Basic Setup and Operation
- TVConnections
- TVFeatures
- TV Menus
- NetCommand IR Control
- NetCommand IR Control of an A/V Receiver
- Appendices
- Trademark and License Information 98
- Network Service Disclaimer 98
- Warranty 105
- Index 107
- For Your Records
- Installation and Operating Notes
- TV Software
- Internal Fans
- Lamp Replacement
- Children and TV Viewing
- Important Safety Instructions
- Outdoor Antenna Grounding
- Replacement Parts
- Special Features of Your TV
- 1080p High-Definition DLP Display System
- 3D Television
- 16:9 Widescreen Picture Format
- Integrated HDTV Tuner
- High-Definition Video Inputs
- Easy Connect Auto Input Sensing
- Home-Theater Control
- HDMI Control
- NetCommand with IR Learning
- Immersive Sound Technology
- StreamTV Internet
- ENERGY STAR
- 1
- Basic Setup and Operation
- Package Contents
- Installing the Remote Control Batteries
- Before You Begin
- First-Time Power-On
- TV Tips
- Turning the TV On or Off
- If You Turn Off the TV by Mistake
- Changing Channels (antenna sources)
- TV Controls
- Remote Control
- TV Controls, continued
- The TOOLS Key and Menu
- TV Control Panel
- System Reset
- Panel-Lock Release
- The STATUS Indicator
- Setting Up TV Inputs
- Using the ANT (Antenna) Input
- Memorizing Channels with Channel Scan
- For the ANT input
- To start channel memorization
- Setting Up Inputs with Auto Input Sensing
- Important Note for NetCommand Users
- Setting Up TV Inputs, continued
- About Auto Input Sensing
- Auto Input Sensing for Most Devices
- When You First Connect a Device
- Tips on Auto Sensing
- Reactivating Auto Input Sensing for an HDMI Input
- Basic TV Operation
- Selecting an Input to Watch
- More About the Input Selection Menu
- Watching Broadcast TV
- TV Connected to an Antenna or Direct Cable Service (no cable box)
- Basic TV Operation, continued
- Picture Settings
- Basic Audio Controls
- Controlling Sound Volume
- Changing Audio Settings (TV Speakers Only)
- Changing the Audio Output
- TV Care
- Assistance
- The FORMAT Key and Picture Shape
- Important
- Sample Uses of the FORMAT Key
- Using the TV with a Personal Computer
- Connecting a Computer to the TV
- HDMI Connection
- HDMI and Digital Surround Sound
- Computer Video Adjustments
- Distortion in Computer Images
- Image Resolution
- Tip
- Computer Display Formats
- 2
- TV Connections
- Auto Input Sensing
- Connection Types
- Picture Quality
- Surround Sound
- Inputs and Outputs
- Side Inputs
- Inputs and Outputs, continued
- HDMI® Inputs (High-Definition Multimedia Interface)
- HDMI Cable Categories
- 2a. USB (limited use)
- 2b. USB (838 Series)
- LAN
- AUDIO
- Y/VIDEO (Composite Video)
- Y/VIDEO Pb Pr (Component Video)
- 3D GLASSES EMITTER
- ANT (Antenna)
- 9a. AUDIO OUTPUT
- 9b. AUDIO/SURROUND OUTPUT
- DVI/PC AUDIO INPUT
- DIGITAL AUDIO OUTPUT
- SUBWOOFER OUTPUT
- CENTER INPUT
- IR-NetCommand Output
- HDMI Device
- Commonly used with an HDTV Cable Box, Satellite Receiver, or DVD/Blu-ray Player
- For assistance call 1(800) 332-2119
- Y Pb Pr Component Video Device
- Required:
- DVI Video Device
- Commonly used with a Cable Box, Satellite Receiver, or DVD Player
- Antenna or Cable TV Service
- Composite Video Device
- VCR or other device with composite video output
- VCR or DVD Recorder to an Antenna or Wall Outlet Cable
- Note:
- A/V Receiver
- A/V Receiver with HDMI Output
- Supplemental Audio Connections
- Adding a Subwoofer
- Subwoofer with Audio Cable
- Wireless Subwoofer
- Supplemental Audio Connections, continued
- Using the TV Speakers as a Center Channel
- 3
- TV Features
- Sleep Timer
- Setting the Sleep Timer
- Viewing or Changing the Sleep Timer
- FAV (Favorite Channels)
- Adding
- Removing
- Selecting
- ChannelView Channel Listings
- About ChannelView
- ChannelView Custom Channel Banks
- Using Custom Channel Banks
- Status Display
- About Channel Numbers
- Signal Definitions
- Using an External Sound System
- Redirecting Audio Output
- Selecting the Audio Output
- Disconnecting an A/V Receiver
- Controlling A/V Receiver Sound Volume
- With a Standard TV Setup
- With HDMI Control (CEC-Enabled HDMI A/V Receiver)
- With NetCommand IR Control
- Picture Shape and Display Formats
- Format Definitions
- DVD Image Definitions
- 3D Video
- Enhanced 3D Video Options
- (TV Software Versions 012.06 and later)
- Automatic
- Which Software Version Is in My TV?
- Initial Setup
- Off
- Choice of Source Formats
- 3D Video, continued
- Watching 3D Video
- Notes on Using 3D Video Settings
- Notice Concerning 3D Format Compatibility
- Original 3D Video Options
- Watching Regular (non-3D) Video
- Notice Concerning 3D Format Compatibility (TV Software Versions 012.05 and earlier)
- 3D Safety Requirements
- Epilepsy
- WARNING! IF YOU OR ANY MEMBER OF YOUR FAMILY HAS A HISTORY OF EPILEPSY, CONSULT A PHYSICIAN BEFORE USING 3D VIDEO OR GAME PRODUCTS.
- WARNING! SOME LIGHT PATTERNS MAY INDUCE SEIZURES IN PERSONS WITH NO PRIOR HISTORY OF EPILEPSY. DISCONTINUE 3D VIEWING IF YOU EXPERIENCE ANY OF THE FOLLOWING SYMP-TOMS:
- Camera Images and Music Files
- USB Source Devices (838 Series)
- The USB Media Player Menu
- Displaying the Menu
- Photos
- Audio
- Setup
- Notes on Using the USB Port
- Picture Files Compatible with the USB Port
- Camera Images and Music Files, continued
- Using the Photos and Audio Menus
- USB Media Setup Menu
- Photos and Motion Video as Composite Video
- Using an Audio-Only Device
- Wireless Audio Playback
- Pairing the TV with an Audio Playback Device
- Resetting Bluetooth Pairing or Connection
- Tips for Wireless Playback
- Sound Projector (838 Series)
- Sound Projector Technology
- Positioning the TV
- Connecting the TV
- Basic Manual Setup
- Custom Menu
- Sound Projector (838 Series), continued
- How to Make Adjustments in the Custom Menu
- Resetting Angle and Level Values in the Custom Menu
- Auto Setup
- Initial Preparation
- Start Auto Setup
- Microphone Placement
- Microphone
- External Rear Speakers
- StreamTV™ Internet Media
- Home Network Setup
- Ethernet Connection
- DHCP (automatic)
- Required for StreamTV internet media:
- Manual
- StreamTV™ Internet Media, continued
- Wireless Connection
- Using StreamTV Internet Media
- Getting Started with VUDU Movies
- Troubleshooting
- If You Are Unable to Connect to the Internet
- For Further Assistance
- Using VUDU Apps and VUDU Movies
- ENTER
- LAST
- PLAY/PAUSE
- FAST FORWARD/REVERSE
- STOP
- Introduction to Home-Theater Control
- Source device connected directly to the TV
- Remote Control Programming (Any Connection Type)
- CEC-Enabled HDMI Device (HDMI Connection Only)
- Series. NetCommand IR Control (Any Connection Type)
- Source device connected to an A/V receiver connected to the TV
- CEC-Enabled HDMI A/V Receiver
- Series: A/V Receiver with HDMI Output (no CEC)
- 4
- TV Menus
- Main Menu
- Picture
- Picture Video
- Picture, continued
- Picture Reset
- Picture Perfect
- Using PerfectColor:
- Using PerfecTint:
- Picture Advanced
- To use the custom Picture Mode at a later time
- Sound
- Sound Audio
- Sound, continued
- Sound Global
- Sound Auto SP
- Sound SoundPro
- Captions
- Captions on Digital Channels
- Captions on Analog Channels
- Captions Services
- Captions Font
- Captions Color
- Setup, continued
- Setup Channel
- Adding/Deleting Channels Using the Channel Edit Menu
- Notes on Scan and Channel Memorization
- Inputs
- Inputs Name
- General Notes for the Inputs > Name Menu
- Notes for HDMI devices
- Inputs Learn
- Inputs AVR
- Inputs, continued
- Inputs Order
- Inputs Demo
- Lock
- Pass Code
- Setting a Pass Code
- Resetting a Pass Code
- Parental Menu
- Other Menu (Alternate Rating System)
- Bypassing TV Locks
- Important Notes on Rating Locks
- Lock, continued
- Lock Parental
- TV Rating
- Movie Rating
- Start Time/Stop Time
- Lock Time
- Lock Channel
- Panel
- Off, On
- Lock Other
- Other Menu Options (alternate rating system)
- 5
- NetCommand IR Control
- About NetCommand IR Control
- Important Note on NetCommand
- IR Emitters
- Placement
- If You are Unable to Locate a Device's IR Sensor
- NetCommand Setup
- Initial NetCommand Setup
- NetCommand and Device-Specific Keys
- NetCommand Setup, continued
- Adding or Removing Device Keys from NetCommand Control
- Operating NetCommand-Controlled Devices
- Controlling Most Device Types
- Special Operation Methods
- Operating NetCommand-Controlled Devices, continued
- 6
- NetCommand IR Control of an A/V Receiver
- Controlling an A/V Receiver after NetCommand Setup
- Switching Audio to and from the A/V Receiver
- Controlling A/V Receiver Power
- With Any Connection Type
- With an HDMI Connection
- Controlling Other A/V Receiver Functions
- Setting Up A/V Receiver Control
- Power and Volume
- Setup to Control A/V Receiver Power and Volume
- Setting Up A/V Receiver Control, continued
- Automatic Audio/Video Switching Over an HDMI Connection
- More About Using an HDMI Connection
- Setup to Control Automatic Audio and Video Switching via HDMI
- NetCommand Control of a Device Connected to an HDMI A/V Receiver
- Appendix A: Programming the Remote Control
- Functions Available for Other A/V Devices
- Appendix A: Programming the Remote Control, continued
- Programming the Remote Control
- Code Verification
- Audio Lock: Universal A/V Receiver Control
- To Reset the Remote Control to Operate Volume and Mute for the TV Speakers
- Appendix B: Bypassing the Parental Lock
- Mitsubishi Home Theater TV
- Bypassing the Parental Lock
- Appendix C: HDMI Control of CEC Devices
- To use HDMI Control, you must enable it in both the TV and the device.
- Enabling HDMI Control of CEC Devices
- If the New Device Found Screen Has No HDMI Control Option
- Action:
- Appendix C: HDMI Control of CEC Devices, continued
- HDMI Control of an HDMI A/V Receiver and Connected Devices
- Resolving CEC Conflicts
- Turning Off the TV's HDMI Control of a CEC Device
- Removing an HDMI Device
- Using HDMI Control
- Direct Keys
- CEC-enabled VCR, DVD, and DVR functions that may be available:
- CEC-enabled A/V receiver functions that may be available:
- Appendix D: TV Care
- Lamp-Cartridge Replacement
- Lamp
- To Order a New Lamp
- To Receive a Replacement Lamp Under Warranty
- To Purchase a Replacement Lamp After Warranty
- WARNING
- Lamp Part Number 915B441001
- Lamp-Substitution Alert
- Appendix D: TV Care, continued
- Removing the Old Lamp Cartridge
- Installing the New Lamp Cartridge
- Disposal of the Old Lamp Cartridge
- Cleaning Recommendations
- Top and Sides of the TV
- Screen
- General Cleaning Precautions
- Care of the Remote Control
- Remote Control Tips
- Resetting the Remote Control
- Low-Battery Indicator
- Appendix E: Troubleshooting
- TV Reset Comparison Guide
- Service and Customer Support
- Service
- Customer Support
- Appendix E: Troubleshooting, continued
- Trademark and License Information
- Network Service Disclaimer
- Mitsubishi TV Software
- END-USER LICENSE AGREEMENT FOR EMBEDDED SOFTWARE
- GNU GENERAL PUBLIC LICENSE
- Preamble
- TERMS AND CONDITIONS
- Definitions.
- Source Code.
- Basic Permissions.
- Protecting Users' Legal Rights From Anti-Circumvention Law.
- Conveying Verbatim Copies.
- Conveying Modified Source Versions.
- Conveying Non-Source Forms.
- Additional Terms.
- Termination.
- Acceptance Not Required for Having Copies.
- Automatic Licensing of Downstream Recipients.
- Patents.
- No Surrender of Others' Freedom.
- Use with the GNU Affero General Public License.
- Revised Versions of this License.
- Disclaimer of Warranty.
- Limitation of Liability.
- Interpretation of Sections 15 and 16.
- TERMS AND CONDITIONS FOR COPYING, DISTRIBUTION AND MODIFICATION
- NO WARRANTY
- Mitsubishi Home-Cinema Television Limited Warranty
- TO OBTAIN WARRANTY SERVICE:
- MITSUBISHI
- Index
- A
- B
- C
- D
- E
- F
- G
- H
- |
- L
- M
- N
- P
- R
- s
- T
- U
- V
- W
- Call Consumer Relations for operational or connection assistance at
- 800-332-2119
- To order replacement or additional remote controls, lamp cartridges, or NetCommand IR emitters,
- Visit our website www.mitsuparts.com
Brand : MITSUBISHI
Model : WD-65738
Category : Video projector