
BR110 - Freezer BAUMATIC - Free user manual and instructions
Find the device manual for free BR110 BAUMATIC in PDF.


| Product Type | Chest Freezer |
| Brand | Baumatic |
| Model | BR110 |
| Capacity | 110 Liters |
| Dimensions (H x W x D) | 85 x 55 x 60 cm |
| Weight | 30 kg |
| Energy Class | F (EU 2017) |
| Power Consumption | 0.5 kWh/24h |
| Temperature Range | -24°C to -18°C |
| Climate Class | N, ST |
| Defrosting Type | Manual |
| Noise Level | 42 dB |
| Refrigerant | R600a |
| Control Type | Mechanical Thermostat |
| Quick Freeze Function | Yes |
| Door Lock | Yes |
| Adjustable Feet | Yes |
| Interior Light | No |
| Handle | Recessed |
| Warranty | 2 Years |
Frequently Asked Questions - BR110 BAUMATIC
User questions about BR110 BAUMATIC
0 question about this device. Answer the ones you know or ask your own.
Ask a new question about this device
Download the instructions for your Freezer in PDF format for free! Find your manual BR110 - BAUMATIC and take your electronic device back in hand. On this page are published all the documents necessary for the use of your device. BR110 by BAUMATIC.
USER MANUAL BR110 BAUMATIC
natural_image
Simple line drawing of a fish with fins and tail, no text or symbols presentUSER MANUAL FOR YOUR BAUMATIC
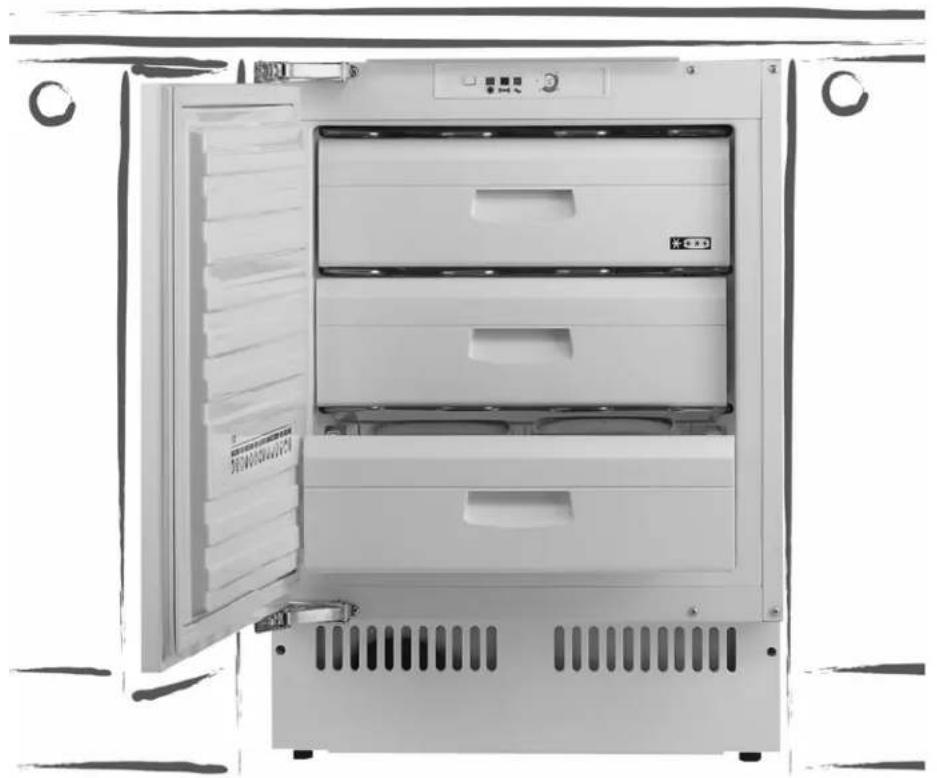
BR110, 102 Litres Built under freezer
natural_image
Front view of a white refrigerator with open door and side panel, no visible text or symbols on the device itself.
NOTE: This User Instruction Manual contains important information, including safety & installation points, which will enable you to get the most out of your appliance. Please keep it in a safe place so that it is easily available for future reference. for you or any person not familiar with the operation of the appliance.
JW 07/01/13
Contents
| E | n | v | i | r | o | n | m | e | n | t | a | l |
| Important safety information | ||||||||||||
| Specifications of your freezer | ||||||||||||
| D | i | m | e | n | s | i | o | n | s | |||
| D | e | s | c | r | i | p | t | i | o | n | o f | |
| Using your Baumatic freezer | ||||||||||||
| B | e | f | o | r | e | s | w | i | t | c | h i | |
| D | u | r | i | n | g | f | i | r | s | t | ||
| Switching on the appliance and setting the thermostat 10 | ||||||||||||
| C | o | n | t | r | o | l | P | a | n | e | l | |
| The *# freezer compartment | ||||||||||||
| T | i | p | s | o | n | f | r | e | e | z i | ||
| M | a | k | i | n | g | i | c | e | c | u b | ||
| Freezing fresh food with fast freeze | ||||||||||||
| Saving energy when using your freezer | ||||||||||||
| Cleaning and maintenance | ||||||||||||
| Defrosting the *# freezer compartment | ||||||||||||
| I | n | s | t | a | l | l | a | t | i | o | n | |
| Electrical connection | ||||||||||||
| P | o | s | i | t | i | o | n | i | n | g | ||
| Reversing the door of your appliance 19-20 | ||||||||||||
| A | p | e | r | t | u | r | e | d | i | m | e n | |
| Adjusting the plinth/kickboard 21-22 | ||||||||||||
| Fitting the furniture door to the appliance 23-26 | ||||||||||||
| T | r | o | u | b | l | e | s | h | o | o | t | i n |
| Baumatic consumables | ||||||||||||
| T | e | c | h | n | i | c | a | l | d | a | t a | |
| C | o | n | t | a | c | t | d | e | t | a | i l | |
Environmental note
Note: Before discarding an old appliance, switch off and disconnect it from the power supply. Cut off and render any plug useless. Cut the cable off directly behind the appliance to prevent misuse. This should be undertaken by a competent person. Disable the door lock to make sure that children cannot get stuck inside the appliance.
This appliance is marked according to the European directive 2002/96/EC on Waste electrical and Electronic Equipment (WEEE). By ensuring this product is disposed of correctly, you will help prevent potential negative consequences for the environment and human health, which could otherwise be caused by inappropriate waste handling of this product.
The symbol

on the product, or on the documents accompanying the product, indicates that this appliance may not be treated as household waste. Instead it shall be handed over to the applicable collection point for the recycling of electrical and electronic equipment.
Disposal must be carried out in accordance with local environmental regulations for waste disposal.
For more detailed information about treatment, recovery and recycling of this product, please contact your local city office, your household waste disposal service or the shop where you purchased the product.

natural_image
Symbol of a trash bin crossed with diagonal lines, representing waste sorting or restriction (no text or labels)
Important safety information

natural_image
Illustration of an owl reading a book (no text or symbols present)Your safety is of the utmost importance to Baumatic. Please make sure that you read this instruction booklet before attempting to install or use the appliance. If you are unsure of any of the information contained in this booklet, please contact the Baumatic Advice Line.

IMPORTANT: Any installation work must be carried out by a qualified electrician or competent person.
Use of the appliance
- Your appliance is only designed to be used in the home. It is suitable for freezing and storing frozen food. If it is used for any other purpose or it is not used correctly, then Baumatic Ltd. will accept no liability for any damage that might be caused.
natural_image
Simple black-and-white icon of a house with windows and trees, no text or symbols present.- Altering the specification of the appliance must not be attempted for reasons of safety.
Before using your appliance
- Check the appliance for any signs of transport damage. If you notice any damage, then you should not connect your appliance to your mains supply and should contact your supplier.
Refrigerant
- Your appliance contains R600a refrigerant, which is a natural gas that does not contain CFCs that can damage the environment. However it is a flammable substance, therefore care should be taken:
- During the transportation and installation of the appliance, make sure that the refrigeration pipework does not get damaged.
- If it does become damaged then sources of ignition and open flames should be avoided. Also the room that the appliance is situated in should be thoroughly ventilated.
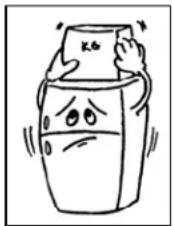
- Do not place any objects on top of the appliance, as this may damage the table top.
natural_image
Cartoon illustration of a smiling container with arms and legs, no text or symbols presentChild safety
○ Packaging material should be kept away from children.
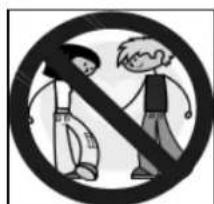
○ Children should not be allowed to touch the controls or play with the appliance.
natural_image
Black and white pictogram showing a person crossed out of a diagonal line, symbolizing no change or restriction (no text present)General safety
- Do not pull on the power supply cable to remove the plug from your mains supply socket.
- Do not pull out or insert the plug with wet hands.
- Do not attempt to use your appliance outdoors or any place where it is likely to come into contact with the elements.

Before cleaning the appliance or performing maintenance work, ensure that the appliance has been disconnected from your mains supply.
- Never allow the back coils of the appliance to come into contact with the wall surface.
○ Always ensure that the location where you are installing your appliance is free of stored items such as papers and other flammable materials.
- Never block the ventilation openings of the appliance, either on the inside or its exterior.
- It is vital to keep your appliance well ventilated, so that there is proper air flow between the bottom of the unit and the plinth/kick plate which it is sitting on.

natural_image
Black and white abstract camera aperture icon with six blades (no text or symbols)Do not place electrical devices inside of the appliance, such as mixers and electric ice cream makers.
Service
You should not attempt to repair the appliance yourself, as this could cause injury or a more serious malfunction. If you require a service call then please contact the Customer Care Department.
natural_image
Illustration of five different tools: pliers, wrench, screwdriver, and wrench (no text or symbols)Specifications of your freezer

Dimensions of appliance Dimensions of aperture\*
Height: 818 - 870 mm
Width: 596 mm
Depth: 550 mm
Height: 820 - 870 mm
Width: 600 mm
Depth: 600 mm (min)
○ Freezer star rating ****
- Manual defrost
○ Adjustable thermostat
o Temperature rise warning indicator
- Fast freeze switch
- Fast freeze indicator light
- 3 Transparent freezer drawers
- Reversible door
- Door on door fittings
○ Adjustable feet
o Ice cube tray
Cubic capacities
○ Gross capacity: 102 litres
- Net capacity: 100 litres
Energy efficiency class
Energy class: A+
IMPORTANT: When you install your appliance it is important to bear in mind its climatic rating.
In order to find out the climatic rating of your appliance, you should check the rating plate. The rating plate is located on the front left edge of the inside of the fridge. You will need to open the door of your appliance to be able to find it.
The rating plate will indicate the ambient temperature range that your appliance will function correctly within.
For future reference please record the following information which can be found on the rating plate and the date of purchase which can be found on your sales invoice.
Model Number
Serial Number
Date of Purchase
Description of the appliance
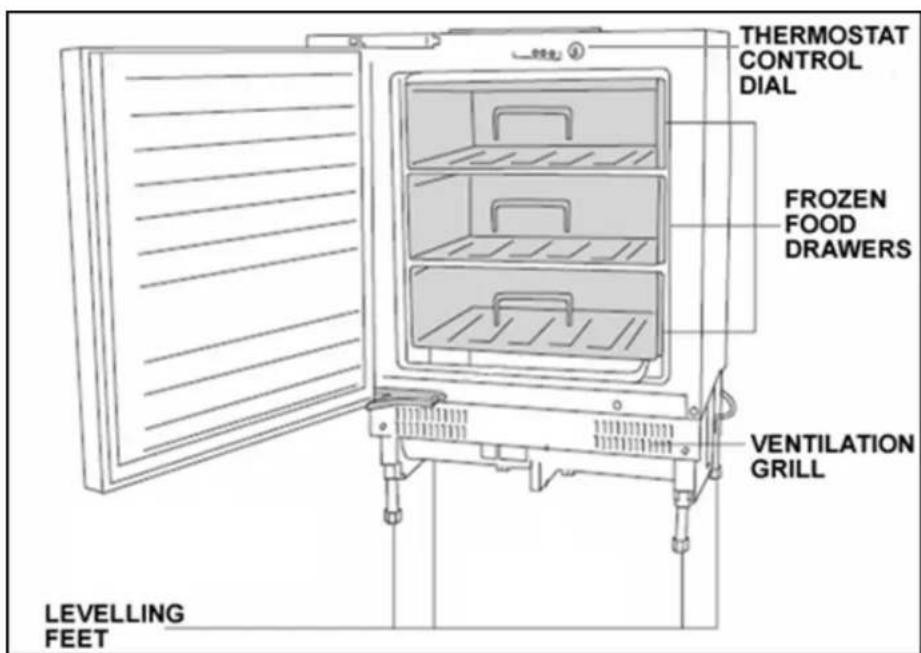
NOTE: Image is for reference only and may slightly differ from your product.
Using your Baumatic freezer
Before switching on
- Make sure that it has been installed by a suitably qualified person, as per the information contained in Baumatic's installation instructions.
- After delivery, wait for eight hours before connecting the appliance to your mains supply. This will allow any refrigerant gasses that may have been disturbed during the transportation process to settle.
- The outside of the appliance and the removable accessories contained within it, should be cleaned with a solution of liquid detergent and water.
- The interior of the appliance should be cleaned with a solution of sodium bicarbonate dissolved in lukewarm water. The interior and accessories should be thoroughly dried, after the cleaning process has been completed.
natural_image
Cartoon illustration of a smiling cube character giving thumbs up and giving medicine (no text or symbols)- There can be an odour when you first switch on the appliance. It will lessen as the appliance starts to cool.
During first use
- You should set the thermostat dial to its maximum setting for 24 hours after switching on the appliance for the first time.
- When you first switch on the appliance, the compressor will run continuously for approximately 24 hours or until the freezer reaches a cool enough temperature.
During this period of time, you should try not to open the door frequently or place a large amount of food within the appliance.
- You should then adjust the thermostat dial down to its normal operating position.
- If the unit is switched off or unplugged, you must allow at least 5 minutes before restarting the appliance on the thermostat or connecting it to your mains supply.
Switching on the appliance and setting the thermostat
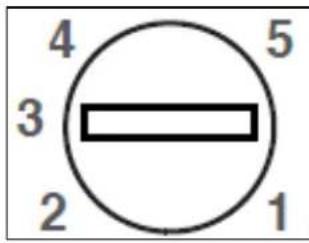
You switch on your appliance by connecting it to your mains supply and setting the thermostat. The thermostat control knob is located at the top of the appliance.
- The thermostat automatically regulates the temperature inside the freezer, depending on what number you have turned the thermostat control knob to:-
○ Position <0> means that the appliance will not cool. However the light will still function.
o Position <1> will give you a higher temperature inside the freezer.
o Position <5> will give you a lower temperature inside the freezer.
- Ideally the thermostat should be set to position between <3>.
o The freezer can cool down to -18 degrees centigrade and lower.
○ IMPORTANT: The ambient temperature of the room, the temperature of food and the amount of food that has been placed in the appliance and how often the door is opened, will all affect the temperature being maintained by the appliance.
On the maximum setting (position <5>), your freezer will work harder to maintain a lower temperature and will increase the energy usage. There is no need to run your appliance on this setting for prolonged periods.
Control panel

- Thermostat control dial.
- Super freeze switch
- Power indicator light
- Temperature warning light
-
Fast freeze indicator light
-
Power light (Green) - will light up as soon as the appliance is connected to your mains supply.
- Fast freeze light (Yellow) - will light up when the fast freeze switch has been activated.
o Temperature rise warning light (Red) - will light up when the appliance detects a rise in temperature that could affect the contents of your freezer.
The freezer compartment
- The freezer compartment temperature must have already reached - 18 degrees centigrade (or lower) before you attempt to store food that is already frozen or freezing fresh food.
- The freezer compartment is only able to freeze a certain quantity of food at one time. You should not attempt to freeze more than 4.5 kilograms of fresh food within a 24 hour period.
o Warm food should be allowed to cool down before you attempt to freeze it. If you place warm food in the freezer, then the increased humidity will cause quicker ice formation and increase the amount of power that the appliance uses. - The guidance of the food manufacturer should be followed, in regard to the maximum storage time.
o Thawed foods must not be frozen for a second time.
Do not open the freezer door too often or leave the door open for long periods of time, as this will increase the temperature inside of the appliance and will increase the energy usage.
Tips on freezing
- Freezer bags, polythene wraps, aluminium foil (extra thick) and special cans for frozen foods are suitable packaging for storing frozen goods in.
- Tape, rubber bands or plastic clips are suitable for sealing bags and wrappings.
Before sealing a suitable bag, you should compress the air out of it, as this will help the food to freeze more easily.
natural_image
Simple line drawing of a cylindrical object with internal bands and a small protrusion (no text or symbols)- Flat packages freeze more easily.
○ If you are freezing liquid, then do not fill the container to the brim. Liquids will expand when being frozen.
- Do not place bottles (glass or tin) containing liquids (especially sparkling liquids) into the freezer as they could cause the bottle to burst during freezing.
Making ice cubes
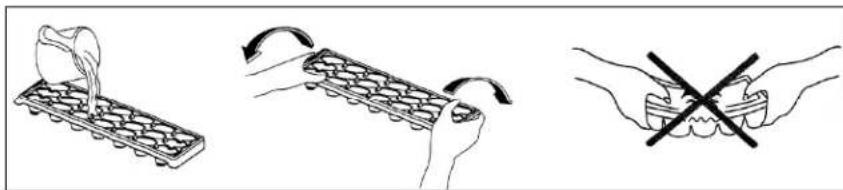
o Fill the ice cube tray with water and place it in the freezer compartment.
○ After the water is completely frozen and turned to ice, you can twist the ice cube tray (as shown in the drawing below) to dispense the ice.
natural_image
Illustration showing three steps of a hand holding an abacus, with arrows indicating motion and a crossed-out tool (no text or symbols present)Freezing with fast freeze
This function should be used whilst you are freezing fresh food, it will ensure that a powerful supply of cold air enters the freezer compartment.

- Press the fast freeze switch (2) and the freezer will start to run continuously at its maximum setting.
- The yellow fast freeze light (5) will come on when the fast freeze setting has been switched on.
- There is no need to adjust the thermostat knob.
- The freezer temperature will decrease and the appliance will get to its lowest temperature.
- Place the food that is to be frozen inside the freezer.
Once the food is frozen, you should switch off the fast freeze setting. DO NOT SWITCH OFF THE FAST FREEZE SETTING UNTIL THE FOOD IS FULLY FROZEN. - The orange fast freeze light will go out and your appliance will return to normal operation.
IMPORTANT: DO NOT LEAVE THE APPLIANCE RUNNING IN FAST FREEZE MODE FOR LONGER THAN 24 HOURS AT A TIME.
Saving energy when using your freezer
Installing:
○ Install the appliance in a cool position. If it is placed in direct sunlight or next to an oven or other heat source, the energy consumption can increase substantially.
- Ensure the appliance is installed with the correct ventilation requirements. Restricting ventilation can increase the energy consumption by 15%.
Cleaning and Maintenance:
- Occasionally clean the condenser coils (if present) at the back of the appliance to maintain a high performance level.
- Defrost the appliance regularly. A build up of thick ice decreases the efficiency of the appliance. You should defrost whenever the frost reaches 5 mm thickness.
- Clean the door gasket with warm water or a neutral detergent that leaves no residue. A tight-sealing door gasket is critical to the efficiency of your appliance.
Usage:
- Do not open the door repeatedly or more frequently than you have to.
- Do not set the thermostat too low. A change of just one degree can effect the energy consumption by 5%. Use a thermometer to check the temperature.
- The freezer should operate at -15 to -18 degrees Celsius.
- Allow food to sufficiently cool before putting it in the appliance (but don't let it sit at room temperature for too long).
- In the freezer, food packages should be scattered and never grouped or stacked together until they are completely frozen.
- If you are going away for a long period of time, turn off the appliance, empty and clean it and leave the door ajar.
- If you have a second appliance that is not used, make sure that it is stored with the power off and the door left ajar until it is actually required.
Disposing:
If you're going to throw out your old freezer, see if there's a chlorofluorocarbons (CFCs) recycler in your area. The government department which looks after the environment in your area may be able to help you.
Cleaning and maintenance

WARNING: PLEASE ENSURE THAT YOUR APPLIANCE IS DISCONNECTED FROM YOUR MAINS SUPPLY BEFORE ATTEMPTING TO CLEAN IT.

- Do not clean the appliance by pouring water onto it or spraying water over it.

- The freezer should be cleaned periodically, using a solution of bicarbonate of soda and lukewarm water.
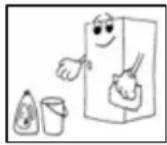
- Clean the accessories separately with soap and water. Do not clean them in a dishwasher.

- Do not use abrasive products, detergents or soaps.
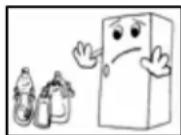
- After washing the appliance, wipe over the area that you have cleaned with a damp cloth and then dry it thoroughly.
- When cleaning is complete, dry your hands and then reconnect the plug to your mains supply.
Defrosting the freezer compartment
The frost in the freezer compartment should be removed periodically. You can use a plastic scraper to keep down the amount of frost that builds.
IMPORTANT: The freezer should be defrosted at least twice a year. The number of times that you need to defrost it, will depend on the setting of your thermostat and how much food you freeze and store in the freezer.
- The day before you defrost, turn the thermostat dial to position <5>, this will make sure that the food contained in the freezer is frozen properly.
- Whilst defrosting the appliance, the food should be removed from the freezer and wrapped in several layers of paper and stored in a cool place. The foods rise in temperature will shorten its storage life and therefore the food should be used within a relatively short period of time.
- DO NOT PLACE FOOD BACK IN THE FREEZER ONCE IT HAS STARTED TO THAW.
- Set the thermostat knob to position <0> and disconnect the appliance from your mains supply.
- Leave the door to the freezer open. You can place a bowl of warm water inside the freezer to speed up the defrost process.
- You can use a sponge to mop up the defrost water that will run into the bottom of the freezer.
- IMPORTANT: You should place some old towels on the flooring that is immediately in front of the appliance. In case any defrost water comes out of the freezer and onto the floor.
Once all the ice that has built up has melted, then the inside of the freezer should be dried thoroughly. Failure to do this will result in immediate ice build when the appliance is switched back on.
With dry hands, reconnect your appliance to your mains supply. Set the thermostat knob to position <5> for a 24 hour period, before returning it to the normal setting of <3>. - You should not attempt to freeze fresh food inside the freezer until this 24 hour time period has elapsed.
Do not defrost the appliance with other electrical devices (e.g. hair dryer). Do not use sharp metal objects to remove the ice on the freezer, as this could cause damage to the refrigerant system.

IMPORTANT: Before installation and usage read all the instructions and make sure that the voltage (V) and the frequency (Hz) indicated on the rating plate are exactly the same as the voltage and frequency in your home. The rating plate can be found on the front left edge of the
inside of the freezer.
The manufacturer declines all responsibility in the event of the installer failing to observe all the accident prevention regulations in force, which are necessary for normal use and the regular operation of the electric system.
Electrical connection

YOUR FREEZER IS INTENDED FOR FITTED AND PERMANENT INSTALLATION.
We recommend that the appliance is connected by a qualified electrician, who is a member of the N.I.C.E.I.C. and who will comply with the I.E.E. and local regulations.
- Your freezer comes supplied with a 13 amp plug fitted. If in future you need to change the fuse in this plug, then a 13 amp ASTA approved (BS 1362) fuse must be used.
- The wiring in the mains lead is coloured as follows:
Brown
Live
Blue
Neutral
Green and yellow
Earth
- As the colours of the wires in the appliance's mains lead may not correspond with the coloured markings identifying the terminals in your spur box, please proceed as follows:
The brown wire must be connected to the terminal marked "L" (live), or coloured red.
The blue wire must be connected to the terminal marked "N" (neutral), or coloured black.
The green and yellow wire must be connected to the terminal marked "E" (earth), or by the earth symbol, or coloured green and yellow.
- When the connection is completed, no stray strands or cut wire should be present. The cord clamp must be secured over the outer sheath.

Positioning
It is advisable that your appliance is only installed in a location where the ambient temperature of the room, corresponds with the climate classification that is stated on the rating plate of your appliance. Your appliance may not function correctly if the ambient temperature falls outside of the following ranges.
| Climate classification | Appropriate ambient temperature |
| SN +10 to +32 degrees centigrade | |
| N +16 to +32 degrees centigrade | |
| ST +16 to +38 degrees centigrade | |
| T +16 to +43 degrees centigrade | |
- Your appliance should not be located in direct sunlight or exposed to continuous heat or extremes of temperature (e.g. next to a radiator or boiler).
- The door should be able to open completely and freely.
- The appliance should be situated so you can easily access the food that is stored in it.
- You should check whether there is an electrical socket available, which will be accessible after your appliance is installed.
Reversing the door of your appliance
This procedure MUST be completed before the furniture door is attached.
Any parts that you remove from the appliance whilst reversing the door, should be retained for later use.
WARNING- Take care when opening the hinges, they are sprung loaded and there is the risk of injury if they close on your hand.
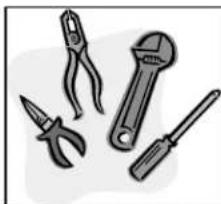
Tools required:-
- Phillips screwdriver
- Flat bladed screwdriver

- Slacken the retaining screws (1) on the appliance and then carefully remove the appliance door.
-
Place the appliance door on a cushioned surface, so that damage does not occur to it.
-
Lever off the cover caps (3).
- Insert the retaining screws (1) into the opposite side of the appliance from their original position. These screws should be partially tightened but not fully tightened.
- Remove the door retaining screws (2) and then reverse the position of the top and bottom hinge (as shown in the diagram on page 18).
- Reattach the appliance door and then fully re-tighten the retaining screws (1) and the door retaining screws (2).
- Insert the cover caps (3) into the holes that are now exposed on the right hand side of the cabinet.
IMPORTANT: Check that the door opens and shuts correctly, without fouling, after you have completed the door reversal process.
After the door has been reversed, you should check the door seal of the appliance. The seal should not be creased or crushed; otherwise there will be a gap between it and the inside of the door.
- The seal must adhere properly all the way around the door.
-
If the seal is not adhering to the cabinet properly, then you should either:-
-
Use a warm damp cloth and manipulate the seal until it does adhere to the cabinet properly, all the way around the door.
or
- Use a hair dryer on its lowest heat setting and lightly heat the areas of the door seal that are not adhering correctly. The heat will make the seal more pliable and this will allow you to manipulate the seal into the correct position.
IMPORTANT: DO NOT HEAT THE DOOR SEAL ON ANYTHING BUT THE LOWEST HEAT SETTING, OR HEAT THE SEAL FOR A LONG PERIOD OF TIME. OTHERWISE DAMAGE MAY BE CAUSED TO THE DOOR SEAL, WHICH WOULD NOT BE RECTIFIED UNDER THE GUARANTEE FREE OF CHARGE.
Aperture dimensions
The diagram below shows the aperture size that you will need to be able to install your appliance.

The appliance must be stood on a level floor. You can use the levelling feet to take into account any minor unevenness in the floor.
Adjusting the plinth/ kickboard
When the appliance has been placed underneath the worktop, you may decide to attach a plinth or kickboard to match your existing kitchen units.
natural_image
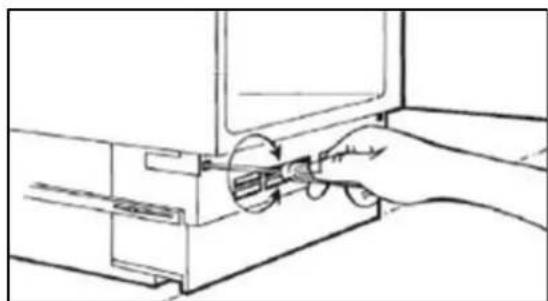
Line drawing of a hand inserting a component into a device (no text or symbols)- Remove the grid on the base of the appliance by unscrewing the screws on each side of the grid and then pull the grid towards you.

- Use a spanner to adjust the height of the adjustable feet.
○ If your aperture has a height of 820 mm, then the adjustable feet should be set at a height of 30 mm.
- If your aperture has a height of 870 mm, then the adjustable feet should be set at a height of 50 mm.
- The appliance should be flush with the underside of the worktop and be level. IMPORTANT: If the appliance is not level, then the door and door seal may be affected.
○ A cut out must be made in the plinth/kickboard for ventilation. The cut out should measure 140 mm in width and 90 mm in height.
○ Insert the plinth/kickboard and then refit the grid in its original position to hold it in place.
- IMPORTANT: Please note that as shown in drawing, an appropriately sized ventilation cut MUST be made in the furniture plinth/ kickboard.
Fitting the furniture door to the appliance

If you need the appliance door to open from the other side, then please reverse the door before commencing the installation process. (See “Reversing the door” section).
Tools required:-
- Tape measure
- Sharp pencil
o Small flat bladed screwdriver
○ Spanner
IMPORTANT: We recommend that two people install this appliance.
a) Undo the screws from the two adjusting bolts that are located on the top of the appliance door and then remove the mounting bracket (1).
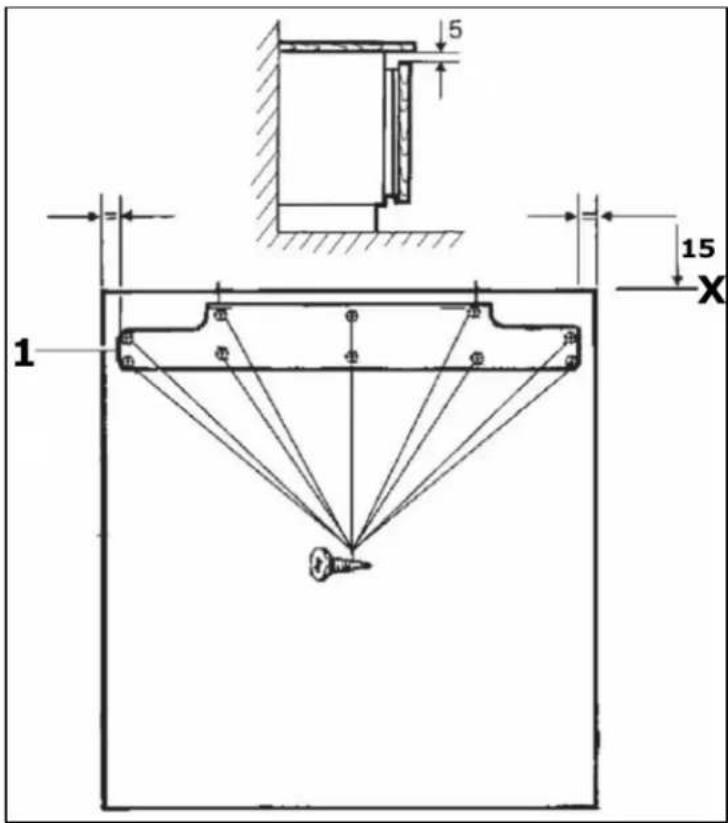
b) Measure the width of the furniture door, at the halfway point mark a line vertically down the inner surface of the furniture door. You should draw the line from the top of the furniture door to approximately halfway down.
- Place the mounting bracket (1) on the reverse of the furniture door.
- The middle of the mounting bracket should be positioned on the line that you have just drawn. Please note the position of the mounting bracket in the above drawing, to ensure that you have the mounting bracket the correct way up.
- The top of the mounting bracket should be positioned approximately 15 mm from the top of the furniture door. This will allow you a 5 mm gap from the top of the furniture door, to the underneath of your worktop.
- Fix the mounting b racket to the furniture door using the screws provided and a Phillips-head screwdriver. These screws should be fully tightened.

c) Hang the furniture door onto the appliance door, making sure that the brooketting blockstate over the adjusting bolts.

c) Use a screwdriver to adjust the gap on the lower section of the adjusting bolts. The gap should be set to approximately 9 mm (as shown in the above drawing).
d) Fix the lower bracket to the bottom of the furniture door and the underneath of the appliance door (as shown in the drawing on the previous page).
- It is possible to make minor adjustments to the position of the furniture door using the screws on the top and the bottom of the appliance door. You should make these adjustments so that the furniture door is level.

natural_image
Technical line drawing of a mechanical assembly with labeled components (no text or symbols)e) Insert the cover plate to the top of the appliance; this will just clip into place.
natural_image
Simple line drawing of a ceiling fixture with a screwdriver and a bulb (no text or symbols)f) Open the appliance door.
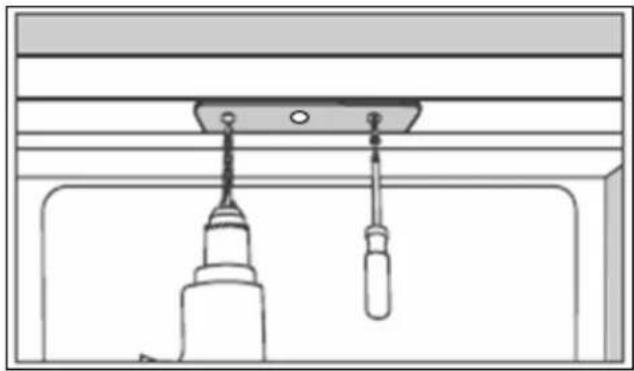
- Use a suitably sized drill bit to drill through the holes in the bracket, into the work top. IMPORTANT: The drill bit should be appropriate for the material that your work top is made from.
- Secure the bracket to the underside of the worktop, using the screws provided. IMPORTANT: These screws should be fully tightened.
- If the appliance is being installed under a granite worktop, use the L shaped brackets provided to secure the fridge to the side of the cabinet. Use a suitably sized drill bit to drill through the three holes in the bracket into the cabinet side on the opposite side to the hinges.
- The oval holes rest over the hinge positions which are not being used on the front of the appliance. Use two screws to secure the bracket to the front of the appliance.

Check that the door opens and shuts without snagging, as well as checking that the door is sealing correctly.
Troubleshooting
IMPORTANT: If your freezer appears not to be operating properly, before contacting the Customer Care Department, please refer to the checklist below.

My freezer does not appear to be working/ there is no power to my appliance.
- Check that the plug is fully inserted into the power socket.
- Check that there is power to your mains supply (e.g. that there hasn't been a power cut or that the fuse hasn't blown).
- Check that the thermostat inside the appliance has not been turned to the <0> position.
○ Checksthat your mains supply voltage, correspo vo age stated on the rating plate of your appliance. It

My freezer appears to be performing poorly
- Check that the appliance isn't overloaded and that food hasn't been packed too tightly into it.
- The thermostat setting is too low; you should turn the thermostat up higher.
o Ensure that the door is closing properly and that the door has not been opened for a prolonged period in error. - Ensure that there is adequate ventilation for your appliance.

My freezer is noisy
- The refrigerant gas that circulates the pipework in the appliance may make a slight noise, even if the compressor is not running.
- If the noise worsens or the appliance gets louder than normal; check that it is levelled off correctly, that nothing is touching the rear of the fridge and that nothing placed inside the appliance is rattling.

Ice has quickly formed on the inner back wall of my freezer
- Check that food has not been pushed too far back inside the appliance, so that it is in contact with the inner back wall.

IMPORTANT: If your appliance appears not to be operating correctly, then you should disconnect it from your mains supply and then contact Baumatic Customer Care on telephone number (0118) 9336911.
DO NOT ATTEMPT TO REPAIR THE APPLIANCE YOURSELF.
Please note that if an engineer is asked to attend whilst the product is under guarantee and finds that the problem is not the result of an appliance fault, then you may be liable for the cost of the call out charge.
The appliance must be accessible for the engineer to perform any necessary repair. If your appliance is installed in such a way that an engineer is concerned that damage will be caused to the appliance or your kitchen, then they will not complete a repair.
This includes situations where appliances have been tiled in, sealed in with sealant, have wooden obstructions placed in front of the appliance, like plinths. Or any installation other than the one specified by Baumatic Ltd. has been completed.
Please refer to the conditions of guarantee that appear on the warranty card that you receive with the appliance.
Baumatic Consumables
o BC001 Degreaser for Dishwashers (200 g)
- BC002 Descaler for Washing Machines and Dishwashers (200 g)
- BC003 Ceramic Hob Cleaner (250 ml)
- BC004 Oven Cleaner (250 ml)
- BC005 Stainless Steel Cleaner and Protector (250 ml)
- BC007 E-Cloth – General Purpose Cloth
- BC008 Microwave Cover
To order a Baumatic consumable product please call 0123 5437 244 and quote the product code. You can also order online from eshop.baumatic.co.uk
ta Technical Da
| Manufacturer | BAUMATIC LTD |
| Model Number RB 110 | |
| Product Category -8 Upright Freezer | |
| Energy Efficiency Class (1) A+ | |
| Annual Energy Consumption (2) 183 kWh | |
| Storage Volume of Fridge Compartment | |
| Storage Volume of Freezer Compartment | 100 litres |
| Star Rating 4 | |
| Frost Free Compartments | |
| Temperature Rise Time 11 hours | |
| Freezing Capacity 24hr | |
| Climate Class (3) | N, ST |
| Noise Level | 41 dB |
| Installation Type | Built-in |
(1) On a scale from A_+++ (highest efficiency) to G (lowest efficiency).
(2) Annual energy consumption based on standard test results for 24 hours. The actual energy consumption will depend on how the appliance is used and where it is located.
(3) This appliance is intended to be used at an ambient temperature between “16°C” (lowest temperature) and “38°C” (highest temperature).
Baumatic®
United Kingdom
Baumatic Ltd.,
Baumatic Buildings,
6 Bennet Road,
Reading, Berkshire
RG2 0QX
United Kingdom
Sales Telephone
(0118) 933 6900
Sales Fax
(0118) 931 0035
r Care Telephone Custome
(0118) 933 6911
Customer Care Fax
(0118) 986 9124
Spares Telephone
(01235) 437244
e TelephoneAdvice Lin
(0118) 933 6933
E-mail:
sales@baumatic.co.uk
customercare@baumatic.co.uk
spares@baumatic.co.uk
technical@baumatic.co.uk
Website:
www.baumatic.co.uk
Facebook:
www.facebook.com/baumatic.uk
Republic of Ireland
Service Telephone
1-890 812 724
Spares Telephone
091 756 771
Czech Republic
Baumatic CR s.r.o.
Lípovà 665
460 01 Liberec 4
Czech Republic
+420 483 577 200
www.baumatic.cz
Slovakia
Baumatic Slovakia, s.r.o.
Panenská 34
811 03 Bratislava - Staré Mesto
Slovakia
+421 255 640 618
www.baumatic.sk
Germany
Baumatic GmbH
Bachstr.10-12
D-32257 Bünde
Deutschland
+49 (0) 5223 99408 0
www.baumatic.de
Italy
Baumatic Italia S.R.L.
Via Galvani N.3
35011 Campodarsego (PD)
+3904 9920 2297
www.baumatic.it
Holland
Baumatic Benelux B.V.
Dukdalfweg 15d
1332 BH ALMERE
Nederland
+31(0)36 549 1553
www.baumatic.nl

- USER MANUAL FOR YOUR BAUMATIC
- BR110, 102 Litres Built under freezer
- Environmental note
- Important safety information
- Use of the appliance
- Before using your appliance
- Refrigerant
- Child safety
- General safety
- Service
- Specifications of your freezer
- Dimensions of appliance Dimensions of aperture\*
- Cubic capacities
- Energy efficiency class
- Description of the appliance
- Using your Baumatic freezer
- Before switching on
- During first use
- Switching on the appliance and setting the thermostat
- Control panel
- The freezer compartment
- Tips on freezing
- Making ice cubes
- Freezing with fast freeze
- Saving energy when using your freezer
- Installing:
- Cleaning and Maintenance:
- Usage:
- Disposing:
- Cleaning and maintenance
- Defrosting the freezer compartment
- Electrical connection
- YOUR FREEZER IS INTENDED FOR FITTED AND PERMANENT INSTALLATION.
- Positioning
- Reversing the door of your appliance
- Tools required:-
- Aperture dimensions
- Adjusting the plinth/ kickboard
- Fitting the furniture door to the appliance
- Troubleshooting
- My freezer appears to be performing poorly
- My freezer is noisy
- DO NOT ATTEMPT TO REPAIR THE APPLIANCE YOURSELF.
- Baumatic Consumables
- ta Technical Da
- Baumatic®
- United Kingdom
- Sales Telephone
- Sales Fax
- Customer Care Fax
- Spares Telephone
- E-mail:
- Website:
- Facebook:
- Republic of Ireland
- Service Telephone
- Czech Republic
- Slovakia
- Germany
- Italy
- Holland
Brand : BAUMATIC
Model : BR110
Category : Freezer