
CL-ENC50038 - Docking Station Syba - Free user manual and instructions
Find the device manual for free CL-ENC50038 Syba in PDF.


| Product Type | USB 3.0 Docking Station for 2.5/3.5-inch SATA HDDs |
| Brand | Syba |
| Model | CL-ENC50038 |
| Supported Drives | 2 x 2.5-inch or 3.5-inch SATA HDDs |
| Interface | USB 3.0 (backward compatible with USB 2.0) |
| Data Transfer Rate | Up to 5 Gbps (USB 3.0) / 480 Mbps (USB 2.0) |
| Power Supply | DC 12V, AC 100-240V adapter included |
| One Touch Backup | Yes |
| HDD Duplication (Offline) | Yes, without PC |
| Turbo USB Mode | Up to 25% faster data transfer (utility required) |
| Operating System Support | Windows XP/Vista/7 |
| Package Contents | Docking Station, USB 3.0 cable, AC adapter, driver CD, user manual |
| Hardware Installation | Plug & play; no driver needed under Windows XP/Vista/7 |
| Formatting | New HDDs must be partitioned and formatted before use |
| Safety Removal | Safely remove hardware via system tray before disconnecting |
Frequently Asked Questions - CL-ENC50038 Syba
User questions about CL-ENC50038 Syba
0 question about this device. Answer the ones you know or ask your own.
Ask a new question about this device
Download the instructions for your Docking Station in PDF format for free! Find your manual CL-ENC50038 - Syba and take your electronic device back in hand. On this page are published all the documents necessary for the use of your device. CL-ENC50038 by Syba.
USER MANUAL CL-ENC50038 Syba
USB3.0 Docking Station
For 2*2.5"/3.5" SATA HDD

natural_image
Exterior view of a rectangular metal enclosure (no text or symbols visible)Model: DOCK-3UBT3
Connectland
Congratulations on your purchase of our product! we will show you a new storage concept with safety and convenience. It is our pleasure to give you the best solution to expand your HDD'S Capacity and enhance your data's reliability in PC system. Before using the product, please read this manual carefully for further recognizing of the product.
I. System Requirement
Basic environment for setup this device:
Hardware requirement: a PC, Notebook with free USB interface Operation system: WindowsXP/Vista/7
II. Key Feature
- Easy to install and remove the hard disk drive
- Support USB3.0 to Serial ATA interface
- Suitable for 2.5"/3.5" Serial ATA HDD
- One touch backup function
- Backwards compatibility with USB 2.0, supports High-Speed (480Mbps)
- Support two SATA HDDs sometime
- Power Supply: DC12V (AC100\~240V)
- Attached HDDs duplication function without PC system(Free)
III. Package Content
one Docking Station
one CD Driver
one User's Manual
one 12V adapter
one USB3.0 cable
IV. Hardware installation
- Install a 2.5" or 3.5" SATA HDD:
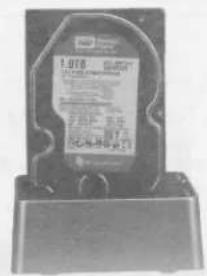
Plug the SATA HDD in the docking adapter directly, and connect the USB3.0 cable to PC, then plug the end of the power supply to the power jack, and the other end plug to power source.
- Install two HDDs
。
a. Pull out inner case from main product
b. Install SATA HDD properly
c. Push inner case to close HDD tightly
d. Connect USB3.0 cable and power supply
- Remove 2.5" or 3. 5" SATA HDD:
Rotate the button to left to remove the disk drive (Note: please take care and hold the hard disk)

2




natural_image
Exterior view of a mechanical component with no visible text or symbols on its body
natural_image
Exterior view of a hard disk drive unit (no visible text or labels)3

natural_image
Exterior view of a battery pack with a circuit breaker and wiring (no visible text or symbols)
natural_image
Exterior view of a black hard drive unit with visible label and mounting base (no readable text or symbols)Warning:
Don't shake the hard disk drive when it has been installed correctly, otherwise it maybe damage your hard disk drive.
When inserting the hard disk drive in the docking, please sure that the SATA port is arm at the appropriate SATA port of the docking.
V. Driver installation
Under Windows XP/Vista/7, the system can detect and setup [USB Mass Storage Device] directly
Then an 📋 icon will appear on the right-bottom area of the system toolbar as bellow:

Congratulations, you can enjoy this product now!
VI. Backup software installation and usage
A. Backup software installation
1.Open the folder [PCCLONEEX_LITE 2.01.31 JMICRON] and double click [Setup], the below window will appear:

- Click [Agree] to accept the license agreement

6
- Click [Install] enter next step
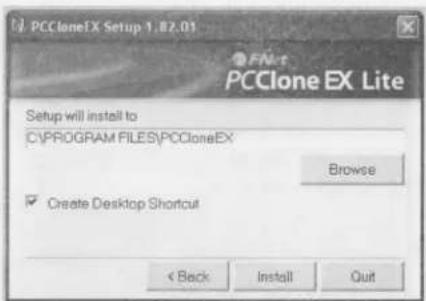
- Click [OK] to finish installation

7
B. Use backup function
- After finishing installation, an icon will appear on desktop, double click [PCCloneEX], The below window will appear:

- Press the backup button, program will appear [Please select file(s)], click [OK]
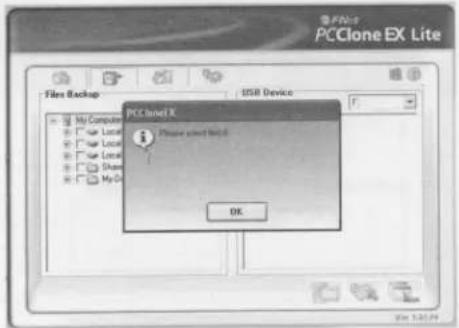
- Please select the file(s) which you want to backup in the left window, then press the button again

- Follow the instruction to press the button again or click [Start] with mouse

- System start to backup the file(s) which you have selected, when finish, there will display [Backup finished], click [OK]

- Backup file finished now you may check the file on right window

VII. HDD Duplication Function (Free)
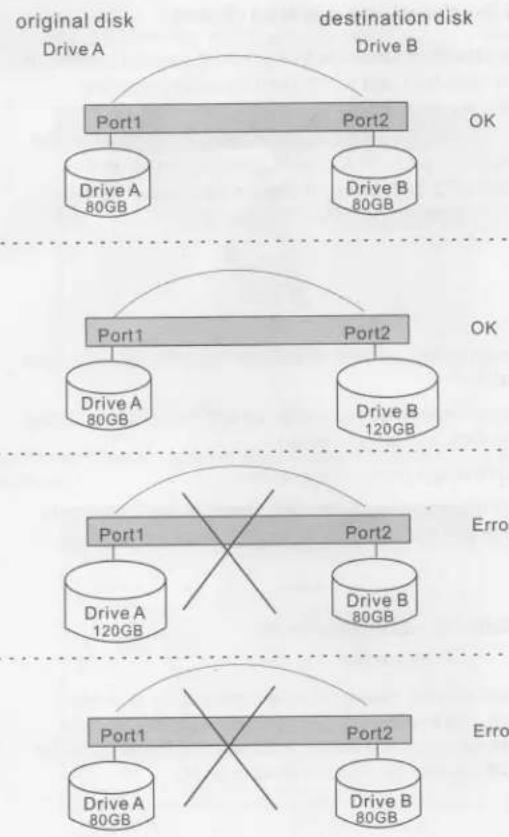
As one attached function, this product can support HDDs. Duplication function and don't need through computer system. When press the button over 5 seconds, the duplication action is beginning, all the information from the original HDD will be copy to the destination HDD. In this process, the LED indicator will always flashing until the duplication is finished.
Note:
The destination disk volume is must equal to or greater than the original disk
Once the duplication is beginning, all the information of the destination disk will be formatted.
Don't need through computer system
Duplication might spend a very long time, example for one 80GB disk drive, the duplication time is need about 25 minutes
\~80000MB / 25 =3200MB/minute
The duplication time depend on the total capacity of the original disk, not the file exist in the disk. For example: a original disk capacity is 200GB, but the total file exist in the disk is 50GB, so the duplication time is about:


VIII Remove a external enclosure
Warning: Before removing the USB cable, you must finish the following procedure:
1). Click the icon at the toolbar of your system
2). A [Safely Remove Hardware] message window will appear, click the [Stop] button
3). [It is now safe to remove the USB device] message will appear, close the [Safely Remove Hardware] window
4). Remove [power off] the power jack or the 12Vpower adapter if it is applied
TURBO USB
You have to install the Turbo USB utility if you want to use it. It speeds data transfer up to 25% faster.
Click on Setup in the Turbo USB folder. Click by default Yes if there is a windows warning.
Check Yes, I have read and accept... to continue. You can choose the language used between English, Chinese, Korean, Italian, French, German, Hungarian, Lithuanian, Czech, Slovenian, Romanian, pole, Russian, Turkish, Dutch, Slovenian... You have to execute the utility and to check Turno mode :
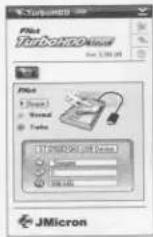
Otherwise the hard disk will work at normal rate. The Turbo USB is complaint with Windows 32/64 bits systems. If you can not set up the utility, check that you are acting as administrator.
\* Format a new Hard Disk Drive
If new Hard Disk Drive, you need to partition and format it before using.
please follow the steps below to format new Hard Disk Drive:
1). Right click [My Computer], and select [Manager]
2). System will display a "Computer Manager" window, and click [Disk Manager] on left window
3). On right window, the information of the new Hard Disk Drive will appear under the system disk, [Unallocated....]
4). Right click the new disk drive, and select [New Partition], and follow the instruction to finish the step
5). The disk information will be shown [Free Space 78.12GB]
6). Right click the new disk drive, and select [New logical drive]
7) Follow the instruction to finish the step, then the information of the new disk drive will be shown: [New Volume (J:) 78.12GB Healthy]
The [J:] disk drive will be shown in [My Computer] and now you can use it!
All the information in this document is subject to change without prior notice The manufacturer makes no representations or any warranties regarding the Contents of this manual. The information contained in this manual is provided for the general use by the customers. No part of this document may be reproduced or transmitted in any form by any means without the express written permission of The manufacturer. All brand names and product names used in this document are trademarks or registered trademarks of their respective holders.
This product is in compliance with the essential requirements of the European Directives for which it is concerned.
You can download declaration of conformity on the website :
http://www.connectland.eu
CONNECTLAND.2011.ALL RIGHTS RESERVED


Made In China


- USB3.0 Docking Station
- System Requirement
- Key Feature
- Package Content
- Hardware installation
- Warning:
- Driver installation
- Backup software installation and usage
- Backup software installation
- Use backup function
- HDD Duplication Function (Free)
- VIII Remove a external enclosure
- TURBO USB
- \* Format a new Hard Disk Drive
Brand : Syba
Model : CL-ENC50038
Category : Docking Station