
ZX5-90PI - Loudspeaker BOSCH - Free user manual and instructions
Find the device manual for free ZX5-90PI BOSCH in PDF.


| Product Type | Active PA Speaker |
| Brand | Bosch |
| Model | ZX5-90PI |
| Dimensions (H x W x D) | 300 x 200 x 250 mm |
| Weight | 5.2 kg |
| Power Output | 100 W RMS |
| Frequency Response | 50 Hz - 20 kHz |
| Impedance | 8 ohms |
| Inputs | Bluetooth 5.0, 1/4" TS, RCA, USB |
| Outputs | 1/4" TS link output |
| Power Supply | AC 100-240 V, 50/60 Hz |
| Battery | Rechargeable Li-Ion, 8 hours playtime |
| Water Resistance | IPX4 splashproof |
| Main Functions | Bluetooth streaming, microphone input, EQ presets, USB playback |
| Cleaning and Maintenance | Wipe with dry cloth; do not use solvents |
| Safety Precautions | Do not expose to rain or moisture; keep away from heat sources |
| Spare Parts and Repairability | Contact Bosch customer service for spare parts and repairs |
| General Information | Designed for portable PA applications; includes carrying handle |
Frequently Asked Questions - ZX5-90PI BOSCH
User questions about ZX5-90PI BOSCH
0 question about this device. Answer the ones you know or ask your own.
Ask a new question about this device
Download the instructions for your Loudspeaker in PDF format for free! Find your manual ZX5-90PI - BOSCH and take your electronic device back in hand. On this page are published all the documents necessary for the use of your device. ZX5-90PI by BOSCH.
USER MANUAL ZX5-90PI BOSCH
Zx5 Series Loudspeaker Owner's Manual

Zx5-60
Zx5-90
- Read these instructions.
- Keep these instructions.
- Heed all warnings.
- Follow all instructions.
- Do not use this apparatus near water.
- Clean only with a dry cloth.

The lightning flash with arrowhead symbol, within an equilateral triangle is intended to alert the user to the presence of uninsulated "dangerous voltage" within the product's enclosure that may be of sufficient magnitude to constitute a risk of electric shock to persons.

The exclamation point within an equilateral triangle is intended to alert the user to the presence of important operating and maintenance (servicing) instructions in the literature accompanying the appliance.

The asterisk within an equilateral triangle is intended to inform the user to necessary installation or removal instructions regarding equipment or hardware use relating to the system.
Zx5 Series Owner's Manual
Thank you for choosing the Electro-Voice® Zx5 series loudspeaker system. This system is the culmination of EV's 75 years of experience in transducer design. Please take time to consult this manual so that you can understand all the features built into your EV system and fully utilize all its performance capabilities.
Table of Contents
Important Safety Instructions .... 1
Zx5 Series Owner's Manual 1
Safety First 3
Description 4
System Features - Zx5 4
System Coverage - Zx5 4
Suspending Zx5 Speaker Systems 5
Zx5 Stage Monitor Positions....11
Specifications 12
Dimensions 13
Block Diagram 13
Frequency Response, Beamwidth, and Directivity 14
Zx5 Rigging Accessory Reference Table 15
Painting Zx5 Speaker Systems 16
Notes 17
When setting up, installing and using the Electro-Voice® Zx5 speaker system, there are a number of precautions that you should follow:
- When Electro-Voice® Zx5 speakers are used for portable applications in which they will be positioned directly on the floor, make sure that the floor or stage is solid and secure.
- Electro-Voice® Zx5 speakers include 1-3/8 inch stand mounts to allow mounting on tripod stands.
Make sure to:
- Check the specifications of the speaker stand to be certain it is capable of supporting the weight of the speaker.
- Check that the speaker stand is placed on a flat, stable surface and be sure to fully extend the legs of the stand. Do not try to make the stand “taller” and compromise its structural integrity.
- Route cables and position the stand so that performers, production crew and audience members will not trip over the stand or cables and pull the speaker system over. Secure cables with wire ties or tape whenever possible.
- Do not attempt to suspend more than one speaker on a stand designed for a single speaker.
- Unless you are confident that you can safely handle lifting the weight of the speaker onto the stand, ask another person to help you place it.
- If you intend to hang or fly the Zx5 system, only do so safely with the correct hardware and accessories.

WARNING: Suspending any object is potentially dangerous and should only be attempted by individuals who have a thorough knowledge of the techniques and regulations of rigging objects overhead. Electro-Voice® strongly recommends that Zx5 speakers be suspended taking into account all current national, federal, state and local regulations. It is the responsibility of the installer to ensure that Zx5 speakers are safely installed in accordance with all such regulations. If Zx5 speakers are suspended, Electro-Voice® strongly recommends that the system be inspected at least once a year. If any sign of weakness or damage is detected, remedial action should be taken immediately. There are data sheets for each EV Suspension and Array Kit that should also be consulted prior to suspending speakers.

- Electro-Voice® does not recommend use of Zx5 speakers outdoors without protection from rain or in high moisture environments.

- Electro-Voice® Zx5 loudspeakers are easily capable of generating sound pressure levels sufficient to cause permanent hearing damage to anyone within normal coverage distance. Caution should be taken to avoid prolonged exposure to sound pressure levels exceeding 90 dB.
Description
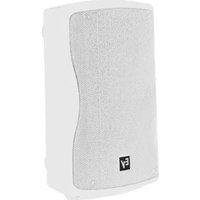
The Electro-Voice® Zx5 is a unique, lightweight package of pro audio performance, versatility and aesthetics. You won't find a speaker system available on the market that offers the unbelievable sound, incredible flexibility and tremendous output capability of the Zx5 anywhere near its size and weight.
System Features - Zx5
- Full-face grille for a clean, professional look. · DVX3150 15" woofer with 500 watts continuous power handling.
- ND2 2" voice coil, 1" exit neodymium compression driver.
- Two models: 60° x 60° or 90° x 50° coverage patterns.
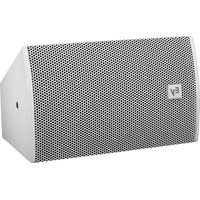
- Adjustable monitor angle built into enclosure.
- Integral rigging points and inserts for multiple flying options.
- Full line of accessories for any installation.
- Passive and biamp selectable.
System Coverage - Zx5
Coverage Patterns and Applications
Zx5-60 60° x 60° coverage for long-throw and cluster applications
Zx5-90 90° x 50° for wider coverage or shorter distances

Figure 1a: 3D EASE Directivity Balloon, Zx5-60, 60° x 60° Coverage

Figure 1b: 3D EASE Directivity Balloon, Zx5-90, 90° x 50° Coverage
Zx5 enclosures have 5 steel anchor points internally mounted on the top, bottom, and rear. Single stud fittings can be attached to these anchor plates and used as suspension points. Each of these anchor plates also has a M8 thread to accept rated forged M8 shoulder eyebolts. In addition to these points there are five additional M8 threaded points; two on the handle side, and three on the rear. These points can be used for suspending Zx5s vertically, horizontally, individually, in clusters, or to attach to EV mounting brackets. Working load limits for the Zx5 and fittings are shown in Figure 2.
WARNING
ENCLOSURE WORKING-LOAD LIMIT STRUCTURAL RATINGS
180 LB (81.6 kg) MAXIMUM TOTAL COLUMN WEIGHT (90 LB (40.8 kg) / POINT) ANY DIRECTION. 180


180 LB (81.6 kg) MAXIMUM TOTAL COLUMN WEIGHT (90 LB (40.8 kg) / POINT) ANY DIRECTION.

90 LB (40.8 kg) MAXIMUM FORCE ANY DIRECTION.

NEVER EXCEED THE WORKING-LOAD LIMITS SHOWN. RATINGS BASED ON USING EV SST-1 SINGLE-STUD FITTING OR RATED FORGED M8 SHOULDER EYE BOLT. ALWAYS ENGAGE THE SST-1 SAFETY PIN BEFORE LIFTING OVERHEAD. ALL NON-EV HARDWARE IS THE RESPONSIBILITY OF OTHERS.
570389-000 REV B
Figure 2:
Working Load-Limit Rating of Zx5 Speaker System
Prior to each use, inspect the grid assembly or suspension point(s) and associated hardware for any cracks, deformations, broken welds, corrosion, missing or damaged components which could reduce the grid assembly or suspension point(s) strength. Replace any damaged hardware. Never exceed the limitations or maximum recommended load intended for grid assembly design or suspension point(s). As an added safety measure, it is suggested that the user install a second suspension point back to the grid (or building structural supports). This redundant safety point should have as little slack as possible (less than one inch is preferable).
Prior to each use, inspect the loudspeaker enclosures for any cracks, deformations, missing or damaged components, which could reduce enclosure strength. Inspect the bracket assembly on the enclosures for any cracks, deformations, missing or loose screws which could reduce the flying hardware strength. Replace any loudspeaker systems that are damaged or missing hardware. Never exceed the limitations or maximum recommended load for the Zx5 systems.
Zx5 M8 Suspension Points
Metric (M8) inserts are equipped on the top and bottom of the enclosure, around the handle, and on the back of the enclosure for a total of 10 points. The inserts can be used to attach forged eyebolts or rigging brackets.

Figure 3a: Zx5 M8 Suspension Points (Top, Handle, Rear) Figure 3b: Zx5 M8 Suspension Points (Bottom)
Suspending the Zx5 using optional Electro-Voice Single-Stud Rigging Kits
The Zx5 is shipped with three single-stud anchor plates for rigging with single-stud rigging. There are two more locations on the bottom to mount single-stud anchor plates for flying the Zx5 upside down or horizontally. All of these locations can also accommodate M8 eyebolts if desired.
Figure 4:
Suspending the Zx5 Using Included Single-Stud Anchor Plates
Kit Used (Left View) -
SSK-1 Single-Stud Rigging Kit (x1)
Kits Used (Right View) -
SSK-1 Single-Stud Rigging Kit (x2)
EBK-3 Forged M8 Eyebolt Kit (x1)*

Step 1: Remove Decals
Step 2: Attach Single-Stud Anchor Plates Removed from the Top of the Enclosure or optional RK-Z Kit (shown) or Eyebolts (not shown)

Figure 5: Suspending the Zx5 Upside-Down Using Included Single-Stud Anchor Plates and Single-Stud Rigging Kit
Kits Used -
RK-Z Single-Stud Anchor Plate Kit (x1)
SSK-1 Single-Stud Rigging Kit (x1)
Horizontal Suspension of the Zx5
The Zx5 is capable of being suspended horizontally from the side (handle) or downward from the rear with the use of M8 Eyebolts.
Figure 6:
Suspending the Zx5 Downward from Rear Using Optional Forged Eyebolt Kit*
Kit Used - EBK-3 Forged M8 Eyebolt Kit (x1)
*Note - When suspending from the rear M8 suspension points, it is recommended that the (2) left M8 suspension points are used on the rear of the enclosure for best weight distribution in relation to enclosure's center of gravity.


Figure 7:
Assembling Eyebolts to Handle for Horizontal Suspension
Step 1: Remove Handle Bolts Step 2: Attach Eyebolts Figure 8:
Suspending the Zx5 Horizontally from Handle Using
Optional Forged Eyebolt Kit
Kit Used - EBK-3 Forged M8 Eyebolt Kit (x1)

Figure 9: Assembling HA-5 Adapter for use with PSA-V Strong-Arm Mount Kits Used - HA-5 Handle Adapter Kit (x1) PSA-V Strong-Arm Mount (x1)
Arraying and Suspending the Zx5 using optional Electro-Voice Mounting or Array Brackets
Figures 10 and 11 show several applications using EV mounting and array brackets. Carefully follow the instructions in this manual & the user manual packaged with EV brackets, and always use safe rigging practices when suspending Zx5.

Figure 10: Suspending the Zx5 Vertically from Handle Using Optional Handle Adapter and Strong-Arm Mount Kits Used - HA-5 Handle Adapter Kit (x1) PSA-V Strong-Arm Mount (x1) *Note - Please consult PSA-V User Manual for additional information.

Kit Used - MB5 Wall/Ceiling Mounting Bracket (Wall Configuration)

Kit Used - MB5 Wall/Ceiling Mounting Bracket (Ceiling Configuration)

Kits Used - CB5 Array Bracket Kit (x1)* SSK-1 Single-Stud Rigging Kit (x1)

Kit Used - CB5 Array Bracket Kit (x2)*

Kits Used - CB5 Array Bracket Kit (x2)* SSK-1 Single-Stud Rigging Kit (x2) EBK-3 Forged M8 Eyebolt Kit (x1)
NOTE: Do not exceed working load limit for individual rigging points when arraying the Zx5. (See Figure 2, Page 5)

Kits Used - CB5 Array Bracket Kit (x4)* EBK-3 Forged M8 Eyebolt Kit (x1) *Note - CB5 Array Kits can be used for 60° or 90° Splay Angles Figure 11: Arraying and Suspending the Zx5
Zx5 as a Monitor
By design the Zx5 is a perfect solution for stage monitors. As different stage sizes require different monitor angles, the Zx5 offers two angles without any additional accessories.
Step 1: Remove Monitor Foot Screws

Step 2: Rotate Monitor Feet 180° Step 3: Re-attach Monitor Feet
and Screws
Figure 12: Switching the Monitor Feet from the 45° to 55° Positions
Figure 13a: Zx5 as Monitor in 45° Position

Figure 13b: Zx5 as Monitor in 55° Position

CAUTION: When flipped to 55° the feet protrude from the enclosure. Care should be taken when moving the enclosure, since damage to the feet or enclosure might occur if the system is dropped or slid across a rough surface. It is recommended that the feet be returned to the 45° position for transport.
| esnopseR) | BekF (z |
| eg(n18 dB)F | 39 Hz - 20 kHz |
| Rec. Hipass Frequency: | 36 Hz |
| Axial Sensitivity: | 98 dB (1W/1m) |
| Max Calculated SPL: | 132 dB |
| Horizontal Coverage: | 90° or 60° |
| Vertical Coverage: | 50° or 60° |
| Rated System Power: | 600W Continuous, 2400W Peak |
| LF Power Handling: | 500W Continuous, 2000W Peak |
| HF Power Handling: | 40W Continuous, 160W Peak |
| LF Transducer: | DVX3150, 15in (300mm) Driver |
| HF Transducer: | ND2, 1in. (25.4mm) exit Neodymium Compression Driver |
| Crossover Frequency: | 1.5 kHz |
| Nominal Impedance: | 8 Ohms |
| Minimum Impedance: | 6.5 Ohms |
| Connectors: | Neutrik Speakon NL4Glandnut SJO Cable (PI Versions Only) |
| Enclosure Material: | Polypropylene Structural Foam |
| Suspension: | Enclosure has locations for 5 Single-Stud Attachment Plates and 10 Forged Steel Eyebolts - 2 on Top, 2 on Bottom, 2 on Side, and 4 on Rear of Enclosure |
| Grille: | Polyester Powder Coated, 16GA Galvanized Steel |
| Environmental Spec: | IEC 529 IP24 / IP44 (PI Version) |
| Dim (H x W x D): | 27.26" x 17.57" x 16.16"(692mm x 446mm x 411mm) |
| Net Weight: | 49 lbs (22.2 kg) |
| Shipping Weight: | 57.4 lbs (26.0 kg) |
1 Half Space measurement.

Block Diagram
Biamp:
Passive:
![graph TD A["HPF"] --> B["Passive Limiter"] C["LPF"] --> D["DVX3150"] E["ND2-B"] --> F["+"] G["2+"] --> H["HPF"] I["2-"] --> J["LPF"] K["1+"] --> L["HPF"] M["1-"] --> N["LPF"] O["2+"] --> P["HPF"] Q["2-"] --> R["LPF"]](/content/2026/05/988449/images/5dc7f02fe7a61bd9ddf768b8ab899b4bfa1404749991e85c8afa77c549471dc2.jpg)
Frequency Response, Beamwidth, and Directivity
Zx5-60, 60° x 60° Coverage
Frequency Response & Impedance:
Beamwidth:
Directivity:

Zx5-90, 90° x 50° Coverage
Frequency Response & Impedance:
Beamwidth:
Directivity:

| Model | Description | Part No. |
| CB5-B | Array Bracket Kit, Black Finish | 301625-001 |
| CB5-W | Array Bracket Kit, White Finish | 301625-002 |
| MB5-B | Wall/Ceiling Mounting Bracket Kit, Black Finish | 301626-001 |
| MB5-W | Wall/Ceiling Mounting Bracket Kit, White Finish | 301626-002 |
| SSK-1 | Single-Stud Rigging Kit (Set of 3) | 301633-000 |
| EBK-3 | Forged M8 Eyebolt Kit (Set of 3) | 301634-000 |
| RK-Z | Single-Stud Anchor Plate Kit (Set of 3) | 301812-000 |
| HA-5 | Handle Adapter Kit | 301830-001 |
| PSA-V | Strong-Arm Mount | 301538-001 |
| HDC-5 | Heavy-Duty Stackable Cover, Black | 301813-001 |
Painting Zx5 Speaker Systems
Painting a Zx5 Enclosure
The Zx5 Loudspeaker Enclosures are made of a high performance Polypropylene material. For best paint adhesion, we recommend a “Plastic Adhesion Promoter” be applied before any paint. Sherwin Williams Plastic Adhesion Promoter UP07226 is a good example (See Telex document number LIT000066-000 for further details.) Once Plastic Adhesion Promoter is applied follow the manufacturer’s painting directions as you would normally.
Painting a Zx5 Grille
Remove grille from loudspeaker and remove the backing material & logo from grille prior to painting. Once the paint is dry, reapply the backing material and logo to the grille. Spray adhesive such as 3M Super 77 may help adhere the backing material to the grille.
Additional Precautions to be Taken
Prior to painting, be sure to take precautions not to get paint into the transducers. This can be done by masking the grille, temporarily removing the grille and masking the transducers, or by temporarily removing the grille and temporarily removing the transducers. Precautions must also be taken not to get paint into any exposed electrical components by masking them off prior to painting. It is also recommended that any exposed rigging points, warning labels, or instruction labels be masked off for ease of future operation.

Painting View: Painting the Zx5 Enclosure
U.S.A. and Canada:
For customer orders, contact the Customer Service department at:
800/392-3497 Fax: 800/955-6831
For warranty repair or service information, contact the Service Repair Department at:
800/685-2606
For technical assistance, contact Technical Support at:
866/78 AUDIO
Specifications subject to change without notice.
All Locations:
952-884-4051 Fax: 952-884-0043
www.electrovoice.com • Telex Communications, Inc. • www.telex.com
Printed in U.S.A
© Telex Communications, Inc. 01/2007
Part Number 38110-355 Rev E

- ZX5 SERIES LOUDSPEAKER OWNER'S MANUAL
- ZX5 SERIES OWNER'S MANUAL
- TABLE OF CONTENTS
- MAKE SURE TO
- DESCRIPTION
- SYSTEM FEATURES - ZX
- SYSTEM COVERAGE - ZX
- COVERAGE PATTERNS AND APPLICATIONS
- WARNING
- ENCLOSURE WORKING-LOAD LIMIT STRUCTURAL RATINGS
- ZX5 M8 SUSPENSION POINTS
- SUSPENDING THE ZX5 USING OPTIONAL ELECTRO-VOICE SINGLE-STUD RIGGING KITS
- HORIZONTAL SUSPENSION OF THE ZX
- ARRAYING AND SUSPENDING THE ZX5 USING OPTIONAL ELECTRO-VOICE MOUNTING OR ARRAY BRACKETS
- ZX5 AS A MONITOR
- BLOCK DIAGRAM
- FREQUENCY RESPONSE, BEAMWIDTH, AND DIRECTIVITY
- PAINTING ZX5 SPEAKER SYSTEMS
- PAINTING A ZX5 ENCLOSURE
- PAINTING A ZX5 GRILLE
- ADDITIONAL PRECAUTIONS TO BE TAKEN
Brand : BOSCH
Model : ZX5-90PI
Category : Loudspeaker