KL60DFL - Washing machine KELVINATOR - Free user manual and instructions
Find the device manual for free KL60DFL KELVINATOR in PDF.


| Product Type | Freestanding Washing Machine |
| Brand | Kelvinator |
| Model | KL60DFL |
| Capacity | 6 kg |
| Maximum Spin Speed | 1000 rpm |
| Dimensions (H x W x D) | 850 x 600 x 500 mm |
| Net Weight | 70 kg |
| Power Supply | 220-240 V ~ 50 Hz |
| Energy Efficiency Class | A+ |
| Wash Programs | Cotton, Synthetics, Delicates, Quick Wash, Eco, Rinse & Spin |
| Temperature Settings | Cold to 90°C |
| Control Type | Electronic with LED Display |
| Door Opening | Left hinge, 180° opening |
| Noise Level (Wash/Spin) | 58 dB / 76 dB |
| Water Consumption per Cycle | 45 L |
| Annual Energy Consumption | 180 kWh |
| Features | Delay start, Child lock, Anti-foam system, Overflow protection |
| Self-Cleaning | Drum cleaning program |
| Spare Parts Availability | 5 years after end of production |
Frequently Asked Questions - KL60DFL KELVINATOR
User questions about KL60DFL KELVINATOR
0 question about this device. Answer the ones you know or ask your own.
Ask a new question about this device
Download the instructions for your Washing machine in PDF format for free! Find your manual KL60DFL - KELVINATOR and take your electronic device back in hand. On this page are published all the documents necessary for the use of your device. KL60DFL by KELVINATOR.
USER MANUAL KL60DFL KELVINATOR
DIGITAL FRONT LOAD WASHING MACHINE

natural_image
Front view of a white washing machine with a blue handle and internal glass bowl (no visible text or symbols)
natural_image
Cartoon illustration of a woman carrying a basket outdoors near a table with flowers and a cloud, no text or symbols present.Table of Contents
Before using the appliance
Name of parts.....inside front cover
Matters needing attention....1-3
Installation....4-5
Operational functions 6-7
How to operate the washing machine
Program description table......8
Preparation....9
Washing methods 10-11
Hints for saving energy....11
Washing instructions....12
Other functions....13
Maintenance
Maintenance 14-15
Trouble shooting 16
Wiring circuit 17
Specifications ....back cover
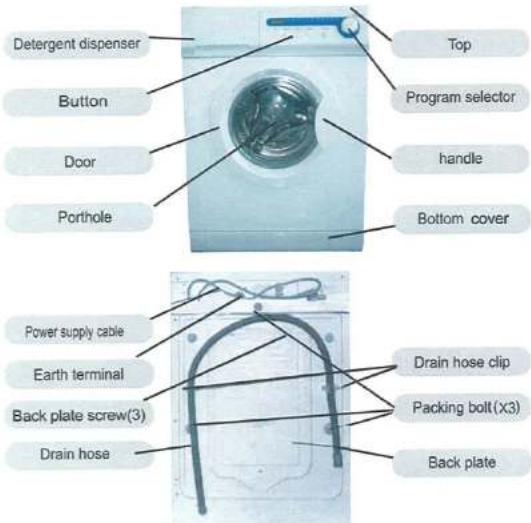
Name of Parts
| Caution and Warning symbols | |
 | For you safely,any instructions in this manual with this "Warning"sign must be followed strictly. |
 | For your safety and to prevent damage to the washing machine,any instructions in this manual with this "Stop" sign must be followed strictly. |
This diagram may be slightly different from the layout of the washing machine you have just purchased due to technical improvements
Matters Needing Attention
Safety
| 8.The washing machine should not be installed outdoors or in a damp place. In the event of water leakage or splashes allow the machine to dry naturally. | 9.The carpet must not obstruct the ventilation openings in the base of the washing machine. |
| 10.Keep away from heat sources and direct sunlight to prevent plastic and rubber components from aging. | 11.During installation, ensure that the electric cable is not trapped by the washing machine and avoid damage to the electric cable. |
During Use
| 1. Before use, check the joints of the filling hose, the tap and the drainage hose for possible problems from water pressure fluctuations. If joints are loose or there is leakage, turn off the tap and repair. Do not use the washing machine until the hoses are properly fixed. | 2. Keep the door slightly open when the washing machine is not in use to prevent formation of odors; do not cover the washing machine with plastic cover so that inside dampness cannot be kept in. |

Matters Needing Attention
1.A separate earthed socket is required for the power supply. The washing machine must be positioned so that the plug is accessible.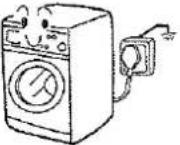 | 2.Hold the plug and not the electric cable when unplugging the washing machine. |
3.Fuses in the power circuit should be rated for 15A.If the supply cord is damaged, it must be replaced by the manufacturer, its service agent or similarly qualified persons in order to avoid a hazard.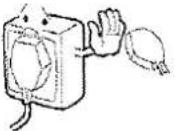 | 4.Do not touch or use the washing machine barefooted or when the hands or feet are wet. |
5.Do not use flammable detergent or dry cleaning agent; do not use flammable spray in close vicinity to the washing machine; do not remove or insert the plug in the presence of flammable gas. | 6.The door of the washing machine will become hot during the heating process. Avoid contact with the door during the heating process. For safety, keep children away from the washing machine. |
7.Keep children away from the packing materials after unpacked. | |
Installation
Matters Needing Attention
| Name | Operation manual | Quality certificate | Water hose | Drainage holder | Plastic plugs |
| Quantity | 1 | 1 | 1 | 1 | 3 |
| 4. Do not hot wash foam rubber or sponge-like materials. |  |  |  |
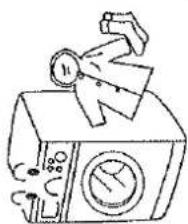 |  | 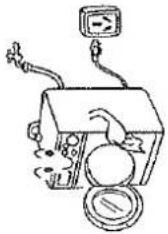 | |
| 3. Do not place heavy, heating source or wet articles on the top of the washing machine. |  |  |  |
 | 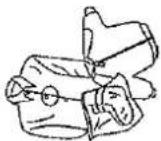 |  | |
| Steel wires in bras will pop out during washing; never wash bras containing steel wires. |
Installation
Joining the Inlet Hose to the Washing Machine

Drainage Hose


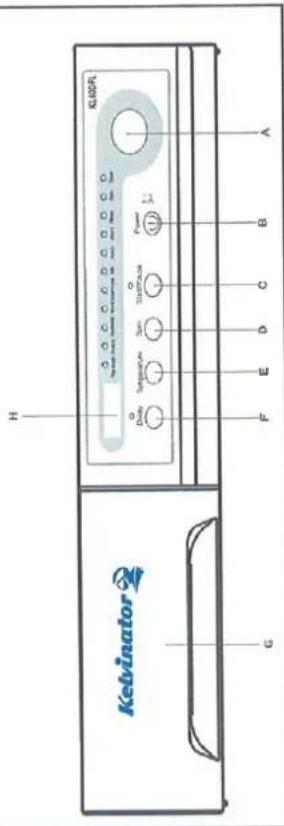
A:Wash programming knob By turning the knob clockwise/counterclockwise, the required program can be selected. There are 11 programs available. After a program is selected, the corresponding light will go on.
B:Power Switch Press this button to switch on the washing machine. Press it again to switch it off.
C: Start / Pause Button When the washing machine is connected to the power socket and a program is selected, lightly touch this button to start operation. During a wash cycle, touch it lightly, operation will stop and the digits on the screen start blinking. Touch it again to resume operation. To cancel a wash program during a wash cycle, touch this button, when the digits on the screen start blinking, press the Power switch, the program will be cancelled.
- The socket is adequate for the maximum power of the washing machine (For safety, fuses in the power circuit should be rated for no less than 15A). - The voltage should meet the requirement. - The power outlet should be capable of accepting the washing machine plug. The washing machine must be earthed before use. - Supplementary earth cable should not be necessary if the socket is connected to the earth. - Supplementary earth cable should be installed on the upper back of the washing machine and connected to an earth if the power supply socket has no earth connection.
Operational Functions
Program description table
| KL60DFL | |||||||||
| Program | Recommended Laundry | Default Setting | Temperature | Delay | Detergent | ||||
| total time | speed | temperature | 1 | 2 | 3 | ||||
| Pre-wash | Heavy-soil laundry | 2:46 | 800 | 60 | Cold-40-50-60-80 | Yes | ★ | ★ | ○ |
| Cotton | Cotton fabrics | 2:28 | 800 | 60 | Cold-40-50-60-80 | Yes | × | ★ | ○ |
| Synthetic | Fast-color synthetic | 1:30 | 800 | 40 | Cold-40-50-50 | Yes | × | ★ | ○ |
| Wool | Woolen fabrics | 0:58 | 600 | 40 | Cold-40 | Yes | × | ★ | ○ |
| Cashmere | Cashmere fabrics | 0:58 | 400 | 40 | Cold-40 | Yes | × | ★ | ○ |
| Silk | Silk fabrics | 0:55 | 400 | 40 | Cold-40 | Yes | × | ★ | × |
| Quick | Medium-soil laundry | 0:29 | 800 | 40 | Cold-40 | Yes | × | ★ | × |
| Wash | Medium-soil laundry | 0:53 | / | 50 | Cold-40-50-50 | Yes | × | ★ | × |
| Rinse | Medium-soil laundry | 0:27 | 800 | / | / | Yes | × | × | ○ |
| Spin | / | 0:13 | 800 | / | / | Yes | × | × | × |
| Drain | / | 0:03 | / | / | / | Yes | × | × | × |
Note: "O" indicates that softener can be added if needed;
"★" indicates that detergent must be added;
"X" indicates that detergent must not be added.
1) The wash temperature refers to the maximum temperature.
2) The above wash cycle times are intended as a guide only. The actually used time may vary due to different water pressure, initial water temperature, etc.

Operational functions
| F: Delay ButtonTouch this button lightly, the washing machine will start operation after a period of time and the corresponding indicator will go on. The range is 0.5-24 hours; each touch of this button increases a half hour. After the button is set, press the Start/Pause button to start countdown of the set time (the time is displayed on the screen until the program ends).Note:The delay time must be longer than the program time;otherwise,the washing machine will start the wash program directly. |
| E+F: Combination for keyboard lockPress these two keys simultaneously, the sign "LOCK" and the remaining washing time are displayed on the LED alternately. Now all the function keys except the Power switch can be locked. Press the key combination again to cancel this function. |
| G: Detergent distribution drawerOpen the drawer, three compartments can be seen:Compartment 1: Pre-wash detergentCompartment 2: Normal - Quick wash detergentCompartment 3: Softener, conditioning agent,perfume, etc. |
| H: DisplaySuch information as remaining wash time, temperature and speed setting and error messages will be shown.Note: After power is switched on, the display will go on and the remaining wash time decreases. As the water pressure and temperature may differ, the remaining time may be adjusted accordingly. When the laundry is not balanced during spinning, the time may be automatically prolonged. These are normal phenomena. |

Preparation
Washing methods
| 1. LoadingOpen the door,put in the laundry piece bypiece and then tightly close the door.Notes:1) When first using the washing machine,let it run unloaded for one program toprevent the laundry from being taintedby oil or dirty water from the washingmachine.2) Do not overload thewashing machine. | Load Reference |
| 2. Adding detergentSlide out the detergent drawer and put the requireddetergent and softening agent into the correspondingboxes. Push back the drawer gently.Caution:1)Do not add liquid detergent to compartment 1and 2.2) For pre-washing program, detergent should be addedto both compartments 1 and 2. For other programs, donot add detergent to compartment 1.3) Do not overuse softener; otherwise, it will damage theartificial fibers. |  |
| 3. Selecting washing programTo get the best washing effect, an appropriate washing program should be selectedaccording to the laundry type. | |
1. Power supplyPlug in the power supply220V-/50Hz | 2. Water supplyTurn on the tap ensure that the water is clear.Caution: Before staring the washing machine tum onthe water faucet to ensure that the water faucet and thewater inlet hose are connected correctly and do not leak. | |||
| 3. Detergent selectionOnly special low foam detergent should be used in automatic drum washing machine, form blended or wool fabrics special detergent should be used. dry cleaning solvent should not be used such as trichloroethylene or alike (caution :load the required amount of detergent only). | 4. Laundry treatment● sort out clothes according to type and extent of dirt.There are three types of clothes: cotton, synthetical and woolen (silk) fabrics.● separate white clothes from colored. If whites and coloreds are combined for one load, make sure the coloreds are colorfast.-Remove all objects from pockets that may cause damage to the machine, such as keys and coins.-Clothing with frayed edges or yarns should be put in a wash bag or special bag before washing.-Repaire damaged clothing,lose buttons or damagedzips and hooks before washing.-Bed sheets and table ware should be loosely loaded and not folded.● This washing machine is for household use and designed for mechanically washable clothes. When washing, separate unwashable clothes with reference to clothes labels. | |||
| 5.Wash Load | ||||
| Type | non-fade cottons | Delicat fabrics | Woolen fabrics | Blending fabrics |
| Max load | 5.5 kg | 2 kg | 1 kg | 2.5 kg |
| Type | non-fade cottons | Delicat fabrics | Woolen fabrics | Blending fabrics |
| Max load | 5.5 kg | 2 kg | 1 kg | 2.5 kg |
Hints for Saving Energy
Washing Instructions

flowchart
graph TD
    A["Pre-wash"] --> B["Default"]
    B --> C["Press Start/Pause"]
    C --> D["Default setting"]
    D --> E["Start washing"]
    B --> F["Setting"]
    F --> G["Select temperature"]
    G --> H["0.400 50°C, 60°C, 80°C"]
    G --> I["Select spinning speed"]
    I --> J["0.30 - 24.00"]
    J --> K["Press Start/Pause → operation"]
    L["Select delay"] --> K
| 4. Setting washing temperaturePress the temperature button until " _ " is displayed if heating is not needed; otherwise, select an appropriate temperature as required . |
| 5. Function selecting buttonSelect functions as required (refer to the "Operational Functions" section). |
| 6. WashingPress the Start / Pause button, the washing machine starts operation. |
| 7. FinishThe washing machine will stop operation automatically when a wash cycle ends. The "End" sign will appear. Open the door and take out the laundry. Then turn off the tap and unplug the power cable. |
| Hints for saving energyDuring operation1. Collect clothes for one full wash load.2. Do not overload the washing machine.3. Pre-wash heavily soiled clothes.4. Reduce the amount of detergent or choose standard or delicate wash programs for slightly soiled clothes.5. Choose a proper washing temperature. Only exceed 60°C for heavily soiled clothes.6. Do not use more detergent than required.7. Softening agent makes clothes feel softer and easier to iron.OtherTo add fabric conditioner will not only make the clothes feel soft but also get rid of static condensation to facilitate ironing. |
Other Functions
Maintenance
| 1. Turn off the water tap and pull out electricity plug after each wash. Open the porthole to prevent formation of moisture and odors. If the washing machine is left idle for a long period, drain the water in the machine and replace the drainage hose. |  |
| 2.Unplug the machine during cleaning and maintenance. Use a soft cloth dampened with soap liquid to clean the machine case and rubber components. Do not use organic chemicals or corrosive solvents. |  |
| 3. Clean the detergent distribution drawer regularly.Raise the drawer slightly and pull it out, flush it clean with water and then replace it. |  |
| 4. Clean the filter (once a month):1) Pull out the bottom cover with both hands (as shown in Fig.2);2) Remove the filter by turning counterclockwise (as shown in Fig.3);3) Flush clean with running water;4) Replace the filter by turning clockwise and remount the cover.Note: To ensure the bottom cover in place during transportation, it fits tightly with the body. For the first one or two times, use a flat screwdriver to lightly loosen the cover (as shown in Fig.4) before removing it with the hands (as shown in Fig.5). |  Fig 4 Fig 5 Fig 4 Fig 5 |
Fig 4 Fig 5
-
Control panel lock function: To prevent children from accidentally changing the settings, the control panel can be locked by pressing the "Temperature" and "Delay" buttons at the same time. After the panel is locked, the sign "LOCK" and the wash time are displayed alternately and all the keys except the Power switch are inactivated. Press the two buttons again to cancel.
-
Power-off memory function:
This machine has a power-off memory function. In case of abrupt power failure or the power must be cut off during a program cycle, the present settings will be saved, and operation will resume when the power is switched on again.
- Display messages:
Cause: Door is not properly shut.
Correction: Shut the door properly.
Cause: Drainage error, water not emptied within 4 minutes.
Correction: Clean the filter and check the drain hose for blockage.
If error still exists, please contact the maintenance personnel.
Cause: Temperature sensor not properly connected or damaged.
Correction: Contact the maintenance personnel.
Cause: Heating coil damage or overload of laundry that leads to
a failure to reach the set temperature within the specified time
(This message is displayed at the end of a program).
Correction: Reduce load and then start washing again or contact
the maintenance personnel.
Cause: Water level not met in 8 minutes.
Correction: Make sure that tap is turned on, and water pressure is normal.
If problem still exists, please contact the maintenance personnel.
Cause: Motor overheat protection or damage.
Correction: Contact the maintenance personnel.
Cause: Water exceeds protective level.
Correction: Contact the maintenance personnel.
A program ends.
The remaining time is 1 hour 25 minutes.
Cris
Em1
£m
End
1:25
Trouble shooting
| Check the following, Before placing a service call | |
| Problem | Possible Cause |
| The washing machine fails to operate | Poor connection to power supplyPower failureDoor is not properly closedMachine has not been switched on |
| Washing machine does not fill with water | Water is not turned onWater pressure is less than 0.05MPaThe inlet hose is kinkedWater supply failureThe program knob is not properly setThe door is not properly closed |
| The water supply and drainage do not stop | Check that the height of the water hose is below 80cm |
| Drainage failure | Drainage hose is blockedDrainage hose end is below 100cm above the floor level |
| Strong vibration during spin | Some packing fixing bolts removedWashing machine on a uneven surface |
| Operation stops before completion of the wash cycle | Water or electricity failure |
| Excessive foam in the drum | The detergent is not a low foam typeExcessive detergent has been used |
Maintenance
-
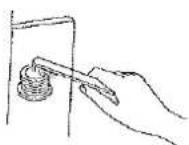
To prevent blockage to the water supply by ingress of foreign substances, clean the water inlet and inlet filter regularly.
-
If the machine is to be moved to a distant place, replace the vibration absorbing locks (packing screws, rubber gaskets) removed before installation to prevent damage as shown below.

Remove the back cover and insert the channel steel insert the rubber bolt gaskets. take out the three rubber plugs. vibration locks and the bolts.

Replace the back cover.
-
If the working machine is left side for a long period, pull out the electrical plug and turn
-
If the washing machine is left side for a long period, pull out the electrical plug and turn off the water tap. Open the door to prevent formation of moisture and odors. Let the door open while not used.

natural_image
Cartoon illustration of a washing machine with a fan and power cord, no text or symbols presentService and Spares
In the event of your appliance requiring service, or if you wish to purchase spare parts, contact your local Kelvinator Service Centre by telephoning:
0860 234 481/2/3 (South African Customers)
+27-11-579-0800 (International Customers)
Help us to help you
Please determine your type of enquiry before writing or telephoning. When you contact us we need to know:
- Your name
- Telephone Number
■ Physical Address where appliance is located
■ Model and Serial Number of the appliance
■ Clear and concise details of the fault
Customer Care
For general enquiries or information regarding Kelvinator appliances contact:
Customer Care Department
Kelvinator
P.O. Box 3657
Johannesburg
2000
South African Customers: 0860 234 481
International Customers: +27-11-579-0800
E-mail: service@electrolux.co.za
Guarantee Conditions
- The guarantee is valid for Twelve (12) months commencing when the appliance is handed over to the first retail purchaser, which must be verified by purchase invoice or similar documentation.
- Kelvinator guarantees the equipment against defective material or faulty manufacture, provided it is used for domestic use from the date of purchase by the original purchaser. If not used as above-mentioned, the warranty period will limited.
- If the appliance is used or installed more than Fifty (50) kilometres from the nearest Kelvinator Authorised Service Agent, the additional distance covered shall be for the account of the purchaser.
- The risk in regard to appliances to be repaired shall at all times remain with the purchaser.
- This guarantee is given on condition that only genuine Kelvinator parts and accessories are used at all times in the appliance.
- Kelvinator shall not be responsible for damage of any kind resulting from electricity fluctuations, faults in the building wiring, faulty installations, improper use of controls or failure to use the appliance in accordance with the operating instructions and/or general misuse and/or abuse, which would include unforeseen accidents, wear and tear, and/or earthquake, flood, lightning or any other natural disaster beyond the control of Kelvinator.
- Any attempt by an unauthorised person to repair or tamper with the appliance shall render this guarantee null and void.
- This guarantee does not include bulbs, loose glass, glass oven doors, enamelled surfaces, discolouring of stainless steel surfaces, filters and other parts subject to wear and tear.
- Kelvinator shall not be responsible in terms of this guarantee for the replacement or repair of any parts of the appliance if damaged during transit, where packaging damage is visible.
- Repairs carried out under guarantee do not extend the guarantee period for the appliance. Parts removed during guarantee repairs become the property of Kelvinator.
- This guarantee shall be available only to a purchaser of Kelvinator appliances from an authorised Electrolux Home Products/Kelvinator Dealer or Distributor in and where the appliance has been retained for use in the Republic South Africa, Namibia, Swaziland, Lesotho and Zimbabwe.
- Failure to produce documentary proof of the date or original acquisition by the original purchaser will result in normal charges being levied for the work carried out and the parts supplied.
- The liability of Kelvinator under this guarantee is limited to the replacement and/or repair of the defective parts within the guarantee period and does not extend to be installation or removal of the appliance. Furthermore, Kelvinator does not accept responsibility or liability to compensate for any consequential loss or damage of any kind caused by or due to the failure of operation or malfunction of any equipment to which this guarantee applies.
- It is at the sole discretion of Kelvinator that, in terms of guarantee, consideration be given to replace the appliance due to various parts failing of a similar nature or in the event of the appliance being in a state of beyond repair.
- DIGITAL FRONT LOAD WASHING MACHINE
- Table of Contents
- Maintenance
- Name of Parts
- Matters Needing Attention
- Installation
- Operational Functions
- Program description table
- Preparation
- Washing methods
- Hints for Saving Energy
- Washing Instructions
- Other Functions
- Service and Spares
- Help us to help you
- Customer Care
- Guarantee Conditions
Brand : KELVINATOR
Model : KL60DFL
Category : Washing machine