VIR-7355NR - Car radio Soundstream - Free user manual and instructions
Find the device manual for free VIR-7355NR Soundstream in PDF.


| Product Type | Car Stereo / Multimedia Receiver |
| Brand | Soundstream |
| Model | VIR-7355NR |
| Chassis Size | Double DIN (178 x 100 x 160 mm) |
| Weight | Approx. 1.5 kg |
| Power Supply | 12V DC (negative ground) |
| Maximum Power Output | 4 x 50 Watts RMS |
| Display | 7-inch touchscreen (approx.) |
| Supported Audio Formats | MP3, WMA, WAV, FLAC |
| Supported Video Formats | MP4, AVI, MKV |
| Radio Bands | AM / FM (RDS) |
| Bluetooth | Yes (Hands-free calling & audio streaming) |
| USB Input | Yes (Rear USB, supports up to 64 GB) |
| AUX Input | Yes (3.5 mm front) |
| SD Card Slot | Yes (up to 32 GB) |
| Steering Wheel Control | Compatible (requires adapter) |
| Navigation | Built-in GPS (with preloaded maps) |
| Rear Camera Input | Yes (compatible with backup camera) |
| Maintenance | Clean with soft dry cloth; avoid liquids and abrasives |
| Safety | Use only specified fuse; disconnect battery during installation |
| Spare Parts & Repairability | Contact authorized Soundstream dealer for replacement parts |
Frequently Asked Questions - VIR-7355NR Soundstream
User questions about VIR-7355NR Soundstream
0 question about this device. Answer the ones you know or ask your own.
Ask a new question about this device
Download the instructions for your Car radio in PDF format for free! Find your manual VIR-7355NR - Soundstream and take your electronic device back in hand. On this page are published all the documents necessary for the use of your device. VIR-7355NR by Soundstream.
USER MANUAL VIR-7355NR Soundstream
DISC NOTES
Handling and Cleaning
● Dirty, dusty, scratched or warped discs will cause misoperation.
- Do not place stickers or make scratches on discs.
- Do not warp discs.
● A disc should always be kept in its case when not in use to prevent from damage.
● Do not place discs in the following places:
-
Direct sunlight.
-
Dirty, dusty and damp areas.
-
High temperature places
-
On the seats or dashboard
Disc Cleaning
Use a dry soft cloth to wipe the surface. If the disc is quite dirty, use a soft cloth slightly moist with isopropyl (rubbing) alcohol. Never use solvent such as benzene, thinner or conventional record cleaners which may mar the surface of the disc.
NOTE:
A disc may become somewhat scratched (although not enough to made it unusable) depending on your handing it in the condition of the usage environment. These scratches are not an indication of any problem with the player.
Repairing New Discs with Rough Spots
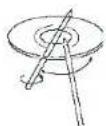
A new disc may have rough edges on its inside and outside edges. If a disc with rough edges is used, the proper setting will not be performed and the player will not play the disc. Therefore, remove the rough edges in advance by using a ballpoint pen or pencil. To remove the rough edges, press the side of the pen or pencil against the inside and outside edges of the disc.

Label side up

Do not touch the underside of the die

Do not bend

Wipe the disc from the centre toward edge.
| Problem | Cause | Action |
| TFT MONITOR | ||
| No video display (when in reverse) | Reverse circuit not connected | Check connections at reverse lamp |
| Vehicle is not in reverse | Select reverse gear | |
| Front panel will not open/close | Front panel obstructed | Remove the obstruct and press OPEN to resume the monitor open/close sequence |
| Flashing image or interference appears on screen | DVD is not compatible with current TV system settings Image blurred, distorted, or dark | Change setup to accommodate disc |
| Prolonged image or improper height/width ratio display | Improper video signal connections | Check wiring and correct |
| Improper aspect ratio setup | Use correct aspect ratio setting | |
| Touch screen function disorder if the position is excursion | Under different condition, for example: temperature , humidity, tec | Do touch screen calibrate |
| DISC | ||
| Cannot insert disc | Disc already inside unit | Eject current disc and insert new one |
| DVD does not start playback | Disc is warped or scratched | Use disc in good condition |
| Disc is dirty or wet | Clean disc with soft cloth | |
| Incompatible disc is used | Use compatible disc | |
| Disc rating exceeds Parental Lock rating limit | Change parental Lock settings to lower restriction | |
| Disc region code is not compatible with unit | Use disc with proper region code | |
| Disc is inserted upside down | Insert disc with label side up | |
| Image blurred , distorted, or dark | Disc is illegally copied | Use original disc |
| No repeat or searching while playing VCD | PBC is on | Turn PBC off |
| Interruption occurred during MP3 playback | Disc is dirty or scratched | Clean disc or replace new disc |
| Bad Disc appears on display | Focus error | Press eject or RESET |
TABLE OF CONTENTS
Table of Contents....1
Safety Information....2
Features....3
Accessories....4
Wire Connection....5
Unit Installation and Removal 8
Front Panel....12
Base Panel 13
Remote Control....14
Touch Screen Operations....19
Touch Screen Calibrate....19
Main Menu....20
Radio Operations....21
DVD Operations....22
Bluetooth Operations....28
IPOD Operations....33
SD Operations....35
USB Operations....35
DIM Operations....35
AV IN1 Operations....36
AV IN2 Operations....36
NAVI Operations....37
TV Operations....41
DIGITAL TV Operations....42
System Parameters Setup 43
Specifications....46
Troubleshooting....47
Disc Notes 49
SAFETY INFORMATION
Please read the manual carefully before operating this unit and keep it for future reference.
CAUTION: This unit is a class 1 laser product. To prevent direct exposure to the laser system, do not open the unit. The laser beam may hurt your eyes. If the unit requires adjustments, contact an authorized service centre.
USE THIS PRODUCT SAFELY
Be sure you fully understand the following safety information:
When driving
Keep the unit at an appropriate sound level. Driving with the sound at a level preventing you from hearing sounds outside and around the car may cause an accident.
When cleaning
Do not expose the product to water or excessive moisture. This could cause short circuit, fire or other severe damage.
When parked
Parking in direct sunlight can result in very high temperature levels inside your car. Let the interior and unit cool down before switching the unit on.
NOTE:
Do not use and store the player in dusty, hot or humid environment.
FUSE REPLACEMENT - WARNING!
Never replace any fuse with one of a higher value than the fuse supplied with your unit. Using a higher current rated fuse may cause damage to your unit and/or electrical wiring.
TROUBLE SHOOTING
If any of problem persists after checking the below list, Please consult your nearest service dealer. Never attempt to disassemble and repair unit personally.
| Problem | Cause | Action |
| GENERAL | ||
| Unit will not turn on (no power) | Yellow wire not connected or incorrect voltage Re wire not connected or incorrect voltage | Check connections for proper voltage(11-16vdc) |
| Black wire not connected | Check connection to ground | |
| ACC Fuse blown or Car battery fuse blown | Install new fuse with correct rating | |
| Illegal operation | Press the RESET button | |
| Unit has power (but no/low audio output) | Speaker wires not connected | Check connections at speakers |
| One or more speaker wires touching each other or touching chassis ground | Insulate all bare speaker wires from each other and chassis ground | |
| Speakers damaged | Review wiring diagram and check | |
| Poor sound quality or distortion | Speaker power rating not compatible with unit | Connect proper speakers |
| Speaker is shorted | Check speaker wire contact | |
| Unit resets itself when engine is off | Incorrect connection between ACC and Positive battery wire | Check wiring and correct |
| Unit blows fuse | Yellow or red wire touching chassis ground | Check for pinched wire |
| Speaker wires touching chassis ground | Check for pinched wire | |
| Incorrect fuse rating | Use fuse with correct rating | |
| Unit has audio (when in reverse) | Parking brake safety circuit not connected | Check connections at parking brake |
| Parking brake not applied | Apply parking brake | |
| Excessive skipping | Unit is not mounted correctly | Check mounting sleeve |
| Physical defect in media | Check media for scratches | |
| IR remote does not work | Dead battery | Replace battery |
| Battery installed incorrectly | Remove battery and install correctly | |
| TUNER | ||
| Weak station searching | Auto antenna is not fully extended | Connect the auto antenna control cable properly |
| Auto antenna not properly connected | Connect the auto antenna control cable properly | |
| LOCAL function is activated | Turn LOCAL function off | |
SPECIFICATIONS
| GENERAL | |
| Supply Voltage | : 14.4V DC (11-16V allowed) |
| Load Impedance | : 4Ω per channel |
| Max Power Output | : 50W x 4 |
| Bass 100Hz | : ≥ 10dB |
| Treble 10KHz | : ≥ 10dB |
| Dimensions (approx.) | : 180 x 188 x 59 mm (d/w/h) |
| Mounting (approx.) | : 160 x 178 x 50 mm (d/w/h) |
FM TUNER
| Frequency Range | 87.5 – 108 MHz (Europe/Asia)87.5 – 107.9 MHz (USA) |
| IF | 10.7 MHz |
| Usable Sensitivity | ≤ 15dBuV |
| Stereo Separation | ≥ 26dB (1 KHz) |
| Frequency Response | 100-20000Hz |
AM TUNER
| Frequency Range | : 531 - 1602 KHz (Asia) |
| 522 - 1620 KHz (Europe) | |
| 530 - 1710 KHz (USA) | |
| IF | : 450 KHz |
| Usable Sensitivity | : ≤ 40dBuV |
TV TUNER (Optional)
| Frequency Range | NTSC: 55.25 MHz~855.25MHzPAL: 48.25 MHz~855.25MHz |
DVD PLAYER
| Signal-to-noise Ratio | : ≥ 85dB (1 KHz) |
| Distortion | : ≤ 0.5% |
MONITOR
| Resolution | : 480 (w) x 234 (H) (RGB) |
| Brightness | : 400 cd/m ^2 |
| Contrast | : 250:1 |
NOTE:
Specifications and design are subject to modification without notice due to improvement in technology.
FEATURES
• Motorized TFT-LCD with 4 Pre-Set Angles & Last Angle Memory
- Accepts Add-On GPS Navigation Module, NAVIBOX-1 (Optional)
• Accepts Add-On Digital TV Tuner Module, DTV-1 (Optional)
• Car-Spec DVD Transport for Extreme Temperature Exposure
- Playback from DVDR/RW & CDR/RW Including VCD, MP3, MP4 & DivX
• Recall Memory for Last DVD Position
• IPOD Input Connection (requires IC-2 cable only) (Optional)
• Mini-USB Connection for MP3 & MP4 Playback From 16GB Flash Drive
• 16GB SD Card Reader for MP3, MP4, DivX & Xvid Playback
• 30MB Internal Memory for Background & Screen Saver Images
• 18 FM / 12 AM Station Memory
• 50w x 4 MOSFET Powered Speaker Level Outputs
• Front & Rear Pre-Amp Outputs
• Variable Subwoofer Pre-Amp Output with LPF (80, 120, 160Hz)
• A/V Outputs for Multiple Components
• A/V Inputs for Secondary Source
• Front Panel 3.5mm Auxiliary A/V Input
• Reverse Camera Input with Trigger
• Custom & Pre-Set EQ Settings
• Audio Staging Controls
• 12/24 Hour Clock
• USA/European Frequency Stepping
• NTSC/PAL Auto Selection
• High Definition Digital Panel with LED Back Light
• 400 NIT Backlight Brightness
• Built-In TV Tuner (Optional)
• 3 Selectable User Interface
Bluetooth Features (Optional)
• Work with Most Bluetooth V2.0 Enabled Phones
• Noise & Echo Cancellation
- Contacts List Transferred for Easy Access Dialing
- Caller ID Shows Name and Number from Contacts List
• Recent Calls & Talk Time Logs
• A2DP for MP3 Playback
NOTE:
This user's manual is only for reference.
Modifying rights are reserved.
Specifications are subject to change without notice.
ACCESSORIES
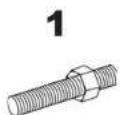
Bolt x 1
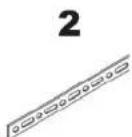
Back Strap x 1
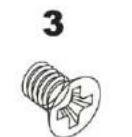
M5X5 Screws x 4
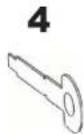
Keys x 2
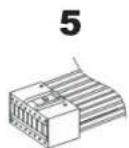
Power Wire x 1
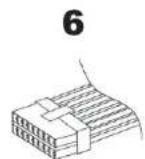
Connector Wire x 1
Operational Manual x1
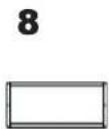
Trim Bezel x 1 (Small)
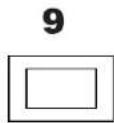
Trim Bezel x 1 (Big)
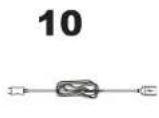
USB Cable x 1
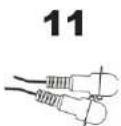
AV IN Cable x 1
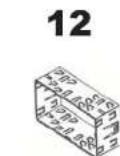
Mounting Sleeve x 1
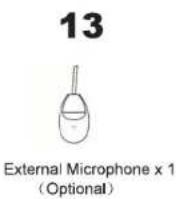
Remote Control x 1
- Screen Saver Time
Touch to adjust the screen saver time as following:
3MIN - 5MIN - NEVER - 10S - 20S - 30S - 60S - 3MIN
SYSTEM SETUP
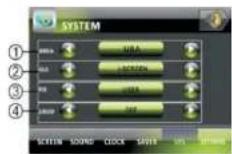
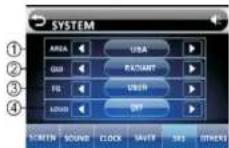
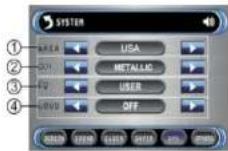
- RADIO AREA
Touch [LEFT] / [RIGHT] icons to switch the Radio Area as following:
USA - JAPAN - ORIT - EUROPE - ASIA - USA
- GUI
Touch [LEFT] / [RIGHT] icons to switch between the 3GUI's.
I-SCREEN - RADIANT - METALLIC
- EQ
Touch [LEFT] / [RIGHT] icons to switch the EQ as following:
USER - POP - CLASSIC - ROCK - JAZZ - USER
- LOUD
Touch [LEFT] / [RIGHT] icons to turn Loud on or off;
OTHERS SETUP
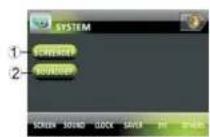
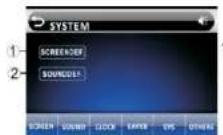
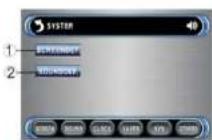
- SCREENDEF
Touch the icon to restore all SCREEN default settings of System Parameters Setup.
- SOUNDDEF
Touch the icon to restore all SOUND default settings of System Parameters Setup.
5. Buzzer
Touch to turn Buzzer on or off;
- Balance / Fader
Touch [LEFT] / [RIGHT] icons to adjust the BALANCE parameters (Range: -9 to 9); Touch [FRONT] / [REAR] icons to adjust FADER parameters (Range: -9 to 9);
- X-Bass
Touch to turn X-Bass on or off
CLOCK SETUP
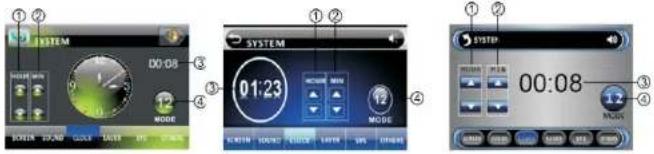
- Hour
Touch [UP] / [DOWN] icons to adjust the HOUR;
- Minute
Touch [UP] / [DOWN] icons to adjust the MINUTE;
- Time Display
Display the time currently.
- Time Mode
Touch to switch the time mode between 12-Hour and 24-Hour;
SAVER SETUP
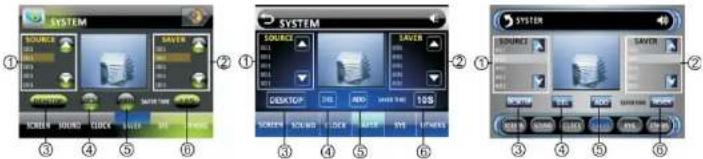
- Captured Images List
Touch [UP] / [DOWN] icons to select the image captured from DVD, SD card and USB
- Screen Saver Images List
Touch [UP] / [DOWN] icons to select the image of screen saver.
- Desktop
Touch to set the selected image of captured images list as desktop image.
- Del
Touch to delete the selected image of screen saver images list.
- Add
Touch to add the selected image of captured images list as screen saver.
WIRE CONNECTION
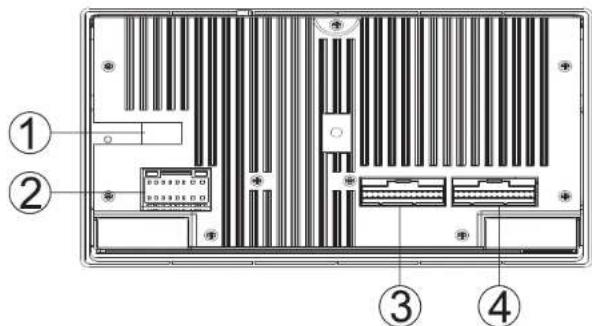
- RADIO & ANALOG TV ANTENNA (OPTIONAL)
- 16PIN SOCKET
- AUDIO /VIDEO OUTPUT & INPUT
- NAVI & DIGITAL TV ADAPTER (OPTIONAL)

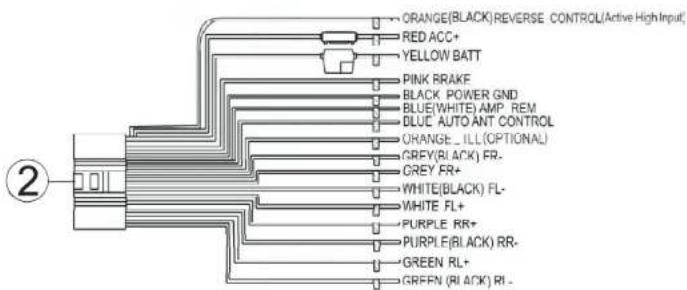
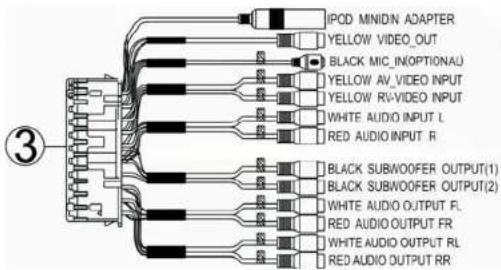
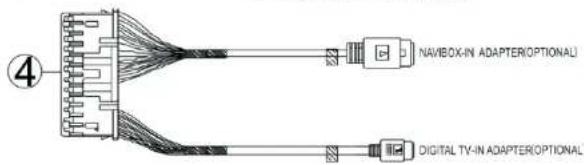
Brake Control
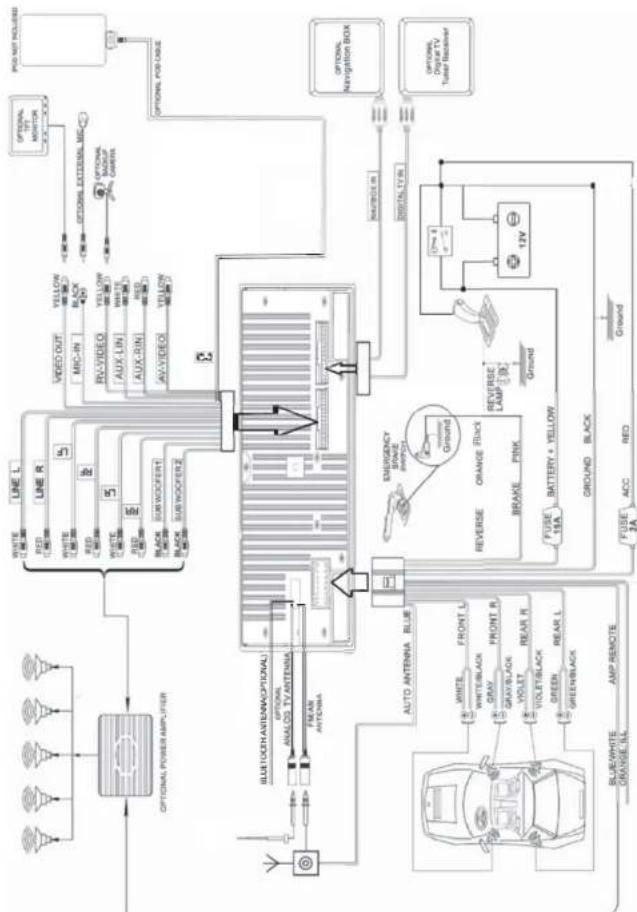
Connect the brake control wire AUTO_ANT (see Wiring Diagram). It is necessary to connect the Brake Control wire to the Hand-brake switch of the car. While driving, the TFT monitor will display the alarm picture (see as follows) in order to ensure the safety.
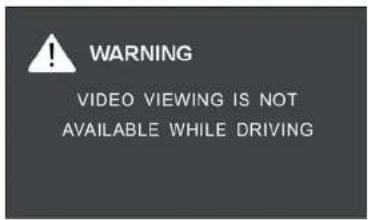
Under the Rear View Mode, the Brake Control function is no effective.
Auto Antenna Control
Connect the auto antenna control wire AUTO_ANT (see Wiring Diagram). The antenna will lift when the unit startup; it will descend when the unit turnoff
SYSTEM PARAMETERS SETUP
Touch the [SYSTEM] icon to enter the System Parameters Setup.
SCREEN SETUP
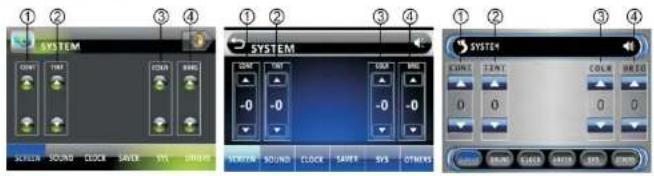
1. Contrast
Touch [UP] / [DOWN] icons to adjust the CONTRAST parameters (Range: -9 to 9);
2. Tint
Touch [UP] / [DOWN] icons to adjust the TINT parameters (Range: -9 to 9);
3. Color
Touch [UP] / [DOWN] icons to adjust the COLOR parameters (Range: -9 to 9);
4. Brightness
Touch [UP] / [DOWN] icons to adjust the BRIGHTNESS parameters (Range: -9 to 9);
SOUND SETUP
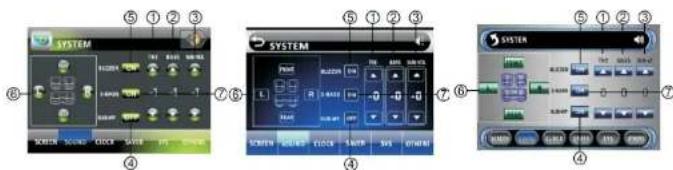
1. Treble
Touch [UP] / [DOWN] icons to adjust the TREBLE parameters (Range: -9 to 9);
2. Bass
Touch [UP] / [DOWN] icons to adjust the BASS parameters (Range: -9 to 9);
3. Sub-Woofer Volume
Touch [UP] / [DOWN] icons to adjust the SUB-WOOFER volume parameter (Range: 0 to 15);
4. Sub-Woofer Frequency
Touch [UP] / [DOWN] icons to switch the SUB-WOOFER frequency as following: OFF — 80Hz — 120Hz — 160Hz — OFF
DIGITAL TV OPERATIONS (Optional)
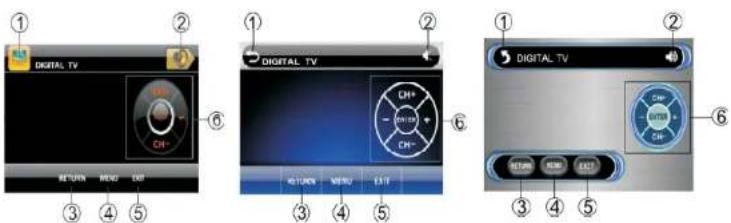
- Current Source Indicator
Display the source currently playing, touch to return the main menu.
- Mute
Touch to switch off the sound; touch it again to resume to the previous volume level.
- Return
Touch to return submenu to menu.
- Menu
Touch to display the menu.
- Exit
Touch to exit the menu.
- Direction Arrows Keyboard
Touch the arrows icons to select the item, touch the [ENTER] icon to confirm the selection
NOTE:
Under DIGITAL TV mode, please view all operations by DIGITAL TV Device DTV-1 User's manual.
Wiring Diagram
UNIT INSTALLATION AND REMOVEL
Installation Method 1:
1 Install the mounting sleeve into the dashboard.
2 Bend the claws into place to secure the sleeve.
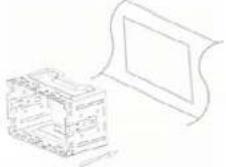
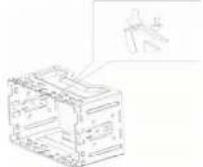
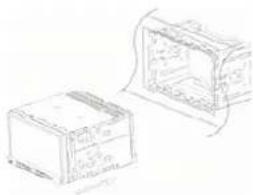
3 Slide the units into the mounting sleeve.
4 Install the trim bezel onto the unit.
natural_image
Two hand-drawn sketch-style boxes with no visible text or symbols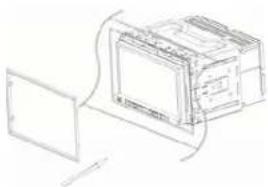
natural_image
Line drawing of a computer monitor connected to a screen (no text or symbols)5 Sketch map when installation finished.
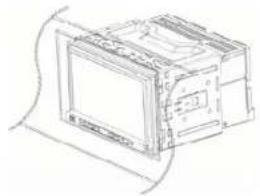
natural_image
Line drawing of a computer monitor with a curved cable (no text or symbols)TV OPERATIONS (Optional)
Touch the icon "TV" to enter the TV Mode:
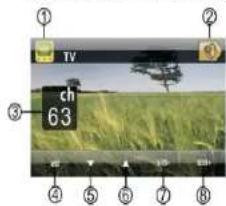
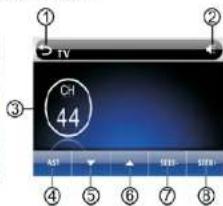
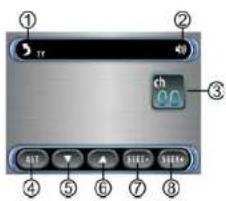
- Current Source Indicator
Display the source currently playing, touch to return the main menu.
- Mute
Touch to switch off the sound; touch it again to resume to the previous volume level.
- Current Channel Indicator
Display the TV channel currently playing.
- Auto Station Tune
Touch to automatically seek all strongest stations available; touch any icon to stop the tuning.
- / 6. Next Station - Down / Up
After the Auto Station Tune, touch to select the stations downward / upward.
- / 8. Seek Next Station - Down / Up
Touch to seek the next available channel by increasing / decreasing the tuning frequency.
Quick Access Key [NAVI]
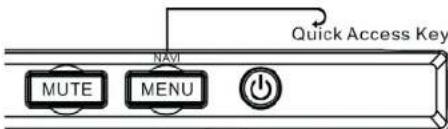
Under any working mode, press the [NAVI] button to switch to NAVI mode; press the [NAVI] button again to return the previous working mode. For example, under Radio mode, press the [NAVI] button to switch to NAVI mode; press the [NAVI] button again to quit the NAVI mode and return back the Radio mode.
Enter the NAVI mode by Quick Access Key, the previous working mode is still working on background. For example, under Radio mode, press the [NAVI] button to switch to NAVI mode, and you can still listen to the radio stations. But when voice of Navigation comes, the radio will be interrupted until voice of Navigation ends.
NO NAVIBOX CONNECTION
Touch the "NAVI" icon to enter the following screen if the NAVIBOX not connected:
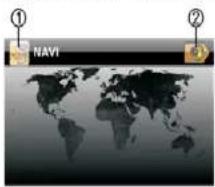
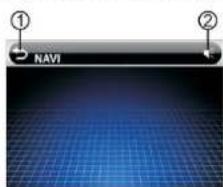
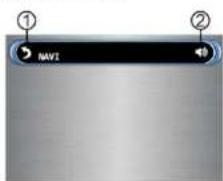
- Current Source Indicator
Display the source currently playing, touch to return the main menu.
- Mute
Touch to switch off the sound; touch it again to resume to the previous volume level.
Removal Method 1:
1 Detach the trim bezel.
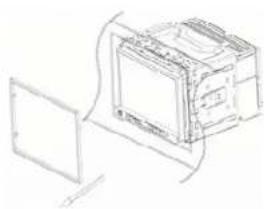
natural_image
Line drawing of a computer monitor with an open screen and a paper plane, no text or symbols present2 Insert the keys into the aperture between the unit and the mounting sleeve to release the internal locks.
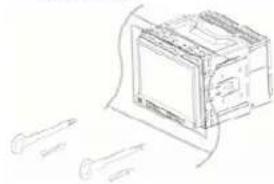
natural_image
Line drawing of a computer monitor with two screw-like components and a curved screen (no text or symbols)3 Pull the unit out of the mounting sleeve
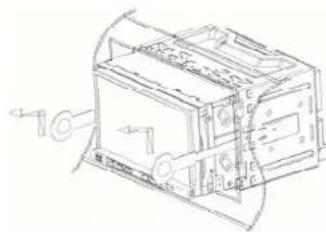
natural_image
Technical line drawing of a mechanical device with no visible text or symbols4 Sketch map when removal finished.
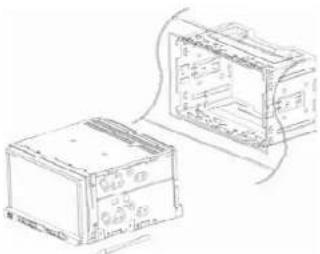
natural_image
Technical line drawing of two electronic device modules (no text or symbols visible)Installation Method 2:
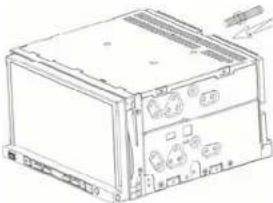
1 Tighten the bolt onto the rear panel of the unit.
natural_image
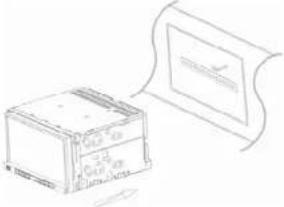
Line drawing of a computer rack unit with buttons and ventilation slots (no text or symbols)3 Place the unit into the dashboard; make the bolt bar across back strap; and then fix the bolt by the Nut M5.
2 Tighten the back strap onto your car inside the dashboard.
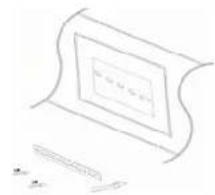
natural_image
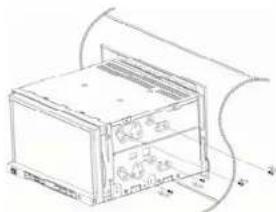
Simple line drawing of a scroll with a blank card and two small objects below (no text or symbols)4 Screw the unit on the car on the two sides with M5×5 SCREWS.
natural_image
Line drawing of a device with a paper sheet and a box, no visible text or symbols5 Install the trim bezel onto the unit.
natural_image
Technical line drawing of a rectangular device with internal components, no visible text or symbols6 Sketch map when installation finished.
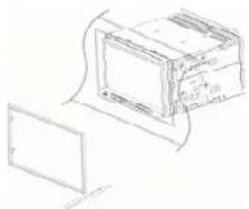
natural_image
Simple line drawing of a computer monitor and a separate screen (no text or symbols)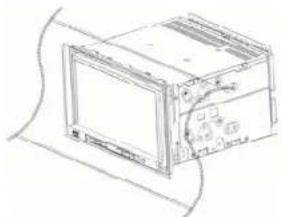
natural_image
Line drawing of a rectangular electronic device with a screen and control panel (no text or symbols)Go to NAVI mode
Touch the icon "NAVI" to enter the NAVI Mode if NAVIBOX connected:
Following screen will be displayed:

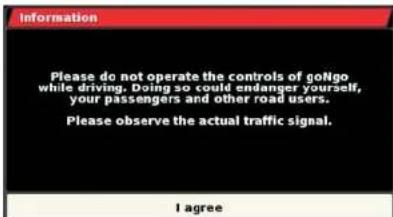
Read information and touch "I agree" button at the bottom of the screen.
Enter the NAVI mode by main menu, the NAVI operations are effective only, all other processes are disable such as Radio, CD etc.
NOTE:
Under NAVI mode, please view all operations by Navigation Device NAVIBOX-1 User's manual.
The Touch Screen is restored to their default positions. Touch anywhere of panel to finish the calibration and go to the following screen:
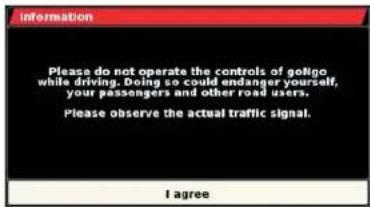
Read information and touch "I agree" button at the bottom of the screen, then enter the NAVI mode.
NOTE:
If change the NAVIbox to connect another unit, please take out the SD card from the NAVIbox and connect with computer, the following screen is displayed on computer:
![Removable Disk [1-1] File Edit View Favorites Tools Help Back Search Folders Address 31 File and Folder Tasks Remove the File Move the File Copy the File Publish the File to the Web Browse the File Delete this file Other Places BSIMAP all files 30 Files 125](/content/2026/05/988079/images/b4b9b6f077f6cc84618f9e350c85c67c4c4881203b0a507cfd2f3a53872e4c03.jpg)
Delete the file "calib.ifo" only. Insert the SD card into NAVIbox again, and connect the NAVIbox with another unit.
Removal Method 2:
1 Detach the trim bezel.
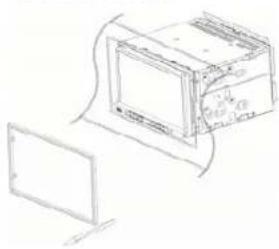
natural_image
Simple line drawing of a computer monitor connected to a screen (no text or symbols)2 Unscrew the unit off the car on the two sides.
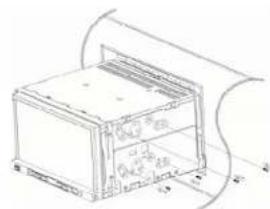
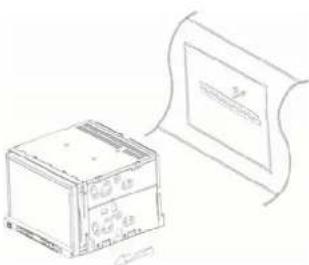
3 Unscrew the Nut M5 screw on the rear
4 Sketch map when removal finished. side of the unit and pull out the unit.
natural_image
Technical line drawing of a mechanical component and its corresponding schematic diagram (no text or symbols)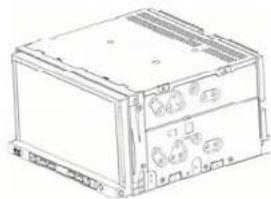
natural_image
Line drawing of a rectangular electronic device with ports and connectors (no text or symbols)FRONT PANEL
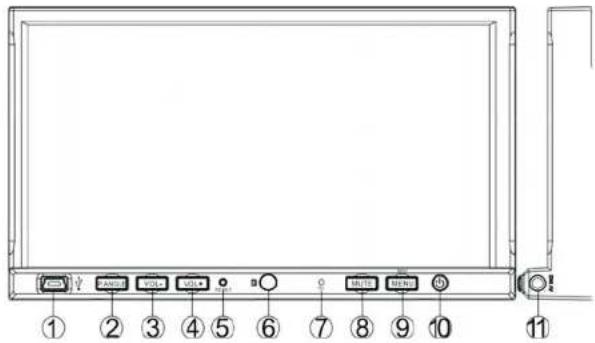
-
MINI USB
-
RESET
-
MENU/NAVI
-
P. ANGLE
-
REMOTE
-
POWER/SOURCE
-
VOLUME-
-
MIC
-
AV IN2
-
VOLUME+
-
MUTE
1. Mini USB
The unit will be switched to USB Mode automatically when USB connected, and play the songs, pictures, videos in USB.
2. P.ANGLE
Inserting Disc
Touch the [P.ANGLE] button, the front panel will slide down to
Position 1; then insert a disc into the Disc Loading Slot;
the panel will slide back automatically.
Ejecting Disc
Touch the [PANGLE] button, the front panel will slide down to Position 1; then eject a disc; the panel will slide back automatically if no action is taken.
TFT Viewing Angle Adjustment:
Hold on touch the [P.ANGLE] button to adjust the viewing angle as following:
Angle 1- Angle 2- Angle 3- Angle 4- Angle 1

Angle 1

Angle 2
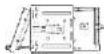
Angle 3
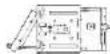
Angle 4
NOTE: you can also make the same adjustments with the remote control. Simply press and hold the [PANGLE] button to adjust according to your preference.
NAVI OPERATIONS (Optional)
Touch Screen Calibration
When 1 ^st time to enter NAVI mode, you will see the calibration screen. Please touch the points from 1 to 5 by using a ballpoint pen or pencil.
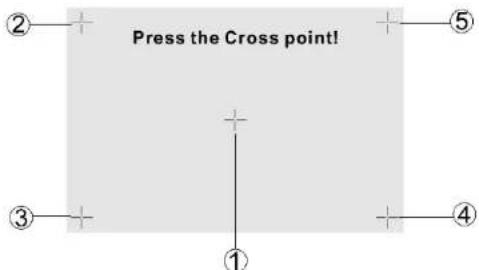
To verify the calibration, please touch the points from 1 to 5 again.
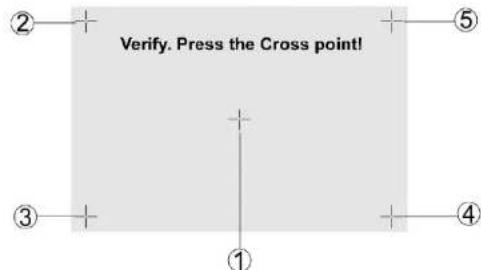
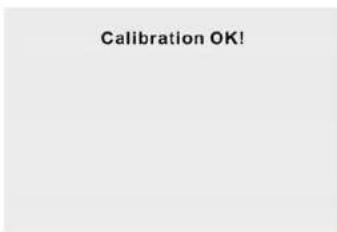
Then the following screen is displayed:
AV IN 1 OPERATIONS
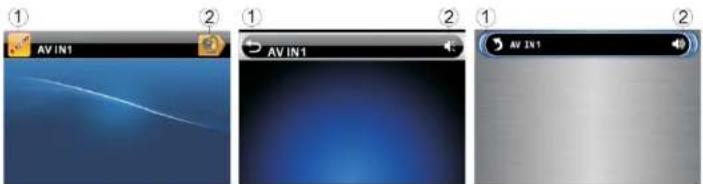
Touch the icon "AV IN1" to enter the AV IN1 Mode:
natural_image
Three-panel image sequence showing a blue abstract background with two UI elements: AV IN1, one in a gradient blue-to-gray transition, the other in a black gradient (no text or symbols)- Current Source Indicator
Display the source currently playing, touch to return the main menu.
- Mute
Touch to switch off the sound, touch it again to resume to the previous volume level.
NOTE:
There are 2 RCA Audio Inputs & 1 RCA Video Input for unit.
AV IN 2 OPERATIONS
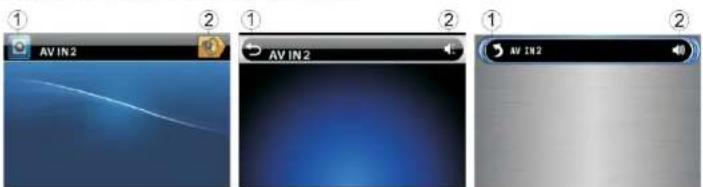
Touch the icon "AV IN2" to enter the AV IN2 Mode:
- Current Source Indicator
Display the source currently playing, touch to return the main menu.
- Mute
Touch to switch off the sound; touch it again to resume to the previous volume level
- VOL-14. VOL+
Press the [VOL+] button to increase the volume.
Press the [VOL -] button to decrease the volume
- Reset
Press and hold this button to switch back to all the original factory settings. Keep in mind this will erase all your preset radio stations and any EQ settings you may have made and saved.
- Remote
Remote infrared receiver
- MIC (Optional)
Microphone for Bluetooth.
- Mute
Press to switch off the sound; press it again to resume to the previous volume level.
- Menu/Navi
Touch to access the Main Menu.
Hold on pressing to access the Navigation Menu
- Power/Source
When ACC is on, press the button to turn the unit on; hold on pressing the button to turn off the unit.
When the unit is on, press to switch between different modes.
- AV IN 2
Connect an external audio/video device to this jack to watch to the device through your car video system.
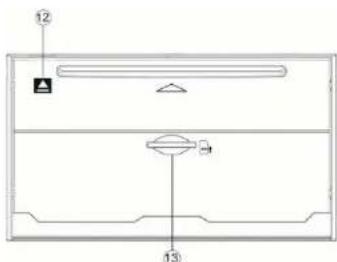
-
EJECT
-
SD CARD SLOT
-
EJECT
When flip down the front panel, press [EJECT] button to eject / load a disc.
- SD CARD SLOT
The unit will be switched to SD CARD Mode automatically when SD CARD connected, and play the songs, pictures, videos in SD CARD.
REMOTE CONTROL
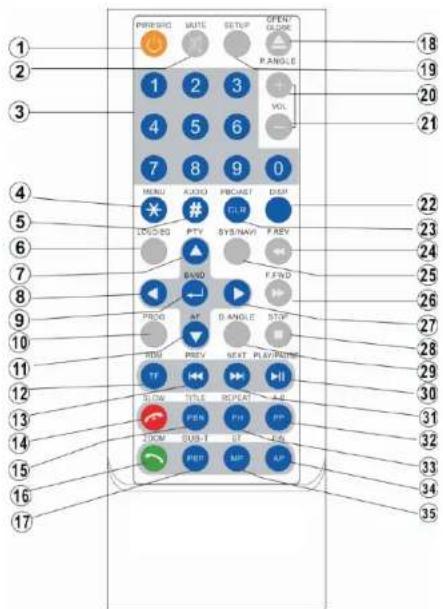
-
POWER/SOURCE
-
MUTE
-
NUMBER BUTTONS
-
MENU /*
-
AUDIO / #
-
EQ / LOUD
-
UP (TUNE UP)/PTY
-
LEFT (SEEK DOWN)
-
ENTER / BAND
-
PROGRAM
-
DOWN(Tune Down)/AF
-
RANDOM / TRANSFER
-
PREVIOUS
-
SLOW / END CALL
-
TITLE / PBN
-
ZOOM / CALL
-
SUBTITLE / PBP
-
OPEN / CLOSE / P.ANGLE/ EJECT
-
SETUP
-
VOLUME+
-
VOLUME-
-
DISPLAY
-
PBC / AST / CLEAR
-
F.REV
-
SYSTEM / NAVI
-
F.FWD
-
RIGHT(Seek up)
-
STOP
-
D.ANGLE
EJECT
30, PLAY / PAUSE
-
NEXT
-
A-B / PHONE PAIR
-
REPEAT / PHONE
-
PAL/NTSC/AP
-
STEREO / MP
NOTE:
This is an universal remote, some functions would be optional.
SD CARD OPERATIONS
Under the SD CARD Mode, all operations are same as DVD Mode.
-
Touch the [SD CARD] icon to access to SD CARD Mode if SD / MMC Card inserted.
-
The unit will switch to SD CARD Mode automatically and enter into track playing when SD CARD connected. Press the [<] button once on remote control or Direction Arrows Keyboard on the screen to retreat to file select, and press the [<] button again to retreat to Music playing. Then press the [>] button once to select Photo playing, press the [>] button again to select video playing. Touch [v] / [^] to go to the previous/next song, picture or video when under Music/Photo/Video playing.
-
When music/video playback, touch the stop icon once to stop the playback, touch the [Play/Pause] icon to resume the playback again. Touch the icon twice to stop the playback, touch the [Play/Pause] icon to start the playback from the beginning of the music/video.
-
When SD Card disconnected, the unit will switch to RADIO Mode automatically if there is no SD Card in the unit; the unit will switch to SD CARD Mode automatically if there is a SD Card in the unit.
USB OPERATIONS
Under the USB Mode, all operations are same as SD CARD operations.
DIM OPERATIONS
Touch the icon [DIM] to switch brightness modes as following:
DIM 1→ DIM 2→ DIM 3
↑
The screen brightness will decrease step by step from DIM 1 → DIM 2 → DIM 3
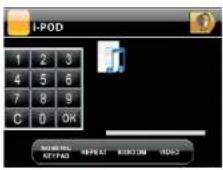
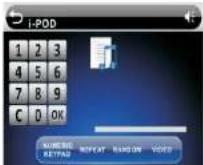
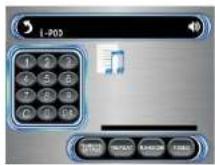
8.Repeat
Touch to repeat current song, touch it again to repeat songs as ALL
9.Random
Touch to play songs randomly.
10. Video
Touch to access the video page.
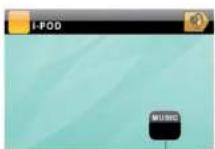
①
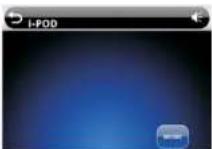
①
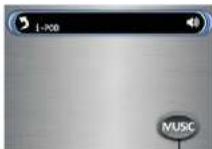
①
Under the Video Page, use the controller of IPOD itself to control all operations of IPOD including play music, videos and view pictures.
1. Music
Touch the icon to access the music page.
NOTE:
The TV Output in IPOD SETUP should be effective, and the pictures & videos could be displayed on the TFT monitor of unit.
Under IPOD mode, the unit may pause or delay, when any function button is pressed, (play/ prev/ next and so on) or if pressed too many times. IPOD may freeze sometimes, after disconnecting from the head-unit. Please reset your IPOD.
1. [POWER/SOURCE]
When ACC is on, press the button to turn the unit on; hold on pressing the button to turn off the unit.
When the unit is on, press to switch between different modes.
2. [MUTE]
Press to switch off the sound; press it again to resume to the previous volume level.
3. [NUMBERS 0\~9]
Radio Mode, press the buttons 1\~6 to select a preset station, hold on touching to store current radio frequency to the preset station.
DVD Mode. When playing DVD, VCD, CD, MP3, press the buttons 0\~9 to input the number of track, press the [BAND] button to confirm.
TV Mode, press the buttons 0\~9 to choose the channel and press the [BAND] button to confirm
Bluetooth Mode, press the buttons 0\~9 to input phone numbers.
4. [MENU / \*]
DVD Mode, press to return to the boot menu when playing DVD disc.
Bluetooth Mode, press to input the symbol *
5. [AUDIO / #]
DVD Mode, press to change dialogue language when playing DVD disc; Press to select different audio channels when playing VCD, CD disc.
Bluetooth Mode, press to input the symbol #.
6. [LOUD/EQ]
Press to adjust the EQ setting as following:
USER - POP - CLASSIC - ROCK - JAZZ - USER
Hold on pressing to switch between LOUD ON / OFF
7. [∧]/[PTY]/ 8. [<] / 11. [∨]/ [AF]/ 27. [>] Direction Key
DVD Mode and System Parameters Setup, press the [v] / [^] buttons to move the cursor upward / downward to select item. Press the [<] / [>] buttons to move the cursor leftward / rightward to select item.
Radio Mode, press the [<] / [>] buttons to switch the stored stations. Hold on pressing the [<] / [>] buttons to fast seeking the next available channel by decreasing /
increasing the tuning frequency; seeking will stop by pressing any button. Press the [v] / [^] buttons to decrease / increase the frequency step by step. Hold on pressing the [^]/[PTY] to activate/deactivate the PTY function, hold on press the [v] / [AF] to activate/deactivate the RDS operation.
TV Mode, hold on pressing the [<] / [>] buttons to fast tuning channel forward the low / high frequency automatically. Press the [^] / [v] buttons to select the stored channel upward / downward.
Bluetooth Mode, press [<] / [>] buttons to switch between dialing page, phonebook, music and setup page.
GPS Mode, press the [√] / [^] buttons to decrease / increase the brightness of the screen.
9. [BAND/ENTER]
DVD Mode, press to confirm the selection.
Radio Mode, press to switch the wave band as following:
FM1-FM2-FM3-AM1-AM2-FM1
TV Mode, press to switch the TV audio as following:
NTSC-PAL/BG-PAL/I-PAL/DK-NTSC
Hold on pressing to switch the TV system area as following:
USA - CCIR - ITALY - AUS - NZ - USA
Bluetooth Mode, press the button to turn on/off selected item.
10. [PROGRAM]
DVD Mode, press to enter / exit the PROGRAM Function when playing the DVD.
VCD, CD disc.
12. [RANDOM/TRANSFER]
DVD Mode, press to turn RANDOM function on / off when playing DVD, VCD, CD
disc.
Bluetooth Mode, press to transfer the call between the unit and your cell phone when
talking the phone.
13. [PREVIOUS] / 31. [NEXT]
DVD Mode, press to go to the pervious / next chapter, track or song.
14. [SLOW/END CALL]
DVD Mode, press to slow motion playback at 1/2x speed when playing DVD/VCD
disc. Each press changes speed from 1/2x to 1/4x to 1/8x to 1/16x then back to
normal play
Bluetooth Mode, press to reject or hang up a call.
15. [TITLE/PBN]
DVD Mode, press to enter the title menu when playing DVD disc.
Bluetooth Mode, press to enter the next page of phone number list in phonebook
16. [ZOOM/CALL]
DVD Mode, press to zoon the picture display when playing DVD, VCD disc. Each
press changes speed from 2x to 3x to 4x to 3x to 2x then back to normal play.
Bluetooth Mode, press to call a number or to receive a cell phone call.
17. [SUB-T/PBP]
DVD Mode, press to change the subtitle language when playing DVD disc.
Bluetooth Mode, press to enter the previous page of phone number list in phonebook.
18. [OPEN/CLOSE/P.ANGLE/EJECT]
Press the button to open the monitor to eject the disc, press it again to close the
monitor.
Hold pressing the button to enter into adjusting mode, press it again to adjust the
angle of the front panel as following:
Angle 1 - Angle 2 - Angle 3 - Angle 4 - Angle 1
19. [SETUP]
DVD Mode, press to enter/ exit the DVD SETUP menu.
20. [VOL+] / 21. [VOL-]
Press to increase / decrease the volume
Hold on pressing the button to keep increasing/decreasing the volume
IPOD OPERATIONS (Optional)
- Touch the [IPOD] icon to switch IPOD Mode when IPOD connected
- The unit will switch to IPOD Mode automatically when IPOD connected.
- The unit will switch to RADIO Mode automatically when IPOD disconnected
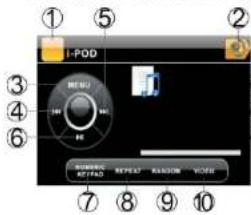
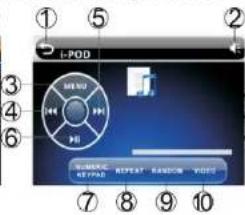
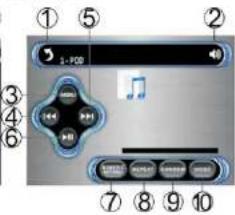
Music Page
Under the Music Page, it is not effective for the controller of IPOD itself, use the keys of unit to control the operation and all operations are same as DVD Mode.
- Current Source Indicator
Displays the source currently playing, touch to return the main menu.
- Mute
Touch to switch off the sound; touch it again to resume to the previous volume level
3.Menu
Touch to appear below image, then touch [UP] / [DOWN] icons to select songs
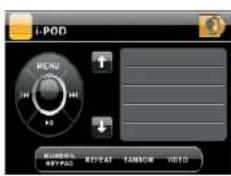
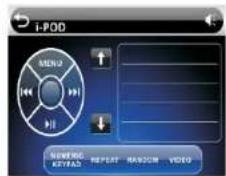
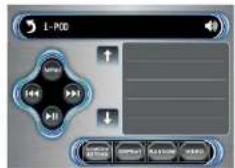
- Previous / 5. Next
Touch to go to the pervious/ next chapter, track or song.
- Play/Pause
Touch to pause or resume the playback.
7.Numeric keypad
Touch to appear below image, then select songs by numbers immediately.
8. End Call
Touch to reject or hang up a call.
9. / 10. Previous Page / Next Page
There are 5 numbers in each page, touch to see the previous / next page
Phone Number List
Touch the icon 1\~5, when item is changed to yellow color, the item is selected. And touch it again and the item is changed to green color, the operation is active and you will see the below image:
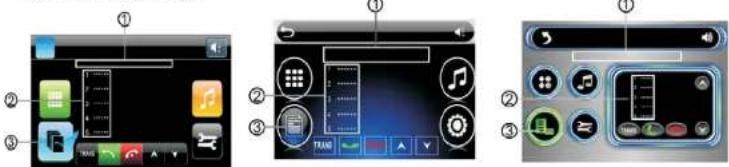
1, Information Display
You will see the phone number of the item in blue color.
2, Phone Number
If this number is stored, you will see the name; if not, you will see the phone number. Touch the icon when item is changed to yellow color, the item is selected.
3. Phonebook
Touch to return the phonebook page.
AUDIO
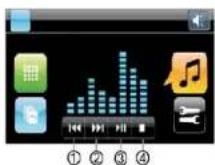
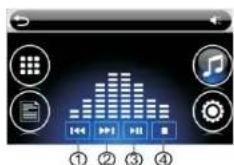
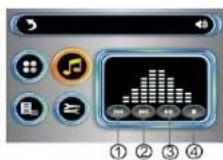
1. Previous / 2. Next
Touch to select the previous / next track.
3. Play / Pause
Touch to stop the playback; touch it again to continue playing.
4. Stop
Touch to stop the playback, touch the [Play/Pause] icon to start the playback from the beginning.
22. [DISPLAY]
Under main menu, press to set the background by default picture. DVD Mode, press to display current playback information. Bluetooth Mode, press to return to the previous page.
23. [PBC/AST/CLEAR]
DVD Mode, press to select the PBC function on / off when playing VCD disc.
Radio Mode, press to review stored stations; Hold on pressing to automatically program the 6 strongest stations available into the presets in the each wave band. TV Mode, automatically seek the stations available. Bluetooth Mode, press to cancel or clear the numbers you have input
24. [F.REV] / 26. [F.FWD]
DVD Mode, press to fast reverse / fast forward at 2x speed. Each press changes speed from 2x to 4x to 8x to 16x to 32x then back to normal play. Press the [PLAY/PAUSE] button to resume to normal playback
25. [SYSTEM/NAVI]
Press to enter / exit the System Parameter Setup menu when playing DVD, VCD and CD disc. Hold on pressing to enter / exit the NAVI Mode.
28. [STOP]
DVD Mode, when DVD/VCD/CD disc playback, press the button once to stop the playback, press the [Play/Pause] button to resume the playback again. Press the button twice to stop the playback, press the [Play/Pause] button to start the playback from the beginning of disc. When MP3 disc playback, press the button to stop the playback, press the [Play/Pause] button to start the playback from the beginning of track.
29. [D.ANGLE]
DVD Mode, press to select different viewing angles with interactive DVD media during playback
30. [PLAY/PAUSE]
DVD Mode, press to pause or resume the playback.
32. [A-B/PHONE PAIR]
DVD Mode, press to set point A, press it again to set point B, then the unit starts to repeat from A to B. When playing DVD, MP3, press it again to stop repeating. When playing VCD, CD, press it again to repeat all tracks.
Bluetooth Mode, press to start phone-pairing
33. [REPEAT/PHONE]
DVD Mode, press to repeat as CHAPTER-TITLE-ALL-REPEAT OFF when DVD playback. Press to repeat as TRACK-ALL-REPEAT OFF when VCD/CD playback. Press to repeat as REPEAT ONE-REPEAT ALL-REPEAT OFF when MP3 playback.
Bluetooth Mode, press to break off or connect cell phone with the unit.
34. [P/N/AUDIO PLAYER]
DVD Mode, press to switch the video output (PAL/NTSC) when playing DVD disc. Bluetooth Mode, press to enter into AUDIO PAIRING.
35. [STEREO/MUSIC PAIR]
Radio Mode, press to turn the stereo on / off under.
Bluetooth Mode, press to break off or connect the music storage medium with the unit.
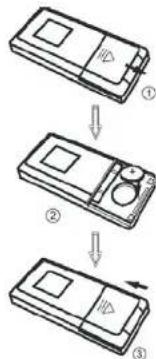
REPLACING THE BATTERIES
If the remote control has no function or if the operating range reduced, replace the old battery with new one.
-
Pull out the battery holder. Follow the arrow 1 slide it to the right toward the battery while at the same time pull the battery holder away from the remote control.
-
Place the new battery. Place the new lithium battery with the (+) side up.
-
Push the holder back. Using the finger to push in the holder back until the locking sound is heard.
flowchart
graph TD
    A["① State"] --> B["② State"]
    B --> C["③ State"]
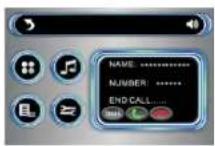
When talking, you will see the below image:
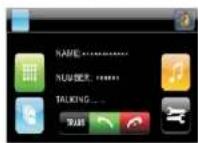
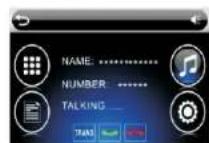
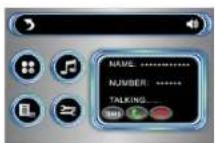
When end the call, you will see the below image:
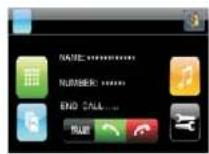
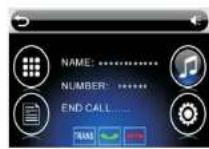
PHONEBOOK
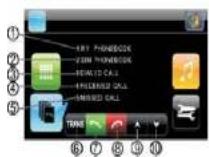
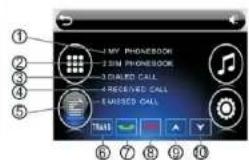
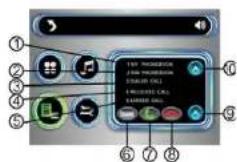
- My Phonebook
The phone numbers are stored in phone.
- SIM Phonebook
The phone numbers are stored in SIM card.
- Dialed Call
The phone numbers are dialed in phone.
- Received Call
The phone numbers are received in phone.
- Missed Call
The phone numbers are missed in phone.
- Transfer
When talking the phone, touch to transfer the call between the unit and cell phone.
- Call
Touch to call a selected number from phonebook or to receive a cell phone call
PHONE CALL
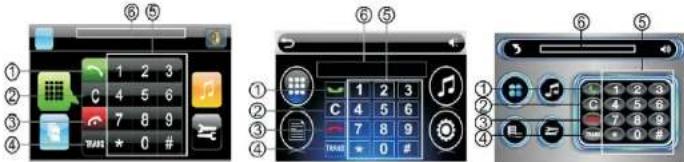
- Call
Touch to call a number or receive a cell phone call. Touch to call the last number if no number input.
- Clear
Touch to cancel or clear the numbers you have input.
- End Call
Touch to reject or hang up a call
- Transfer
When talking the phone, touch to transfer the call between the unit and cell phone.
- Number Keys
Touch the icons to input a phone number.
- Information Display
CALL OUT
When call out, you will see the below information:

When talking, you will see the below information:

When end the call, you will see the below information:

CALL IN
When call in, you will see the below image:
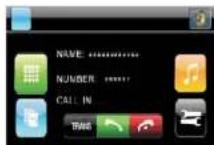
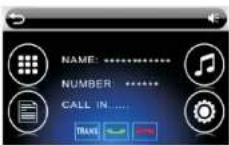
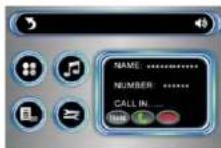
-30-
When "Power Off", press the buttons 2, [BAND] of remote control to enter the CALIBRATION page:
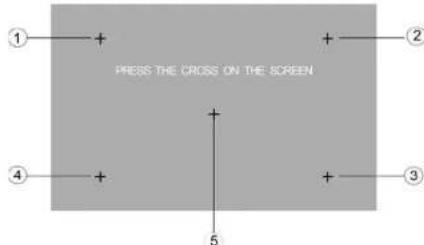
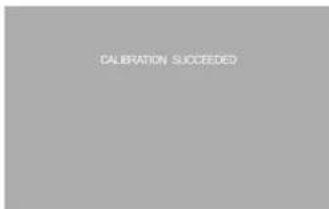
To touch the points from 1 to 5 until the points change to next cross by using a ballpoint pen or pencil. After all 5 points have been touched, the unit has been finished the CALIBRATION. If the calibration is succeeded, the unit would display the following page and then power off automatically.
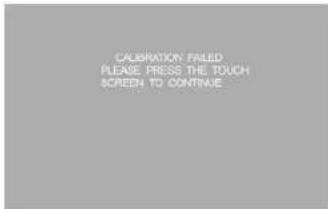
If the calibration is failed, the unit would display the following page and please operate the above processes again.
-19-
MAIN MENU (3 Selectable User Interface)
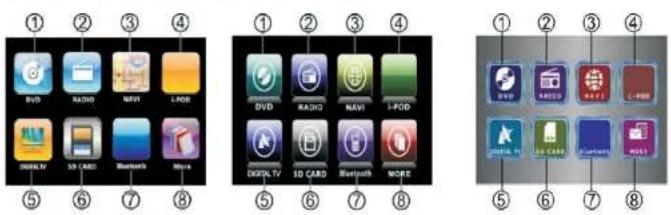
- Touch to access the DVD mode.
- Touch to access the RADIO mode
- Touch to access the NAVI mode (Optional)
- Touch to access the IPOD mode.
- Touch to access the DIGITAL TV mode. (Optional)
- Touch to access the SD CARD mode.
- Touch to access the BLUETOOTH mode. (Optional)
- Touch to access the 2^nd page of MAIN MENU
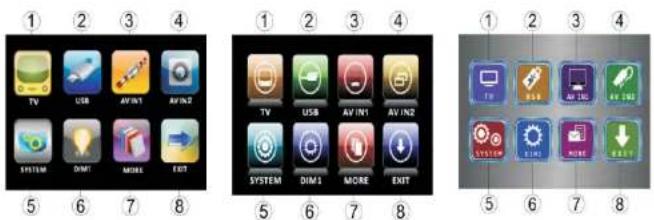
- Touch to access the TV mode. (Optional)
- Touch to access the USB mode.
- Touch to access the AV IN1 mode
- Touch to access the AV IN2 mode
- Touch to access the SYSTEM PARAMETERS SETUP
- Touch to change the Brightness of the screen.
- Touch to access the 1 ^st page of MAIN MENU
-
Touch to access the previous working mode.
-
Phone Pairing
Touch the icon and the below words on information display:
PHONE PAIR WAITING
Then set the phone to pair with unit. When paring finished, set the phone connect with unit, then you can see the phone name on information display.
Touch the icon again to cancel the pairing and the below words on information display:
PHONE PAIR FAIL
- Audio Paring
Touch the icon and see the below words on information display:
AUDIO PAIR WAITING
Then set the audio device to pair with unit. When paring finished, set the audio device connect with unit, then you can see the audio device name on information display.
Touch the icon again to cancel the pairing and the below words on information display:
AUDIO PAIR FAIL
- Pin Code
You can change the PIN code by remote control. Press the [CLR] button of remote control to clear the PIN code, and input the new 4 digitals number, press the [SETUP] button of remote control to save the new code. - Information Display
NOTE:
The unit can pair with totally 5 different devices including cell phones and audio players. Use the [PHONE] / [AUDIO PLAYER] buttons of remote control to connect / disconnect the device.
- When you want to connect another paired cell phone with unit, to press the [PHONE] button of remote control to disconnect the current connecting cell phone; use the another cell phone to connect with the unit without paring operations.
- When you disconnected the current connecting cell phone, also you can press the [PHONE] button of remote control to connect the cell phone with the unit again.
- When you want to connect another paired audio player with unit, to press the [AUDIO PLAYER] button of remote control to disconnect the current connecting audio player; use the another audio player to connect with the unit without paring operations.
- When you disconnected the current connecting audio player, also you can press the [AUDIO PLAYER] button of remote control to connect the audio player with the unit again.
BLUETOOTH OPERATIONS (Optional)
Touch the [BLUETOOTH] icon to access the Bluetooth Mode:
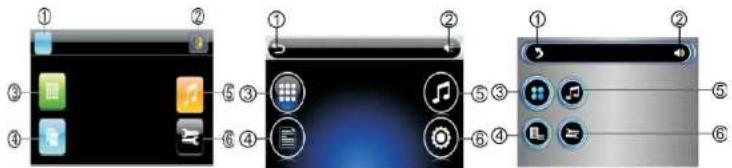
- Current Source Indicator
Displays the source currently playing, touch to return the main menu.
- Mute
Touch to switch off the sound; touch it again to resume to the previous volume level.
- Phone Call
Touch to enter the phone calling.
- Phone Book
Touch to enter the phone book lookup.
- Audio
Touch to enter the audio device operation.
- Settings
Touch to enter the Bluetooth settings.
SETTINGS
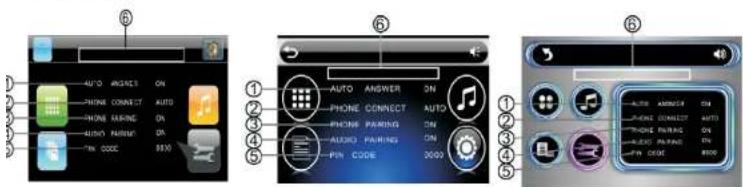
Touch the icon 1\~5, when item is changed to yellow color, the item is selected. And touch it again and the item is changed to green color, the operation is active.
- Auto Answer
Touch to select auto / manual answer when call is coming.
- Phone Connect
Touch to select auto / manual phone connect when return back the car.
RADIO OPERATIONS
Touch the [RADIO] icon to access to Radio Mode.
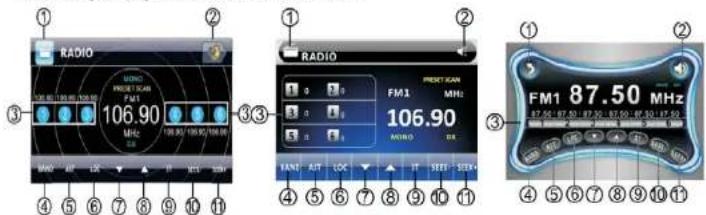
- Current Source Indicator
Display the source currently playing, touch to return the main menu.
- Mute
Touch to switch off the sound; touch it again to resume to the previous volume level.
- Preset Stations
Touch to select a preset station, hold on touching to store current radio frequency to the preset station.
- BAND
Touch the icon to switch the FM/AM wave band as following:
FM1 - FM2 - FM3 - AM1 - AM2 - FM1
- Auto Station Tune
Touch to automatically program the 6 strongest stations available into the presets in the each wave band; touch any icon to stop the tuning. After tune, the unit will scan through all tunable presets stations and play them for 5 seconds each; touch any icon to stop the playing.
- Local
Touch to set the local on / off. When you are using the local searching function, you can only receive the radio station with strong enough signals and fine state.
- / 8. Tune Frequency - Down / Up
Touch to tune the radio to a lower / higher frequency by one frequency step. Hold on touching for continuous tuning down / up.
- Stereo
Touch to set the stereo on / off.
- / 11. Seek Next Station – Down / Up
Touch to tune to the next strong station at a lower / higher frequency. Touch any icon to stop seeking.
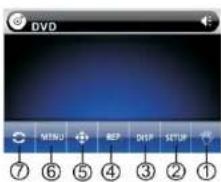
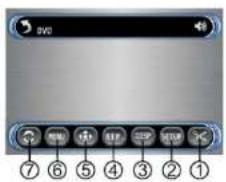
DVD PLAYER OPERATIONS
- Touch the [DVD] icon to access to DVD Mode if disc inside.
- The unit will be switched to DVD Mode automatically when inserting the disc.
- The unit will switch to RADIO Mode automatically if disc ejected.
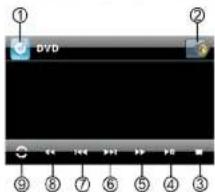
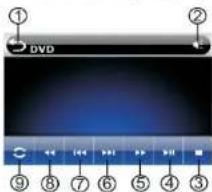
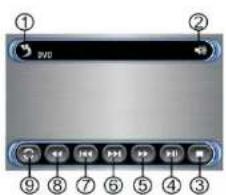
- Current Source Indicator
Display the source currently playing, touch to return the main menu. - Mute
Touch to switch off the sound; touch it again to resume to the previous volume level. - Stop
When DVD/VCD/CD disc playback, touch the icon once to stop the playback, touch the [Play/Pause] icon to resume the playback again. Touch the icon twice to stop the playback, touch the [Play/Pause] icon to start the playback from the beginning of disc. When MP3 disc playback, touch the icon to stop the playback, touch the [Play/Pause] icon to start the playback from the beginning of track. - Play/Pause
Touch to pause or resume the playback. - / 8. Fast Forward / Fast Reverse
Touch to fast forward / fast reverse at 2x speed. Each touch changes speed from 2x to 4x to 8x to 16x to 32x then back to normal play. Touch the [PLAY/PAUSE] icon to resume to normal playback. - Next / 7. Previous
Touch to go to the next / pervious chapter, track or song - Switch
Touch to access the 2 ^nd page of DVD menu
DIGITAL SETUP
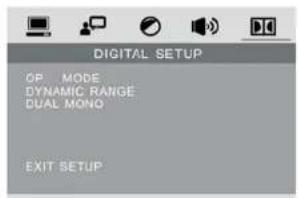
OP MODE
Following options are available for the OP MODE LINE OUT RF REMOD
DYNAMIC RANGE
Following options are available for the DYNAMIC RANGE: FULL 6/8 4/8 2/8 OFF
DUAL MONO
Following options are available for the DUAL MONO:
STEREO MONO L MONO R MIX MONO
VIDEO SETUP
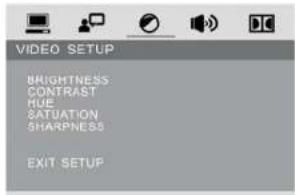
BRIGHTNESS
Following options are available for the BRIGHTNESS: 0 2 4 6 8 10 12
CONTRAST
Following options are available for the CONTRAST: 0 2 4 6 8 10 12
HUE
Following options are available for the HUE: -6 -4 -2 0 +2 +4 +6
SATURATION
Following options are available for the SATURATION: 0 2 4 6 8 10 12
SHARPNESS
Following options are available for the SHARPNESS: 0 2 4 6 8
SPEAKER SETUP
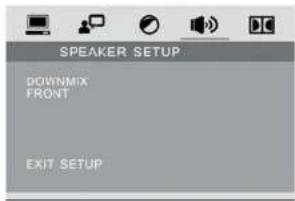
DOWNMIX
Following options are available for the DOWNMIX: LT / RT Stereo VSS
FRONT
Following options are available for the FRONT: LARGE SMALL
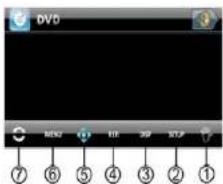
1. Capture Image
Touch to capture the current playing image and store into memory for background or screen saver.
3. Display
Touch to display the current playback information on the screen.
4. Repeat
Touch to repeat as CHAPTER-TITLE-ALL-REPEAT OFF when DVD playback.
Touch to repeat as TRACK-ALL-REPEAT OFF when VCD/CD playback.
Touch to repeat as REPEAT ONE-REPEAT ALL-REPEAT OFF when MP3 playback.
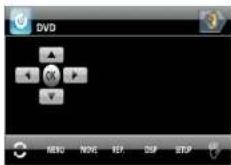
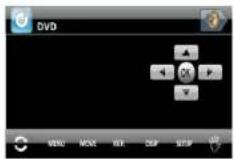
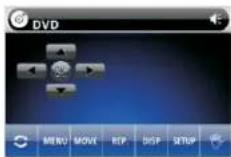
5. Direction Arrows Keyboard
Touch to display the [Direction Arrows Keyboard] on the left side of screen. Touch repeatedly to move the [Direction Arrows Keyboard] icons on the right side or left side of screen.
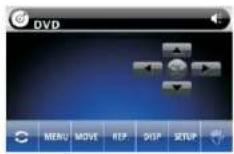
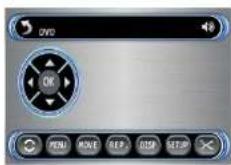
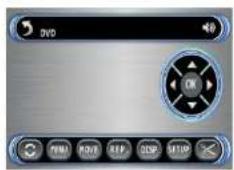
6. Menu
Touch to go to the menu of disc when playing DVD disc.
7. Switch
Touch to access the 1 ^st page of DVD menu.
2. Setup
Touch to access the DVD SETUP menu.
Touch the [<] / [>] icons to switch the main menus as following:
SYSTEM - LANGUAGE - VIDEO - SPEAKER - DIGITAL
Touch the [∧]/[∨] icons to access the submenus from main menus.
Touch the [∧] icon on the top submenu or [∨] icon on the bottom of submenu to exit the submenus to main menus.
Touch the [∧]/[∨] icons to select the submenus as your need.
Touch the [>] or [ENTER] icons to access the items of submenus.
Touch the [<] icon to exit the items of submenus.
Touch the [V] / [∧] icons to select the item you want to change.
Touch the [OK] icon to confirm the item you have selected and exit to the submenus.
Touch the [OK] icon on the submenu EXIT SETUP to exit the DVD SETUP Menu and save all settings.
General Setup Page
SYSTEM SETUP
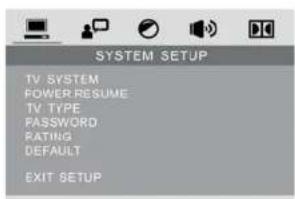
TV SYSTEM
Following options are available for the TV Display:
NTSC PAL AUTO
POWER RESUME
Following options are available for the Power Resume:
ON OFF
TV TYPE
Following options are available for the TV Display:
4:3 PS 4:3 LB 16:9
PASSWORD
Setup the password for Parental Ratings change. The default password is 0000.
RATING
Following options are available for the Parental Ratings:
1 KID SAFE 2 G 3 PG 4 PG 13
5 PG - R 6 R 7 NC - 17 8 ADULT
The Parental Ratings could be changed after the correct password input
DEFAULT
The unit will restore all default settings by selecting this option.
LANGUAGE SETUP
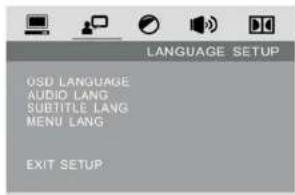
OSD LANGUAGE
Following options are available for the OSD LANGUAGE
ENGLISH GERMAN SPANISH FRENCH PORTUGUESE
ITALIAN RUSSIAN DUTCH SWEDISH KOREAN
DANISH NORWEGIAN POLISH HUNGARIAN
AUDIO LANGUAGE
Following options are available for the AUDIO LANGUAGE:
ENGLISH GERMAN SPANISH FRENCH PORTUGUESE
ITALIAN RUSSIAN DUTCH SWEDISH KOREAN
DANISH NORWEGIAN POLISH HUNGARIAN
SUBTITLE LANGUAGE
Following options are available for the SUBTITLE LANGUAGE:
ENGLISH GERMAN SPANISH FRENCH PORTUGUESE
ITALIAN RUSSIAN DUTCH SWEDISH KOREAN
DANISH NORWEGIAN POLISH HUNGARIAN
MENU LANGUAGE
Following options are available for the MENU LANGUAGE:
ENGLISH GERMAN SPANISH FRENCH PORTUGUESE
ITALIAN RUSSIAN DUTCH SWEDISH KOREAN
DANISH NORWEGIAN POLISH HUNGARIAN
- DISC NOTES
- Handling and Cleaning
- Disc Cleaning
- NOTE:
- Repairing New Discs with Rough Spots
- TABLE OF CONTENTS
- SAFETY INFORMATION
- USE THIS PRODUCT SAFELY
- When driving
- When cleaning
- When parked
- FUSE REPLACEMENT - WARNING!
- TROUBLE SHOOTING
- FEATURES
- Bluetooth Features (Optional)
- ACCESSORIES
- Buzzer
- Brake Control
- Auto Antenna Control
- SYSTEM PARAMETERS SETUP
- Contrast
- Tint
- Color
- Brightness
- Treble
- Bass
- Sub-Woofer Volume
- Sub-Woofer Frequency
- UNIT INSTALLATION AND REMOVEL
- TV OPERATIONS (Optional)
- Quick Access Key [NAVI]
- NO NAVIBOX CONNECTION
- Removal Method 1:
- Installation Method 2:
- Go to NAVI mode
- Mini USB
- P.ANGLE
- Ejecting Disc
- TFT Viewing Angle Adjustment:
- NAVI OPERATIONS (Optional)
- Touch Screen Calibration
- AV IN 1 OPERATIONS
- AV IN 2 OPERATIONS
- SD CARD OPERATIONS
- USB OPERATIONS
- DIM OPERATIONS
- 8.Repeat
- 9.Random
- Video
- Music
- [POWER/SOURCE]
- [MUTE]
- [NUMBERS 0\~9]
- [MENU / \*]
- [AUDIO / #]
- [LOUD/EQ]
- [∧]/[PTY]/ 8. [<] / 11. [∨]/ [AF]/ 27. [>] Direction Key
- [BAND/ENTER]
- [PROGRAM]
- [RANDOM/TRANSFER]
- [PREVIOUS] / 31. [NEXT]
- [SLOW/END CALL]
- [TITLE/PBN]
- [ZOOM/CALL]
- [SUB-T/PBP]
- [OPEN/CLOSE/P.ANGLE/EJECT]
- [SETUP]
- [VOL+] / 21. [VOL-]
- IPOD OPERATIONS (Optional)
- Music Page
- End Call
- / 10. Previous Page / Next Page
- Phone Number List
- 1, Information Display
- 2, Phone Number
- Phonebook
- Previous / 2. Next
- Play / Pause
- Stop
- [DISPLAY]
- [PBC/AST/CLEAR]
- [F.REV] / 26. [F.FWD]
- [SYSTEM/NAVI]
- [STOP]
- [D.ANGLE]
- [PLAY/PAUSE]
- [A-B/PHONE PAIR]
- [REPEAT/PHONE]
- [P/N/AUDIO PLAYER]
- [STEREO/MUSIC PAIR]
- REPLACING THE BATTERIES
- PHONE PAIR WAITING
- PHONE PAIR FAIL
- AUDIO PAIR WAITING
- AUDIO PAIR FAIL
- BLUETOOTH OPERATIONS (Optional)
- RADIO OPERATIONS
- DVD PLAYER OPERATIONS
- DIGITAL SETUP
- VIDEO SETUP
- BRIGHTNESS
- CONTRAST
- HUE
- SATURATION
- SHARPNESS
- SPEAKER SETUP
- DOWNMIX
- FRONT
- Capture Image
- Display
- Repeat
- Direction Arrows Keyboard
- Menu
- Switch
- Setup
- SYSTEM - LANGUAGE - VIDEO - SPEAKER - DIGITAL
- General Setup Page
- TV SYSTEM
- POWER RESUME
- TV TYPE
- PASSWORD
- RATING
- DEFAULT
- OSD LANGUAGE
- AUDIO LANGUAGE
- SUBTITLE LANGUAGE
- MENU LANGUAGE
Brand : Soundstream
Model : VIR-7355NR
Category : Car radio