VM-430HB - Car radio Soundstream - Free user manual and instructions
Find the device manual for free VM-430HB Soundstream in PDF.


| Product Type | Car Stereo Receiver with Multimedia Playback |
| Brand | Soundstream |
| Model | VM-430HB |
| Dimensions (W x D x H) | 188 x 160 x 60 mm |
| Weight | 0.4 kg |
| Power Supply | 11-16V DC, max 10A |
| Maximum Power Output | 4 x 50W (max) |
| Display | 4-inch TFT, 800x480 pixels, aspect ratio 4:3/16:9, brightness 460 cd/m², contrast 500:1 |
| Radio Bands | FM (87.5-107.9 MHz US / 87.5-108 MHz SA) and AM (530-1710 kHz) |
| Preset Stations | 18 FM + 12 AM |
| Supported Media | USB, SD card, Bluetooth (A2DP), AUX input |
| Supported File Formats | MP3, WMA, MPEG1, MPEG2, AVI, JPEG |
| Bluetooth | Hands-free calling and music streaming (A2DP), device name 'Soundstream' |
| Video Inputs | Rear view camera input (yellow RCA), parking brake interlock for video playback |
| Audio Outputs | 4-channel speaker outputs (front/rear left/right), preamp outputs (FL, FR, RL, RR, sub? none specified) |
| Other Connections | Steering wheel control (SWC-1, SWC-2, SWC-IR), automatic antenna, parking brake, reverse, illumination, USB charging (2A) |
| Safety Features | Video playback only with parking brake engaged; do not watch while driving; proper grounding required |
| Maintenance | Clean panel with soft cloth and alcohol; avoid extreme temperatures and sunlight; do not disassemble |
| Spare Parts / Repairability | Fuse (10A), remote control battery (CR2025), professional service recommended for repairs |
| Operating Temperature | -20°C to +60°C |
Frequently Asked Questions - VM-430HB Soundstream
User questions about VM-430HB Soundstream
0 question about this device. Answer the ones you know or ask your own.
Ask a new question about this device
Download the instructions for your Car radio in PDF format for free! Find your manual VM-430HB - Soundstream and take your electronic device back in hand. On this page are published all the documents necessary for the use of your device. VM-430HB by Soundstream.
USER MANUAL VM-430HB Soundstream
Take the time to read through this owner manual.
Familiarity with installation and operation procedures will help you obtain the best
Performance from your new Player-receiver.
WARNING!
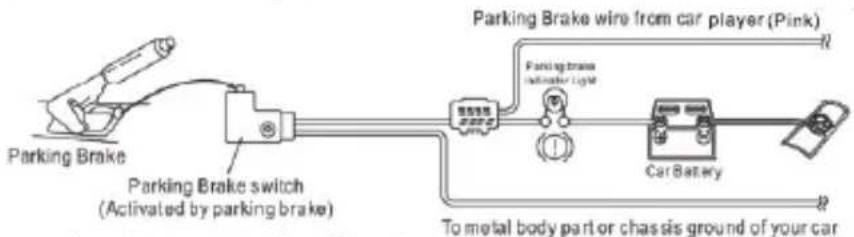
To promote safety, certain functions are disabled unless the parking brake is on. The Unit is designed to detect parked status and must be connected to the power supply side of the parking brake switch. Improper connection or use of his connection may violate applicable law and may result in serious injury or damage. To avoid the risk of damage and injury and the potential violation of applicable laws, this unit is not for use with a video screen that is visible to the driver.
■ To avoid the risk of accident and the potential violation of applicable laws, the front Video image feature should never be used while the vehicle is being driven. Also, other video displays should not be in a location where it is a visible distraction to the driver. In some countries or states the viewing of images on a display inside a vehicle even by persons other than the driver may be illegal. Where such regulations apply, they must be obeyed and this unit Player features should not be used.
■ Please remember to wear your seat belt at all times while operating your vehicle. If you are ever in an accident, your injuries can be considerably more severe if your seat belt is not properly buckled.
■ The supplier waves any and all liability when these warnings are not followed.
OPERATION PRECAUTIONS
■ Only connect to a 12VDC battery and negative grounding.
■ Avoid placing the product in direct sunlight, in areas with high levels of dust, high temperatures (over 40) or high humidity (over 90%). In case of high temperatures, cool down the car interior by means of ventilation or air-conditioning.
■ Operate in well ventilated areas.
■ Do not turn on or off the product in short intervals. When turning the unit off, wait for at least 10 seconds prior to turning the unit on again. Do not operate the player with scratched,
■ Do not watch video playback while driving which will cause serious danger and risks of traffic accident. It may violate the laws and regulations.
(There may be exceptional case they, using rear view camera)
■ Do not install the unit where the operation for safety driving is restrained.
■ Do not disassembly the unit by yourself, if need repairing, please take the unit to the after service center.
■ Do not open and close the monitor manually, it may damage the monitor tilt system.
■ Do not touch the LCD screen by hard objects, it may damage or give scratch to the LCD screen.
■ If the back of monitor touches dashboard or air-conditioner inlet etc after open the monitor, then setup TILT level in monitor TILT menu to prevent damage from repeat touching.
■ Car parking under direct sunlight may increase the temperature inside the car and the unit may not be in proper operation, please try it again after the temperature returns to normal.
■ Do not replace the fuse on the power cable without professional guidance, using improper fuse may cause damage to the unit or even cause burn the unit.
■ Do not use irregular shaped Disk.
■ IR remote control operation may be hindered by monitor when the monitor is opened, thus please use the remote control at the similar level of remote control receiver.
■ Do not install the unit where the cooling fan is blocked.
CONTENTS
WARNING! 2
OPERATION PRECAUTIONS 2
CONTENTS 3
ACCESSORIES....4
INSTALLATION / UN-INSTALLATION 5
WIRING CONNECTIONS 6-7
PANEL 8
REMOTE CONTROL....9
REMOVE BATTERY....10
MAIN MENU 11
◆ RADIO INTERFACE 11
◆ USB/SD CARD /AUX/Bluetooth music INTERFACE 12
♦ SETTING CONTROL....13 15
BLUETOOTH PHONE INTERFACE 16
AUX MODE 17
TROUBLESHOOTING....18—19
TECHNICAL SPECIFICATIONS 20
ACCESSORIES
Package contains the following accessories for installation and operation of the unit.
| (1) Bracket | 1 | 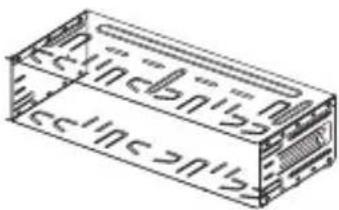 |
| (2) Key | 2 |
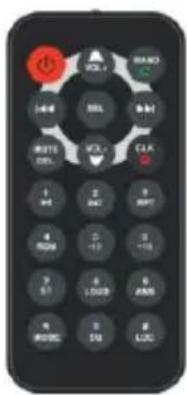
Remote Control
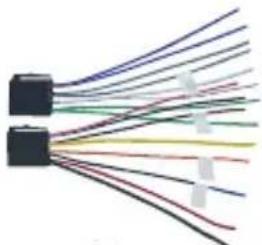
natural_image
Pure electrical circuit lines without any symbolsWarranty card
User Manual
Note:
Product image may vary from the actual delivery.
UNIT INSTALLATION
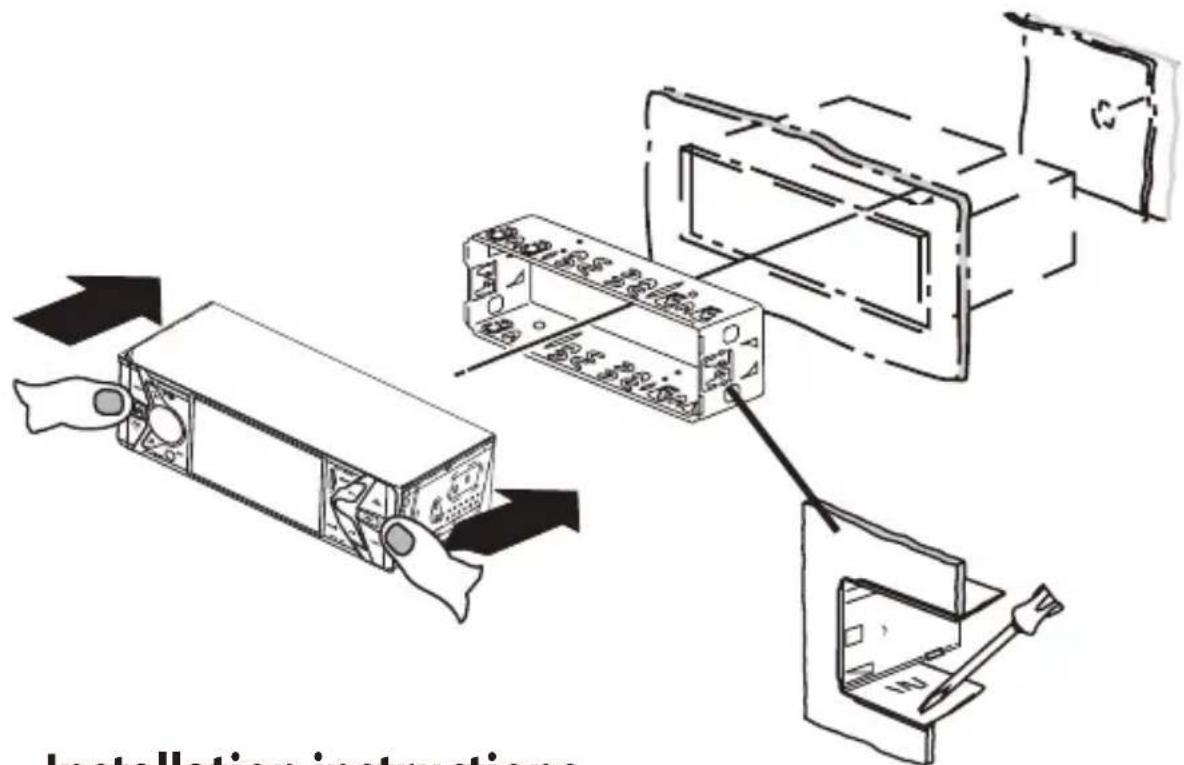

Installation instructions
Safety instructions
When carrying out installation work and making connections please observe the following:
- Disconnect the negative terminal of the battery! When doing so, please observe the vehicle manufacturer's safety instructions.
Make sure you donot damage vehicle components when drilling any holes.
The cross sections of the positive and negative cables must not be less than 1.5 mm^2 . When instaling an amplifier, you must first connect the device earth connections before connecting the plugs for the line-out jacks.
Earth connection of external devices may not be connected to earth of car sound system.
◆ Insert the Mouting sleeve into dash-board hole and fixed it.
◆ Push the unit into the Half Sleeve until you hear a click sound, the headunit is fixed.

Un-Installation
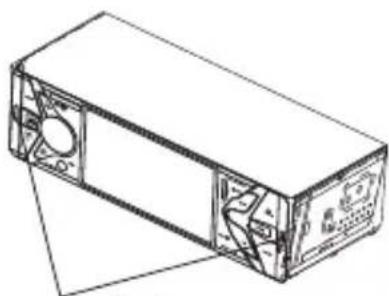
◆ Insert the 2 release keys deeply into the slot.
◆ With the inserted keys to pull out the unit halfway.
◆ Pull the unit all the way with your hands, being careful not to drop it.
natural_image
Line drawing of a rectangular electronic device with internal components (no text or symbols)Release key hole
WIRING CONNECTIONS
Make sure you have good chassis ground. A good ground connection will eliminate most electrical noise problems. A good chassis ground requires a tight connection to the vehicle metal chassis. The area around the ground connection should be clean, bare metal without rust, paint, plastic, dust, or dirt for a good electrical connection.
Caution: Do not interchange the connection of the wiring!!!
For some car models you may need to modify wiring of the supplied power cord. Contact your authorized car dealer before installing this unit.
Using the ISO Connector
- If your car is equipped with the ISO connector, then connect the ISO connectors as illustrated.
- For connections without the ISO connectors, check the wiring in the vehicle carefully before connecting, incorrect connection may cause serious damage to this unit.
- Cut the connector; connect the colored leads of the power cord to the car battery as shown in the color code table below for speaker and p
NOTE: Never connect cable to the system while it is connected to the battery power. Whenever the unit is disconnected from the battery, the preset memory will be erased and the unit will go back to its factory defaults.
When the brown cable for steering wheel control connected to the steering wheel, we can use the steering wheel to control some unit
SWC Interface Connections
To use the built-in SWC function, connect SWC-1 (Blue) and SWC-2 (Brown) to the corresponding SWC wires of the vehicle. Follow the SWC settings described in the SWC Settings section
To use an external universal ASWC module, connect only SWC-IR (Green/White) to the output of the module.
Power supply 5V uses SWC when it is first activated
Note: To watch video the parking wire should be connected to break signal. 2 cables are connected to a Hands-Free device (not included).
![SOUNDSTREAM USB,MP3/MP4,Bluetooth, AM/FM STEREO MODEL:VM-430HB Frequency range: FM:87.5-107.9MHz AM: 530-1710KHz FCC ID:2A19D-VM-430HB 1. Rear Right+ [purple] 2. Front Right+ [Gray] 3. Front Left+ [White] 4. Rear Left+ [Green] 5. Rear Right- (purple and black) 6. Front Right- (gray and black) 7. Front Left- (white and black) 8. Rear Left- (Green and black) 9. Parking Brake (Brown) 10. Steering Wheel Control [Orange and black] 11. Automatic antenna [Blue] 12. ACC+12VDC [Red] 13. Reverse [Pink] 14. Battery + [Yellow] 15. ILLUMI [Orange] 16. GND [Black] 17. FL-OUT [White] 18. RL-OUT [White] 19. Video-OUT [Yellow] 20. FR-OUT [RCD] 21. RR-OUT [RED] 22. Back Video IN [Yellow] 23. Redo-AN 17 18 19 20 21 22 23 PULSE 10A](/content/2026/05/957919/images/606b8c0fa44580bc3d06476eb108349d7eb05e7030dc437b7cbfd6abe90fe3fa.jpg)
Parking wire
Note: The parking wire is connected with brake signal; for safety, the programs can be seen on the monitor after braking the car.
Connecting the reversing line to taillight on the car

After connecting, when you start up the reverse gear, the unit will receive the picture from car rear view camera.
Note:
- Only use groundless loudspeakers.
- Use only loudspeakers of minimal 40Watt, using fewer watts may result in damaging your loudspeakers at higher volumes.
- Use 4\~8Ω (Ohm impedance) loudspeakers only; using higher or lesser impedance may damage the unit.
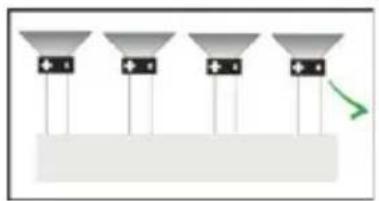
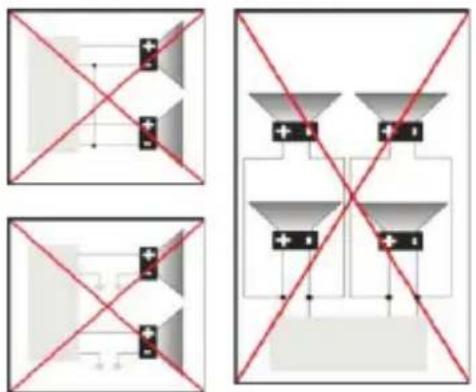
- Do not use 3-cable loudspeakers and do not connect the loudspeakers minus to the car body (GND). The unit is using a BTL circuit and each loudspeaker must be connected with insulated cables according to the diagram.
- Loudspeaker cables and/or optional external power amplifiers must always be about 30cm away from the antenna and/or antenna extension parts.
Connect the speakers according the following diagram, incorrect connections will damage the unit or your loudspeakers
Correct connection
Left front - Right front | Left rear - Right rear
natural_image
Diagram of four identical funnel-shaped objects with plus signs and a green arrow pointing to one (no text or symbols)Incorrect connections
natural_image
Four-panel diagram showing a grid of rectangular blocks with black connectors and red X-shaped crosshairs, no text or symbols present.FRONT PANEL
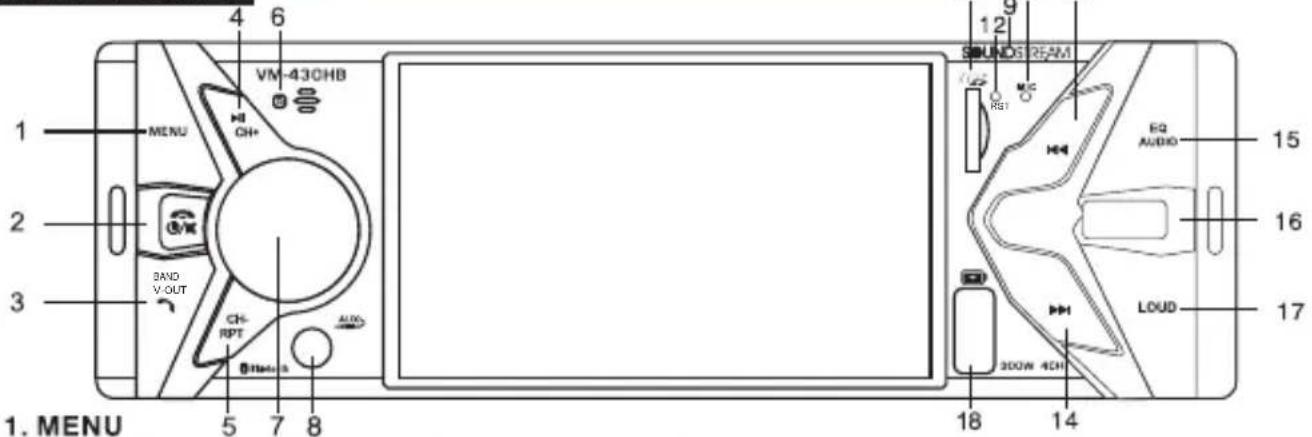
Press this button in any mode to pop up menu options.
In USB/SD mode, long press the menu button to enter the folder selection.
2. Power/Mute/Hang up
After turning off the machine, click to turn it on; when turning on the machine, click to mute it; long press to turn it off. During a Bluetooth call, click to hang up.
3. BAND / V-OUT / Answer/AMS
In radio mode: short press to switch frequency; video output: when playing video, long press this button to output image, when outputting image, the front panel is black, there is no image, you need to press this button to restore the image;
answer: press when there is an incoming call This key can answer calls.
In radio mode, long pressing the BAND button will change to AMS function, which will automatically search for broadcast stations. After the search is completed, each radio station will be previewed for 5 seconds.
4. Play/Pause/CH+
When playing video or music, you can pause or play;
CH +: In radio mode, you can select the next channel.
5.RPT/CH-
Repeat, repeat once or repeat all; CH-: In radio mode, you can select the previous channel.
6.IR
IR Remote control signal receiving window
7. Knob
The knob is the volume addition and subtraction function, in the folder mode it is the up and down selection function. The middle button is the equalizer or confirmation function.
8.AUX
Put the audio plug into the AUDIO jack which was marked on front panel
9. Nameplate
Customer brand logo.
10.TF Card
To play MP3/MP4/WMA/JPEG files on a TF card, insert the card into the card slot (you should Open cover on the front panel and insert the TF card into card slot.) The unit will play automatically MP3/MP4/WMA/JPEG files. Or repeatedly press the MODE or Card to select SD mode.
11.MIC
12.RST
Press it with a thin, sharp object, the device will then be reset to factory default settings
13/14. Select up and down
In USB/SD mode, select the previous/next chapter/track;
in radio mode, search for lower/higher frequencies;
in folder mode, select left and right functions.
15.EQ audio
There are multiple sound effects: Beat Jazz Pop Rock Class.
16.USB Slot
USB slot, for multimedia playback files only. Insert a USB into this a USB into this slot and unit will automatically start reading and playback the card. Supported Music file format.
17. LODD
Loudness switch.
18. USB charging port.
Suitable for mobile phone charging, the charging current is about 2A.
REMOTE CONTROL
VII. Remote Control
Precaution:
- Under normal conditions, the battery life of remote control is about 6 months. When remote control doesn't work well, check and replace with a new battery timely.
- When the remote control is not to be used for a long time, please remove the battery to avoid liquid leakage which may damage the remote control
- Prevent falling from a height to avoid damage.
- The battery is forbidden to be disassembled nor heated nor put into fire nor placed together with other metals.
- Place the battery in a safe place to prevent the kid from swallowing it. In case the kid swallowed the battery, immediately send him/her to see a doctor.
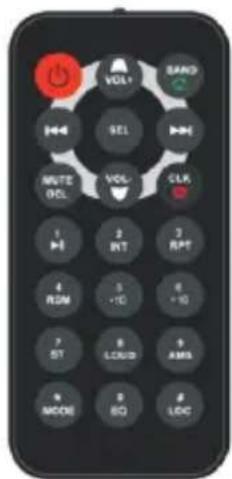
| Button Name | Button Function |
| Power ON/OFF | |
| VOL-/VOL+/▲▼ | Decrease/increase volume/Select up and down in folder mode. |
| ☐ /BAND | In radio mode, select bands; Answer the call in Bluetooth mode. |
| ☐ ☐ / ☐ | In USB/SD mode, select the previous/next chapter/track; in radio mode, search for lower/higher frequencies; in folder mode, select left and right functions. |
| SEL | Enter EQ setup menu /OK key |
| MUTE /Delete | Mute key/Delete |
| ☐ /CLK | In Bluetooth mode, hang up the calling; Clock display. |
| 1、2、3、4、5、6、7、8、9、0 | Select current band, section or preset stations. |
| ☐ II | Play/pause |
| INT | Temporary preview. |
| RPT | Loop playback, repeat playback. |
| RDM | Shuffle Playback. |
| ST | Stereo switch. |
| LOUD | Loudness switch. |
| AMS | Short press to preview / long press to search |
| MODE | Mode conversion. |
| EQ | Sound effect switching. |
| LOC | Local signal broadcasting. |
REMOVE BATTERY
Note:
■ The distance may vary according to the brightness of ambient light.
■ If the remote is not used for an extended period of time, remove the battery to prevent possible damage from battery leakage and corrosion.
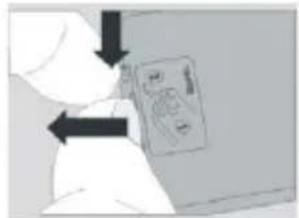
natural_image
Illustration of a hand holding a small object with arrows indicating direction (no text or symbols)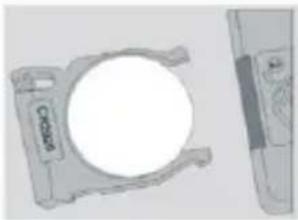
natural_image
Technical line drawing of a circular component with labeled parts (no readable text or symbols)■ Do not place any objects between the remote control unit and the sensor on the unit.
■ Do not drop the remote control onto the floor; it will damage it beyond repair.
■ Do not use the remote control unit, while simultaneously operating the remote control unit of any other equipment; they may interfere resulting in improper operation.
The battery normally last for about one year although depending how often the remote control is used. If the remote control unit isn't working even when it is operated near the unit, replace the battery with a new battery of the same make and use only a lithium cell battery type: CR2025 (3V).
■ Dispose empty batteries in accordance with your local governmental regulations.
■ Do not short-circuit, disassemble, heat or dispose of fire or flames the battery.
- Keep the battery out of reach of children, should the battery be swallowed, immediately consult a doctor.
Press MENU on the panel to pop up the menu interface, and then use the knob to select the corresponding function. Press the middle button of the knob to confirm, or it can be controlled by the remote control.
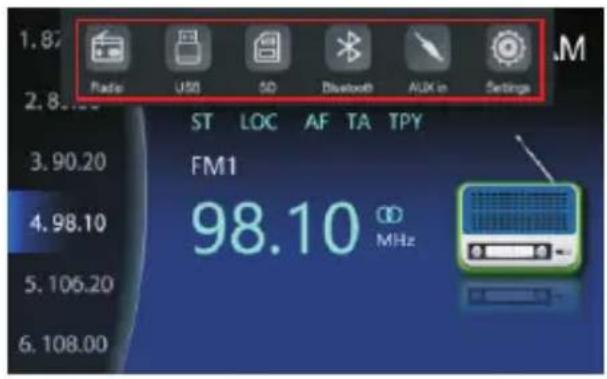
Main menu functions: radio, USB, SD, Bluetooth, AUX, settings.
♦ Radio Interface
To start broadcasting, select Broadcast in the main menu screen.
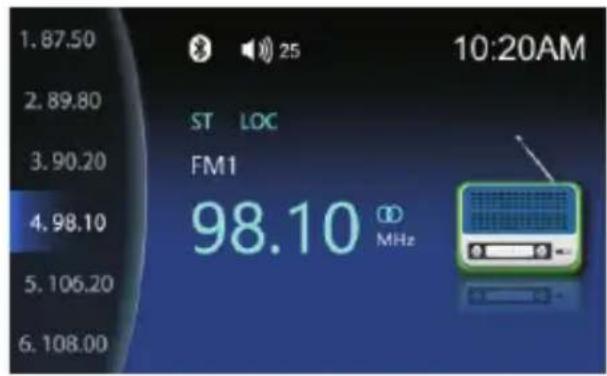
FM1 Frequency band switching: Press (BAND) on the panel to switch; or press (BAND) on the remote control to switch.
ST Mono/stereo switching: When receiving FM, it can be switched through the panel button (ST) or through the remote control.
LOC Receive local signal broadcast.
The highlight is stereo.
Highlight the connected Bluetooth.
Volume display.
10/20AM Clock display.
◆ USB/SD card display interface
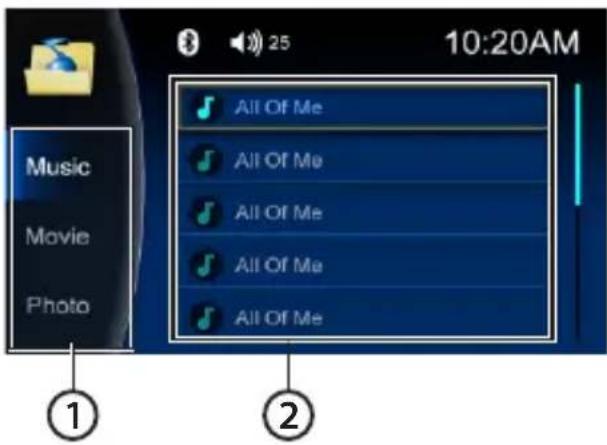
- This area is for choosing Music >Movie> Photo root folder.
- This area is for choosing Music >Movie> Photo desired file for playback.
In USB/SD mode, long press the MENU button to display the file list page, rotate the VOL button to select Music >Movie>Photo root folder. Press the ▶▶▶ button to enter area ② to select the desired file. Press the ◀◀◀ button to ① area for root folder choosing.
◆ AUX display interface
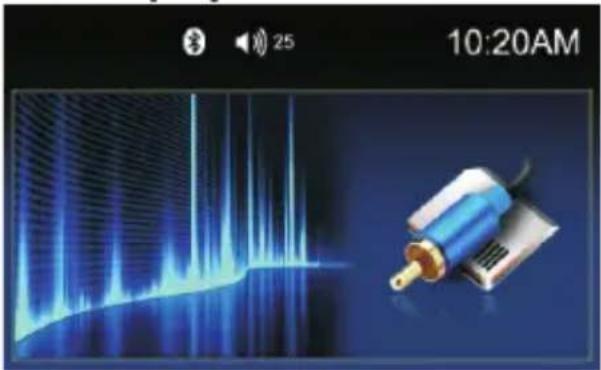
natural_image
Digital interface showing a blue audio waveform and a connected microphone device (no readable text or symbols)◆ Bluetooth music display interface
SETTING CONTROL
To start SETTING, tap SETUP icon on main menu.
Language
| Language English | Language: Press it choose English,Indonesia...and act. |
Radio
| Radio Area America | Area: Press it choose U.S.A or S.America |
◆ Time
| Time 02:16 | Adjust the time. |
◆ Time mode
| Time mode 24H | Display Format: you can choose 12H/24H. |
SETTING CONTROL
Date
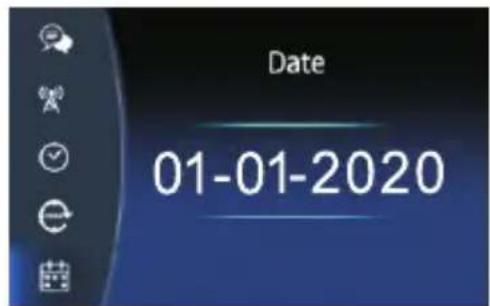
Display Mode: Month/Day/Year.
PAL/NTSC

The output image system is switched.
◆ Led Colour olorful light color switching:
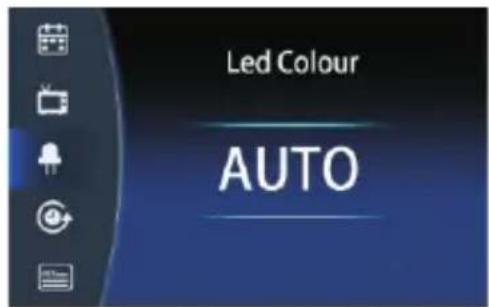
C
automatically switch various colors/green /blue/red/yellow/cyan/purple/white.
◆ Steering wheel conteols teering wheel control: Make the cursor correspond
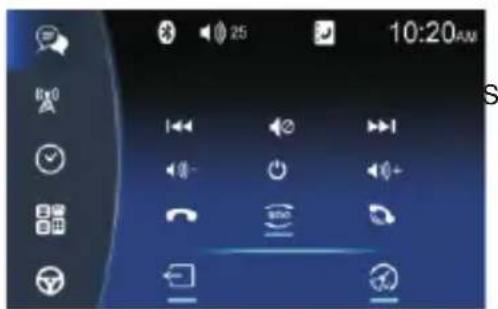
to the function to be adjusted, and then press the steering wheel button to highlight the button icon of the device. After learning in order, press Exit to complete the operation.
SETTING CONTROL
◆ Video Warning y default, the handbrake switch is turned on, and
| Video warning ON | B the car must pull the handbrake to watch the video. |
◆ Factory default estart and return to factory settings.
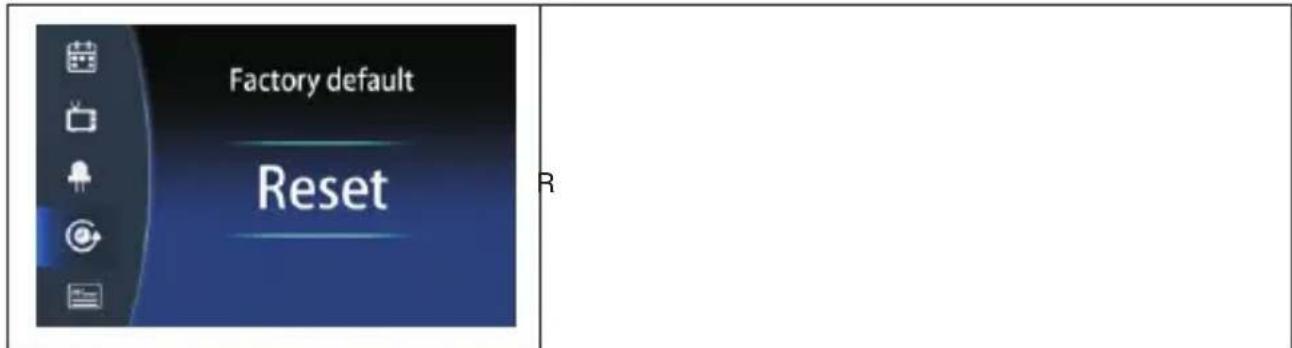
◆ Version rision information.
| Version 1D4H8369A01-0811US-EN-SD-200729 MCU:M5F4CV06 | Ve |
BLUETOOTH SECTION
Warning: Driving and having a Telephone conversation at the same time is dangerous, please park your car before having a telephone conversation. The supplier waves any and all liability when this warning is not followed.
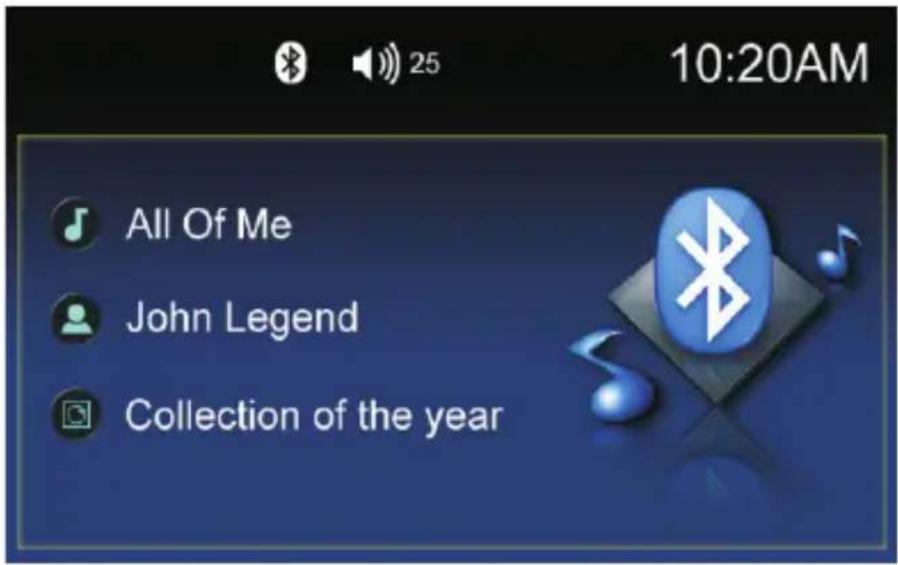
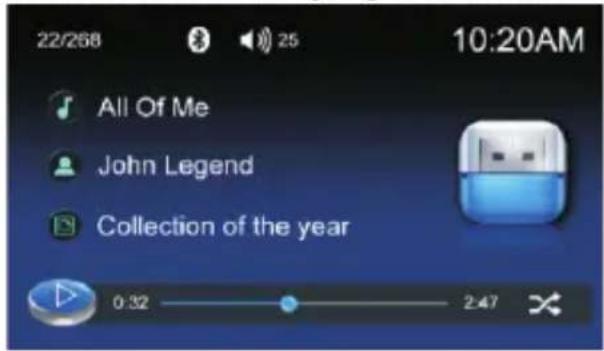
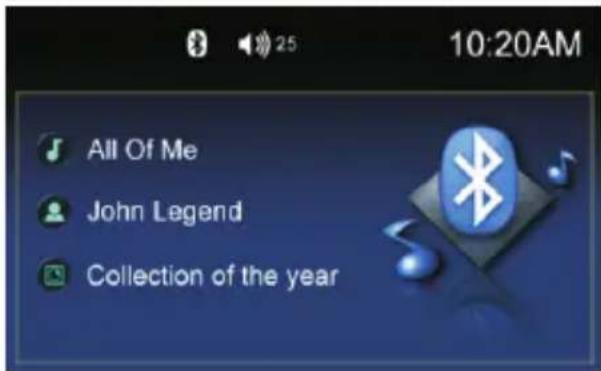
The song name is displayed.
Show singer name.
Show artist album.
Bluetooth Connection Instructions

- To enter Bluetooth mode you can tap Bluetooth icon 📁 on Main menu.
- At the 1 st time when using BLUETOOTH, you need to pair the mobile phone with the bluetooth whose name is "Soundstream".
- Place your Bluetooth Enabled cell phone in pairing mode.
(A2DP) Music Mode
Tap Music button listen in Bluetooth mode.
You can select the function with the key for previous, play or pause, stop and next.
A2DP (Advanced Audio Distribution Profile) Music Player A2DP is a function which can receive The audio frequency signal from the mobile phone, amplified by the car audio and played out by the car speakers.
Notice: your mobile phone need to support A2DP.
Tap the buttons on the screen as shown, or press corresponding buttons (PAUSE/PLAY, STOP, PREVIOUS/NEXT) on remote control to play ,pause, play previous, or next music file.
AUX MODE
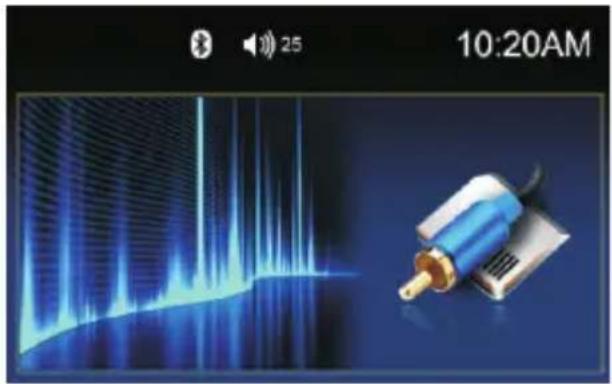
To start AUX Mode, tap on AUX button from main menu screen. Connect the external audio signal source to this unit. Select Aux mode in the main menu.
Note: If there is no external audio input, the TFT displays "Warning".
natural_image
Digital display showing a blue audio waveform and a connected device with a gold connector, both on a dark background (no readable text or symbols)OTHER FUNCTIONS
Parking
When the car is stopped and the parking brake is working, the screen can display the video image, otherwise the screen can't display the video image
Back View Camera
This unit is equipped with back view camera output. The camera is used to observe the situation behind the vehicle when you are backing the car.
Please connect your back view camera with the back car video input. And connect the reverse wire for back a car with the rear gear light. Rear view camera picture will be enabled when you are backing the car.
TROUBLESHOOTING
| Symptom | Cause | Remedy | |
| General | Power does not turn on.(No sound is produced.) | Fuse is blown | Replace with fuse of the same amperage.If the fuse blows again, consult your store of purchase |
| In correct wiring | Consult your local retailer. | ||
| No sound output when operating the unit with amplifiers or power antenna attached. | Power antennal lead is shorted to ground excessive current is required or remote on the amplifiers or power antenna. | 1. Turn off the unit.2. Remove all wires attached to the power antenna lead. Check each wire for a possible short to ground using an ohm meter.3. Turn on the unit.4. Reconnect each amplifier remote wire to the power antenna lead one by one. If the amplifiers turn off before all wires are attached, use an external replay to provide remote-on voltage (excessive current required). | |
| Nothing happens when buttons are pressed.Display is not Accurate | The microprocessor has malfunctioned due to noise, etc. | Turn off the power, Then press the [no open] button and remove the DCP. Press the reset button for about 2 seconds with a thin rod. | |
| Panel or main unit Connectors are dirty | Wipe the dirt off with a soft cloth moistened with cleaning alcohol. | ||
| LCD | Small LCD display error massage | When deck mechanism error, show ERROR 1 | Reset the unit. |
| When disc or servo error, it show ERROR 2 | Change the disc or reset the unit. | ||
| When USB error, t show ERROR 3 | 1.Remove the USB and insert it again2. File errorK please check the file.3. Reset the unit. |
TROUBLESHOOTING
| SYMPTOM | CAUSE | SOLUTION |
| NO POWER | THE CAR IGNITION IS NOT ON. | IF THE POWER SUPPLY IS PROPERLY CONNECTED TO THE CAR ACCESSORY SWITCH THE IGNITION KEY TO CC? |
| THE FUSE IS BLOWN. | REPLACE THE FUSE. | |
| NO SOUND | VOLUME IS IN MINIMUM. | ADJUST VOLUME TO A DESIRED LEVEL. |
| WIRING IS NOT PROPERLY CONNECTED. | CHECK WIRING CONNECTION. | |
| THE OPERATION KEYS DO NOT WORK. | THE BUILT-IN MICROCOMPUTER IS NOT OPERATING PROPERLY DUE TO NOISE. | PRESS THE POWER BUTTON FOR ABOUT 10 SECONDS TO RESET THE UNIT. |
| FRONT PANEL IS NOT PROPERLY FIX INTO ITS PLACE. | ||
| SOUND SKIPS. | THE INSTALLATION ANGLE IS MORE THAN 30 DEGREES. | ADJUST THE INSTALLATION ANGLE TO LESS THAN 30 DEGREES. |
| THE DISC IS EXTREMELY DIRTY OR DEFECTIVE. | CLEAN THE COMPACT DISC/TRY TO PLAY A NEW ONE. | |
| THE RADIO DOES NOT WORK, THE RADIO STATION AUTOMATIC SELECTION DOES NOT WORK. | THE ANTENNA CABLE IS NOT CONNECTED THE SIGNALS ARE TOO WEAK. | INSERT THE ANTENNA CABLE FIRMLY SELECT A STATION MANUALLY. |
TECHNICAL SPECIFICATIONS
| General | |
| Power supply: | 11~16V DC |
| Current consumption: | max. 10 A |
| Maximum power output: | 4 x 50W channels (max) |
| Dimensions (W x D x H) / weight: | 188*160*60mm/0.4kg |
| Working temperature range: | -20°C - +60°C |
| ESP function: | 10 sec. for Audio CD, 120 sec. for MP3 |
| TFT display | |
| Screen size: | 4 inch |
| Resolution: | 800*480 pixel |
| Aspect ratio: | 4:3/16:9 |
| Brightness: | 460 cd/m2 |
| Contrast ratio: | 500:1 |
| FM Stereo Radio | |
| Frequency range(U.S.A Area): | 87.5 -107.9MHz(Step 200KHz) |
| Frequency range(South America Area): | 87.5 -108MHz(Step 100KHz) |
| Preset memory stations: | 18 |
| AM/MW Radio | |
| Frequency range(U.S.A Area): | 530kHz - 1710 KHz(Step 10KHz) |
| Frequency range(South America Area): | 520kHz - 1710 KHz(Step 10KHz) |
| Preset memory stations: | 12 |
| Audio specification | |
| Frequency response: | 20 Hz-20 KHz |
| USB interface | |
| USB type | USB 2.0 full speed |
| Support format | mp3 , wma, mpeg1, mpeg2, avi |
Specifications are subject to change without notice. Mass and dimension are approximate.
- WARNING!
- OPERATION PRECAUTIONS
- CONTENTS
- ACCESSORIES
- UNIT INSTALLATION
- Installation instructions
- Safety instructions
- Un-Installation
- WIRING CONNECTIONS
- Using the ISO Connector
- SWC Interface Connections
- Parking wire
- Connecting the reversing line to taillight on the car
- Note:
- Correct connection
- Incorrect connections
- FRONT PANEL
- Power/Mute/Hang up
- BAND / V-OUT / Answer/AMS
- Play/Pause/CH+
- 5.RPT/CH-
- 6.IR
- Knob
- 8.AUX
- Nameplate
- 10.TF Card
- 11.MIC
- 12.RST
- 13/14. Select up and down
- 15.EQ audio
- 16.USB Slot
- LODD
- USB charging port.
- REMOTE CONTROL
- Remote Control
- Precaution:
- REMOVE BATTERY
- ♦ Radio Interface
- ◆ USB/SD card display interface
- ◆ AUX display interface
- ◆ Bluetooth music display interface
- SETTING CONTROL
- Date
- PAL/NTSC
- ◆ Led Colour olorful light color switching:
- ◆ Steering wheel conteols teering wheel control: Make the cursor correspond
- BLUETOOTH SECTION
- Bluetooth Connection Instructions
- (A2DP) Music Mode
- AUX MODE
- OTHER FUNCTIONS
- Parking
- Back View Camera
- TROUBLESHOOTING
- TECHNICAL SPECIFICATIONS
Brand : Soundstream
Model : VM-430HB
Category : Car radio