
HRV190S - Air Conditioning BROAN - Free user manual and instructions
Find the device manual for free HRV190S BROAN in PDF.


| Product Type | Heat Recovery Ventilator (HRV) |
| Model | HRV190S |
| Brand | Broan |
| Dimensions (H x W x D) | 23.5 x 25.25 x 21.5 in (59.7 x 64.1 x 54.6 cm) |
| Weight | 55 lbs (24.9 kg) |
| Power Supply | 120 V, 60 Hz |
| Max Current | 3.0 A |
| Airflow (High Speed) | 190 CFM |
| Airflow (Low Speed) | 80 CFM |
| Efficiency (Sensible) | Up to 80% |
| Filter Type | Washable Permanent Filter |
| Controls | Four-speed wall control included |
| Duct Connection | 6 in (15.2 cm) round |
| Installation | Ceiling mount or wall mount |
| Maintenance | Clean filter every 3-6 months |
| Safety Features | Overheat protection, lockable cover |
| Warranty | 5 years limited |
| Energy Star Certified | Yes |
| Sound Level (High) | 62 dB |
| Sound Level (Low) | 45 dB |
| Outdoor Temperature Range | -40°F to 140°F (-40°C to 60°C) |
| Drain Connection | 3/4 in (1.9 cm) drain port |
| Replacement Parts Availability | Filters, motors, controls available |
Frequently Asked Questions - HRV190S BROAN
User questions about HRV190S BROAN
0 question about this device. Answer the ones you know or ask your own.
Ask a new question about this device
Download the instructions for your Air Conditioning in PDF format for free! Find your manual HRV190S - BROAN and take your electronic device back in hand. On this page are published all the documents necessary for the use of your device. HRV190S by BROAN.
USER MANUAL HRV190S BROAN
natural_image
Exterior view of a gray rectangular electronic device labeled 'BROAN' with mounting holes (no other text or symbols visible)VB0297
HRV150S
HRV190S

natural_image
Exterior view of a gray rectangular electronic device with black connectors and mounting holes (no visible text or symbols)VB0267
ERV180S
IMPORTANT INFORMATION FOR ERV180S UNIT ABOUT DRAIN INSTALLATION IN COLD CLIMATES ON PAGE 12, SECTION 3.8.
READ AND SAVE THESE INSTRUCTIONS
Broan-NuTone LLC Hartford, Wisconsin www.broan-nutone.com 1-800-558-1711
REGISTER YOUR PRODUCT ONLINE AT: www.broan-nutone.com/register
For additional information - visit www.broan-nutone.com
Because of the large amount of models covered by this publication, the illustrations are typical ones. Some details of your unit may be slightly different than the ones shown.
Please take note that this manual uses the following symbols to emphasize particular information:
WARNING
Identifies an instruction which, if not followed, might cause serious personal injuries including possibility of death.
CAUTION
Denotes an instruction which, if not followed, may severely damage the unit and/or its components.
NOTE: Indicates supplementary information needed to fully complete an instruction.
We welcome any suggestions you may have concerning this manual and/or the unit, and we would appreciate hearing your comments on ways to better serve you. Please contact us by phone at 1-800-558-1711.
ABOUT THESE UNITS
LIMITATION
For residential (domestic) installation only. Installation work and electrical wiring must be done by a qualified person(s) in accordance with all applicable codes and standards, including fire-rated construction codes and standards.
WARNING
TO REDUCE THE RISK OF FIRE, ELECTRIC SHOCK, OR INJURY TO PERSON(S) OBSERVE THE FOLLOWING:
- Use this unit only in the manner intended by the manufacturer. If you have questions, contact the manufacturer at the address or telephone number listed in the warranty.
- Before servicing or cleaning this unit, disconnect power cord from electrical outlet.
- This unit is not designed to provide combustion and/or dilution air for fuel-burning appliances.
- When cutting or drilling into wall or ceiling, do not damage electrical wiring and other hidden utilities.
- Do not use this unit with any solid-state speed control device other than following:
| Units Optional | Main Controls Optional Auxiliary Controls | |
| HRV150SHRV190SERV180S | VT7W, VT4W or VT6W VB20W and 59W |
- This unit must be grounded. The power supply cord has a 3-prong grounding plug for your personal safety. It must be plugged into a mating 3-prong grounding receptacle, grounded in accordance with the national electrical code and local codes and ordinances. Do not remove the ground prong. Do not use an extension cord.
- Do not install in a cooking area or connect directly to any appliances.
- Do not use to exhaust hazardous or explosive materials and vapors.
- When performing installation, servicing or cleaning this unit, it is recommended to wear safety glasses and gloves.
- Due to the weight of the unit, two installers are recommended to perform installation.
- When applicable local regulation comprise more restrictive installation and/or certification requirements, the aforementioned requirements prevail on those of this document and the installer agrees to conform to these at his own expenses.
CAUTION
- To avoid prematurate clogged filters, turn OFF the unit during construction or renovation.
- Please read specification label on product for further information and requirements.
- Be sure to duct air outside – Do not intake/exhaust air into spaces within walls or ceiling or into attics, crawl spaces, or garage.
- Intended for residential installation only in accordance with the requirements of NFPA 90B (For unit installed in the USA).
- Do not run any air ducts directly above or closer than 2 ft to any furnace or its supply plenum, boiler, or other heat producing appliance. If a duct has to be connected to the furnace return plenum, it must be connected not closer than 9' 10" from this plenum connection to the furnace.
- The ductwork is intended to be installed in compliance with all local and national codes that are applicable.
- When leaving the house for a long period of time (more than two weeks), a responsible person should regularly check if the unit operates adequately.
- If the ductwork passes through an unconditioned space (e.g.: attic), the unit must operate continuously except when performing maintenance and/or repair. Also, the ambient temperature of the house should never drop below 65^ F.
TABLE OF CONTENTS
1. TECHNICAL DATA 4-5
1.1 AIR DISTRIBUTION (NORMAL OPERATION) 4
1.2 AIR DISTRIBUTION (DEFROST MODE) 4
1.3 EROST CYCLES TABLES....4
1.4 DIMENSIONS....5
1.41 HRV150S AND HRV190S.... 5
1.4.2 ERV180S 5
1.5 SPECIFICATIONS....5
2. TYPICAL INSTALLATIONS 6
2.1 FULLY DUCTED SYSTEM 6
2.2 EXHAUST DUCTED SYSTEM (SOURCE POINT VENTILATION) 6
2.3 SIMPLIFIED (VOLUME VENTILATION) 6
3. INSTALLATION 7-13
3.1 INSPECT THE CONTENT OF THE BOX 7
3.2 LOCATING AND MOUNTING THE UNIT 7
3.3 PLANNING OF THE DUCTWORK 7
3.4 CALCULATING THE DUCT SIZE....8
3.4.1 EXAMPLE OF CALCULATION 8
3.4.2 EXAMPLE OF A DESIGN FOR A FULLY DUCTED SYSTEM 8
3.5 INSTALLING THE DUCTWORK AND THE REGISTERS 9-10
3.5.1 FULLY DUCTED SYSTEM 9
3.5.2 EXHAUST DUCTED SYSTEM 9
3.5.3 SIMPLIFIED INSTALLATION 10
3.6 CONNECTING THE DUCTS TO THE UNIT 11
3.7 INSTALLING THE EXTERIOR HOODS 12
3.8 CONNECTING THE DRAIN 12-13
3.8.1 HRV UNITS 12
3.8.2 ERMIT 13
4. CONTROLS 13-15
4.1 INTEGRATED CONTROL 13
4.1.1 BOOT SEQUENCE 13
4.1.2 SETTING EXTENDED DEFROST 13
4.2 ELECTRICAL CONNECTION TO OPTIONAL WALL CONTROLS 14-15
4.2.1 ELECTRICAL CONNECTION TO VT7W MAIN WALL CONTROL....14
4.2.2 ELECTRICAL CONNECTION TO VT4W MAIN WALL CONTROL....15
4.2.3 ELECTRICAL CONNECTION TO VT6W MAIN WALL CONTROL 15
4.2.4 ELECTRICAL CONNECTION TO OPTIONAL AUXILIARY WALL CONTROLS 15
5. ELECTRIC CONNECTION TO THE FURNACE 15
6. WIRING DIAGRAM....16
7. BALANCING THE UNIT ....17
7.1 WHAT YOU NEED TO BALANCE THE UNIT 17
7.2 PRELIMINARY STAGES TO BALANCE THE UNIT 17
7.3 BALANCING PROCEDURE 17
8. SERVICE PARTS ......18
9. TROUBLESHOOTING 19-20
1. TECHNICAL DATA
1.1 AIR DISTRIBUTION (NORMAL OPERATION)

natural_image
Cross-sectional diagram of a mechanical or hydraulic system with internal components and flow paths (no text or symbols)1.2 AIR DISTRIBUTION (DEFROST MODE)

natural_image
Technical schematic of a mechanical or electrical device with internal flow paths and labeled components (no readable text or symbols)1.3 DEFROST CYCLES TABLES
HRV150S UNIT
| OUTDOOR TEMPERATURE | DEFROST CYCLES (MINUTES) | EXTENDED DEFROST CYCLES | ||
| FAHRENHEIT (°F) DEFROSTING | OPERATION TIME BETWEEN EACH DEFROST CYCLES | DEFROSTING | OPERATION TIME BETWEEN EACH DEFROST CYCLES | |
| 23 7 50 10 30 | ||||
| 5 7 25 10 20 | ||||
| -17 10 20 10 15 | ||||
ERV180S UNIT
| OUTDOOR TEMPERATURE | DEFROST CYCLES (MINUTES) | EXTENDED DEFROST CYCLES | ||
| FAHRENHEIT (°F) DEFROSTING | OPERATION TIME BETWEEN EACH DEFROST CYCLES | DEFROSTING | OPERATION TIME BETWEEN EACH DEFROST CYCLES | |
| 23 10 60 10 30 | ||||
| 5 | 10 | 30 | 10 | 20 |
| -17 10 20 10 15 | ||||
HRV190S UNIT
| OUTDOOR TEMPERATURE | DEFROST CYCLES (MINUTES) | EXTENDED DEFROST CYCLES | ||
| FAHRENHEIT (°F) DEFROSTING | OPERATION TIME BETWEEN EACH DEFROST CYCLES | DEFROSTING | OPERATION TIME BETWEEN EACH DEFROST CYCLES | |
| 23 6 50 10 30 | ||||
| 5 6 25 10 20 | ||||
| -17 10 20 10 15 | ||||
NOTE: The HRV and ERV Performance Charts are listed on the specification sheets of these units. Visit our website at www.broan-nutone.com to access those documents.
1. TECHNICAL DATA (CONT'D)
1.4 DIMENSIONS
1.4.1 HRV150S AND HRV190S

1.4.2 ERV180S


1.5 SPECIFICATIONS
| MODEL HRV150S | HR V190S | ERV180S | |
| WEIGHT | 65 LB. | 65 LB. | 76 LB. |
| PORTDIAMETER | 6" 6" 6" | ||
| DRAINDIAMETER | 1/2" 1/2" 1/2" | ||
| INSTALLATION | CHAINS AND SPRINGS (PROVIDED WITH THE UNIT) | ||
| MOTOR SPEED | HIGH AND LOW SPEED FACTORY SET (OPTIONAL INCREASED LOW SPEED) | ||
| ELECTRICAL SUPPLY | 120 V, 60 Hz | 120 V, 60 Hz | 120 V, 60 Hz |
| POWER CONSUMPTION | 160 WATTS | 195 WATTS | 200 WATTS |
There are three common installation methods.
2.1 FULLY DUCTED SYSTEM
(Primarily for homes with radiant hot water or electric baseboard heating. See illustration at right.)
Moist, stale air is exhausted from the high humidity areas in the home, such as bathrooms, kitchen and laundry room.
Fresh air is supplied to bedrooms and principal living areas.
If required, bathroom fans and a range hood may be used to better exhaust stale air.
Homes with more than one level require at least one exhaust register at the highest level.

2.2 EXHAUST DUCTED SYSTEM (SOURCE POINT VENTILATION)
(For homes with forced air heating. See illustration at right.)
Moist, stale air is exhausted from the high humidity areas in the home, such as bathrooms, kitchen and laundry room. Fresh air is supplied to the cold air return or the supply duct of the furnace. If required, bathroom fans and a range hood may be used to better exhaust stale air.
Homes with more than one level require at least one exhaust register at the highest level.
NOTE: For this type of installation, it is not essential that the furnace blower runs when the unit is in operation, but we recommend it.

2.3 SIMPLIFIED (VOLUME VENTILATION)
(For homes with forced air heating. See illustration at right.)
Fresh air and exhaust air flow through the furnace ducts, which simplifies the installation.
The use of bathroom fans and a range hood is suggested to exhaust stale air.
NOTE: For this type of installation, the furnace blower must be running when the unit is in operation.

3. INSTALLATION
WARNING
When applicable local regulation comprises more restrictive installation and/or certification requirements, the aforementioned requirements prevail on those of this document and the installer agrees to conform to these at his own expenses.
WARNING
When performing installation, servicing or cleaning the unit, it is recommended to wear safety glasses and gloves.
3.1 INSPECT THE CONTENT OF THE BOX
- Inspect the exterior of the unit for shipping damage. Ensure that there is no damage to the door, door latches, door hinges, dampers, duct collars, cabinet, etc.
- Inspect the interior of the unit for damage. Ensure that the fan motor assembly, recovery module, insulation, dampers, condensation tray are all intact.
- If the unit was damaged during shipping, contact your local distributor. (Claim must be made within 24 hours after delivery.)
NOTE: Prior to installation of the unit, remove its shipping bracket by unscrewing its wing nut and loosing its both retaining screws.

3.2 LOCATING AND MOUNTING THE UNIT
Choose an appropriate location for the Unit:
- Within an area of the house where the ambient temperature is kept between 50^ and 104^
- Away from living areas (dining room, living room, bedroom), if possible
- So as to provide easy access to the interior cabinet for every three months and annual maintenance, and to the control panel on the side of the unit;
- Close to an exterior wall, so as to limit the length of the insulated flexible duct to and from the unit
- Close to a drain. If no drain is close by, use a pail to collect run-off
- Away from hot chimneys, electrical panel and other fire hazards
- Allow for a power source (standard outlet)
Hang the unit with the 4 chains and springs provided (see illustrations at right).

natural_image
Technical line drawing of a mechanical component with pipes and housing (no text or symbols)
natural_image
Technical diagram of a mechanical assembly with hanging weights and a central rotating component (no text or symbols)3.3 PLANNING OF THE DUCTWORK
a) Follow the instructions in Section 3.4 (next page) to determine the appropriate duct diameters for your system.
b) Keep it simple. Plan for a minimum number of bends and joints. Keep the length of insulated duct to a minimum.
c) Do not use wall cavities as ducts. Do not use branch lines smaller than 4" ∅.
d) Do not ventilate crawl spaces or cold rooms. Do not attempt to recover the exhaust air from a dryer or a range hood. This would cause clogging of the recovery module. Use sheet metal for the kitchen exhaust duct.
e) Be sure to plan for at least one exhaust register on the highest lived-in level of the house if it has 2 floors or more.
3. INSTALLATION (CONT'D)
3.4 CALCULATING THE DUCT SIZE
Use the table below to ensure that the ducts you intend to install will be carrying air flows at or under the recommended values. Avoid installing ducts that will have to carry air flows near the maximum values and never install a duct if its air flow exceeds the maximum value.
| DUCT DIAMETER | RECOMMENDED AIR FLOW | MAXIMUM AIR FLOW | ||||
| 4" (102 MM) | 40 CFM | 19 L/S | 68 M^3/H | 60 CFM | 28 L/S | 102 M^3/H |
| 5" (127 MM) | 75 CFM | 35 L/S | 127 M^3/H | 110 CFM | 52 L/S | 187 M^3/H |
| 6" (152 MM) | 120 CFM | 57 L/S | 204 M^3/H | 180 CFM | 85 L/S | 306 M^3/H |
| 7" (178 MM) | 185 CFM | 87L/S | 314 M^3/H | 270 CFM | 127 L/S | 459 M^3/H |
| 8" (203 MM) | 260 CFM | 123 L/S | 442 M^3/H | 380 CFM | 179 L/S | 645 M^3/H |
NOTE: Examples 3.4.1 and 3.4.2 use imperial measures. The same calculation applies to metric measures.
3.4.1 EXAMPLE OF CALCULATION
PROBLEM: My installation requires two exhaust registers (one for the kitchen, one for the bathroom). I will connect these registers to a main duct which will connect to the unit (high speed performance value of 140 cfm). What size of duct should I use for the main exhaust duct and for the two end branches leading to the registers? (See illustration at right.)
SOLUTION: Simplified method. (For a more detailed method of calculating duct size refer to the ASHRAE or HRAI HANDBOOK).
Main duct: Table above indicates a 6" ∅ duct: Recommended air flow: 120 cfm; maximum air flow 180 cfm. The high speed air flow of 140 cfm is close enough to the recommended value (120) and far enough away from the maximum value (180). Therefore a 6" ∅ duct or larger is an appropriate choice for the main exhaust duct.
End branches: Each end branch will have to transport an air flow of 70 cfm (140 divided by 2). Table above indicates a 5" ∅ duct: Recommended air flow: 75 cfm; maximum air flow: 110 cfm. The high speed air flow of 70 cfm is close enough to the recommended value (75) and far enough away from the maximum value (110). Therefore a 5" ∅ duct or larger is an appropriate choice for the 2 end branches.
NOTE: A 4" ∅ duct would have been too small because the maximum acceptable value for a 4" ∅ duct is 60 cfm.

3.4.2 EXAMPLE OF A DESIGN FOR A FULLY DUCTED SYSTEM FOR A UNIT HAVING A HIGH SPEED PERFORMANCE OF 222 CFM

3.5 INSTALLING THE DUCTWORK AND THE REGISTERS
WARNING
Never install a stale air exhaust register in a room where there is a combustion device, such as a gas furnace, a gas water heater or a fireplace.
CAUTION
The ductwork is intended to be installed in compliance with all local and national codes that are applicable.
3.5.1 FULLY DUCTED SYSTEM (AS ILLUSTRATED IN SECTION 2.1)
STALE AIR EXHAUST DUCTWORK:
• Install registers in areas where contaminants are produced: Kitchen, bathrooms, laundry room, etc.
• Install registers 6 to 12 inches from the ceiling on an interior wall OR install them in the ceiling.
• Install the kitchen register at least 4 feet from the range.
- If possible, measure the velocity of the air flowing through the registers. If the velocity is higher than 400 ft/min., then the register type is too small. Replace with a larger one.
FRESH AIR DISTRIBUTION DUCTWORK:
• Install registers in bedrooms, dining room, living room and basement.
• Install registers either in the ceiling or high on the walls with air flow directed towards the ceiling.
(The cooler air will then cross the upper part of the room, and mix with room air before descending to occupant level.)
- If a register must be floor installed, direct the air flow up the wall.
3.5.2 EXHAUST DUCTED SYSTEM (AS ILLUSTRATED IN SECTION 2.2)
STALE AIR EXHAUST DUCTWORK:
Same as for Fully Ducted System, described on point 3.5.1 above)
FRESH AIR DISTRIBUTION:
WARNING
When performing duct connection to the furnace, installation must be done in accordance with all applicable codes and standards. Please refer to your local building code.
CAUTION
When performing duct connection to the furnace supply duct, this duct must be sized to support the additional airflow produced by the ERV/HRV. Also, use a metal duct. It is recommended that the ERV/HRV is running when the furnace is in operation in order to prevent backdrafting inside ERV/HRV.
There are two methods for connecting the unit to the furnace:
METHOD 1: SUPPLY SIDE CONNECTION
- Cut an opening into the furnace supply duct at least 18 inches from the furnace.
- Connect this opening to the fresh air distribution port of the HRV/ERV (use metal duct, see illustration at right).
- Make sure that the HRV/ERV duct forms an elbow inside the furnace ductwork.
- If desired, interlock (synchronize) the furnace blower operation with the HRV/ERV operation. (See Section 5).

METHOD 2: RETURN SIDE CONNECTION
- Cut an opening into the furnace return duct not less than 10 feet from the furnace (A + B) .
- Connect this opening to the fresh air distribution port of the HRV/ERV (see illustration at right).
NOTE: For Method 2, it is not essential that the furnace blower runs when the unit is in operation, but we recommend it. If desired, synchronize the furnace blower operation with the HRV/ERV operation. (See Section 5).

3. INSTALLATION (CONT'D)
3.5 INSTALLING THE DUCTWORK AND THE REGISTERS (CONT'D)
3.5.3 SIMPLIFIED INSTALLATION (AS ILLUSTRATED IN SECTION 2.3)
WARNING
When performing duct connection to the furnace, installation must be done in accordance with all applicable codes and standards. Please refer to your local building code.
CAUTION
When performing duct connection to the furnace ducts (Method 1), these ducts must be sized to support the additional airflow produced by the ERV/HRV. Also, the supply duct must be a metal duct. It is recommended that the ERV/HRV is running when the furnace is in operation in order to prevent backdrafting inside ERV/HRV.
There are two methods (illustrated below) for connecting the unit to the furnace ducts:
METHOD 1: RETURN-SUPPLY
METHOD 2: RETURN-RETURN


STALE AIR INTAKE:
- Cut an opening into the furnace return duct not less than 10 feet from the furnace.
- Connect this opening to the stale air intake port of the HRV/ERV (as shown above).
FRESH AIR DISTRIBUTION:
Same instructions as for Method 1 or Method 2, section 3.5.2 in previous page)
CAUTION
If using Method 2, make sure the furnace blower operation is synchronized with the unit operation! See Section 5.
For Method 2 (Return-Return), make sure there is a distance of at least 3 feet between the 2 connections to the furnace duct.
NOTE: For Method 1, it is not essential to synchronize the furnace blower operation with the HRV/ERV operation, but we recommend it.
3.6 CONNECTING THE DUCTS TO THE UNIT
CAUTION
If ducts have to go through an unconditioned space (e.g.: attic), always use insulated ducts.
INSULATED FLEXIBLE DUCTS
Use the following procedure for connecting the insulated flexible duct to the ports on the unit (exhaust to outside and fresh air from outside).
① Pull back the insulation to expose the flexible duct and place it over inner port ring.
② Install good quality aluminum duct tape on flexible duct to prevent potential water leakage from duct.
③ Attach the flexible duct to the port using tie wrap.
④ Pull the insulation over the joint and tuck it between the inner and outer rings of the double collar.
⑤ Pull down the vapor barrier (shaded part in illustrations below) over the outer ring to cover it completely. Fasten in place the vapor barrier using the port strap (included in unit parts bag). To do so, insert one collar pin through vapor barrier and first strap hole, then insert the other collar pin through vapor barrier and center strap hole and close the loop by inserting the first collar pin in the last strap hole.
CAUTION
Make sure the vapor barrier on the insulated ducts does not tear during installation to avoid condensation within the ducts.

Rigid ducts
To prevent potential water leakage from ducts, use good quality aluminum duct tape to connect the rigid ducts to the ports.
CAUTION
Do not use screws to connect rigid ducts to the ports.
Make sure that both balancing dampers are left in a fully open position before connecting the Fresh air to building port and Exhaust air from building port (as shown in illustration at right).

natural_image
Technical line drawing of a mechanical assembly with a magnified inset showing a circular component (no text or symbols)3. INSTALLATION (CONT'D)
3.7 INSTALLING THE EXTERIOR HOODS
Choose an appropriate location for installing the exterior hoods:
- At a minimum distance of 10 feet between the hoods to avoid cross-contamination
- At a minimum distance of 18 inches from the ground
WARNING
Make sure the intake hood is at least 6 feet away from any of the following:
- Dryer exhaust, high efficiency furnace vent, central vacuum vent
• Gas meter exhaust, gas barbecue-grill
• Any exhaust from a combustion source - Garbage bin and any other source of contamination.
Refer to illustration at right for connecting the insulated duct to the hoods. An "Anti-Gust Intake Hood" should be installed in regions where a lot of snow is expected to fall.

3.8 CONNECTING THE DRAIN
CAUTION
A drain tubing (included) must be installed for all HRV units. For ERV units, it is not required, however, it is recommended for climates where the outside temperature typically remains below -13°F, (over a 24-hour period) for several days in a row, combined with an indoor humidity of 40% or higher.
3.8.1 HRV UNITS

Cut 2 sections of the plastic tube, minimum 12" long, and attach them to each inner drain fitting, located under the unit.
Join both short sections to the "T" junction and main tube as shown, to prevent the unit from drawing unpleasant odors from the drain source.

Run the tube to the floor drain or to an alternative drain pipe or pail.
IMPORTANT: If using a pail to collect water, locate the tube end approximately 1" from the top of the pail in order to prevent water from being drawn back up into the unit.
3. INSTALLATION (CONT'D)
3.8 CONNECTING THE DRAIN (CONT'D)
3.8.2 ERV UNIT

Make a water trap loop in the tube to prevent the unit from drawing unpleasant odors from the drain source. Run the tube to the floor drain or to an alternative drain pipe or pail.
IMPORTANT: If using a pail to collect water, locate the tube end approximately 1" from the top of the pail in order to prevent water from being drawn back up into the unit.

natural_image
Technical line drawing of a mechanical device with mounting bracket and circular component (no text or symbols)Insert a drain plug (included in parts bag) in alternate drain fitting located on top of the unit.
Furthermore, if the drain will not be used, insert a second drain plug (included in parts bag) in the drain fitting located underneath the unit.
4. CONTROLS
4.1 INTEGRATED CONTROL
All units are equipped with an integrated control, located in front of the electrical compartment. Use the push button (1) to control the unit. The LED (2) will then show on which mode the unit is in.
NOTES: 1. The integrated control must be turned OFF to use an optional main control.
- If an optional auxiliary control is used, if activated, this auxiliary control will override the optional main control.
Refer to table below to see how to operate the unit using its integrated control.
| PRESS ON PUSH BUTTON | LED COLOR | RESULTS |
| ONCE | AMBER | UNIT IS ON LOW SPEED |
| TWICE | GREEN | UNIT IS ON HIGH SPEED |
| THREE TIMES | NO LIGHT | UNIT IS OFF |

If a problem occurs during the unit operation, its integrated control LED (2) will blink. The color of the blinking light depends on the type of error detected. Refer to Section 9 Troubleshooting on pages 19 and 20 for further details.
4.1.1 BOOT SEQUENCE
The unit boot sequence is similar to a personal computer boot sequence. Each time the unit is plugged after being unplugged, or after a power failure, the unit will perform a 30-second booting sequence before starting to operate. During the booting sequence, the integrated control LED will light GREEN (unit set in normal defrost) or AMBER (unit set in extended defrost) for 5 seconds, and then will shut off for 2 seconds. After that, the LED will light RED for the rest of the booting sequence. During this RED light phase, the unit is checking and resetting the motorized damper position. Once the motorized damper position completely set, the RED light turns off and the booting sequence is done.
NOTE: No command will be taken until the unit is fully booted.
4.1.2 SETTING EXTENDED DEFROST
The unit is factory set to normal defrost. In cold region, it may be necessary to setup extended defrost. During the first 5 seconds of booting sequence, while the integrated control LED is GREEN, press on push button until the LED turns AMBER (about 3 seconds).

4.2 ELECTRICAL CONNECTION TO OPTIONAL WALL CONTROL
For more convenience, this unit can also be controlled using an optional main wall control.
WARNING
Always disconnect the unit before making any connections. Failure in disconnecting power could result in electrical shock or damage of the wall control or electronic module inside the unit.
CAUTION
Never install more than one optional main wall control per unit. Make sure that the wires do not short-circuit between themselves or by touching any other components on the wall control. Avoid poor wiring connections. To reduce electrical interference (noise) potential, do not run wall control wiring next to control contactors or near light dimming circuits, electrical motors, dwelling/building power or lighting wiring, or power distribution panel.
Use the terminal connector included in the installation kit to perform the electrical connection for main and optional wall controls. Check if all wires are correctly inserted in their corresponding holes in the terminal block. (A wire is correctly inserted when its orange receptacle is lower than another one without wire. On illustration at right, wire A is correctly inserted, but not wire B.)

VE0272
Once the wall control(s) connections have been made, insert the terminal connector in the electrical compartment front face.
NOTE: For information about the operation of the wall controls, refer to the user guide.

4.2.1 ELECTRICAL CONNECTION TO
VT7W MAIN WALL CONTROL

4. CONTROLS (CONT'D)
4.2 ELECTRICAL CONNECTION TO OPTIONAL WALL CONTROL (CONT'D)
4.2.2 ELECTRICAL CONNECTION TO VT4W MAIN WALL CONTROL

4.2.3 ELECTRICAL CONNECTION TO VT6W MAIN WALL CONTROL

4.2.4 ELECTRICAL CONNECTION TO OPTIONAL AUXILIARY WALL CONTROLS

5. ELECTRIC CONNECTION TO THE FURNACE
WARNING
Never connect a 120-volt AC circuit to the terminals of the furnace interlock (standard wiring). Only use the low voltage class 2 circuit of the furnace blower control.
FOR A FURNACE CONNECTED TO A COOLING SYSTEM:
On some older thermostats, energizing the "R" and "G" terminals at the furnace has the effect of energizing "Y" at the thermostat and thereby turning on the cooling system. If you identify this type of thermostat, you must use the ALTERNATE FURNACE INTERLOCK WIRING.
STANDARD FURNACE INTERLOCK WIRING

flowchart
graph TD
    A["THERMOSTAT TERMINALS"] --> B["FURNACE 24-VOLT TERMINAL BLOCK"]
    A --> C["TWO WIRES HEATING ONLY"]
    A --> D["NO C NO I O C Y F G R G"]
    A --> E["COOLING SYSTEM"]
    B --> F["POWER"]
    C --> G["POWER"]
    D --> H["POWER"]
    E --> I["POWER"]
VE0108A
ALTERNATE FURNACE INTERLOCK WIRING

WARNING
- Risk of electric shocks. Before performing any maintenance or servicing, always disconnect the unit from its power source.
- This product is equipped with an overload protection (fuse). A blown fuse indicates an overload or a short-circuit situation. If the fuse blows, unplug the product from the outlet. Discontinue using the unit and contact technical support.

7. BALANCING THE UNIT
7.1 WHAT YOU NEED TO BALANCE THE UNIT
- A magnehelic gauge capable of measuring 0 to 0.5 inch of water (0 to 125 Pa) and 2 plastic tubes.
• The balancing chart of the unit.

natural_image
Line drawing of a pressure gauge with tubing and a small object on the base (no text or symbols)7.2 PRELIMINARY STAGE TO BALANCE THE UNIT
- Seal all the unit ductwork with tape. Close all windows and doors.
- Turn off all exhaust devices such as range hood, dryer and bathroom fans.
• Make sure the integrated balancing dampers are fully open. - Make sure all filters are clean (if it is not the first time the unit is balanced).

natural_image
Technical line drawing of a mechanical component with no visible text or symbols7.3 BALANCING PROCEDURE
- Set the unit to high speed.
Make sure that the furnace/air handler blower is ON if the installation is in any way connected to the ductwork of the cold air return. If not, leave furnace/air handler blower OFF. If the outside temperature is below 32^ F, make sure the unit is not running in defrost while balancing. (By waiting 10 minutes after plugging the unit in, you are assured that the unit is not in a defrost cycle.)
-
Place the magnehelic gauge on a level surface and adjust it to zero.
-
Connect tubing from gauge to EXHAUST air flow pressure taps (see diagram at right). Be sure to connect the tubes to their appropriate high/low fittings. If the gauge drops below zero, reverse the tubing connections.
NOTE: It is suggested to start with the exhaust air flow reading because the exhaust has typically more restriction than the fresh air, especially in cases of fully ducted installations or source point ventilation.
Place the magnehelic gauge upright and level. Record equivalent AIR FLOW of the reading according to the balancing chart.
-
Move tubing to FRESH air flow pressure taps (see diagram). Adjust the fresh air balancing damper until the FRESH air flow is approximately the same as the EXHAUST air flow. If FRESH air flow is less than EXHAUST air flow, then go back and adjust the exhaust balancing damper to equal the FRESH air flow.
-
Secure both dampers in place with a fastening screw.
-
Write the required air flow information on a label and stick it near the unit for future reference (date, maximum speed air flows, your name, phone number and business address).
-
Install 4 pressure taps plugs (included in parts bag).

flowchart
graph TD
    A["Input Air Flow"] --> B["Central Processing Unit"]
    B --> C{High Air Flow}
    B --> D{Low Air Flow}
    C --> E["Exhaust Air Flow"]
    D --> F["Fresh Air Flow"]
    style A fill:#f9f,stroke:#333
    style B fill:#ccf,stroke:#333
    style C fill:#cfc,stroke:#333
    style D fill:#fcc,stroke:#333
    style E fill:#ffc,stroke:#333
    style F fill:#fcc,stroke:#333
NOTES: 1. Use conversion chart provided with the unit to convert magnehelic gauge readings to equivalent cfm values. 2. The unit is considered balanced even if there is a difference of ±10 cfm (or ±5 l/s or 17 m ^3 /h) between the two air flows.
8. SERVICE PARTS

VL0050
| ITEM | DESCRIPTION HRV150S HRV190S ERV180S | ||
| 1 Hinge assembly kit SV13036 SV13036 S V13036 | |||
| 2 Damper supply port assembly SV17245 SV17245 SV17245 | |||
| 3 | Damper system actuator (including no. 4) | SV17235 SV17235 SV17235 | |
| 4 Thermistor kit SV17242 SV17242 SV17242 | |||
| 5 Capacitor 7.5 μF SV17240 SV17240 SV17240 | |||
| 6 Electronic board SV60809 SV60809 SV60812 | |||
| 7 Transformer SV17244 SV17244 SV17244 | |||
| 8 Double collar port SV60818 SV60818 SV60818 | |||
| 9 Blower assembly (including no. 10) | SV60804 SV60805 SV60806 | ||
| 10 | Square damper kit | SV17243 SV17243 SV17243 | |
| 11 | Magnet switch | SV19060 | SV19060 |
| 12 | Door assembly (including hinges and latches) | SV63500 SV63500 SV63501 | |
| 13 | Door latches (keeper) and screws | SV00887 (2) SV00601 (4) | SV00887 (2) SV00601 (4) |
| 14 | Diffuser | SV60822 SV60822 SV62756 | |
| 15 | Filter kit | SV60800 SV60800 SV60799 | |
| 16 | Core | SV60801 SV60803 SV16582 | |
| 17 | Door latches and screws | SV00886 (2) SV00601 (4) | SV00886 (2) SV00601 (4) |
| 18 | Balancing damper | SV02253 SV02253 SV02253 | |
| 19 | Balancing double collar port | SV02256 SV02256 SV02256 | |
| * | Terminal connector | SV16416 | SV16416 |
| * | Hardware kit | SV20510 | SV20510 SV20606 |
* Not shown.
REPLACEMENT PARTS AND REPAIRS
In order to ensure your ventilation unit remains in good working condition, you must use Broan-NuTone LLC genuine replacement parts only. The Broan-NuTone LLC genuine replacement parts are specially designed for each unit and are manufactured to comply with all the applicable certification standards and maintain a high standard of safety. Any third party replacement part used may cause serious damage and drastically reduce the performance level of your unit, which will result in premature failing. Also, Broan-NuTone LLC recommends to contact a certified service depot for all replacement parts and repairs.
9. TROUBLESHOOTING
If the integrated control LED of the unit is flashing, this means the unit sensors detected a problem. See the list below to know where on the unit the problem occurs.
LED flashes GREEN (double blink). • Thermistor error. Replace the thermistor kit.
LED flashes AMBER. • Damper error. Go to point 8.
WARNING
A few diagnosis procedures may require the unit to be in operation while proceeding. Open the unit door and bypass its magnetic switch by putting the door white magnet on it. Be careful with moving and/or live parts.
- Risk of electric shocks. Electronic board connections must be checked by qualified personnel only.
| PROBLEMS | POSSIBLE CAUSES | YOU SHOULD TRY THIS |
| 1. The error code E1 is displayed on VT7W wall control screen. | The wires may be in reverse position.The wires may be broken.The wires may have a bad connection. | Ensure that the color coded wires have been connected to their appropriate places.Inspect every wire and replace any that are damaged.Ensure the wires are correctly connected. |
| 2. VT7W wall control screen alternates between normal display and E3 or E4 appears on screen. | The VT7W wall control needs to be reset.The VT7W wall control is defective. | Reset the VT7W wall control by pressing simultaneously on DOWN arrow and OK keys for 8 seconds (as shown at right). Then,unplug the unit for 30 seconds. Plug the unit back.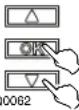 VcIf the problem is not solved, replace the VT7W wall control. VcIf the problem is not solved, replace the VT7W wall control. |
| 3. Unit does not work (no LED is lit on the integrated control). | The transformer may be defective.The circuit board may be defective.The unit is unplugged.The unit door is opened.A fuse is blown.Wrong control connections. | Check for 24 VAC on J8-1 and J8-2.Unplug the unit. Disconnect the main control and the optional(s) control(s) (if need be). Jump G and B terminals. Plug the unit back and wait about 10 seconds. If the motor runs on high speed and the damper opens, the circuit board is not defective.Plug the unit.Close unit door.Unplug the product from the outlet. Inspect fuse on circuit board (refer to F1 on wiring diagram, page 16). If blown, discontinue using the unit and contact technical support.Try the integrated control (see Section 4.1 on page 13). |
| 4. The damper actuator does not work or rotates continuously. | The damper actuator or the integrated damper port mechanism may be defective (integrated control LED flashes AMBER and unit is OFF).The circuit board or the transformer may be defective.(integrated control LED flashes AMBER and unit is OFF). | Unplug the unit. Disconnect the main control and the optional controls(s) (if need be). Wait 10 seconds and plug the unit back. Check if the damper opens. If not, use a multimeter and check for 24 VAC on J12-1 and J12-2 (in electrical compartment). If there is 24 VAC, replace the entire port assembly.NOTE: It is normal to experience a small delay (7-8 seconds) before detecting the 24 VAC signal at starting-up. This signal will stay during 17-18 seconds before disappearing.If there is no 24 VAC, check for 24 VAC between J8-1 and J8-2. If there is 24VAC replace the circuit board, and if there is no 24 VAC, change the transformer. |
| 5. The wall control does not work OR its indicator flashes. | The wires may be in reverse position.The wires may be broken.The wire in the wall OR the wall control may be defective. | Ensure that the color coded wires have been connected to their appropriate places.Inspect every wire and replace any that are damaged.Remove the wall control and test it right beside the unit using another shorter wire. If the wall control works there, change the wire. If it does not, change the wall control. |
| 6. The VB20W push-button does not work OR its indicator light does not stay on. | The wires may be in reverse position.The VB20W may be defective. | Ensure that the color coded wires have been connected to their appropriate places.Jump the OL and OC terminals. If the unit switches to high speed, remove the VB20W push-button and test it right beside the unit using another shorter wire. If it works here, change the wire. If it doesn't, change the VE0098VB20W. |
VE0097
- TROUBLESHOOTING (CONT'D)
| PROBLEMS | POSSIBLE CAUSES | YOU SHOULD TRY THIS |
| 7. The motor does not work. | The circuit board may be defective.The motor may be defective.The motor capacitor may be defective.The motor is unplugged from inside the unit.The motor is unplugged from the electronic board (J4).There is a problem with the door magnet switch.JU-1 jumper is missing or in wrong position. | Press on the integrated control push button until the unit turns on low speed (the LED will light AMBER). Using a multimeter, check the voltage on J9-4 and J9-3. Refer to Section 6 Wiring Diagram. The reading must be 120 VAC. The set the unit on high speed by pressing on the integrated control push button one more time (the LED will light GREEN). Using a multimeter, check the voltage on J9-4 and J9-2. The reading must be 120 VAC Check also between J4-2 and J4-1, the reading must be 120 VAC Refer to Section 6 Wiring Diagram. If all the readings correspond to the right voltage values, the circuit board is not defective. If one or both readings are different, change the circuit board.Using a multimeter, check for 120 VAC for the following speeds: High Speed between GREY and ORANGE wires; Low/Medium Speed: between GREY and RED/BLUE wires. Refer to Section 6 Wiring Diagram.Unplug the unit. Check for continuity between Pin 5 on the 6-pin connector (brown leads) and Pin 3 of the capacitor connector. Also check for continuity between Pin 4 on the 6-pin connector (brown leads) and Pin 1 of the capacitor connector. Refer to Section 6 Wiring Diagram.Open the door and ensure that the wire going to the motor is connected.Check J4 motor connection on circuit board.Door magnet switch is missing or not in its place (see item no. 11 on page 18).Ensure JU-1 jumper is set on “M” speed (refer to Section 6 Wiring Diagram). |
| 8. The defrost cycle does not work (the fresh air duct is frozen OR the fresh air distributed is very cold). | Ice deposits may be hindering the damper operation.The damper rod or the port damper itself may be broken.The damper actuator or circuit board may be defective. | Remove the ice.Inspect these parts and replace if necessary.See point 4. |
| 9. The integrated control push button does not work. | The 30-second boot sequence is not completed.The circuit board may be defective.The transformer may be defective. | See Section 4.1.1 Boot Sequence (page 13).Check voltage going to circuit board J8-1 and J8-2.Check for 24 VAC on J8-1 and J8-2. |
- READ AND SAVE THESE INSTRUCTIONS
- WARNING
- CAUTION
- ABOUT THESE UNITS
- LIMITATION
- TO REDUCE THE RISK OF FIRE, ELECTRIC SHOCK, OR INJURY TO PERSON(S) OBSERVE THE FOLLOWING:
- TABLE OF CONTENTS
- TECHNICAL DATA 4-5
- TYPICAL INSTALLATIONS 6
- INSTALLATION 7-13
- CONTROLS 13-15
- ELECTRIC CONNECTION TO THE FURNACE 15
- WIRING DIAGRAM....16
- BALANCING THE UNIT ....17
- SERVICE PARTS ......18
- TROUBLESHOOTING 19-20
- TECHNICAL DATA
- TECHNICAL DATA (CONT'D)
- DIMENSIONS
- FULLY DUCTED SYSTEM
- EXHAUST DUCTED SYSTEM (SOURCE POINT VENTILATION)
- SIMPLIFIED (VOLUME VENTILATION)
- INSTALLATION
- INSPECT THE CONTENT OF THE BOX
- LOCATING AND MOUNTING THE UNIT
- PLANNING OF THE DUCTWORK
- INSTALLATION (CONT'D)
- CALCULATING THE DUCT SIZE
- EXAMPLE OF CALCULATION
- EXAMPLE OF A DESIGN FOR A FULLY DUCTED SYSTEM FOR A UNIT HAVING A HIGH SPEED PERFORMANCE OF 222 CFM
- INSTALLING THE DUCTWORK AND THE REGISTERS
- FULLY DUCTED SYSTEM (AS ILLUSTRATED IN SECTION 2.1)
- STALE AIR EXHAUST DUCTWORK:
- FRESH AIR DISTRIBUTION DUCTWORK:
- EXHAUST DUCTED SYSTEM (AS ILLUSTRATED IN SECTION 2.2)
- METHOD 1: SUPPLY SIDE CONNECTION
- METHOD 2: RETURN SIDE CONNECTION
- STALE AIR INTAKE:
- FRESH AIR DISTRIBUTION:
- CONNECTING THE DUCTS TO THE UNIT
- INSULATED FLEXIBLE DUCTS
- INSTALLING THE EXTERIOR HOODS
- CONNECTING THE DRAIN
- HRV UNITS
- CONNECTING THE DRAIN (CONT'D)
- CONTROLS
- INTEGRATED CONTROL
- BOOT SEQUENCE
- SETTING EXTENDED DEFROST
- ELECTRICAL CONNECTION TO OPTIONAL WALL CONTROL
- ELECTRICAL CONNECTION TO
- CONTROLS (CONT'D)
- ELECTRIC CONNECTION TO THE FURNACE
- BALANCING THE UNIT
- WHAT YOU NEED TO BALANCE THE UNIT
- PRELIMINARY STAGE TO BALANCE THE UNIT
- BALANCING PROCEDURE
- SERVICE PARTS
- REPLACEMENT PARTS AND REPAIRS
- TROUBLESHOOTING
Brand : BROAN
Model : HRV190S
Category : Air Conditioning