
JQG9031 - Range hood Fotile - Free user manual and instructions
Find the device manual for free JQG9031 Fotile in PDF.


| Product Type | Wall-mounted Range Hood |
| Brand | Fotile |
| Model | JQG9031 |
| Width | 900 mm |
| Depth | 500 mm |
| Height | 600 mm |
| Net Weight | 25 kg |
| Power Supply | 220V-240V ~ 50Hz |
| Motor Power | 220 W |
| Max Airflow | 800 m³/h |
| Noise Level | 55 dB(A) (low speed), 65 dB(A) (high speed) |
| Control Type | Touchscreen |
| Number of Speeds | 3 |
| Lighting | LED strip, 2 x 1.5 W |
| Filter Type | Aluminum mesh, dishwasher safe |
| Extraction Modes | Ducted or recirculation (with carbon filter) |
| Installation | Professional installation recommended |
| Safety Features | Overheating protection, auto-off timer |
| Maintenance | Clean filters every month |
| Warranty | 2 years |
Frequently Asked Questions - JQG9031 Fotile
User questions about JQG9031 Fotile
0 question about this device. Answer the ones you know or ask your own.
Ask a new question about this device
Download the instructions for your Range hood in PDF format for free! Find your manual JQG9031 - Fotile and take your electronic device back in hand. On this page are published all the documents necessary for the use of your device. JQG9031 by Fotile.
USER MANUAL JQG9031 Fotile
Any needs, please contact FOTILE service center. Some pictures in this manual are sketch map, only for reference. If there are some discrepancies, please subject to real object.
HTTP://WWW.FOTILEGLOBAL.COM
Please read carefully about the user manual before using the product. And keep it well after reading, for future reference.
Dear User, thank you for purchasing the Fotile Range Hood. At Fotile, we manufacture exquisite appliances that are expertly crafted with the finest materials. Before using the Fotile Range Hood, please take some time to read through this Product Manual (manual). It will familiarize you with important safety, operation and maintenance instructions, as well as help maximize your culinary experience.
Before using the Fotile Range Hood, you must follow the instructions, as specified in this manual. Any damage resulting from the improper operation and/or maintenance of the appliance may result in the loss of warranty. The warranty will become invalid, and your warranty application, whether direct or indirect, will not be accepted by authorized service center of Fotile. If you require warranty or post-warranty after-sale service, please contact the local authorized service center of Fotile nearest you.
Your satisfaction with the Fotile brand is important to us. Our after-sales service centers provide assistance in resolving issues with Fotile appliances. Product model and serial number are required if you need services.
CONTENTS
Warning and Safety Instructions 1
Usage 4
Main Technical Specifications 4
Operation Instruction 5
Cleaning and Maintenance 7
Normal Malfunction and Trouble Shooting 8
Installation 9
Packing List 9
Installation Methods 10
Product Basic Conditions 11
Installation Suggestions 11
Installation Steps 14
Debugging 16
Component Name Diagram 16
Product features and specifications are subject to change, at any time, without notice and may be different from those in this material. Please visit our website at www.fotileglobal.com for the most up-to-date information.
Warning and Safety Instructions
CAUTION: Accessible parts may become hot when used with cooking appliances.
Special version:
Please properly use the appliance, strictly complying with the user manual. FOTILE company will not bear responsibility for properly loss and personal injury due to improper use.
Warning:
The appliance can be used by children aged from 8 years and above and persons with reduced physical sensory or mental capabilities or lack of experience and knowledge if they have been given supervision or instruction concerning use of the appliance in safe way and understand the hazards involved (only for EU market). Children shall not play with appliance.
Cleaning and user maintenance shall not be made by children without supervision.
This appliance is not intended for use by persons (including children) with reduced physical, sensory or mental capabilities, or lack of experience and knowledge, unless they have been given supervision or instruction concerning use of the appliance by a person responsible for their safety.

a. Pour out the gathering oil periodically; please wipe the range hood surface once after every using the range hood.
b. Please frequently clean the range hood surface and oil cup.
c. There is a fire risk if cleaning is not carried out in accordance with the instructions.
Strictly execute
 Group connection Group connection | The plug should be connected with reliable ground wire to ensure safety. The ground wire should not be connected with gas pipe, tap water pipe, lightening rod and telephone line. Bad ground connection may cause electric shock or other accidents. |
 | Because the installation procedure of the range hood is complex, and the weight is heavier, it should be installed by professional person according to the instructions. Failure to install the screws or fixing device in accordance with these instructions may result in electrical hazards. |
 | If the new range hood is damaged obviously before using, please don't install and contact FOTILE service center soon. |
 | Please comply with the safety guideline provided by the heating equipment manufacturer priorly and safety regulations published by the fire authority simultaneously. |
 | The wall should be strong enough to support the range hood. As for hollow wall or hollow plate, the thickness of its solid part should be no less than 30mm. As for concrete wall, the installation can be directly operated. The range hood should be firmly fixed on the wall. |
| When drilling on the roof or ceiling, please make sure not damage the electric wires and any other hidden devices. | |
| The range hood is for family use only, and don't use it in special environment (e.g. outdoor), and it also can't be used to exhaust dangerous or explosive substance or gas. Fotile assumes no responsibility if you use it in special environment. | |
| There shall be adequate ventilation of the room when the range hood is used at the same time as appliances burning gas or other fuels (not applicable to appliances that only discharge the air back into the room). | |
| When the cooking pots catch fire, turn off the range hood immediately (It will stimulate the fire if the range hood is working). Effective fire extinguishing measures must be taken at once, such as covering the open flame with metal cover, turning off the general gas valve and keeping flammable substance away from the open flame, etc. | |
| Make sure the exhausting pipe can reach outdoors to avoid the fire and keep the fresh air in the room. Please don't make the waste gas stay indoor, loft, garage, etc. (This is only for ducted range hood) | |
| The working temperature should not be more than 40°C. | |
| Please clean the range hood according to the user manual, otherwise, it may catch fire or cause other dangers. | |
| Please clean the oil cup timely to avoid overflowing when the oil reaches the very scale in the oil cup. Please don't use the waste oil. | |
| Before install, clean or repair the range hood, please make sure cut off the power to avoid the electric shock. And wear protective golves to avoid your hands being hurt by range hood metal panel. | |
| The plug shall be accessible after the appliance has been installed.Cut off the power if you are not going to use range hood for a long time. | |
| If the supply cord is damaged, it must be replaced by the manufacturer,its service agent or similarly persons in order to avoid a hazard. |
FOTILE
RANGE HOOD
  | If there is abnormality, please turn off the range hood and cut off the main power supply, contact FOTILE service center to repair it. It will easily cause dangers like electric shock, fire, if the range hood still working under abnormal conditions. |
 | Please don't let children use range hood by themselves and don't place it where infants can touch, otherwise, it will cause burning injury, electric shock or other accidents. |
  | Please keep the product plastic package away from the infants, to avoid suffocation, etc. Children should be supervised to ensure that they do not play with the appliance. |
Forbidden
 | Please clean the range hood according to the user manual, otherwise, it may catch fire or cause other dangers. |
| Don't transform, stretch, tie, ballast or extrude the power cord, or it may cause electric shock or fire. | |
 | Don't change the internal wiring by yourself, otherwise, it will cause possible abnormality and personal injury; and the improper repair leads to electric shock, fire or other dangers. |
 | The air must not be discharged into a flue that is used for exhausting fumes from appliances burning gas or other fuels. Regulations concerning on the discharge of air have to be fulfilled. |
 | It is strictly forbidden to let the stove working without pot otherwise it will damage the above range hood. |
 | Don't touch the bulb that is still working or finish working for a short while, to avoid scalding. |
 | Don't put your hands or other things into impeller when it is working to avoid hurting. |
  | All electrical parts including motor, switch and connections, etc. should be away from water. Don't rinse range hood directly with water. Don't use the range hood when it is wet to prevent electric shock. |
 | Never touch the power plug, power switch or other electric parts with wet hand, otherwise, it may cause electric shock. |

a. Services guaranteed under warranty must be performed by Fotile certified service provider or personnel. The warranty is not effective for products removed for repair without authorization.
b. Adhere to the voltage and frequency settings listed in this manual to avoid possible damages to the range hood.
c. When the range hood and appliances supplied with energy other than electricity are simultaneously in operation, the negative pressure in the room must not exceed 4 Pa (4 x 10 ^-5 bar) (only for GERMANY).
d. The glass used in FOTILE products is tempered glass, and the tempering mechanism of glass decides that there is extremely small probability for tempered glass self explosion. Once it happens self explosion not due to improper use, we promise to replace the tempered glass free.
Usage
Main Technical Specifications
Electrical parameter
| Model | Voltage/Frequency | Input Power | Motor Power | LED Light Power |
| JQG8031 | 220~240V/50Hz | 361W | 358W | 1.5W×2 |
Exhaust model (exhaust pipe)
| Model | JQG9031 | Product size | 900mm(L)×405mm(W)×435mm(H) | |
| Gear | Transient absorption | High speed | Low speed | |
| 220V/50Hz | Air flow(m3/h) | 1250 | 1020 | 640 |
| Noise(dB(A)) | 56 | 54 | 43 | |
| Max static pressure(Pa) | 450 | 420 | 340 | |
| 240V/50Hz | Air flow(m3/h) | 1340 | 1140 | 710 |
| Noise(dB(A)) | 58 | 55 | 46 | |
| Max static pressure(Pa) | 460 | 440 | 380 | |

a. The level of noise shown is sound pressure level noise, which corresponds to acoustic power level noise. Under the condition of 220V/50Hz: transient absorption gear 68dB(A), strong gear 66dB(A), weak gear 56dB(A). Under the condition of 240V/50Hz: transient absorption gear 70dB(A), strong gear 67dB(A), weak gear 58dB(A).
b. The air flow in the table are tested in accordance with IEC 61591-2010 standard. The noise in the table are tested in accordance with 60704-3-2006 standard.
Operation Instruction
■ Please move the smoke baffle mat before using.

■ Let's be familiar with the range hood control interface.
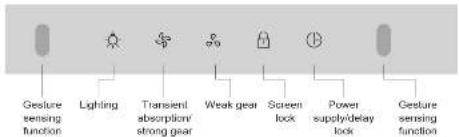
■ Function description

Wave your hand 📋 in front of the sensors at two sides, and then the smoke shield will be On automatically, the range hood will run at the strong gear, and the LED lamp will be On. Wave your hand 📋 again in front of the sensors at two sides, and then all the functions of the range hood will be Off, the smoke shield will be Off automatically, and the range hood will be in Off state. (In Off state, keep pressing ⚙ and ⚙ for 5 seconds to turn on/off gesture sensing function)

Touch Ⓐ, the Ⓐ indicator will be fully lit, the range hood will be in standby state, and other buttons can be used. (The machine will shut down automatically when there is no other button operation within 2 minutes) When the fan is in operating state, touch Ⓐ, the Ⓐ indicator will flash, and the range hood will be in delay state, and will shut down automatically 2 minutes later. Touch Ⓐ again to close all functions. The button light will be Off, the smoke shield will be Off automatically, and the range hood will be in Off state. (Delay state will be cancelled if other air volume buttons are touched during the delay shutdown)(Except the Lock Screen button, the other buttons only work when the Power button is On)

Touch g0 , the smoke shield will be On, the g0 indicator will be fully lit, and the range hood will run at the mild gear. Touch g0 again, the g0 indicator will be Off, and the fan will stop running.

Touch ✦ again, the smoke shield will be On, the ✦ indicator will flash, and the range hood will run at the transient absorption gear. Touch ✦ again, the ✦ indicator will be fully lit, and the range hood will run at strong gear. Touch ✦ the third time, the ✦ indicator will be Off, and the fan will stop running. (The machine will switch to strong gear automatically 3 minutes later if there is no operation within the 3 minutes after the first touch. The indicator keeps On during this period.)

Touch ⚙, the smoke shield will be On, the ⚙ indicator will be fully lit, and the LED lamp will be On. Touch ⚙ again, the ⚙ indicator will be Off, and the LED lamp will be Off.

Press ☑ for 1.5 seconds, and the ☑ will keep On. At this time, if you try to use other functions, ☑ will flash twice and buzz twice to prompt invalid operation. Press ☑ for 1.5 seconds again to cancel the screen lock. (The screen lock will be cancelled automatically after 1 hour)

Do not press buttons too heavily, prevent no-load running of hob, and avoid overflow of oil cup.
b. Do not dismantle the product when it is powered on or against the instructions. Do not dismantle or examine the product by non-professionals.
c. To keep air clear, it is recommended to turn on the range hood when braising or boiling.
d. Too much vapor may activate gesture sensing function. Please close the function when you don't need it.
Cleaning and Maintenance
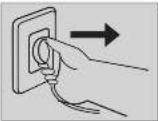 1. Cut off the power before cleaning 1. Cut off the power before cleaning | 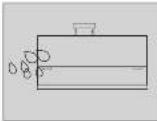 2. All electric parts including motor, switch,etc. should be away from water. 2. All electric parts including motor, switch,etc. should be away from water. | |
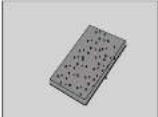 3. Please don't clean the surface with roughmaterial like steel wire ball, brush orcoarse cloth, etc. It will greatly scratch thesurface. 3. Please don't clean the surface with roughmaterial like steel wire ball, brush orcoarse cloth, etc. It will greatly scratch thesurface. |  4. Please don't clean with gasoline, acidicsubstance, benzene, solvent and otherchemical agents. If you need to clean,please use neutral cleanser, and wipe drythe appliance surface by soft cloth aftercleaning. 4. Please don't clean with gasoline, acidicsubstance, benzene, solvent and otherchemical agents. If you need to clean,please use neutral cleanser, and wipe drythe appliance surface by soft cloth aftercleaning. | |
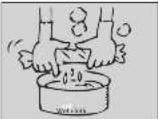 5. If the stainless steel panel is stained withsalty liquor, disinfectant, bleaching powderand other cleanser, please wipe it by wetcloth at once and dry it by dry cloth. 5. If the stainless steel panel is stained withsalty liquor, disinfectant, bleaching powderand other cleanser, please wipe it by wetcloth at once and dry it by dry cloth. |  6. Cleaning of oil cupa. Please prepare neutral detergent and a pieceof soft cloth (or a soft brush);b. Take out the oil cup. The dismantling steps areshown in the figure: Hold two sides of thebottom of the oil cup, and take it out horizontally.c. After cleaning, install the oil cup along reverseorder of the dismantling steps. 6. Cleaning of oil cupa. Please prepare neutral detergent and a pieceof soft cloth (or a soft brush);b. Take out the oil cup. The dismantling steps areshown in the figure: Hold two sides of thebottom of the oil cup, and take it out horizontally.c. After cleaning, install the oil cup along reverseorder of the dismantling steps. | |
 |  | 7. Cleaning of smoke shield and oil screena. Please prepare neutral detergent and a piece of soft cloth(or a soft brush).b. Touch the Power button, and then touch the Lightingbutton to open the smoke shield. Pull out the power plug.c. Press the round button on the left shaft on the side of therange hood d. Lift the smoke screen until a click is heard. Now, it islocked e. Clean the internal and external surfaces of the smokeshield, and scrub the external surface of the oil screen. |
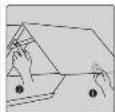

- Close
a. Hold the smoke shield first
b. Press the round button on the left spin axis at the side of the range hood. The machine will close slowly. The resetting is completed when you hear the sound of "black"

a. Please cut off the power first before cleaning and replacing components so as not to get an electric shock.
b. Please wipe surface of range hood (surface of net for filtering oil and back of smoke baffleshield) and close smoke baffle shield after using range hood every time. c. If the smoke screen cannot be closed due to incorrect operation, please turn on the cleaning mode again and then close it.
d. It is recommended to clean the oil screen every three months.
Normal Malfunction and Trouble Shooting
| Malfunctions | Possible reasons | How to check |
| Range hood can't work, light can't lighten | Haven't connected with power supply | Check whether the plug is well inserted or not |
| Check whether there is electricity or not in the plug | ||
| Motor can working, but light can't lighten | LED light is damaged | Replace LED light (done by professional people) |
| There is machinery shaking noise | Screw is loosed | check whether the surface screws are tightened or not |
| Suction power is weak | Too long distance between range hood and stove | Lower the range hood installation height (done by professional people) |
| Too much ventilation near the range hood leads to strong convection | Close some doors and windows | |
| Noisy | Exhaust pipe surface is distorted | Reinstall exhaust pipe (done by professional people) |

a. Change the LED light: please contact FOTILE after-sale service center.
b. If the range hood still can't work after getting nd of the above malfunctions, please contact FOTILE service center.
c. The ventilator shall be not allowed to be repaired by any party other than Fotile's appointed technicians. Otherwise it may cause serious consequences and exempt the product from warranty.
d. The following circumstances do not fall into the scope of free warranty, and a fee will be charged for repair.
- Damage resulting from improper handling, installation, use, maintenance and safekeeping conducted by customer.
- Failure and damage caused by using the product beyond the normal operating conditions (damage caused in the case that the voltage is higher than 264V or lower than 189V).
- The product installed, dismantled or repaired by customer or any party other than Fotile's appointed service staff or agency.
- Discrepancy between the information on the purchase voucher and the warranty card and the product.
- Product damage caused by force majeure (such as natural disaster and war, etc.).
- Product failure or damage arising from use not in conformity with the "instructions".
Installation
Packing List
| Packing List | |||||
| Complete Appliance | 1 | User Manual | 1 | ||
| Pothook | 1 | Warranty Card | 1 | ||
| Exhaust Cover | 1 | Aluminum Foil Tape | 1 | ||
| Upper Seal Mat | 1 | Exhaust Pipe | 1 | ||
| Oil Cup | 1 | Cross Head Self- tapping Screw M4x18 | 8 | ||
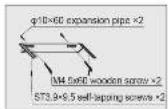
| Expansion Pipe 10X60 | 5 | Cross Recess Head Self-tapping Screw ST3.9x9.5 | 2 | ||
| Wood Screw 4.5X60 | 5 | Flat Gasket M5 | 4 | ||
| Safe Block | 1 | ||||
The following accessories should be purchased separately (please contact FOTILE authorized outlets)
| Part List of Outer Mover | |||||
| Blower Outer Cover | 1 | Decorative Cover | 1 | ||
| Decorative Cover Pothook | 1 | Cross Head Self- tapping Screw ST2.9x19 | 2 | ||
| Wood Screw 4.5X60 | 2 | Stepped Screw M4x8 | 4 | ||
| Expansion Pipe10X60 | 2 | ||||
Installation Methods
| Suggest install the range hood after finish the kitchen decoration. | If it is necessary to move the gas stove before installing the range hood, please close general gas valve before moving the gas stove. |
| Make sure the installation wall of the range hood is smooth and keep the appliance horizontal. | After finishing installation and make sure the range hood can work normally, please read carefully and keep the user manual well. |
| Package of new range hood: to keep a well environment, please deal with the plastic package by environmental way.Packing material is not toy, so please keep the plastic bags and box away from the infant to prevent such dangers as suffocation, etc. | Make sure the exhausting pipe can reach outdoors to avoid the fire and keep the fresh air in the room. Please don't make the waste gas stay indoor, loft, garage, etc. (This is only for ducted range hood) The waste air from the range hood couldn't share the same flue with other infiamble gas. |
| The range hood is heavy and the installation is complex, so the installation should be done by professional people according to the user manual. | Please wear protective golves to avoid your hands being hurt by rang hood sharp edge. |
| Please do not damage the electric wire and other hidden equipment when drilling on wall. P over off the range hood when installation | Please use specialized power socket and it should be connected with reliable ground wire to ensure safety. |
| The wall should be strong enough to support the range hood, otherwise the range hood may drop down and result in damage. | Please abandon and recycle the old range hood which can't work any more, to protect the environment. |

Wall Preparation
The wall should be strong enough to support the range hood. As for hollow wall or hollow plate, the minimum thickness of the lumber should be 30mm. As for concrete wall, the installation can be directly operated. The range hood should be firmly fixed on the wall.
Product Basic Conditions

Product Basic Conditions (The dotted line means cleaning mode status)
Installation Suggestions
■ Installation Position
The range hood is only for family use only; Please do not use the range hood under other conditions.
The range hood should be installed above the stove. Keep parallel between the blower outer cover bottom end and cabinet bottom end.
The temperature of the range hood should not be more than 40°C.
The wall should be none-flammable. Never install the range hood on the flammable wooden wall.
The electrical outlet must be installed within a proper range to ensure the installation of decorative cover.
■ Installation Diagram of Hoods and Cabinets (Unit: mm)
Hole size of ceiling or cabinet

Exhaust pipe through ceiling

Exhaust pipe through cabinet

Product installation and cabinet collocation figure diagram
( ★ is the distance from the wall)
FOTILE
RANGE HOOD

a. This installation height is only applicable to electric ranges. If the range hood is installed above a gas range, the minimum distance between the supporting surface of the cooking appliance on the range and the lowest part of the range hood should be at least 650 mm. If the installation instructions for the gas range specify a larger installation distance, this should be considered.
When the installation height of this product (i.e. the distance between the supporting surface of the cooking appliance on the range and the lowest part of the range hood) is lower than 650mm, all parts below 650mm are nonflammable parts of the range hood or parts working under safe and ultra-low voltage, and the deformation of these parts will not affect the protection against the touch of live parts. (If relevant laws in the region stipulate the installation height of range hood, it is recommended to abide by relevant laws, but the oil smoke suction effect of the product may be affected to some extent.)
b. When installing the range hood into a cupboard, the depth of the cupboard should be between 260mm and 380mm.
c. The installation height of the range hood is a recommended value. The matching of the cupboard and the range hood in the figure is only for reference.
d. Please note: clearance may be needed between the top of the range hood and the bottom of a cupboard for installation and dismantling.
e. The installation height can be adjusted according to users' height. The height shall be raised when a user is tall, and vice versa. However, the installation height should not exceed the recommended height range. It may influence the line of sight during cooking if too low, or it may affect the effect of the range hood if too high.
f. The electrical outlet should be reliably grounded.
■ Preparation before installation
- Warning, Please don't make sundries into exhaust pipe to avoid damaging the range hood. Estimate the exhaust pipe position. A straight and short exhaust pipe makes smoke extraction more smooth, please refer to installation diagram.
The joint between exhaust pipe and wall hole should be sealed with tape, and ensure firm connection between exhaust pipe and exhaust cover.
Too small wall hole will affect smoke extraction, therefore, please broaden the wall hole to fit exhaust pipe size under safety condition.
- Tool preparation
Please prepare the following tools before range hood installation (include but not limited to the following tools).

Impact electric drill with drillbit of φ10mm

Cross crewdriver

Sharp-nose
pilers

Hammer

Measuring tape

Level ruler
Installation Steps
Steps for installation with cover (optional)
- Open diameters of 180mm pore in a proper place in wall (for exhaust pipe).
- Refer to Fig 1, set the right position on the wall to drill and then firmly imbed the expansion pipe. Insert wooden screws to tighten the fixed pothook and decorative cover pothook; then use two ST3.9×9.5 self-tapping screws to fix the decorative cover on the suspended ceiling (see Fig 2 and Fig 3).
- Place the upper seal mat (notch downward) at the air outlet of the machine and fix the exhaust cover with eight M4×18 screws. Then fix four M4x8 stepped screws at the corresponding positions (see Fig 4 and Fig 5).
- Fixed the complete appliance firm on the pothook, no shaking, and no shifting
- Please insert the exhaust pipe into exhaust cover, and fix it with two ST3.9×9.5 selftapping screws (see Fig 6) and seal with aluminum foil tape. The other end of exhaust pipe extends to outdoor or public smoke passageway. Seal interface of exhaust pipe and wall hole with aluminum foil tape. Check the pipe shell is not bulging and not shriveled, curve freely. The exhaust pipe and wall should be tightly connected to prevent smoke back, the backflow barrier blade should be up and down smoothly.
- Make sure the location (see Fig 7) to drill, buried the expansion pipe, fixed the safety block on wall by using wood screws.
- Insert the host power plug into the power outlet.
- Installation of fan cover and decorative cover:
As shown in Figure 8, put the decorative cover into the fan cover, uplift the fan cover and the decorative cover together, clip the decorative cover into the cover hooks first, slide down the fan cover slowly, clip the fan cover into the stage screws, and push it to the bottom.
- Install the oil cup and net for filtering oil.
Steps for installation without cover
- Open diameters of 180mm pore in a proper place in wall (for exhaust pipe).
- Refer to Fig 1, set the right position on the wall to drill and then firmly imbed the expansion pipe. Insert wooden screws to tighten the fixed pothook (see Fig 2).
- Place the upper seal mat (notch downward) at the air outlet of the machine and fix the exhaust cover with eight M4×18 screws (see Fig 4).
- Fixed the complete appliance firm on the pothook, no shaking, and no shifting.
- Please insert the exhaust pipe into exhaust cover, and fix it with two ST3.9×9.5 self-tapping screws (see Fig 6) and seal with aluminum foil tape. The other end of exhaust pipe extends to outdoor or public smoke passageway. Seal interface of exhaust pipe and wall hole with aluminum foil tape. Check the pipe shell is not bulging and not shriveled, curve freely. The exhaust pipe and wall should be tightly connected to prevent smoke back, the backflow barrier blade should be up and down smoothly.
- Make sure the location (see Fig 7) to drill, buried the expansion pipe, fixed the safety block on wall by using wood screws.
- Insert the host power plug into the power outlet.
- Install the oil cup and net for filtering oil.
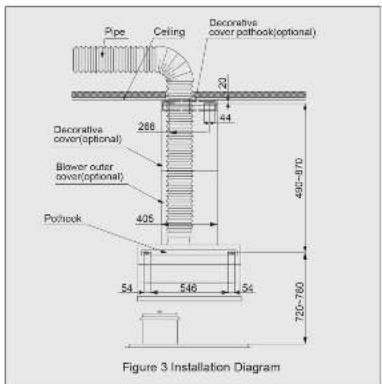

(Fg.2)
(Fig.3)

(Fig 4)

(Fig.5)

(Fig.6)

(Fig.7)

natural_image
Two mechanical diagrams showing a piston-cranked joint under compression, with arrows indicating force direction (no text or symbols)(Fig.8)
Debugging
- Put on oil cup.
- Plug the power cable into socket
- Press power key, check whether smoke baffle turns up. Press light key, check whether light works normally.
- Press buttons of weak gear or transient absorption/strong gear to check the running of motor. In the following cases, cut off power, stop turning and check whether it is reason of installation (if range hood breaks down, please contact our service center).
(1) Machine shakes violently
(2) Expansion pipe looses
(3) Impeller doesn't turn
(4) Impeller with obvious grating when turning
(5) Motor with abnormal noise
- Press power key, motor stops turning, smoke baffle closes.
(1) If the power supply wire is damaged, in consideration of the safety, must have the manufacturer, the repair department or similarly qualified personnel to replace.
(2) When the range hood, gas stove or other fuel stove used at the same time, the room must be well ventilated.
Correct Disposal of this product

This marking indicates that this product should not be disposed with other household wastes throughout the EU. To prevent possible harm to the environment or human health from uncontrolled waste disposal, recycle it responsibly to promote the sustainable reuse of material resources. To return your used device, please use the return and collection systems or contact the retailer where the product was purchased. They can take this product for environmental safe recycling.
Component Name Diagram

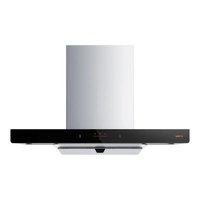


Brand : Fotile
Model : JQG9031
Category : Range hood