
VR1 - Rowing Machine PURE - Free user manual and instructions
Find the device manual for free VR1 PURE in PDF.


| Product Type | Rowing Machine |
| Brand | Pure |
| Model | VR1 |
| Resistance Type | Magnetic |
| Display | LCD with time, distance, calories, strokes, pulse |
| Power Source | 2x AAA batteries (not included) |
| Dimensions (Assembled) | 200 x 50 x 80 cm (78.7 x 19.7 x 31.5 in) |
| Folded Dimensions | 100 x 50 x 140 cm (39.4 x 19.7 x 55.1 in) |
| Weight | 35 kg (77.2 lbs) |
| Max User Weight | 120 kg (264.6 lbs) |
| Frame Material | Steel with powder coating |
| Seat | Ergonomic sliding seat with ball bearings |
| Foot Pedals | Adjustable with straps |
| Resistance Levels | 8 levels |
| Pulse Sensor | Yes, grip pulse on handle |
| Transport Wheels | Yes, front wheels for easy moving |
| Maintenance | Periodic lubrication of slide rail and tension check |
| Safety Features | Non-slip pedals, stable base, emergency stop on display |
| Spare Parts Available | Seat, handle, pedal straps, monitor (contact support) |
| Warranty | 2 years for frame, 1 year for parts |
Frequently Asked Questions - VR1 PURE
User questions about VR1 PURE
0 question about this device. Answer the ones you know or ask your own.
Ask a new question about this device
Download the instructions for your Rowing Machine in PDF format for free! Find your manual VR1 - PURE and take your electronic device back in hand. On this page are published all the documents necessary for the use of your device. VR1 by PURE.
USER MANUAL VR1 PURE
natural_image
Exterior view of a Pure Design rowing machine with a flat support and wheels (no text or symbols visible on the device itself)ASSEMBLY
Congratulations on purchasing the Pure Design Fitness VR1! Please see the following pages for instructions on assembling your VR1.
BITS BAG CONTENTS:
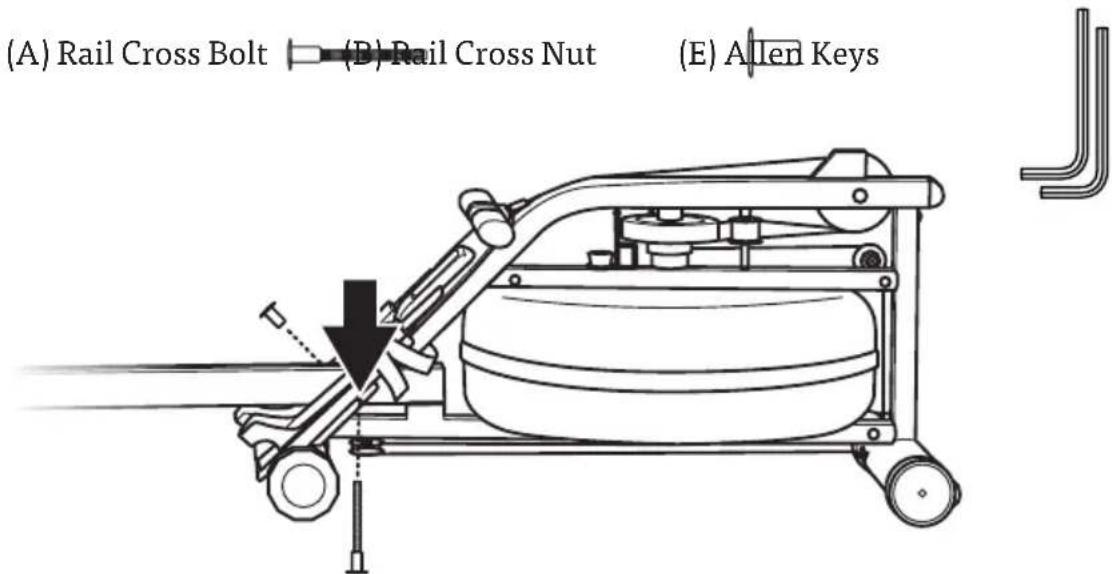
A. Rail Cross Bolt
B. Rail Cross Nut
C. Rail Bolt (x2)
D. Rear Leg Bolt (x2)
E. 5mm Allen Key (x2)
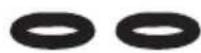
F. Black Washer (x2)
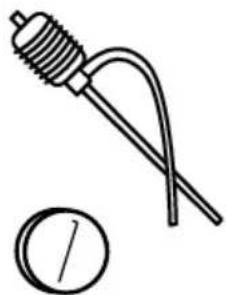
G. Syphon Pump
H. Purification Tablets
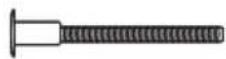

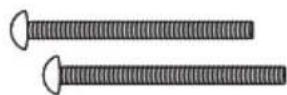
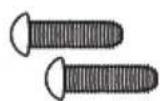
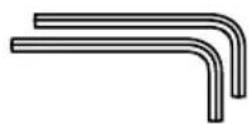
natural_image
Simple line drawing of a thermometer with a coiled tube and a circular symbol below (no text or labels)-
Open box, remove the bits bag, seat, and rear leg from the cardboard insert. Remove the cardboard insert.
-
Carefully pull the tank out of box.
-
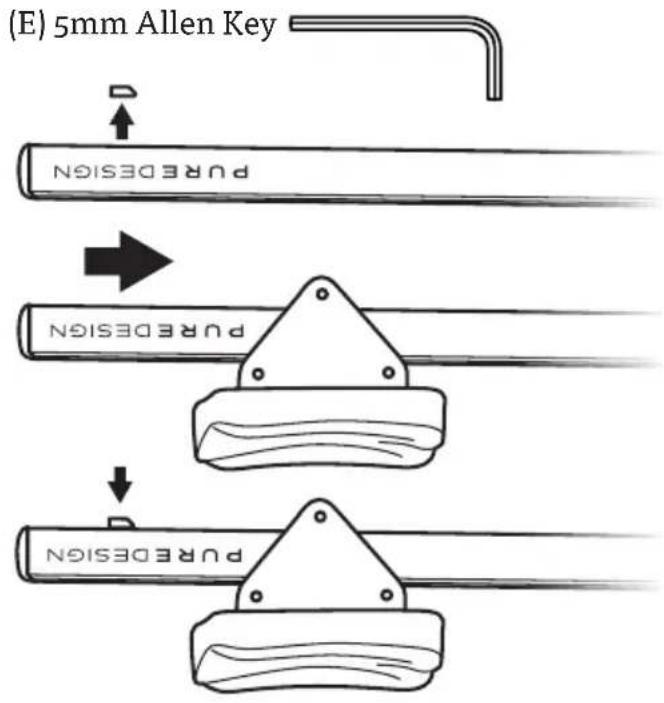
Using the Allen key, remove the stops from each side of the rail and slide the seat onto the rail (front/wider end) first. With the Allen key, replace the stops back onto each side of the rail.
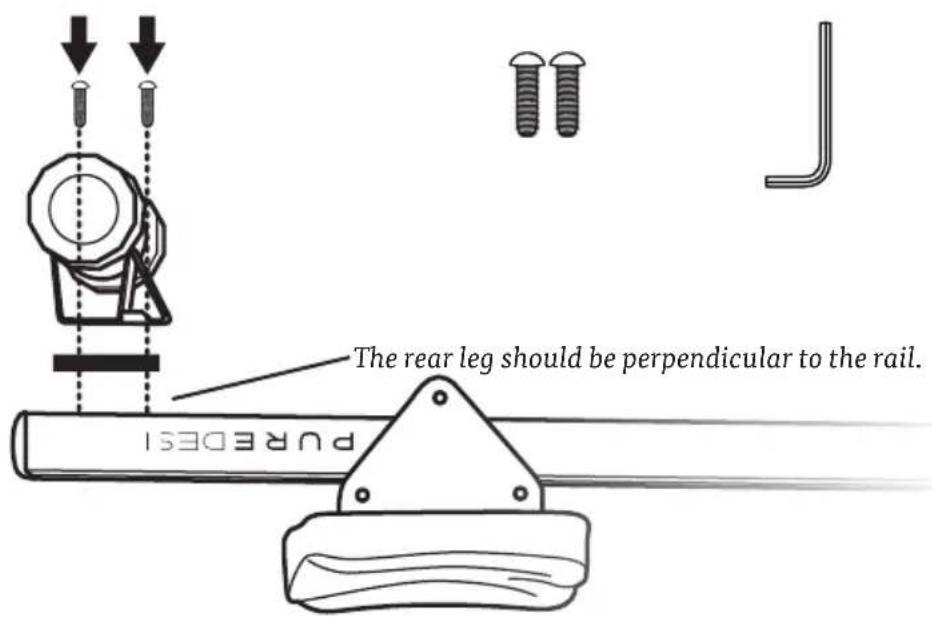
- Attach the rear leg to the underside of the rail using the Rear Leg Bolts (D). Firmly tighten the bolts with the 5mm Allen key.
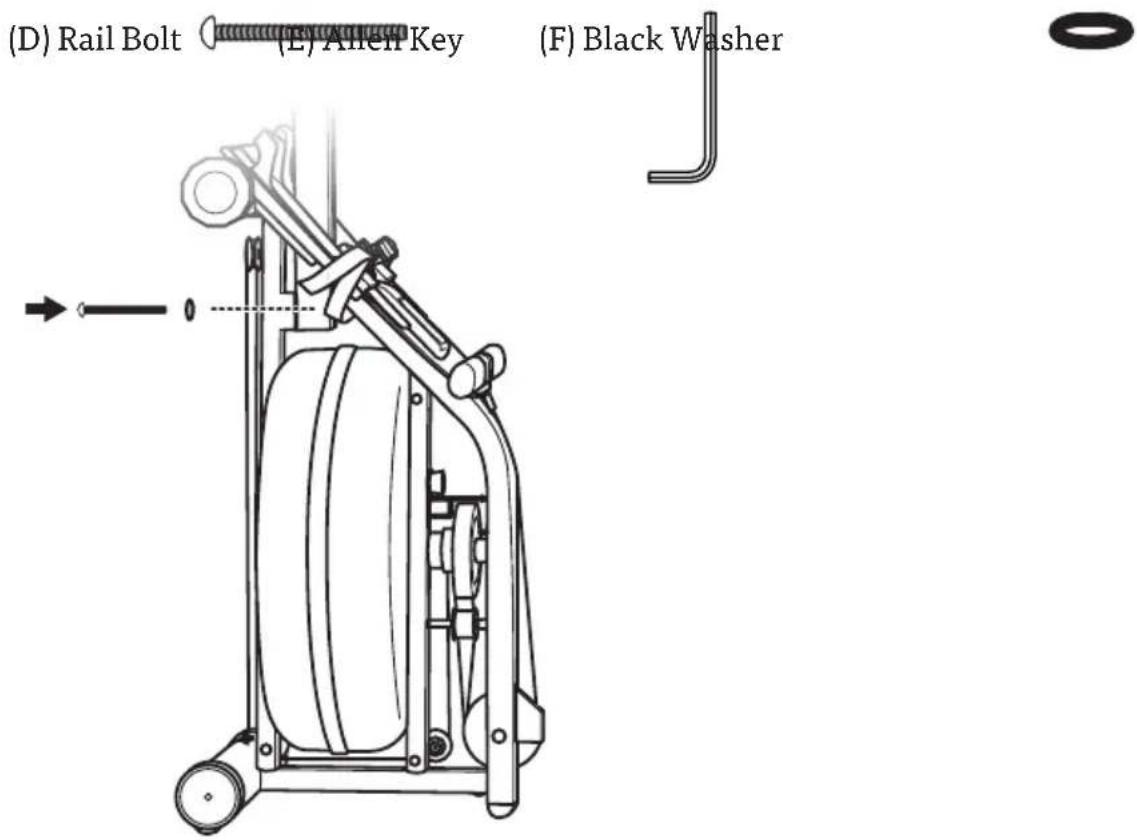
(D) Rear Leg Bolt (x2)
(E) Allen Key
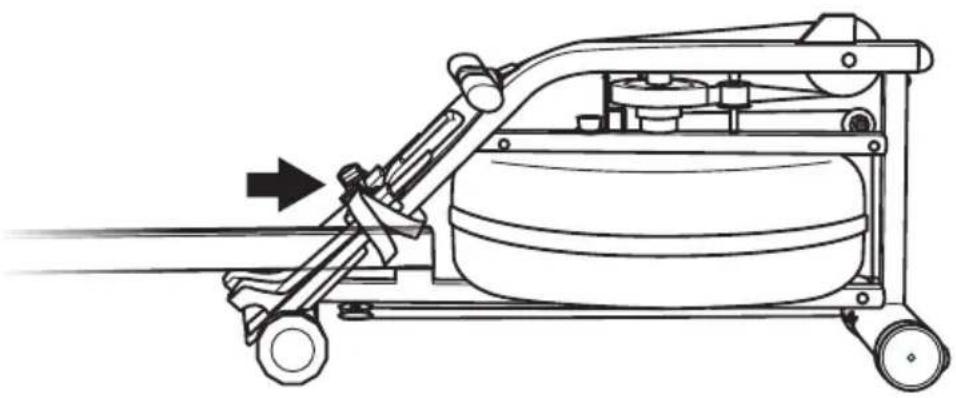
- Slide the rail into the gap in the footboard between the heel rests. The seat should be upwards. The rail end should slide in until the holes on the side of the rail line up with the holes behind the footboard. (You may need to lift tank to slide rail through.)
natural_image
Technical line drawing of a mechanical device with motion arrows indicating flow or movement (no text or symbols)- Install the rail cross bolt (A) through the back of the footboard and rail and into the rail cross nut (B) (inserted into the opposite side). Do not tighten all the way.
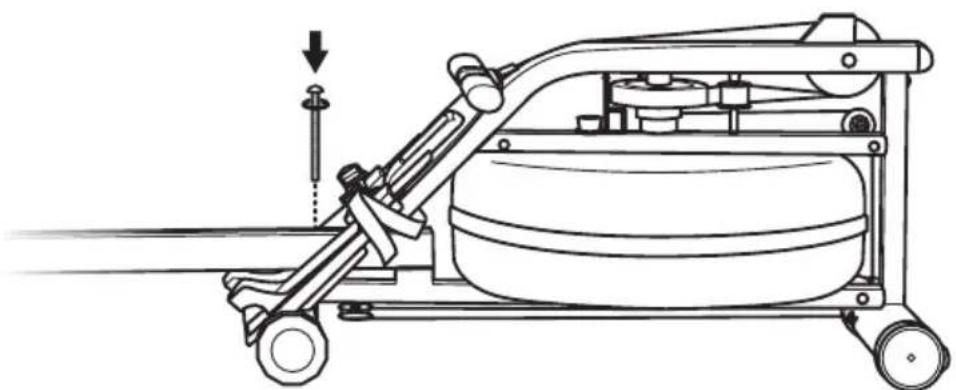
- Install the rail bolt (C) and black washer (F) through the top surface of the rail and into the footboard. Do not tighten all the way.
(C) Rail Bolt (E) Black Washer (E) Allen Key
natural_image
Technical line drawing of a mechanical device with wheels and a cylindrical component, showing motion direction (no text or symbols)- Stand the unit up. Use the Allen key (E) to install the rail bolt and washer through the hole in the bottom of the tank sub frame, and into the rail underside. Use the Allen key (E) to firmly tighten the bolt.
-
Using the Allen key (E), tighten the bolts from steps 6 and 7.
-
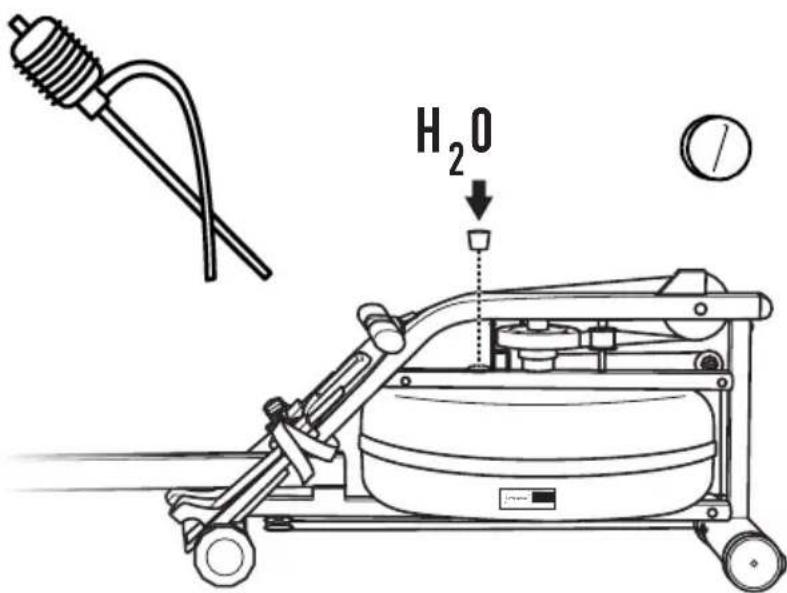
Remove the tank stopper. Using the siphon pump (G), fill the tank with municipal tap or distilled water to the appropriate level indicated on the gauge sticker on the side of the tank. Add 1 purification tablet (H) to the tank. Be sure not to overfill the tank. Add a new purification tablet approximately every 6 months. Purification tablets are available for order on puredesignfitness.com. Refer to Maintenance - Water and Tank section for direction on frequency of adding purification tablets.
SAFETY
We recommend consulting a physician before starting out with an exercise program.
Please read all instructions before using the VR1.
WARNING:
⚠️ Please keep hands away from moving parts when rowing machine is in use.
Keep all observers, especially children and pets, away from moving seat wheels, straps and pulleys.
⚠️ Place the handle back into the handle rest after use. Do not let go of the handle while rowing.
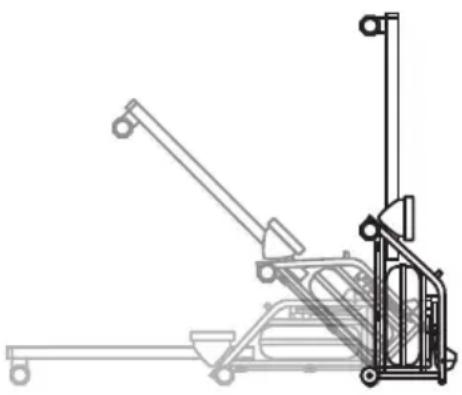
When the VR1 is in its upright storage position, take care it is not bumped as this may cause it to fall over. Take extra caution with children.
Do not pull on the handle when the VR1 is upright. This can cause the VR1 to fall over.
BASIC MAINTENANCE
-
Periodically ensure all bolts are tight.
-
Add 1 purification tablet every 6 months. To request extra purification tablets, visit www.puredesignfitness.com.
-
Keep rail and seat wheels clean by using a damp cloth. Avoid using any chemicals.
-
If, during the recoil phase, the handle does not return towards the front of the machine smoothly, you can add more tension tying an additional knot further up on the recoil rope (the thinner of the two cords along the bottom of the VR1). To do this: stand the rower up, disconnect the cords, tie the knot on the recoil rope (closest to the side that attaches to the pulley), and reattach the cords.
-
The monitor runs on two AA batteries. To replace monitor batteries, remove monitor face by unscrewing the two screws on the top and bottom of the computer.
-
Do not let go of handle while rowing as it could damage monitor screen.
For more information or to contact us, please visit:
www.puredesignfitness.com
OWNER'S MANUAL
Congratulations on purchasing a Pure Design VR1 indoor rowing machine!
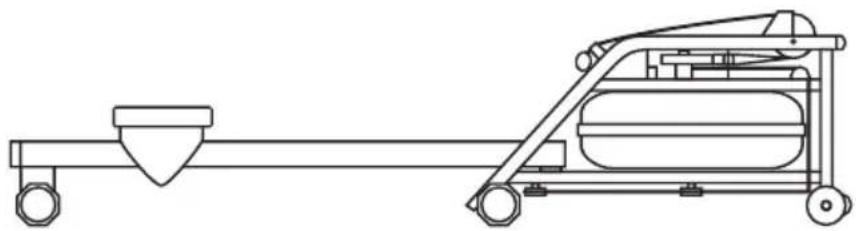
This guide has been designed to provide you information on the operation and maintenance of your VR1, as well as to assist you with proper rowing technique.
natural_image
Technical line drawing of a mechanical device with a handle and wheels, no text or symbols presentOPERATION
The VR1 uses the effect of drag to provide an exercise which is entirely self paced. Because drag is linked to speed, a crew rowing down a river chooses its intensity of exercise simply by altering the pace at which they row. The faster the boat travels, the greater the drag and the harder the crew works.
By replicating these dynamics, the VR1 does not require adjustment to increase resistance. If a more intense workout is wanted, simply row faster and harder and the VR1 will respond.
WATER LEVEL
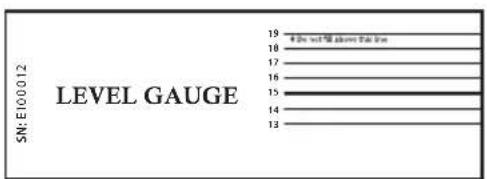
Use the level gauge located on the side of the tank to determine the amount of water to put in the tank.
Recommended Water Level Marks: Standard Water Level - between the "16" and "18" level mark.
Do not fill the tank past the “19” level mark as this will cause leakage and damage to components. Overfilling of tank will result in void of product warranty.
HEEL REST POSITION
The heel rest has been designed to be adjusted for maximum comfort. The foot strap crosses at the ball of your the foot and allows the heels to be raised off the footboard as you come forward with each stroke.
MAINTENANCE - CLEANING
The VR1 does not require heavy maintenance. We suggest you take care of it as you would with any other piece of furniture in your home. Regularly clean the VR1 with a soft cloth dampened with water or eco-friendly cleaner.
MAINTENANCE - WATER AND TANK
We advise using municipal tap water to fill the tank, as it contains additives that keep it free of bacteria and algae.
If you have well water or mineral rich water, we suggest using distilled water and putting in one purification tablet every 3 to 6 months. If the tank is in direct sunlight, then add one tablet every 3 months.
If the water in the tank discolors, add one purification tablet. If the water does not clear, we recommend emptying the tank, flushing it out with clean water, refilling, and adding in the tablet.
- Never use other types of chlorine or bleach in the tank as it can damage the polycarbonate beyond repair and may cause rusting.
- Replacement tablets are available through www.puredesignfitness.com.
STORAGE
The VR1 has been designed for compact storage when not in use. To stand the VR1 up, slide the seat towards the footboard, lift the rear leg and roll the machine towards you, using the momentum to stand it upright. When stored, the VR1 is stable and only takes up the space of a chair.
natural_image
Technical line drawing of a mechanical lifting device (no text or symbols)Dimensions:
22.25"/75cm wide, 82.5"/210cm long, 18.625"/47cm tall.
MONITOR GUIDE
INTRODUCTION
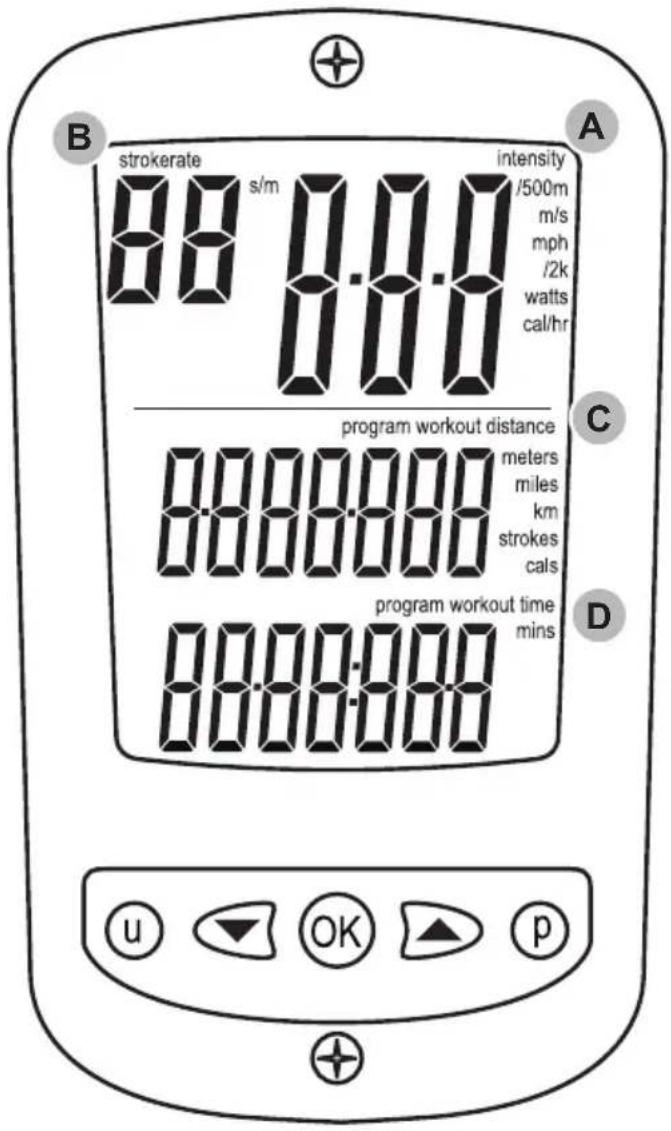
The VR1 Monitor has been designed to balance function with user friendliness. The VR1 Monitor Display consists of 4 information windows, 2 select buttons and 3 navigation buttons.
Display Windows Include:
INTENSITY - Shows the intensity of exercise in various units STROKERATE - Shows the number of strokes per minute DISTANCE - Shows the distance covered in various units TIME - Shows the duration of exercise in time
STARTING INFORMATION
Please press the OK button to turn on the monitor. The four information windows will read zeros and be in Ready Mode. The monitor will commence monitoring as soon as you begin rowing.
Note: the monitor will turn off automatically after about 2 minutes of no use.
INFORMATION WINDOWS
A) INTENSITY WINDOW
The Intensity Window of the VR2 Monitor displays speed in units of time/500m (minutes per 500 meters), m/s (meters per second), mph (miles per hour), and /2km (minutes per 2 kilometers). It also displays power in watts, and energy consumption in cal/hr (calories burnt per hour). See “Setting Units” later in this manual to select desired units
B) STROKERATE WINDOW
The Strokerate Window of the VR2 Monitor displays strokerate (number of strokes rowed per minute) in units of strokes/min (strokes per minute).
C) DISTANCE WINDOW
The Distance Window displays the distance covered in units of meters, miles, km (kilometers), strokes or cals (calories burnt). See “Setting Units” later in this manual to select desired units. The Distance Window will also display the distance remaining when doing a distance workout. See Setting Workouts-Distance Workouts later in this manual to set a distance workout
D) TIME WINDOW
The Time Window displays the time covered in units of hours, minutes, and seconds. The Time Window may also be programmed to display time remaining. See Setting Workouts -Time Workouts later in this manual to set a time workout.
natural_image
Line drawing of hands holding a smartphone and a remote control device (no text or symbols)CHANGING THE BATTERIES
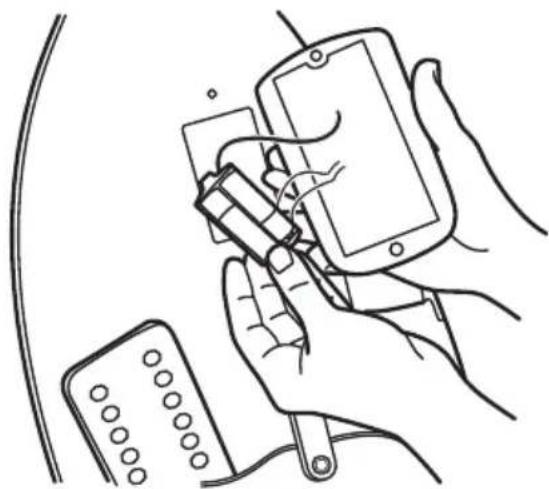
• Using a Phillips screwdriver, remove the screws at the top and bottom of the monitor.
• Gently lift away the monitor from the footboard.
- Remove the battery pack that is sitting inside a recess in the footboard.
- Remove the 2 AA batteries and replace with 2 new ones.
- Set the monitor back on the footboard, being careful not to pinch any of the wires under the edges of the monitor.
- Replace and tighten the two screws with the Phillips headed screwdriver.
SETTING UNITS
Display units may be changed by pressing the U button.
Press the U button once to change intensity units / twice to change distance units.
Intensity Units
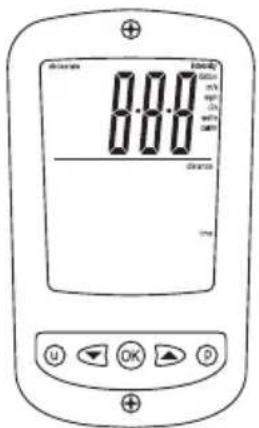
- Press the U button until only the intensity digits appear along with the list of intensity units (see image below).
- Using the ARROW buttons, scroll to the desired intensity unit: /500m, m/s, mph, /2km, watts or cal/hr
- Once the desired unit is flashing, press OK. The monitor will return to Ready Mode.
Distance Units
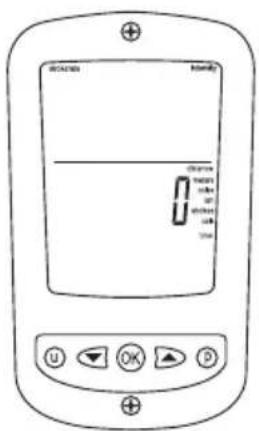
- Press the U button until only the distance digits appear along with the list of distance units (see image below).
- Using the ARROW Buttons, scroll to the desired distance unit: meters, miles, km, strokes, or cals
- Once the desired unit is flashing, press OK. The monitor will return to Ready Mode.
Workouts may be set by pressing the P button.
Press the P button once to set distance workouts / twice to set time workouts.
Distance Workouts
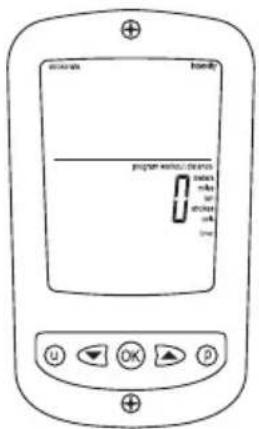
- Press the P button until only distance digits appear along with Program Workout Distance flag (see image below) with the distance units flashing.
• Using the ARROW buttons, scroll to the desired workout distance.
- The UP ARROW button increases the distance by 50 meters.
- The DOWN ARROW button decreases the distance by 10 meters.
Holding either button accelerates scrolling.
- Once the desired workout distance is reached, press OK and the monitor will return to Ready Mode with the set distance in the Distance Window.
- When rowing starts, distance will count down.
Time Workouts
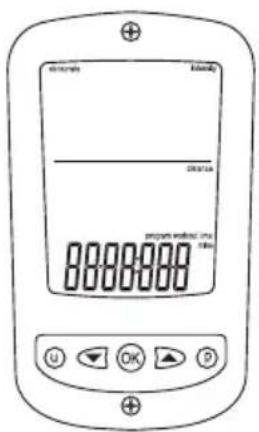
- Press the P button until only the time digits appear along with Program Workout Time (see image below) with the time units flashing.
• Using the ARROW buttons, scroll to the desired workout duration.
- The UP ARROW button increases the time by 1 minute.
- The DOWN ARROW button decreases the time by 10 seconds.
Holding either button accelerates scrolling.
- Once the desired workout duration is reached, press OK and the monitor will return to Ready Mode with the set time in the Time Window.
- When rowing starts, time will count down.
ROWING TECHNIQUE
Following proper rowing technique will allow you to get the best of your VR1.
The rowing action has been broken down into 3 phases and 3 positions to make it easier for you to learn the technique and we hope it will soon become second nature.
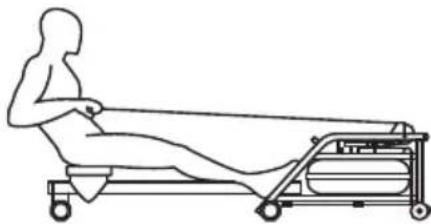
Position 1: The Release Position
The Release Position is at the end of the Drive Phase. Your legs are straight, the handle is drawn into your chest, the upper back is leaning back just passed being vertical, shoulders are relaxed and your eyes are looking forward.
natural_image
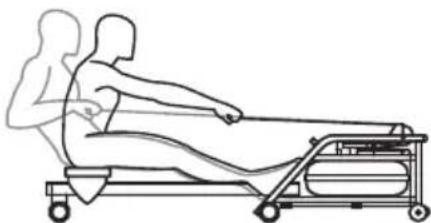
Line drawing of a person using a rowing machine (no text or symbols)Phase 1: The Rock Over Phase
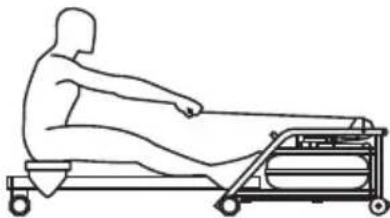
The Rock Over Phase begins at the Release Position and ends at the Rocked Over Position. Your arms extend and your torso rocks over on the seat at the hips, not the lower back. Your legs remain straight.
natural_image
Line drawing of a person using a rowing machine (no text or symbols)Position 2: The Rocked Over Position
In the Rocked Over Position, your arms are straight, posture is tall and strong. Your legs remain straight.
natural_image
Line drawing of a person using a rowing machine (no text or symbols)Phase 2: The Recovery Phase
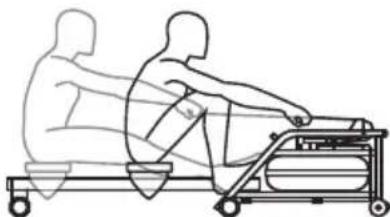
The Recovery phase begins at the Rocked Over Position and ends at the Catch Position. As the name suggests, it is the recovery part of the rowing stroke. There is no active propulsion. The legs bend and slide the body forwards to the Catch Position. The arms remain stretched out straight in front.
natural_image
Line drawing of two people using a rowing machine (no text or symbols)Position 3: The Catch Position
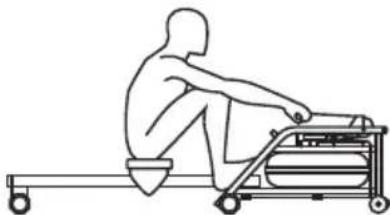
The Catch Position is when your body is coiled like a spring and ready to release. Your legs are bent with the seat as close to your heels as comfortable for you. Your arms and upper body are reaching forward and eyes are looking straight ahead.
natural_image
Line drawing of a person sitting on a wheeled cart with a ramp (no text or symbols)Phase 3: The Drive Phase
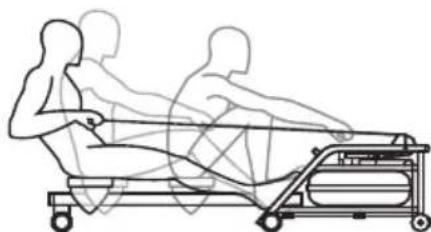
The Drive Phase is the work phase of the rowing action beginning at the Catch Position and ending at the Release Position. You first push with the legs, hold your posture strong and complete the Drive Phase by pulling the handle into your body. End at the Release Position.
natural_image
Line drawing of a person pushing a cart with motion lines indicating movement (no text or symbols)WARRANTY (COVERS PRIVATE AND NON-COMMERCIAL USE)
The VR1 was designed to be a home use machine, and is not a commercially rated machine, therefore should only be used in a home setting.
Pure Design Fitness will replace or repair at its factory or nominated service center any component found to be defective in material or workmanship for a period of ONE year from the date of initial shipment or retail purchase. The original purchase receipt must be retained in order to provide proof and date of purchase. No warranty request will be fulfilled without proof and date of purchase.
This warranty will be invalid if, in the opinion of Pure Design Fitness, the claim has been caused by: (a) accident, abuse, misuse, misapplication or as a result of any modification other than by Pure Design Fitness or (b) deterioration due to normal wear and tear.
Return of the machine or parts to the Pure Design Fitness factory or nominated service center will be the responsibility of the claimant.
The machine or parts should be packed to protect it from damage; Pure Design Fitness will not be responsible for any damage which may occur during shipment. Postage should be prepaid and the package should contain the claimant's name, address and telephone number, a description of the problem and proof of purchase.
Pure Design Fitness will return the machine or parts to the claimant at its (Pure Design Fitness') expense, except in the case where the warranty has been deemed invalid. In the event that the warranty is found to have been invalidated, the costs of such investigations, repair and any associated shipping costs shall be borne by the claimant.
The Pure Design Fitness warranty is non-transferable. Should the ownership of the machine be transferred, the warranty may also be transferred at an additional cost. Pure Design Fitness warranties against any defective spare part received from Pure Design Fitness or an authorized dealer for a period of THIRTY (30) DAYS after the date of shipment.
Pure Design Fitness shall not be liable for any direct, consequential, incidental, indirect or special damages under this warranty, or any implied warranty.
The warranty described shall be in lieu of any other warranty, express or implied, including but not limited to, any implied warranty of merchantability or fitness for a particular purpose.
Some Regions do not allow limitations of incidental or consequential damages, therefore the above limitations or exclusions may not apply to you. This warranty gives you specific legal rights, and you may have other rights that vary from Region to Region.
For further information, frequently asked questions, troubleshooting and service inquiries, visit www.puredesignfitness.com or email us at info@puredesignfitness.com
Please make note of your serial number which is located on the level gauge. You will need to reference this for any service or support you may need with your VR1.
SN:
Store this pamphlet in a safe place for easy reference.
- ASSEMBLY
- BITS BAG CONTENTS:
- SAFETY
- WARNING:
- BASIC MAINTENANCE
- OWNER'S MANUAL
- OPERATION
- WATER LEVEL
- HEEL REST POSITION
- MAINTENANCE - CLEANING
- MAINTENANCE - WATER AND TANK
- STORAGE
- Dimensions:
- MONITOR GUIDE
- INTRODUCTION
- STARTING INFORMATION
- INFORMATION WINDOWS
- A) INTENSITY WINDOW
- B) STROKERATE WINDOW
- C) DISTANCE WINDOW
- D) TIME WINDOW
- CHANGING THE BATTERIES
- SETTING UNITS
- Intensity Units
- Distance Units
- Distance Workouts
- Time Workouts
- ROWING TECHNIQUE
- Position 1: The Release Position
- Phase 1: The Rock Over Phase
- Position 2: The Rocked Over Position
- Phase 2: The Recovery Phase
- Position 3: The Catch Position
- Phase 3: The Drive Phase
- WARRANTY (COVERS PRIVATE AND NON-COMMERCIAL USE)
Brand : PURE
Model : VR1
Category : Rowing Machine