MTC1 - Dash cam Rexing - Free user manual and instructions
Find the device manual for free MTC1 Rexing in PDF.


| Product Type | Motorcycle Dash Cam |
| Brand | Rexing |
| Model | MTC1 |
| Front Camera Resolution | 1920x1080 (2MP CMOS, 140° wide angle) |
| Rear Camera Resolution | 1920x1080 (2MP CMOS, 140° wide angle) |
| Video Recording | Loop recording with intervals: 1/2/3/5/10 minutes |
| Storage | Micro SD card 8-128GB (Class 10 UHS-1 or higher required) |
| GPS | Built-in GPS logger for speed and location tracking |
| G-Sensor | Built-in, switchable ON/OFF for emergency video auto-lock |
| Microphone | Yes, can be toggled ON/OFF during recording |
| Water Resistance | IP67 for camera lenses |
| Operating Voltage | DC 12/24V (also supports 5V/2A USB input) |
| Operating Temperature | -14°F to +122°F (-10°C to +50°C) |
| Display | 3-inch LCD screen (non-touch) |
| Wi-Fi | Yes, for app connectivity (SSID: NPD_CarDV_WiFi_XXXX, password: 1234567890) |
| Remote Control | Included, with emergency video and RESET button |
| Emergency Video | Manual lock (hold button 3 sec) or auto-lock via G-sensor |
| Power Input | USB 5V/2A or hardwire kit (12/24V) |
| What's in the Box | Monitor, front camera, rear camera, hardware kit, GPS logger, USB cable, remote, zip ties, adhesives, screws, manual |
| Warranty | 12 months (extendable to 18 months with registration) |
| FCC Compliance | Part 15 compliant |
Frequently Asked Questions - MTC1 Rexing
User questions about MTC1 Rexing
0 question about this device. Answer the ones you know or ask your own.
Ask a new question about this device
Download the instructions for your Dash cam in PDF format for free! Find your manual MTC1 - Rexing and take your electronic device back in hand. On this page are published all the documents necessary for the use of your device. MTC1 by Rexing.
USER MANUAL MTC1 Rexing
MTC1 Motorcycle Dash Cam
User Manual
The information in this manual is subject to change without notice. Rexing All Rights Reserved
www.rexingusa.com
Overview
Thank you for choosing REXING!
We hope you love your new products as much as we do. If you need assistance, or have any suggestions to improve it, please contact us.

care@rexingusa.com

(877) 740-8004
Our support team will respond you as soon as possible.
Always a surprise in Rexing.
Check us out here.
- https://www.facebook.com/rexingusa/
- https://www.instagram.com/rexingdashcam/
- https://www.rexingusa.com/support/registration/

Facebook Instagram Site Product Support
What's in the box?
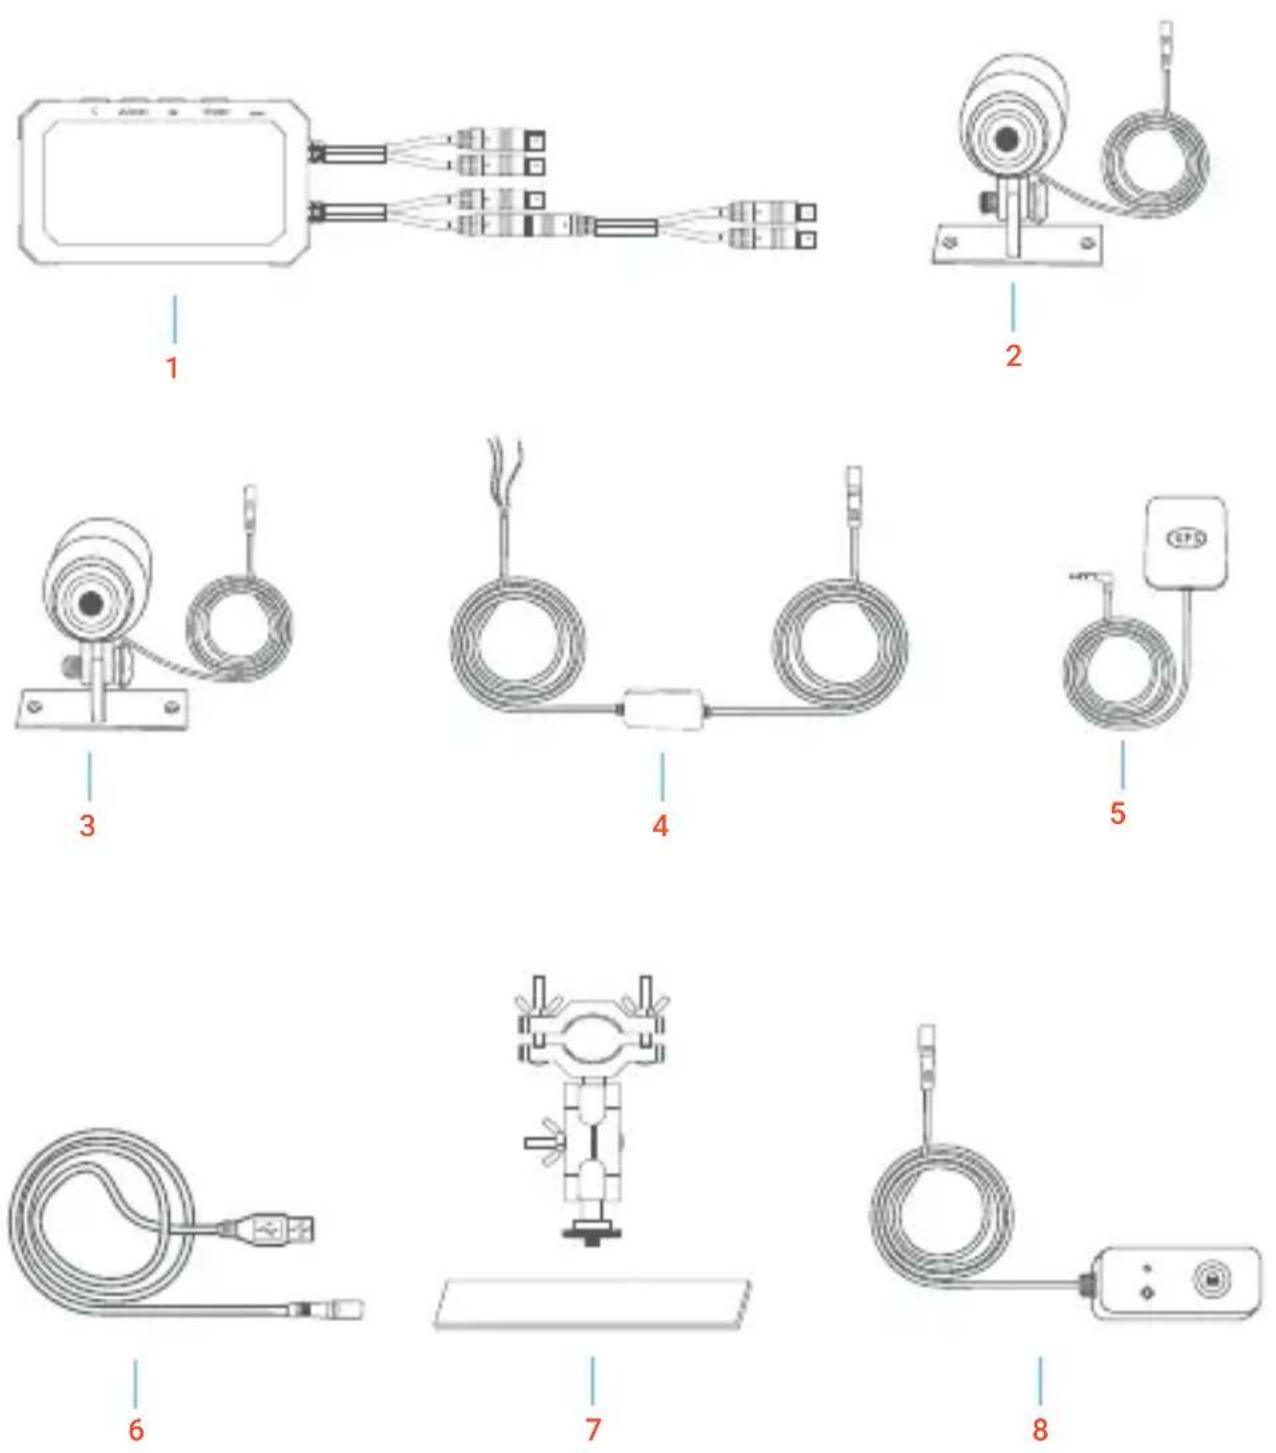
- Monitor
- Front camera
- Rear Camera
- Hardware Kit Cable
- GPS Logger
- USB Cable
-
Monitor Stand Installation Kit
-
Remote Control
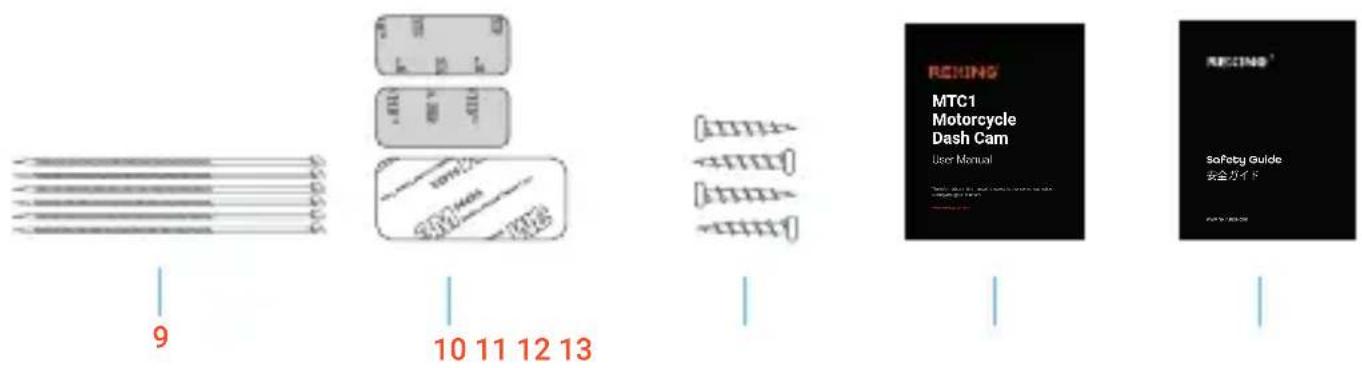
- Zip Ties X 5
- Adhesives
- Screws X 4
- User Manual
- Safety Guide
Installation
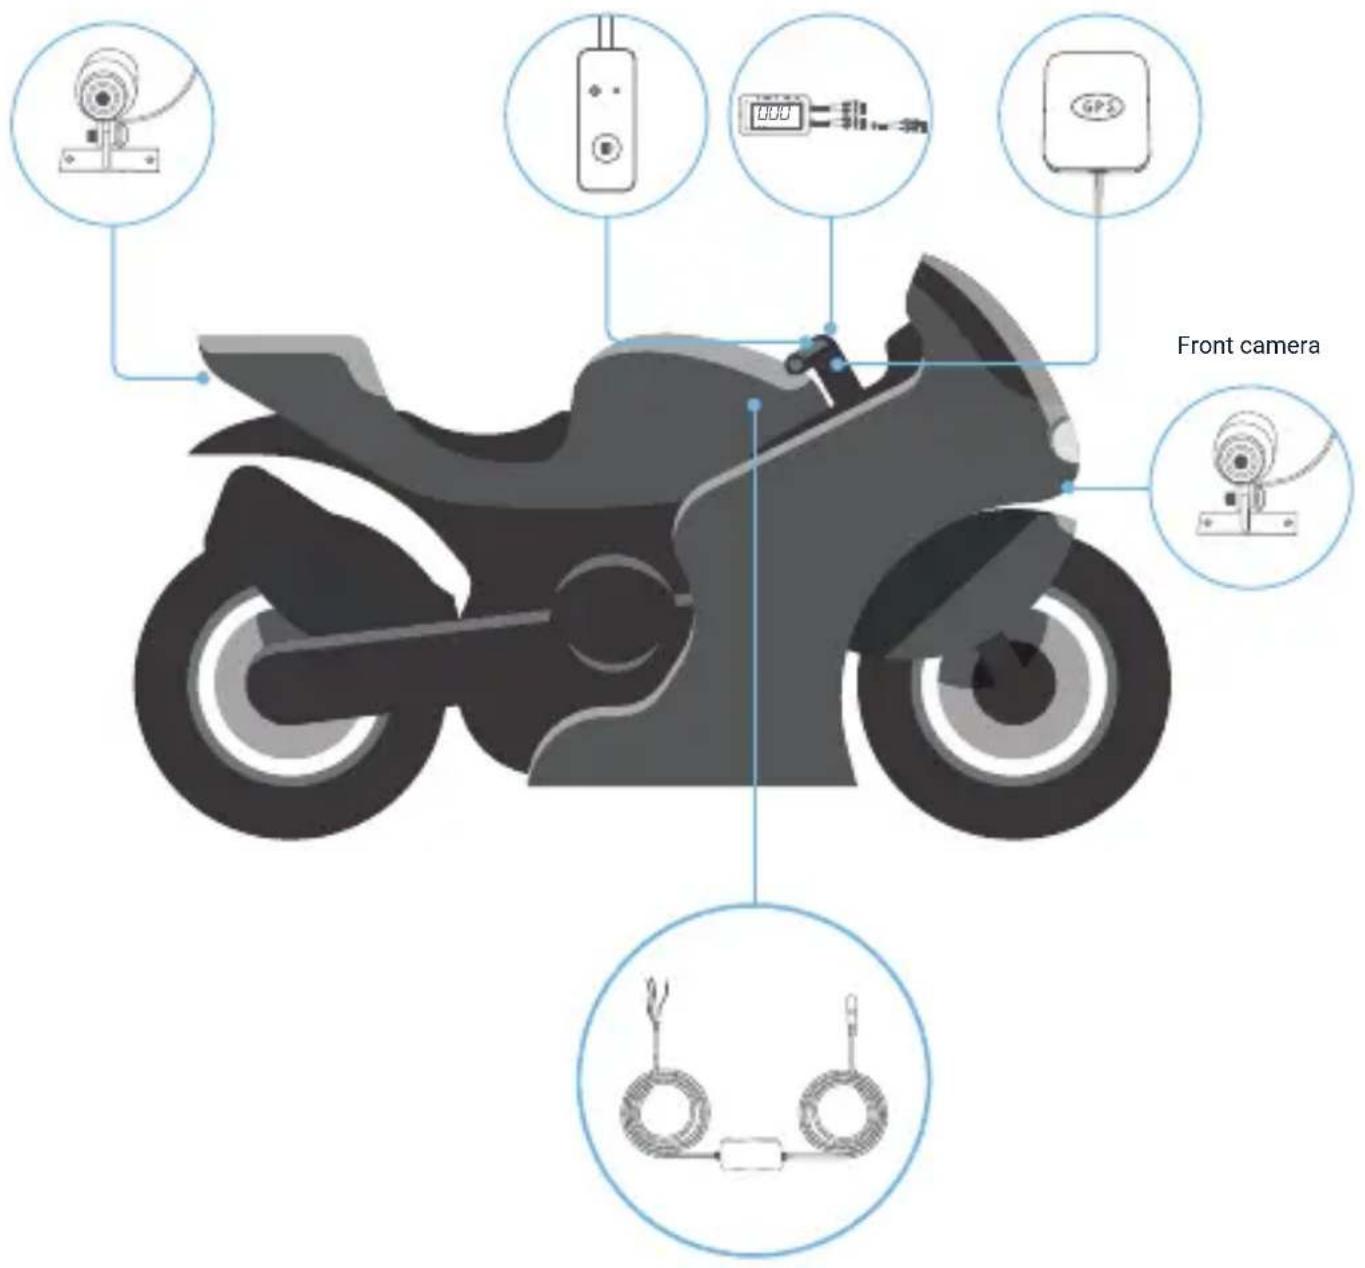
Various Motorcycles models require different installation instructions. For you and your bikes own safety, please consider consulting a local professional for installation.

Warning
This is for reference only, please adjust installation method based on your own motorcycle model.
If you would like to purchase other accessories (Camera Extending Cable, Extra parts), please feel free to contact us.
After you confirm the correct quantity and code of terminals, please make sure your cables and terminals are connected completely.
Moreover, if a terminal is broken, it will have a poor connection, therefore it will not work properly.

natural_image
Pure electrical circuit lines without any symbolsRear camera Remote Monitor GPS Logger
1. Front and Rear Cameras Installation
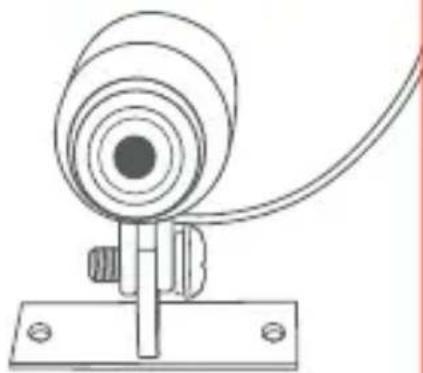
1 Use a screw driver to loose/fix screw. After the screw is released, you can adjust the lens angle to up to 270 degrees.
3 Remove the 3M adhesive to stick the camera to the right place.
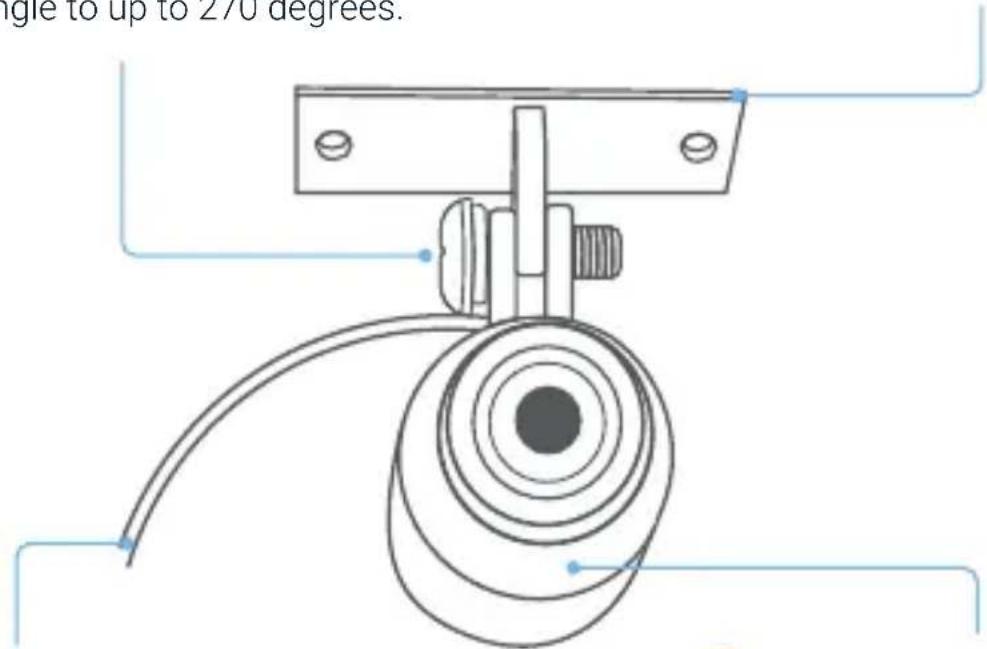
2 Dash cam lens's terminal connection port.
4 Dash cam lens connection ring. When you verify the display on your screen, turn the cylinder-shaped lens body 360 degree.
Note:
Please repeat the same installation steps for both front and rear camera.

Warning
Different motorcycles can have different positioning point for your lenses. In some cases, you can stick your lenses upside down. If this is the case, you need to adjust the recording angle.
- Unscrew the lens support fix.
- Turn the cylinder-shaped lens body 360 degree.
- You can adjust lens vertical angle up to 270 degrees.
• Lenses are Water Proof (IP67)
- If cleaning is necessary, please use a gentle cloth to clean lenses
- Please clean any water, oil stain, or dust before sticking your 3M Adhesive Pad. If you relocate your lenses repeatedly, the 3M Glue ability to stick will weaken, and your lens may fall.
- When you accelerate, the image quality may not be very stable, this is the character of CMOS sensors. Please be aware, this is not part of agreement.
natural_image
Technical line drawing of a mechanical device with a curved cable and mounting base (no text or symbols)2. Monitor Installation
natural_image
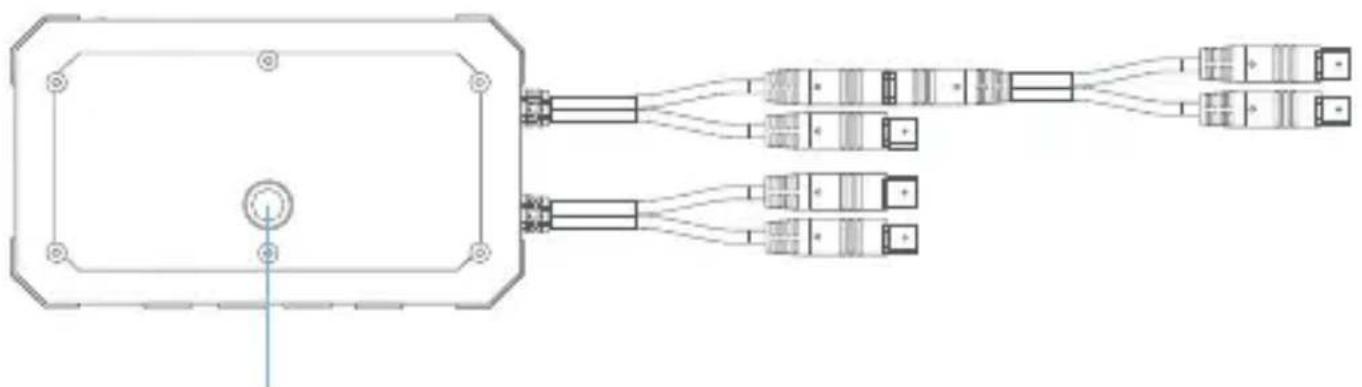
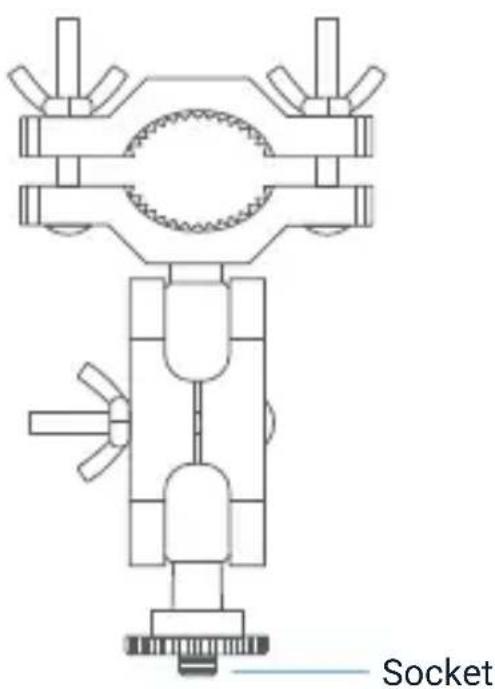
Pure electrical connector diagram without any text, numbers, or symbolsScrew the dash cam monitor into the socket
Place your motorcycle's handle in the middle of the ring, then use a screw driver to tide the ring
3. Install a Micro SD Card
- Please use 8GB to 128GB micro SD card.
- Please use "Class 10 UHS-1" or higher standard card and higher speed card. If you use class 10 or lower standard cards, the camera may not able to film.
- Please format your micro SD card before use.
Note:
-
Format will delete all contents in your SD card, please backup your files before formatting.
-
Do not release your finger before removing the memory card.
-
Format regularly. We recommend once a month.
-
If you are removing or inserting micro SD card while power on, it may damage your data or your camera.
Micro SD card installation
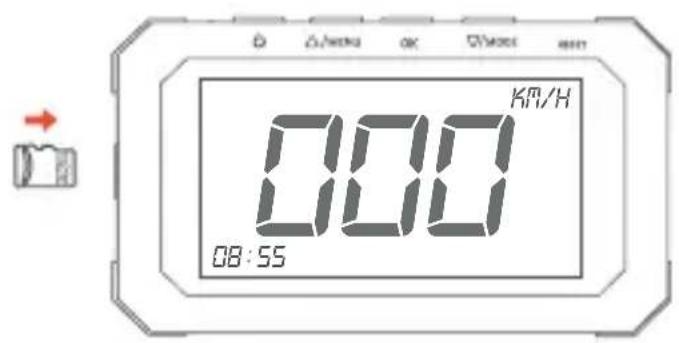
Make sure your camera's power is off, and make sure you insert card correctly, push the card into the card slot until you hear a click.
Micro SD card removal
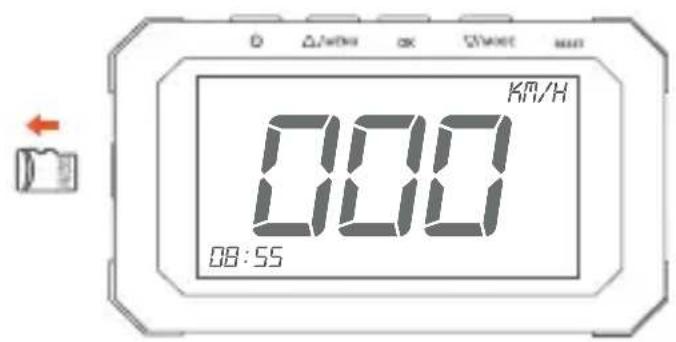
Make sure your camera's power is off, push the card in the card slot until you hear a click, then you are safe to remove your micro SD card.
4. Cable Connection
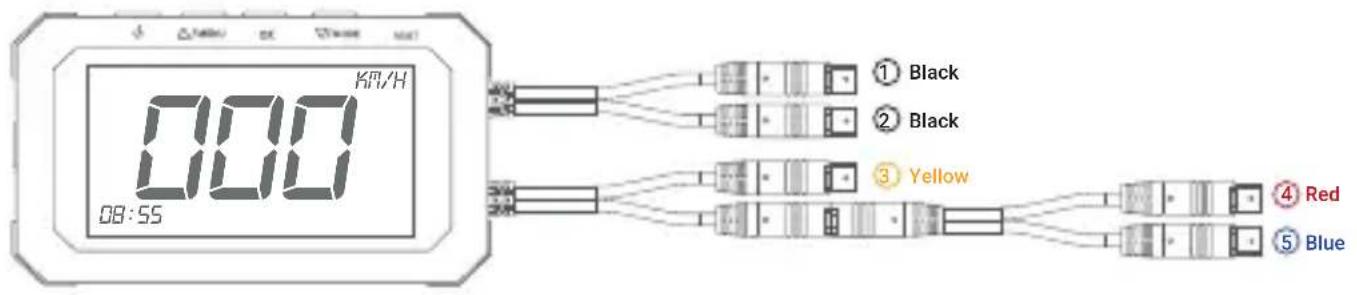
Before installing your camera to your motorcycle, you can connect the camera to power source through a USB power cable. You can connect USB power cable to a 5V/2.0A output or a portable battery's AC adaptor.
Items
Instructions
Connect to port ①
Connect to port ②
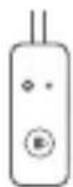
Connect remote control to the yellow port ③
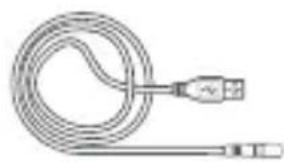
natural_image
Coiled cable with connector and terminal connector (no text or symbols visible)OR
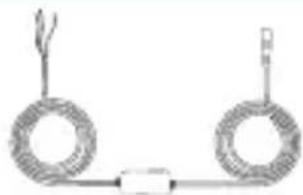
natural_image
Pure electrical circuit lines without any symbolsConnect to port ④
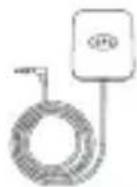
Connect to port ⑤
Hardware Kit Connection
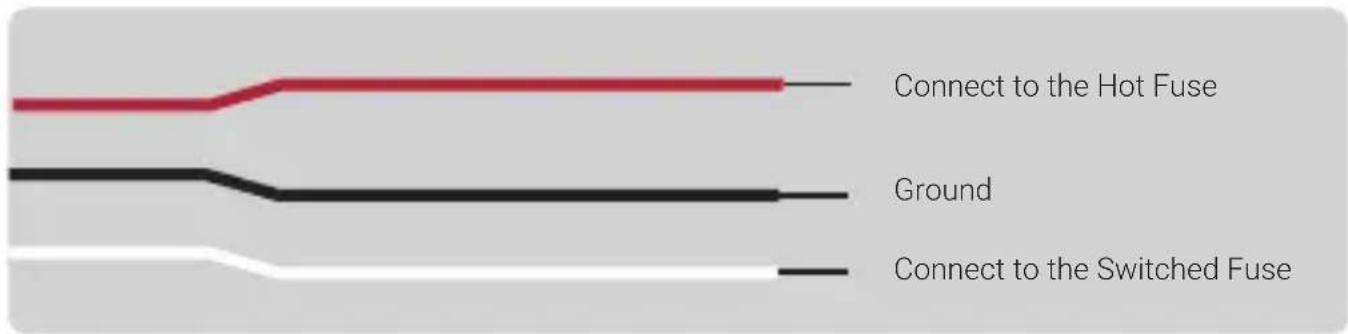
Hardware Kit
Optional Connection Methods
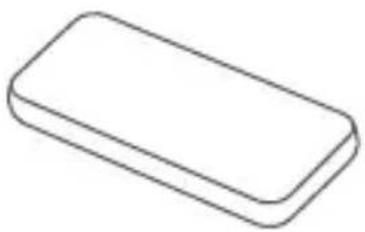
USB terminal can be connected to an AC adaptor/ a portable battery.
natural_image
Simple line drawing of a rectangular block (no text or symbols)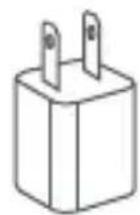
Portable battery 5V 2.0A (optional) AC Wall Charger (Not Included)

Warning
- AC adaptor and portable battery require 5V/2.0A output. If the portable battery is in a low power, it will start normally.
- When you connect your camera to USB power cable, if there is no sufficient electric current, the GPS receiver will be not able to work. Even through sometimes these problems occur, but they are not faulty.
Product Overview
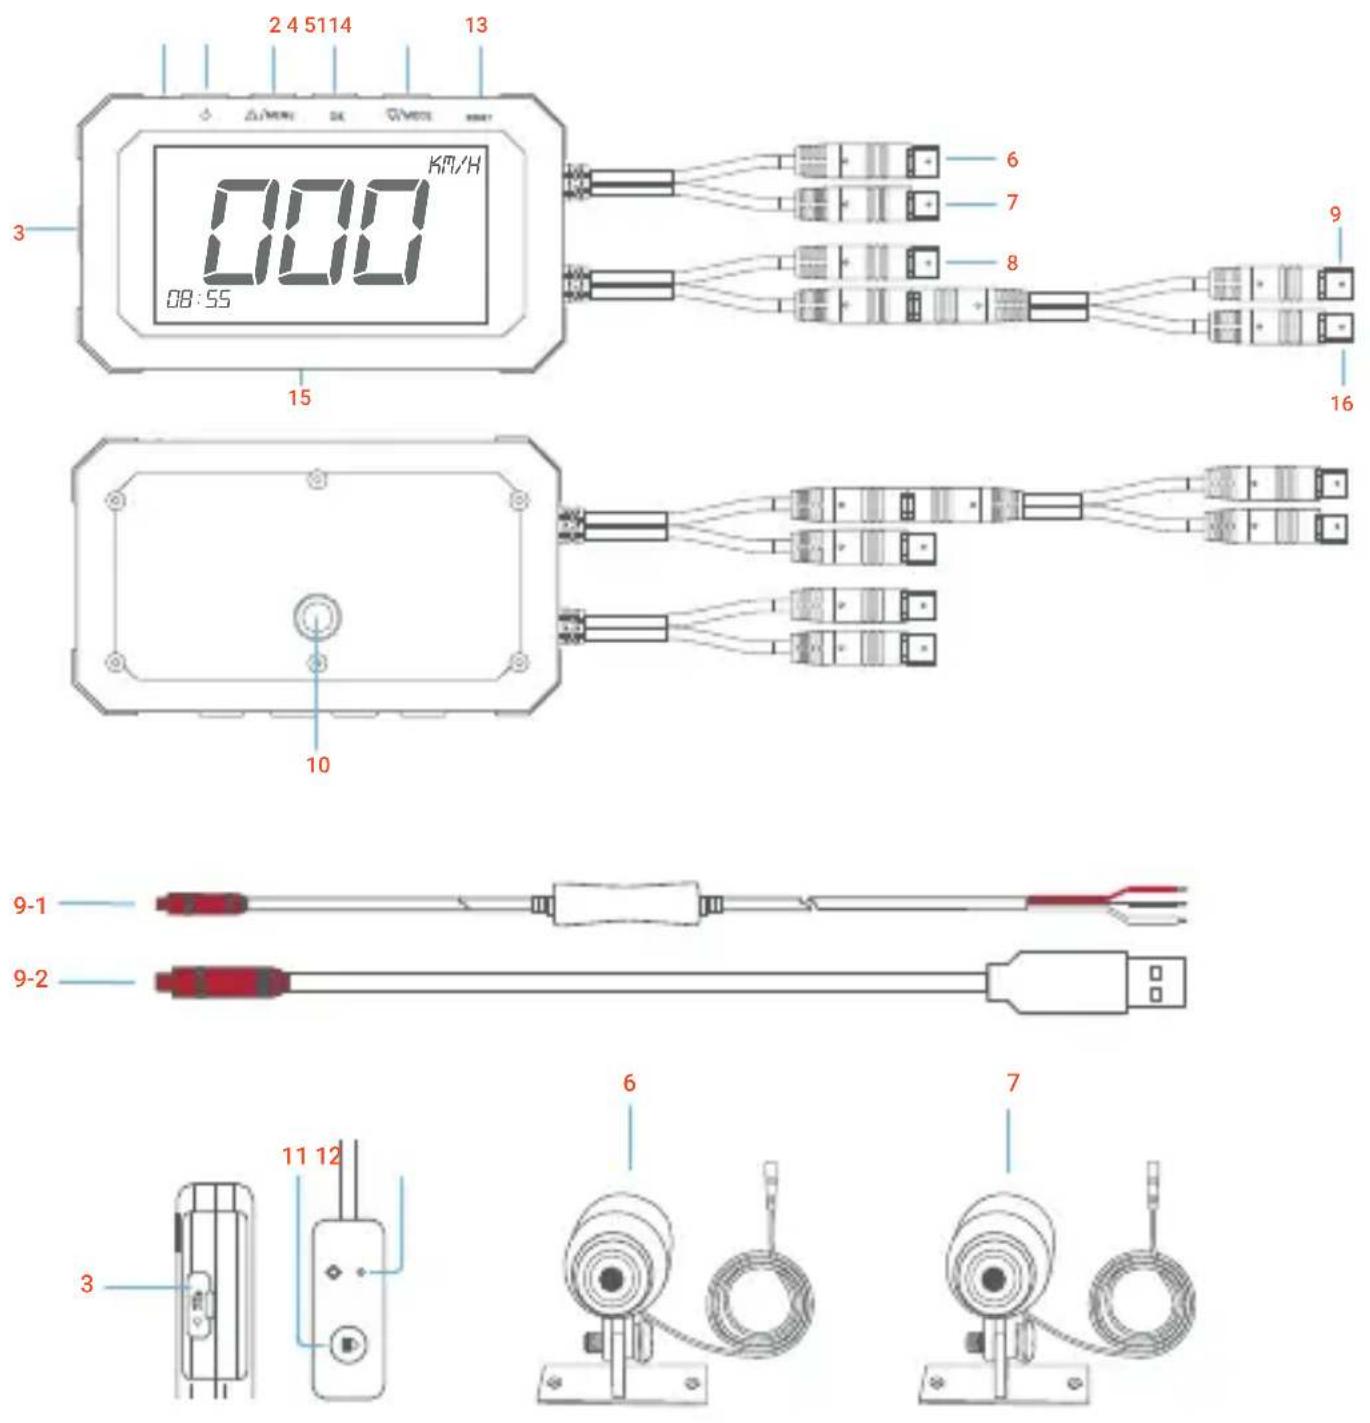
Basic Operations
1. Power/Screen On/Off
- Hold for about 3 secs to switch ON/OFF camera.
- Press the button to deactivate/activate the camera screen.
2. Menu/Up Button
- Recording Mode: Press to turn ON/OFF microphone (to record). When not filming (press OK button to stop recording), hold for about 3 secs to enter the setting menu for filming, hold for about 3 secs again to exit setting.
- Play mode: Press and move to a specific location.
When play stops, hold for about 3 secs to enter the setting menu for play, hold for about 3 secs to exit the settings.
3. MicroSD card slot
Compatible from 8GB to 128 GB, we recommend class 10 or higher SD card.
4. OK button
• Filming mode: press, start/stop filming.
- Setting menu: confirmation and setting location.
- Playing mode: Start/stop play videos.
5. Mode switch/Screen display switch/Next button
When voice recording stops: hold for about 3 secs to switch from voices/ videos/photos play mode.
Filming mode:
- Press to switch front and rear screen display mode.
- Hold for about 3 secs, the camera will start SOS filming, and it will lock the video. To unlock, hold for about 3 secs.
6. Front Camera Port
7. Rear Camera Port
- Remote control cable
- Power connection port
9-1: Powered by Smart hardwire kit
9-2: Powered By USB cable
- Monitor mount socket
Install the dash cam monitor and fix with the quick release plate
- Emergency Video
Press: switch front and rear lenses display mode.
Hold for about 3 secs to start Emergency Video, after entering the Emergency Video Mode, hold for another 3 secs to cancel the mode. Emergency Video Mode automatically locks the recorded footage.
- Remote control RESET button
☐☐☐ Use a pin to restart the camera.
- Monitor RESET button
Use a pin to restart the camera
- LED light display
□□□Filming: red light on, flashing blue light.
- 3" LCD Screen
Not a touch screen.
- GPS Logger Port
Wi-Fi Connect
To connect to your mobile phone or tablet: Download the APP via link https://www.rexingusa.com/support/rexing-apps/ or scanned the QR code below.
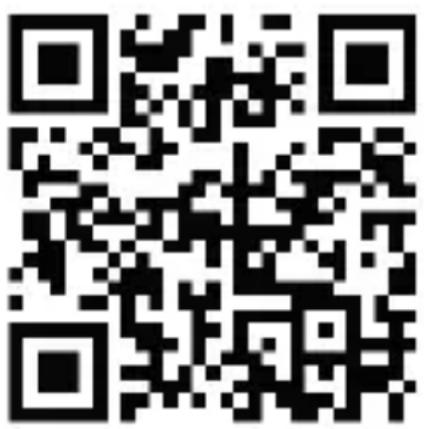
SSID: NPD_CarDV_WiFi_XXXX
PASSWORD: 1234567890
Screen Display While Filming
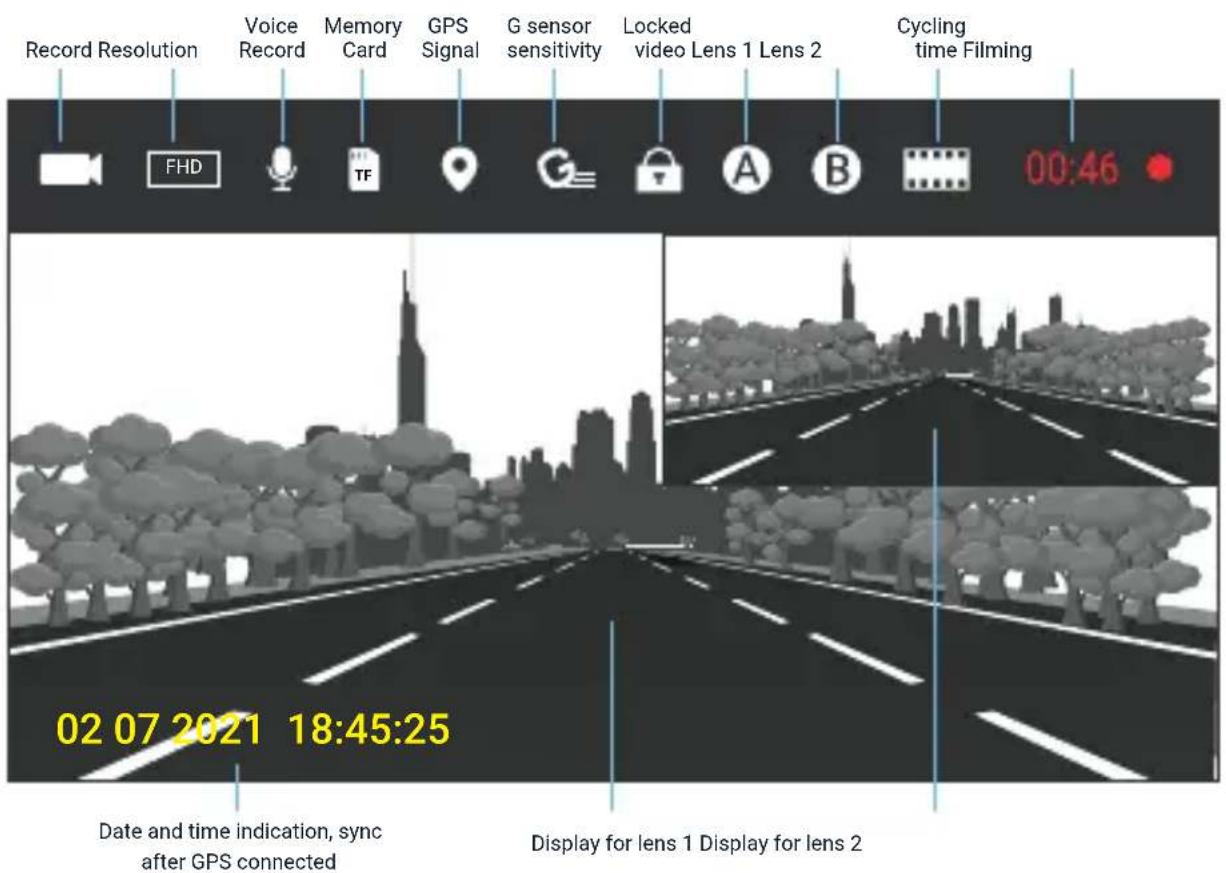
Note 1 Note 2

No GPS reception

GPS reception received

SOS filming icon.
The icon will be only shown when the video is locked. Hold remote control button for 3 secs OR Press the Mode button, to lock the current video.
GPS Logger
When connected to the camera, it will record the speed and location of your vehicle as you drive.
You can then access this information while playing back your recordings using the GPS Video player (For windows and Mac, available at gpsb.rexingusa.com).
The dash cam will automatically search for the GPS signal once it's connected to a power source.
Menu Setting
Under the video filming mode, pressing △ for about 3 secs to open menu setting page, so you can change settings
- Video resolution: FHD/HD
- Loop Recording: 1/2/3/5/10 minutes *1-minute cycle is recommended
- Mic: ON/OFF
- Volume: Standard/Low
- Beep: ON/OFF
- Start-up/Shutdown voice: ON/OFF
- Time setting: set your dash cam's date and hour
- Date Format: set your date and hour display format
- Stamp Format: Date and hour + model type/Date/model type/OFF
- Language: ENGLISH/简体中文/繁體中文/日本語
- Flicker: automatic/50Hz/60Hz
- LCD Power Saver: OFF/1 min/3mins
- G-Sensor: OFF/High/Middle/Low
- GPS: ON/OFF
- Time zone: setting time zone
- System setting: charging system
- Format SD card: YES/NO
- Hardware version: show current version

Warning
If the dash cam detects an error, (for example: lens terminal connection cable disappears, microSD card lost, insufficient storage or disconnected), a warning notice will be displayed on the screen with a warning voice. Eliminate the notice and voice by pressing any button on the monitor.
- Loop Recording: With different settings, videos can be stored as 1/2/3/5/10 minute intervals. When the memory card full, the newest video will overwrite the oldest.
- Emergency Video/Anti-Overwrite: When filming, hold 📄 for about 3 secs, or G sensor detects shocks, Emergency Video begins. When Emergency Video is on, an icon will show up on the top of the screen.
Under the Emergency Video mode, data will be stored in Emergency Video Folder.
These videos cannot be deleted through the dash cam, if you want to delete them, you have to delete from computer.
Video 1 1 min
Video 2 ★ 1
Video 3 1 min
When G sensor detects shocks while the camera is filming graph 2, graph 2 and graph 3 will be stored in the Emergency Video Folder.
- When the number of emergency video increase, your Micro SD card will be full, so please format your SD card regularly.
- To prevent insufficient space in your memory card, please set cycling time to 1 minute.
Filming Time
Filming Time Reference
Filming time may vary depends on different Micro SD cards.
| Storage Cpability 1920P X 1080P | 1280 X 720P |
| 1000 min128GB | 1280 min |
| 500 min64GB | 640 min |
| 500 min32GB | 320 min |
| 125 min16GB | 160 min |
| 60 min | 160 min8GB |
Data above for reference only, actual times may be different.
Filming time is the sum of normal filming and Emergency Video Filming. The actual filming time may vary, depend on your using behaviours.
Troubleshooting
If you have any problems while using our product, please refer to the following table:
Problems Solutions
| Power button no response | Make sure your power cable is connectedMake sure you are using factory power cable |
| Reset the unitCrash | |
| Unable to read SD card | Insert SD card properlyFormat SD card with your computerReplace with a new SD card |
| Unable to film | Make sure you installed all lenses correctlyMake sure you have sufficient storage in your SD cardTry switch front and rear lenses |
| Lenes not displaying | Make sure you connected all lenese correctlyMake sure lenses cable are connectedTry switch front and rear lenses |
| Normal filming not working | Check your SD card storageTry change filming mode |
| Warning voice, cannot filming | Make sure you installed your SD card correctlyCheck your SD card storageMake sure all lenses are installed correctly |
Specification
| Micro SD Card | 8~128GB (Class10 or Higher) |
| Front camera | 2 million-pixel CMOS sensorWide angle:140°1920×1080 |
| Rear camera | 2 million-pixel CMOS sensorWide angle:140°1920×1080 |
| 1/2/3/5/10 minutesVideo length | |
| Front and rear camera display | Up+down (Windows)/Down+Up (Mini Windows)/Up (Right)+Down (Left)/Down(Left)+Up(Right) |
| GPS | Support |
| SupportG-Sensor | |
| Built-in, can be switch ON/OFFMicrophone | |
| 1W/8Ω×1Speaker | |
| Normal/SOS/PhotoFilming method | |
| Document formats | Video: H.264 (.mov)Photo: .JPEG |
| Windows Media PlayerPlay videos | |
| IP67Water resistant level | |
| DC12/24VOperating voltage | |
| -14°F ~ +122°FOperating temperature |
Warranty & Support
Warranty
The Rexing MTC1 Motorcycle Dash Cam comes with a full 12-month warranty. If you register your product on our official site (https://www.rexingusa.com/support/registration), you can extend the warranty to 18 months.
Support
If you have any questions regarding your product, please do not hesitate to contact us at care@rexingusa.com, or call us at (877) 740-8004. Queries are typically answered within 12-24 hours.
Your opinion matters
Rexing is firmly committed to always improving our products, services, and user experience. If you have any thoughts on how we can do even better, we welcome your constructive feedback and suggestions.
Connect with us today at care@rexingusa.com
Thank you for choosing Rexing!
FCC ID: 2AW5W-MTC1
This device complies with part 15 of the FCC Rules. Operation is subject to the following two conditions: (1) This device may not cause harmful interference, and (2) this device must accept any interference received, including interference that may cause undesired operation.
Changes or modifications not expressly approved by the party responsible for compliance could void the user's authority to operate this equipment.
REXING®




MADE IN CHINA
- MTC1 Motorcycle Dash Cam
- Overview
- Thank you for choosing REXING!
- Check us out here.
- What's in the box?
- Installation
- Warning
- Front and Rear Cameras Installation
- Note:
- Monitor Installation
- Install a Micro SD Card
- Cable Connection
- Items
- Instructions
- Hardware Kit Connection
- Optional Connection Methods
- Product Overview
- Basic Operations
- Power/Screen On/Off
- Menu/Up Button
- MicroSD card slot
- OK button
- Mode switch/Screen display switch/Next button
- Filming mode:
- Front Camera Port
- Rear Camera Port
- Wi-Fi Connect
- Screen Display While Filming
- Note 1 Note 2
- GPS Logger
- Menu Setting
- Filming Time
- Filming Time Reference
- Troubleshooting
- Warranty & Support
- Warranty
- Support
- Your opinion matters
- FCC ID: 2AW5W-MTC1
Brand : Rexing
Model : MTC1
Category : Dash cam