
KY-E227E - Cooker PANASONIC - Free user manual and instructions
Find the device manual for free KY-E227E PANASONIC in PDF.


| Brand | Panasonic |
| Model | KY-E227E |
| Product Type | Freestanding Cooker |
| Fuel Type | Electric |
| Oven Type | Conventional with Grill |
| Number of Cooking Zones | 4 |
| Control Type | Rotary Knobs |
| Dimensions (H x W x D) | 900 x 600 x 600 mm |
| Weight | 50 kg |
| Power Consumption (max) | 3500 W |
| Voltage | 230 V / 50 Hz |
| Oven Capacity | 65 Litres |
| Oven Functions | Convection, Grill, Defrost |
| Cleaning Type | Standard Enamel |
| Safety Features | Child Lock, Auto Shut-Off, Overheat Protection |
| Spare Parts Availability | Official Panasonic Service Centers |
| Energy Rating | Class A |
| Installation Type | Freestanding |
| Color | White |
| Warranty | 2 Years |
Frequently Asked Questions - KY-E227E PANASONIC
User questions about KY-E227E PANASONIC
0 question about this device. Answer the ones you know or ask your own.
Ask a new question about this device
Download the instructions for your Cooker in PDF format for free! Find your manual KY-E227E - PANASONIC and take your electronic device back in hand. On this page are published all the documents necessary for the use of your device. KY-E227E by PANASONIC.
USER MANUAL KY-E227E PANASONIC
Operating / Installation Instructions
Induction Heating Cooktop
For domestic use
Model No. KY-E227E

Panasonic Corporation
Web Site: http://panasonic.com
© Panasonic Corporation 2024
Thank you for purchasing this Panasonic appliance.
This appliance is intended for household use only.
Please read these instructions carefully before using the appliance. Keep Operating/Installation Instructions and Guarantee Certificate for future use.
ENGLISH

IR sensor eases your cooking
Place the cookware in the centre of the cooking zone.
The IR sensor must be covered to operate properly.
What is the IR sensor?
The IR sensor prevents overheating and restores the temperature to the original level when the temperature drops by adding ingredients.
Pan-frying Mode
Cooks delicious food without burning due to overheating
Deep-frying Mode
Automatically maintained temperature makes food crispy and tasty.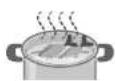
Contents
IH (Induction Heating) features
Safe
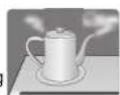
Flameless, comfortable cooking with less rise in room temperature

Clean
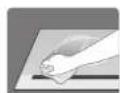
Flat top plate for easy care
Efficient
Highly efficient and energy-saving heating
IH Cooking Mechanism
The magnetic line of force produced in the magnetic coil, passes through the metallic cookware, induces an eddy current, and then the cookware generates heat with its electrical resistance.

Safety Precautions 4
General Precautions 7
- Safety features 7
Part Names / Functions 8
Suitable Cookware 10
Basics 12
Heating Mode 13
Pan-frying Mode 14
Deep-frying Mode 15
Congee Mode 16
Count-up Timer / Timer……18
Cleaning 19
Error Indications 20
Troubleshooting 22
Specifications 31
Installation 25
(For installer)
Safety Precautions

WARNING

This appliance is not intended for use by persons (including children) with reduced physical, sensory or mental capabilities, or lack of experience and knowledge, unless they have been given supervision or instruction concerning use of the appliance by a person responsible for their safety. Children should be supervised to ensure that they do not play with the appliance. Keep infants away from the appliance.
To avoid fires from overheated oil

■ WARNING: Unattended cooking on a hob with fat or oil can be dangerous and may result in a fire. ■ Set to 6 or below for preheating. ■ Do not overheat oil.
For proper function of the IR sensor
■ Cover the sensor.
■ Wipe water off.
IR sensor

For deep-frying:
Use DeepFry
■ Observe the amount of oil.

To avoid injuries or burns caused by bumping
Liquids may splatter.
■ Stir liquids before heating.

To avoid fire, explosion or electric shock

■ Do not apply excessive pressure. It may crack the top plate. ■ WARNING: If the top plate is cracked, do not touch. Turn off the main power switch to avoid the possibility of electric shock. ■ Danger of fire: Do not store items on the cooking surfaces. ■ Do not place combustible materials near the appliance. ■ After use, turn off the appliance by its control and do not rely on the pot detector (safety features). ■ Turn off the circuit breaker when not using the appliance for long period of time. ■ Do not disassemble, repair or modify the appliance by yourself.
To avoid injuries or burns

CAUTION: Hot surfaces
■ Do not touch the top plate. ■ Metallic objects such as knives, forks, spoons, lids and aluminum foil should not be placed on the hob surface since they can become hot.
In case of a malfunction or breakdown
- Smell of burning ● Feeling electricity through the top plate
- Cracked top plate • Extremely hot power cord ● The power shuts off when the cord is moved.

If the power cord is damaged, it must be replaced by the manufacturer, its service agent or a qualified person in order to avoid a hazard.

CAUTION
To avoid fire or accidents

If you are wearing a medical device, such as a pacemaker, consult your doctor. The operation of the appliance may affect the medical device. ■ CAUTION: The cooking process has to be supervised. A short term cooking process has to be supervised continuously. ■ Do not use the appliance for purposes other than cooking. ■ Do not place paper or dish towels under the cookware.

For deep-frying:
■ If the oil smokes,

■ Do not use oil preheated by other appliances. The oil temperature control system will not work properly.
To avoid injuries or burns
Splattering hot oil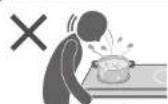
■ Ensure the cookware is stable. For deep-frying: ■ Do not bring your face close to the cookware.
To avoid damage to the cookware
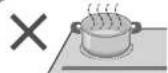
■ Do not heat empty cookware. ■ Do not overheat ingredients.
■ Do not place the following near or on the top plate.
- Noise interference, data erased or damaged. ● Generated electromagnetic waves damage the appliance.

- They may be spoiled by the exhaust heat.
● The operation panel key may malfunction.
■ The appliance is not intended to be operated by an external timer or separate remote control system.
■ Do not block or clog. - The filter clog detection may be activated, and the appliance may shut off automatically.
| Safety features | |
| Heating stops. | No cookware is detected (P.21)Small object on the cooking zone (P.21)Empty pot on the cooking zone (P.20)No operation for a long time (P.22) |
| Heating power is reduced. | Overheating prevention (P.23)Heating power is reduced automatically when the bottom of the cookware overheats. |
| The main power turns off. | Main power auto shut-offThe main power automatically turns off if 1 minute has elapsed without any operation. |
| Illuminates when the top plate is hot. | Hot surface warning (P.9) |
| Locks all operations. | Child lock (P.9) |
Part Names / Functions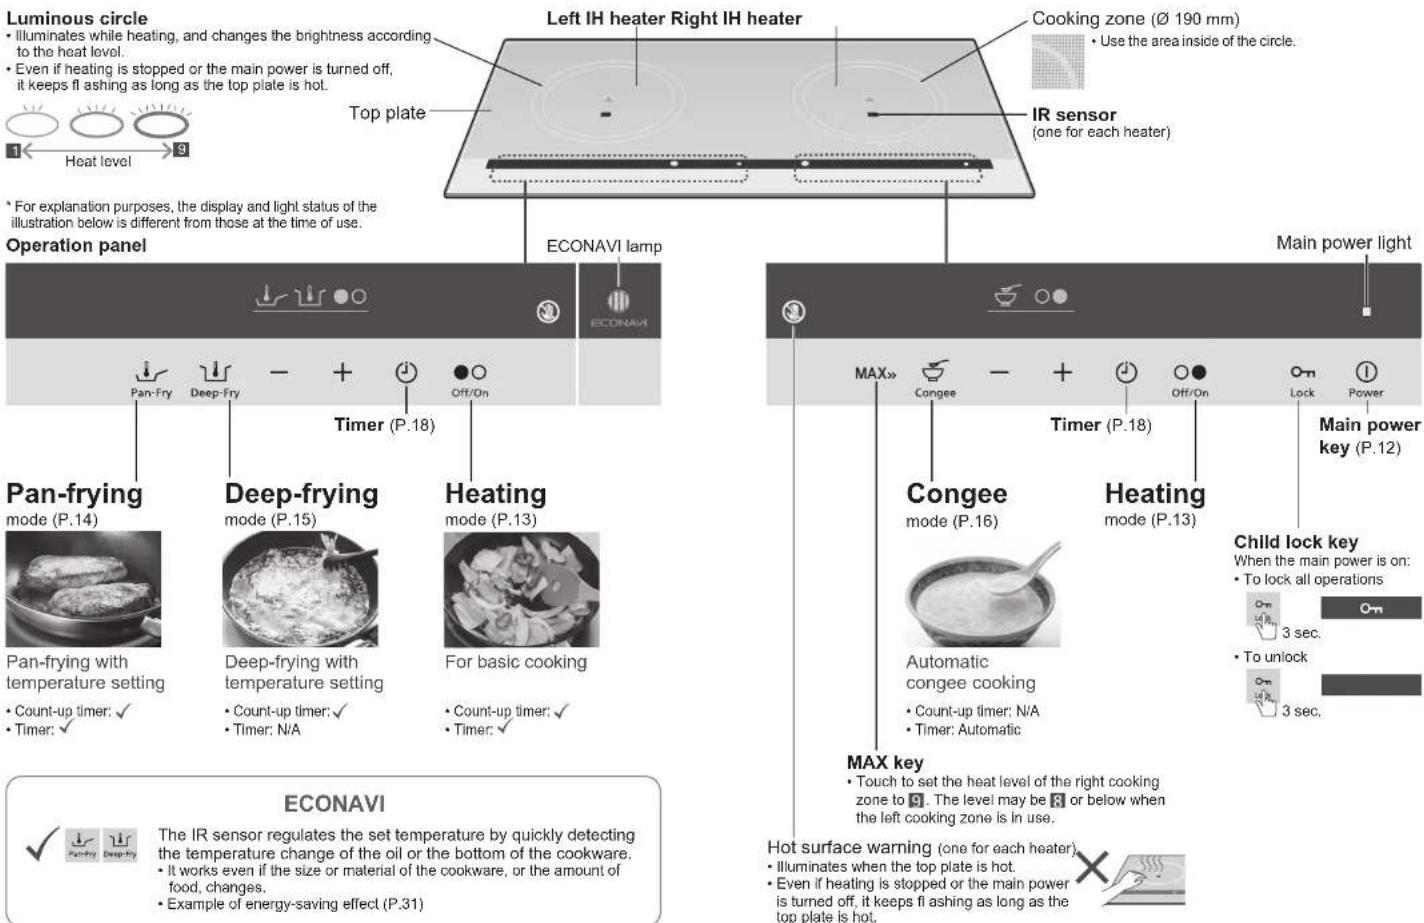
Suitable Cookware
| Material | Compatible Incompatible | |
Iron / Cast iron Enamelled iron Enamelled iron Magnetic stainless steel Magnetic stainless steel | Aluminum / Concrete Heat-resistant glass / Ceramic and earthenware Heat-resistant glass / Ceramic and earthenware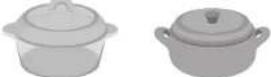 Nonmagnetic stainless steel Nonmagnetic stainless steel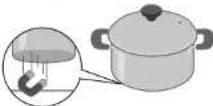 Not heatable or heating power may be reduced Not heatable or heating power may be reduced | |
| Bottom shape | 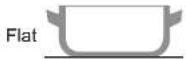 | Round  Legged Legged  Curved Curved 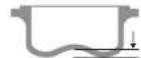 * The safety feature may not function properly, heating power may be reduced, or the cookware may not be heated. * The safety feature may not function properly, heating power may be reduced, or the cookware may not be heated. |
| Size |  12 cm or over 12 cm or over |  Under 12 cm Under 12 cm |

Note
● Ceramic and earthenware
Even if they are made for induction heating:
• The appliance may malfunction.
• Heating power is reduced.
- Heating stops.

- Thin bottom
• Turns red-hot and/or deforms

● Empty enamelware
- Enamel coating may melt and damage the top plate.

Using


Depending on the type, material, and the bottom shape and size of the cookware:
• The actual oil temperature may vary from the set temperature.
- Preheating may take longer. - Heating may stop.
Using

other restrictions.
(P.16)
Basics
How to turn on the power
Note ● The power automatically turns off if 1 minute has elapsed without any operations.
Cooking tips
- Cover the sensor. IR sensor
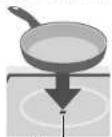
● Wipe water off before cooking.
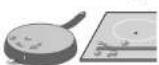
- When heating more than 45 minutes

Use the timer.
(P.18)
■When using Deep-Fry For proper function of the temperature control: - Observe the amount of oil.
- Do not use these oil.

● After preheating starts
- When preheating

Heating Mode
For basic cooking 1


2

• Heat level range: • To raise the level to max (P.9) ■Count-up timer /
Timer ⏻ (P.18) 3 When the cooking is completed:
Heat level adjustment guideline
![graph LR A["1 2 3 4 5 6 7 8 9"] --> B["75 W 235 W 370 W 500 W 700 W 1000 W 1450 W 2000 W 3200 W"] B --> C["Keep warm"] C --> D["Thick soup Light soup"] D --> E["Reheat"] E --> F["Simmer"] F --> G["Simmer lightly"] G --> H["Boll, steam or stir-fry"] H --> I["Pasta, vegetables"] H --> J["Steamed meat…](/content/2026/05/986137/images/2b4bf8ffb8ad44610e10246b27b80c6b045eb415ee31876b4fccc057c22a3aa9.jpg)
- Heat values may vary depending on material of the cookware. *Recommend to use Pan-frying mode. (P.14)
Pan-frying Mode Deep-frying Mode
Pan-frying with
the temperature setting 1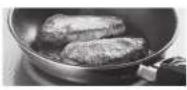

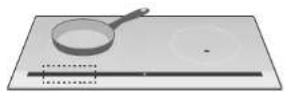
2

3
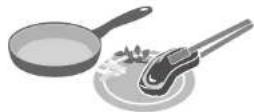
Temperature adjustment guideline![graph LR A["140 °C 160 °C 180 °C 200 °C 230 °C"] --> B["Pancakes"] B --> C["Fried egg"] C --> D["Hamburger steak"] D --> E["Steak"] E --> F["Scrambled eggs"] F --> G["French toast Omelette"] G --> H["Scrambled eggs"]](/content/2026/05/986137/images/a1064b8e947c1d9666f08ef8e28c10c229bb47fdd797dd8e97d83ead310c0e6a.jpg)
Deep-frying with
the temperature setting 1
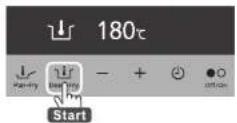

2

3
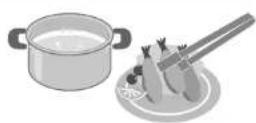
Temperature adjustment guideline
Congee Mode

Cooking congee automatically
(For 4 or 2 servings)
● Measure rice and water correctly.
| Rice Water | ||
| 4 servings | 170 g (approx. 200 mL) | 2.4 L |
| 2 servings | 85 g (approx. 100 mL) | 1.3 L |
| • Do not use hot water. | ||
Suitable pots
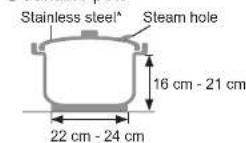
* With non-stick coating pots, congee may not be as thick.
● After washing rice
Drain the water.

- When cooking
Close the lid.

- When the top plate is hot

1


• The number of servings and the cooking time can be changed within 15 seconds after cooking starts.
■For 2 servings
■To cook less
thickened congee (Reduce cooking time)

- Setting range:
2:00 - 3:00 (By 10 min.)
- Touch and hold to change rapidly.
■To cancel cooking
Heating stops
automatically.

Congee with chicken and dried scallops
Cooking steps
| Ingredients 4 servings 2 servings | ||
| Dried scallops 20 g | 10 g | |
| Fresh chicken | 200 g | 100 g |
| Rice | 170 g | 85 g |
| Water (including soaking water) | 2.2 L | 1.2 L |
| Ginger (chopped) | 1 slice (15 g) | 1/2 slice (7.5 g) |
| Salt | tsp. 1 | tsp. 1/2 |
* Topping: Century egg, coriander, welsh onion, etc.
1
Preparation
①Soak in the water until tender.
② Chop finely.
Dried scallops

• The water will be needed in step 2.


② Wash and dry.
③ Rub in.
Rice

Wash rice and drain the water.
2
Put the ingredients into the pot.

②
Chicken • For 2 servings Cut the chicken into size to be soaked.
3


Note
- When boiling over, let out the steam.

- When the room temperature is low, congee may not be as thick. → Simmer it again.

Count-up Timer / Timer
Count-up timer can be set with ●○ ○● ↓ ▼ ▼ ▼ and Timer can be set with ●○ ○● ↓ ▼
Setting Count-up timer

• To cancel Count-up timer, touch 📄vice.
Setting Timer
1

- If no key operation for 5 seconds, Timer will be canceled.
2
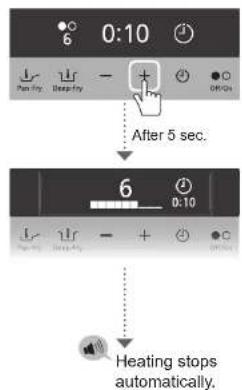
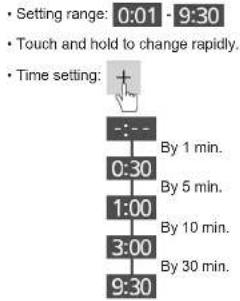
• To cancel Timer
Note
- Count-up timer does not turn off the cooking zone.
- For timer starts running after preheating is completed.
Cleaning
Always keep the appliance clean.
Spilled food or oil scorched on the appliance may become difficult to clean.

CAUTION
Before cleaning

- Do not use a steam cleaner. Water may get into the electrical components and cause a malfunction.

■ Light stains

Oil stains

■ Heavy stains

Note
- Be sure to remove stains.
- Stain will be scorched and stuck on the top plate.

Error Indications
If any of the following error indication appears, check the cause and resolve.
After eliminating the cause, touch or to clear the error indication.

| Indication Possible cause | |
| U04 | Clogged intake and/or exhaust vent Intake Exhaust vent/low from intake to exhaust |
| U13 U14 | Empty pot on the cooking zone Empty pot is heated. This function may not operate properly, depending on the type of pot, or if the heat level is low. |
| When deep-frying, oil was overheated by Heating mode. Off/On Off/On Deep-Fry Be sure to use the Deep-frying mode. | |
| U19 | When using Congee mode The top plate is hot. Empty pot Add ingredients allow top plate to cool down, and start. |
| U33 U34 | When using Deep-frying mode Over 800 g Improper position Unsuitable cookware (P.10) When preheating Ingredients |
Heating automatically resumes if the cause of the following error is eliminated.
| Indication Possible cause | |
| U16 | Stains on the operation panel Water, ingredients or foreign objects ① ② Set the appliance again as required. |
| Improper operation Operation keys More than 3 sec. | |
| 6 | No cookware is detected* No cookware Removed Improper position Unsuitable cookware (P.10) |
| Small object on the cooking zone* Metallic objects * The power shuts off in 1 minute under the conditions above. | |
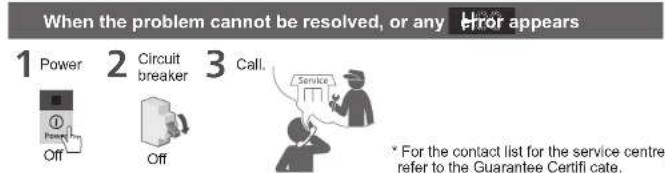
* For the contact list for the service centre, refer to the Guarantee Certificate.
Troubleshooting
| Symptom Possible cause | ||
| ■Power Source | ||
| The main power cannot be turned on. | The power cannot be easily turned on to prevent unintended operation. |  Slightly long Slightly long |
 |  3 sec. Unlock 3 sec. Unlock | |
| The main power turns off. | Main power auto shut-off | |
 | operation 1 min.  | |
| Heating stops while cooking. | No operation for a long time | |
| [KSA2] | Heating stops. for 45 min. | |
| To simmer for a long time: | ||
 | Use the timer. (P.18) | |
| ■Operation Panel | ||
| Key operation is disabled. |  |  |
 |  | |
| Keys react when the surrounded area is touched. |  |  |
Symptom Possible cause
Sound and Noise
| Noise is heard while heating. | Depending on the type of cookware:Making various soundsFeeling vibrations when holding the handleMoving slightly | It is not a malfunction.Slightly move or replace the cookware. |
| If the cookware is removed while heating, a short metallic sound may be heard. | ||
| After the main power is turned off, sound from the fan can still be heard. | The cooling fan operates while the inside of the appliance is hot.When the appliance cools down, it will automatically stop. | |
Heating Power
| Heating power is weaker. | Overheating preventionHeating power will be reduced automatically without changing the heat level indication.[IMAGE] | Heating power returns to normal after the cookware cools down. |
| Ceramic and earthenware (P.10)[IMAGE]^ Do not use ceramic and earthenware, even if they are made for induction heating. | ||
| When using the both cooking zones together:• Heating power or the indication level decreased.• The heat level cannot be increased. | Heating power is automatically regulated to restrict overall power consumption. (P.31) | To increase the heat level, avoid using the both cooking zones together, or reduce the heat level of either of cooking zone. |
Troubleshooting
Symptom Possible cause
Pan-frying Mode
 |  | |
| IR sensor is not covered.(P.4) | ||
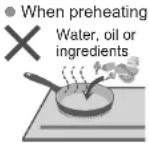 | ● If the right cooking zone is used at the same time, preheating may take longer.[IMAGE] | |
| The temperature on the bottom of the pan may vary from the set temperature depending on the type of the pan. |  Adjust the temperature as required. Adjust the temperature as required. | |
- If the right cooking zone is used at the same time, preheating may take longer. The temperature on the bottom of the pan may vary from the set temperature depending on the type of the pan. Adjust the temperature as required.
Deep-frying Mode
 IR sensor is not covered.(P.4) IR sensor is not covered.(P.4) |  | |
| Cov 200 | Heavable oil | |
 |  | |
| The oil temperature may vary from the set temperature or preheating may take longer depending on the type, material, and shape and size of the bottom of the pot. |  Adjust the temperature as required. Adjust the temperature as required. |
Installation
(For installer)
Contents
Safety Precautions 26
Dimensions 27
Installation Location 28
Electrical Work 28
Installing the Appliance 29
Post-installation Checklist 30

Important
■ Install the appliance in accordance with the Installation Instructions. Otherwise, the performance of the appliance may be affected. ■ The installer is responsible for proper installation. Any malfunction or accident resulting from the failure to follow the instructions is not covered by the warranty. ■ Make sure to have a qualified gas technician or personnel from gas company close the gas valve when replacing the gas appliances with this unit. ■ Do not install an oven under the cabinet. ■ After installation, perform an electrical test. ■ Explain to the customer how to use the appliance correctly. ■ Provide the Operating / Installation Instructions to the customer for the local electrical inspector's use.
Safety Precautions

WARNING
To avoid fire, electric leakage, electric shock or abnormal operation
If the power cord is damaged, it must be replaced by the manufacturer, its service agent or a qualified person in order to avoid hazards. Electrical work must be performed by a legally certified electrician. Before installation, make sure to turn off the circuit breaker. Install a 230 V / 20 A dedicated single-phase circuit with an earth leakage circuit breaker for the power supply to avoid abnormal overheating of the electric wire. This appliance must be properly earthed following the electric laws. The earth line must not be connected to a gas pipe, water pipe, earth of lightning rod or telephone. The power cord must be correctly connected to ensure the integrity of the connection. Do not step on the appliance, or drop heavy items on top of it. Do not disassemble, repair or modify the appliance. (Ex. Disassembling the top plate)

CAUTION
To avoid fire, deformation or discolouration
Use a heat resistant material for the countertop. (Heat resistance equal to or exceeding that of "laminated thermosetting high-pressure decorative sheets")
Do not use a varnished material for the countertop.
Dimensions
■Top view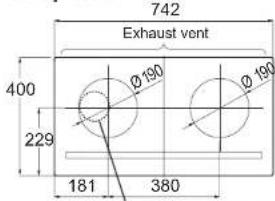
Intake vent (on the undersurface)
(unit: mm) ■Front view ■Side view

Related Dimensions
■Countertop cutout Cabinet front
Cabinet Countertop with bulge in front More than 25 mm Bulge for flat part Do not install unless the condition above is met.

*The clearance area of the intake has to be more than 40 cm².
■If a partition board without an intake part has been set
| • Observe related laws for installation. | |||
| Wall and ceiling | Minimum clearance (unit: cm) | ||
| A | B | C | |
| Incombustible*1 | 0 70 0 | ||
| Combustible | 5 100 5 | ||
*1 Metal, tile, brick, etc. (Including heat-insulating board made of metal, tile, brick, etc.)
*2 An exhaust vent is provided on the back of the appliance.
Electrical Work
• Follow the local safety laws and regulations for electrical wiring and earthing applied in the area.
- Do not twist or load on the power cord.
WARNING
• Provide socket wiring for single-pole earthing.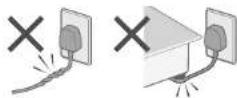
| Dedicated circuit | • Single-phase 230 V/20 A (with a circuit breaker)• Electric wire for house wiring: Single wire of at least 2.0 mm in diameter• Stranded wire of at least 3.5 mm can also be used for the wall socket (box type). |
| Earth leakage circuit breaker | • Rated current: 30 A• Rated sensitivity current: 30 mA*In accordance with the electrical wiring rules, incorporate the breaker and the earth leakage circuit breaker in the home electrical wire. |
| Wall socket | • Type of socket:BS546 type(15 A)• Installation location[IMAGE]Install the socket where the plug can be disconnected. |
Installing the Appliance Installation
How to Install
1 Insert the plug to the socket.


2 Insert horizontally.

3 Make sure there is no space between the countertop and the top plate in the front, back, left and right.

Post-installation Checklist Specifications

Check and mark off the following items.
| Installation | Not tilted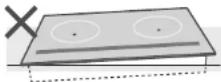 Clean Clean | Securely insertedPress lightly and make sure the corner of the top plate is not lifted up. | SETTING |
| Electrical work | The power supply is a single phase, 230 V.The earth has been installed.The earth leakage circuit breaker has been installed. | ☐ | |
1 [IMAGE]→ [IMAGE]Check if the light is on. Check if the indication is fl ashing. Check if the indication is fl ashing. | SETTING | ||
- Turn off each cooking zone and the main power after performing the electrical test.
- Provide the Operating / Installing Instructions and Guarantee Certificate to the customer.
I hereby certify that installation has been completed.
Signature of installer
| Power supply Single phase 230 V 60 Hz | |
| Power consumption 3200 W | |
| Standby power consumption (approx.) | 0.9 W*When the main power is off |
| Dimensions (approx.) | (W) 742 × (D) 400 × (H) 107 mm |
| Weight (approx.) | 11.5 kg |
| Heat level adjustment (approx.) | 9-level adjustment75 W - 3200 W equivalent |
| Pan-frying temperature adjustment (approx.) | 5-level adjustment140 °C - 230 °C |
| Deep-frying temperature adjustment (approx.) | 7-level adjustment140 °C - 200 °C |
| Congee mode 4 servings or 2 servings | |
| Cooking timer 1 minute - 9 hours 30 minutes | |
■ Using both cooking zones simultaneously

Heating power may be regulated automatically to restrict overall power consumption.
- Heating power weakens without changing the heat level indication.
- The heat level decreases by one or several.
- The heat level cannot be increased, even if touching + To increase the heat level, avoid using both cooking zones together, or reduce the heat level of either cooking zone.
■ Energy saving effect with ECONAVI
| Comparative mode | (socal) 160 °C Level 4 | (socal) | |
| Calculation condition |  | ·Cook 3 pancakes in a row with Panasonic standard pan.·Fry one side for 6 min. and the other side for 2 min. | |
| Power consumption (approx.) | Saves approx. 23 % | 147.5 Wh | 191.5 Wh |
*Average integral power consumption calculated by comparison based on the actual data provided by Panasonic.
*Energy saving effect varies depending on the cooked volume, and size and material of the pan.


- OPERATING / INSTALLATION INSTRUCTIONS
- PLACE THE COOKWARE IN THE CENTRE OF THE COOKING ZONE
- WHAT IS THE IR SENSOR
- IH (INDUCTION HEATING) FEATURES
- SAFE
- CLEAN
- EFFICIENT
- IH COOKING MECHANISM
- SAFETY PRECAUTIONS
- WARNING
- TO AVOID FIRES FROM OVERHEATED OIL
- FOR PROPER FUNCTION OF THE IR SENSOR
- TO AVOID INJURIES OR BURNS CAUSED BY BUMPING
- TO AVOID FIRE, EXPLOSION OR ELECTRIC SHOCK
- TO AVOID INJURIES OR BURNS
- IN CASE OF A MALFUNCTION OR BREAKDOWN
- CAUTION
- TO AVOID FIRE OR ACCIDENTS
- TO AVOID DAMAGE TO THE COOKWARE
- SUITABLE COOKWARE
- NOTE
- BASICS
- COOKING TIPS
- HEATING MODE
- PAN-FRYING MODE DEEP-FRYING MODE
- CONGEE MODE
- COOKING CONGEE AUTOMATICALLY
- ②
- COUNT-UP TIMER / TIMER
- SETTING COUNT-UP TIMER
- SETTING TIMER
- CLEANING
- LIGHT STAINS
- OIL STAINS
- HEAVY STAINS
- ERROR INDICATIONS
- TROUBLESHOOTING
- SYMPTOM POSSIBLE CAUSE
- INSTALLATION
- (FOR INSTALLER)
- CONTENTS
- IMPORTANT
- TO AVOID FIRE, ELECTRIC LEAKAGE, ELECTRIC SHOCK OR ABNORMAL OPERATION
- TO AVOID FIRE, DEFORMATION OR DISCOLOURATION
- DIMENSIONS
- RELATED DIMENSIONS
- ELECTRICAL WORK
- INSTALLING THE APPLIANCE INSTALLATION
- HOW TO INSTALL
- POST-INSTALLATION CHECKLIST SPECIFICATIONS
- USING BOTH COOKING ZONES SIMULTANEOUSLY
- ENERGY SAVING EFFECT WITH ECONAVI
Brand : PANASONIC
Model : KY-E227E
Category : Cooker