
AVS1464 - Uncategorized DAEWOO - Free user manual and instructions
Find the device manual for free AVS1464 DAEWOO in PDF.


| Product Type | Canister Vacuum Cleaner |
| Brand | Daewoo |
| Model | AVS1464 |
| Dimensions (LxWxH) | 400 x 250 x 300 mm |
| Weight | 5.5 kg |
| Power Consumption | 1200 W |
| Voltage | 220-240 V, 50/60 Hz |
| Dust Bag Capacity | 3.5 liters |
| Filtration System | HEPA filter |
| Noise Level | 78 dB |
| Cord Length | 8 meters |
| Suction Power | Adjustable, max 350 air watts |
| Accessories Included | Crevice tool, upholstery brush, floor nozzle |
| Telescopic Tube | Yes |
| Automatic Cord Rewind | Yes |
| On/Off Switch | Foot pedal |
| Color | Dark gray/black |
| Maintenance | Clean filters regularly; empty bag when full |
| Safety Features | Automatic shut-off on overheating |
| Repairability | Spare parts available; replaceable filters and belt |
Frequently Asked Questions - AVS1464 DAEWOO
User questions about AVS1464 DAEWOO
0 question about this device. Answer the ones you know or ask your own.
Ask a new question about this device
Download the instructions for your Uncategorized in PDF format for free! Find your manual AVS1464 - DAEWOO and take your electronic device back in hand. On this page are published all the documents necessary for the use of your device. AVS1464 by DAEWOO.
USER MANUAL AVS1464 DAEWOO
natural_image
Abstract white fan-like logo design on orange background (no text or symbols)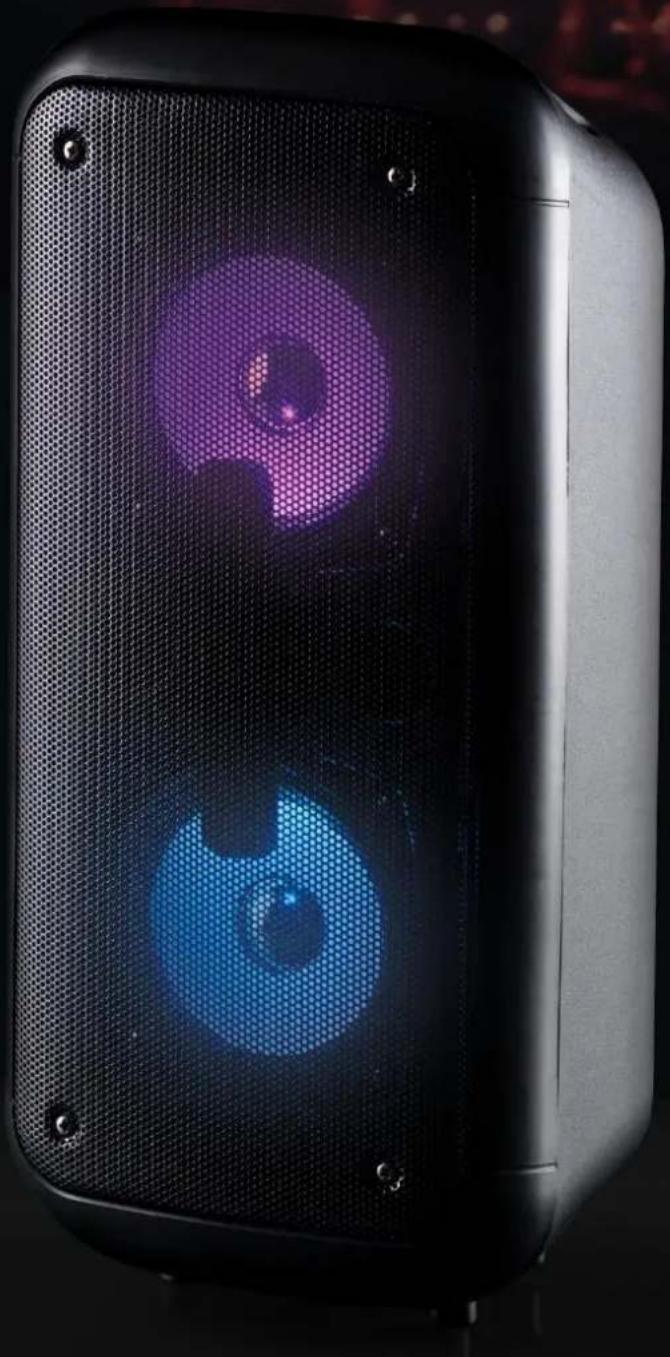
natural_image
Black rectangular device with two glowing blue circular patterns on its side, no visible text or symbols.LED Bluetooth Party Speaker
User Manual

IMPORTANT SAFEGUARDS
When using electrical appliances, basic safety precautions should always be followed. These instructions should be saved for future reference:
- Read and familiarise yourself with all operating instructions before using this Speaker.
- Before using your Speaker, visually check that the unit is intact and has not suffered any transit damage.
• Always use this appliance on a solid, level, non-flammable surface. - Ensure that there is clearance of at least 100mm (4 Inches) minimum around the Speaker for sufficient ventilation.
- Ensure that any ventilation openings are not covered with items, such as newspapers, table-cloths, curtains, etc.
- No naked flame sources, such as lighted candles, should be placed on the Speaker.
- Do not position the Speaker close to sources of heat such as radiators, heaters, other electronic equipment, etc.
- The Speaker shall not be exposed to dripping or splashing and that no objects filled with liquids, such as vases, shall be placed on the apparatus.
- Do not immerse the Speaker or its charging cable in water or any other liquids.
- Do not leave the Speaker unattended during use.
- Do not leave the Speaker unattended whilst connected to a USB supply.
- Close supervision is required when using this Speaker near children.
- Never leave this Speaker within reach of children.
- This appliance can be used by children aged from 8 years and above and persons with reduced physical, sensory or mental capabilities or lack of experience and knowledge if they have been given supervision or instruction concerning use of the appliance in a safe way and understand the hazards involved. Children shall not play with the appliance. Cleaning and user maintenance shall not be made by children without supervision.
-
Children of less than 3 years should be kept away unless continuously supervised.
-
It is imperative to unplug the USB supply after the Speaker has been used, before it is cleaned and whilst being repaired.
- Unplug after each use.
- Repairs to electrical appliances should only be performed by qualified personnel. Improper repairs may place the user at serious risk.
- Do not operate this appliance after a malfunction or after being dropped or damaged in any way.
- Do not allow the charging cable to hang over sharp edges or come in contact with hot surfaces.
- Do not run the charging cable under carpets, rugs, etc.
- This product is intended for household use only and should not be used for industrial purposes.
- Do not use any accessories or attachments with this product other than those supplied or recommended by supplier.
- Do not use this product for anything other than its intended use.
- Do not push objects into any openings as damage to the product and/or electric shock may occur.
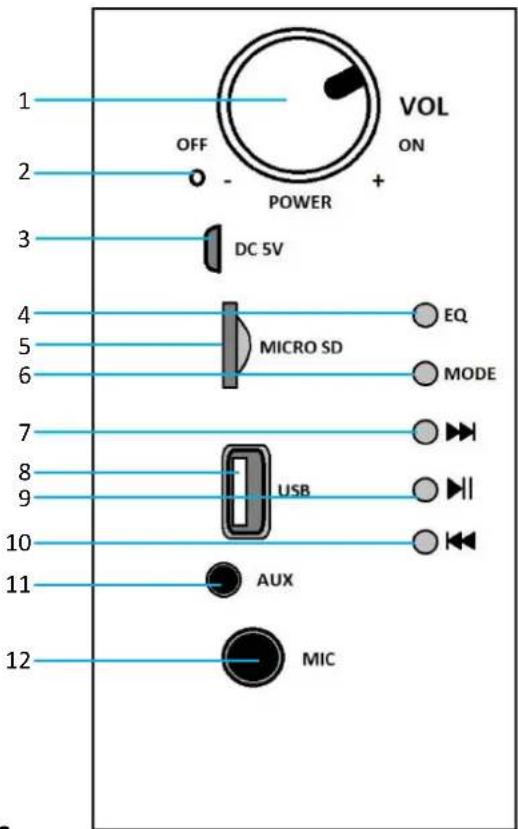
Description of Parts – Rear Panel
- Power On/Off/Volume Switch
- LED Indicator
- Micro USB Charging Port
- EQ button
- Micro SD/TF Card Player
- MODE – press to select Bluetooth, AUX, USB or SD/TF mode.
- ▶▶▶ Press to Skip forwards to the next track, press and hold to search track.
- USB Memory Stick Port
- ▶ Press to Play or Pause tracks.
- Press to Skip back to the previous track, press and hold to reverse search a track.
- 3.5mm AUX input Jack socket.
- 6.25mm (quarter Inch) Microphone input Jack socket.
Description of Parts – Speaker Front & Accessories
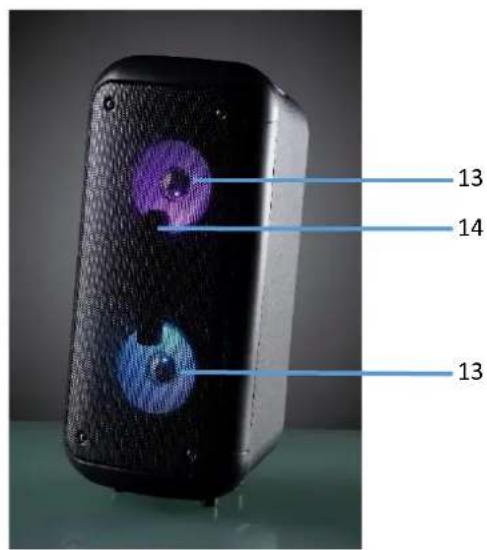
- Loudspeaker(s)
- LED Lighting Effect
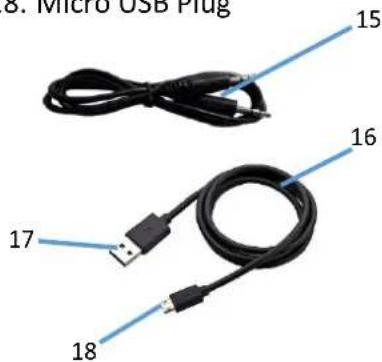
- 3.5mm Jack to Jack lead
- USB Charging Cable
- Large USB Plug
- Micro USB Plug
Before the first time you use your Party Speaker
Please read these operating instructions thoroughly and keep them in a safe place for future reference.
Remove all packing materials and discard responsibly.
Charging the internal Battery
Before use, please ensure that the internal rechargeable battery is fully charged as follows:
- Insert the Micro USB Plug (18) of the USB Charging Cable (16) into the Micro USB Charging Port (3) on the rear panel of the Party Speaker to charge the internal battery.
- Insert the Large USB plug (17) of the USB Charging Cable (16) into a suitable USB charger rated at 1 amp minimum.
- The LED Indicator (2) will light red to show the internal battery is charging. Once the battery is fully charged (after approximately 3 hours), the LED Indicator (2) will go out showing that the internal battery is fully charged and the USB Charging Cable (16) can be removed.
NB the Party Speaker can be used normally during charging. Also, once fully charged, the speaker will operate for up to 3 hours on its internal battery. During use, the speaker will give a tone to indicate the internal battery is low on charge and will need recharging.
Using the Bluetooth Mode
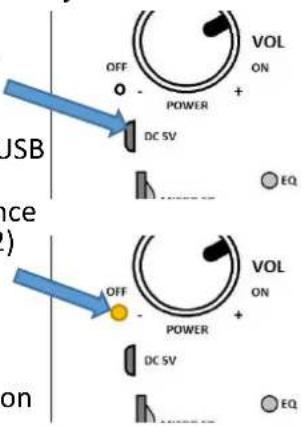
- Switch on the Party Speaker by rotating the Power On/Off/Volume (1) control on the rear panel (arrowed right) clockwise.
- The speaker will give out a chiming tone and the LED Indicator (2) on the rear panel will flash to indicate that it is ready to pair with an external Bluetooth device.
3 Enable the Bluetooth mode on your Phone, Tablet or other Bluetooth compatible device and set it to search. - Select 'AVS1464' from the search results found by your device which will now pair with the speaker. Once your device has paired the speaker will chime once to confirm it is has paired and ready play music.
- Enable the music player on your Phone, Tablet or other device you are using.
- Press the Play/Pause button ▶(9) to start and stop (pause) the connected device playing.
- Briefly press the skip forwards ▶▶| (7) and skip backwards ◀◀buttons (10) to change the track being played.
- Rotate the Power On/Off Volume (1) control clockwise and anticlockwise increase and decrease the volume level.
- Alternatively use your devices controls in the usual manner.



AUX
Using the AUX Input
The AUX Input allows a direct wired connection of an external audio device (such as a mobile phone, mp3 player, etc.) via a 3.5mm jack socket input on the rear panel.
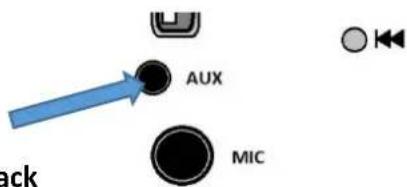
- Insert the 3.5mm jack to jack lead (15) into the 3.5mm AUX input Jack socket (11) on the rear panel (arrowed right).
- Connect the other end of the 3.5mm jack to jack lead* (11) to your external device.
- Press the mode button (6) to enter the aux in mode.
- Rotate the Power On/Off Volume (1) control clockwise and anticlockwise increase and decrease the volume level.
- Use your devices controls in the usual manner whilst playing music back through the speaker.
*A different lead may be required if the supplied cable is not compatible with your device.
Using the Microphone input
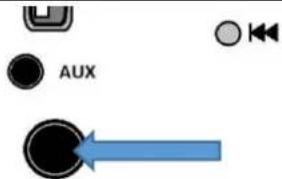
Insert a Microphone (not supplied) equipped with a 0.25" (6.35mm) Jack plug into the Microphone Input Jack Socket (12) in order to sing along with your favourite tracks.
NB Whilst using the Microphone input it may be necessary to lower the volume level on your phone, tablet or other Bluetooth device you are using so that the vocal can be heard over the music.
Playing Music from a USB Memory Stick
- Insert a USB Memory Stick (pre-loaded with audio tracks – Mp3, WAV, files etc.) into the USB memory stick port (8) on the rear panel. NB the USB port supports USB 2.0 and up to 32GB capacity max.
- The tracks on the memory stick will begin to play automatically.
- Press the Play/Pause button ▶(9) to play and pause the memory stick. Press the Play/Pause button ▶(9) again to resume playing the memory stick.
- Briefly press the skip forwards ▶▶| (7) and skip backwards ◀◀◀ buttons (10) to change the track being played.
- Rotate the Power On/Off Volume (1) control clockwise and anticlockwise increase and decrease the volume level.
NB the speaker will default to Bluetooth mode after the USB memory stick has been removed.
Playing Music from a Micro SD/TF Card
- Insert a Micro SD/TF card (pre-loaded with audio tracks – Mp3, WAV, files etc.) into the Micro SD/TF Card Player (5) on the rear panel. NB the Micro SD/TF card player supports cards up to 32GB capacity max.
- The tracks on the card will begin to play automatically.
- Briefly press the skip forwards ▶▶|(7) and skip backwards ◀◀◀ buttons (10) to change the track being played.
- Rotate the Power On/Off Volume (1) control clockwise and anticlockwise increase and decrease the volume level.
NB the speaker will default to Bluetooth mode after the Micro SD/TF card has been removed.
Setting the EQ
Press the EQ button (4) to select from the following EQ mode settings:
- Jazz, Rock, Bass, Normal and Classic.
Care and Use of your Party Speaker
• Always disconnect the Party Speaker from the USB supply before cleaning.
- Clean outside of the Party Speaker with a clean damp cloth. Never clean with harsh or abrasive cleaners.
- Do not submerge the Party Speaker or its charging cable in water or any other liquids.
Technical Specification
| Model Number | AVS1464 |
| Power Supply/Charger | DC 5V @1.0A |
| Audio output power | 2x 4W RMS |
| Speaker Units | 2x 4” Full Range Drivers |
| Unpacked Weight | Approx. 1.58 Kgs |
| Dimensions (Approx.) | 390mm (h) x 170mm (w) x 165mm (d) Approx. |
| Operation temperature | 0°C to + 40°C |
| Built in Battery type | 3.7V Li-ion, 1500 mAh |
| Bluetooth Frequency Range | 2402 - 2480MHz |
| Bluetooth Transmission power | ≤-3.325dBm |
| This product conforms to Radio Equipment Directive 2014/53/EU | |
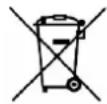
Waste batteries should not be disposed of with household waste. Please recycle where facilities exist. Check with your Local Authority or retailer for recycling advice.
DAEWOO
ELECTRICALS

natural_image
Abstract black-and-white geometric pattern resembling a stylized fan or petal shape (no text or symbols)GUARANTEE
This product is guaranteed for twenty-four months from the date of original purchase. If any defect should occur due to faulty materials or workmanship, please return it to the store it was purchased from.
You will need to have your receipt of purchase to hand. The guarantee is subject to the following provisions:
- It is only valid within the boundaries of the country of purchase.
- The product must be correctly installed and operated in accordance with the instructions contained in the User Manual.
- The product must be used solely for domestic purposes.
- The guarantee will be rendered invalid if the product is re-sold or has been damaged by inexpert repair.
- The manufacturer disclaims any liability for incidental or consequential damages.
- The guarantee is in addition to, and does not diminish, your statutory or legal rights.
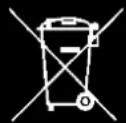
Waste electrical products should not be disposed of with household waste. Please recycle where facilities exist. Check with your Local Authority or retailer for recycling advice

Daewoo Electricals is a registered trademark. Produced and imported under licence by ESG Ltd
Manchester M3 1JS www.esgld.com
- IMPORTANT SAFEGUARDS
- When using electrical appliances, basic safety precautions should always be followed. These instructions should be saved for future reference:
- Description of Parts – Rear Panel
- Description of Parts – Speaker Front & Accessories
- Before the first time you use your Party Speaker
- Charging the internal Battery
- Using the Bluetooth Mode
- Using the AUX Input
- Using the Microphone input
- Playing Music from a USB Memory Stick
- Playing Music from a Micro SD/TF Card
- Setting the EQ
- Care and Use of your Party Speaker
- DAEWOO
- ELECTRICALS
- GUARANTEE
Brand : DAEWOO
Model : AVS1464
Category : Uncategorized