
ZDAPVW1 - Électronique automobile PHOENIX GOLD - Free user manual and instructions
Find the device manual for free ZDAPVW1 PHOENIX GOLD in PDF.


| Product Type | Car Audio Interface / DSP |
| Brand | Phoenix Gold |
| Model | ZDAPVW1 |
| Vehicle Compatibility | Volkswagen Passat 2020 (B8) |
| Included Components | ZDA4.6 processor, SOT Cable, ZDAISOT adapter, 2x Release Keys |
| Installation Tools Required | Plastic Pry Tool, Release Keys |
| Power Supply | 12V DC (vehicle battery) |
| Dimensions (approx.) | 6.3 x 4.0 x 1.2 inches |
| Weight (approx.) | 0.6 lbs |
| Connection Type | Quadlock (factory), RCA, speaker level |
| Software | Phoenix Gold ZDA4.6 software (download from official website) |
| Sound Curves | Pre-loaded Phoenix Gold sound curves, customizable via software |
| Cable Lengths (approx.) | SOT: 1.5 ft, ZDAISOT: 3 ft |
| Material | Plastic housing, metal connectors |
| Operating Temperature | 0°C to 50°C |
| Storage Temperature | -20°C to 60°C |
| Color | Black |
| Installation Recommendation | Professional installation recommended |
Frequently Asked Questions - ZDAPVW1 PHOENIX GOLD
User questions about ZDAPVW1 PHOENIX GOLD
0 question about this device. Answer the ones you know or ask your own.
Ask a new question about this device
Download the instructions for your Électronique automobile in PDF format for free! Find your manual ZDAPVW1 - PHOENIX GOLD and take your electronic device back in hand. On this page are published all the documents necessary for the use of your device. ZDAPVW1 by PHOENIX GOLD.
USER MANUAL ZDAPVW1 PHOENIX GOLD
ZDAPVW1

natural_image
Black electronic device labeled 'PHOENEOIS' with a logo, showing ports and connectors (no readable text beyond branding)
natural_image
Coiled electrical connectors with various colors and symbols, no visible text or labels
natural_image
Coiled black cable with multiple colored connectors (no visible text or symbols)
1x ZDA4.6 1x SOT Cable 1x ZDAISOT 2x Release keys
Installation Tools Required
Vehicle used for installation:\*
Volkswagen Passat 2020 (B8)
Standard Stereo
*Some differences may occur between different car and year models.
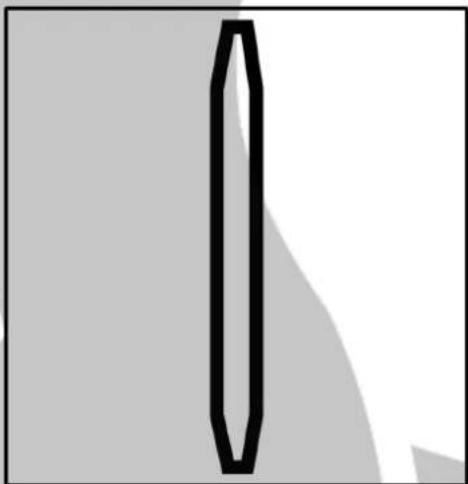
Plastic Pry Tool
natural_image
Simple geometric shape resembling a vertical rectangle with an octagon, set against a plain gray background (no text or symbols)ZDAPVW1 Installation 1
Tools required:

2x Release Keys
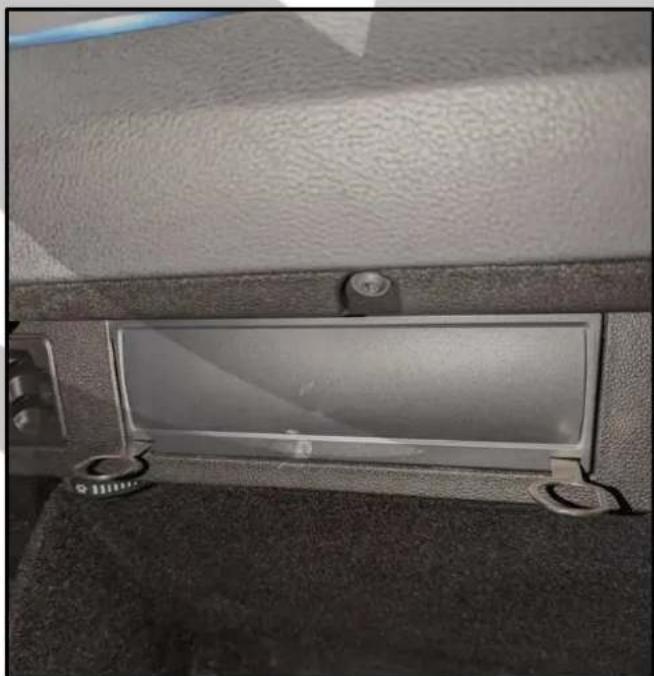
1. Open the glove box

natural_image
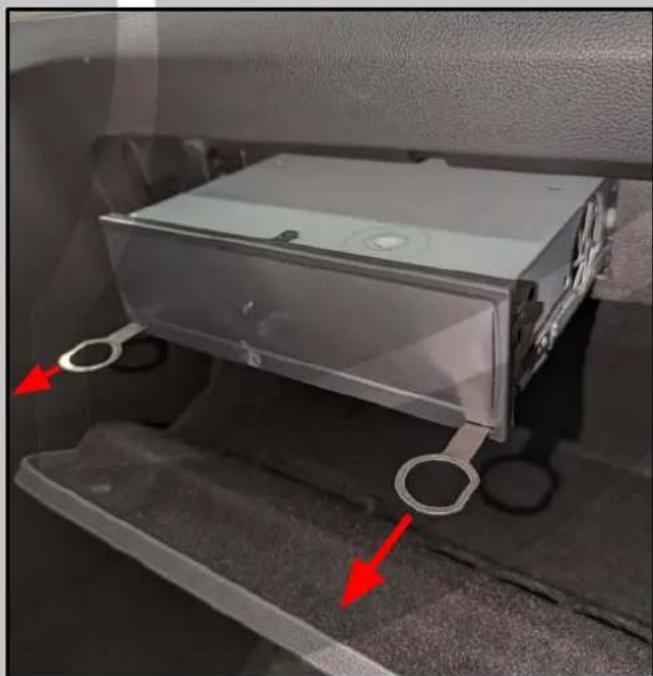
Close-up of a car's front door and side panel, showing no text or symbols on the main body3. Insert the release keys
natural_image
Interior view of a car showing the backrest door, seatbelt, and dashboard panel (no text or symbols visible)2. Locate the factory stereo

natural_image
Close-up of a car's side panel showing the frontrest and interior compartments (no text or symbols visible)4. Pull out the stereo
natural_image
Interior view of a car showing a transparent plastic enclosure with red arrows pointing to its side (no text or symbols visible)ZDAPVW1 Installation 2
Tools required:

natural_image
Coiled electronic circuit boards with various colored connectors and connectors, no visible text or symbols1x SOT Cable
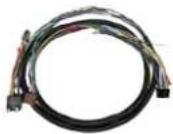
1x ZDAISOT
5. Unplug the quadlock connector

natural_image
Interior view of a vehicle showing a white DVD drive with attached cable and control panel (no visible text or symbols)7. Connect the SOT to the stereo
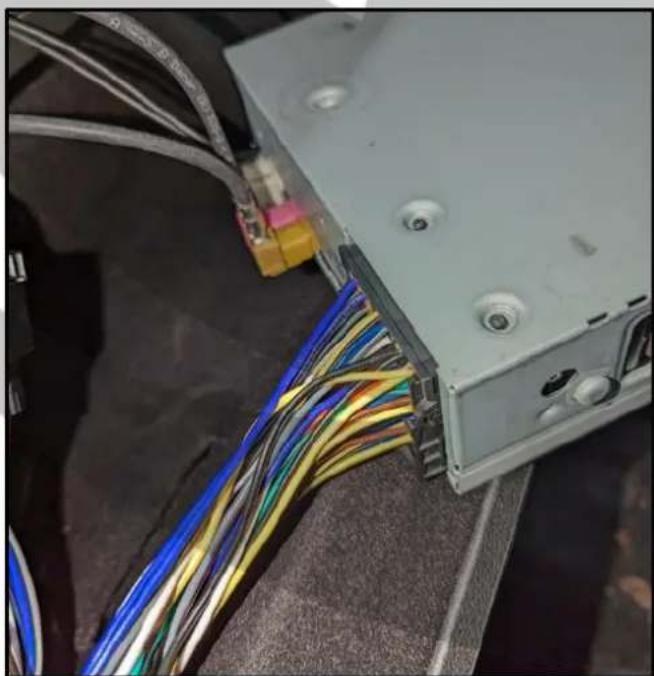
natural_image
Close-up of a computer monitor with multicolored cable connectors and wiring, no visible text or symbols6. Connect the SOT cable
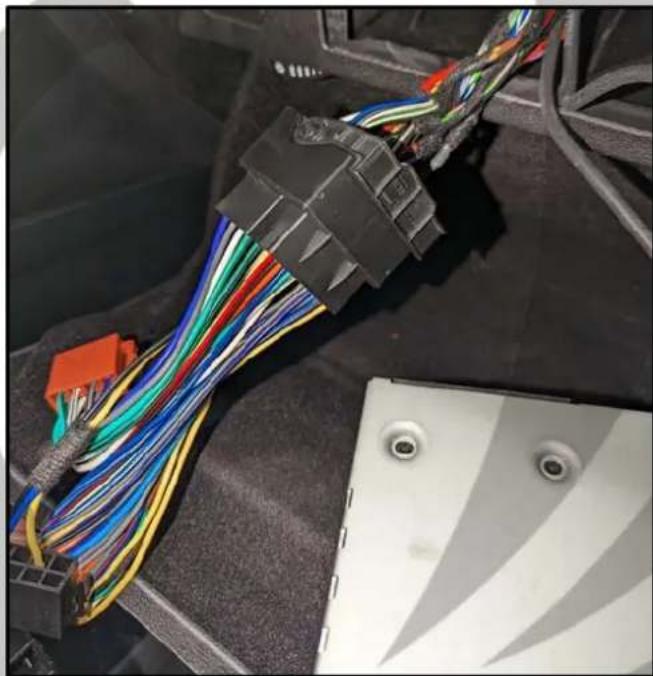
natural_image
Close-up of a car electrical connector with multicolored wires and connectors (no visible text or symbols)8. Connect ZDAISOT to SOT cable

natural_image
Close-up of a multi-colored automotive electrical connector with wires and connectors (no visible text or symbols)ZDAPVW1 Installation 3
Tools required:

1x Plastic Pry Tool
- Open the side of the glove box

natural_image
Close-up of a car's front panel showing the engine compartment with a blue tool inserted, no visible text or symbols.- Pull up the side panel
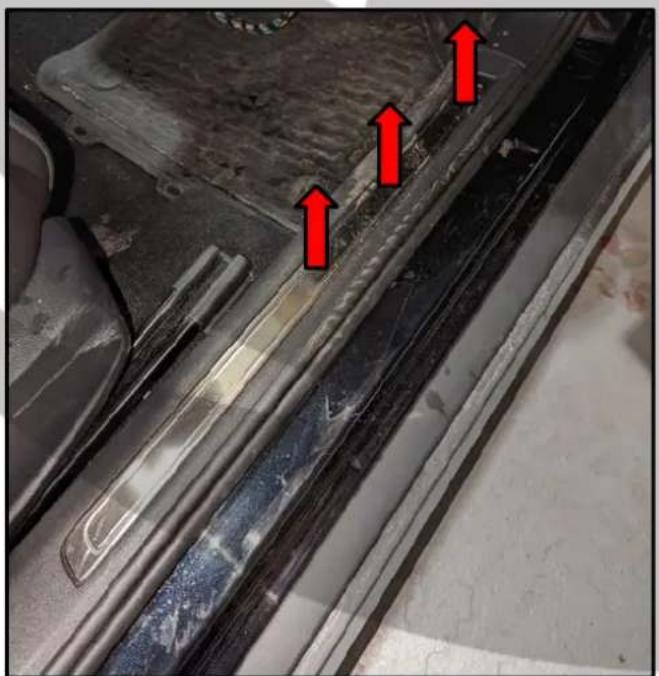
natural_image
Close-up of a damaged car interior with red arrows pointing to structural damage areas (no text or symbols visible)- Pull ZDAISOT out
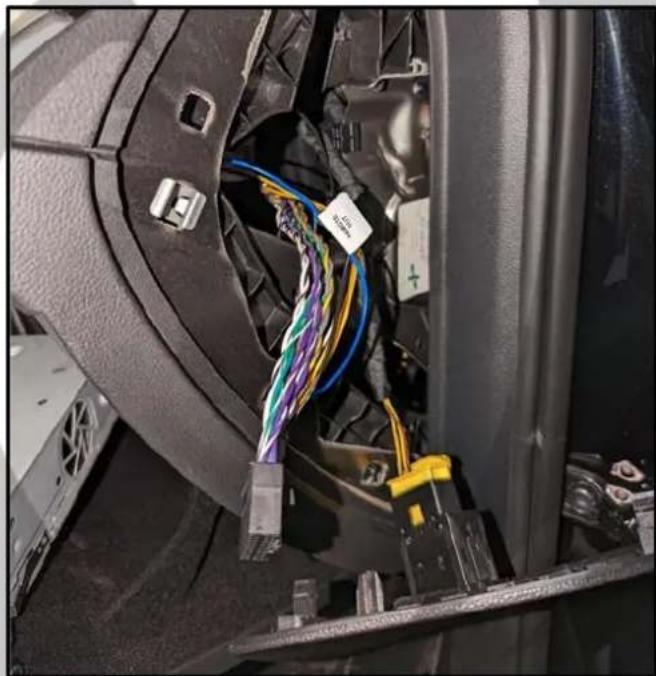
natural_image
Close-up of a car interior showing cable wiring and connectors (no visible text or symbols)- Pull out plastic panel
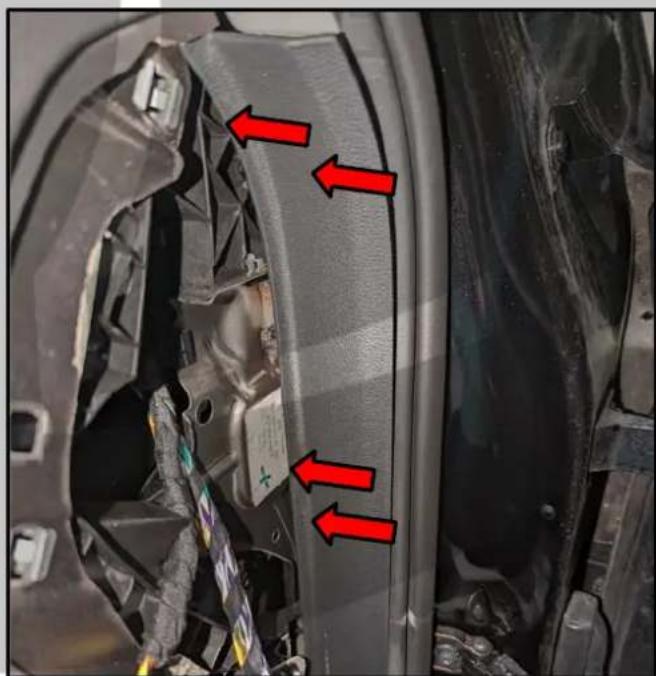
natural_image
Close-up of a car's front wheel and dashboard with red arrows pointing to structural components (no text or symbols visible)ZDAPVW1 Installation 4
Tools required:
- Pull panel towards you

natural_image
Close-up of a car's side panel showing a damaged interior with two red arrows pointing to specific areas (no text or symbols visible)- Pull up the carpet
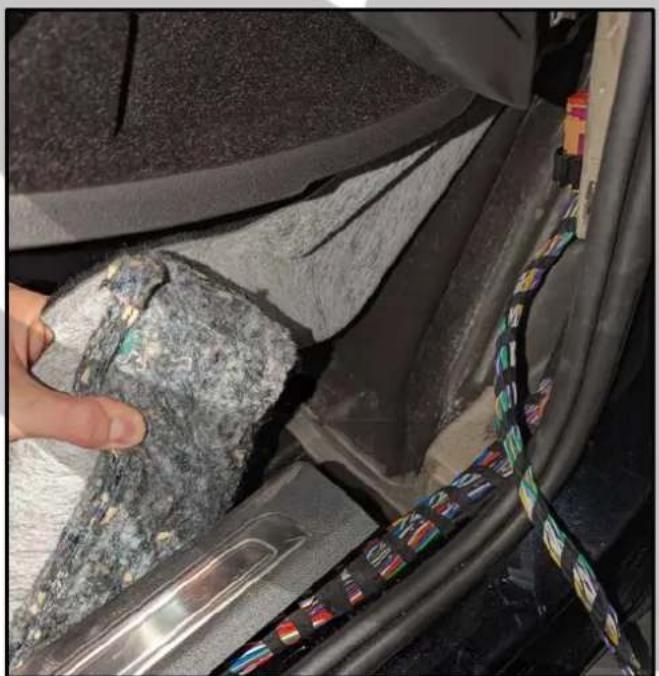
natural_image
Close-up of a car's rear wheel assembly showing a hand holding a damaged cable, with no visible text or symbols.- Route the cable behind the panels
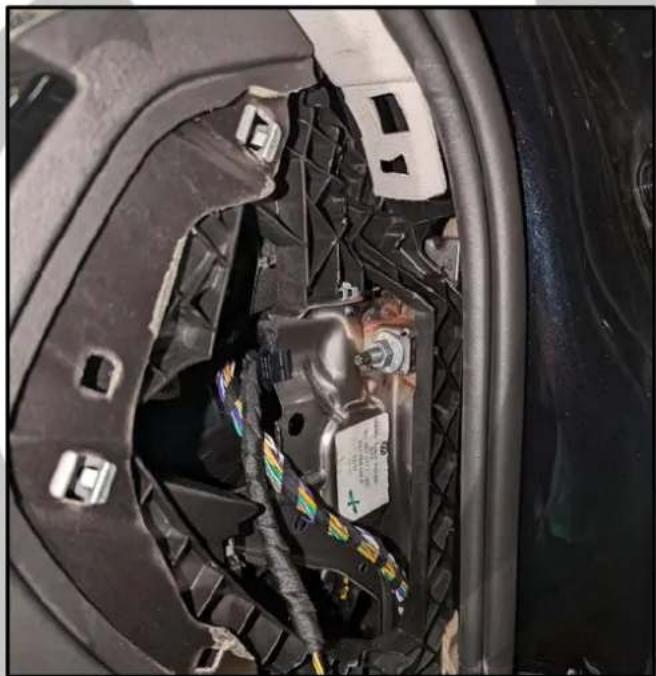
natural_image
Interior view of a car's dashboard and engine compartment showing wiring, battery pack, and mounting fixtures (no visible text or symbols)- Route the cable under the carpet

natural_image
Interior view of a car showing exposed wiring and a red cable, with no visible text or symbols.ZDAPVW1 Installation 5
Tools required:

1x ZDA4.6 1x Computer
- Install the ZDA4.6 18. Physical install is now complete

natural_image
Black electronic device labeled 'PRESERVADO' with visible wiring and connectors, placed on a dark textured surface (no readable text beyond label)
natural_image
Stylized orange bird logo within a circular frame, no text or symbols present- Go to phoenixgold-eu.com/downloads/ and download the ZDA4.6 software and your Phoenix Gold sound curve
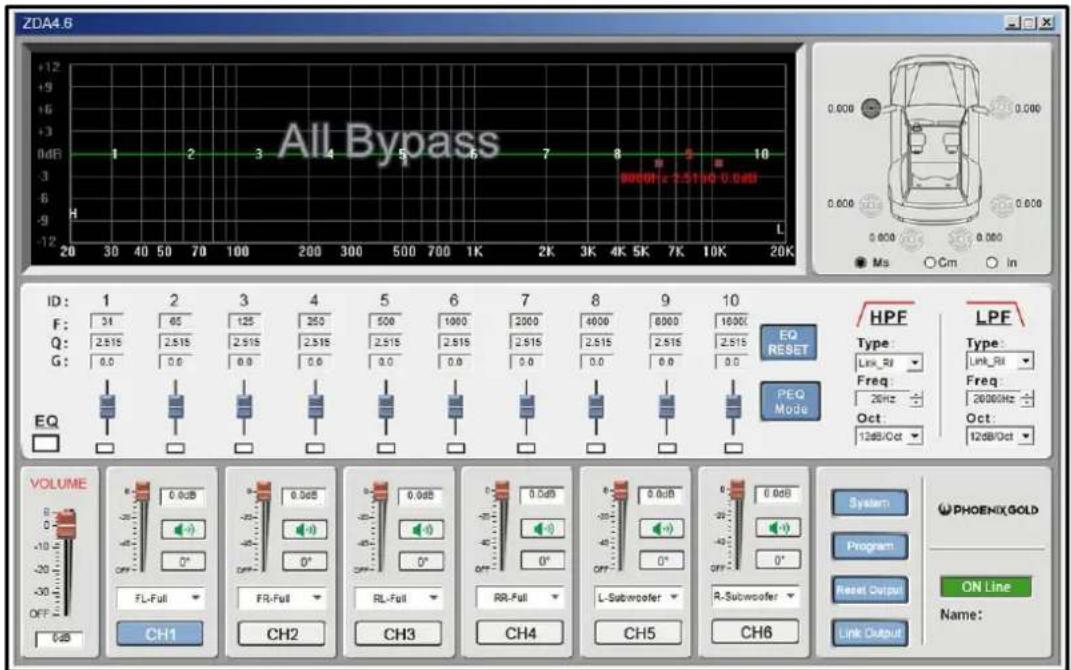
Software Installation 1
Tools required:

1x Computer
- Press "Program" 21. Press "Load PC Presets File"
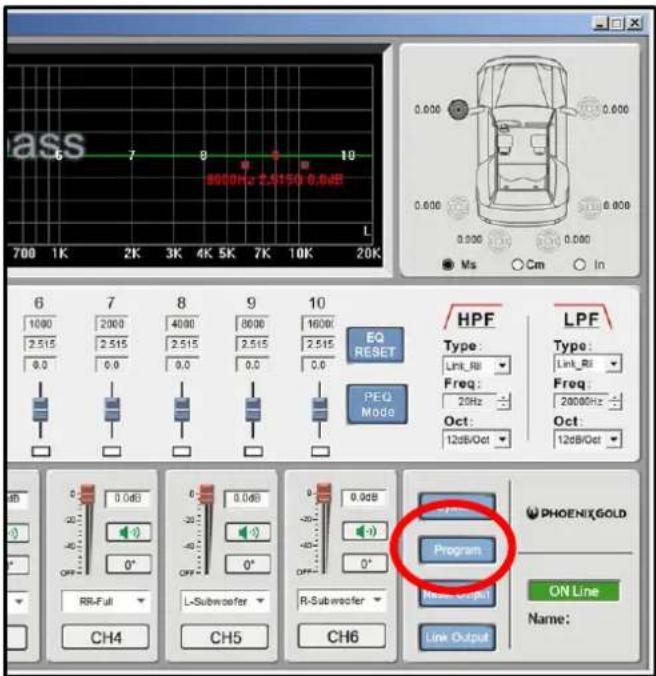

- Go to your saved location and choose your Phoenix Gold sound curve, then click "Open"

Software Installation 2
Tools required:

1x Computer
- Press "Program" 24. Press "Save As Machine Preset"
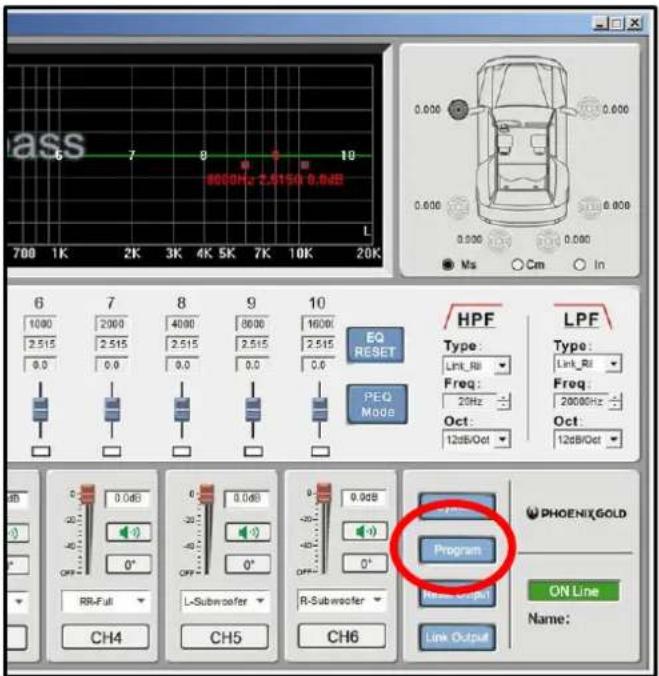

- Press "Save"

Software Installation 3
Tools required:

1x Computer
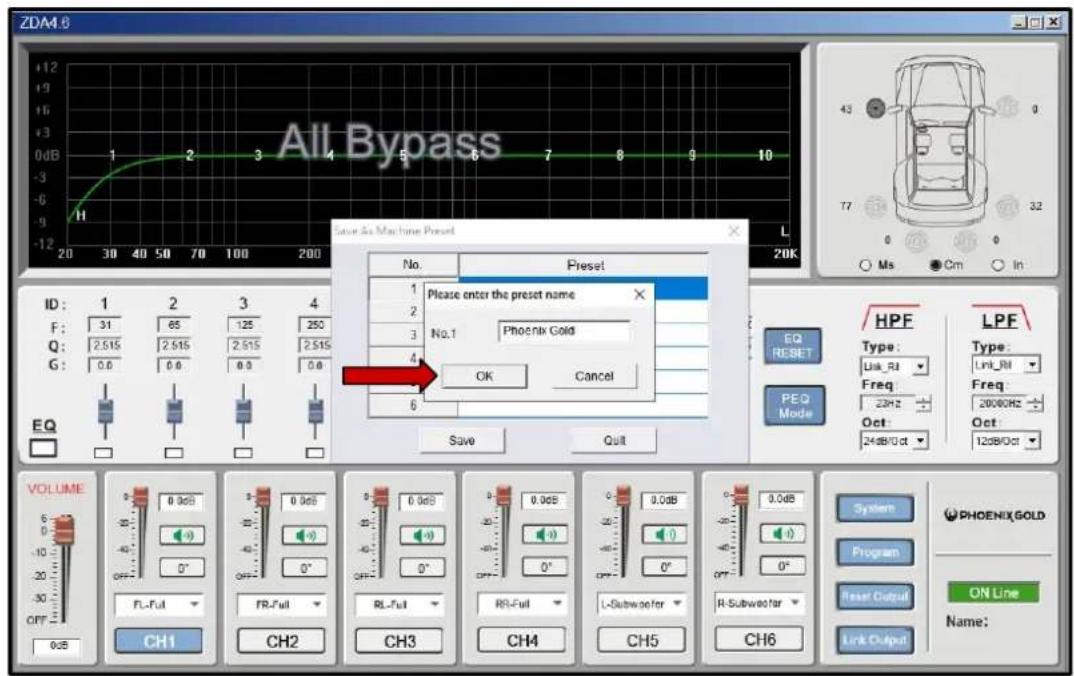
- Press "OK". The sound curve is now installed and saved to the ZDA4.6.
On Behalf of the Phoenix Gold team, Thank you for choosing us!
Your installation is complete and we hope that your new upgraded system will bring you joy and happiness for many years to come when listening to your favorite music. As always, our goal is bringing you The Gold Standard in Sound.

- ZDAPVW1
- Installation Tools Required
- Vehicle used for installation:\*
- ZDAPVW1 Installation 1
- Tools required:
- Open the glove box
- Insert the release keys
- Locate the factory stereo
- Pull out the stereo
- ZDAPVW1 Installation 2
- Unplug the quadlock connector
- Connect the SOT to the stereo
- Connect the SOT cable
- Connect ZDAISOT to SOT cable
- ZDAPVW1 Installation 3
- ZDAPVW1 Installation 4
- ZDAPVW1 Installation 5
- Software Installation 1
- Software Installation 2
- Software Installation 3
- On Behalf of the Phoenix Gold team, Thank you for choosing us!
Brand : PHOENIX GOLD
Model : ZDAPVW1
Category : Électronique automobile