
DA6580 - Bed Dorel - Free user manual and instructions
Find the device manual for free DA6580 Dorel in PDF.


| Product Type | Loft Bed with Desk |
| Brand | Dorel |
| Model | DA6580 |
| Color | Espresso |
| Material | Metal frame, engineered wood panels |
| Recommended Mattress Size (Upper Bunk) | 74-75 inches long, 37.5-38.5 inches wide, max 6 inches thick |
| Weight Capacity (Upper Bunk) | 165 lbs (75 kg) |
| Weight Capacity (Desk) | 100 lbs |
| Age Recommendation | 6 years to young teenagers |
| Assembly Required | Yes, adult assembly required, two people recommended |
| Tools Included | Allen key |
| Tools Required (Not Included) | Phillips screwdriver, rubber mallet |
| Number of Slats | 13 |
| Safety Features | Full-length guardrails, ladder, warning labels |
| Warranty | 1 year limited warranty against defects in material and workmanship |
| Care Instructions | Dust regularly with soft dry cloth; avoid chemical cleaners or wax |
| Maintenance | Periodically check and tighten bolts/screws |
| Customer Service | 1-800-295-1980, das@dorel.com |
Frequently Asked Questions - DA6580 Dorel
User questions about DA6580 Dorel
0 question about this device. Answer the ones you know or ask your own.
Ask a new question about this device
Download the instructions for your Bed in PDF format for free! Find your manual DA6580 - Dorel and take your electronic device back in hand. On this page are published all the documents necessary for the use of your device. DA6580 by Dorel.
USER MANUAL DA6580 Dorel
LOFT BED WITH DESK
Model Number: UPC Code: Color:
DA6580 0-65857-17353-6 Espresso
Congratulations on your latest furniture purchase! Dorel Living furniture has been developed with quality, convenience and style in mind. We trust it will provide you with many years of exceptional comfort and service.
Before beginning assembly, we encourage you to familiarize yourself with your new furniture piece by taking a few minutes to go through this booklet. It contains important information on our warranty and care tips to keep your furniture looking as good as new.
Customer satisfaction is important to us at Dorel Asia. Our agents are available Monday to Friday 8am to 5pm (EST) to answer any question you may have. For faster service, always have the model number ready when calling our toll free number 1-800-295-1980 or emailing us at das@dorel.com.
For more great furniture ideas, check out our website at www.dorelliving.com
You can also keep up to date on all the latest trends by liking our Facebook page.

natural_image
Line drawing of a two-tiered metal bunk bed structure with ladder and support beams (no text or symbols)Date of Purchase: ____ / ____ / ____ Lot Number:
(taken from carton)
DO NOT RETURN PRODUCT TO THE STORE. If a part is missing or damaged, contact our customer service department. We will replace the part FREE of charge.
NOTE: THIS INSTRUCTION BOOKLET CONTAINS IMPORTANT SAFETY INFORMATION. PLEASE READ AND KEEP FOR FUTURE REFERENCE.
CUSTOMER SERVICE
If you are missing parts or have any questions about this product, contact our customer service representative first!

CALL 1-800-295-1980
You can also order parts by writing to the address listed below. Please include the product model number, color and a detailed description of the part.
Customer Service Department No. 413
12345 Albert-Hudon Boulevard, Suite 100
Montreal, Quebec
Canada, H1G 3L1
E-MAIL: das@dorel.com

WARNING
* STRANGULATION HAZARD - NEVER ATTACH OR HANG ITEMS TO ANY PART OF THE BUNK BED THAT ARE NOT DESIGNED FOR USE WITH THE BED; FOR EXAMPLE, BUT NOT LIMITED TO HOOKS, BELTS AND JUMP ROPES.
* FOLLOW THE INFORMATION ON THE WARNINGS APPEARING ON THE UPPER BUNK END STRUCTURE AND ON THE CARTON. DO NOT REMOVE WARNING LABEL FROM BED.
* THE MATTRESS PLATFORM IS DESIGNED TO SUPPORT A MATTRESS WITHOUT THE NEED FOR A POSTURE BOARD OR BOX SPRING.
* ALWAYS USE THE RECOMMENDED SIZE MATTRESS OR MATTRESS SUPPORT, OR BOTH, TO HELP PREVENT THE LIKELIHOOD OF ENTRAPMENT OR FALLS.
* USE ONLY COIL SPRING MATTRESS. FAILURE TO DO SO CAN RESULT IN INJURY.
USE ONLY MATTRESSES WHICH ARE 74"-75" LONG AND 37 1/2" - 38 1/2" WIDE . ENSURE THICKNESS OF MATTRESS DOES NOT EXCEED 6". SURFACE OF MATTRESS MUST BE AT LEAST 5" (127MM) BELOW THE UPPER EDGE OF GUARDRAILS.
* DO NOT ALLOW CHILDREN UNDER 6 YEARS OF AGE TO USE THE UPPER BUNK.
* ALWAYS USE GUARDRAILS ON BOTH LONG SIDES OF THE UPPER BUNK. IF THE BUNK BED WILL BE PLACED NEXT TO THE WALL, THE GUARDRAIL THAT RUNS THE FULL LENGTH OF THE BED SHOULD BE PLACED AGAINST THE WALL TO PREVENT ENTRAPMENT BETWEEN THE BED AND WALL (APPLICABLE FOR BUNK BEDS WITH FULL LENGTH GUARDRAILS ON ONE SIDE).
* PERIODICALLY CHECK AND ENSURE THAT THE GUARDRAIL, LADDER AND OTHER COMPONENTS ARE IN THEIR PROPER POSITION, FREE FROM DAMAGE, AND THAT ALL CONNECTORS ARE TIGHT.
* DO NOT ALLOW HORSEPLAY ON OR UNDER THE BED AND PROHIBIT JUMPING ON THE BED.
* DO NOT USE SUBSTITUTE PARTS. CONTACT CUSTOMER SERVICE FOR REPLACEMENT PARTS.
* USE OF A NIGHT LIGHT MAY PROVIDE ADDED SAFETY PRECAUTION FOR A CHILD USING THE UPPER BUNK.
* THE USE OF WATER OR SLEEP FLOTATION MATTRESSES IS PROHIBITED.
* ALWAYS USE THE LADDER FOR ENTERING AND LEAVING THE UPPER BUNK.
* PROHIBIT MORE THAN ONE PERSON ON UPPER BUNK.
* KEEP THESE INSTRUCTIONS FOR FUTURE USE.
NOTES
* READ EACH STEP CAREFULLY BEFORE STARTING. IT IS VERY IMPORTANT THAT EACH STEP OF INSTRUCTION IS PERFORMED IN THE CORRECT ORDER. IF THESE STEPS ARE NOT FOLLOWED IN SEQUENCE, ASSEMBLY DIFFICULTIES WILL OCCUR AND CAN RESULT IN INJURY.
* CAUTION: ADULT ASSEMBLY REQUIRED
* MAKE SURE ALL PARTS ARE INCLUDED. WORK IN SPACIOUS AREA, PREFERABLY ON A SMOOTH SOFT SURFACE.
* ASSEMBLY WILL REQUIRE TWO PEOPLE.
* MOST BOARD PARTS ARE LABELED OR STAMPED ON THE RAW EDGE.
* PHILLIPS SCREWDRIVER (NOT INCLUDED) IS REQUIRED.
* A RUBBER MALLET (NOT INCLUDED) IS RECOMMENDED TO FACILITATE ASSEMBLY.
* BED IS DESIGNED FOR CHILDREN RANGING FROM 6 YEARS OF AGE TO YOUNG TEENAGERS.
CARE AND CLEANING
Dust regularly with a soft, dry cloth. We do not recommend the use of chemical cleaners or wax on our lacquered furniture as it may damage the finish. Keep solvents, alcohol, nail polish and polish removers away from your hardwood furniture surfaces.
MAINTENANCE
Check bolts/screws periodically and tighten them if necessary.
LIMITED WARRANTY
Dorel warrants its product to be free from defects in material and workmanship and agrees to remedy any such defect. This warranty covers 1 year from the date of original purchase. This warranty is valid only upon presentation of proof of purchase. This is solely limited to the repair or replacement of defective furniture components and no assembly labor is included. This warranty does not apply to any product which has been improperly assembled, subjected to misuse or abuse or which has been altered or repaired in any way. This warranty gives you specific legal rights and you may also have other rights which vary from State to State

WARNING: Should this product
become damaged, and/or components are broken or missing, DO NOT USE.
LOFT BED WITH DESK
DA6580
HARDWARE LIST
| 1 |  Φ 1/4" x 100mm Φ 1/4" x 100mm | 2 |  Φ 6.5mm x 48mm Φ 6.5mm x 48mm |
| JOINT CONNECTOR (4mm HEX HEAD)12 PCS | WOOD JOINT CONNECTOR (4mm HEX HEAD)12 PCS | ||
| 3 |  Φ 6.5mm x 100mm Φ 6.5mm x 100mm | 4 |  Φ 4mm x 35mm Φ 4mm x 35mm |
| WOOD JOINT CONNECTOR (4mm HEX HEAD)26 PCS | FLAT HEAD SCREW26 PCS | ||
| 5 |  Φ 11.8mm x 15mm Φ 11.8mm x 15mm | 6 | 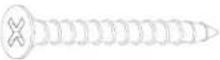 Φ 4mm x 30mm Φ 4mm x 30mm |
| BARREL NUT12 PCS | FLAT HEAD SCREW6 PCS | ||
| 7 |  Φ 10mm x 50mm Φ 10mm x 50mm | 8 | 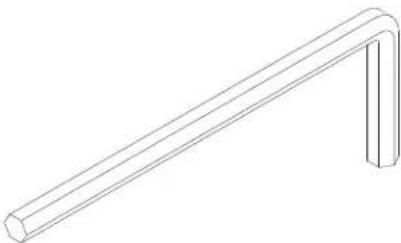 |
| WOOD DOWEL44 PCS | ALLEN KEY1 PC | ||
LOFT BED WITH DESK
DA6580
HARDWARE LIST
| 9 |  Φ 1/4" x 64mm Φ 1/4" x 64mm | 10 |  Φ 8mm x 30mm Φ 8mm x 30mm |
| JOINT CONNECTOR (4mm HEX HEAD)7 PCS | WOOD DOWEL2 PCS | ||
| 11 | 12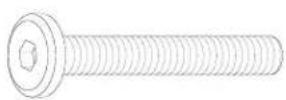 Φ 1/4" x 32mm Φ 1/4" x 32mm | 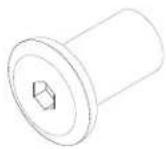 Φ 9mm x 17mm Φ 9mm x 17mm | |
| JOINT CONNECTOR (4mm HEX HEAD)4 PCS | HEX CAP2 PCS | ||
| 13 | 14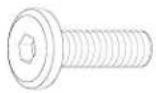 Φ 1/4" x 15mm Φ 1/4" x 15mm |  30mm x 30mm x 18mm 30mm x 30mm x 18mm | |
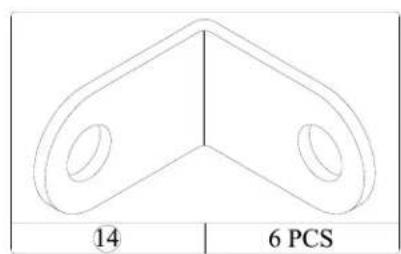
| JOINT CONNECTOR (4mm HEX HEAD)12 PCS | L SHAPED METAL PLATE6 PCS | ||
| 15 | 16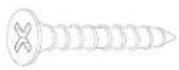 Φ 3.5mm x 19mm Φ 3.5mm x 19mm | ||
| FLAT HEAD SCREW2 PCS | |||
LOFT BED WITH DESK
DA6580
PARTS LIST
| ABC | ||
| LEFT FRONT POST1 PC | LEFT BACK POST1 PC | RIGHT BACK POST1 PC |
| DEF |  |  |
| RIGHT FRONT POST1PC | HEADBOARD CROSS6 PCS | HEADBOARD CENTER CROSS1 PC |
  | ||
LOFT BED WITH DESK
DA6580
PARTS LIST
GHI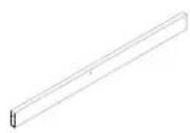 | 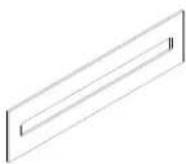 |  | |
| HEADBOARD CENTER CROSS1 PC | HEADBOARD PANEL4 PCS | FRONT SIDE RAIL1 PC | |
JKL |  | 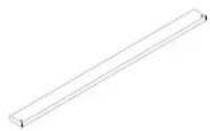 | |
| BACK SIDE RAIL1 PC | DESK FRONT RAIL1PC | SLAT13 PCS | |
MNO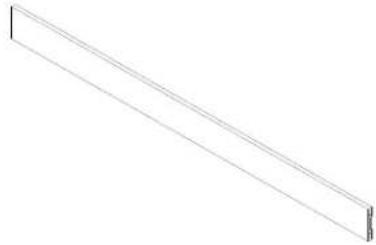 |  |  | |
| LONG GUARDRAIL1 PC | SHORT GUARDRAIL1 PC | LEFT LADDER END1 PC | |
PQR |  | ### | |
| RIGHT LADDER END1 PC | LADDER STEP5 PCS | GUARDRAIL LEG2 PCS | |
LOFT BED WITH DESK
DA6580
PARTS LIST
| STU[SHW] | ||
 |  | |
| SHORT GUARDRAIL POST1 PC | DESK PANEL1 PC | DESK BACK RAIL1 PC |
VWX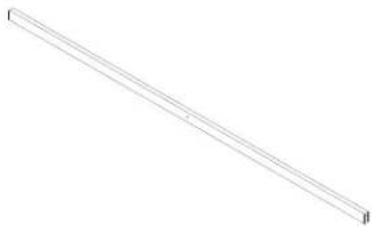 |  | |
| BOTTOM BACK GUARDRAIL1 PC | BOTTOM BACK SIDE RAIL1 PC | SUPPORT POST1 PC |
Y | ||
| SPACE BLOCK2 PCS | ||
LOFT BED WITH DESK
DA6580

The 2 holes on cross (F) face the same direction as the grooves on posts (A & B).

STEP 1
One of the headboard crosses (E) has a warning label on it. Do not use it in this step.
Insert wood dowels (7) into the ends of headboard cross (E) and headboard center cross (F). Insert headboard panel (H) into the grooves of the headboard cross (E) and headboard center cross (F).
Attach the assembled headboard (EHE) and (FHE) to left front post (A) and left back post (B) with wood joint connectors (3) as shown. Use Allen key (8) to tighten the wood joint connectors (3).
LOFT BED WITH DESK
DA6580
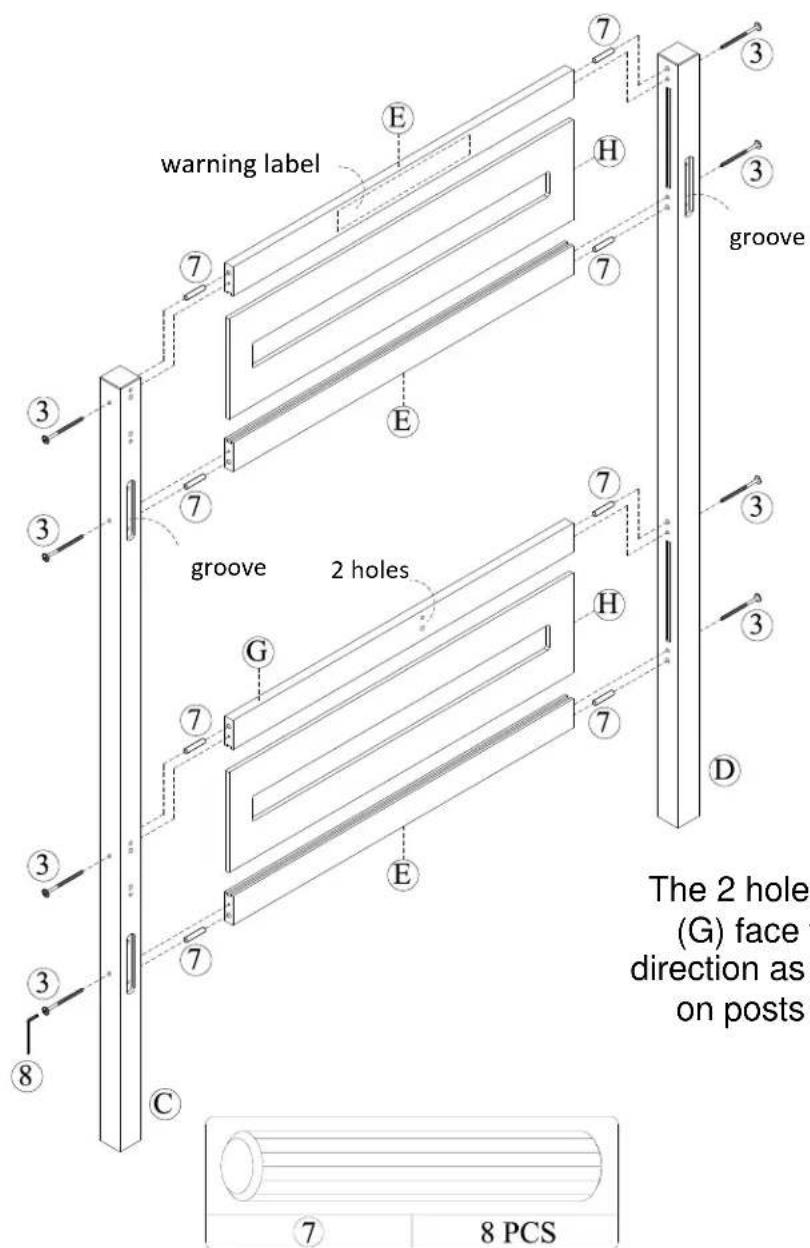
The 2 holes on cross (G) face the same direction as the grooves on posts (C & D).

STEP 2
Use the headboard cross (E) with warning label in this step.
Insert wood dowels (7) into the ends of headboard cross (E) and headboard center cross (G).
Insert headboard panel (H) into the grooves of the headboard cross (E) and headboard center cross (G).
Attach the assembled headboard (EHE) and (GHE) to right back post (C) and right front post (D) with wood joint connectors (3) as shown. Use Allen key (8) to tighten the wood joint connectors (3).
LOFT BED WITH DESK
DA6580
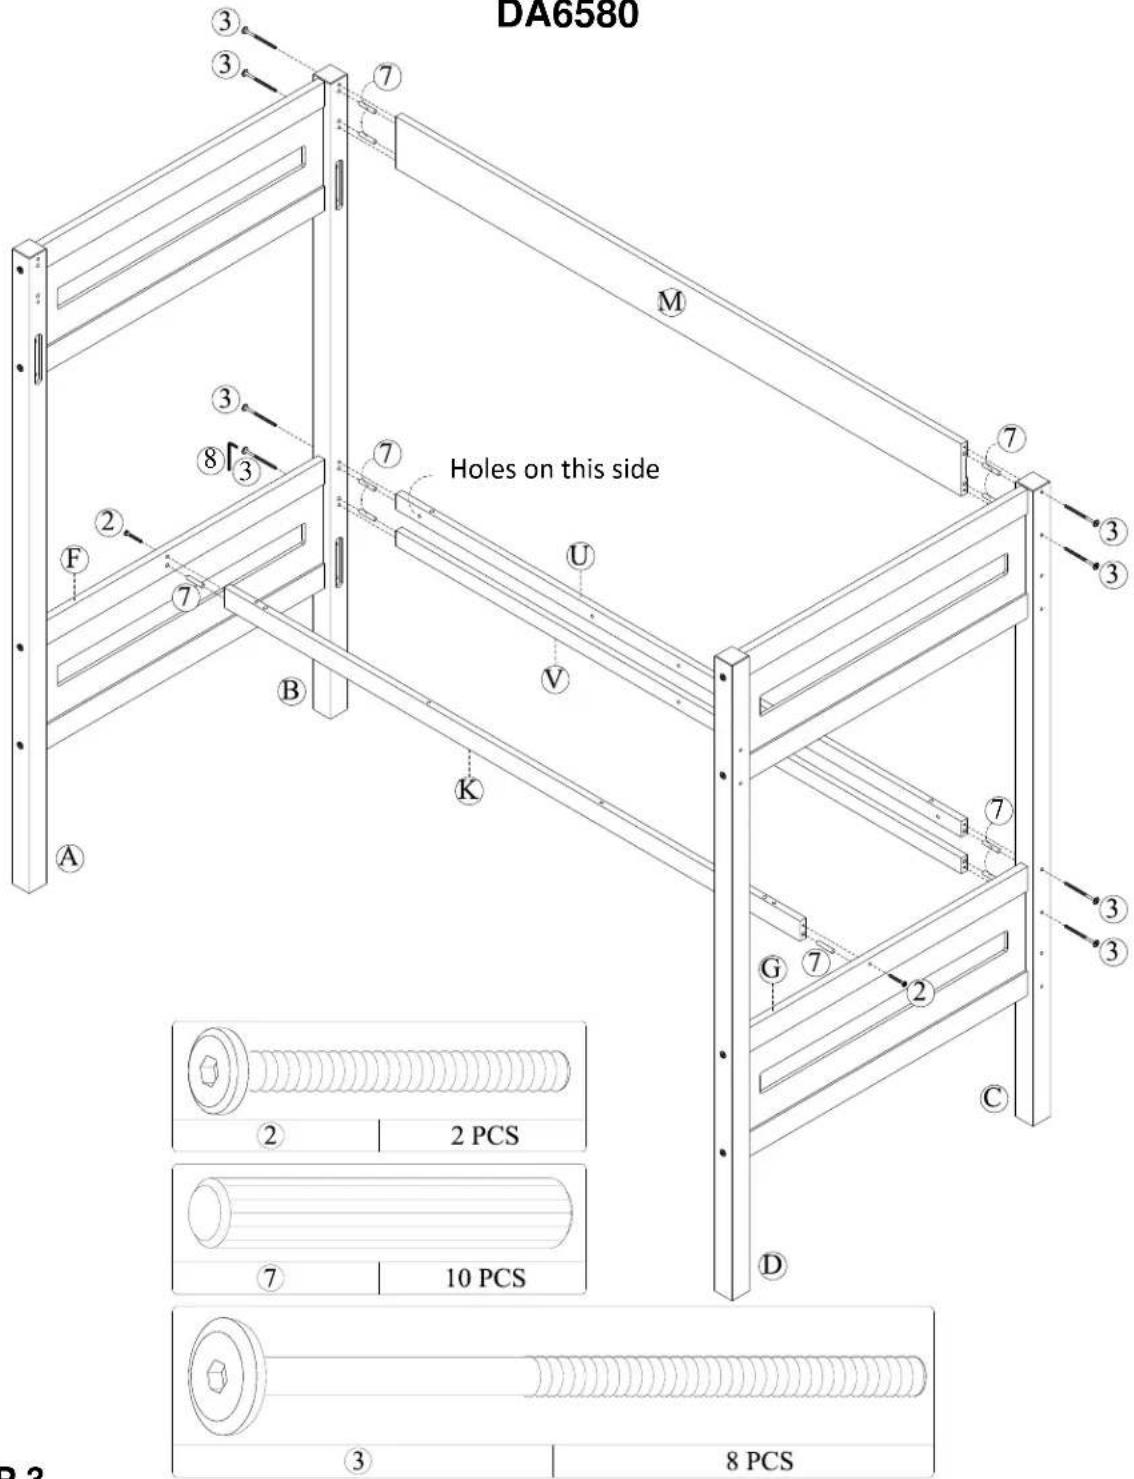
STEP 3
Do not fully tighten bolts in this step, this will facilitate assembly in the following steps.
Insert wood dowel (7) into each end of the long guardrails (M), desk back rail (U) and bottom back guardrail (V).
Attach long guardrails (M), desk back rail (U) and bottom back guardrail (V) to back posts (B and C) with wood joint connectors (3) and Allen key (8) as shown.
Insert wood dowel (7) into each end of the desk front rail (K).
Attach desk front rail (K) to headboard center crosses (F and G) with wood joint connectors (2) and Allen key (8) as shown.
LOFT BED WITH DESK
DA6580


STEP 4
Insert barrel nuts (5) into top front side rail (I).
Attach top front side rail (I) to front posts (A & D) with joint connectors (1) as shown.
Insert barrel nut (5) into top back side rail (J) and bottom back side rail (W).
Attach top back side rail (J) and bottom back side rail (W) to back posts (B & C) with joint connectors (1) as shown.
Tighten joint connectors (1) with the Allen key (8).

STEP 5
Insert wood dowel (10) into holes of the short guardrails (N) and attach it to short guardrail post (S) with joint connectors (11) and Allen key (8).
Insert wood dowel (7) into end of the short guardrails (N) an attach it to left front post (A) with wood joint connectors (3).
Attach the short guardrail post (S) to top front side rail (I) with joint connectors (11) and hex cap (12) as shown. Fully tighten the joint connectors (11) with the Allen key (8).
LOFT BED WITH DESK
DA6580
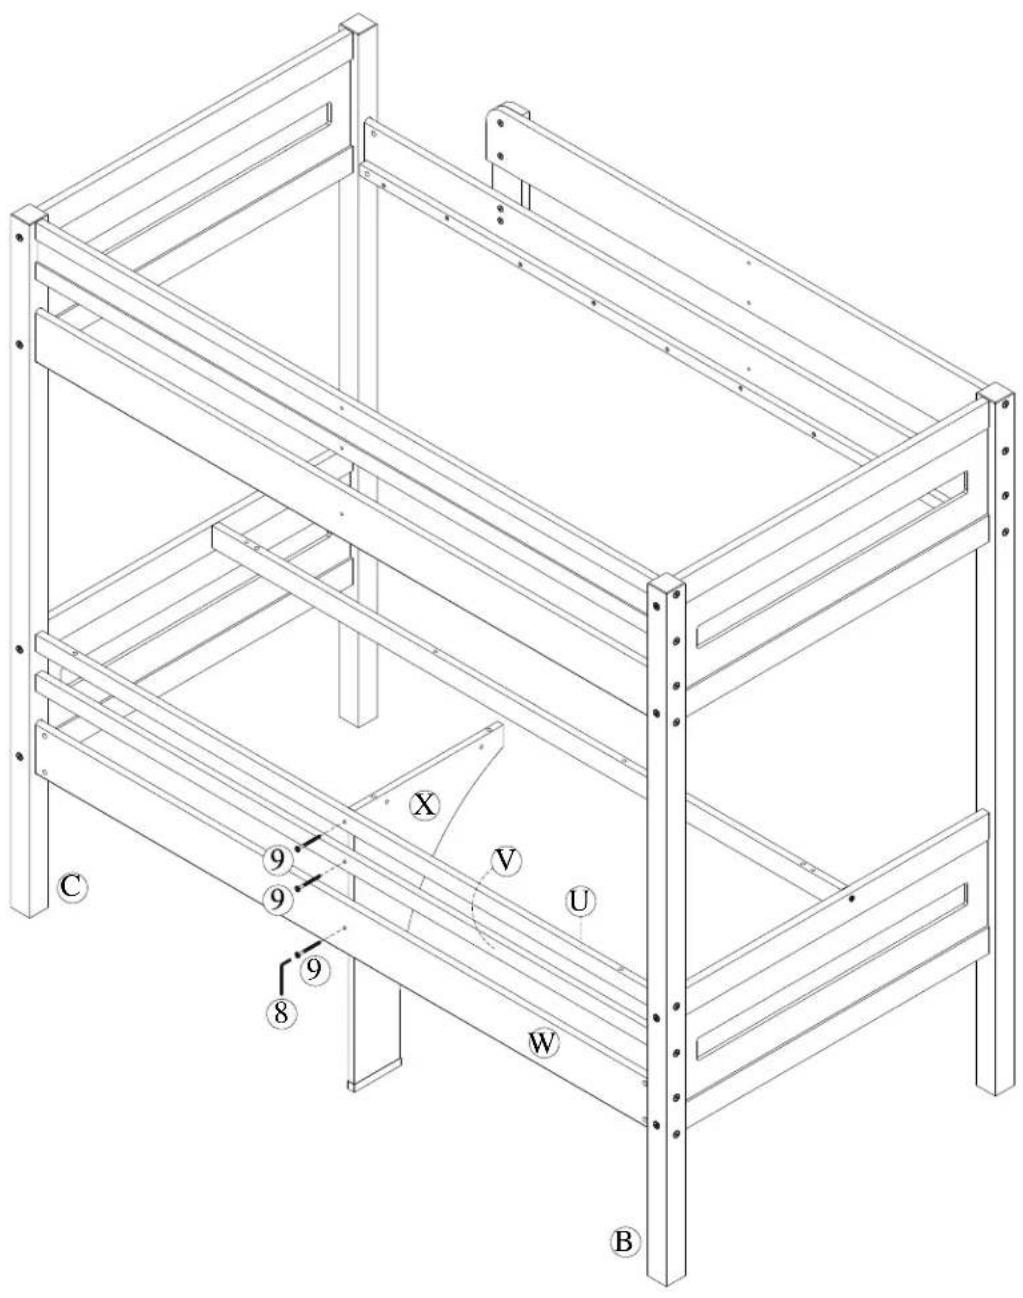

STEP 6
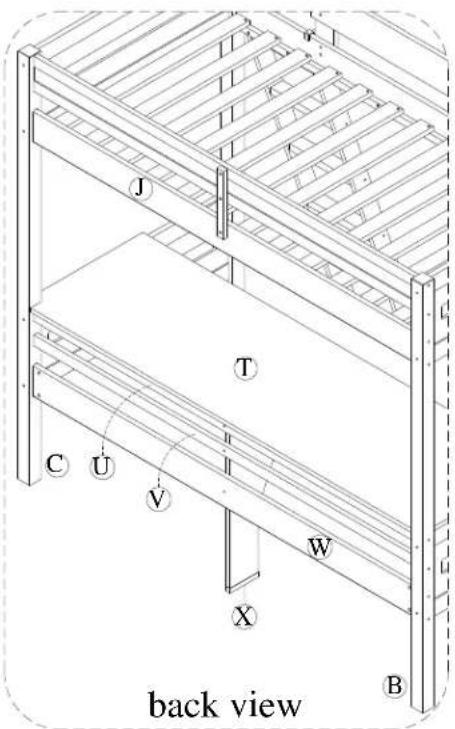
Attach support post (X) to desk back rail (U), bottom back guardrail (V) and bottom back side rail (W) with joint connectors (9) as shown. Tighten joint connectors (9) with the Allen key (8).
LOFT BED WITH DESK
DA6580
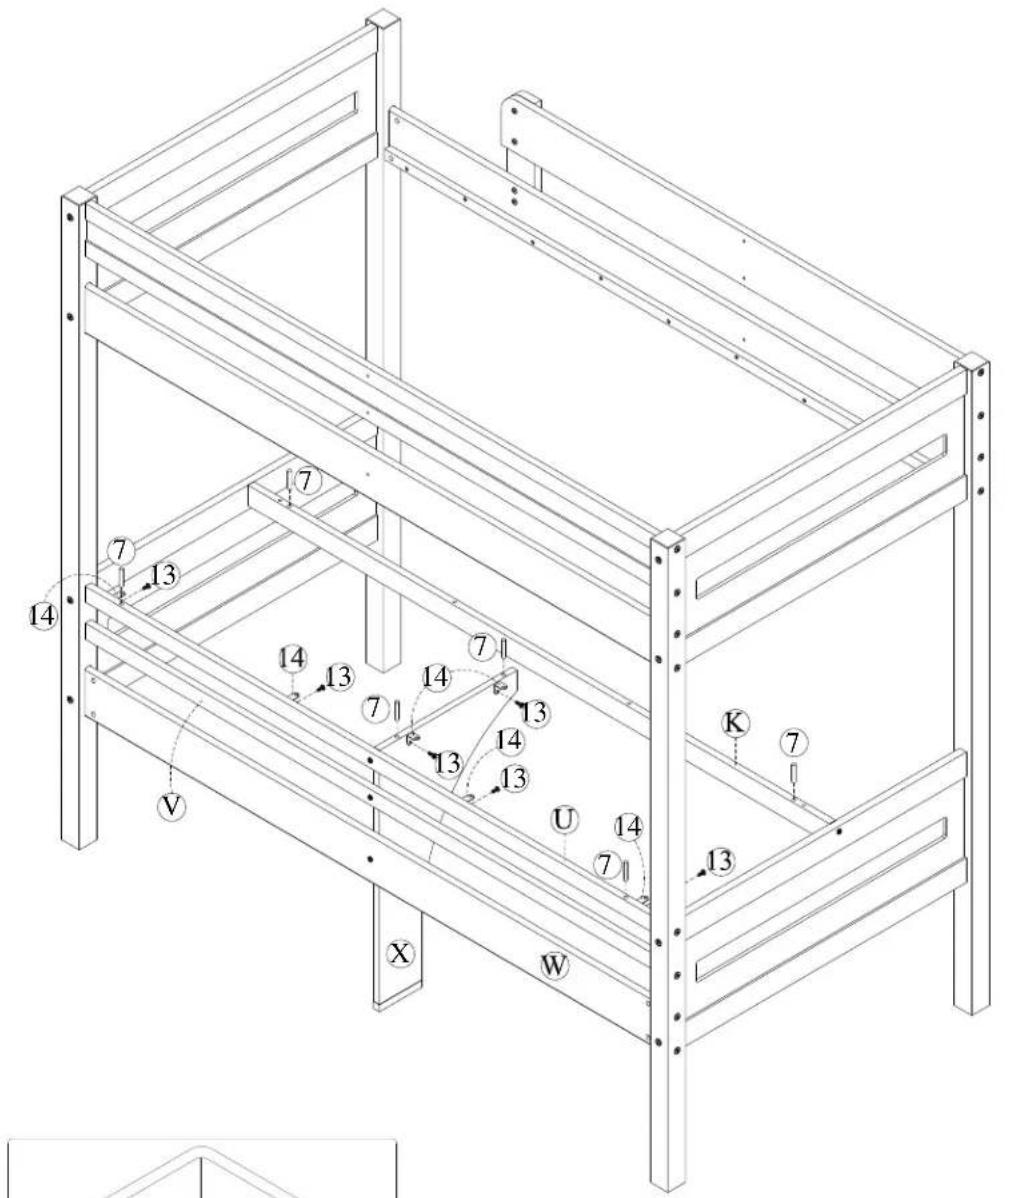


STEP 7
Insert wood dowels (7) into the holes of desk front rail (K), desk back rail (U) and support post (X).
Attach the L shaped metal plate (14) to support post (X) and desk back rail (U) as shown above using joint connectors (13) and Allen key (8).
LOFT BED WITH DESK
DA6580

STEP 8
Attach desk panel (T) to the assembled unit and secure it to desktop front rail (K) with joint connectors (9) as shown.
Secure the desk panel (T) to support post (X) and desk back rail (U) using joint connectors (13) through metal plates (14).
Tighten joint connectors (9 & 13) using Allen key (8).
NOTE: Fully tighten all joint connector installed in previous steps.
LOFT BED WITH DESK
DA6580

STEP 9
Attach a slat (L) onto top side rails (I & J) of the top bunk with flat head screws (4). Make sure the slat touches the corner posts (as close to the headboard as possible). Attach the other slats (L) onto the top side rails (I & J) with flat head screws (4). Use space block (Y) to space them out evenly as shown. Use Phillips screwdriver (not included) to tighten flat head screws (4).
NOTE: If you notice that any of the slats (L) are not perfectly flat, be sure to attach them so that the slats (L) curves up in the middle and down on the ends.
LOFT BED WITH DESK DA6580


STEP 10
To assemble the ladder, insert wood dowels (7) into the ends of the ladder steps (Q). Attach left ladder end (O) and right ladder end (P) to ladder steps (Q) with wood joint connectors (2). Tighten the wood joint connectors (2) with the Allen key (8).
LOFT BED WITH DESK
DA6580

STEP 11
Attach the ladder to the top front side rail (I) with flat head screw (15) as shown. Use Phillips screwdriver (not included) to tighten flat head screws (15).
Attach the guardrail leg (R) to the short guardrail (N) and top front side rail (I) with flat head screws (6). Attach another guardrail leg (R) (on the other side of the bed) to long guardrail (M) and top back side rail (J) with flat head screws (6) as shown. Use Phillips screwdriver (not included) to tighten flat head screws (6).
LOFT BED WITH DESK DA6580

CAUTION: This unit is intended for use only with the products and/or maximum weights indicated. Use with other products and/or products heavier than the maximum weights indicated may result in instability or cause possible injury.
DO NOT ALLOW HORSEPLAY ON OR UNDER THE BED AND PROHIBIT JUMPING ON THE BED.
DO NOT ALLOW CHILDREN UNDER 6 YEARS OF AGE TO USE THE UPPER BUNK. BED IS DESIGNED FOR CHILDREN RANGING FROM 6 YEARS OF AGE TO YOUNG TEENAGERS.

natural_image
Technical line drawing of a two-level metal bunk bed structure with ladder and support beams (no text or symbols)USE ONLY A MATTRESS WHICH IS 74"-75" LONG AND 37 1/2" - 38 1/2" WIDE ON UPPER BUNK. ENSURE THICKNESS OF MATTRESS DOES NOT EXCEED 6".
MAXIMUM WEIGHT CAPACITY:
- 165 LBS (75KGS) ON UPPER BUNK
- 100 LBS ON DESK
That's it! You've finished assembling your loft bed.
DO NOT RETURN PRODUCT TO THE STORE.
If a part is missing or damaged, contact our customer service department. We will replace the part FREE of
charge.

Tel #: 1-800-295-1980
PLEASE DO NOT RETURN THIS PRODUCT TO THE STORE
PLEASE CONTACT CUSTOMER SERVICE REPRESENTATIVES AT THE FOLLOWING NUMBERS SHOULD THERE BE ANY MISSING OR DEFECTIVE PART(S).
Customer Service Phone Number 1-800-295-1980
Email: das@dorel.com
Customer Service Fax Number 514-353-7819
Request Date:
Name:
Shipping Address:
Street & Number:
City & State:
Zip Code:
Day Time Phone Number:
(including area code)
Date & Place of Purchase:
Part(s) description and quantity: (Please be sure to list model number or SKN number)


- LOFT BED WITH DESK
- CUSTOMER SERVICE
- WARNING
- NOTES
- CARE AND CLEANING
- MAINTENANCE
- LIMITED WARRANTY
- WARNING: Should this product
- become damaged, and/or components are broken or missing, DO NOT USE.
- DA6580
- STEP 1
- STEP 2
- STEP 3
- STEP 4
- STEP 5
- STEP 6
- STEP 7
- STEP 8
- STEP 9
- LOFT BED WITH DESK DA6580
- STEP 10
- STEP 11
- PLEASE DO NOT RETURN THIS PRODUCT TO THE STORE
Brand : Dorel
Model : DA6580
Category : Bed