
GT2318 - Lawn mower Draper - Free user manual and instructions
Find the device manual for free GT2318 Draper in PDF.


| Type | Lawn mower |
| Brand | Draper |
| Model | GT2318 |
| Power Source | Electric (corded or battery) |
| Cutting Width | Approximately 35 cm (14 inches) |
| Cutting Height Adjustment | Central lever, 5 positions (approx. 25-75 mm) |
| Grass Collection Bag Capacity | 30 liters |
| Weight | 12 kg |
| Dimensions (L x W x H) | 800 x 400 x 350 mm |
| Motor Power | 1200 W (for corded model) |
| Noise Level | ≈ 82 dB(A) |
| Safety Features | Safety switch, blade brake |
| Maintenance | Sharpen blade annually, clean after use |
| Warranty | 2 years |
| Spare Parts Availability | Blade, grass bag, wheels available |
Frequently Asked Questions - GT2318 Draper
User questions about GT2318 Draper
0 question about this device. Answer the ones you know or ask your own.
Ask a new question about this device
Download the instructions for your Lawn mower in PDF format for free! Find your manual GT2318 - Draper and take your electronic device back in hand. On this page are published all the documents necessary for the use of your device. GT2318 by Draper.
USER MANUAL GT2318 Draper
IMPORTANT: PLEASE READ THESE INSTRUCTIONS CAREFULLY TO ENSURE THE SAFE AND EFFECTIVE USE OF THIS PRODUCT.
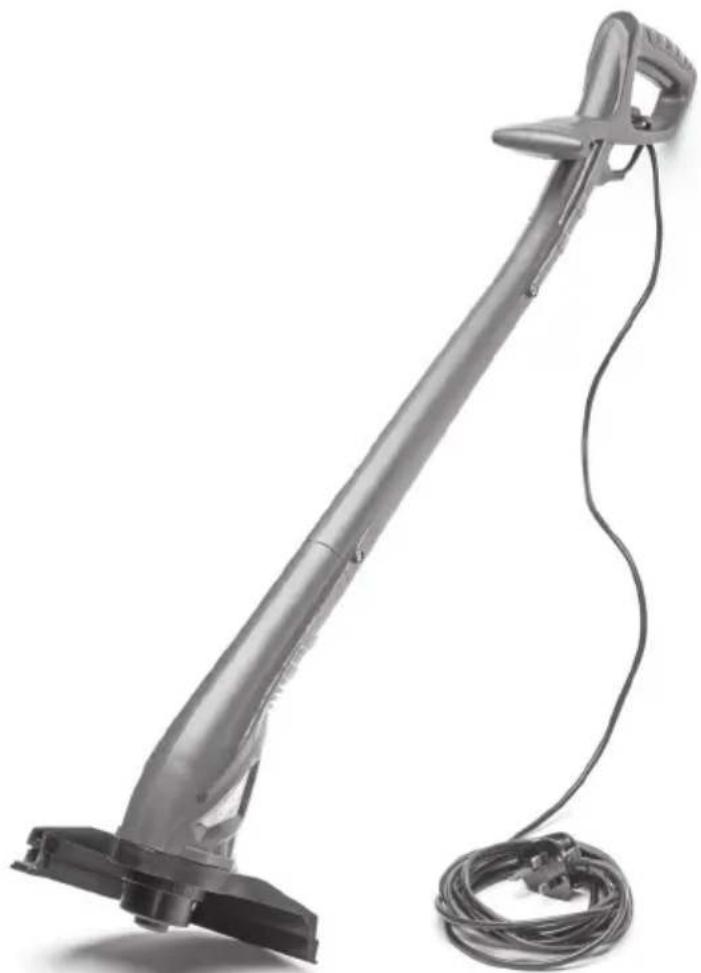
natural_image
Exterior view of a handheld vacuum cleaner with attached cable (no text or symbols visible)CE
INSTRUCTIONS
These instructions accompanying the product are the original instructions. This document is part of the product, keep it for the life of the product passing it on to any subsequent holder of the product. Read all these instructions before assembling, operating or maintaining this product.
This manual has been compiled by Draper Tools describing the purpose for which the product has been designed, and contains all the necessary information to ensure its correct and safe use. By following all the general safety instructions contained in this manual, it will ensure both product and operator safety, together with longer life of the product itself.
All photographs and drawings in this manual are supplied by Draper Tools to help illustrate the operation of the product.
Whilst every effort has been made to ensure the accuracy of information contained in this manual, the Draper Tools policy of continuous improvement determines the right to make modifications without prior warning.
1. TITLE PAGE
1.1 INTRODUCTION:
USER MANUAL FOR:
250W 230V Grass Trimmer
Stock no. 45923
Part no. GT2318
1.2 REVISIONS:
Date first published January 2017
As our user manuals are continually updated, users should make sure that they use the very latest version.
Downloads are available from: http://www.drapertools.com/manuals.pgm
DRAPER TOOLS LIMITED
WEBSITE:
drapertools.com
HURSLEY ROAD
PRODUCT HELP LINE: +44 (0) 23 8049 4344
CHANDLER'S FORD
GENERAL FAX: +44 (0) 23 8026 0784
EASTLEIGH
HAMPSHIRE
SO53 1YF
UK
1.3 UNDERSTANDING THIS MANUALS SAFETY CONTENT:
WARNING! Information that draws attention to the risk of injury or death.
CAUTION! Information that draws attention to the risk of damage to the product or surroundings.
1.4 COPYRIGHT © NOTICE:
Copyright © Draper Tools Limited.
Permission is granted to reproduce this publication for personal & educational use only.
Commercial copying, redistribution, hiring or lending is prohibited.
No part of this publication may be stored in a retrieval system or transmitted in any other form or means without written permission from Draper Tools Limited.
In all cases this copyright notice must remain intact.
2. CONTENTS
2.1 CONTENTS
Page content
Page
1 TITLE PAGE
1.1 INTRODUCTION 2
1.2 REVISION HISTORY 2
1.3 UNDERSTANDING THIS MANUAL 2
1.4 COPYRIGHT NOTICE 2
2 CONTENTS
2.1 CONTENTS 3
3 GUARANTEE
3.1 GUARANTEE 4
4 INTRODUCTION
4.1 SCOPE 5
4.2 SPECIFICATION....5
4.3 HANDLING & STORAGE....5
5. HEALTH & SAFETY INFORMATION
5.1 GENERAL SAFETY INSTRUCTIONS FOR POWER TOOL USE 6-8
5.2 SPECIFIC SAFETY INSTRUCTION FOR GRASS TRIMMER USE....8
5.3 CONNECTION TO THE POWER SUPPLY 9
6. TECHNICAL DESCRIPTION
6.1 IDENTIFICATION 10
7. UNPACKING & CHECKING
7.1 PACKAGING....11
7.2 WHAT'S IN THE BOX? 11
8. PREPARING THE GRASS TRIMMER
8.1 HOUSING CONNECTION 12
8.2 GUARD ATTACHMENT....12
DECLARATION OF CONFORMITY......ENCLOSED
3. GUARANTEE
3.1 GUARANTEE
Draper tools have been carefully tested and inspected before shipment and are guaranteed to be free from defective materials and workmanship.
Should the tool develop a fault, please return the complete tool to your nearest distributor or contact Draper Tools Limited, Chandler's Ford, Eastleigh, Hampshire, SO53 1YF. England.
Telephone Sales Desk: (023) 8049 4333 or Product Help Line (023) 8049 4344.
A proof of purchase must be provided with the tool.
If upon inspection it is found that the fault occurring is due to defective materials or workmanship, repairs will be carried out free of charge. This guarantee period covering parts/labour is 12 months from the date of purchase except where tools are hired out when the guarantee period is 90 days from the date of purchase. The guarantee is extended to 24 months for parts only. This guarantee does not apply to normal wear and tear, nor does it cover any damage caused by misuse, careless or unsafe handling, alterations, accidents, or repairs attempted or made by any personnel other than the authorised Draper warranty repair agent.
Note: If the tool is found not to be within the terms of warranty, repairs and carriage charges will be quoted and made accordingly.
This guarantee applies in lieu of any other guarantee expressed or implied and variations of its terms are not authorised.
Your Draper guarantee is not effective unless you can produce upon request a dated receipt or invoice to verify your proof of purchase within the guarantee period.
Please note that this guarantee is an additional benefit and does not affect your statutory rights. Draper Tools Limited.
4.1 SCOPE
This machine is used for cutting grass in hard-to-reach areas - around garden furniture for example, or tidying around borders where a lawn mower can not go. Any other application is considered mis-use.
4.2 SPECIFICATION
Stock no.... 45923
Part no. GT2318
Rated voltage 230V\~50Hz
Rated input 250W
Revolutions per minute (no load) 12,000min
Cutting diameter ∅ 220mm
Nylon line: ......
spool .... Twin Line
length .... 6.0M
diameter ∅ .... 1.2mm
Sound pressure level 81.3dB(A)
Sound power level 94.4dB(A)
Single value noise level 93dB(A)
Vibration level: 1.5m/s ^2 Front 6.53m/s ^2 Rear 4.61m/s ^2
Weight (machine only) 1.63kg
4.3 HANDLING & STORAGE
The environment will have a negative result on its operation if you are not careful. And if not cleaned and maintained correctly or regularly the machine will not perform at its best.
5. HEALTH & SAFETY INFORMATION
5.1 GENERAL SAFETY INSTRUCTIONS FOR POWER TOOL USE
When using any type of power tool there are steps that should be taken to make sure that you, as the user, remain safe.
Common sense and a respect for the tool will help reduce the risk of injury.
Read the instruction manual fully. Do not attempt any operation until you have read and understood this manual.
Most important you must know how to safely start and stop this machine, especially in an emergency.
Keep the work area tidy and clean. Attempting to clear clutter from around the machine during use will reduce your concentration. Mess on the floor creates a trip hazard. Any liquid spilt on the floor could result in you slipping.
Find a suitable location. If the machine is bench mounted; the location should provide good natural light or artificial lighting as a replacement. Avoid damp and dust locations as it will have a negative effect on the machine's performance.
If the machine is portable; do not expose the tool to rain. In all cases do not operate power tools near any flammable materials.
Beware of electric shock. Avoid contact with earthed surfaces; because they can conduct electricity if there is an electrical fault with the power tool. Always protect the power cable and route it away from danger.
Keep bystanders away. Children, onlookers and passers by must be restricted from entering the work area for their own protection. The barrier must extend a suitable distance from the tool user.
Unplug and house all power tools that are not in use. A power tool should never be left unattended while connected to the power supply. They must be housed in a suitable location, away locked up and from children.
Do not overload or misuse the tool. All tools are designed for a purpose and are limited to what they are capable of doing. Do not attempt to use a power tool (or adapt it in any way) for an application it is not designed for. Select a tool appropriate for the size of the job. Overloading a tool will result in tool failure and user injury: This covers the use of accessories.
Dress properly. Loose clothing, long hair and jewellery are all dangerous because they can become entangled in moving machinery: This can also result in parts of body being pulled into the machine.
Clothing should be close fitted, with any long hair tired back and jewellery and neck ties removed. Footwear must be fully enclosed and have a nonslip sole.
5. HEALTH & SAFETY INFORMATION
Wear personal protective equipment (PPE). Dust, noise, vibration and swarf can all be dangerous if not suitably protected against. If the work involving the power tool creates dust or fumes; wear a dust mask. Vibration to the hand, caused by operating some tools for longer periods must be protected against. Wear vibration reducing gloves and allow long breaks between uses. Protect against dust and swarf by wearing approved safety goggles or a face shield. These are some of the more common hazards and preventions; however, always find out what hazards are associated with the machine/work process and wear the most suitable protective equipment available.
Do not breathe contaminated air. If the work creates dust or fumes; connect the machine (if possible) to an extraction system either locally or remotely. Working outdoors can also help if possible.
Move the machine as instructed. If the machine is hand held, do not carry it by the power supply cable. If the product is heavy; employ a second or third person to help move it safely or use a mechanical device. Always refer to the instructions for the correct method.
Do not overreach. Extending your body too far can result in a loss of balance and you falling. This could be from a height or onto a machine and will result in injury.
Maintain your tools correctly. A well maintained tool will do the job safely. Replace any damaged or missing parts immediately with original parts from the manufacturer. As applicable; keep trimming line moving parts clean, oiled or greased; handles clean; and emergency devices working.
Wait for the machine to stop. Unless the machine is fitted with a safety brake; some parts may continue to move due to momentum. Wait for all parts to stop; then unplug it from the power supply before making any adjustments, carrying out maintenance operations or just finishing using the tool.
Remove and check setting tools. Some machinery requires the use of additional tools or keys to set, load or adjust the power tool. Before starting the power tool always check to make certain they have been removed and are safely away from the machine.
Prevent unintentional starting. Before plugging any machine in to the power supply, make sure the switch is in the OFF position. If the machine is portable; do not hold the machine near the switch and take care when putting the machine down; that nothing can operate the switch.
Carefully select an extension lead. Some machines are not suitable for use with extension leads. If the tool is designed for use outdoors; use an extension lead also suitable for that environment. When using an extended lead, select one capable of handling the current (amps) drawn by the machine in use. Fully extend the lead regardless of the distance between the power supply and the tool. Excess current (amps) and a coiled extension lead will both cause the cable to heat up and can result in fire.
Concentrate and stay alert. Distractions are likely to cause an accident. Never operate a power tool if you are under the influence of drugs (prescription or otherwise), including alcohol or if you are feeling tired. Being disorientated will result in an accident.
5. HEALTH & SAFETY INFORMATION
Have this tool repaired by a qualified person. This tool is designed to confirm to the relevant international and local standards and as such should be maintained and repaired by someone qualified; using only original parts supplied by the manufacturer: This will ensure the tool remains safe to use.
5.2 SPECIFIC SAFETY INSTRUCTION FOR GRASS TRIMMER USE
WARNING: When using the machine the safety rules must be followed. For your own safety and that of bystanders please read these instructions before operating the machine. Please keep the instructions safe for later use.
1) Personal Safety
a) Wear protective glasses or goggles.
b) Never allow children or people unfamiliar with the instructions to use the machine.
c) Stop using the machine while people, especially children, or pets are nearby.
d) Only use the machine in daylight or good artificial light.
e) Before using the machine and after any impact, check for signs of wear or damage and repair as necessary.
f) Never operate the machine with damaged guards or without the guards in place.
g) Keep hands and feet away from the cutting means at all times and especially on the motor.
h) Take care against injury from any device fitted for trimming the filament line length. After extending new cutter line always return the machine to its normal operating position before switching on.
i) Never fit metal cutting elements.
j) Never use replacement parts or accessories not provided or recommended by the manufacturer.
k) Disconnect the machine from the mains before checking, cleaning or working on the machine and when it is not in use.
I) Always ensure that ventilation openings are kept clear of debris.
2) Service
a) After use, disconnect the machine from the mains and check for damage.
b) When not in use store the machine out of reach of children.
c) Mains powered trimmers should only be repaired by an authorised repairer.
d) Use only manufacturer's recommended replacement parts and accessories.
3) Additional grass trimmer safety instructions
a) Read the instructions carefully.
b) Be familiar with the controls and proper use of equipment.
c) Before use check the supply and extension cord for signs of damage or ageing.
d) If the cord becomes damaged during use, disconnect the cord from the supply immediately. DO NOT TOUCH THE CORD BEFORE DISCONNECTING THE SUPPLY.
e) Do not use the trimmer, if the cords are damaged or worn.
f) WARNING: Cutting elements continue to rotate after the motor is switched off.
g) Keep extension cords away from cutting elements.
h) For safe operation of this appliance it should be supplied via a residual current device (RCD) with a tripping current of no more than 30mA.
5. HEALTH & SAFETY INFORMATION
5.3 CAUTION: RISK OF ELECTRIC SHOCK. DO NOT OPEN.
Caution: Risk of electric shock. Do not open.
This appliance is supplied with a moulded 3 pin mains plug for your safety. The value of the fuse fitted is marked on the pin face of the plug. Should the fuse need replacing, ensure the substitute is of the correct rating, approved to BS1362 and ASTA or BS Kite marked.
The fuse cover is removable with a small plain slot screwdriver. Ensure the fuse cover is replaced before attempting to connect the plug to an electrical outlet. If the cover is missing, a replacement must be obtained or the plug replaced with a suitable type.
If a replacement plug is to be fitted this must be carried out by a qualified electrician.
The damaged or incomplete plug, when cut from the cable should be disabled to prevent connection to a live electrical outlet.
This appliance is Class II ^† and is designed for connection to a power supply matching that detailed on the rating label and compatible with the plug fitted.
If an extension lead is required, use an approved and compatible lead rated for this appliance. Follow all the instruction supplied with the extension lead.
^ Double insulated ☐: This product requires no earth connection as supplementary insulation is applied to the basic insulation to protect against electric shock in the event of failure of the basic insulation.
Important: On products exceeding 2000W it is recommended that the power cable and/or extension cable are fully unwound before a connection is made to the power supply. However, ensure the residual cable does not pose a trip hazard
6. TECHNICAL DESCRIPTION
6.1 IDENTIFICATION
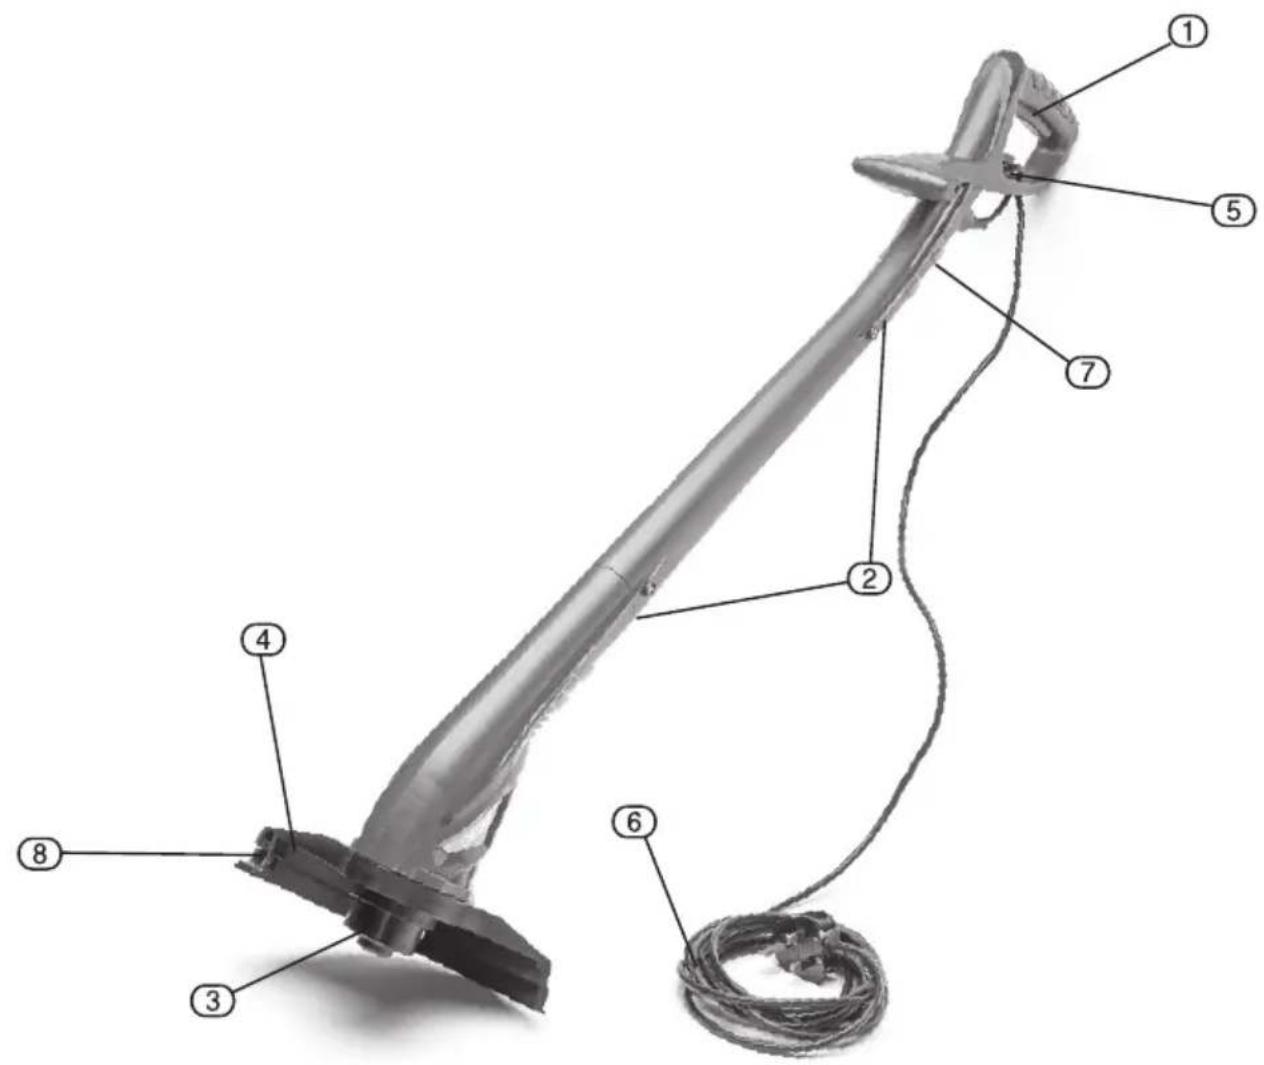
① On/off trigger switch
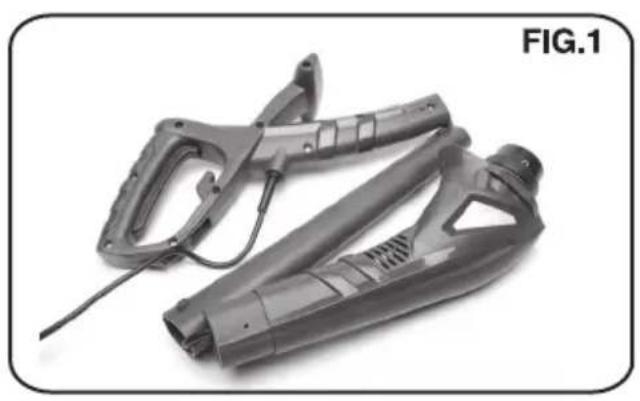
② Housing connection
③ Double line spool
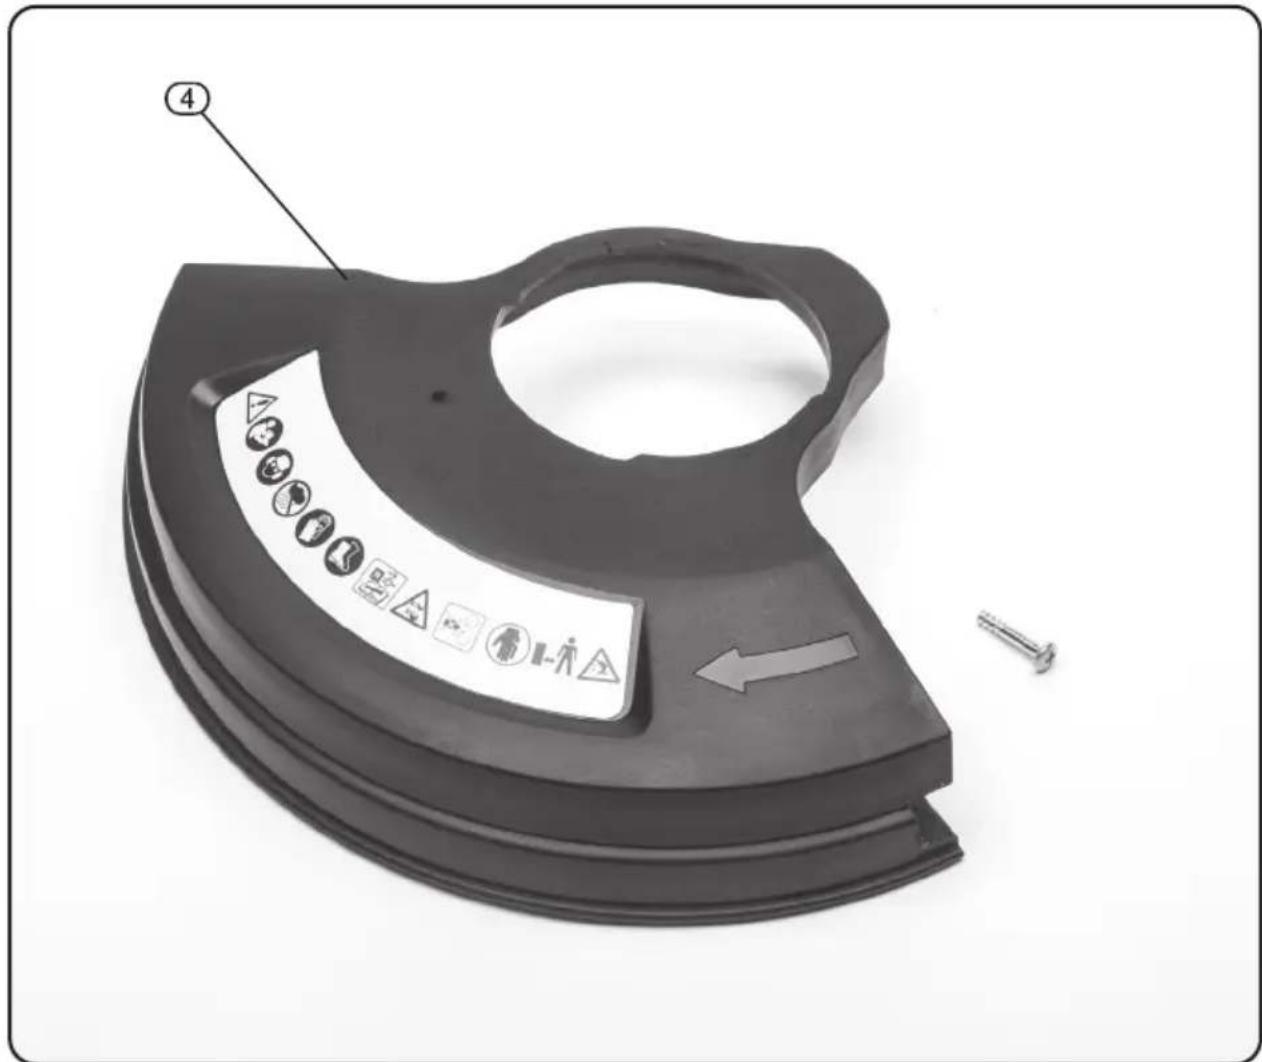
④ Guard
⑤ Cable restraint
⑥ Moulded plug & cable
⑦ Spare spool holder
⑧ Line length trimming blade


WARNING:
Some of the contents of this grass trimmer have sharp edges.
Item ⑧ is the line length trimming blade which is sharp!
Avoid contact with fingers.
7. UNPACKING & CHECKING
7.1 PACKAGING
Carefully remove the product from the packaging and examine it for any sign of damage that may have happened during shipping. Lay the contents out and check them against the parts shown on page 10. If any part is damaged or missing; please contact the Draper Help Line (the telephone number appears on the Title page) and do not attempt to use the product.
The packaging material should be retained at least during the guarantee period: in case the machine needs to be returned for repair.
Warning! Some of the packaging materials used may be harmful to children. Do not leave any of these materials in the reach of children.
If any of the packaging is to be thrown away, make sure they are disposed of correctly; according to local regulations.
7.2 WHAT'S IN THE BOX?
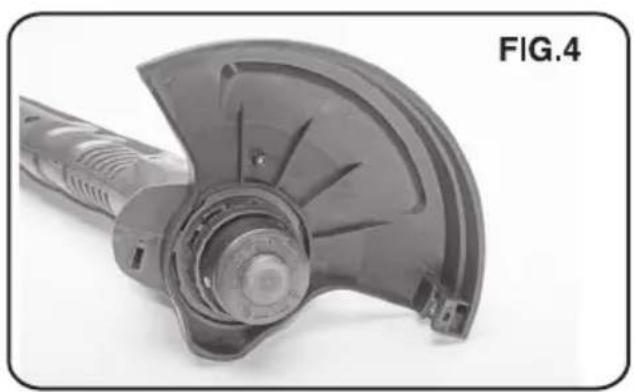
The guard ④ is not fitted to the grass trimmer.
Follow the instructions 8.2 to complete this simple task.
8. PREPARING THE GRASS TRIMMER
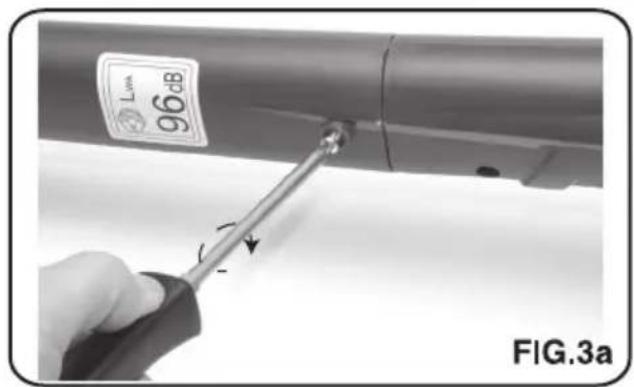
NOTE: Remove the plug from the socket before carrying out adjustment, servicing or maintenance.
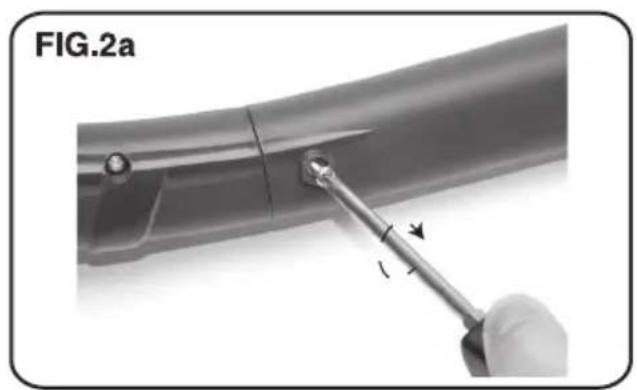
8.1 HOUSING CONNECTION - FIGS. 1 - 3a
natural_image
Exterior view of a black electric shock absorber device (no text or symbols visible)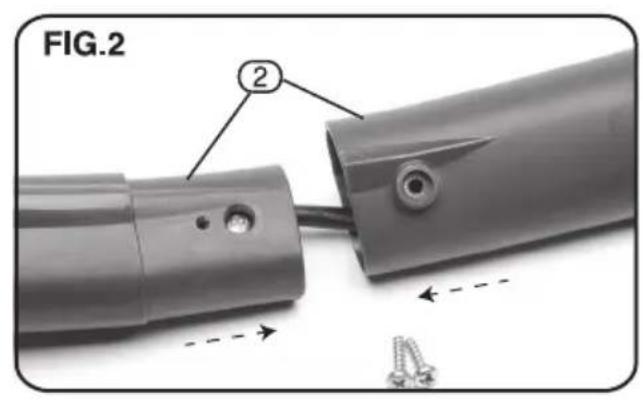
natural_image
Close-up of a mechanical component with a hand holding a screwdriver, labeled FIG.2a (no text or symbols on the object itself)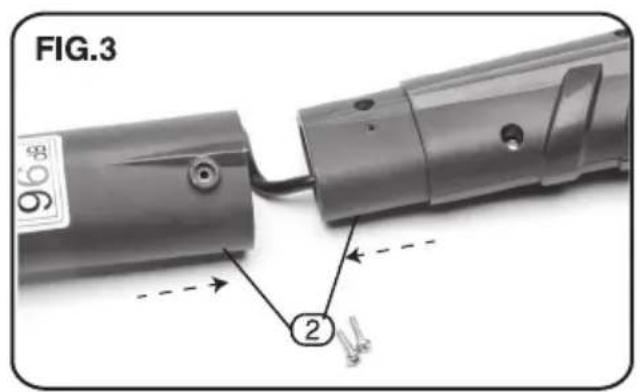
natural_image
Close-up of a hand using a screwdriver to adjust a car's wheel (no visible text or symbols)8.2 GUARD ATTACHMENT - FIG. 4
natural_image
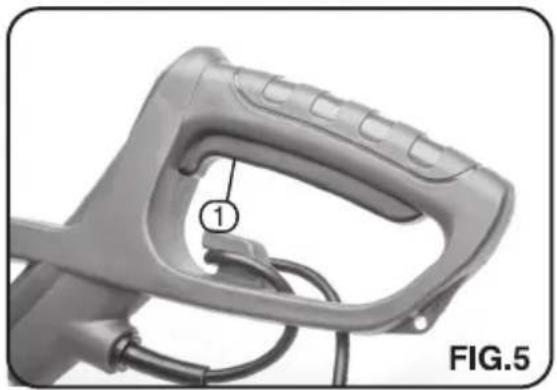
Close-up of a mechanical component with a curved blade and central hub, labeled 'FIG.4' in the corner (no other text or symbols visible)Pull the trigger ① to start the machine, release the trigger ① to stop the machine.
NOTE: Ensure the cutting head is off the ground when starting.
natural_image
Close-up of a gray electric vehicle charging plug with cable and connector (no text or symbols visible)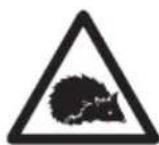
WARNING: Use of this product can pose a danger to wildlife. Before attempting to use this product check the area, particularly long grass and under bushes, for signs of life and relocate if necessary.
NOTE: Not all animals will be deterred by the noise of the product alone.
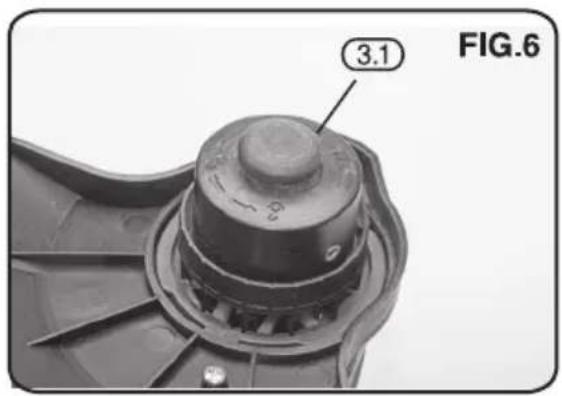
9.2 'TAP'N'GO' CUTTING HEAD - FIGS. 6 & 7
Check the nylon line regularly.
When the trimming performance decreases, adjust the line length. With the trimmer running, tap the cutting head, button ③.1, on the grass. The nylon line will automatically extend. Any excess will be automatically cut to length.
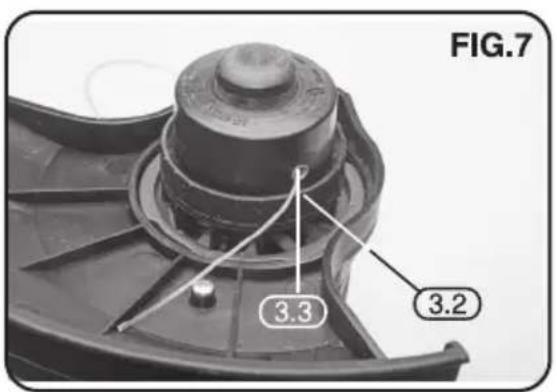
Due to insufficient length or tangled line, it may be necessary to manually adjust the nylon line. Remove the plug from the power supply and turn the machine over. Press button ③.1 completely. Pull the nylon line one stage.
If the nylon line has disappeared inside the spool, hold base and turn the spool anti clockwise (as 3.2 indicated by arrow moulded on top of spool).
Raise the cover up to access the reel.
Take care if the reel contains any residual nylon line as it will have a tendency to uncoil rapidly. This will lead to the line becoming tangled causing feed problems.
Pass the end of the line through the spool apertures ③.3 and position the reel over the spring. While holding the reel down and preventing it from spinning, relocate the cover and turn clockwise. ③.2
Clean the line length trimming blade of grass to ensure a satisfactory cut is maintained.
WARNING: Take care of injury from any device fitted for trimming the filament line length.
natural_image
Silhouette of a person using a power tool to clean grass, with motion arrows indicating movement (no text or symbols)10. MAINTENANCE
10.1 MAINTENANCE
Remove the plug from the socket before carrying out adjustment, service or maintenance. Regular inspection and cleaning reduces the necessity for maintenance operations and will keep your machine in good working condition. For this reason avoid the air inlets from becoming blocked. After use disconnect the machine from the power supply and clean the ventilation slots. Clean the line length trimming blade of grass to ensure a satisfactory cut is maintained. WARNING: Take care of injury from any device fitted for trimming the filament line length. If the replacement of the supply cord is necessary, this has to be done by the manufacturer or his agent in order to avoid a safety hazard.
11. EXPLANATION OF SYMBOLS
11.1 EXPLANATION OF SYMBOLS
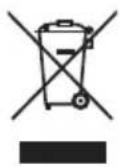
WEEE*
Do not dispose of Waste Electrical & Electronic Equipment in with domestic rubbish
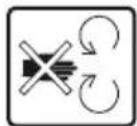
Keep hands away from blades and moving parts.

Class II construction (Double insulated)
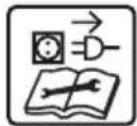
Remove plug before maintenance.

Warning!
Wear suitable eye/face protection.

Wear protective gloves.

Warning!
Can pose a danger to wildlife.

Safety shoes.

Warning!
Read instruction manuals before operating and servicing this equipment.

Conforms to all relevant safety standards.

Beware sharp blades.

Keep distance of persons. Observe.

* Waste Electrical & Electronic Equipment.
12. DISPOSAL
12.1 DISPOSAL
- At the end of the machine's working life, or when it can no longer be repaired, ensure that it is disposed of according to national regulations.
- Contact your local authority for details of collection schemes in your area.
In all circumstances:
- Do not dispose of power tools with domestic waste.
- Do not incinerate.
- Do not abandon in the environment.
- Do not dispose of WEEE* as unsorted municipal waste.
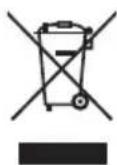
* Waste Electrical & Electronic Equipment.
CONTACTS
- DRAPER TOOLS LIMITED,
Hursley Road, Chandler's Ford, Eastleigh, Hampshire. SO53 1YF. U.K.
- Help Line: (023) 8049 4344
- Sales Desk: (023) 8049 4333
- General Enquiries: (023) 8026 6355
- Service/Warranty Repair Agent
For aftersales servicing or warranty repairs, please contact the Draper Tools Help Line for details of an agent in your local area.
YOUR DRAPER STOCKIST
RDLJ1216
- INSTRUCTIONS
- TITLE PAGE
- INTRODUCTION:
- REVISIONS:
- UNDERSTANDING THIS MANUALS SAFETY CONTENT:
- COPYRIGHT © NOTICE:
- CONTENTS
- CONTENTS
- Page content
- TITLE PAGE
- CONTENTS
- GUARANTEE
- INTRODUCTION
- HEALTH & SAFETY INFORMATION
- TECHNICAL DESCRIPTION
- UNPACKING & CHECKING
- PREPARING THE GRASS TRIMMER
- GUARANTEE
- GUARANTEE
- SCOPE
- SPECIFICATION
- HANDLING & STORAGE
- GENERAL SAFETY INSTRUCTIONS FOR POWER TOOL USE
- SPECIFIC SAFETY INSTRUCTION FOR GRASS TRIMMER USE
- CAUTION: RISK OF ELECTRIC SHOCK. DO NOT OPEN.
- IDENTIFICATION
- WARNING:
- PACKAGING
- WHAT'S IN THE BOX?
- HOUSING CONNECTION - FIGS. 1 - 3a
- GUARD ATTACHMENT - FIG. 4
- 'TAP'N'GO' CUTTING HEAD - FIGS. 6 & 7
- MAINTENANCE
- MAINTENANCE
- EXPLANATION OF SYMBOLS
- EXPLANATION OF SYMBOLS
- DISPOSAL
- DISPOSAL
- CONTACTS
Brand : Draper
Model : GT2318
Category : Lawn mower