
CD-583X - Cassette player LG - Free user manual and instructions
Find the device manual for free CD-583X LG in PDF.


| Product Type | Cassette Player |
| Brand | LG |
| Model | CD-583X |
| Dimensions (Approx.) | 400 x 250 x 100 mm |
| Weight (Approx.) | 2.0 kg |
| Power Supply | AC 220-240V, 50Hz or 6 x D-size batteries |
| Power Consumption | 15 W |
| Functions | Play, Rewind, Fast Forward, Pause, Stop, Eject, Auto Stop |
| Output Power | 2 x 2 W RMS (stereo) |
| Frequency Response | 40 Hz - 14 kHz |
| Signal-to-Noise Ratio | 50 dB |
| Headphone Jack | 3.5 mm stereo |
| Maintenance | Clean heads and capstans regularly with isopropyl alcohol; demagnetize heads periodically |
| Safety Precautions | Do not expose to moisture, extreme temperatures, or magnetic fields. Use only specified power source. |
| Spare Parts / Repairability | Replacement belts, pinch rollers, and heads available; consult service manual for repairs |
| General Information | Top-loading mechanism with auto-stop; manual available for free download at notice-facile.com |
Frequently Asked Questions - CD-583X LG
User questions about CD-583X LG
0 question about this device. Answer the ones you know or ask your own.
Ask a new question about this device
Download the instructions for your Cassette player in PDF format for free! Find your manual CD-583X - LG and take your electronic device back in hand. On this page are published all the documents necessary for the use of your device. CD-583X by LG.
USER MANUAL CD-583X LG
Please read this manual carefully before operating your set. The working life of this product is 7 years since the date of purchase.
WARNING

CAUTION
RISK OF ELECTRIC SHOCK DO NOT OPEN

CAUTION:
TO REDUCE THE RISK OF ELECTRIC SHOCK, DO NOT REMOVE COVER (OR BACK). NO USER SERVICEABLE PARTS INSIDE. REFER SERVICING TO QUALIFIED SERVICE PERSONNEL.
Explanation of Graphical Symbols:

The lightning flash with arrowhead symbol, within an equilateral triangle, is intended to alert the user to the presence of uninsulated dangerous voltage within the product's enclosure that may be of sufficient magnitude to constitute a risk of electric shock to persons.

The exclamation point within an equilateral triangle is intended to alert the user to the presence of important operating and maintenance (servicing) instructions in the literature accompanying the appliance.
WARNING
TO REDUCE THE RISK OF FIRE OR ELECTRIC SHOCK, DO NOT EXPOSE THIS APPLIANCE TO RAIN OR MOISTURE. To avoid electrical shock, do not open the cabinet. Refer servicing to qualified personnel only.
The apparatus shall not be exposed to dripping or splashing, and no objects filled with liquids, such as vases, shall be placed on the apparatus.
Warning:
Do not install this equipment in a confined space such as a bookcase or similar unit.
CAUTION
Use of controls or adjustments or performance of procedures other than those specified herein may result in hazardous radiation exposure.
Laser component in this product is capable of emitting radiation exceeding the limit for Class 1.
CAUTION: INVISIBLE LASER RADIATION WHEN OPEN AND INTERLOCKS DEFEATED. AVOID EXPOSURE TO BEAM.
VARNING: OSYNLIG LASERSTRÅLNING NÄR DENNA DEL ÄR ÖPPNAD STRÅLEN ÄR FARLIG.
This label is located on the interior.
| CLASS 1 | LASER PRODUCT |
| KLASSE 1 | LASER PRODUKT |
| LUOKAN 1 | LASER LAITE |
| KLASS 1 | LASER APPARAT |
| CLASSE 1 | PRODUIT LASER |
This Compact Disc player is classified as a CLASS 1 LASER product. The CLASS 1 LASER PRODUCT label is located on the exterior.
Specifications
■ RADIO SECTION
Frequency range
AM (MW:PO) : 520-1630kHz FM : 65-108MHz
Intermediate frequencies
AM (MW:PO) : 455kHz FM : 10.7MHz
Antenna (Aerial)
FM : Telescopic antenna AM (MW:PO) : Ferrite bar antenna
■ CASSETTE SECTION
Recording system: 4-track, 2-channel stereo
Frequency response: 125-8000Hz S/N ratio: 40dB (Play) : 35dB (Rec/Play)
■ CD PLAYER SECTION
Frequency response: 100-18000Hz S/N ratio: 60dB (1kHz)
GENERAL
Speakers (Woofer): 3.2Ω x 2
Output power (10% T.H.D): 2.5W x 2 Power supplies
AC operation: Refer to the indicated voltage on the bottom of unit Battery operation: DC 9V, 6 "D" cells, (R20) batteries not included
Power consumption: 17W Dimensions (W x H x D): 535 x 177 x 250mm Weight: 4.0kg
Note: Design and specifications are subject to change without notice for improvement.
Location of controls
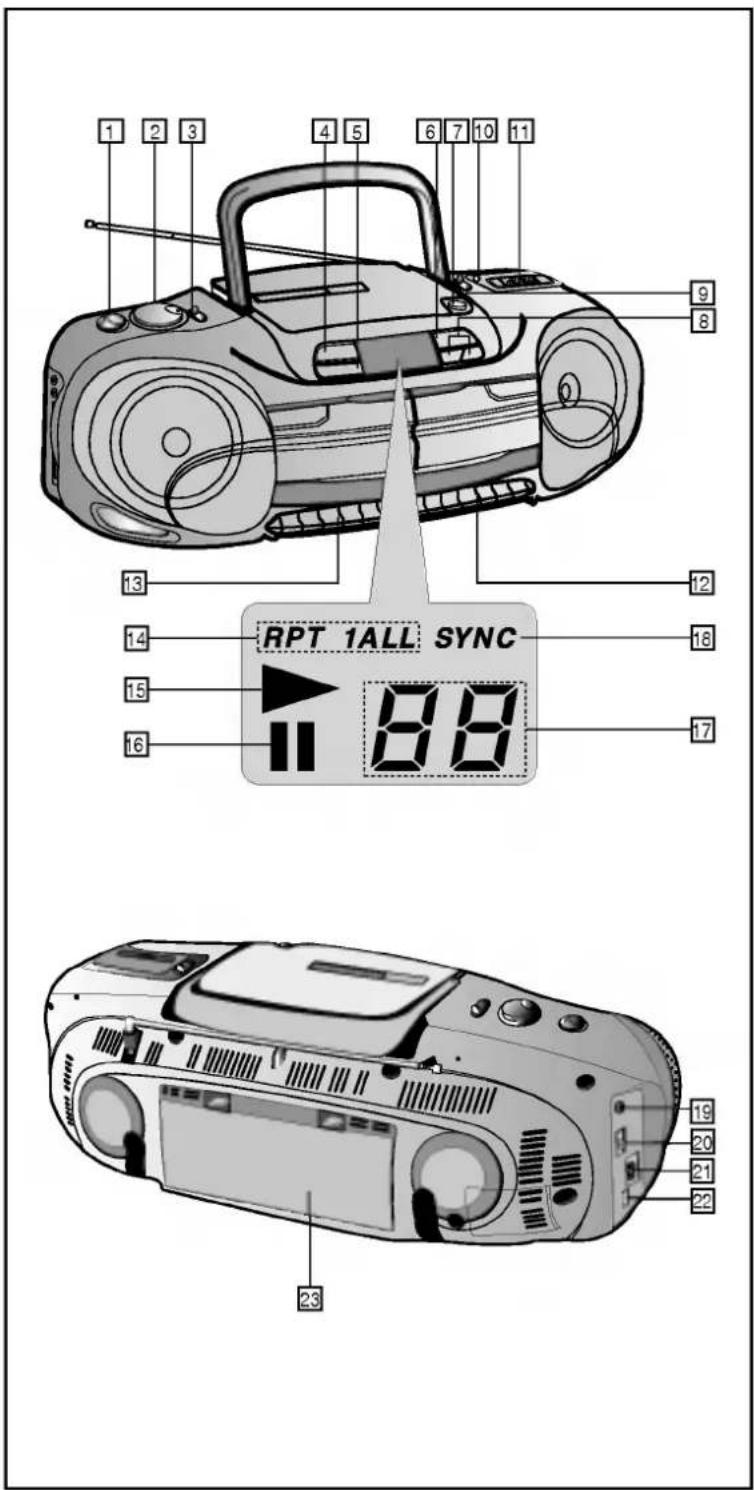
1 TONE Control 2 VOLUME Control 3 FUNCTION Switch 4 CD STOP button (■) 5 CD REPEAT button 6 CD PLAY/PAUSE button (▶/II) 7 CD OPEN button 8 CD SKIP/SEARCH buttons 9 BAND selector 10 FM STEREO indicator 11 TUNING dial 12 Deck B controls 13 Deck A controls 14 CD RPT 1/ALL indicator 15 CD Play indicator 16 CD Pause indicator 17 CD TRACK indicator 18 CD SYNC indicator 19 PHONES socket 20 RIF switch 21 AC Power input socket 22 Voltage Selector (optional) 23 Battery compartment

Power Sources
A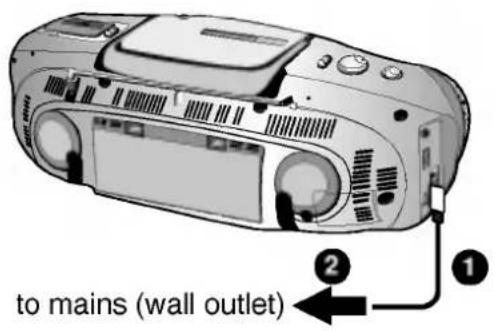
Operating the player on AC (see Fig. A)
Connect one end of the supplied AC cord (mains lead) to the AC IN socket located at the rear of the player ①. Plug the other end into the wall outlet ②.
Adjusting the voltage
If your player is equipped with a VOLTAGE SELECTOR at the rear, be sure to set it to your local power supply before connecting the power cord (mains lead).
B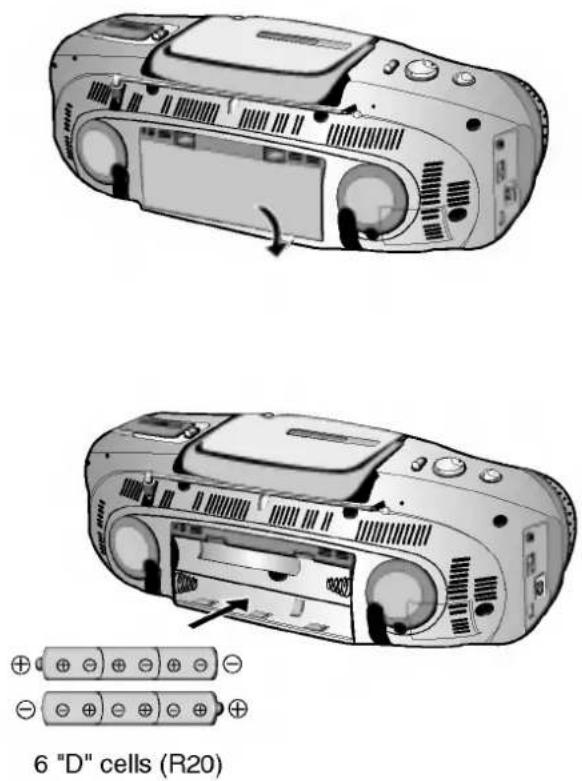
Operating the player on batteries (see Fig. B)
To run on battery power, disconnect the power cord from the unit. The batteries will not be used while the cord is connected.
When to replace the batteries
When the batteries are weak, replace all the batteries with new ones.
Radio Operation
1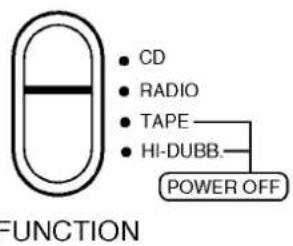
2
3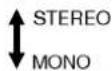
4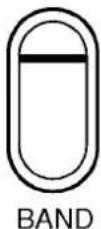
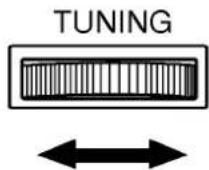
5 LOW TONE HIGH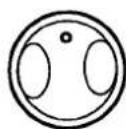
MIN VOLUME MAX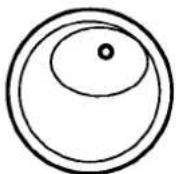
- Set the FUNCTION Switch to RADIO.
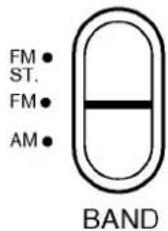
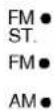
- Set the BAND selector to the desired band.
- When listening to an FM broadcast, select MONO or STEREO.
- Tune in a station using the TUNING DIAL.
Note:
The FM stereo indicator will light if the station is transmitting a stereo FM signal. 5. Adjust the VOLUME and TONE as necessary.
A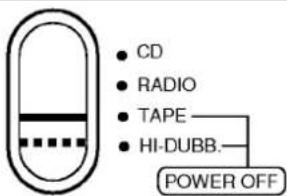
FUNCTION
B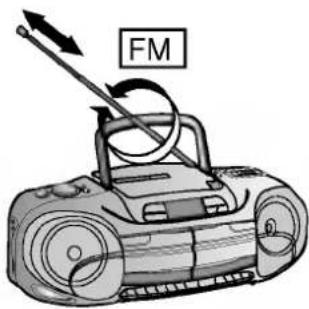
To turn off the radio
(see Fig. A)
To improve broadcast reception
(see Fig. B)
Reorient the aerial (for FM) or the player itself (for AM).
Playing a CD
1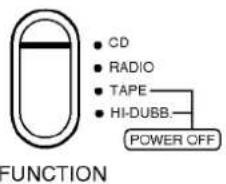
2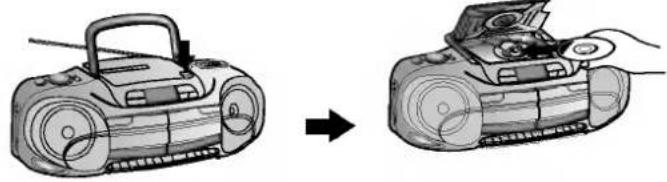
3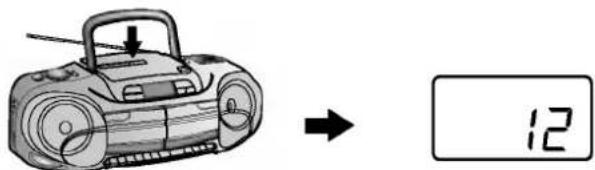
4
5
6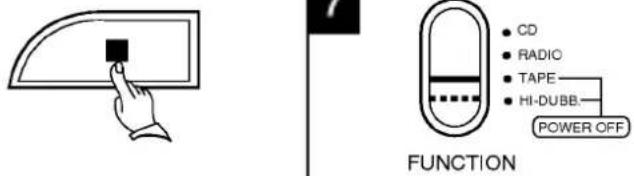
- Set the FUNCTION switch to CD.
- Press OPEN (▲). Insert a CD.
- Close the door.
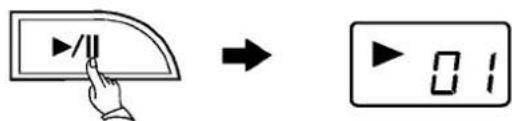
- Press PLAY/PAUSE (▶/II).
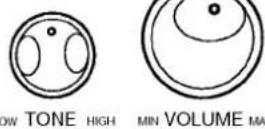
- Adjust the VOLUME and TONE as necessary.
- To stop play, press STOP (■).
- To turn off the CD, set the FUNCTION switch to POWER OFF.
- To pause: Press the PLAY/PAUSE (▶/Ⅱ). To resume play, press the PLAY/PAUSE (▶/Ⅱ) again.
• To eject a disc: Press the OPEN (▲).
Do not press the OPEN (▲) during play.
Otherwise the disc might be damaged. Be sure the disc stops spinning first.
CD Skip
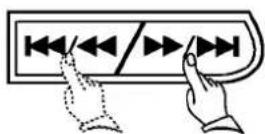
• To SKIP to the beginning of the current song: Press ◀◀/◀◀ once. • To SKIP to the next song: Press ▶/▶ once. - Press ◀◀/◀◀ or ▶▶/▶▶ repeatedly to SKIP over additional tracks. - Press ◀◀/◀ twice to SKIP from the first track to the last. - Press ▶/▶ once to SKIP from the last track to the first track.
CD Search
To SEARCH a song at high speed:
Hold down ◀◀/◀◀ or ▶▶/▶▶.
• Volume is reduced during SEARCH. - Release the button to end SEARCH.
CD Repeat
1
2
a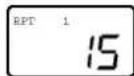
b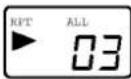
3
4
C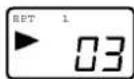
d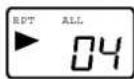
- REPEAT 1
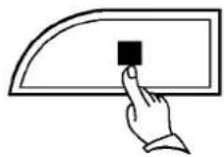
- Press STOP(■).
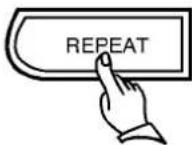
- Press REPEAT once to repeat one song (See Fig. a)
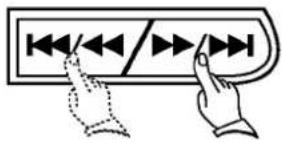
- Press ◀◀/◀◀ or ▶▶/▶▶ to select the desired song.
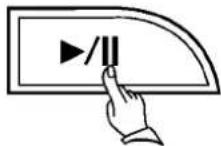
- Press PLAY/PAUSE(▶/II) (See Fig. C)
● REPEAT ALL
- Press STOP(■).
- Press REPEAT a second time to repeat an entire CD or program (See Fig. b).
- Press ◀◀/◀◀ or ▶▶/▶▶ to select the desired song.
- Press PLAY/PAUSE(▶/II) (See Fig. d)
● To Cancel repeat
Press REPEAT a third time to enter normal PLAY mode.
A
B
Notes on CD
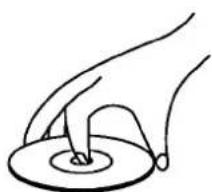
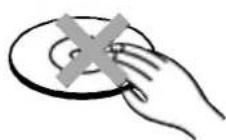
A
Handle the CD's by the edges, not by the flat surfaces.
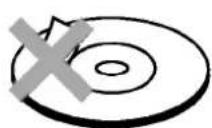
B
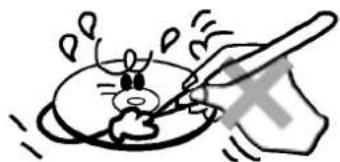
Don't stick tape to the surface. Don't write anything on the disc.
Playing a Tape
- Set the FUNCTION switch to TAPE.
- Insert a cassette in deck A or deck B (■ ▲ ST/EJ button to open compartment)
- Press PLAY (▶) to start playing.
- Adjust the VOLUME and TONE as necessary.
Additional operations
To stop play, press ■ ▲ ST/EJ.
To pause, press II (PAUSE).
To resume play after pause, press II (PAUSE).
To fast forward, press ▶ (FF)
To rewind, press ← (REW.)
To remove the cassette, press ■ ▲ ST/EJ.

For private listening
Connect a pair of stereo headphone to PHONES socket by means of 3.5mm jack plug.
NOTE: Stereo headphones are not supplied with this unit.
Continuous playback
- Set the FUNCTION switch to TAPE.
- Insert a cassette into each deck.
- Press the PLAY (▶) button for deck B. The cassette will begin to play.
- Press PLAY (▶) and the PAUSE (■) button for deck A. After the cassette in deck B has finished playing, the pause feature for deck A is released automatically and the cassette in deck A is played.
- Adjust the volume and tone.
- To stop play, press the ■▲ST/EJ button. Note: The unit switches off automatically after the second cassette has finished.
- Press the ■▲ST/EJ button to remove the cassettes.
Recording
From a CD
- Insert a tape into deck A.
- Set the FUNCTION switch to CD.
- Insert a CD.
- Press ● (REC). PLAY (▶) goes down automatically. When recording from a CD, the disc will begin playing after 7 seconds.
- To stop recording Press ■▲ (ST/EJ) on the cassette deck and STOP (■) on the CD player.
From a radio
- Insert a tape into deck A.
- Set the FUNCTION switch to RADIO. Select the desired band.
- Tune in a station.
- Press ● (REC). PLAY (▶) goes down automatically.
- To stop recording, press ■▲ (ST/EJ).

To shut off the unit, set the FUNCTION switch to POWER OFF.
- Recording Level: The recording volume level is preset. Adjusting the volume and tone will have no effect on the recording. ● To reduce noise during AM recording, set the RIF switch to 1, 2, or 3, depending on which one best reduces the noise.
NOTE:
Only use normal (ferric, IEC Type I) cassettes for recording. Prerecorded music cassettes using chrome dioxide tape (recorded bias 120 μs EQ) can be played back. Do not use chrome dioxide (CrO₂, IEC Type II) tapes for recording. Do not use Metal (IEC Type IV) tape cassettes for recording or playback.
Copying from deck B to deck A (DUBBING)
- Insert the cassette to be dubbed in deck B.
- Insert an empty cassette into deck A.
- Set the FUNCTION switch to HI-DUBB if you want the cassettes to be dubbed at twice the normal speed. For dubbing at regular speed, set the FUNCTION switch to TAPE.
- Press the PAUSE (Ⅱ) and the REC (●) for deck A.
- Press the PLAY (▶) for deck B. The cassette will begin to record.
- To stop the dubbing, press the ■▲ ST/EJ button for decks A and B.

LG


- WARNING
- CAUTION
- EXPLANATION OF GRAPHICAL SYMBOLS
- SPECIFICATIONS
- RADIO SECTION
- CASSETTE SECTION
- CD PLAYER SECTION
- GENERAL
- LOCATION OF CONTROLS
- POWER SOURCES
- OPERATING THE PLAYER ON AC (SEE FIG. A)
- ADJUSTING THE VOLTAGE
- OPERATING THE PLAYER ON BATTERIES (SEE FIG. B)
- WHEN TO REPLACE THE BATTERIES
- RADIO OPERATION
- NOTE
- PLAYING A CD
- CD SKIP
- CD SEARCH
- CD REPEAT
- REPEAT
- ● REPEAT ALL
- ● TO CANCEL REPEAT
- A
- B
- NOTES ON CD
- PLAYING A TAPE
- ADDITIONAL OPERATIONS
- FOR PRIVATE LISTENING
- CONTINUOUS PLAYBACK
- RECORDING
- FROM A CD
- FROM A RADIO
- COPYING FROM DECK B TO DECK A (DUBBING)
Brand : LG
Model : CD-583X
Category : Cassette player