
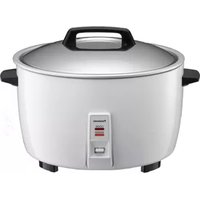
SR-ZS105 - Rice cooker PANASONIC - Free user manual and instructions
Find the device manual for free SR-ZS105 PANASONIC in PDF.


| Product Type | Rice Cooker |
| Brand | Panasonic |
| Model | SR-ZS105 |
| Capacity (uncooked rice) | 5 cups (approx. 1 liter) |
| Power Consumption | 500 W |
| Voltage | 220-240 V ~ 50/60 Hz |
| Dimensions (W x D x H) | 250 x 250 x 200 mm |
| Weight | 2.5 kg |
| Inner Pot Material | Non-stick coated aluminum |
| Main Functions | Cook, Keep Warm, Reheat, Quick Cook |
| Control Type | Mechanical with indicator light |
| Keep Warm Duration | Up to 12 hours |
| Safety Features | Auto shut-off, overheat protection |
| Cleaning & Maintenance | Removable inner lid, washable exterior |
| Accessories Included | Measuring cup, rice spatula, inner lid |
| Repairability | Replaceable power cord, inner pot available |
Frequently Asked Questions - SR-ZS105 PANASONIC
User questions about SR-ZS105 PANASONIC
0 question about this device. Answer the ones you know or ask your own.
Ask a new question about this device
Download the instructions for your Rice cooker in PDF format for free! Find your manual SR-ZS105 - PANASONIC and take your electronic device back in hand. On this page are published all the documents necessary for the use of your device. SR-ZS105 by PANASONIC.
USER MANUAL SR-ZS105 PANASONIC
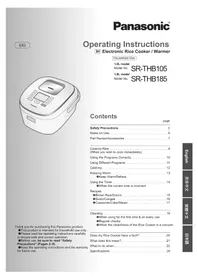
Panasonic®
Operating Instructions
Electric Rice Cooker Household Use
Thank you for purchasing the Panasonic product. • This product is intended for household use only. - Please read these instructions carefully and follow safety precautions when using this product. - Before using this product please give your special attention to "Safety Precautions" (Page 3-4).
Reserve it for later use
When using electrical appliances, basic safety precautions should always be followed, including the following:
- Read all instructions.
- Do not touch hot surfaces. Use handles or knobs.
- To protect against electrical shock, do not immerse cord, plugs, or appliance in water or other liquid.
- Close supervision is necessary when any appliance is used by or near children.
- Unplug from outlet when not in use and before cleaning. Allow to cool before putting on or taking off parts.
- Do not operate any appliance with a damaged cord or plug or after the appliance malfunctions or has been damaged in any manner.
Return appliance to the nearest authorized service facility for examination, repair, or adjustment.
- The use of accessory attachments not recommended by the appliance manufacturer may cause injuries.
- Do not use outdoors.
- Do not let cord hang over edge of table or counter, or touch hot surfaces.
- Do not place on or near a hot gas or electric burner, or in a heated oven.
- Extreme caution must be used when moving an appliance containing hot oil or other hot liquids.
- Always attach plug to appliance first, then plug cord into the wall outlet. To disconnect, turn any control to "off", then remove plug from wall outlet.
- Do not use appliance for other than intended use.
14. SAVE THESE INSTRUCTIONS.
This product is intended for household use only.
CAUTION :
a. A short power-supply cord (or detachable power-supply cord) is to be provided to reduce the risk resulting from becoming entangled in or tripping over a longer cord. b. Longer detachable power-supply cords or extension cords are available and may be used if care is exercised in their use. c. If a longer detachable power-supply cord or extension cord is used,
(1) The marked electrical rating of the cord set or extension cord should be at least as great as the electrical rating of the appliance, and
(2) The cord should be arranged so that it will not drape over the countertop or tabletop where it can be pulled on by children or tripped over unintentionally.
This appliance has a polarized plug (one blade is wider than the other). To reduce the risk of electric shock, this plug is intended to fit into a polarized outlet only one way. If the plug does not fit fully into the outlet, reverse the plug. If it still does not fit, contact a qualified electrician. Do not attempt to modify the plug in any way.
Safety Precautions
Must be followed!
In order to prevent accidents or injuries to the users, other people, and damage to property, please follow the instructions below.
■ The following charts indicate the degree of damage caused by wrong operation.

WARNING: Indicates serious injury or death.

CAUTION:
Indicates risk of injury or property damage.
■ The symbols are classified and explained as follows.


These symbols indicate prohibition.

This symbol indicates requirement that must be followed.

WARNING
■ Do not use the appliance if the power cord or power plug is damaged or the power plug is loosely connected to the power outlet.

(It may cause an electric shock or fire caused by short circuit.)
■ Do not insert any objects in the steam vent or gap.

Especially metal objects such as pins or wires. (It may cause an electric shock or malfunction.)
This appliance is not intended for use by persons (including children) with reduced physical, sensory or mental capabilities, or lack of experience and knowledge, unless they have been given supervision or instruction concerning use of the appliance by a person responsible for their safety. Children should be supervised to ensure that they do not play with the appliance.

(It may cause burn or injury.)
■ Clean the power plug regularly.

(A soiled power plug may cause insufficient insulation due to the moisture, and may cause a fire.)
- Unplug the power plug, and wipe with a dry cloth.
■ Do not damage the power cord or power plug.

Following actions are strictly prohibited.
Modifying, placing near heating elements, bending, twisting, pulling, putting heavy objects on top, and bundling the cord. (It may cause an electric shock or fire caused by short circuit.)
- If the supply cord is damaged, it must be replaced by a special cord or assembly available from the manufacturer or its service agent.
■ Do not plug or unplug the power plug with wet hands.

(It may cause an electric shock.)
Do not get your face close to the steam vent or touch it with your hand. Keep the steam vent out of reach of small children.

Steam vent

(It may cause a burn.)
■ Do not immerse the appliance in water or splash it with water.

(It may cause a fire caused by short circuit or electric shock.)
- Please enquire with an authorized dealer if water gets inside the appliance.
■ Use only a power outlet rated at a minimum of 10 amperes and alternating electric voltage at 120 volts.

(Plugging other devices into the same outlet may cause electric overheating, which may cause a fire.)
- Use only an extended cord rated at 10 amperes minimum.
■ Do not modify, disassemble, or repair this appliance.

(It may cause a fire, electric shock or injury.)
- Please make enquiries at the store or the repair department of an authorized dealer.
■ Insert the instrument plug and the power plug firmly.

(Otherwise it may cause an electric shock and fire caused by the heat that may generate around the instrument plug or the power plug.)
- Do not use a broken power plug or a loose power outlet.
Discontinue using the appliance immediately and unplug the power cord in cases of abnormal situations and breakdowns.

(It may cause smoke, fire, or electric shock.)
(e.g., for abnormal situations or breakdowns)
• The power plug and power cord become abnormally hot. • The power cord is damaged or power failure occurs when touched. • The main body is deformed or abnormally hot. • The unit emits smoke or a scorching smell. • There are cracks, looseness, or wobbles in the appliance. • The cast heater is warped or the pan is deformed.
→ Please contact a Panasonic authorized service center for immediate inspection and repair.

CAUTION

Do not use the appliance in the following places.

- In an area where it may be splashed with water or near a heat source. (It may cause a fire due to short circuit or electric shock.)
- On an unstable surface, carpet, electric carpet, tablecloth (ethylene plastic), or other object that cannot resist high temperature. (It may cause injury, burns, or fire.)
- Near a wall or furniture. (It may cause discoloration or deformation.)
■ Do not touch heating elements while the appliance is in use or after cooking.

Especially the cast heater. (It may cause burns.)

Do not expose the power plug to steam and do not let water spill on the connector of the power plug.

- Do not expose the power plug to steam when it is plugged in. (It may cause a fire due to short circuit.) When using a cabinet with a sliding table, use the appliance where the power plug cannot be exposed to steam.

Do not touch the hook button while moving the appliance.

(It may cause the outer lid to open, resulting in a burn.)

Be sure to hold the plug when unplugging the power plug. Do not pull the power cord.

(Otherwise it may cause an electric shock or fire caused by short circuit.)

Do not use a cord set (for the plug and power) that is not specified for this appliance. Also, do not transfer them.

(It may cause an electric shock, leak, and fire.)

Be careful when opening the outer lid while cooking.

(It may cause a burn.)

Unplug the power plug from the power outlet when the appliance is not in use.

(Otherwise it may cause an electric shock and fire caused by short circuit due to insulation deterioration.)

The heating element is subjected to heat after use. Please allow the appliance to cool before cleaning it.

(Touching hot elements may cause a burn.)

Do not use other pans than the specified one.

(It may cause a burn and injury due to overheating or malfunction.)
Precautions for Use
Please put in the correct amount of rice and water and select functions correctly according to the operating instructions.
(So as to avoid overflow of rice water, half-cooked rice or scorched rice.)
Do not put ingredients to be cooked directly into the appliance in which no pan is placed. Do not cook without pan.
(So as to prevent any impurities from causing failure.)
Avoid using the appliance under direct sunlight.
(So as to avoid color change.)
Do not use scouring pad to clean the inner surface of the pan.
Use only with a sponge.
Before using the appliance, the anti-tarnish paper between the pan and the cast heater should be removed.
(So as to avoid poor cooking or fire.)
Do not cover the outer lid with cloth or other objects when the appliance is in use.
(So as to avoid deformation, color change of the outer lid or failure.)
Do not serve out rice with any metal object.
(So as to avoid scratching the pan coating and causing peeling of the coating.)
Please always clean the foreign matters such as rice on the pan, cast heater and temperature sensor.

Foreign matters
Cast heater
Temperature sensor
- Do not tilt or overturn the appliance.
- Before cleaning, turn off the power switch and pull out the power plug.
When there is any overflow of rice water from the steam vent, pull out the power plug immediately to disconnect the power supply. Do not resume the use until the rice water on the power plug and the instrument plug is cleaned with a dry cloth.
The appliance is for household use only. Do not use it for any commercial or industrial purposes or any purposes other than cooking.
When power failure occurs during the operation of the appliance, the cooking result may be affected.
Parts identification
Display

- Press this button to select a cooking function.
- Press this button to enter Keep Warm mode.
- Press this button to preset timer.
- Press this button to set clock or cooking timer.
- Press this button to start setting cooking timer.
- Press this button to cancel the operation.
- Press this button to start cooking.
Parts identification
Accessories
Measuring cup (1) (Approx. 180 mL)
Basket (1)

Porridge scoop (1) Rice scoop (1) Adjusted
Time setup / Lithium battery
Time setup
1. Connect the power plug. Press the or button for more than one second, then release the button after a beep sound. The time shown on the LCD starts to blink.
8:00
2. Press the or button to set the time (1 minute increments). Keeping the button pressed will make setting faster.
• 24:00 is replaced by 0:00. - Error may occur in the Timer function if the current time has not been set properly. - The time cannot be set during operating state.
3. The time will be automatically set after leaving about 5 seconds. (LCD stops blinking.)
Lithium battery
Power source for the clock


Battery Replacement
If the lithium battery is consumed, please contact an authorized service center for replacement.
The battery life is approximately 5 years (at 20°C room temperature and when plugged in for 12 hours each day). ■ When the battery is consumed, the following phenomena will occur:
• The clock becomes dim or disappears. • The preset time memory is lost. - The clock can be used again when the power plug is connected. (The clock resetting is required.)
Note: Do not dispose of the lithium battery in fire, and do not recharge, disassemble, or heat the battery.
Preparations
1. Measure rice with the provided measuring cup.
• The volume of the measuring cup is approximately 180 mL. - For the maximum quantity of rice to be cooked at once, refer to the specifications on P.19.
Correct

The cooking result may be affected.
2. Wash the rice until the water becomes relatively clear.
① Wash the rice quickly with plenty of water, stirring the rice lightly while changing the water. ② Repeat this several times (wash the rice → pour out the water) until the water becomes relatively clear.
Attention
- To avoid scratching the non-stick coating on the pan surface, do not wash rice in the pan.
- Wash the rice thoroughly. Otherwise, rice crust may form and residual rice bran may affect the taste of the rice.
①
②
3 Add the washed rice or other ingredients into the pan.
- Use the water line on the pan to measure the water quantity as follows:
| Function Water line |
| White Rice White Rice |
| Jasmine Jasmine Rice |
| Multi Grain Multi Grain |
| Quinoa Refer to P.10 |
| Quick Cook White Rice |
| Brown Rice Brown Rice |
| Sticky Rice Sticky Rice |
| Porridge Porridge |
| Soup/Slow Cook White Rice |
- In the Soup/Slow Cook function, the total amount of ingredients and water shall not exceed the maximum water line for "White Rice".
- Dry the outside surface of the pan. If it is wet, it may cause noise while cooking. Any foreign matter between the pan and the cast heater may damage the unit.
- Please make sure that the pan is on a level surface.
- Please measure water by aligning the water line on the left side and right side.
- If the rice is too hard or too soft, please adjust the water quantity according to your personal taste.
When the rice quantity is 5 measuring cups, wash the rice and put it into the pan, then add water into the pan until the water surface reaches scale "5" at the water line of "White Rice".
SR-ZS185
Preparations
4 Put the pan into the body and close the outer lid.
- In order to closely attach the bottom of the pan to the cast heater, please rotate the pan along the direction indicated by the arrow 2 or 3 times.
- Please check whether the moisture retention cap is tightly positioned. (Refer to P.16)
- Close the outer lid until it clicks.

5 Connect the plugs.
- Please insert the instrument plug into the body first, and then connect the power plug. Make sure that both plugs are tightly connected.
①
②
CAUTION
* The table on the right shows the maximum allowable amount of rice that can be cooked while steaming food in the adjustable steam basket.
The maximum amount of rice (in measuring cups)
| Height of the adjustable steam basket | Maximum amount of rice | |
| SR-ZS185 | SR-ZS105 | |
| Shallow 5 2 | ||
| Deep 4 1 | ||
Functions
White Rice, Jasmine, Multi Grain, Quick Cook, Brown Rice or Sticky Rice

■ Important Information
• The amount of rice is specified in specifications. (P.19) - In the Quick function, the rice may be harder or there may be rice crust. - For brown rice, it takes about 2 hours to complete cooking. - For sticky rice, please soak the rice in water for 30 minutes before start cooking.
Operations (Cooking with the White Rice, Jasmine, Multi Grain, Quick Cook, Brown Rice or Sticky Rice function.)
1 Press button to point to White Rice, Jasmine, Multi Grain, Quick Cook, Brown Rice or Sticky Rice function.
- The indicator blinks.
2 Press button. • The indicator lights
• The indicator lights up and the cooking starts. - Before cooking is completed, the LCD display will show the remaining time in 1 minute decrement.
- If you want to preset the timer for White Rice, Jasmine, Multi Grain, Brown Rice and Sticky Rice, please refer to "Using the Timer" (on Page 15).
The cooking is over
Stir and loosen the rice.
- When cooking is over, the electric rice cooker beeps and automatically switches to the Keep Warm function (The Start indicator turns off and the indicator lights up automatically).
Keep Warm
- When the cooking is over, all functions will turn to Keep Warm functions automatically. But some functions are not recommended to use with Keep Warm function. Please press off button to exit Keep Warm function.
- You can keep the rice warm for up to 12 hours, so as not to affect the taste or cause strange smell.
- When in Keep Warm function, there may be some droplets at the edge of the pan.
- The rice taste may be affected if rice scoop is left in the electric rice cooker during Keep Warm function.

| Menu | Keep warm | The result after kept warm |
| White Rice | ○ | |
| Jasmine | ○ | |
| Multi Grain | ○ | |
| Quick Cook | ○ | |
| Quinoa | × | Affects the taste or causes a strange smell.Flavor can be adversely affected. |
| Brown Rice | × | |
| Sticky Rice | × | |
| Porridge | × | It may become too thick. |
| Cake/Bread | × | Affects the taste or causes a strange smell. |
| Soup/Slow Cook | × | |
| Steam | × |
○: Can be used. ×: Not recommend for use
Functions Quinoa

■ Important Information
- The amount of quinoa is specified in specifications. (P.19)
- The amount of water for cooking is indicated below:
| Quinoa (Measuring cup) | Water (Measuring cup) | |
| ZS185 ZS105 | ||
| 1 cup 2 cups 2 cups | ||
| 2 cups 4 cups - | ||
Operations (Cooking with the Quinoa function.)
1. Press the button to select the Quinoa function.
• The indicator blinks.
2. Press the button. • The indicator lights up.
- The indicator lights up and cooking starts.
- Before cooking is completed, the LCD display will show the remaining time, decreasing by 1 minute increments.
The cooking is over.
Press the button.
- When cooking is over, the electric rice cooker beeps and automatically switches to the Keep Warm function (the Start indicator turns off and the indicator lights up automatically). However, we do not recommend using the Keep Warm function as it may affect the taste. Press the off button to exit the Keep Warm function and unplug the power plug.
Functions: Porridge

■ Important Information
• The amount of rice is specified in the specifications (P.19). • If too much water is used, it may cause water overflow. - It is not recommended to use the Keep Warm function since porridge may become thick. - When the outer lid is opened during cooking, the amount of moisture condensation may increase. • Take off and clean the moisture retention cap after every use to prevent any strange smells. - This function is designed for cooking with white rice. Cooking with other kinds of rice may result in undercooking.
Operations (Cooking with the Porridge function.)
1. Press the button to select the Porridge function.
- The indicator blinks.
Press button.
• The indicator lights up and the cooking starts. - Before cooking is completed, the LCD display will show the remaining time in 1 minute decrement.
- If you want to preset the timer for Porridge, please refer to "Using the Timer" (on Page 15).
The cooking is over
Press button.
- When cooking is over, the electric rice cooker beeps and automatically switches to the Keep Warm function (The Start indicator turns off and the indicator lights up automatically). However, we do not recommend using the Keep Warm function as it may become too thick. Press the off button to exit the Keep Warm function and unplug the power plug.
Functions Steam

■ Important Information
• After boiling and complete evaporation of water, the electric rice cooker automatically switches off. - If you want to abort steaming during cooking, press button. - When steaming food while cooking rice, it's recommended to use Jasmine, Multi Grain or White Rice function with maximum quantity as described on P.8. - Please do not block the hole of the inner lid with food.
Preparations
- Add the required amount of water.
- Place the adjustable steam basket into the pan as shown.
- Place foods to be steamed into the adjustable steam basket.
- Close the outer lid.
■ Correspondence between the amount of water and time of steaming
| Cooking time | Amount of water | |
| SR-ZS185 | SR-ZS105 | |
| Less than 10 minutes | 1 measuring cup | 1 measuring cup |
| 10 ~ 30 minutes | 2 measuring cups | 2 measuring cups |
| 30 ~ 60 minutes | 4 measuring cups | 3 measuring cups |

Operations (Cooking with the Steam function.)
Press button to point to Steam function.
- The indicator and blink (as the default cooking time for Steam function).
Press ▶ button to set the cooking time as your desire.
- You can set the cooking time from 1 to 60 minutes (1 minute increment).
- Keeping the button pressed will make setting faster.
3 Press button.
- The indicator lights up and the cooking starts.
- After water is boiled, the LCD display will show remaining time in 1 minute decrement.

The cooking is over
Press button.
- When cooking is over, the electric rice cooker beeps and automatically switches to the Keep Warm function (The Start indicator turns off and the indicator lights up automatically). However, we do not recommend using the Keep Warm function as it may affect the taste. Press the off button to exit the Keep Warm function and unplug the power plug.
Functions Cake/Bread

■ Important Information
- The maximum allowable weight (total weight of the ingredients) for Cake/Bread is 500 g. If the maximum allowable weight is exceeded, the baking will not be cooked thoroughly.
- The Bread function performs only the bake function. Please make a leavened dough with reference to the recipe book.
Preparations
• Prepare the Cake/Bread mix. - For cake: Beat all the mixture as instructed in the recipe book. For bread: Knead all the mixture as instructed in the recipe book. - Coat the inner surface area (bottom and sides) of the pan with butter (or cooking oil), place the prepared ingredients in the pan, and close the outer lid.
Operations (Cooking with the Cake/Bread function.)
1. Press the button to point to the Cake/Bread function.
- The indicator and blink (as the default cooking time for the Cake/Bread function).
Press the ▶ button to set the cooking time as desired.
- You can set the cooking time from 20 to 65 minutes (in 5-minute increments).
- Keeping the button pressed will make setting faster.
Press the button.
• The indicator lights up and cooking starts. - The LCD display will show the remaining time in 1-minute decrements.

The cooking is over.
Press the button.
- When cooking is over, the electric rice cooker beeps and automatically switches to the Keep Warm function. (The Start indicator turns off and the Indicator lights up automatically). However, we do not recommend using the Keep Warm function as it may affect the taste. Press the off button to exit the Keep Warm function and unplug the power plug.
- Remove the pan and let it cool for 2-3 minutes. Then turn the pan upside down onto a tray or grill. Decorate the cake surface as desired.

Functions: Soup/Slow Cook

Important Information
The maximum amount of ingredients and liquid for Soup/Slow Cook cannot exceed the maximum water line for "White Rice".
Preparations
Place all ingredients into the pan.
Close the outer lid.
Operations (Cooking with the Soup/Slow Cook function)
1. Press the button to select the Soup/Slow Cook function.
The indicator and blink (as the default cooking time for Soup/Slow Cook function).
Press the ▶ button to set the cooking time as desired.
You can set the cooking time from 1 to 12 hours (in 30-minute increments).
Keeping the button pressed will make setting faster.
Press the button.
The indicator lights up and cooking starts. The LCD display will show remaining time in 1-minute decrements.

The cooking is over
Press button.
- When cooking is over, the electric rice cooker beeps and automatically switches to the Keep Warm function (the Start indicator turns off and the Indicator lights up automatically). However, we do not recommend using the Keep Warm function as it may affect the taste. Press the Off button to exit the Keep Warm function and unplug the power plug.
Using the Timer

The presetting time is the desired time for eating.
• Time can be preset 24 hours in advance.
Example
If the timer is set for 18:30, cooking will be completed at 18:30.
* When the preset timing is less than the required timing for cooking, the electric rice cooker will start cooking as soon as the Start button is pressed.
※ Memory of preset time will be lost if battery is consumed. Please contact authorized service center for replacement.
Operations
1 Press Menu Select button to select function. • Applicable functions for timer setting:
| Function | Function |
| White Rice | Brown Rice |
| Jasmine Sticky Rice | |
| Multi Grain Porridge |
2 Press button to select the timer setting.
- The first time the Timer button is pressed, the previous timer setting will be displayed. The time and the Start indicator blink.
Press the ▼ button to set the desired time.
• The timer will advance 10 minutes each time.
- Keeping the button pressed will make setting faster.
4 Press button.
- The Start indicator turns off and the Time indicator lights up.
- When cooking starts, the ■Timer indicator turns off and the indicator lights up.
- Timer setting can't be used with the following functions:
| Function |
| Quinoa |
| Quick Cook |
| Steam |
| Cake/Bread |
| Soup/Slow Cook |
Cleaning and maintenance
- Be sure to unplug and carry out these operations when the appliance is cooled down.
- Do not use objects such as benzine, thinners, cleansing powder or metal scrubbers.
Inner lid

Remove the inner lid
Hold the two tabs, then pull them towards you.
- Wash with a diluted dishwashing detergent and sponge.

Attach the inner lid
① Insert the protruding part into the locker on the outer lid in a tilted way. ② Press the tabs (both sides) inwards the outer lid sides until the click sound is heard.

Load and unload tabs of inner lid
Pan
Wash with a diluted dishwashing detergent and sponge and wipe off the external surface of the pan.
Temperature sensor / Cast heater
If an object has become stuck to the temperature sensor / cast heater, slightly polish it off using fine sandpaper (of about #600). Then wipe with a well-wrung cloth.

Moisture retention cap

Remove the moisture retention cap
Hold the moisture retention cap firmly and pull it out from the outer lid.

Attach the moisture retention cap
Hold the moisture keeping cap firmly and push it inside the hole of the outer lid until it seats properly.
- Wash with a diluted dishwashing detergent and sponge.
Body / Outer lid
Wipe with a well-wrung cloth.
- Do not use a dishwashing detergent.
Upper frame
Wipe with a well-wrung cloth.

Do not pour water directly on the upper frame.
Accessories
Measuring cup
Adjustable steam basket

Porridge scoop, rice scoop
Wash with a diluted dishwashing detergent and sponge.
How to use the adjustable steam basket / When the display shows as follows
How to use the adjustable steam basket
Height adjustment
Put your thumb on the ring on the inner wall of the rotating part, lift and slightly turn it counterclockwise, then release your finger. The height of the adjustable steam basket will increase. To restore the previous size, hold the bottom of the rotating part with your palm, slightly turn it clockwise, and lift it up to clip.


Disassembly
First, restore the adjustable steam basket to its initial state (shallow), turn it over on the table, and then press down firmly on the rotating part until it clips. The fixed part and rotating part will separate.

Assembly
Direct the protrusion on the edge of the rotating part towards the groove on the inner wall of the fixed part, and then press with force on the bottom of the rotating part until it clips.


When the display shows as follows
| Display Problems and troubleshooting | |
| U14 | Following continuous 96 hoursKeep Warmfunction, the power supply will automatically cut off.Please pressoffbutton fi rst. |
| H01 H02H05 | Contact the authorized service center for repair. |
Troubleshooting
Please check the following items
Rice Cooking
| Details | Cooking problems | Keep Warm problems | No power | Strange sound occurs | ||||||
| Too hard | Undercooked | Too soft | Water overflow | Burnt rice at bottom of pan | Color change | Bad smell | Too dry | |||
| Wrong rice and water proportion. | ● | ● | ● | ● | ● | ● | Pull out plug and check the socket. | Sound occurs because of water that has stuck to pan. ● | ||
| Inadequate washing of the rice. | ● | ● | ● | ● | ||||||
| Foreign matters between pan and cast heater. | ● | ● | ● | ● | ||||||
| Cooking with a lot of oil. | ● | ● | ● | ● | ● | |||||
| The rice has been warmed more than 12 hours. | ● | ● | ● | |||||||
| The outer lid is not securely closed. | ● | ● | ● | |||||||
| The pan is not adequately washed. | ● | ● | ||||||||
| The power cord is not connected to the socket securely. | ● | ● | ||||||||
Cake/Bread Baking
| Details | Baking Cake/Bread problems | No power | Strange sound occurs to pan. | ||||||
| Undone Cake/ Bread | Undercooked Cake/Bread | Wet Cake/Bread | The Cake/Bread sticks to the base of pan | Bottom of the Cake/Bread burnt | Not fluffed | Crumbly | |||
| Too much dough. | ● | ● | Pull out plug and check the socket. | Sound occurs because of water that has stuck to pan. | |||||
| Not enough mixing before baking. | ● | ● | ● | ||||||
| Used with incompatible cake mix. | ● | ● | ● | ● | |||||
| Used with cake mix that contains too much chocolate,sugar or fruit ingredients. | ● | ● | ● | ● | |||||
| Outer lid not close while cooking. | ● | ● | ● | ||||||
| Foreign matters between pan and cast heater. | ● | ● | ● | ● | ● | ||||
| Not enough butter or cooking oil applied to the bottom of the pan. | ● | ||||||||
| Cake/Bread left in the pan too long. | ● | ● | |||||||
| Inadequate mixing or mixed too long. | ● | ● | |||||||
| Wrong ingredient quantity. | ● | ● | ● | ● | |||||
Specifications
| Model No. | SR-ZS185 SR-ZS105 | ||
| Power Source | 120 V~60 Hz | ||
| Power Consumption | In the Cooking function | 775 W | |
| In the Keep Warm function | 86.9 W 81 W | ||
| Capacity | White Rice 2 - 10 cups | 1 - 5.5 cups | |
| Jasmine 2 - 10 cups | 1 - 5.5 cups | ||
| Multi Grain 2 - 8 cups | 1 - 4 cups | ||
| Quinoa 2 - 4 cups | 1 - 2 cups | ||
| Quick Cook 2 - 10 cups | 1 - 5.5 cups | ||
| Brown Rice 2 - 6 cups | 1 - 3 cups | ||
| Sticky Rice 3 - 6 cups | 1 - 3 cups | ||
| Porridge | 0.5 - 2 cups | 0.5 - 1 cup | |
| Cake/Bread | 500 g | 500 g | |
| Soup/Slow Cook 3.2 L | 1.8 L | ||
| Dimensions (Height x Length x Width) (approx.) | 241 x 385 x 261 mm | 201 x 385 x 261 mm | |
| Weight (approx.) | 3.4 kg | 3.1 kg | |
| Keep Warm | 12 hours | ||
- For power cord replacement and product repair, please contact Panasonic authorized service center.
- The design and specifications are subjected to change without prior notice.
| Function | Cooking time (approximate) *1 |
| White Rice | 40 min |
| Jasmine | 35 min |
| Multi Grain | 45 min |
| Quinoa | 35 min |
| Quick Cook *2 | 15 min |
| Brown Rice | 120 min |
| Sticky Rice | 40 min |
| Porridge | 60 min |
*1 Cooking time may vary depending on supply voltage, room temperature, kind of rice, cooking quantity, water quantity and water temperature.
*2 Rice cooked (white rice at minimum cooking quantity) within 15 minutes. (Under Panasonic test method)


- PANASONIC®
- OPERATING INSTRUCTIONS
- ELECTRIC RICE COOKER HOUSEHOLD USE
- SAVE THESE INSTRUCTIONS
- CAUTION
- SAFETY PRECAUTIONS
- MUST BE FOLLOWED
- WARNING
- DO NOT USE THE APPLIANCE IN THE FOLLOWING PLACES
- DO NOT EXPOSE THE POWER PLUG TO STEAM AND DO NOT LET WATER SPILL ON THE CONNECTOR OF THE POWER PLUG
- PRECAUTIONS FOR USE
- PLEASE ALWAYS CLEAN THE FOREIGN MATTERS SUCH AS RICE ON THE PAN, CAST HEATER AND TEMPERATURE SENSOR
- PARTS IDENTIFICATION
- DISPLAY
- TIME SETUP / LITHIUM BATTERY
- TIME SETUP
- LITHIUM BATTERY
- BATTERY REPLACEMENT
- PREPARATIONS
- MEASURE RICE WITH THE PROVIDED MEASURING CUP
- WASH THE RICE UNTIL THE WATER BECOMES RELATIVELY CLEAR
- ATTENTION
- ADD THE WASHED RICE OR OTHER INGREDIENTS INTO THE PAN
- PUT THE PAN INTO THE BODY AND CLOSE THE OUTER LID
- CONNECT THE PLUGS
- FUNCTIONS
- WHITE RICE, JASMINE, MULTI GRAIN, QUICK COOK, BROWN RICE OR STICKY RICE
- IMPORTANT INFORMATION
- OPERATIONS (COOKING WITH THE WHITE RICE, JASMINE, MULTI GRAIN, QUICK COOK, BROWN RICE OR STICKY RICE FUNCTION.)
- PRESS BUTTON TO POINT TO WHITE RICE, JASMINE, MULTI GRAIN, QUICK COOK, BROWN RICE OR STICKY RICE FUNCTION
- PRESS BUTTON. • THE INDICATOR LIGHTS
- THE COOKING IS OVER
- STIR AND LOOSEN THE RICE
- KEEP WARM
- FUNCTIONS QUINOA
- OPERATIONS (COOKING WITH THE QUINOA FUNCTION.)
- PRESS THE BUTTON TO SELECT THE QUINOA FUNCTION
- PRESS THE BUTTON. • THE INDICATOR LIGHTS UP
- PRESS THE BUTTON
- FUNCTIONS: PORRIDGE
- OPERATIONS (COOKING WITH THE PORRIDGE FUNCTION.)
- PRESS THE BUTTON TO SELECT THE PORRIDGE FUNCTION
- PRESS BUTTON
- FUNCTIONS STEAM
- OPERATIONS (COOKING WITH THE STEAM FUNCTION.)
- PRESS BUTTON TO POINT TO STEAM FUNCTION
- PRESS ▶ BUTTON TO SET THE COOKING TIME AS YOUR DESIRE
- FUNCTIONS CAKE/BREAD
- OPERATIONS (COOKING WITH THE CAKE/BREAD FUNCTION.)
- PRESS THE BUTTON TO POINT TO THE CAKE/BREAD FUNCTION
- PRESS THE ▶ BUTTON TO SET THE COOKING TIME AS DESIRED
- FUNCTIONS: SOUP/SLOW COOK
- OPERATIONS (COOKING WITH THE SOUP/SLOW COOK FUNCTION)
- PRESS THE BUTTON TO SELECT THE SOUP/SLOW COOK FUNCTION
- USING THE TIMER
- EXAMPLE
- OPERATIONS
- CLEANING AND MAINTENANCE
- INNER LID
- REMOVE THE INNER LID
- ATTACH THE INNER LID
- PAN
- TEMPERATURE SENSOR / CAST HEATER
- MOISTURE RETENTION CAP
- REMOVE THE MOISTURE RETENTION CAP
- ATTACH THE MOISTURE RETENTION CAP
- BODY / OUTER LID
- UPPER FRAME
- ACCESSORIES
- HOW TO USE THE ADJUSTABLE STEAM BASKET / WHEN THE DISPLAY SHOWS AS FOLLOWS
- HOW TO USE THE ADJUSTABLE STEAM BASKET
- HEIGHT ADJUSTMENT
- DISASSEMBLY
- ASSEMBLY
- WHEN THE DISPLAY SHOWS AS FOLLOWS
- TROUBLESHOOTING
- PLEASE CHECK THE FOLLOWING ITEMS
- SPECIFICATIONS
Brand : PANASONIC
Model : SR-ZS105
Category : Rice cooker