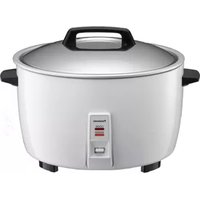
USER MANUAL SR-DB071 PANASONIC
Operating Instructions
Household Use Electronic Rice Cooker
Model No. SR-DB071

Thank you very much for purchasing the Panasonic product.
● This appliance is intended to be used in household and similar applications. - Please read these Operating Instructions carefully for safe and proper use of this product. - Be sure to read the "Safety Precautions" (pages 2-3) before use. - Keep the warranty card together with the Operating Instructions with care.
Contents
Safety Precautions 2-3
Instructions for Use 4
Parts Identification
- Main body 5 • Control panel 5
Preparation
- Wash rice and add water 6 • Function selecting · Setting cooking time · Tips to cook delicious rice 7
Cook Rice · Keep Warm · Reheat 8 - Porridge · Stew / Soup · Steam · Instant Boil · Yogurt · Cake 9-10 - Timer 10
Cleaning and Maintenance .... 11-12
Recipes 12 - 13
Troubleshooting 14 - 15
Error Codes Indication 16
Specifications 16
Reserve it for later use
The Warranty is attached separately
Safety Precautions
Be sure to observe the following precautions
To prevent personal injury, injury to others and property damage, the following instructions must be followed.
The following symbols show the damage or harm level caused by incorrect operation.

WARNING:
Indicate a potential hazard which could result in death or serious injury.

CAUTION:
Indicate a potential hazard which could result in injury or damage to property.
■ Classification and description of symbols are as follows.

This symbol indicates an action that is prohibited.

This symbol indicates an action that must be followed.

WARNING

■ Power supply • Power cord • Power plug
- Do not use the appliance if the power cord or power plug is damaged or the power plug is loosely connected to the power outlet.
(To avoid electric shock or fire due to short circuit.)
→ If the supply cord is damaged, it must be replaced with the dedicated power cable or dedicated parts obtained from the manufacturer or service department.
● Do not damage the power cord or power plug.
- The following actions are strictly prohibited: damaging, processing, making contact with or placing near high-temperature sections, forcibly bending, twisting, pulling, hanging on corners, placing heavy objects on it, tying into bundles, sandwiching, or pulling the power cord to move the appliance.
(To avoid electric shock due to damaged power cord and plug, or fire due to short circuit.)
- Do not connect or disconnect the power plug with wet hands.
- Make sure your hands are dry before touching the power plug or the product.
(To avoid electric shock or injury.)
- Do not let anyone lick the instrument plug. (To avoid electric shock or injury.)
• Pay extra attention to infants.
- Do not spill water or other liquids on the instrument plug.
(To avoid electric shock or fire due to short circuit.)

● Please use an AC power outlet with a rating of 10 A, 220 V.
(Using the unit together with other equipment on the same outlet can cause overheating and fire.)
● Make sure that the power plug and the instrument plug are fully inserted. (To avoid smoke, fire, or electric shock.)
● This appliance should be used with a single-phase, three-wire grounded outlet to ensure reliable grounding. If a grounding device is not installed, it may cause electrostatic induction on other metal parts such as the housing.
(To avoid the risk of electric shock due to failure or leakage.)
● Clean the power plug regularly.
(To avoid fire due to poor insulation of the power plug caused by accumulation of moisture and foreign matter.)
→ Disconnect the power plug and wipe it with a dry cloth.
■ Main body
● Do not insert any objects into the vent or gaps.
- Especially pins or other metal objects. (To avoid electric shock or abnormal operation.)
● Do not place items that may clog the inner lid into the pan.
(To avoid burns or injuries caused by steam leaks or cooked food blowing out.)
• Cooking method in which ingredients and seasonings are placed into a plastic bag to heat.
- Do not modify, disassemble, or repair this appliance.
(To avoid fire, electric shock, or injury.)
→For repair, please contact the Panasonic authorized service center.
- Do not use this appliance for any purpose other than those described in the Operating Instructions.
(To avoid fire, burns, injury, or electric shock.)
- Panasonic shall not assume any responsibility for improper use or failure to follow the operating instructions.
- Do not immerse the appliance in water or splash it with water.
(To avoid electric shock or fire due to a short circuit.)
→Please make enquiries to the Panasonic authorized service center if water gets inside the appliance.
-vent
Hole on the inner lid


WARNING

Usage
- When in use or after cooking, do not put your face or hands near the steam vent, special attention must be paid to the infant. (To avoid burns.)

- Do not open the outer lid or move the main body during cooking.
(To avoid burns or injuries caused by steam leak or cooked food blowing out.)

● This appliance is not intended for use by persons (including children) with reduced physical, sensory or mental capabilities, or lack of experience and knowledge, unless they have been given supervision or instruction concerning use of the appliance by a person responsible for their safety. Children should be supervised to ensure that they do not play with the appliance. (To avoid burn, injury or electric shock.)
- Keep the appliance out of reach of small children.
(To avoid burn, injury or electric shock.)
- If an exception or malfunction occurs, stop using the appliance immediately and unplug the power plug.
(To avoid smoke, fire or electric shock.)
Abnormalities • Malfunction Cases
• The power plug and cord become abnormally hot.
• The power cord is damaged or intermittent power outages when being touched.
• The main body is deformed or abnormally hot.
• The main body emits smoke or burning smell.
• The main body is broken, loose or makes abnormal noise.
→Immediately contact the Panasonic authorized service center for inspection or repair.
CAUTION

- Do not use the appliance in the following places.
- Near heat or in high humidity environments. (To avoid electric shock, electric leakage or fire.)
- On uneven surfaces or mats that are not heat-resistant. (To avoid injury, burns or fire.)
- In places close to the wall or furniture, etc. (To avoid bumping into them when opening the outer lid, or causing discoloration, deformation and breakage of the furniture.)
- Do not use a non-dedicated pan or a deformed pan.
(To avoid burns or injury due to overheating or malfunction.)
- Do not touch the hook button when moving the product.
(To avoid injury due to the opening of the outer lid.)
- Do not touch the hot surface while the appliance is in use or after cooking.
• The main body has a high temperature. In particular, the metal parts such as the inner lid, the pan and the cast heater. (To avoid a burn.)

- Do not use a power cord not specified for use with this appliance, or use the power cord provided with this appliance for any other device. (To avoid malfunctions or electric shock, electric leakage or fire.)
- Do not expose the power plug to steam.
(So as not to cause an electric shock, or a fire due to a short circuit.)
→When using a cabinet with sliding table, use the appliance where the power plug cannot be exposed to steam.

- Do not let the appliance operate in an empty state.
(So as not to cause burn.)
- Do not connect the appliance with an external timing device or operate the appliance in the mode of a separate remote control system. (So as to avoid injury.)
- When unplug the power plug or instrument plug, be sure to hold the plug itself.
(So as not to cause an electric shock, or a fire due to a short circuit.)
- When taking out the pan or when the pan is not in use, remember to turn off the power and unplug.
(So as not to cause burns, injury, or an electric shock, leakage, fire due to insulation aging.) ● Wait for the main body to cool down sufficiently before cleaning.
(So as not to cause burns.)
- When used within a cupboard or other enclosed spaces, make sure that the steam can emit outward.
(So as not to cause discoloration or deformation of the cupboard.) ● This appliance is intended to be used in household and similar applications such as:
- staff kitchen areas in shops, offices and other working environments;
- farm houses;
- by clients in hotels, motels and other residential type environments;
- bed and breakfast type environments.
When a power outage occurs during use
Including unplug of the power plug, trip, etc.
- Return to standby mode.
Instructions for Use
About the main body
If the product is on a cabinet with a sliding table, make sure that the load of the table is greater than 9.0 kg.
(To prevent the product from falling.)

■ Do not cover the outer lid with cloth or other objects when the product is in use.
(To prevent steam from being blocked, which could cause deformation, discoloration of the outer lid, and malfunction of the product.)

■ Do not use the product outdoors.
(Unstable power supply may result in product failure.)
■ Avoid using the product under direct sunlight.
(To avoid color change.)
■ Please clean rice and other foreign objects that stick to the main body (bottom sensor, cast heater).
(To avoid error display, or scorched rice, half-cooked rice, etc.)
- Do not use the product where the bottom of the product (the vent) may be clogged.
For example: on carpet, plastic bag, aluminum foil, or fabric, etc.
(To prevent damage to the product.)
About the Inner pan
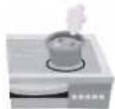
Do not use the pan in a place other than the warm jar.

Do not use it on a gas stove, induction cooker, or microwave.
Do not impact the pan with a hard object.

So as not to cause scratches or dents on the outer surface.

Pay attention to the following in order to avoid slashes or scratches on the coating of the pan.
Before cooking

Do not let objects like metal sieves come into contact with the coating of the pan.

After cooking

- Do not put vinegar into the rice in the pan. (While cooking sushi and other food)
- Do not use a metal spoon. (While cooking porridge and other food) ● Do not touch or strike the pan. (While filling a bowl with rice)
During cleaning and maintenance (P11)

- Do not use the pan as a washing container.
- Do not place a spoon or other utensils into the pan. ● After cooking with seasoning, do not leave food inside the pan.
After cooking mixed rice, please remove the food from the pan as soon as possible and then clean the pan.
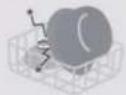
- Do not use a bowl dryer or dishwasher/dryer for cleaning.
- Do not put the pan in other utensil to dry after washing.
- Do not use abrasive powder or metal brush, nylon brush (with the grind), scouring pad to clean or scrub the pan.
→ To clean the pan, wash it with a soft sponge.


Notes
The following will not affect the product performance or personal health.
[Outer surface] superficial scratches, small dents or collision.
[Inner surface] flaking of the coating of the pan. →If the pan is deformed or you are worried about its condition, please purchase a new pan.


Parts Identification
● For the first use, clean the pan, inner lid, steam cap, accessories. (P11-12)
Main body
Accessories Rice scoop (1)
Porridge [Soup] scoop (1)
Measuring cup (1) (Approx. 180 mL)

Control panel
White Rice
Sticky Rice
Quick/Quinca
Mixed Rice
Brown Rice
Reheat
Porridge
Stew/Soup
Steam
Instant Boil
Yogurt
Cake
<
88:88
Off Cancel
Keep Warm
Timer
Time
Start
Off/Cancel key
- Cancel incorrect operation, or turn off keep warm.
Keep Warm key
● Press this key to keep food warm.
Timer key
- Press this key to set the timer.
Time key
● To set the cooking time, you must first press this key.
< > key
● It is used to select the function. ● It is used to set preset time and cooking time. - When setting time, press and hold the key to quickly add or subtract time.
Start key
● Press this key to start cooking or end the setting of the preset time.
Preparation: Wash rice and add water.
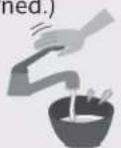
| Before use for the first time1 Add water to the waterline 3 of "RICE", and close the outer lid.2 Select "Steam" function, and set the cooking time to 15 minutes.3 When you hear the buzzer, remove the pan, and pour away the water inside it. | CAUTION: The pan is very hot at this moment, so remove the pan wrapped with a towel to avoid being burnt. |
| 1 | Measure rice with the measuring cup provided● Maximum quantity of rice to be cooked at once,■ "Specifications" on P16. | ○ Correct  About 180 mL (about 150 g) About 180 mL (about 150 g) | × Incorrect   |
| 2 | Wash the rice till the water turns relatively clear1 Wash the rice quickly with plenty of water and stirring the rice lightly to wash it while changing water.2 Repeat several time of rice washing → rinse with water, till the water turns relatively clear.● In order to avoid scratching the non-stick coating on the pan surface, do not wash rice in the pan.● Wash the rice thoroughly. Otherwise, rice crust may appear and the residual rice bran may affect the taste of the rice. | 1 | 2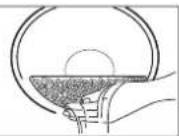 |  |
| 3 | Place the washed rice into the panAdd water until the corresponding waterline( ■ P7) and dry the outside of the pan.● Add water on a flat surface, and flatten the surface of the rice.(Confirm the scale and add water to the same height)● When cooking mixed rice or glutinous rice, please add water according to the following table 1.Table 1 | Example: when cooking 3 cups of rice, add water to the "3" waterline of the "RICE".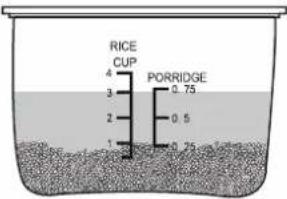 |
| Rice quantity(Measuring cups) | Water quantity | | |
| Mixed rice | Glutinous rice (measuring cup) | | |
| 1 | "RICE"waterline | 1 | | |
| 2 | 2 | | |
| ※The above water quantities can be increased or decreased according to personal preference.(When too much water is added, it may overflow when cooking.) | | |
| 4 | Put the pan into the body and close the outer lid● When closing the outer lid, please confirm that there is a "click" sound, If the inner lid is not properly installed, the outer lid can not be closed. ( ■ P11 Inner lid)● Verify that the steam cap is in place ( ■ P12 Steam cap) | 1 | 2 |  |
| 5 | Connect the plugs● Please plug in the instrument plug, then plug the power plug, and make sure both are connected securely. | 1 | 2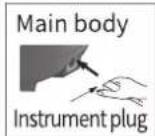 |  |
Preparation
Function selecting · Setting cooking time · Tips to cook delicious rice
Table 2
| Categories of food to cook | Menu select | Waterline | 1 Cooking time (Approx.) (min) | 2 Keep warm (auto) | 3 Time range to preset |
| Rice | White Rice | RICE | 42 | ○ | 60 minutes or more |
| Sticky Rice | 48 | ○ | 60 minutes or more |
| Quick/Quinoa | 35 | ○ | 60 minutes or more |
| Brown Rice | Brown Rice | RICE | 80 | ○ | 90 minutes or more |
| Mixed Rice | Mixed Rice | RICE | 48 | × | - |
| Glutinous Rice | Sticky Rice | Refer to on P6 Table 1 | 48 | × | - |
| Porridge | Porridge | PORRIDGE | Table 3 | × | Cooking time + 10 minute or more |
| Soup | Stew/Soup | To the maximum waterline of "PORRIDGE" | Table 3 | × | - |
| Steam | Steam | Water for a steam of more than 40 minutes: 2 measuring cups | Table 3 | × | - |
| Instant Boil | Instant Boil | To the "3" waterline of "RICE" | Table 3 | × | - |
| Yogurt | Yogurt | Water: 500 mL | Table 3 | × | - |
| Cake | Cake | - | Table 3 | × | - |
| *1 • The time needed to cook the intermediate amount of rice (2 cups) at a voltage of 220 V, a room temperature of 20 °C and a water temperature of 20 °C for reference.• The actual cooking time will vary according to the amount of rice, water, voltage, temperature, water temperature and rice quality.• The cooking time for mixed rice, glutinous rice will vary according to the ingredients used.*2 • All functions at the end of the cooking will be automatically converted to keep warm.But items marked with "×" are not recommended to keep warm, and please press the [Off/Cancel] key as soon as possible after the end of the cooking.*3 • The functions of mixed rice, reheat, steam, instant boil, stew/soup, yogurt, cake do not have timer.• When cooking glutinous rice, mixed rice, do not use the function of timer to performance influence.• In summer when temperature is high, the preset time should not be greater than 8 hours to avoid rice deterioration. |
■ Setting cooking time (Table 3)
| Categories of food to cook | Menu select | Setting cooking time range | Setting increments | Initial value | Time memory |
| Porridge | Porridge | 1 hour - 2 hours | 30 minutes | 1 hour | - |
| Soup | Stew/Soup | 1 hour - 4 hours | 1.5 hours | - |
| Steam | Steam | 5 minutes - 1 hour | 1 minute | 5 minutes | - |
| Instant Boil | Instant Boil | 1 - 20 minutes | 1 minute | 5 minutes | - |
| Yogurt | Yogurt | 6 hours - 12 hours | 30 minutes | 8 hours | - |
| Cake | Cake | 40 minutes - 1 hour | 1 minute | 50 minutes | - |
Tips to cook delicious rice

Measure water and rice correctly.

- Wash rice gently and quickly.
- Do not place rice in a sieve. (To avoid rice fragmentation or rice sticking to the pan.)

- Add water to the pan on a flat countertop.
- Do not use hot water or alkaline water of more than pH9. (So as to avoid rice sticking to the pan or becoming burned.)
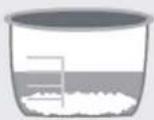

※ When cooking with the "White Rice" function
1. Press < or > key to select "White Rice".
2. Press Start key to start cooking.
● The [Start] indicator lights up.
● After entering the cooking stage, the remaining cooking time displayed will be automatically adjusted depending on the rice volume. For example, it may sometimes drop from "After 7 minutes" to "After 3 minutes", rather than decreasing in unit of 1 minute.

3 When cooking is over, loosen the rice.
● After the buzzer rings, cooking finishes. The function will automatically turn to keep warm status. To prevent the rice from sticking together, please loosen the rice after cooking.
- For mixed rice, brown rice, press the [Off/Cancel] key as soon as possible so as not to affect the taste.
■ Kind reminder
● "Quick/Quinoa" can be used for cooking rice. As the cooking time is shortened, the rice may be harder or there may be rice crust.
→Soak the rice in water in advance, and you can make the cooked rice become soft.
● With "Sticky Rice" function, you can make rice softer and more delicious.
Keep Warm
- If the function of "Keep Warm" is longer than 24 hours, it will automatically stop, and the display shows "----". To continue using, press the [Off/Cancel] button first. ● Cooked rice should be consumed within 5 hours of keeping warm to avoid discoloration or becoming stale.
- When in keep warm function, there may be some droplets at the edge of the pan. ● The rice taste may be affected if the rice scoop is left in the pan when the rice is in keep warm function.
※ When reheating the cooled rice
Preparation ● Stir the cooled rice in the pan to make it even. ● Please refer to the following table of the amount of water to be added.
Table 4
| Cooled rice quantity (Waterline) | Water volume (measuring cup) |
| 1/2 | --- |
| 1 | --- |
| 2 | 1/2 |
■ The maximum amount of cooled rice to reheat: RICE 2 Cups

1 Press < or > key to select "Reheat".
2 Press Start key to start cooking.
● The [Start] indicator lights up. ● No matter how much cooled rice to reheat, the heating time is about 15 minutes.

3 After the buzzer rings, cooking finishes, the function will automatically turn to keep warm status.
■ Kind reminder
- When adding cooled rice, do not exceed the maximum amount of cooled rice (as shown in Table 4). ● It is recommended to reheat cooled rice for only once so as not to affect the taste of rice.
- Do not reheat mixed rice and brown rice, so as not to affect the taste.
※ When cooking porridge for 2 hours
1 Press < or > key to select "Porridge".
2 Press Time key
3 Press < or > key to set the cooking time.
※ For the cooking time which can be set, 📋 Table 3 on P7.
4 Press Start key to start cooking.

5 After the buzzer rings, cooking finishes, the function will automatically turn to keep warm status.
- Keep warm function will affect taste, press [Off/Cancel] key as soon as possible.
■ Kind reminder
- Opening the lid while cooking will increase the amount of dew condensation. ● Incorrect water quantity or rice quantity may lead to overflow of rice water from the steam vent.
- When the porridge is kept in the keep warm function for an excessively long time, it will get thicker.
- Soup may overflow if exceeding the "PORRIDGE" max water level. ("Specifications" on P16) ● After each use, remove the inner lid and steam cap, then rinse them so that no odor is produced.
- If the steam cap is missed, the porridge may still be raw.
※ When steaming for 10 minutes
Preparation ① Add suitable amount of water into the pan.
② Put the food on the plate.
③ Put the plate in the pan.
④ Close the outer lid.
1 Press < or > key to select "Steam". 2 Press Time key 3 Press < or > key to set the cooking time. 4 Press Start key to start cooking.
※ For the cooking time which can be set, see 📋 Table 3 on P7.
● After water boils, remaining time is shown in 1 minute decrements.
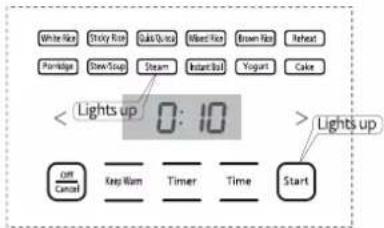
5 After the buzzer rings, cooking finishes, the function will automatically turn to keep warm status.
- Keep warm function will affect taste, press [Off/Cancel] key as soon as possible.
■ Kind reminder
● For longer steaming time (over 40 minutes), add 2 cups of water to avoid dry heating. ● The time shown in the display is the remaining time after the water inside the pan is boiled. - Instant boil may overflow if exceeding the "PORRIDGE" max water level. ("Specifications" on P16)
※ When baking a cake with the "Cake" function (50 minutes)
Preparation
● Mix all the ingredients well in accordance with the requirements of cake flour. - Apply a layer of butter (or cooking oil) on the wall of the pan, then pour the stirred cake batter into the pan and close the lid.
1 Press < or > key to select "Cake".
2 Press Time key
3 Press < or > key to set the cooking time.
※ For the cooking time which can be set, see 📋 Table 3 on P7.

4 After the buzzer rings, cooking finishes, the function will automatically turn to keep warm status.
- Keep Warm function will affect taste, press [Off/Cancel] key if this is a concern. ● Take the pan out and cool for several minutes, then turn over the pan, and pour the cake out. Be careful not to burn your hands while taking the pan out.
■ Kind reminder
● Cake batter can not exceed 300 g (the total weight of cake flour, milk, eggs, etc.) so as to avoid half-baked cake. - In addition to cake flour, you can use ordinary low-gluten flour to make cakes. 📋 Recipes on P13. ● While baking the maximum amount of cake batter, set the cooking time to 60 minutes in order to avoid half-baked cake.
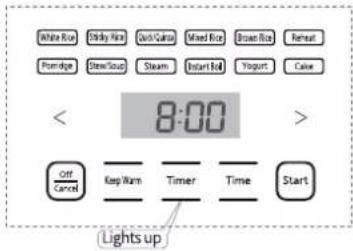
※ When you want to use the "Timer" function to complete the "White Rice" after 8 hours
1 Select a function according to the methods on P8 - P9.
2 Press Timer key
- When porridge timer is set, you need to set the cooking time according to Step 2 on P9, and then press the [Timer] key.
3 Press < or > key to set the preset time.
4 Press Start key to start cooking.
※ For the functions and time range which apply to timer, see Table 2 on P7.
■ Kind reminder
- When cooking glutinous rice or mixed rice, do not use the timer function to avoid food deterioration or performance issues.
- In summer when temperature is high, the preset time should not exceed 8 hours to avoid rice deterioration.
Cleaning and Maintenance
Attentions
● Before cleaning, please pull out the power plug first. Do not clean the main body until it cools down. - When cleaning the main body, do not immerse it in water, or clean it with lacquer thinner, gasoline, alcohol, cleaning powder, or hard brush, etc. ● Do not use the dishwasher or dish dryer.
Inner lid
Please clean it with a kitchen dedicated neutral detergent. Move
Disassembly


① Move the lever up.
(The inner lid will topple over toward the front direction.) ② Take out.
■ Installation
① Insert the inner lid into the slot. (Both sides) ② Press toward the lid until you hear a "click" sound. Slot

Notes
● Please wash in time after using seasonings (Mixed rice, etc.). (Otherwise odor, deterioration or corrosion may be caused.)
Cast heater/Bottom sensor
If an object has stuck on the Cast heater and Bottom sensor, lightly polish it off using fine sandpaper (of about # 600). Then wipe with a dry cloth.
Notes
- If you do not clean the bottom sensor, the rice may get burnt or cooked badly.
Upper frame
Wipe with a wet towel wrung.
Notes
- Do not pour water in to wash.
The inner surface of the outer lid / Steam seal ring
Wipe with a wet towel wrung.
- Please remove the inner lid and clean the inner side of the outer lid.
- Please do not pull the steam seal ring.


Pan
● Clean with diluted detergent, soft sponge and water. Wipe off any water on the outside of the pan. ● Please do not use the pan as a container for cleaning. ● Color change or stripes may appear on the fluoridized coating surface, which will not affect human health or normal functions of the main body.
Cleaning and Maintenance/Recipes
Steam cap
Remove and rinse.
Soup or oil tends to remain in the steam cap, so wash it with water after each use.
(Otherwise odor or deterioration may be caused.)

■ Disassembly
① Hold the steam cap with your thumb and index finger and lift it up in the direction of the arrow to separate the steam cap from the outer lid for easy removal.
② Rotate in the direction of the arrow to open the steam cap.
■ Installation (according to the order in reverse of the removal.)
① Rotate in the direction of the arrow until you hear a "click" sound.


Accessories
Clean with diluted detergent and soft sponge.
Rice scoop (1)
Porridge [Soup] scoop (1)
Measuring cup (1)
Recipes
Mixed rice
Ingredients:
Rice
1 cup
Fresh shiitake mushrooms
30 g, shredded
Shredded chicken
20 g
Minced celery
15 g
Seasonings:
Sesame oil
3 mL
Soy sauce
10 mL
Sugar
3 g
Salt
2 g
Black pepper
The right amount
Steps:
1) Wash the rice and pour it into the pan, add water to waterline "1" for "RICE" and soak it for about 15 minutes. 2) After mixing all the seasonings, add shredded mushrooms and shredded chicken, then spread evenly on rice of 1) and close the outer lid. 3) Press the [<] or [>] key and select "Mixed Rice", then press the [Start] key. 4) After cooking is complete, press the [Off/Cancel] key. 5) Open the outer lid, stir in celery, close the outer lid, and stew in residual heat for 5 minutes, then gently mix with the rice scoop. ※ The ingredients added for 1 cup of rice shall not exceed 75 g, so as not to affect the cooking results.
Recipes
Attentions:
- Because of the different ingredients added into the rice, there may be scorched rice at the bottom.
- When cooking red bean porridge, the red bean skin may block the steam cap, further leading to the unexpected opening of the outer lid, so please be careful.
- While cooking white fungus soup which may become thick, please use the "Porridge" function, and the maximum cooking volume should not exceed the "PORRIDGE" maximum waterline so as not to overflow. ※1 cup (measuring cup): About 150 g.
Cake (made of low-gluten flour)
Ingredients:
| Low-gluten flour | 60 g | Butter | 15 g |
| Egg | 2 | Milk | 20 mL |
| Sugar | 60 g | | |
Steps:
1) Separate the egg yolk from the egg white and put them respectively in a bowl (without water and oil); add 15 g of sugar in the egg yolk, and stir the sugar and egg yolk until they are smooth without particles. 2) Add the rest of the sugar into the egg white, and stir with a whisk until chopsticks can be upright in the egg white; add the egg yolk in the egg white, and stir well. 3) Gradually add the cake batter in sifted low-gluten flour, stir until it is smooth without particles. 4) Add the melted butter into the cake batter and stir until it is smooth without particles. 5) Add the milk into the cake batter and stir until it is smooth without particles. 6) Pour the cake batter into the pan, and close the outer lid. 7) Press the [<] or [>] key and select "Cake", set the cooking time to 50 minutes, and then press the [Start]. 8) When the buzzer sounds, it indicates that the cake has been baked. 9) Press the [Off/Cancel] key, remove the pan from the warm jar and cool for 2 minutes, then invert the pan and put the cake onto a dish or plate. Wait it to cool and cut it to enjoy. ※ Please be careful not to pour the cake batter exceeding the specified weight, otherwise the cake will be half-baked. The amount of sugar can be adjusted according to your preferences.
Instant boil
(A) Dumplings
| Dumplings | 300 g |
| Water | 500 mL |
Steps:
1) Put the dumplings into the pan, add cold water and close the outer lid. 2) Press [<] or [>] key and select "Instant Boil". Set the cooking time to 10 minutes, then press the [Start] key. ※ • When cooking quick-frozen dumplings, please set the cooking time for more than 10 minutes to make sure the dumplings are boiled enough to eat.
(B) Instant noodles
| Instant noodles | 1 package |
| Water | 500 mL |
Steps:
1) Put the noodles cake and seasonings into the pan, add cold water and close the outer lid. 2) Press [<] or [>] key and select "Instant Boil". Set the cooking time to 3 minutes, then press the [Start] key. ※· Do not use "Keep Warm" function. Clean the pan after use in a timely manner. - Adjust the time by yourself according to the type and amount of instant noodles.
Yogurt
Ingredients:
| Yogurt | 25 mL |
| Milk | 125 mL |
| Sugar | 10 g |
Steps:
1) Disinfect the glass and spoon in hot water* (*: Soak them in hot water of more than 95 °C for 5 minutes). 2) Put yogurt, milk and sugar into the cooled glass and stir well with a spoon. 3) Seal the opening of the glass with plastic wrap. 4) Add 500 mL of water in the pan, put the glass in Step 3) in the water, and close the outer lid. 5) Press [<] or [>] key, select "Yogurt", set the cooking time to 6 hours, and press the [Start] key. ※ • The thickness of yogurt can be controlled by changing the ratio of milk and yogurt or by setting the cooking time. Also, the amount of sugar can be adjusted according to your preferences. • After it cools down, store it in the refrigerator.
Troubleshooting
Please check before requesting a repair.
| Phenomenon | Please check | Ref. page |
| Start cooking as soon as a timer is set | ● Is the preset time not within "Time range to preset"? | 7 |
| Do not cook during preset time | ● Is the [Start] key pressed? | 10 |
| Cooking time is long | ● If cooking is made continuously, the cooking time will be longer. (May be extended up to 30 minutes and affect cooking effect)● Due to the different amounts of rice and water, the remaining time display may be stopped for adjustment in the middle of cooking.● Is "E5" displayed? | — — 16 |
| Cooking time is short | ● Due to the different amounts of rice and water, the remaining time display may be adjusted in the middle of cooking. | — |
| Steam vapor leaks from a place other than the steam vent | ● Is foreign object attached to the pan seal ring of the inner lid and along the pan, or is the pan deformed?● Is the inner lid cleaned after each use, and correctly installed? | — 11 |
| Key operation can not be performed | ● Are the indicator of the keys on?→Key operation can not be performed during cooking, timer or keep warm.Press the [Off/Cancel] key before operation. | — |
| When a power outage occurs during cooking | ● Return to standby mode. | — |
| Sparks occur from the power plug | ● When plugging or pulling the power plug, small sparks may sometimes emerge. | — |
| There are plastic odor | ● There may be plastic smell at the beginning of use and it will be eliminated after used for several times, and it is not abnormal. | — |
| Sound from the cooking | ● The sound of "click" in cooking is the sound of adjusting firepower, which is not a fault.● The "pa" sound in cooking is the cracking sound generated by the thermal expansion of water droplets at the bottom (outside) of the pan, which is not a fault. | — — |
To be known
- If you are careless to put water and rice into the main body without the pan, please consult the Panasonic authorized service center.
Troubleshooting
Please check before requesting a repair if it is not a failure.
Phenomenon
Glutinous (soft)

Cause
● Is the rice quantity and water volume correct? ● Is much broken rice mixed in? ● Is the rice immersed in water for a long time? (Preset time is too long, etc.) →When using the timer function to cook, you need to put less water. ● Is hot water used to wash rice? ● Is rice loosened immediately after cooked? ● Is too much water added into new rice to cook?
Dry (hard)

● Is the rice quantity and water volume correct? ● Is "Quick/Quinoa" function used to cook?
Porridge is mushy

● Is rice soaked in water for a long time when timer cooking is set? ● Is porridge kept warm? ● Is there too much broken rice?
Rice is scorched

● Is rice washed adequately? ● Is there any foreign object at the bottom of the pan, on the bottom sensor, and inside the main body? ● Is timer cooking set? ● Is much broken rice mixed in? ● Are spices added for cooking? (Mixed rice, etc.)
Condensation
Odor
Rice is yellow

● Is rice loosened immediately after cooked? ● Has rice been kept warm for longer than 5 hours? ● Is cooled rice added into the pan and kept warm? ● Is rice washed adequately? ● Is the rice scoop placed during keep warm? ● Due to different types of rice or water quality, cooked rice might be yellowish. - It may smell when you cook mixed rice with seasonings. → Carefully clean the pan, inner lid, and steam cap.
Rice is dry

● Has rice been kept warm for longer than 5 hours? ● Is reheating repeated many times? ● Is the steam cap mounted correctly? ● Is rice attached to the pan seal ring and along the pan, or is the pan deformed?
Rice sticks onto the pan

● Due to different varieties of rice, soft rice and glutinous rice might easily stick to the pan.
● Is bran remained?
Rice paper-like film is a result of dry starch dissolution, and it is harmless; rice that is not washed cleanly is likely to generate such a thin film.
● Did you make the surface of rice smooth before cooking?
Under the following circumstances, rice tends to have an uneven surface.
- When rice has not been sufficiently washed.
- When a lot of broken rice is mixed in.
- When rice has been broken due to excessive force used to wash it.
Error Codes Indication
Please check before requesting a repair if it is not a failure.
Error display
Please check
- Try to unplug the power plug and plug it in again.
If "E※" still appears, then there is a fault.
→Please consult the Panasonic authorized service center, and inform the error code (the digit after "E").
Specifications
| Model No. | SR-DB071 |
| Rated voltage | 220 V~ |
| Rated frequency | 50 Hz |
| Rated power input | 400 W |
| Cooking volume | 0.7 L |
| Cooking quantity (rice quantity) L | White Rice | 0.09 - 0.72 [1/2 - 4 cups] |
| Sticky Rice |
| Quick/Quinoa |
| Mixed Rice | 0.09 - 0.36[1/2 - 2 cups] |
| Brown Rice |
| Porridge cooking volume (rice quantity) L | 0.045 - 0.135 [1/4 - 3/4 cups] |
| Maximum cooking volume (ingredients + water) for soup L | 1.0*1 |
| Maximum cooking volume (ingredients + water) for instant boil L |
| Maximum weight (Approx.) of cake batter (g) | 300 |
| Power cord length (Approx.) m | 0.9 |
| Weight (Approx.) kg | 2.64 |
| Size (Approx.) cm | Width | 25.3 |
| Depth | 32.3 |
| Height | 21.2 |
● (※1) Indicates the cooking capacity at the Maximum waterline of "PORRIDGE". - Please make sure to use this product in areas under 2000 meters above sea level so as not to affect cooking performance.
Panasonic®
User Guide
3 When cooking is done, fluff the rice.
■ Note
Note


Pot