
W 12044 25 - Receiver Ram Audio - Free user manual and instructions
Find the device manual for free W 12044 25 Ram Audio in PDF.


| Product Type | Receiver with DSP |
| Brand | Ram Audio |
| Model | W 12044 25 |
| Control Interface | Ethernet, USB |
| Compatible Software | RAM OCS (Windows XP/Vista/7/8/10) |
| Network Protocol | IP range 192.168.xxx.xxx, subnet 255.255.0.0 |
| DSP Capabilities | Frequency response, delay, PEQ, X-IIR, X-FIR, RMS/PEAK dynamics |
| Preset Memory | 65 Input, 99 Output, 64 Global presets |
| Real-Time Monitoring | Output voltage, current, temperature, impedance |
| Amplifier Setup | Level, Gain, Bridge mode, ICL, Input linking |
| Speaker Data Import | Load magnitude and phase curves (Clio, Smaart, etc.) |
| Firmware Update | Supported via software |
| Dimensions (approx.) | 2U rack-mount (88.9 x 483 x 350 mm) |
| Weight (approx.) | 10 kg |
| Power Supply | 100-240V AC, 50/60Hz |
| Maintenance | Clean ventilation grills; avoid dust and moisture |
| Safety Precautions | Use grounded outlets; disconnect power before servicing |
| Spare Parts & Repairability | Contact authorized Ram Audio service center |
| General Information | Professional audio receiver with advanced DSP control |
Frequently Asked Questions - W 12044 25 Ram Audio
User questions about W 12044 25 Ram Audio
0 question about this device. Answer the ones you know or ask your own.
Ask a new question about this device
Download the instructions for your Receiver in PDF format for free! Find your manual W 12044 25 - Ram Audio and take your electronic device back in hand. On this page are published all the documents necessary for the use of your device. W 12044 25 by Ram Audio.
USER MANUAL W 12044 25 Ram Audio
INSTALLATION AND FIRST STEPS
Welcome to RAM OCS, the Online Control System for RAM Audio V/W Series DSP amplifiers. By using it you can control and monitor the DSP unit of a V/W amplifier through an Ethernet network or a USB connection, in a Windows system.
To start, install the software in a Windows system (XP, Vista, 7, 8 or 10) and connect the amplifiers to the Ethernet network or the USB port. Each amplifier is programmed from factory with a unique IP number inside the range 192.168.xxx.xxx. To detect initially the amplifiers you have to work inside this range. Change the computer IP to 192.168.0.10 for example, and use a mask 255.255.0.0. After detect the amplifiers inside this range you can change the IP of each one if required.
Execute the RAM OCS software using the Shortcut created in the desktop and start scanning the network. To do that, click in the loupe (1) icon placed near to the left top side of the window. The system has to detect all amplifiers you have connected in your network or connected using the USB port. To open an amplifier you have to do a double click on the amplifier showed in the devices tree (2).
Create a virtual amplifier: if you do not have any amplifier connected to the system, you can add an offline amplifier clicking with the right mouse button on the "Amplifiers" section of the devices tree (3), and selecting the Add device option.
To obtain some help for the different button functions, you can maintain the cursor over a button for two seconds to show a hint which can help you.
The elements of the main screen are as follows:

Frequency response graphic window
MAIN MENU DESCRIPTION
- Project Menu icons:

It contains different sections:
File section: contains different icons for manage your project, to open or save the structure of an amplifier group. Also you can create a new empty project.
Settings section: contains the following icons:
- Ethernet devices: pressing this icon you can change the name or the IP of an amplifier. Also you can send a buzz to a specific amplifier to do a blinking of the back panel LEDs to help you to identify an amplifier.
- Preferences: permits to change different software parameters, as can be the dB scale of the response window, humidity and temperature taken in account to calculate the speed of sound, wrapped or unwrapped phase representation, or write a resume of the current project. Also, contains a button for firmware update.
View section: contains the following icons:
- Show Frequency Response: shows the graphical window with the frequency response of your current DSP configuration. - Monitor Online: turn on/off the monitor mode which permits to read the real time data of the current amplifier. You can see it in the Gain or Amp Setup tabs
- Amplifier Menu icons:

It contains different sections:
File section: contains different icons where you can manage your Library, to open or save the current PC Library. Also you can create a new empty Library.
Communications section: using the icons you can send or receive the current library to/from the amp. These icons are the same you have in the Sync Library section of the Library Tab. Also you can send to the amp a new DSP firmware to upgrade it in the future.
View section: contains the following icons:
- Show Frequency Response: shows the graphical window with the frequency response of your current DSP configuration. - Monitor Online: turn on/off the monitor mode which permits to read the real time data of the current amplifier. You can see it in the Gain or Amp Setup tabs. - Real Time Operation: turn on/off the real time mode, so any change you make in the DSP configuration or the amplifier setup is replayed instantaneously. When you enable this option, it will synchronize the amp and the PC configuration, sending the current configuration you have in the PC to the amplifier.
DSP AMPLIFIER WINDOW
When you open a DSP amplifier appears a window which contains different tabs. The description of these Tabs are as follows:
1- Library (green tab): this tab shows the complete presets library, which contains 65 Input presets, 99 Output Presets and 64 Global Presets. Using this tab you can manage the Library to make different functions:
- Send the Input/Output/Global Presets to the amp
- Open/Save a Library file from/to the PC
- Send/Receive the complete Library to/from the amp
You can assign Input and Output presets for each channel individually, or you can make a combination of different input and output presets defining a Global Preset, to assign the desired combination of input and output presets to all channels simultaneously. To create the presets you have to use the following tab DSP Edit.
The elements of this tab are as follows:


When you press the right mouse button over a Preset you open a menu with the next options:
Reset Preset: initializes completely a Preset erasing all data it contains.
Open from disk: you can open a file previously saved which contains all Preset information.
Save to disk: save a file to disk with all Preset information.
Read preset from amp: reads from the amplifier library the selected Preset.
Send preset to amp: sends to the amplifier library the selected Preset.
Send preset to amp output/input: sends to the amplifier library and recall the selected Preset to a specific output/input.
2- DSP Edit (blue tabs): using this tab you can create the Input/Output/Global Presets. You can access to the different parameters of the preset using the blue tabs next to DSP Edit tab (Gain, Delay, PEQ In, X-IIR, X-FIR, PEQ Out, RMS Dyn, PEAK Dyn) or pressing directly the icon of the parameter desired of each channel. After define all required parameters, to create a preset you have to assign a unique memory number, a name, and press the button Send. This creates an Input/Output preset, assigns it to a fix memory in the PC and amp library, and recall it in the amp (places it as current). If you are working with an offline amplifier (you have not connected an amplifier), then only sends it to the PC library.
You can create a preset and send it to the library using any channel you want. After that you can load it in any channel, selecting it using the up/down arrows and pressing the Load button. To send and recall (place as current) it to the amplifier, press the button Send.
The Global Preset contains the information of a combination of Input/Output presets memory and the Route section, to work easily with a fix combination of presets. So, you can define the different Input/Output presets you will use for each channel, define also the Route section and assign a number and name for the Global Preset. After that, press the button Send All and you will send all In/Out presets you have used to the library and also the definition of this combination together with the Route section to create a Global Preset. After that, you can Load it quickly searching the number using the up/down arrows of the global preset section and pressing the Load All button. Warning: pay attention to avoid overwrite any In/Out preset if you have defined it with the same memory number when you press the Send All button.
Using the Read Current button you transfer to the DSP Edit tab all parameters which are loaded as current in the amplifier.
The elements of the DSP Edit tab are as follows:


When you access to the DSP Edit tab, the Frequency Response curve window is automatically open. You can also open or close this window using the corresponding icon in the main menu.
The elements of the Frequency Response window are as follows:

3- Amp Setup: using this tab you can control different amplifier parameters. You can change the front panel potentiometers Level, Gain, configure bridge mode, disable the ICL system or Link the inputs (not available with DSP installed). Also you can monitor the output voltage, current (if installed option), temperature and show the LED status. The system measures in real time the impedance of the load connected to each channel (if installed option). To activate all monitor functions you have to press the Monitor Online icon in the top menu. Also, optionally you have the turn on/off button.

4- Speaker Data: you can load the response curve (magnitude and phase) of your acoustic system measured with different systems (Clio, Smaart, AP, MLSAA...) to show it directly in the final curve response. So you can view directly the influence of the DSP process in your true speaker response.

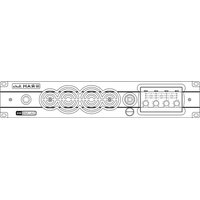
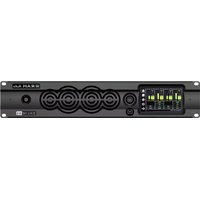


Brand : Ram Audio
Model : W 12044 25
Category : Receiver