32DCG160014 - Television Mitsai - Free user manual and instructions
Find the device manual for free 32DCG160014 Mitsai in PDF.


| Product Type | LED Television |
| Screen Size | 32 inches (81 cm) |
| Resolution | 1366 x 768 (HD) |
| Aspect Ratio | 16:9 |
| Refresh Rate | 60 Hz |
| Dimensions (without stand) | 73.5 x 43.0 x 8.5 cm |
| Dimensions (with stand) | 73.5 x 47.0 x 18.0 cm |
| Weight (without stand) | 4.2 kg |
| Weight (with stand) | 4.5 kg |
| Power Consumption (typical) | 50 W |
| Power Consumption (standby) | < 0.5 W |
| Input Voltage | 100-240 V, 50/60 Hz |
| Connectivity | 2x HDMI, 1x USB, 1x VGA, 1x AV, 1x RF, 1x Headphone |
| Sound Output | 2 x 8 W |
| Key Features | LED backlight, USB media playback, electronic program guide (EPG), sleep timer |
| Wall Mount Standard | VESA 200 x 200 mm |
| Cleaning Instructions | Wipe with a soft, dry cloth; avoid liquid cleaners |
| Safety Warnings | Keep ventilation slots unobstructed; do not expose to rain or moisture |
| Spare Parts Availability | Contact authorzed service centers for genuine parts |
| Repairability Index | Moderate (replaceable power supply, backlight, main board) |
Frequently Asked Questions - 32DCG160014 Mitsai
User questions about 32DCG160014 Mitsai
0 question about this device. Answer the ones you know or ask your own.
Ask a new question about this device
Download the instructions for your Television in PDF format for free! Find your manual 32DCG160014 - Mitsai and take your electronic device back in hand. On this page are published all the documents necessary for the use of your device. 32DCG160014 by Mitsai.
USER MANUAL 32DCG160014 Mitsai
MANUAL DE INSTRUÇÕES
natural_image
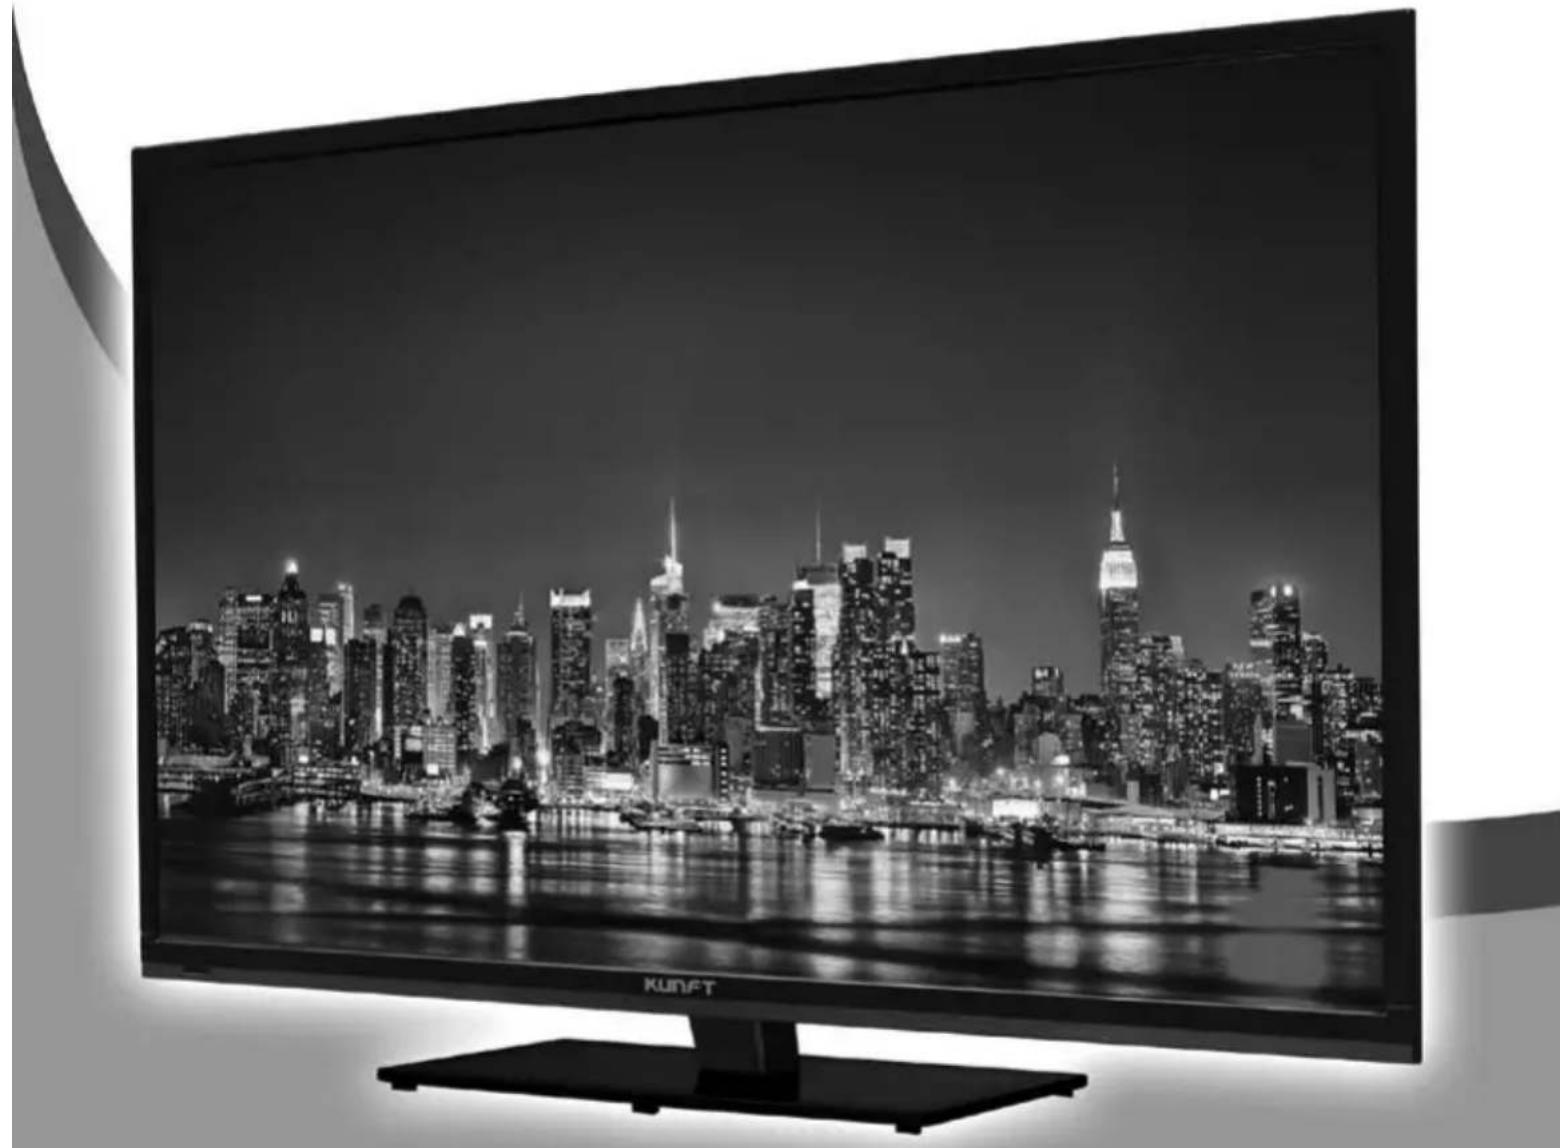
Black-and-white exterior view of a modern KUNFT TV displaying a city skyline at night with illuminated skyscrapers and waterfront (no text or symbols on the screen)32" LED TV
32DCG160014
32" LED TV 32DCG160014
InStruction Manual
Dear client,
We thank you for purchasing this product.
This appliance was submitted to several laboratorial tests, which certify its quality. To simplify the use of this appliance, this instruction manual has been provided. The instructions must ensure a quick and safe use.
Please read carefully the instructions and safety measures described in this manual.
We wish our clients great satisfaction in using their new appliance.
Index
1. Safety Instructions 3
1.1. Power Energy 4
1.2. Power Cord and Other Cables 4
1.3. Humidity and Water 4
1.4. Cleaning 4
1.5. General Precautions 4
2. Utilization and Functioning 9
2.1. Remote Control 9
2.1.1. Using the Remote Control 10
2.1.2. Installing Batteries in the Remote Control 10
2.1.3. Replacing Batteries in the Remote Control 10
2.2.Connection and Setup 11
2.2.1. Cable Installation 11
2.3. Operation 12
2.3.1. Quick Start Guide 12
2.3.2. Turning your TV On and Off 12
2.3.3. Program Selection 13
2.3.4. Volume Adjustment 13
2.3.5. Changing the Input Source 13
2.3.6. Menu Navigation 13
2.3.7.Picture Menu Setup 13
2.3.8.Sound Menu Setup 15
2.3.9. Channel Menu Setup 16
2.3.10. Lock System Menu Setup 17
2.3.11. General Menu Setup 19
2.3.12. Using the USB Mode 21
2.4. Important Unique Buttons 24
2.4.1. Program Guide (In DTV Mode) 24
2.4.2.Channel List 24
2.4.3. Favorite List 24
2.4.4. Using the Teletext Feature 25
-
Troubleshooting 26
-
Maintenance 27
-
Technical Specifications 28
-
Aftermarket 28
-
Environment Conservation 29
1. SAFETY INSTRUCTIONS

ATTENTION RISK OF ELECTRIC SHOCK DO NOT OPEN

ATTENTION: TO AVOID THE RISK OF ELECTRIC SHOCK, DO NOT REMOVE THE COVER. THE INTERIOR DOES NOT CONTAIN ANY PARTS THAT MAY BE REPAIRED BY THE USER. ASK FOR ASSISTANCE TO QUALIFIED PERSONNEL.
Important Warnings
Before using your appliance, read carefully this instruction manual and keep it in a safe place, as you may need it for future consultations.
Before you start your appliance, and to ensure a correct use, do not use it if:
- It has fallen on the ground;
- You notice any evidence of damage;
- Any anomaly occurs during its operation;
To avoid hazards and deterioration of your appliance by an incorrect use, it is advisable to read the instructions carefully and attentively.
Your appliance must not be used to other ends than the ones foreseen in the instructions manual. Your safety is only guaranteed in a household use and not for commercial use. The incorrect use will not be covered and automatically cancels the right to warranty.
Assistance
Be sure that, in case of malfunction, you take your appliance to a qualified technician for assistance.
THIS APPLIANCE CAN BE USED BY CHILDREN FROM 8 YEARS OLD AND ABOVE AND PERSONS WITH REDUCED PHYSICAL, SENSORY OR MENTAL CAPABILITIES OR LACK OF EXPERIENCE AND KNOWLEDGE IF THEY HAVE BEEN GIVEN INSTRUCTION CONCERNING USE OF THE APPLIANCE IN A SAFE WAY AND UNDERSTAND THE HAZARDS INVOLVED. CHILDREN SHALL NOT PLAY WITH THE APPLIANCE. CLEANING AND MAINTENANCE SHALL NOT BE MADE BY CHILDREN WITHOUT SUPERVISION.
These instructions are also available on www.suporteworten.pt
32" LED TV 32DCG160014
1.1. Power Energy
Make sure the voltage of the electric network is compatible with the one of the appliance. If it does not match, consult the vendor or Customer Support Service.
1.2. Power Cord and Other Cables
Do not roll up or pull the cord to disconnect the appliance, and do not use to twine the appliance. Keep the cord far from warm surfaces.
Never use the appliance if it has a damaged cable or socket, or if it is not working properly. In case of damage of the power cord, do not use your appliance. Take it to technical assistance for its replacement.
1.3. Humidity and Water
Do not use your appliance in humid places. Do not let your appliance to catch water under any circumstance, as it may be dangerous. TO AVOID FIRE HAZARD OR ELECTRIC SHOCK DO NOT EXPOSE YOUR APPLIANCE TO HUMIDITY OR WATER. Do not place your appliance under water (for example for washing).
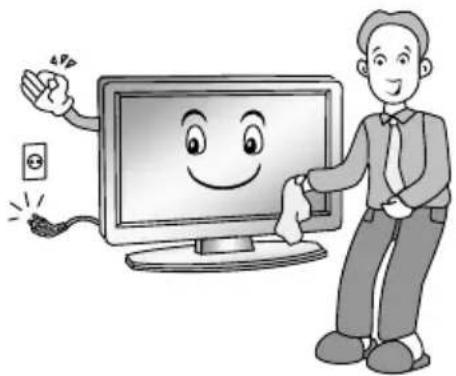
1.4. Cleaning
Before cleaning, be sure to switch off the appliance and remove the plug from the mains power supply.
Do not use harsh abrasive cleaning agents. Only use a soft dry cloth to clean this product.
natural_image
Illustration of a smiling computer monitor with an app icon and a person pointing at it (no text or symbols present)1.5. General Precautions
- Please follow the instructions of the user manual, which helps properly installing and operating this product and enjoying its advanced features. Please keep the instructions for future reference.
- Read all instructions before using the product.

natural_image
Cartoon illustration of a smiling computer monitor holding an open book (no text or symbols present)• Pay attention to all these safety warnings.
- Do not use this appliance near water.

natural_image
Cartoon illustration of a computer monitor with a smiling face and a speech bubble, symbolizing online shopping or messaging (no text present)- Do not block any ventilation openings and install the appliance in accordance with the manufacturer's instructions.
natural_image
Cartoon illustration of a computer monitor with a sad face and frowning expression, surrounded by abstract cloud-like shapes (no text or symbols)- Do not install this appliance near any heat sources such as radiators, heaters, stoves or other appliances (including amplifiers) that produce heat.

natural_image
Cartoon illustration of a computer monitor with a sad face and Chinese flag, accompanied by a computer tower (no text or symbols)- Do not defeat the safety purpose of the polarized or grounding type plug. A polarized plug has two blades with one wider than other. A grounding type plug has two blades and a third grounding prong. The wide blade or the third prong is provided for your safety. When the provided plug does not fit into your outlet, consult an electrician for replacement of the obsolete outlet.
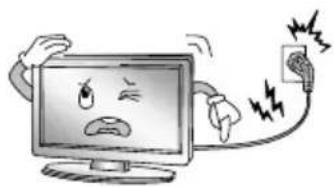
- Protect the power cord from being walked on or pinched particularly at plugs, convenience receptacles, and the point where they exit from the appliance.
natural_image
Cartoon illustration of a computer monitor with a sad face and electrical plug emitting power lines (no text or symbols)32" LED TV 32DCG160014
- Use only attachments/accessories specified by the manufacturer.
- Unplug this appliance during lighting storm or when unused for long periods of time.

natural_image
Cartoon illustration of a smiling computer monitor character with arms and legs, surrounded by clouds and industrial smoke (no text or symbols)- Use only with a cart, stand, tripod, bracket, or table specified by the manufacturer, or sold with the appliance. When a cart is used, use caution when moving the cart/appliance combination to avoid injury from tip-over.

- Refer all servicing to qualified service personnel. Servicing is required when the appliance has been damaged in any way, such as damages to the power cord or plug, liquids have been spilled or objects have fallen into the appliance, the appliance has been exposed to rain or moisture, if it does not operate normally or if it has been dropped.
natural_image
Cartoon illustration of a smiling computer monitor and a delivery worker holding a box (no text or symbols)• To reduce the risk of fire or electric shock, do not expose this appliance to rain or moisture.
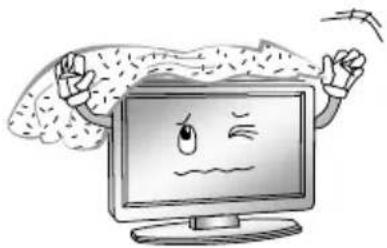
- The ventilation should not be impeded by covering the ventilation openings with items, such as newspapers, table-cloths, curtains, etc.
- The appliance should not be exposed to dripping or splashing and that no objects filled with liquids, such as vases, shall be placed on the appliance.
- Attention should be drawn to the environmental aspects of battery disposal. Do not throw used batteries in dustbin. Please contact your retailer in order to protect the environment.
- When you install your TV, maintain a distance of at least 4 inches between the TV and other objects (walls, cabinet sides, etc.) to ensure proper ventilation. Failing to maintain proper ventilation may result in a fire or a problem with the product caused by an increase in its internal temperature.
- No naked flame sources, such as lighted candles, should be placed on the appliance.
- To prevent the spread of fire, keep candles or other open flames away from this product at all times.
- The appliance may malfunction when under electrostatic discharge. It can be manually resumed by power off and power on again.
- If the TV feels cold to the touch, there may be a small “flicker” when it is turned on. This is normal and there is nothing wrong with TV.
- Some minute dot defects may be visible on the screen, appearing as tiny red, green, or blue spots. However they will have no adverse effect on the monitor's performance.
- Avoid touching the screen or holding your finger(s) against it for long periods of time. Doing so may produce some temporary distortion effect on the screen.
WarnInG SyMBolS

- The lightning flash with arrowhead symbol, within an equilateral triangle, is intended to alert the user to the presence of uninsulated “dangerous voltage” within the products enclosure that may be of sufficient magnitude to constitute a risk of electric shock to persons.

- The exclamation point within an equilateral triangle is intended to alert the user to the presence of important operating and maintenance (servicing) instructions in the literature accompanying the appliance.

- This symbol indicates this equipment is a Class II or double insulated electrical appliance. It has been designed is such a way that it does not require a safety connection to electrical earth.
caution WHen connectInG tHe PoWer cord
- Most appliances recommend they be placed upon a dedicated circuit, that is, a single outlet circuit which powers only that appliance and has no additional outlets or branch circuits.
- Do not overload the wall outlets. Overloaded wall outlets, loose or damaged wall outlets, extension cords, frayed power cords, or damaged or cracked wire insulation are dangerous. Any of these conditions could result in electric shock or fire.
- Periodically examine the cord of your appliance, and its appearance if it indicates damage or deterioration, unplug it, discontinue use of the appliance, and have the cord replaced with an exact replacement part by an authorized servicer.
- Protect the power cord from physical or mechanical abuse, such as being twisted, kinked, pinched, closed in a door, or walked upon. Pay particular attention to plugs, wall outlets, and the point where the cord exits the appliance.
- The mains plug is used as the disconnect device, and the disconnect device shall remain readily operable.
reGulatory InforMatlon
This equipment generates uses and can radiate radio frequency energy and, if not installed and used in accordance with the instructions, may cause harmful interference to radio communication. However, there is no guarantee that interference will not occur in a particular installation. If this equipment does cause harmful interference to radio or television reception, which can be determined by turning the equipment off and on, the user is encouraged to try to correct the interference by one or more of the following measures:
- Relocate the receiving antenna.
- Increase the separation between the equipment and receiver.
- Connect the equipment into an outlet on a circuit different from that to which the receiver is connected.
- Consult the dealer or experienced radio/TV technician for help.
- Any changes or modifications not expressly approved by the party responsible for compliance could void the user's authority to operate the equipment.
cautlon
- Do not attempt to modify this product in any way without written authorization from supplier. Unauthorized modification could void the user's authority to operate this product.
- It is not recommended to keep a certain still image displayed on the screen for a long time as well as displaying extremely bright images on screen.
Note:
- Figures and illustrations in this User Manual are provided for reference only and may differ from actual product appearance. Product design and specifications may be changed without notice.
dISPoSal
- The fluorescent lamp used in this product contains a small amount of mercury.
- Do not dispose of this product with general household waste.
- Disposal of this product must be carried out in accordance to the regulations of your local authority.
2. UTILIZATION AND FUNCTIONING
2.1. Remote Control
The original remote control has the following buttons:
- Power, switch on or off TV set.
- INFO: Press to display the current program information on the screen.
i : Go to the index page.
-
: Press to mute or restore sound.
-
NUMBER BUTTONS: Choose channels or password importation.
-
SOURCE: Press to select signal source.
?: Reveal the hidden information of some teletext pages.
-
AUDIO (∞I/II): The button can be used to switch between Dual I / Dual II / Dual I + II / Mono and switch Audio language in DTV mode.
-
MENU: Press to enter the menu screen for various optional adjustable settings.
-
EXIT: Exit OSD Menu.
-
ENTER: Press to execute the selected item in the menu screen.
-
▲ / ▼ / ◀ To select the direction.
-
INDEX: Press to enter the quick menu. (In USB mode) Press to enter the PVR Settings (In DTV mode).
-
LIST: Press to call up the channel list. Press again to exit it.
-
CH+/CH-: Press to select channels in ascending or descending order.
-
VOL+/VOL-: Press to adjust the volume level up or down.
-
SLEEP: Press to set the sleep timer. When the preset length of time has passed, the TV set enters standby mode.
-
♥ : Switch on/off the favorite programs list.
-
EPG: Electronic Program Guide, use in the DTV mode.
-
: Return to last viewed program.
-
COLOR BUTTONS: Red/ green/ yellow/ blue key navigation link.
◀ : Fast reverse (in USB mode).
: Fast forward (in USB mode).
: Previous (in USB mode).
▶ : Next (in USB mode).
- STILL: Press to hold the picture.
: Hold the teletext page on display, press again to release.
■ : Stop (in USB /PVR mode).
- ☐: Enter the Teletext, press again for MIX mode, press this button again to exit.
▶II : Play / Pause (in USB mode).
-
RADIO: Press to interchange Radio and DTV programs when there is Radio program (In DTV mode).
-
: Press to select different images sizes.
: Change size of teletext screen in display mode.
-
: Enter subtitle mode or subpage.
-
Cancel the teletext but not to exit teletext, press again to exit.
-
DMP: Press to switch to the USB source.
-
● : Press ● button to start recording. (In DTV mode).

Note:
- All pictures in this manual are examples, only for reference, actual product may differ from the pictures.
- The buttons not mentioned here are not used.
2.1.1. Using the Remote Control
When using the remote control, aim it at remote sensor on the television. If there is an object between the remote control and the remote sensor on the unit, the unit may not operate.
- Point the remote control at the Remote Sensor located on the television.
- When using this television in a very brightly lit area, the infrared Remote Control Sensor may not work properly.
- The recommended effective distance for using the remote control is about 7 meters.
2.1.2. Installing Batteries in the Remote Control
- Open the cover at the back of the remote control.

- Install two AAA size batteries. Make sure to match the “+” and “-” ends of the batteries with the diagram inside the compartment.
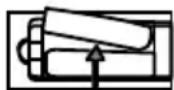
- Replace the cover.

2.1.3. Replacing Batteries in the Remote Control
You will need to install the batteries into the remote control to make it operate following the instruction below.
When the batteries become weak, the operating distance of the remote control will be greatly reduced and you will need to replace the batteries.
Notes on Using Batteries:
The use of the wrong type of batteries may cause chemical leakage and/or explosion. Please note the following:
- Always ensure that the batteries are inserted with the + and - terminals in the correct direction as shown in the battery compartment.
- Different types of batteries have different characteristics. Do not mix different types.
- Do not mix old and new batteries. Mixing old and new batteries will shorten battery life and/or cause chemical leakage.
- Replace batteries as soon as they do not work.
- Chemicals which leak from batteries may cause skin irritation. If any chemical matter seeps out of the batteries, wipe it up immediately with a dry cloth.
- The batteries may have a shorter life expectancy due to storage conditions. Remove the
batteries whenever you anticipate that the remote control will not be used for an extended period.
- The batteries (battery pack or batteries installed) shall not be exposed to excessive heat such as sunshine, fire or the like.
CAUTION:
- It may result in an explosion if batteries are replaced incorrectly.
- Only replace batteries with the same or equivalent type.
2.2. Connection and Setup
2.2.1. Cable Installation
Please read the relevant content in "Notice for Maintenance and Safety" carefully before the installation and use.
- Take out the TV from the package and put it in a drafty and flat place.
Note:
- When you plug or unplug the TV, computer or other equipments, you must make sure that the AC power has been already shut down; when unplugging the power cable or signal cable, please hold the plug (the insulated part), do not draw the body of the cable.
- The RF output terminal can be connected with the RF input port of the TV.
- The output AV terminal of DVD can be connected with the AV input port of the TV through AV cable.
Note:
- Component and AV cannot be used at same time as they share one audio channel.
- The output Component (YPbPr) terminal of DVD can be connected with the Component (YPbPr) input port of the TV through AV cable.
- Connect one end of the VGA cable with the VGA port on computer, connect the other end of the VGA cable with the VGA port on the TV, and tighten the bolts clockwise on each end of VGA cable.
Note:
- While connecting the 15-pin VGA, please do not insert the plug overexertedly, for fear the pin might be broken.
- Connect one end of the HDMI cable with HDMI output port, connect the other end of the HDMI cable with the HDMI port on the TV.
Note:
- While connecting the HDMI, please aim at carefully, do not insert overexertedly, for fear the pin might be broken.
- Connect SCART socket input or output from an external device to these jacks.
- Send the TV's audio signal to external audio equipment via the Digital Audio Output port.
- Check and make sure that all AV cables are connected with the corresponding ports correctly.
- Connect the AC power cable with 100-240V\~ power supply.
32" LED TV 32DCG160014
Note:
- The range of power input for the TV is 100-240V\~50/60Hz. Do not connect the TV power input port with the AC power out of the above range.
- Please hold the insulated part of the plug when you are unplugging the power cable, do not touch directly the metallic part of the cable.
2.3. Operation
2.3.1. Quick Start Guide
Connection:
- Connect the mains and the antenna.
- If TV has a power switch, turn it on firstly. Then press Power button on the remote to turn on the TV.
First Time Setup:
When the TV is initially powered on, a sequence of on-screen prompts will assist in configuring basic settings.
OSD Language:
Press the ◀/▶button to select the desired OSD (On Screen Display) language.
Mode Setting:
Press the ◀/▶button to select Home Mode or Store Mode.
Country:
Press the ◀ / ▶ button to select the desired country.
Auto Scan:
Press the ◀/▶button to select mode: DTV+ATV, DTV, ATV.
LCN:
Press the ◀/▶button to select On or Off.
When selecting Cable: A step appears allowing you to set parameters to the channels. For more information, refer to Channel (Auto Scan).
2.3.2. Turning your TV On and Off
Turn on the TV:
Connect the AC input cable. If TV has a power switch, turn it on firstly. Press the ⏻ button on remote control can turn on TV from standby mode.
Turn off the TV:
Press the ⏻ button on the remote control to enter standby mode.
Do not leave your set in standby mode for long periods of time. It is best to unplug the set from the mains and aerial.
No signal:
There is No Signal menu on screen when there is no input signal. In ATV/DTV mode, if there is no signal in 15 minutes, the TV will turn off automatically. In PC mode, the TV set will automati-
cally turn off in 5 minute if there is no input signal. When VGA cable is connected, the TV turns on automatically.
2.3.3. Program Selection
Using the CH+/CH- on the TV panel or on the remote control.
Press CH+ to increase channel number.
Press CH - to decrease channel number.
Using 0-9 digital buttons.
You can select the channel number by pressing 0 to 9 (in ATV, DTV mode).
Example:
To select - channel (e.g. Channel 5): Press 5.
To select -- channel (e.g. Channel 20): Press 2 and 0 in a short time.
2.3.4. Volume Adjustment
- Press the VOL+/- button to adjust the volume.
- If you want to switch the sound OFF, press the ✗.
- You can release mute by pressing the ⚡ or increase the volume.
2.3.5. Changing the Input Source
You can select the input source by pressing the SOURCE button on the remote control. Press the ▲ / ▼button to cycle through the input source, and press the ENTER button to confirm your choice.
2.3.6. Menu Navigation
Before using the TV follow the steps below to learn how to navigate the menu in order to select and adjust different functions. The access step may differ depending on the selected menu.
- Press the MENU button to display the main menu.
- Press the ◀/▶button to cycle through the main menu.
- Press the ▲/▼ button to select the desired sub item.
- Press the ENTER button to access the submenu.
- Press the ▲/▼/▲button to select the desired value. The adjustment in the OSD may differ depending on the selected menu.
- Press the MENU button to return to the previous menu.
- Press the EXIT button exit from the menu.
Note:
- When an item in MENU is displayed grey, it means that the item is not available or cannot be adjusted.
- Buttons on the TV have the same function as corresponding buttons on the remote control. If your remote control is lost or couldn't work, you may use the buttons on the TV to select menus. This manual focuses on operation of the remote control.
- Some items in the menus may be hidden depending on modes or signal sources used.
2.3.7. Picture Menu Setup
Picture Mode:
32" LED TV 32DCG160014
You can select the type of picture which best corresponds to your viewing requirements.
Brightness:
Adjusts the base level of the signal in the picture.
Contrast:
Adjusts the signal level between black and white in the picture.
Sharpness:
Adjusts the level of crispness in the edges between the light and dark areas of the picture.
Saturation:
Adjusts intensity of all colors.
Hue (only in the NTSC mode):
Adjusts the balance between red and green levels.
Color Temp:
Select the color temperature of the picture.
Aspect Ratio:
You can select the picture size which best corresponds to your viewing requirements.

PC Setting (in PC mode):
Auto Adjust: Adjust the image automatically.
H Position: Centre the image by moving it left or right.
V Position: Centre the image by moving it up or down.
Phase: Minimize horizontal distortion.
Clock: Minimize vertical stripes in the screen image.
Screen Mode (in HDMI mode):
Press the ▲ /▼ button to select Screen Mode, then press the ◀ /► button to select Auto, Video or PC.
Advanced Settings:
NR: Set options to reduce video noise.
MPEG NR: Set options to reduce MPEG noise.
Dynamic Contrast: Automatically adjust picture detail and brightness.
2.3.8. Sound Menu Setup
Sound Mode:
You can select a sound mode to suit your personal preferences.
Treble:
Adjust the treble effect. Increases or decreases high-pitched sounds.
Bass:
Adjust the bass effect. Increases or decreases lower-pitched sounds.
Balance:
You can adjust the sound balance of the speakers to preferred levels.
Surround Sound:
You can select a desired Surround Sound mode.
EQ Setting:
Adjust the curve of 7 bands equalizer.
EQ Mode: Only in User mode, the following can be manually adjusted.
120Hz/300Hz/500Hz/1.2KHz/3.0KHz/7.5KHz/10KHz: Adjusts the level of specific bandwidth frequencies.
Based on your favorites about which frequency band need to be adjusted, make small adjustment with certain frequency band at a time. Suggest NOT making too large changes.
AVL:
AVL automatically remains on the same level of volume if you change programs. Because each broadcasting station has its own signal conditions, volume adjustment may be needed every time when the channel is changed. This feature allows users to enjoy stable volume levels by making automatic adjustments for each program.
SPDIF:
You can select a desired SPDIF Output mode.

32" LED TV 32DCG160014
Audio Description (in DTV mode):
Press the ▲ / ▼ button to select Audio Description, then press the ▶ button to enter sub-menu.
Press the ▲/▼ button to select Mode, then press the ◀/▶ button to select On, Off. When the mode is On, Volume can be adjusted by users.
Sound Type (in DTV mode):
Press the ▲/▼ button to select Sound Type, then press the ◀/▶ button to select.
2.3.9. channel Menu Setup
Auto Scan:
Press the ENTER button to enter sub-menu.
Country: Press the ◀/▶button to select country.
Mode: Press the ◀/▶button to select Mode: DTV+ATV, DTV, ATV.
Start: Press the ENTER button to start the auto searching.
Manual Scan:
Press the ENTER button to enter sub-menu.
- Digital Manual Scan: Press the ▲ / ▼ button to select the Digital Manual Scan, then press the ENTER button to enter sub-menu.
Digital Scan: Press the ◀/▶button to select the channel number.
Start: Press the ENTER button to start the channel searching.
Frequency: Display the frequency of current TV signal.
Strength: Display the quality of current TV signal.
- Analog Manual Scan: Press the ▲ / ▼button to select the Analog Manual Scan, then press the ENTER button to enter sub-menu.
Analog Scan: Press the ◀/▶button to select Analog Scan.
Channel to Save: Press the ◀/▶button to select channel.
Color System: Press the ◀/▶button to select Color System: Auto, PAL or SECAM.
Sound System: Press the ◀/▶button to select Sound System: Auto, DK, BG, I or L.
AFC: Press the ◀/▶button to select On or Off.
Start: Press the ENTER button to start the channel searching.
Channel Edit:
First press the ▲ / ▼ button to highlight the channel you want to delete, skip, rename or swap, then press the red button to delete the channel.
Press the green button to skip the select channel (your TV set will skip the channel automatically when using CH+/- to view the channels).
Press the yellow button to rename the channel (in ATV mode).
Press the blue button to set the channel to moving state, then press the ▲ / ▼button to move it to the position you want to put.
Common Interface (in DTV mode):
This function enables you to watch some encrypted services (pay services).
Please insert CI card into the PCMCIA slot according to the arrow on the CI card.
Note:
- The function can only be gotten when CI slot is available.
- Please do not insert or pull out the CI card when power on.
- Do not insert or pull out the CI card frequently so as to avoid any damages of the TV and the CI card.
- During initialization of the CI card, please don't operate the TV.
Signal Information (in DTV mode):
Display the current Signal Information.

2.3.10. lock System Menu Setup
Enter Password:
The following items are only available if the password input is correct.
Default password is 0000, and if forget what you set, please call the service center.

Enable:
Channel Locks, Parental Rating and Lock Keypad are available when Enable is On.
Channel Locks:
Press ▲ / ▼ to select the channel you want to lock, then press ENTER to set it to lock.
Parental Rating (in DTV mode):
Press the ▲/▼ button to select Parental Rating, then press ◀/▶ button to select.
Lock Keypad:
Set to prevent it from being used by young children, or other unexpected usage.
Hotel Mode:
Press the ▲ / ▼ button to select Hotel Mode, then press the ENTER button to enter Hotel
Mode.

Active Hotel Mode:
Set hotel mode On or Off.
Note:
The following settings work only when Active Hotel Mode is set to be ON.
Max Volume:
Set the max volume that you can adjust.
Default Volume:
Set the Default volume for every time you open the TV, the default volume is 20.
Source Lock:
To lock the input sources that you want.
Default Source:
Set the default input source when turning on your TV.
Default DTV Program:
Only available when the Default Source is set to DTV.
Default ATV Program:
Only available when the Default Source is set to ATV.
Backup to USB:
Backup data to USB.
Restore from USB:
Restore data from USB.
Recall:
Recall the default settings of Hotel mode.
New Password:
Press the ▲ / ▼button to select New Password, then enter a 4-digital number you want to set twice.
Clear Lock:
Restore the Lock System settings to the factory default.
2.3.11. General Menu Setup
OSD Language:
Select your preferred On Screen Display language.

Audio Languages (in DTV mode):
Select your preferred audio language (available for digital channels if multiple audio languages are broadcasted).
Press the ▲ / ▼button to select Audio Languages, then press ENTER button to enter sub-menu.
Press the arrow button to select the Audio Primary Language and Audio Secondary Language.
Subtitle (in DTV mode):
Press the ▲ / ▼button to select Subtitle, then press ENTER button to enter sub-menu.
Press the ▲ /▼ button to select Mode, then press ◀ /▶ button to select On or Off.
Press the arrow button to select the Subtitle Primary Language and Subtitle Secondary Language.
Press the▲/▼ button to select Hearing Impaired, then press ◀/▶ button to select On or Off.
Teletext:
Adjust Teletext settings (only available under DTV and ATV source).
Press the ▲ / ▼button to select Teletext, then press ENTER button to enter sub-menu.
Under DTV source, press ◀/▶button to select Digital Teletext Language.
Under ATV source, press ◀ /▶ button to select Decoding Page Language.
32" LED TV 32DCG160014
Mode Setting:
Press ◀/▶button to select Store mode or Home Mode. The manufacture's recommendation mode is Home Mode.
Time Settings:
Press the ▲/▼button to select Time Settings, then press ENTER button to enter sub-menu.
OSD Time: Select On-Screen Menu displaying time.
Sleep Timer: Select the time to turn the TV to standby mode automatically.
Auto Sleep: Select the Auto Sleep time you want.
Time Zone: Select your time zone.
Time: Press the ▲ / ▼ button to select Time, then press ENTER button to enter sub-menu. Set Auto Sync to Off, then you can set the time manually.
Note: In the case of loss of power, the clock setting will be lost.
PVR Settings (in DTV mode):
Press the ▲/▼button to select PVR Settings, then press ENTER button to enter sub-menu.
It will check the USB.
File Manager: To display the Recorded list.
Replay: Press the red button to replay video.
Delete One: Press the green button to delete a video.
Delete All: Press the yellow button to delete all video.
Zoom In: Press the blue button to zoom in the video.
Device List: When multiple recording devices are connected, the recording devices are listed.
Select one recording device in the Device List.
Format: Press the red button to format USB disk.
Scheduled Record: To set the parameters for scheduled recording.
Press the ENTER button to set the parameters for recording.
Delete One: Press the green button to delete a video.
Delete All: Press the yellow button to delete all video.
Digital program recording:
-
Insert an USB disk, press ● button to record the current program. During the recording, press ● button to zoom in/out the record menu.
-
Press ■ button to stop recording, it will return to normal broadcast television.
Note:
- The USB disk needs at least a capacity of 512MB.
- Please format the inserted USB disk when it could not be recorded to.
- During the Device formatting, do not disconnect the device while formatting is in progress. If you format the device, all files will be deleted. Before formatting your device to the TV, please back up your files to prevent them from damage or loss of data. If USB disk is formatted while having some virus it can cause failures to the system.
- When an USB device has several partitions, the PVR system can help to choose anyone of that to perform recording.
- If PVR recording system is used all the time, it will exit PVR system automatically.
- The USB memory must support USB2.0 high-speed specification.
- Some of nonstandard USB device may not be supported.
First Time Setup:
This is a guide to help you to setup the TV.
Reset:
Restore the system settings to the factory default.
2.3.12. using the uSB Mode
To Access/Quit USB mode:
- Connect an USB device.
- Press SOURCE button to display the main menu. Use the ▲ / ▼ to highlight USB, and the ENTER button to access the USB mode.
- You may also use the signal source selection menu to exit from the USB mode.
Note:
- The special USB device may not be supported or well supported.
- The USB maximum load is DC5V 500mA.
The supported formats are:
| Multimedia Categories | File Extension | Decoder | Notes | |
| Video Decode Audio Decode | ||||
| Movie | *.avi | MPEG-1MPEG-2 MPMPEG-4 SPMPEG-4 ASPMPEG-4 XVIDDivXH.264(AVC)MP@Level 4H.264(AVC)HP@Level 4 | MPEG-1 Layer 2MPEG-1 Layer 3MPEG-2 Layer 3AC3AAC-LCHE-AAC V1HE-AAC V2 | MPGE1/MPEG2/MPEG4:Up to 1080p @ 30FH.264: Up to 1080p @ 25FAAC: AAC-LC(type 2),HE-AAC v1(type 5,SBR),HE-AAC v2(type 29,SBR+PS) |
| MPEG(*.mpeg, *.mpg, *.dat, *vob) | MPEG-1 MPMPEG-2 MP | |||
| MPEG-4(*.mp4) | MPEG-4 SPMPEG-4 ASPMPEG.-4 XVIDH.264(AVC)MP@Level 4H.264(AVC)HP@Level 4 | |||
| TS(*.ts, *.trp, *tp) | MPEG-1MPEG-2 MPH.264(AVC)MP@Level 4H.264(AVC)HP@Level 4 | |||
32" LED TV 32DCG160014
| Movie | MKV(*.mkv) | MPEG-1MPEG-2 MPMPEG-4 SPMPEG-4 ASPMPEG-4 XVIDH.264(AVC) MP @Level 4H.264(AVC) HP @Level 4 | ||
| *.flv | H.264(AVC) MP @Level 4H.264(AVC) HP @Level 4 | |||
| Music | *.mp3 | MPEG-1 Layer 3 | Bit Rate: up to 320KbpsSample Rate: 32KHz, 44.1KHz, 48KHz | |
| MPEG-2 Layer 3 | ||||
| AAC(*.aac,*m4a) | AACHE-AAC V1HE-AAC V2 | |||
| *.wav | LPCMADPCM | |||
| Photo | *.jpg*.jpeg | Baseline Mode | 72x72 < Baseline resolution < 7680x4320 | |
| Progressive Mode | Progressive Mode Size <=1280x1024File Size <=10MB | |||
| Text *.txt | UTF-8UNICODEASCII | File Size <=1MB | ||
| Note: Max 500 files supported each folder. | ||||
Note: Max 500 files supported each folder.
Note:
- Special algorithm documents may not be or well be supported by the USB.
- The USB supports the format mentioned above, if the file format is not supported, change it to the given format.
Main Operating Interface:

Use the ◀/▶button to select Photo, Music, Movie or Text. Press ENTER button to enter the sub-menu.
Photo:
Press the ◀/▶button to select Photo in the main menu, then press ENTER button to enter.
Press the ◀/▶button to select disk you want to watch, then press ENTER button to enter.
Press the CH+/- button to change page.
Press the INDEX button to access to the quick menu.
Use the arrow buttons to highlight the folder, and then press the ENTER button.
Use the arrow buttons to highlight a file, and then press the button to play.
Press the to stop the playing files.
Press the EXIT button to back to the previous menu.
Music:
Press the ◀/▶button to select Music in the main menu, then press ENTER button to enter.
Press the ▲/▼button to select disk you want to watch, then press ENTER button to enter.
Press the ◀ / button to change page.
Press the INDEX button to access to the quick menu.
Use the ▲/▼button to highlight the folder, and then press the ENTER button.
Use the ▲/▼button to highlight a file, and then press the button to play.
Press the ■ to stop the playing files.
Press the EXIT button to back to the previous menu.
Movie:
Press the ◀/▶button to select Movie in the main menu, then press ENTER button to enter.
Press the ▲/▼button to select disk you want to watch, then press ENTER button to enter.
Press the ◀ / ▶ button to change page.
Press the INDEX button to access to the quick menu.
Use the ▲/▼button to highlight the folder, and then press the ENTER button.
Use the ▲/▼button to highlight a file, and then press the button to play.
Press the ■ to stop the playing files.
Press the EXIT button to back to the previous menu.
Text:
Press the ◀/▶button to select Text in the main menu, then press ENTER button to enter.
Press the ▲/▼button to select disk you want to watch, then press ENTER button to enter.
Press the ◀ /▶ button to change page.
Press the INDEX button to access to the quick menu.
Use the ▲ / ▼button to highlight the folder, and then press the ENTER button.
Use the ▲ / ▼button to highlight a file, and then press the ▶ button to play.
Press the EXIT button to back to the previous menu.
2.4. Important Unique Buttons
2.4.1. Program Guide (in DTV Mode)
Press the EPG button to enter PROGRAM GUIDE menu.

Press the ● button to set the parameters for recording. You can choose the time of the appointment to record what you want. The unit is able to do schedule recording when TV is turning on or in standby mode. When recording starts in standby mode, there will be no picture or sound from the unit.
Press the red button to view the previous date's guide.
Press the green button to view the next date's guide.
Press the yellow button to display the EPG Schedule List.
Press the blue button to book program.
Press the EXIT button to exit.
2.4.2. Channel List
Press LIST button to display the Channel List.
Press ▲/▼ to select the items. Press the ENTER button to enter the channel.
Press ◀ /▶ button to page up or down the Channel list.
Press EXIT button to exit.
2.4.3. Favorite List
Press ♥button to display the favorite list.
Press the red button to delete the selected favorite program.
Press the green button to add the current program to the favorite list.
Press ▲ / ▼ to select the items.
Press ◀ button to page up or down the Favorite list.
Press the ENTER button to enter the channel.
Press EXIT button to exit.
2.4.4. Using the Teletext Feature
Display teletext:
- Select a TV station with a teletext signal.
- Press the button to enter teletext mode.
- Press the button 2nd to enter Mix mode, this function enables you to superimpose the teletext page over the TV program.
- Press the button 3rd return or exit to the normal ATV/DTV mode.
Page selection:
- Enter the page number (three digits) using the number buttons. If you press a wrong number during input, you must complete the three digit number and then reenter the correct page number.
- The CH-/CH+ button can be used to select the preceding or following page.
Hold:
You can press the 📄 button to hold a page, and press it again to release the page.
Index:
Press the ☐ button to enter the main index page directly.
Enlarging Text:
When a page is displayed, you can double the size of the text to make it easier to read.
- Press the 📄 button to enlarge the top half of the page.
- Press the 📄 button again to enlarge the bottom half of the page.
- Press the 📄 button once more to return to the normal display.
Reveal mode:
You can display concealed teletext information (e.g. Answer to puzzles or riddles etc.) by pressing 📋 button. Press 📋 button again to remove the information from the display.
Subpage:
Some teletext may contain several sub-pages which are automatically paged in a certain cycle by the TV station.
- You can enter into a certain sub page by pressing the button directly and select the page number with number buttons. Enter the sub page number (e.g. 0003) for the third sub page.
- Press the button again to exit the sub page mode.
Color buttons (Red, Green, Yellow and Blue):
Press these buttons to access directly to the corresponding color pages displayed at the lower part of the teletext screen.
3. trouBleSHootInG
Before contacting the service technician, perform the following simple checks. If any problem still persists, unplug the TV and call for servicing.
| ProBleM PoSSIBLE Solution | |
| No sound and picture | - Check whether the main plug has been connected to a wall outlet.- Check whether you have pressed the POWER button on the front of TV set.- Check the picture contrast and brightness settings. |
| Normal picture but no sound | - Check the volume.- Sound muted? Press the MUTE button.- Try another channel, the problem may be with the broadcast.- Are the audio cables installed properly? |
| The remote control does not work | - Check to see if there any object between the product and remote control causing obstruction.- Are batteries installed with correct polarity (+ to +,- to -)?- Correct remote operating mode set: TV, VCR etc.- Install new batteries |
| Power is suddenly turned off | - Is the sleep timer set?- Check the power control settings. Power interrupted.- No broadcast on station tuned with auto activated. |
| Picture appears slowly after switching on | - This is normal. The image is muted during the product startup process. Please contact your service center, if the picture has not appeared after five minutes. |
| No or poor color or poor picture | - Adjust the color in menu option.- Keep a sufficient distance between the product and the VCR.- Try another channel, the problem may be with the broadcast.- Are the VIDEO cables installed properly?- Activate the any function to restore the brightness of the picture. |
| Horizontal/vertical bars or picture shaking | - Check for local interference such as an electrical appliance or power tool. |
| Poor reception on some channels | - Station or cable product experiencing problems. Tune to another station.- Station signal is weak, reorient antenna to receive stronger station.- Check for sources of possible interference. |
| Lines or streaks in pictures | - Check the antenna (Change the direction of the antenna). |
| No output from one of the speakers | - Adjust balance in menu option. |
| The signal is out of range. | - Adjust resolution, horizontal frequency, or vertical frequency.- Check it whether the signal cable is connected or loose.- Check the input source. |
| Vertical bar or stripe on back ground & Horizontal Noise & Incorrect position. | - Work the auto configure or adjust clock, phase, or H/V position. |
| Screen color is unstable or single color. | - Check the signal cable.- Reinstall the PC video card. |
4. Maintenance
Early malfunctions can be prevented. Careful and regular cleaning can extend the amount of time you will have your new TV. Be sure to turn the power off and unplug the power cord before you begin any cleaning.
Cleaning the screen
- Here's a great way to keep the dust off your screen for a while. Wet a soft cloth in a mixture of lukewarm water and a little fabric softener or dish washing detergent. Wring the cloth until it's almost dry, and then used it to wipe the screen.
- Make sure the excess water is off the screen, and then let it air-dry before you turn on your TV.
Cleaning the cabinet
To remove dirt or dust, wipe the cabinet with a soft, dry, lint-free cloth. Please be sure not to use a wet cloth.
Extended Absence

If you expect to leave your TV dormant for a long time (such as a vacation), it's a good idea to unplug the power cord to protect against possible damage from lightning or power surges.
5. tecHnIcal SPecIfcationS
Operating Temperature: 5°C to 35°C.
Storage Temperature: -15°C to 45°C.
Operating Humidity: ≤80%.
Storage Humidity: ≤90%.

- Trade mark: KUNFT.
- Model identifier: 32DCG160014.
- Energy efficiency class of this model: A.
- The visible screen diagonal in centimeters and in inches: 80cm/32 inch.
- On mode power consumption: 40 watt.
- Annual energy consumption: 59 kWh/annum.
- Standby and off mode power consumption:
Standby: 048 watt; Off mode: N/A
- Screen resolution in physical horizontal and vertical pixel count: 1366*768.
6. afterMarket
Mitsai has designed this appliance in order to guarantee the maximum reliability. However, if a problem occurs, by following the procedures suggested in this section you may be able to determine its cause.
Do not attempt to open the appliance – there is a risk of electrical shock.
If you are not able to solve the problem, please contact your seller or manufacturer.
All users must be familiarized with this section. Knowing what could go wrong can help you avoid the occurrence of problems.
WARNING: any attempt of fixing the appliance without contacting the manufacturer will nullify the warranty.
In case the problem persists, take your appliance to an aftermarket section of any Worten, Modelo or Continente store in order to solve the problem.
Worten Equipamentos para o Lar ensures for a period of 2 years, counting from the date of purchase of this appliance, a warranty against any found manufacturing defect. The warranty supposes a correct use and maintenance of the appliance, namely according to the instructions expressed in this manual. In case otherwise identified, the malfunctions will not be under the warranty.
The repairing of electrical appliances must only be made by qualified technicians, as otherwise there may occur future complications on the appliances.
To avoid unnecessary risks, in case there are any malfunctions on the wires or on another type of components, repairing must be made on the specialized locations of technical assistance, as appropriate tools are needed.
7. enVIronMent conSerVatlon
Aiming to protect the environment, we try to reduce to a maximum the volume of the packages which are confined to three easy separation materials: cardboard, paper and plastic. The appliance is made of recyclable material, once disassembled by a specialized company. Follow the local legislation concerning recycling of all materials.

natural_image
Orange circular icon with white crossed-out trash bin and diagonal lines, no text or symbols presentManual de InStruccloneS
32" LED TV 32DCG160014
natural_image
Illustration of a man presenting a smiling computer screen with an app icon, no text or symbols presentnatural_image
Cartoon illustration of a smiling computer monitor holding an open book (no text or symbols)natural_image
Cartoon illustration of a computer monitor with a smiling face and a hand gesture, surrounded by a money bag and play button (no text or symbols)natural_image
Cartoon illustration of a distressed computer monitor with arms and fangs, no text or symbols presentnatural_image
Cartoon illustration of a computer monitor with a sad face and Chinese flag, accompanied by a printer (no text or symbols present)32" LED TV 32DCG160014
natural_image
Cartoon illustration of a computer monitor with a sad face and electrical plug, showing stress or shock (no text or symbols)natural_image
Cartoon illustration of a smiling computer monitor with hands and a small phone, surrounded by clouds and an airfoil (no text or symbols)natural_image
Symbolic illustration of a person pushing a cart with a large box, enclosed in a circle (no text or symbols)natural_image
Illustration of a smiling computer monitor with a worker holding a toolbox (no text or symbols)32" LED TV 32DCG160014
32" LED TV 32DCG160014
Nota:
32" LED TV 32DCG160014
32" LED TV 32DCG160014
32" LED TV 32DCG160014
SPDIF:
32" LED TV 32DCG160014
32" LED TV 32DCG160014
Volver:
32" LED TV 32DCG160014
32" LED TV 32DCG160014
32" LED TV 32DCG160014
32" LED TV 32DCG160014
32" LED TV 32DCG160014
5. eSPecIflcaccloneS tÉcnIcaS
Temperatura Operativa:5°C a 35°C.
natural_image
Orange circular icon with white cross symbol resembling a trash bin or gate, no text or numbers present.32" LED TV 32DCG160014
natural_image
Illustration of a man presenting a smiling computer screen with an app icon, no text or symbols presentnatural_image
Cartoon illustration of a smiling computer monitor holding an open book (no text or symbols)PT
natural_image
Cartoon illustration of a computer monitor with a smiling face and a hand holding a document, surrounded by a megaphone and cloud (no text or symbols)natural_image
Cartoon illustration of a computer monitor with a sad face and frowning expression, surrounded by a distressed head (no text or symbols)natural_image
Cartoon illustration of a computer monitor with a sad face and Chinese characters, accompanied by a printer (no text or symbols present)32" LED TV 32DCG160014
natural_image
Cartoon illustration of a computer monitor with an angry face and a power plug emitting electrical waves (no text or symbols)natural_image
Cartoon illustration of a smiling computer monitor character with a cloud and lightning bolt above, surrounded by people (no text or symbols)natural_image
Symbolic icon of a person climbing a ladder inside a circle with a diagonal line (no text or symbols)natural_image
Illustration of a smiling computer monitor and a worker holding a box (no text or symbols)32" LED TV 32DCG160014
32" LED TV 32DCG160014
Nota:
32" LED TV 32DCG160014
32" LED TV 32DCG160014
32" LED TV 32DCG160014
SPDIF:
32" LED TV 32DCG160014

32" LED TV 32DCG160014
2.3.11. configurar do Menu Geral
Idioma OSD:
32" LED TV 32DCG160014
Reiniciar:
32" LED TV 32DCG160014
32" LED TV 32DCG160014
32" LED TV 32DCG160014
natural_image
Orange circular icon with white cross symbol resembling a trash bin or accessibility symbol (no text)32" LED TV
32DCG160014
Imported, produced and distributed by:
- 32" LED TV 32DCG160014
- InStruction Manual
- Index
- Safety Instructions 3
- Utilization and Functioning 9
- SAFETY INSTRUCTIONS
- ATTENTION RISK OF ELECTRIC SHOCK DO NOT OPEN
- Important Warnings
- Assistance
- Power Energy
- Power Cord and Other Cables
- Humidity and Water
- Cleaning
- General Precautions
- WarnInG SyMBolS
- caution WHen connectInG tHe PoWer cord
- reGulatory InforMatlon
- cautlon
- Note:
- dISPoSal
- UTILIZATION AND FUNCTIONING
- Remote Control
- Using the Remote Control
- Installing Batteries in the Remote Control
- Replacing Batteries in the Remote Control
- Notes on Using Batteries:
- CAUTION:
- Connection and Setup
- Cable Installation
- Operation
- Quick Start Guide
- Connection:
- First Time Setup:
- OSD Language:
- Mode Setting:
- Country:
- Auto Scan:
- LCN:
- Turning your TV On and Off
- Turn on the TV:
- Turn off the TV:
- No signal:
- Program Selection
- Example:
- Volume Adjustment
- Changing the Input Source
- Menu Navigation
- Picture Menu Setup
- Picture Mode:
- Brightness:
- Contrast:
- Sharpness:
- Saturation:
- Hue (only in the NTSC mode):
- Color Temp:
- Aspect Ratio:
- PC Setting (in PC mode):
- Screen Mode (in HDMI mode):
- Advanced Settings:
- Sound Menu Setup
- Sound Mode:
- Treble:
- Bass:
- Balance:
- Surround Sound:
- EQ Setting:
- AVL:
- SPDIF:
- Audio Description (in DTV mode):
- Sound Type (in DTV mode):
- channel Menu Setup
- Manual Scan:
- Channel Edit:
- Common Interface (in DTV mode):
- Signal Information (in DTV mode):
- lock System Menu Setup
- Enter Password:
- Enable:
- Channel Locks:
- Parental Rating (in DTV mode):
- Lock Keypad:
- Hotel Mode:
- Active Hotel Mode:
- Max Volume:
- Default Volume:
- Source Lock:
- Default Source:
- Default DTV Program:
- Default ATV Program:
- Backup to USB:
- Recall:
- New Password:
- Clear Lock:
- General Menu Setup
- Teletext:
- Time Settings:
- PVR Settings (in DTV mode):
- Digital program recording:
- Reset:
- using the uSB Mode
- Main Operating Interface:
- Photo:
- Music:
- Movie:
- Text:
- Important Unique Buttons
- Program Guide (in DTV Mode)
- Channel List
- Favorite List
- Using the Teletext Feature
- Display teletext:
- Page selection:
- Hold:
- Index:
- Enlarging Text:
- Reveal mode:
- Subpage:
- Color buttons (Red, Green, Yellow and Blue):
- trouBleSHootInG
- Maintenance
- Cleaning the screen
- Cleaning the cabinet
- Extended Absence
- tecHnIcal SPecIfcationS
- afterMarket
- enVIronMent conSerVatlon
- Manual de InStruccloneS
- Nota:
- Volver:
- eSPecIflcaccloneS tÉcnIcaS
- configurar do Menu Geral
- Idioma OSD:
- Reiniciar:
- 32" LED TV
- 32DCG160014
Brand : Mitsai
Model : 32DCG160014
Category : Television