
FSM62120DW - Hob BEKO - Free user manual and instructions
Find the device manual for free FSM62120DW BEKO in PDF.


| Product Type | Freestanding Gas Cooker with Electric Oven |
| Brand | Beko |
| Model | FSM62120DW |
| Overall Dimensions (H x W x D) | 850 x 600 x 600 mm |
| Hob Type | Gas |
| Number of Gas Burners | 4 |
| Burner Configuration | 1 Rapid (2.9 kW), 2 Normal (2.0 kW each), 1 Auxiliary (1.0 kW) |
| Ignition System | Automatic electric spark ignition |
| Gas Safety Device | Flame failure safety system on each burner |
| Gas Type | Natural Gas (G20/20 mbar) — convertible to LPG |
| Total Gas Consumption | 7.9 kW |
| Oven Type | Electric multifunction oven |
| Oven Functions | Top & bottom heating, bottom heating, fan supported, fan heating, 3D, full grill, grill+fan |
| Oven Capacity | Approximately 60 L |
| Energy Efficiency Class | Determined per EN 60350-1 |
| Electrical Connection | 220-240 V ~ 50 Hz, 2.4 kW |
| Control Type | Knobs for hob and oven, mechanical timer |
| Oven Cleaning | Easy steam cleaning; optional catalytic walls |
| Oven Door | Removable; inner glass removable for cleaning |
| Safety Chain | Anti-tilt safety chain included |
| Accessories Included | Standard tray, deep tray, wire grill |
| Warranty | Standard manufacturer warranty |
| Manufacturer | Arçelik A.Ş., Turkey |
Frequently Asked Questions - FSM62120DW BEKO
User questions about FSM62120DW BEKO
0 question about this device. Answer the ones you know or ask your own.
Ask a new question about this device
Download the instructions for your Hob in PDF format for free! Find your manual FSM62120DW - BEKO and take your electronic device back in hand. On this page are published all the documents necessary for the use of your device. FSM62120DW by BEKO.
USER MANUAL FSM62120DW BEKO
FSM62120DW
EN / RU / LT
285.3038.70/R.AH/28.06.2021/3-1
7786188322
Please read this user manual first!
Dear Customer,
Thank you for purchasing this Beko product. We hope that you get the best results from your product which has been manufactured with high quality and state-of-the-art technology. Therefore, please read this entire user manual and all other accompanying documents carefully before using the product and keep it as a reference for future use. If you handover the product to someone else, give the user manual as well. Follow all warnings and information in the user manual.
Remember that this user manual is also applicable for several other models. Differences between models will be identified in the manual.
Explanation of symbols
Throughout this user manual the following symbols are used:

Important information or useful hints about usage.

Warning of hazardous situations with regard to life and property.

Warning of electric shock.

Warning of risk of fire.
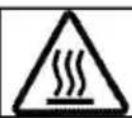
Warning of hot surfaces.
CE
Arçelik A.Ş.
Karaağaç caddesi No:2-6
34445 Süflüce/Istanbul/TURKEY
Made in TURKEY
1 Important instructions and warnings for safety and environment 4
General safety 4
Safety when working with gas....4
Electrical safety 6
Product safety 7
Intended use 9
Safety for children....9
Disposing of the old product 9
Package information 9
Future Transportation....10
2 General information 11
Overview....11
Package contents 12
Technical specifications 13
Injector table....13
3 Installation 14
Before installation....14
Installation and connection 15
Gas conversion....18
4 Preparation 20
Tips for saving energy 20
Initial use....20
First cleaning of the appliance 20
Initial heating 20
5 How to use the hob 21
General information about cooking 21
Using the hobs....21
6 How to operate the oven 23
General information on baking, roasting and grilling23
How to operate the electric oven 23
Operating modes....24
Using the oven clock 25
Cooking times table.... 25
How to operate the grill.... 27
Cooking times table for grilling 28
7 Maintenance and care 29
General information.... 29
Cleaning the hob....29
Cleaning the control panel 29
Cleaning the oven 30
Removing the oven door 30
Removing the door inner glass 31
Replacing the oven lamp 32
8 Troubleshooting 33
1 Important instructions and warnings for safety and environment
This section contains safety instructions that will help protect from risk of personal injury or property damage. Failure to follow these instructions shall void any warranty.
General safety
- This appliance can be used by children aged from 8 years and above and persons with reduced physical, sensory or mental capabilities or lack of experience and knowledge if they have been given supervision or instruction concerning use of the appliance in a safe way and understand the hazards involved.
Children shall not play with the appliance. Cleaning and user maintenance shall not be made by children without supervision.
- The appliance is not to be used by persons (including children) with reduced physical, sensory or mental capabilities, or lack of experience and knowledge, unless they have been given supervision or instruction. Children should be supervised and ensure they do not play with the appliance.
- If the product is handed over to someone else for personal use or second-hand use purposes, the
user manual, product labels and other relevant documents and parts should be also given.
- Never place the product on a carpet-covered floor. Otherwise, lack of airflow beneath the product will cause electrical parts to overheat. This will cause problems with your product.
- Installation and repair procedures must always be performed by Authorised Service Agents. The manufacturer shall not be held responsible for damages arising from procedures carried out by unauthorised persons which may also void the warranty. Before installation, read the instructions carefully.
- Do not operate the product if it is defective or has any visible damage.
- Ensure that the product function knobs are switched off after every use.
Safety when working with gas
- Any work on gas equipment and systems may only be carried out by authorized qualified persons who are Gas Safe registered.
- Prior to installation, ensure that the local distribution conditions (nature of the gas and gas pressure) and the adjustment of the appliance are compatible.
Prior to installation, ensure that the local distribution conditions (nature of the gas and gas pressure) and the adjustment of the appliance are compatible.
- This appliance is not connected to a combustion products or evacuation device. It shall be installed and connected in accordance with current installation regulations. Particular attention shall be given to the relevant requirements regarding ventilation; See Before installation, page 14
- CAUTION: The use of gas cooking appliance results in the production of heat and moisture in the room in which it is installed. Ensure that the kitchen is well ventilated: keep natural ventilation holes open or install a mechanical ventilation device (mechanical extractor hood). Prolonged intensive use of the appliance may call for additional ventilation, for example increasing the level of the mechanical ventilation where present.
- Gas appliances and systems must be regularly checked for proper functioning. Regulator, hose and its clamp must be checked regularly and replaced within the periods recommended by its manufacturer or when necessary.
- Clean the gas burners regularly. The flames should be blue and burn evenly.
- This product should be used in a room which incorporates a properly adjusted and functioning Carbon Monoxide sensor. Make sure the Carbon Monoxide sensor works properly and is maintained frequently. Carbon Monoxide sensor should be installed maximum 2 meters away from the product.
- Good combustion is required in gas appliances. In case of incomplete combustion, carbon monoxide (CO) might develop. Carbon monoxide is a colourless, odourless and very toxic gas, which has a lethal effect even in very small doses.
- Request information about gas emergency telephone numbers and safety measures in case of gas smell from your local gas provider.
What to do when you smell gas
- Do not use open flame or do not smoke. Do not operate any electrical buttons (e.g. lamp button, door bell and etc.) Do not use fixed or mobile phones. Risk of explosion and toxication!
- Open doors and windows.
- Turn off all valves on gas appliances and gas meter at the main control valve, unless it's in a confined space or cellar.
- Check all tubes and connections for tightness. If you still smell gas, leave the property.
- Warn the neighbours.
- Call the fire brigade. Use a telephone outside the house.
- Do not re-enter the property until you are told it is safe to do so.
Electrical safety
- If the product has a failure, it should not be operated unless it is repaired by an Authorised Service Agent. There is the risk of electric shock!
- Only connect the product to a grounded outlet/line with the voltage and protection as specified in the “Technical specifications”. Have the grounding installation made by a qualified electrician while using the product with or without a transformer. Our company shall not be liable for any problems arising due to the product not being earthed in accordance with the local regulations.
- Never wash the product by spreading or pouring water onto it! There is the risk of electric shock!
- Never touch the plug with wet hands! Never unplug by pulling on the cable, always pull out by holding the plug.
- The product must be disconnected during installation,
maintenance, cleaning and repairing procedures.
- If the power connection cable for the product is damaged, it must be replaced by the manufacturer, its service agent or similarly qualified persons in order to avoid a hazard.
- The appliance must be installed so that it can be completely disconnected from the mains supply. The separation must be provided by a switch built into the fixed electrical installation, according to construction regulations.
- The rear surface of the oven gets hot when it is in use. Make sure that the gas/electrical connection does not contact the rear surface; otherwise, connections can get damaged.
- Do not trap the mains cable between the oven door and frame and do not route it over hot surfaces. Otherwise, cable insulation may melt and cause fire as a result of short circuit.
- Any work on electrical equipment and systems should only be carried out by authorised and qualified persons.
- In case of any damage, switch off the product and disconnect it from the mains. To do this, turn off the fuse at home.
• Make sure that fuse rating is compatible with the product.
Product safety
- WARNING: The appliance and its accessible parts become hot during use. Care should be taken to avoid touching heating elements. Children less than 8 years of age shall be kept away unless continuously supervised.
- Never use the product when your judgment or coordination is impaired by the use of alcohol and/or drugs.
- Be careful when using alcoholic drinks in your dishes. Alcohol evaporates at high temperatures and may cause fire since it can ignite when it comes into contact with hot surfaces.
- Food Poisoning Hazard: Do not let food sit in oven for more than 1 hour before or after cooking. Doing so can result in food poisoning or sickness.
- Do not place any flammable materials close to the product as the sides may become hot during use.
- During use the appliance becomes hot. Care should be taken to avoid touching heating elements inside the oven.
- Keep all ventilation slots clear of obstructions.
- Do not heat closed tins and glass jars in the oven. The pressure that would build up in the tin/jar may cause it to burst.
- Do not place baking trays, dishes or aluminium foil directly onto the bottom of the oven. The heat accumulation might damage the bottom of the oven.
- Do not use harsh abrasive cleaners or sharp metal scrapers to clean the oven door glass since they can scratch the surface, which may result in shattering of the glass.
- Do not use steam cleaners to clean the appliance as this may cause an electric shock.
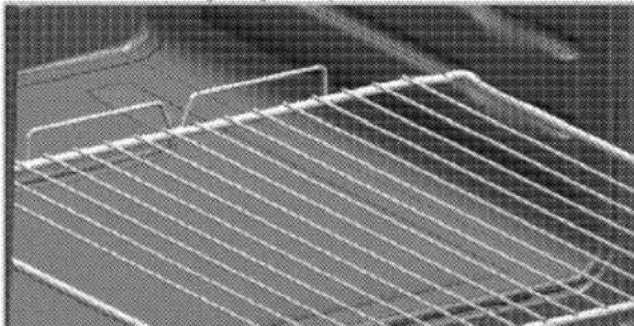
- (Varies depending on the product model.) Placing the wire shelf and tray onto the wire racks properly It is important to place the wire shelf and/or tray onto the rack properly. Slide the wire shelf or tray between 2 rails and make sure that it is balanced before placing food on it (Please see the following figure).

2 General information
Overview   1 Front door 2 Handle 3 Bottom drawer 4 Tray 5 Wire shelf 6 Control panel 7 Burner plate 8 Top lid 9 Fan motor (behind steel plate) 10 Lamp 11 Grill heating element 12 Shelf positions  1 Thermostat lamp 2 Mechanical timer (It depends on the model. Your product's timer may be 100 or 90 minutes. In the illustration, 100 minutes are shown as examples.) 3 Thermostat knob 4 Function knob 5 Normal burner Rear left 6 Rapid burner Front left 7 Auxiliary burner Front right 8 Normal burner Rear rightPackage contents
 Accessories supplied can vary depending on the product model. Not every accessory described in the user manual may exist on your product.1. User manual
2. Standard tray
Used for pastries, frozen foods and big roasts. 3. Deep tray
Used for pastries, large roasts, juicy dishes, and for collecting the fat while grilling. 4. Wire grill
Used for roasting and for placing the food to be baked, roasted or cooked in casserole dishes to the desired rack.  5. Placing the wire shelf and tray onto the telescopic racks properly
(This feature is optional. It may not exist on your product.) Telescopic racks allow you to install and remove the trays and wire shelf easily. When using the tray and wire shelf with telescopic racks, make sure that the pins at the rear section of the telescopic rack stands against the edges of the wire shelf and tray.   Technical specifications| GENERAL | |
| External dimensions (height / width / depth) | 850 mm/600 mm/600 mm |
| Voltage / frequency | 220-240 V ~ 50 Hz |
| Total power consumption | 2.4 kW |
| Cable type / section | min.H05W-FG 3 x 1,5 mm2 |
| Category of gas product | II 2H3B/P / II 2H3+ |
| Gas type / pressure | NG G 20/20 mbar |
| Total gas consumption | 7.9 kW |
| Converting the gas type / pressure^§ | LPG G 30/28-30 mbar |
| - optional | NG G 20/10 mbar - NG G 20/13 mbar |
| HOB | |
| Burners | |
| Rear left | Normal burner |
| Power | 2 kW |
| Front left | Rapid burner |
| Power | 2.9 kW |
| Front right | Auxiliary burner |
| Power | 1 kW |
| Rear right | Normal burner |
| Power | 2 kW |
| OVEN/GRILL | |
| Main oven | Multifunction oven |
| Inner lamp | 15-25 W |
| Grill power consumption | 2.2 kW |
Basics: Information on the energy label of electrical ovens is given in accordance with the EN 60350-1 / IEC 60350-1 standard. Those values are determined under standard load with bottom-top heater or fan assisted heating (if any) functions.
Energy efficiency class is determined in accordance with the following prioritization depending on whether the relevant functions exist on the product or not. 1-Cooking with eco-fan, 2-Turbo slow cooking, 3-Turbo cooking, 4-Fan assisted bottom/top heating, 5-Top and bottom heating.  Technical specifications may be changed without prior notice to improve the quality of the product.  Figures in this manual are schematic and may not exactly match your product.  Values stated on the product labels or in the documentation accompanying it are obtained in laboratory conditions in accordance with relevant standards. Depending on operational and environmental conditions of the product, these values may vary. Injector table| Position hob zone | 2 kWRear left | 2.9kWFront left | 1kWFront right | 2kWRear right |
| Gas type / Gas pressure | ||||
| G 20/10 mbar | 125 | 155 | 90 | 125 |
| G 20/13 mbar | 116 | 145 | 84 | 116 |
| G 20/20 mbar | 103 | 115 | 72 | 103 |
| G 30/28-30 mbar | 72 | 87 | 50 | 72 |
3 Installation
Product must be installed by a qualified person in accordance with the regulations in force. The manufacturer shall not be held responsible for damages arising from procedures carried out by unauthorized persons which may also void the warranty.| Preparation of location and electrical and gas installation for the product is under customer's responsibility. | |
| DANGER:The product must be installed in accordance with all local gas and/or electrical regulations. | |
| DANGER:Prior to installation, visually check if the product has any defects on it. If so, do not have it installed.Damaged products cause risks for your safety. |
Before installation
To ensure that critical air gaps are maintained under the appliance, we recommend that this appliance is mounted on a solid base and that the feet do not sink into any carpet or soft flooring. The kitchen floor must be able to carry the weight of the appliance plus the additional weight of cookware and bakeware and food. If the range is placed on a base, measures have to be taken to prevent the appliance slipping from the base. The appliances must not be installed behind a decorative door in order to avoid overheating.  - It can be used with cabinets on either side but in order to have a minimum distance of 400mm above hotplate level allow a side clearance of 65mm between the appliance and any wall, partition or tall cupboard. - It can also be used in a free standing position. Allow a minimum distance of 750 mm above the hob surface. - (*) If a cooker hood is to be installed above the cooker, refer to cooker hood manufacturer' instructions regarding installation height (min 650 mm). - The appliance corresponds to device class 1, i.e. it may be placed with the rear and one side to kitchen walls, kitchen furniture or equipment of any size. The kitchen furniture or equipment on the other side may only be of the same size or smaller. - Any kitchen furniture next to the appliance must be heat-resistant (100 °C min.).Safety chain
If your product has 2 safety chains;
The appliance must be secured against overbalancing by using the supplied two safety chains on your oven. Fasten hook (1) by using a proper peg to the kitchen wall (6) and connect safety chain (3) to the hook via the locking mechanism (2).  1 Stability hook 2 Locking mechanism 3 Safety chain (supplied and mounted to oven) 4 Firmliy fix chain to cooker rear 5 Rear of cooker 6 Kitchen wallIf your product has 1 safety chain;
The appliance must be secured against overbalancing by using the supplied one safety chain on your oven. Follow below steps in the picture to secure the safety chain to your product.  Stability chain to be as short as practicable to avoid oven tilting forward and diagonal to avoid oven side tilting. Cooker stability chain for cookers is not designed with bracket engagement slot.Room ventilation
All rooms require an openable window, or equivalent, and some rooms will require a permanent vent as well. The air for combustion is taken from the room air and the exhaust gases are emitted directly into the room. Good ventilation is essential for safe operation of your appliance.Rooms with doors and/or windows which open directly to the outer environment
The doors and/or windows that open directly to the outer environment must have a total ventilation opening of the dimensions specified in the table below which is based on the total gas power of the appliance (total gas power consumption of the appliance is shown in the technical specification table of this user manual). If the doors and/or windows do not have a total ventilation opening corresponding to the total gas consumption of the appliance as specified in the table below, then there must definitely be an additional fixed ventilation opening in the room to ensure that the total minimum ventilation requirements for the total gas consumption of the appliance is achieved. The fixed ventilation opening can include openings for existing airbricks, extraction hood ducting opening dimension etc.| Total gas consumption (kW) | min. Ventilation opening ( cm2 ) |
| 0-2 | 100 |
| 2-3 | 120 |
| 3-4 | 175 |
| 4-6 | 300 |
| 6-8 | 400 |
| 8-10 | 500 |
| 10-11.5 | 600 |
| 11.5-13 | 700 |
| 13-15.5 | 800 |
| 15.5-17 | 900 |
| 17-19 | 1000 |
| 19-24 | 1250 |
Rooms that do not have openable doors and/or windows that open directly to the outer environment
If the room where the appliance is installed does not have a door and/or a window that opens directly to the outer environment, other products shall be sought that definitely provide a fixed nonadjustable and non-closable ventilation opening which meets the total minimum ventilation opening requirements for the total gas consumption of the appliance as indicated in the above table. Also the appropriate building regulations advise should be followed. Where a room or internal space contains more than one gas appliance, additional ventilation area shall be provided on top of the requirement given in the table above. Size of additional ventilation area shall be appropriate to regulations of other gas appliances. There should also be a minimum clearance of 10mm on the bottom edge of the door that opens to the inner environment in the room where the appliance is installed. You must ensure that items such as carpets and other floorcoverings etc., do not affect the clearance when the door is closed. The cooker may be located in a kitchen, kitchen/diner or a bed-sitting room, but not in a room containing a bath or a shower. The cooker must not be installed in a bed-siting room of less than 20m 3 . Do not install this appliance in a room below ground level unless it is open to ground level on at least one side.Installation and connection
Product can only be installed and connected in accordance with the statutory installation rules.  Do not install the product next to refrigerators or freezers. The heat emitted by the product will increase the energy consumption of cooling appliances. - Carry the product with at least two persons. - Product must be placed directly on the floor. It must not be placed onto a base or a pedestal.  Do not use the door and/or handle to carry or move the product. The door, handle or hinges get damaged.Electrical connection
Connect the product to a grounded outlet/line protected by a miniature circuit braker of suitable capacity as stated in the "Technical specifications" table. Have the grounding installation made by a qualified electrician while using the product with or without a transformer. Our company shall not be liable for any damages that will arise due to using the product without a grounding installation in accordance with the local regulations. DANGER:
The product must be connected to the mains supply only by an authorised and qualified person. The product's warranty period starts only after correct installation. Manufacturer shall not be held responsible for damages arising from procedures carried out by unauthorised persons. DANGER:
The power cable must not be clamped, bent or trapped or come into contact with hot parts of the product. A damaged power cable must be replaced by a qualified electrician. Otherwise, there is risk of electric shock, short circuit or fire! The mains supply data must correspond to the data specified on the type label of the product. The rating plate is either seen when the door or the lower cover is opened or it is located at the rear wall of the unit depending on the unit type. Power cable of your product must comply with the values in "Technical specifications" table.  Power cable plug must be within easy reach after installation (do not route it above the hob).  While performing the wiring, you must apply with the national/local electrical regulations and must use the appropriate socket outlet/line and plug for oven. In case of the product's power limits are out of current carrying capability of plug and socket outlet/line, the product must be connected through fixed electrical installation directly without using plug and socket outlet/line. DANGER:
Before starting any work on the electrical installation, disconnect the product from the mains supply. There is the risk of electric shock! Connect the power cable into the socket.Gas connection
DANGER:
Product can be connected to gas supply system only by an authorised and qualified person or technician with licence. Risk of explosion or toxication due to unprofessional repairs! Manufacturer shall not be held responsible for damages arising from procedures carried out by unauthorised or unlicensed persons. DANGER:
Before starting any work on the gas installation, disconnect the gas supply. There is the risk of explosion! \- Gas adjustment conditions and values are stated on labels (or ion type label).  Your product is equipped for natural gas (NG). - Natural gas installation must be prepared suitably for the assembly before installing the product. • Gas connection of your product will be performed by the authorised service. - There must be a flex pipe at the outlet of the installation for the natural gas connection of your product and the tip of this pipe must be sealed with a blind plug. The blind plug will be removed during connection and your product will be connected by means of a flat connection device (sleeve). • Make sure that the natural gas valve is readily accessible. - If you need to use your product later with a different type of gas, you must consult the autho- rised service for the related conversion procedure.If your product has only one gas outlet;
\- Before connecting the gas hose, make sure that the gas hose outlet at the back of the product is on the same side of the product as the natural gas valve.  \- If the gas hose outlet and the natural gas valve do not face on the same side, make sure that the hose does not pass through the hot area when connecting it. If your product has two gas outlets;
\- One of the two outlets is sealed with a blind plug and the other one with a plastic plug. Locations of the blind plug and plastic plug may be different depending on the product.  1 Gas hose outlet 2 Blind plug 3 Plastic plug \- Before gas connection, make sure that the natural gas valve and the gas hose outlet of the product to be connected to the gas is on the same side. \- If the natural gas valve and the gas hose outlet sealed with plastic plug face on the same side, make the gas connection as shown in the figure below.  \- If the natural gas valve and the gas hose sealed with blind plug face on the same side, remove and dispose the plastic plug. Take out the blind plug and close the gas hose outlet where gas connection will not be made with a new (unused) sealing gasket.  \- Make the gas connection as shown in the figure below on the gas hose outlet near the natural gas valve. Risk of fire:
If you do not make the connection according to the instructions below, there will be the risk of gas leakage and fire. Our company cannot be held responsible for damages resulting from this. - Gas connection must be made by the authorised service provider only. - Gas connection of the product must definitely be made through the gas hose outlet near the natural gas valve. - Plastic plug must be disposed, and the gas hose outlet that will not be used must be sealed with the blind plug. - When closing the gas hose outlet that will not be used, you must definitely use a new and unused sealing gasket.| DANGER:The flexible gas hose must be connected in a way that it does not contact the moving parts around it and is not trapped when the moving parts are travelling.(e.g. drawers). Besides, it should not be placed in spaces where it might get squeezed. |
Leakage check at the connection point
• Make sure that all knobs on the product are turned off. Make sure that the gas supply is open. Prepare soapy foam and apply it onto the connection point of the hose for gas leakage control. - Soapy part will froth if there is a gas leakage. In this case, inspect the gas connection once again. - If your product has two gas hose outlets, make sure that the unused gas outlet is sealed with a blind plug. Prepare soapy foam and apply it onto the connection point of the blind plug to check for gas leaks. Soapy part will froth if there is a gas leakage. In this case, inspect the blind plug connection again. • Instead of soap, you can use commercially available sprays for gas leak check.  - Push the product towards the kitchen wall. • Adjusting the feet of oven Vibrations during use may cause cooking vessels to move. This dangerous situation can be avoided if the product is level and balanced. For your own safety please ensure the product is level by adjusting the four feet at the bottom by turning left or right and align level with the work top.Final check
1. Check electrical functions. 2. Open gas supply. 3. Check gas installations for secure fitting and tightness. 4. Ignite burners and check appearance of the flame.  Flame must be blue and have a regular shape. If the flame is yellowish, check if the burner cap is seated securely or clean the burner.Gas conversion
DANGER:
Before starting any work on the gas installation, disconnect the gas supply. There is the risk of explosion! In order to change your appliance's gas type, change all injectors and make flame adjustment for all valves at reduced flow rate position.Exchange of injector for the burners
1. Take off burner cap and burner body. 2. Unscrew injectors by turning the counterclockwise. 3. Fit new injectors. 4. Check all connections for secure fitting and tightness.  New injectors have their position marked on their packing or injector table on Injector table, page 13 can be referred to.  ((Varies depending on the product model.)) On some hob burners, the injector is covered with a metal piece. This metal cover must be removed for injector replacement.  1 Flame failure device (model dependant) 2 Spark plug 3 Injector 4 Burner  Unless there is an abnormal condition, do not attempt to remove the gas burner taps. You must call an Authorised service agent or technician with licence if it is necessary to change the taps.Reduced gas flow rate setting for hob taps
1. Ignite the burner that is to be adjusted and turn the knob to the reduced position. 2. Remove the knob from the gas tap. 3. Use an appropriately sized screwdriver to adjust the flow rate adjustment screw. For LPG (Butane - Propane) turn the screw clockwise. For the natural gas, you should turn the screw counter-clockwise once. » The normal length of a straight flame in the reduced position should be 6-7 mm. 4. If the flame is higher than the desired position, turn the screw clockwise. If it is smaller turn anticlockwise. 5. For the last control, bring the burner both to high-flame and reduced positions and check whether the flame is on or off. Depending on the type of gas tap used in your appliance the adjustment screw position may vary.  1 Flow rate adjustment screw  1 Flow rate adjustment screw  If the gas type of the unit is changed, then the rating plate that shows the gas type of the unit must also be changed.Leakage check at the injectors
Before carrying out the conversion on the product, ensure all control knobs are turned to off position. After the correct conversion of injectors, for each injectors should be gas leak checked. 1. Make sure that the gas supply to the product is on, still maintaining all control knobs turned to off position. 2. Each injector hole is blocked with a finger applying reasonable force to stop the gas leakage when corresponding control knob turned to on and it held at depressed position to allow gas reach the injector. 3. Apply prepared soapy water at the injector connection with a small brush, if there is leakage of gas at the injector connection the soapy water will begin to froth. In this case, tighten the injector with a reasonable force and repeat step 3 process once again. 4. If the froth still persist you must turn off the gas apply to the product immediately and call an Authorised service agent or technician with licence. Do not use the product until the authorized service has intervened in the product.  4 Preparation
Tips for saving energy
The following information will help you to use your appliance in an ecological way, and to save energy: - Use dark coloured or enamel coated cookware in the oven since the heat transmission will be better. - While cooking your dishes, perform a preheating operation if it is advised in the user manual or cooking instructions. - Do not open the door of the oven frequently during cooking. - Try to cook more than one dish in the oven at the same time whenever possible. You can cook by placing two cooking vessels onto the wire shelf. • Cook more than one dish one after another. The oven will already be hot. - You can save energy by switching off your oven a few minutes before the end of the cooking time. Do not open the oven door. • Defrost frozen dishes before cooking them. - Use pots/pans with cover for cooking. If there is no cover, energy consumption may increase 4 times. - Select the burner which is suitable for the bottom size of the pot to be used. Always select the correct pot size for your dishes. Larger pots require more energy.Initial use
First cleaning of the appliance
 The surface might get damaged by some detergents or cleaning materials. Do not use aggressive detergents, cleaning powders/creams or any sharp objects during cleaning. Do not use harsh abrasive cleaners or sharp metal scrapers to clean the oven door glass since they can scratch the surface, which may result in shattering of the glass. 1. Remove all packaging materials. 2. Wipe the surfaces of the appliance with a damp cloth or sponge and dry with a cloth.Initial heating
Heat up the product for about 30 minutes and then switch it off. Thus, any production residues or layers will be burnt off and removed. WARNING
Hot surfaces cause burns! Product may be hot when it is in use. Never touch the hot burners, inner sections of the oven, heaters and etc. Keep children away. Always use heat resistant oven gloves when putting in or removing dishes into/from the hot oven.Electric oven
1. Take all baking trays and the wire grill out of the oven. 2. Close the oven door. 3. Select Static position. 4. Select the highest grill power; See How to operate the electric oven, page 23. 5. Operate the oven for about 30 minutes. 6. Turn off your oven; See How to operate the electric oven, page 23Grill oven
1. Take all baking trays and the wire grill out of the oven. 2. Close the oven door. 3. Select the highest grill power; see How to operate the grill, page 27. 4. Operate the grill about 15 minutes. 5. Turn off your grill; see How to operate the grill, page 27  Smoke and smell may emit for a couple of hours during the initial operation. This is quite normal. Ensure that the room is well ventilated to remove the smoke and smell. Avoid directly inhaling the smoke and the smell that emits.5 How to use the hob
General information about cooking
 Never fill the pan with oil more than one third of it. Do not leave the hob unattended when heating oil. Overheated oils bring risk of fire. Never attempt to extinguish a possible fire with water! When oil catches fire, cover it with a fire blanket or damp cloth. Turn off the hob if it is safe to do so and call the fire department. - Before frying foods, always dry them well and gently place into the hot oil. Ensure complete thawing of frozen foods before frying. • Do not cover the vessel you use when heating oil. - Place the pans and saucepans in a manner so that their handles are not over the hob to prevent heating of the handles. Do not place unbalanced and easily tilting vessels on the hob. - Do not place empty vessels and saucepans on cooking zones that are switched on. They might get damaged. - Operating a cooking zone without a vessel or saucepan on it will cause damage to the product. Turn off the cooking zones after the cooking is complete. - As the surface of the product can be hot, do not put plastic and aluminum vessels on it. Such vessels should not be used to keep foods either. • Use flat bottomed saucepans or vessels only. - Put appropriate amount of food in saucepans and pans. Thus, you will not have to make any unnecessary cleaning by preventing the dishes from overflowing. Do not put covers of saucepans or pans on cooking zones. Place the saucepans in a manner so that they are centered on the cooking zone. When you want to move the saucepan onto another cooking zone, lift and place it onto the cooking zone you want instead of sliding it.Gas cooking
\- Size of the vessel and the flame must match each other. Adjust the gas flames so that they will not extend the bottom of the vessel and center the vessel on saucepan carrier.Using the hobs
 1 Normal burner 18-20 cm 2 Rapid burner 22-24 cm 3 Auxiliary burner 12-18 cm 4 Normal burner 18-20 cm is list of advised diameter of pots to be used on related burners. WARNING
Do not use cooking pans beyond the dimension limits given above. Using larger pans causes risk of carbon monoxide poisoning, overheating of adjacent surfaces and control knobs. Using smaller pans causes your risk of being burned by the flame. Large flame symbol indicates the highest cooking power and small flame symbol indicates the lowest cooking power. In turned off position (top), gas is not supplied to the burners.Igniting the gas burners
1. Keep burner knob pressed. 2. Turn it counter clockwise to large flame symbol. » Gas is ignited with the spark created. 3. Adjust it to the desired cooking power.Turning off the gas burners
Turn the knob to off (upper) position.Gas shut off safety system (in models with thermic component)
 1. Gas shut off safety As a counter measure against blow out due to fluid overflows at burners, safety mechanism trips and shuts off the gas. - Push the knob inwards and turn it counter clockwise to ignite. • After the gas ignites, keep the knob pressed for 3-5 seconds more to engage the safety system. - If the gas does not ignite after you press and release the knob, repeat the same procedure by keeping the knob pressed for 15 seconds. DANGER:
Release the button if the burner is not ignited within 15 seconds. Wait at least 1 minute before trying again. There is the risk of gas accumulation and explosion!6 How to operate the oven
General information on baking, roasting and grilling
WARNING
Hot surfaces cause burns! Product may be hot when it is in use. Never touch the hot burners, inner sections of the oven, heaters and etc. Keep children away. Always use heat resistant oven gloves when putting in or removing dishes into/from the hot oven. DANGER:
Be careful when opening the oven door as steam may escape. Exiting steam can scald your hands, face and/or eyes.Tips for baking
- Use non-sticky coated appropriate metal plates or aluminum vessels or heat-resistant silicone moulds. • Make best use of the space on the rack. - Place the baking mould in the middle of the shelf. - Select the correct rack position before turning the oven or grill on. Do not change the rack position when the oven is hot. - Keep the oven door closed.Tips for roasting
- Treating whole chicken, turkey and large piece of meat with dressings such as lemon juice and black pepper before cooking will increase the cooking performance. - It takes about 15 to 30 minutes longer to roast meat with bones when compared to roasting the same size of meat without bones. • Each centimeter of meat thickness requires approximately 4 to 5 minutes of cooking time. - Let meat rest in the oven for about 10 minutes after the cooking time is over. The juice is better distributed all over the roast and does not run out when the meat is cut. - Fish should be placed on the middle or lower rack in a heat-resistant plate.Tips for grilling
When meat, fish and poultry are grilled, they quickly get brown, have a nice crust and do not get dry. Flat pieces, meat skewers and sausages are particularly suited for grilling as are vegetables with high water content such as tomatoes and onions. - Distribute the pieces to be grilled on the wire shelf or in the baking tray with wire shelf in such a way that the space covered does not exceed the size of the heater. - Slide the wire shelf or baking tray with grill into the desired level in the oven. If you are grilling on the wire shelf, slide the baking tray to the lower rack to collect fats. The baking tray to be slid must be of a size that covers the whole grilling area. This tray might not be provided with the product. Add some water in the baking tray for easy cleaning.  Foods that are not suitable for grilling carry the risk of fire. Only grill food which is suitable for intensive grilling heat. Do not place the food too far in the back of the grill. This is the hottest area and fatty food may catch fire.How to operate the electric oven
Select temperature and operating mode
 1 Thermostat knob 2 Function knob 1. Set the oven timer to the desired cooking time; see Using the oven clock, page 25. 2. Set the Function knob to the desired operating mode. 3. Set the Temperature knob to the desired temperature. » Oven heats up to the adjusted temperature and maintains it. During heating, temperature lamp stays on.Switching off the electric oven
Switch the oven timer to off position.  When the timer is set to a certain time, it will turn off automatically; see Using the oven clock, page 25 Turn the function knob and temperature knob to off (upper) position.Rack positions (For models with wire shelf)
It is important to place the wire shelf onto the side rack correctly. Wire shelf must be inserted between the side racks as illustrated in the figure. Do not let the wire shelf stand against the rear wall of the oven. Slide your wire shelf to the front section of the rack and settle it with the help of the door in order to obtain a good grill performance. (Varies depending on the product model.) Operating modes
The order of operating modes shown here may be different from the arrangement on your product.Top and bottom heating
 Top and bottom heating are in operation. Food is heated simultaneously from the top and bottom. For example, it is suitable for cakes, pastries, or cakes and casseroles in baking moulds. Cook with one tray only.Bottom heating
 Only bottom heating is in operation. It is suitable for pizza and for subsequent browning of food from the bottom.  This function must be used for easy steam cleaning as well.Fan supported bottom/top heating
 Top heating, bottom heating plus fan (in the rear wall) are in operation. Hot air is evenly distributed throughout the oven rapidly by means of the fan. Cook with one tray only.Operating with fan
 The oven is not heated. Only the fan (in the rear wall) is in operation. Suitable for thawing frozen granular food slowly at room temperature and cooling down the cooked food.Fan Heating
 Warm air heated by the rear heater is evenly distributed throughout the oven rapidly by means of the fan. It is suitable for cooking your meals in different rack levels and preheating is not required in most cases. Suitable for cooking with multi trays.  This function must be used for easy steam cleaning as well."3D" function
 Top heating, bottom heating and fan assisted heating (in the rear wall) are in operation. Food is cooked evenly and quickly all around. Cook with one tray only.Full grill
 Large grill at the ceiling of the oven is in operation. It is suitable for grilling large amount of meat. - Put big or medium-sized portions in correct rack position under the grill heater for grilling. - Turn the food after half of the grilling time.Grill+Fan
 Grilling effect is not as strong as in Full Grill - Put small or medium-sized portions in correct shelf position under the grill heater for grilling. - Turn the food after half of the grilling time. Using the oven clock  Starting the cooking  In order to operate the oven, you must select cooking mode and the desired temperature and set the time. Otherwise, the oven will not operate. 1. Turn the Time Adjustment knob clockwise to set the cooking time. 2. Put your dish into the oven. Cooking times table  The timings in this chart are meant as a guide. Timings may vary due to temperature of food, thickness, type and your own preference of cooking. 3. Select operation mode and temperature; see. How to operate the electric oven, page 23. » The oven will be heated up to the preset temperature and will maintain this temperature until the end of the cooking time you selected. 4. Once the cooking time is over, Time Setting knob will automatically rotate counterclockwise. A warning sound indicating that the set time is over is heard and the power is cut.  If you do not want to use the timer function, turn the knob counterclockwise towards the hand symbol. 5. Turn off the oven with the Time Setting knob, function knob and temperature knob.Turning off the oven before the set time
1. Turn the Time Adjustment knob counterclockwise until it stops. 2. Turn off the oven with the Function knob and Temperature knob. Baking and roasting  1st rack of the oven is the bottom rack.| Dish | Cooking level number | Accessory to use | Operating mode | Rack position | Temperature (°C) | Cooking time (approx. in min.) |
| Cakes in tray | One level | Standard tray* | 3 | 180 | 25 ... 30 | |
| Cakes in mould | One level | Cake mold on wire grill** | 2 | 180 | 40 ... 50 | |
| Small cakes | One level | Standard tray* | 3 | 160 | 25 ... 35 | |
| One level | Standard tray* | 3 | 150 | 30 ... 40 | ||
| 2 levels | 1-Pastry tray*3-Standard tray* | 1 - 3 | 150 | 35 ... 50 | ||
| 3 levels | 1-Standard tray*3-Pastry tray*5-Deep tray* | 1 - 3 - 5 | 150 | 35 ... 50 | ||
| Sponge cake | One level | Round springform pan with a diameter of 26 cm on wire grill** | 3 | 160 | 25 ... 35 | |
| One level | Round springform pan with a diameter of 26 cm on wire grill** | 2 | 150 | 30 ... 40 | ||
| 2 levels | 1-Round springform pan with a diameter of 26 cm on wire grill**4-Round springform pan with a diameter of 26 cm on pastry tray** | 1 - 4 | 150 | 35 ... 45 | ||
| Cookies | One level | Pastry tray* | 3 | 180 | 25 ... 30 | |
| 2 levels | 1-Pastry tray*3-Standard tray* | 1 - 3 | 180 | 30 ... 40 | ||
| 3 levels | 1-Pastry tray*3-Standard tray*5-Deep tray* | 1 - 3 - 5 | 180 | 35 ... 45 | ||
| Dough pastry | One level2 levels | Standard tray*1-Pastry tray*5-Standard tray* | 21 - 5 | 200200 | 30 ... 4045 ... 55 | |
| 3 levels | 1-Pastry tray*3-Standard tray*5-Deep tray* | 1 - 3 - 5 | 200 | 55 ... 65 | ||
| Rich pastry | One level | Standard tray* | 2 | 200 | 25 ... 35 | |
| 2 levels | 1-Pastry tray*3-Standard tray* | 1 - 3 | 200 | 35 ... 45 | ||
| 3 levels | 1-Pastry tray*3-Standard tray*5-Deep tray* | 1 - 3 - 5 | 190 | 45 ... 55 | ||
| Leaven | One level | Standard tray* | 2 | 200 | 35 ... 45 | |
| Lasagna | One level | Glass/metal rectangular pan on wire grill** | 2 - 3 | 200 | 30 ... 40 | |
| Pizza | One level | Standard tray* | 2 | 200 ... 220 | 15 ... 20 | |
| Beef steak (whole) / Roast | One level | Standard tray* | 3 | 25 min.250/max, then180 ... 190 | 100 ... 120 | |
| Leg of Lamb (casserole) | One level | Standard tray* | 3 | 25 min.250/max, then190 | 70 ... 90 | |
| One level | Standard tray* | 3 | 25 min.250/max, then190 | 60 ... 80 | ||
| Roasted chicken (1,8 - 2 kg) | One level | Standard tray* | 2 | 15 min.250/max, then180 ... 190 | 60 ... 80 | |
| One level | Standard tray* | 2 | 15 min.250/max, then180 ... 190 | 60 ... 80 | ||
| Turkey (5.5 kg) | One level | Standard tray* | 1 | 25 min.250/max, then180 ... 190 | 150 ... 210 | |
| One level | Standard tray* | 1 | 25 min.250/max, then180 ... 190 | 150 ... 210 | ||
| Fish | One level | Standard tray* | 3 | 200 | 20 ... 30 | |
| One level | Standard tray* | 3 | 200 | 20 ... 30 | ||
| It is suggested to perform preheating for all foods.* These accessories may not supplied with the product.** These accessories are not supplied with the product. They are commercially available accessories. | ||||||
Cooking table for test meals
Meals in this cooking table are prepared according to EN 60350-1 to make it easier for control institutes to test the product| Dish | Cooking level number | Accessory to use | Operating mode | Rack position | Temperature (°C) | Cooking time (approx. in min.) |
| Shortbread | One level | Standard tray* | 3 | 140 | 20 ... 30 | |
| One level | Standard tray* | 3 | 140 | 20 ... 30 | ||
| 2 levels | 1-Standard tray*3-Pastry tray* | 1 - 3 | 140 | 20 ... 30 | ||
| 3 levels | 1-Standard tray*3-Pastry tray*5-Deep tray* | 1 - 3 - 5 | 140 | 25 ... 35 | ||
| Small cakes | One level | Standard tray* | 3 | 160 | 25 ... 35 | |
| One level | Standard tray* | 3 | 150 | 30 ... 40 | ||
| 2 levels | 1-Pastry tray*3-Standard tray* | 1 - 3 | 150 | 35 ... 50 | ||
| 3 levels | 1-Standard tray*3-Pastry tray*5-Deep tray* | 1 - 3 - 5 | 150 | 35 ... 50 | ||
| Sponge cake | One level | Round springformpan with a diameter of 26 cm on wire grill** | 3 | 160 | 25 ... 35 | |
| One level | Round springform pan with a diameter of 26 cm on wire grill** | 2 | 150 | 30 ... 40 | ||
| 2 levels | 1-Round springform pan with a diameter of 26 cm on wire grill**4-Round springform pan with a diameter of 26 cm on pastry tray** | 1 - 4 | 150 | 35 ... 45 | ||
| Apple pie | One level | Round black metal dish with a diameter of 20 cm on wire grill** | 2 | 180 | 50 ... 60 | |
| One level | Round black metal dish with a diameter of 20 cm on wire grill** | 2 | 170 | 50 ... 60 | ||
| 2 levels | 1-Round black metal dish with a diameter of 20 cm on wire grill**4-Round black metal dish with a diameter of 20 cm on pastry tray** | 1 - 4 | 170 | 50 ... 60 | ||
| It is suggested to perform preheating for all foods.* These accessories may not supplied with the product.** These accessories are not supplied with the product. They are commercially available accessories. | ||||||
Tips for baking cake
- If the cake is too dry, increase the temperature by 10°C and decrease the cooking time. - If the cake is wet, use less liquid or lower the temperature by 10° C. - If the cake is too dark on top, place it on a lower rack, lower the temperature and increase the cooking time. - If cooked well on the inside but sticky on the outside use less liquid, lower the temperature and increase the cooking time.Tips for baking pastry
- If the pastry is too dry, increase the temperature by 10°C and decrease the cooking time. Dampen the layers of dough with a sauce composed of milk, oil, egg and yoghurt. - If the pastry takes too long to bake, pay care that the thickness of the pastry you have prepared does not exceed the depth of the tray. - If the upper side of the pastry gets browned, but the lower part is not cooked, make sure that the amount of sauce you have used for the pastry is not too much at the bottom of the pastry. Try to scatter the sauce equally between the dough layers and on the top of pastry for an even browning.  Cook the pastry in accordance with the mode and temperature given in the cooking table. If the bottom part is still not browned enough, place it on one lower rack next time.Tips for cooking vegetables
- If the vegetable dish runs out of juice and gets too dry, cook it in a pan with a lid instead of a tray. Closed vessels will preserve the juice of the dish. - If a vegetable dish does not get cooked, boil the vegetables beforehand or prepare them like canned food and put in the oven.How to operate the grill
WARNING
Close oven door during grilling. Hot surfaces may cause burns! \- Turn the Time Adjustment knob counter clockwise to Hand symbol when grilling.Switching on the grill
1. Turn the Function knob to the desired grill symbol. 2. Then, select the desired grilling temperature. 3. If required, perform a preheating of about 5 minutes. » Temperature light turns on.Switching off the grill
1. Turn the Function knob to Off (top) position.  Foods that are not suitable for grilling carry the risk of fire. Only grill food which is suitable for intensive grilling heat. Do not place the food too far in the back of the grill. This is the hottest area and fatty food may catch fire. Cooking times table for grilling Grilling with electric grill| Food | Accessory to use | Rack position | Recommended temperature (°C)** | Cooking time (approx. in min.) |
| Fish | Wire grill | 4..5 | 250/max | 20..25 min.* |
| Sliced chicken | Wire grill | 4..5 | 250/max | 25..35 min. |
| Lamb chops | Wire grill | 4..5 | 250/max | 20..25 min. |
| Roast beef | Wire grill | 4..5 | 250/max | 25..30 min.# |
| Veal chops | Wire grill | 4..5 | 250/max | 25..30 min.# |
| Toast bread* | Wire grill | 4 | 250/max | 1..3 min. |
| #depending on thickness*Preheat for 5 minutes**If the grill temperature of your product cannot be adjusted, the grill will work at the recommended temperature. | ||||
| Food | Accessory to use | Rack position | Temperature (°C) | Cooking time (approx. in min.) |
| Toast bread | Wire grill | 4 | 250/max | 1...3 min. |
| Meatballs (beef) - 12 pieces | Wire grill | 4 | 250/max | 25...35 min. |
| Turn the food after 2/3 of the total grilling time.It is suggested to perform 5 minutes preheating for all foods broiling. | ||||
Maintenance and care
General information
Service life of the product will extend and the possibility of problems will decrease if the product is cleaned at regular intervals. DANGER:
Disconnect the product from mains supply before starting maintenance and cleaning works. There is the risk of electric shock! DANGER:
Allow the product to cool down before you clean it. Hot surfaces may cause burns! - Clean the product thoroughly after each use. In this way it will be possible to remove cooking residues more easily, thus avoiding these from burning the next time the appliance is used. - No special cleaning agents are required for cleaning the product. Use warm water with washing liquid, a soft cloth or sponge to clean the product and wipe it with a dry cloth. • Always ensure any excess liquid is thoroughly wiped off after cleaning and any spillage is immediately wiped dry. - Do not use cleaning agents that contain acid or chloride to clean the stainless or inox surfaces and the handle. Use a soft cloth with a liquid detergent (not abrasive) to wipe those parts clean, paying attention to sweep in one direction. - (This feature is optional. It may not exist on your product.) Do not use solid metal scrapers or abrasive cleaning materials to clean the glass cover. Glass surface can get damaged.  The surface might get damaged by some detergents or cleaning materials. Do not use aggressive detergents, cleaning powders/creams or any sharp objects during cleaning. Do not use harsh abrasive cleaners or sharp metal scrapers to clean the oven door glass since they can scratch the surface, which may result in shattering of the glass.  Do not use steam cleaners to clean the appliance as this may cause an electric shock.Cleaning the hob
Cleaning the burner
1. Remove the saucepan carriers from the hob. 2. Remove all removable parts of the burner and clean only by hand with sponge, some detergent and hot water. 3. Clean the non-removable parts of the burner with a wet cloth. 4. Clean the plug and thermal element (in models with ignition and thermal element) with a slightly moist cloth. Afterwards, dry with a clean cloth. Make sure that flame holes and plug are totally dry. Otherwise, no spark occurs at the end of ignition. 5. When placing the pan supports, pay attention to place the pan supports so that the burners are centered.Assembling the burner parts
After cleaning the bumer, place the parts as shown below.  1 Burner cap 2 Burner head 3 Burner chamber 4 Spark plug (in products with igniter) 1. Place the burner head ensuring that it passes through the burner spark plug (4). Tum the burner head right and left to make sure that it is seated in the burner chamber. 2. Place the burner cap on the burner head.Cleaning the control panel
Clean the control panel and knobs with a damp cloth and wipe them dry.  If your product is equipped with buttons/knobs do not remove the control buttons/knobs to clean the control panel. Control panel may get damaged!Cleaning the oven
To clean the side wall (Varies depending on the product model.)
(This feature is optional. It may not exist on your product.) 1. Remove the front section of the side rack by pulling it in the opposite direction of the side wall. 2. Remove the side rack completely by pulling it towards you. Catalytic walls
(This feature is optional. It may not exist on your product.)
The inner side walls (A) and/or the rear wall (B) of your product may be coated with catalytic enamel. Catalytic walls have a light matte colour and a porous surface. Catalytic walls of the oven should not be cleaned. Thanks to their perforated structure, catalytic surfaces absorb grease and once the surface is filled with grease, they start to shine. In this case, it is recommended to replace the parts.  Easy Steam Cleaning
It ensures easy cleaning because the dirt (having waited not for too long) is softened with the steam that forms inside the oven and the water drops condensing on the inner surfaces of the oven. 1. Remove all accessories inside the oven. 2. Pour 500 ml of water into the oven tray and place the tray at the 2nd rack of the oven.  3. Set the oven to easy steam cleaning mode and run at 100° C for 25 minutes. 4. Open the door and wipe the inner surfaces of the oven with a damp sponge or cloth. 5. Use warm water with washing liquid, a soft cloth or sponge to clean the persistent dirt and wipe it with a dry cloth.  During the easy steam cleaning mode, water that is placed in the tray to soften lightly formed residues/dirt within the oven cavity will evaporate and condense in the oven cavity and inner glass of the oven door, therefore water may drip when the oven door is opened. Wipe away the condensation as soon as the oven door is opened.Clean oven door
To clean the oven door, use warm water with washing liquid, a soft cloth or sponge to clean the product and wipe it with a dry cloth.  Don't use any harsh abrasive cleaners or sharp metal scrapers for cleaning the oven door. They could scratch the surface and destroy the glass.Removing the oven door
1. Open the front door (1). 2. Open the clips at the hinge housing (2) on the right and left hand sides of the front door by pressing them down as illustrated in the figure.  1 Door 2 Hinge lock(closed position) 3 Oven 4 Hinge lock(open position)  3. Move the front door to half-way.  4. Remove the front door by pulling it upwards to release it from the right and left hinges.  Steps carried out during removing process should be performed in reverse order to install the door. Do not forget to close the clips at the hinge housing when reinstalling the door.Removing the door inner glass
(This feature is optional. It may not exist on your product.) The inner glass panel of the oven door can be removed for cleaning. 1. Open the oven door.  2. Pull towards yourself and remove the plastic part installed to upper section of the front door.  3. As illustrated in figure, raise the innermost glass panel (1) slightly in direction A and pull it out in direction B.  1 Innermost glass panel 2* Inner glass panel (This may not exist on your product.) 4. If your product is equipped with an inner glass panel; repeat the same procedure to remove the inner glass panel (2). 5. The first step to regroup the door is reinstalling inner glass panel (2). Place the chamfered corner of the glass panel so that it will rest in the chamfered corner of the plastic slot. (If your product is equipped with an inner glass panel). Inner glass panel (2) must be installed into the plastic slot close the innermost glass panel (1). 6. When installing the innermost glass panel (1), make sure that the printed side of the panel faces towards the inner glass panel. It is important to seat lower corner of innermost glass panel (1) into the lower plastic slot. 7. Push the plastic part towards the frame until you hear a "click".Replacing the oven lamp
DANGER:
Before replacing the oven lamp, make sure that the product is disconnected from mains and cooled down in order to avoid the risk of an electrical shock. Hot surfaces may cause burns!  Position of lamp might vary from the figure.  The lamp used in this appliance is not suitable for household room illumination. The intended purpose of this lamp is to assist the user to see foodstuffs.  In this oven, an incandescent lamp with a power of less than 40 W, a height of less than 60 mm, a diameter of less than 30 mm or a halogen lamp with socket type G9, a power of less than 60 W is used. The lamps are suitable for operation at temperatures above 300 °C. Oven lamps can be obtained from Authorised Service Agents or technician with licence.  The lamps used in this appliance have to withstand extreme physical conditions such as temperatures above 50 °C.If your oven is equipped with a round lamp:
1. Disconnect the product from mains. 2. Tum the glass cover counter clockwise to remove it.  3. If your oven lamp is of type (A) shown in the figure below, remove it by rotating as shown and replace it. If it is of type (B), pull and remove it as shown in the figure and replace it.   4. Install the glass cover.8 Troubleshooting
Oven emits steam when it is in use.
\- It is normal that steam escapes during operation. >>> This is not a fault.Product emits metal noises while heating and cooling.
\- When the metal parts are heated, they may expand and cause noise. >>> This is not a fault.Product does not operate.
- The mains fuse is defective or has tripped. >>> Check fuses in the fuse box. If necessary, replace or reset them. • Product is not plugged into the (grounded) socket. >>> Check the plug connection.Oven light does not work.
- Oven lamp is defective. >>> Replace oven lamp. - Power is cut. >>> Check if there is power. Check the fuses in the fuse box. If necessary, replace or reset the fuses.Oven does not heat.
- Might not be set to a certain cooking function and/or temperature. >>> Set the oven to a certain cooking function and/or temperature. - In models equipped with a timer, the timer is not adjusted. >>> Adjust the time. (In products with microwave oven, timer controls only microwave oven.) - Power is cut. >>> Check if there is power. Check the fuses in the fuse box. If necessary, replace or reset the fuses.There is no ignition spark.
• No current. >>> Check fuses in the fuse box. • Time is not set. >>> Set the time.There is no gas.
• Main gas valve is closed. >>> Open gas valve. • Gas pipe is bent. >>> Install gas pipe properly.Burners are not burning properly or at all.
- Burners are dirty. >>> Clean burner components. - Burners are wet. >>> Dry the burner components. - Burner cap is not mounted safely. >>> Mount the burner cap properly. • Gas valve is closed. >>> Open gas valve. • Gas cylinder is empty (when using LPG). >>> Replace gas cylinder.(In models with timer) Clock display is blinking or clock symbol is on.
\- A previous power outage has occurred. >>> Adjust the time / Switch of the product and switch it on again.  Consult the Authorised Service Agent or technician with licence or the dealer where you have purchased the product if you can not remedy the trouble although you have implemented the instructions in this section. Never attempt to repair a defective product yourself. Arcelik A.S. Karaağaç Caddesi No:2-6 Sütlüce, 34445, Turkey Made in TURKEY Importer in Russia: «BEKO LLC» Address: Selskaya street, 49, Fedorovskoe village, Pershinskoe rural settlement, Kirzhach district, Vladimir region, Russian Federation 601021 The manufacture date is included in the serial number of a product specified on rating label, which is located on a product, namely: first two figures of serial number indicate the year of manufacture, and last two – the month. For example, "10-100001-05" indicates that the product was produced in May, 2010. You can ask for certification number from our Call Center 8-800-200-23-56 The manufacturer reserves the right for making changes in modification, design and specification of an electric device.beko
Плита Руководство пользователя  RURead this user manual before using the product!
Уважаемый покупатель! Спасибо за то, что отдали предпочтение продукции компании «Веко». Надеемся, что это высококачественное изделие, изготовленное с применением самых современных технологий, будет демонстрировать наилучшие результаты эксплуатации. Для этого перед началом эксплуатации внимательно прочитайте это руководство и всю сопутствующую документацию и используйте его в дальнейшем в качестве справочника. Если вы передаете изделие новому владельцу, передайте ему и руководство пользователя. Придерживайтесь всех предупреждений и информации, содержащихся в руководстве. Помните, что данное руководство пользователя также может быть применимо к некоторым другим моделям. Различия между моделями будут указаны в руководстве.Explanation of symbols
В данном руководстве пользователя используются следующие символы:  Важная информация или полезные советы по использованию.  Предупреждение о ситуациях, опасных для жизни людей и имущества.  Предупреждение об опасности поражения электрическим током.  Предупреждение об опасности пожара.  Предупреждение о горячих поверхностях. 1 Важные инструкции и предупреждения по технике безопасности и охране окружающей среды 4 Общие правила техники безопасности....4 Правила техники безопасности при работе с газовым оборудованием....5 Электробезопасность......6 Безопасность изделия....8 Использование по назначению....11 Безопасность детей 11 Утилизация старого изделия....12 Утилизация упаковочных материалов....12 Для будущей транспортировки 12 2 Общие сведения 13 Обзор 13 Содержание упаковки 14 Технические характеристики.....15 Характеристики горелок....16 3 Установка 17 До начала установки....17 Установка и подключение .....19 Переход на другой вид газа 23 4 Подготовка к эксплуатации 25 Рекомендации по экономии электроэнергии ....25 Подготовка к эксплуатации ....25 Очистка прибора перед началом эксплуатации25 Первоначальный прогрев.... 25 5 Правила эксплуатации варочной панели 26 Общие сведения о приготовлении пищи..... 26 Эксплуатация варочных панелей.... 26 6 Правила эксплуатации духовки 28 Общие сведения о выпекании, жарении и приготовлении с грилем.... 28 Правила эксплуатации электрической духовки 29 Режимы работы....29 Использование часов духовки.... 30 Время приготовления блюд 31 Как пользоваться грилем.... 34 Время приготовления блюд на гриле 35 7 Уход и техническое обслуживание 36 Общие сведения.... 36 Чистка варочной панели.... 36 Чистка панели управления 37 Чистка духовки 37 Снятие дверцы духового шкафа 38 Снятие внутреннего стекла дверцы.... 38 Замена лампочки освещения духового шкафа 39 8 Поиск и устранение неисправностей 401 Important instructions and warnings for safety and environment
В данном разделе содержатся инструкции по технике безопасности, которые помогут вам избежать травм и повреждений. При несоблюдении этих правил все гарантийные обязательства аннулируются. Общие правила техники безопасности \- Это изделие может эксплуатироваться детьми старше 8 лет и людьми с ограниченными физическими, сенсорными или умственными способностями, а также лицами, не имеющими достаточного опыта и знаний, только в том случае, если они находятся под наблюдением лиц, ответственных за их безопасность, или проинструктированы на предмет безопасного использования изделия и осознают связанные с этим риски. Следите за тем, чтобы дети не играли с устройством. Дети могут чистить и обслуживать устройство только под наблюдением. • Прибор не должен использоваться лицами (включая детей) с ограниченными физическими, сенсорными или умственными способностями или недостатком опыта и знаний, за исключением случаев, когда использование происходит под непосредственным контролем или в соответствии с указаниями. Следите за детьми, чтобы они не играли с прибором. • В случае передачи изделия третьему лицу в личное пользование или в целях вторичного использования необходимо также передать руководство пользователя, наклейки изделия, а также другие связанные с ним документы и компоненты. \- Не устанавливайте устройство на ковровом покрытии. Недостаточная вентиляция под днищем устройства может привести к перегреву электрических деталей и проблемам в работе изделия. \- Работы по установке и ремонту должны выполняться только представителями авторизованной сервисной службы. Производитель не несет ответственности за повреждения в результате выполнения работ лицами, не имеющими соответствующей квалификации. Это также может привести к аннулированию гарантии. Перед установкой внимательно прочтите инструкции. - Не пользуйтесь неисправным изделием, а также при наличии на нем заметных повреждений. - Проверяйте, чтобы после каждого использования переключатели функций изделия были выключены. Правила техники безопасности при работе с газовым оборудованием - Все работы с газовыми приборами и системами должны выполнять только квалифицированные специалисты, имеющие право на выполнение таких работ. • Перед установкой проверьте, соответствуют ли параметры местной распределительной сети (давление и тип газа) настройкам прибора. \- Это устройство не подсоединяется к устройству для удаления продуктов горения. Это устройство не подсоединяется к устройству для удаления продуктов горения. Установка и подключение прибора должны выполняться в соответствии с действующими нормами и правилами. Особое внимание следует уделить требованиям к вентиляции (см. раздел До начала установки, стр. 17). - ОСТОРОЖНО: Во время эксплуатации газовой плиты она выделяет тепло, влагу и продукты сгорания в помещении, в котором установлена. Убедитесь, что кухня хорошо проветривается, в особенности во время использования прибора: держите открытыми отверстия, через которые осуществляется естественная вентиляция, или установите прибор для искусственной вентиляции (механическую надплитную вытяжку). Длительное интенсивное использование прибора может требовать дополнительной вентиляции, например, увеличения уровня мощности механической вытяжки, если она имеется. \- Необходимо регулярно проверять исправность газовых приборов и систем. Регулятор, шланг и его хомут следует проверять регулярно и заменять в сроки, рекомендованные производителем, или по мере необходимости. \- Регулярно очищайте газовые горелки. Горелка должна гореть ровным голубым пламенем. \- Данное изделие должно использоваться в помещении, где установлен правильно отрегулированный и работоспособный датчик угарного газа. Убедитесь, что датчик угарного газа работает правильно и регулярно проходит техническое обслуживание. Датчик угарного газа должен устанавливаться на расстоянии не более 2 м от изделия. • В газовых приборах необходимо обеспечить полное сжигание газа, так как при неполном сгорании газа выделяется угарный газ (СО). Угарный газ (монооксид углерода) - это очень ядовитый бесцветный газ без запаха, который даже в очень малых дозах вызывает отравление и смерть. \- Узнайте у своего поставщика газа телефон местной аварийной службы газа, а также ознакомьтесь с мерами предосторожности, которые необходимо предпринимать при обнаружении запаха газа. Меры предосторожности при обнаружении запаха газа \- ⬤Не пользуйтесь открытым пламенем и не курите. Не пользуйтесь электрическими выключателями (например, выключателем освещения, дверным звонком и т.д.). Не пользуйтесь стационарными и мобильными телефонами. Остерегайтесь взрыва и отравления газом! • Перекройте все краны газовых приборов и газовых счетчиков • Откройте окна и двери. \- Проверьте все трубы и соединения на герметичность. Если запах газа не исчезает, покиньте помещение. • Предупредите соседей. \- Вызовите пожарную команду. Звоните по телефонному аппарату, который находится за пределами дома. \- Не входите в помещение, пока вам не сообщат, что это безопасно. Электробезопасность • В случае неисправности следует прекратить эксплуатацию изделия, пока оно не будет отремонтировано в авторизованном сервисном центре. Существует риск поражения электрическим током! \- Изделие можно подключать только к заземленной розетке/линии, напряжение и уровень защиты которой соответствуют параметрам, указанным в разделе «Технические характеристики». Установку заземления должен выполнять квалифицированный специалист (при использовании прибора с трансформатором или без него). Наша компания не несет ответственности за какие-либо проблемы, возникшие вследствие использования изделия без заземления, выполненного в соответствии с местными нормами и правилами. \- Никогда не лейте воду на изделие во время мытья! Существует риск поражения электрическим током! \- Категорически запрещается дотрагиваться к штепсельной вилке влажными руками! Не тяните за кабель питания. Вынимая вилку из розетки, беритесь непосредственно за вилку. \- Прежде чем приступить к установке, техническому обслуживанию, чистке и ремонту, изделие необходимо отключить от электросети. - Во избежание несчастных случаев при повреждении кабеля питания его замену должен выполнять производитель, его специалист по сервису или лицо, имеющее аналогичную квалификацию. \- Электроприбор следует устанавливать таким образом, чтобы его можно было полностью отсоединить от сети электропитания. Отсоединение должно осуществляться с помощью штепсельной вилки или выключателя, встроенного в фиксированную сеть электропитания, в соответствии со строительными нормативами и правилами. \- Задняя стенка духового шкафа во время работы сильно нагревается. Следите за тем, чтобы газовые шланги и электрические провода не соприкасались с задней стенкой, так как это может привести к их повреждению. - Следите за тем, чтобы шнур питания не был зажат между рамой и дверцей духового шкафа, и не прокладывайте его по горячим поверхностям. В противном случае изоляция кабеля может расплавиться, что приведет к короткому замыканию и пожару. - Все работы с электрическим оборудованием и системами должны выполняться только квалифицированными специалистами, допущенными к выполнению таких работ. • В случае какого-либо повреждения выключите прибор и отсоедините его от электросети. Для этого выключите общий предохранитель в доме. - Проверьте, соответствуют ли изделию номинальные характеристики предохранителя.Product safety
• ВНИМАНИЕ: Данное изделие и его внешние части нагреваются в процессе использования. Будьте осторожны, не касайтесь нагревательных элементов. Детей младше 8 лет следует допускать к духовому шкафу только под постоянным присмотром взрослых. - Не пользуйтесь прибором, находясь под воздействием алкоголя или лекарственных препаратов, снижающих скорость реакции или нарушающих координацию движений. - Будьте осторожны при использовании спиртных напитков в приготавливаемых блюдах. При высокой температуре спирт испаряется и при соприкосновении с горячими поверхностями может загореться и вызвать пожар. - Не располагайте рядом с прибором легковоспламеняющиеся материалы, так как во время работы его боковые поверхности могут сильно нагреваться. - Во время работы устройство может нагреваться. Будьте осторожны, не касайтесь нагревательных элементов внутри духового шкафа. - Следите за тем, чтобы вентиляционные отверстия были полностью открыты. - Не разогревайте в духовом шкафу продукты в закрытых жестяных или стеклянных банках. Внутри банок может повыситься давление, что приведет к взрыву. - Не ставьте противни или посуду непосредственно на дно духового шкафа, а также не кладите на него алюминиевую фольгу. Избыточное тепло может привести к повреждению дна духового шкафа. - Не используйте для чистки стеклянной дверцы духового шкафа грубые абразивные чистящие средства или острые металлические скребки, чтобы не поцарапать поверхность, поскольку это может привести к разрушению стекла. - Не используйте для чистки устройства пароочистители, поскольку это может привести к поражению электрическим током. • (Может отличаться в зависимости от модели изделия.) Правильное расположение проволочной решетки и противня на направляющих Проволочную решетку и/или противень следует правильно устанавливать на направляющие. Вставьте проволочную решетку или противень между 2 направляющими и проверьте, устойчиво ли держится решетка или противень (см. рисунок). Только после этого можно класть на них продукты. 2 General information
Обзор   1 Передняя дверца 2 Ручка дверцы 3 Нижний выдвижной ящик 4 Противень 5 Проволочная решетка 6 Панель управления 7 Крышка конфорки 8 Верхняя крышка 9 Двигатель вентилятора (за стальной пластиной) 10 Лампочка 11 Нагревательный элемент гриля 12 Положения полок  1 Лампочка термостата 2 Механический таймер (Это зависит от модели. Таймер вашего продукта может составлять 100 или 90 минут. На иллюстрации в качестве примера показаны 100 минут.) 3 Ручка термостата 4 Ручка выбора функции 5 Нормальная конфорка Задняя левая 6 Конфорка быстрого нагрева Передняя левая 7 Дополнительная конфорка Передняя правая 8 Нормальная конфорка Задняя праваяPackage contents
 Изделие комплектуется различным набором дополнительных принадлежностей в зависимости от модели. Некоторые дополнительные принадлежности, описанные в руководстве пользователя, в комплекте этого изделия могут отсутствовать.1. User manual
2. Standard baking tray
Предназначен для выпечки изделий из теста, размораживания замороженных продуктов и жарения продуктов большими кусками. 3. Deep baking tray
Предназначен для выпечки изделий из теста, жарения продуктов большими кусками, сочных блюд, а также для сбора стекающего жира при приготовлении на гриле. 4. Wire rack
Предназначена для жарения, а также для размещения продуктов на нужной полке при выпечке, жарении или приготовлении в формах.   5. Правильное расположение проволочной решетки на выдвижных направляющих (Данная функция — дополнительная. Она может отсутствовать в вашем изделии.) Благодаря наличию выдвижных направляющих можно легко устанавливать и выдвигать противни и проволочную решетку. При установке противней или проволочной решетки следите за тем, чтобы края противня или решетки опирались на штырьки, расположенные на задней части выдвижных направляющих.   Технические характеристики| ОБЩИЕ СВЕДЕНИЯ | |
| Габариты (высота / ширина / глубина) | 850 мм/600 мм/600 мм |
| Напряжение/частота | 220-240 В ~ 50 Гц |
| Общая потребляемая мощность | 2.4 кВт |
| Тип кабеля/сечение | мин.H05VV-FG 3 x 1,5 mm2 |
| Категория газового прибора | II 2H3B/P / II 2H3+ |
| Тип газа/давление | NG G 20/20 мбар |
| Общий расход газа | 7.9 кВт |
| Переход на тип газа/давление§ | LPG G 30/28-30 мбар |
| – дополнительно | NG G 20/10 мбар - NG G 20/13 мбар |
| ВАРОЧНАЯ ПАНЕЛЬ | |
| Конфорки | |
| Задняя левая | Нормальная конфорка |
| Мощность | 2 кВт |
| Передняя левая | Конфорка быстрого нагрева |
| Мощность | 2.9 кВт |
| Передняя правая | Дополнительная конфорка |
| Мощность | 1 кВт |
| Задняя правая | Нормальная конфорка |
| Мощность | 2 кВт |
| ДУХОВКА/ГРИЛЬ | |
| Главный духовой шкаф | Многофункциональный духовой шкаф |
| Лампочка внутреннего освещения | 15–25 Вт |
| Гриль: потребляемая мощность | 2.2 кВт |
| Класс защиты -1 | |
Degree of protection IP 44
# Основные сведения Данные на паспортной табличке энергопотребления электрических духовых шкафов приведены в соответствии со стандартом EN 60350-1 / IEC 60350-1. Эти данные определены при стандартной нагрузке с функциями нижнего-верхнего нагревательного элемента или нагрева с помощью вентилятора (при наличии). Класс энергетической эффективности определен в соответствии с приведенными ниже приоритетами в зависимости от наличия или отсутствия соответствующих функций в изделии. 1 - Приготовление с вентилятором - экономичный режим, 2 - Медленное приготовление в турборежиме, 3 - Приготовление в турборежиме, 4 - Нагрев сверху и снизу с вентилятором, 5 - Нагрев сверху и снизу. «Этикетка энергоэффективности представлена на продукте»  При усовершенствовании качества продукции технические характеристики могут быть изменены без предварительного уведомления.  Иллюстрации в данном руководстве являются схематичными и могут несколько отличаться от конкретного изделия.  Значения, указанные на этикетках изделия или в сопроводительной документации, получены в лабораторных условиях согласно соответствующим стандартам. Эти данные могут быть иными в зависимости от условий эксплуатации изделия. Характеристики горелок| Расположение конфорки | 2 кВтЗадняя левая | 2.9 кВтПередняя левая | 1 кВтПередняя правая | 2 кВтЗадняя правая |
| Тип газа /давление | ||||
| G 20/10 мбар | 125 | 155 | 90 | 125 |
| G 20/13 мбар | 116 | 145 | 84 | 116 |
| G 20/20 мбар | 103 | 115 | 72 | 103 |
| G 30/28-30 мбар | 72 | 87 | 50 | 72 |
3 Installation
Прибор должен устанавливаться квалифицированным специалистом в соответствии с действующими нормами и правилами. В противном случае гарантия аннулируется. Производитель не несет ответственности за повреждения в результате выполнения работ лицами, не имеющими соответствующей квалификации. Это может привести к аннулированию гарантии.| i | Подготовка места установки,электрического и газового оборудованияобеспечивается покупателем. |
| ОПАСНО:Бытовой прибор следует устанавливать всоответствии со всеми местными нормамипо подключению газового и/илиэлектрического оборудования. | |
| ОПАСНО:Прежде чем приступить к установке,визуально проверьте отсутствие внешнихдефектов духового шкафа.При наличии дефектов не устанавливайтеего. Поврежденные электроприборыпредставляют собой угрозу вашейбезопасности. |
Before installation
Для того чтобы обеспечить наличие необходимых зазоров для циркуляции воздуха под плитой, рекомендуем устанавливать ее на твердом основании так, чтобы ножки не погружались в ковер или мягкое напольное покрытие. Кухонный пол должен выдерживать вес прибора с учетом веса посуды и продуктов.  - Ее можно использовать с кухонными шкафами с обеих сторон, однако следует оставить свободное пространство минимум 400 мм над уровнем конфорок, а также боковое свободное пространство не менее 65 мм между плитой и стеной, перегородкой или высоким кухонным шкафом. - Плита может также стоять отдельно. Обеспечьте свободное расстояние не менее 750 мм от поверхности плиты до поверхностей над ней. • В случае установки надплитного воздухоочистителя соблюдайте инструкции его производителя в отношении высоты монтажа устройства (мин. 650 мм). - Это устройство соответствует требованиям к приборам класса 1, и его можно устанавливать так, чтобы задняя и одна из боковых стенок примыкали к стенам помещения, стенкам кухонных шкафчиков или бытовых приборов любой высоты. Кухонная мебель или бытовые приборы, примыкающие с другой стороны, должны быть не выше прибора. - Вся кухонная мебель, рядом с которой устанавливается устройство, должна быть термостойкой (не менее 100 °C).Safety circuit
If the appliance is equipped with two safety circuits (2);
Для обеспечения устойчивости изделия его необходимо закрепить с помощью двух предохранительных цепей, входящих в комплект поставки. С помощью соответствующего дюбеля установите крючок (1) в стене кухни (6), а затем подсоедините предохранительную цепь (3) к крючку с помощью карабина (2).  1 Крючок 2 Карабин 3 Предохранительная цепь 4 Прочно закрепите цепь с задней стороны плиты 5 Задняя сторона плиты 6 Стена кухниIf the appliance is equipped with one safety circuit (1);
Для обеспечения устойчивости изделия его необходимо закрепить с помощью входящей в комплект поставки предохранительной цепи на духовом шкафу. Следуйте указаниям на рисунке ниже для крепления предохранительной цепи к изделию.   Предохранительная цепь должна быть как можно короче, чтобы исключить опрокидывание изделия как вперед, так и в сторону. В конструкции предохранительной цепи для плиты нет гнезда для крепления скобы.Room ventilation
Во всех помещениях должно быть открывающееся окно, а в некоторых помещениях потребуется также наличие постоянной вентиляции. Забор воздуха для процесса горения производится в помещении, и уходящие газы выделяются непосредственно в помещение. Поэтому для безопасной эксплуатации устройства необходимо обеспечить в помещении хорошую вентиляцию.Rooms with doors and/or windows that open directly to the outside
В дверях и (или) окнах, которые открываются непосредственно наружу, должно быть общее вентиляционное отверстие с размерами, указанными в таблице ниже, с учетом общей мощности газового потока устройства (общая потребляемая мощность газового потока устройства показана в таблице технических характеристик в данном руководства пользователя). Если в дверях и (или) окнах нет общего вентиляционного отверстия, соответствующего общему расходу газа устройства, как указано в таблице ниже, тогда в помещении обязательно должно быть дополнительное постоянное вентиляционное отверстие, чтобы обеспечить выполнение общих минимальных требований к вентиляции в соответствии с общим расходом газа в данном устройстве. В качестве постоянного вентиляционного отверстия можно применить отверстия для существующих воздуховодов, например отверстия с размерами воздуховода бытовой вытяжки и т. д.| Общий расход газа (кВт) | мин.вентиляционное отверстие (см) 2 ) |
| 0–2 | 100 |
| 2–3 | 120 |
| 3–4 | 175 |
| 4–6 | 300 |
| 6–8 | 400 |
| 8–10 | 500 |
| 10–11,5 | 600 |
| 11,5–13 | 700 |
| 13–15,5 | 800 |
| 15,5–17 | 900 |
| 17–19 | 1000 |
| 19–24 | 1250 |
Rooms without doors and/or windows that can open directly to the outside
Если в помещении, где устанавливается устройство, отсутствуют дверь и (или) окно, которые открываются непосредственно наружу, следует найти иную продукцию, определенно позволяющую обеспечить наличие постоянного нерегулируемого и незакрываемого вентиляционного отверстия и выполнение общих минимальных требований к вентиляции в соответствии с общим расходом газа в данном устройстве, как указано в приведенной выше таблице. Кроме того, следует соблюдать соответствующие рекомендации по строительным нормам. Если помещение или внутреннее пространство содержит более одного газового устройства, то в дополнение к требованию, указанному в таблице выше, должна быть обеспечена зона дополнительной вентиляции. Размер дополнительной вентиляционной зоны должен соответствовать требованиям других газовых приборов. В помещении, где установлено изделие, также должен быть предусмотрен минимальный свободный зазор 10 мм между полом и нижним краем двери, которая открывается внутрь помещения. Необходимо обеспечить, чтобы такие изделия, как ковры, перекрытия и т. д., не перекрывали данное свободное пространство, когда дверь закрыта. Плита может устанавливаться в кухне, в кухнестоловой или в жилой комнате, но не в помещении с ванной или душем. Плиту запрещается устанавливать в жилой комнате площадью менее 20 кв. м. 3 . Не устанавливайте плиту в помещении, находящемся ниже уровня поверхности, если оно не выходит на уровень поверхности хотя бы одной стороной.Installation and connection
Прибор следует устанавливать и подключать в соответствии с действующими нормами и правилами.  Не устанавливайте изделие рядом с холодильником или морозильной камерой. Поскольку духовой шкаф излучает тепло, холодильники будут потреблять больше электроэнергии. • Переносить прибор должны не менее двух человек. - Прибор следует устанавливать прямо на пол. Не устанавливайте прибор на подставки.  Не перемещайте устройство, держась за дверцу и/или за ручку дверцы. Дверца, ручка или петли могут повредиться.Electrical connection
Подключайте изделие к розетке или линии с заземлением, защищенной миниатюрным автоматическим выключателем с соответствующим номиналом, который указан в таблице «Технические характеристики». Установку заземления должен выполнять квалифицированный электрик (при использовании изделия с трансформатором или без него). Наша компания не несет ответственности за ущерб, понесенный вследствие использования изделия без заземления, выполненного в соответствии с местными нормами и правилами. DANGER:
Подключение прибора к электросети должен выполнять квалифицированный специалист, имеющий право на выполнение таких работ. Гарантийный период начинается только после правильной установки. Производитель не несет ответственности за повреждения в результате выполнения работ лицами, не имеющими соответствующей квалификации. DANGER:
Шнур питания не должен быть сдавлен, изогнут или зажат, а также не должен соприкасаться с нагревающимися компонентами изделия. Замену поврежденного шнура питания должен выполнять квалифицированный электрик. В противном случае это может привести к поражению электрическим током, короткому замыканию или возгоранию! Параметры электрической сети должны соответствовать данным, указанным на паспортной табличке прибора. Паспортную табличку можно увидеть либо при открытой дверце или нижней крышке, либо на задней стенке прибора, в зависимости от типа прибора. Шнур питания прибора должен соответствовать параметрам, указанным в таблице "Технические характеристики".  К штепсельной вилке шнура питания после установки должен быть обеспечен легкий доступ (не прокладывайте шнур над варочной поверхностью).  При монтаже проводки необходимо соблюдать национальные/местные электротехнические правила и нормы, а также использовать соответствующие розетки/штепсельные вилки и вилку для духовки. В случае если предельные значения мощности продукции превышают допустимую нагрузку на вилку и розетку, изделие должно быть подключено через стационарное электрическое оборудование напрямую без использования вилки и розетки. DANGER:
Перед выполнением каких-либо электромонтажных работ отключите прибор от электрической сети. Существует риск поражения электрическим током! Включите шнур питания в розетку.Gas connection
DANGER:
Подключение прибора к электрической сети должен выполнять квалифицированный специалист, имеющий право на выполнение таких работ. Непрофессиональный ремонт может привести к взрыву или отравлению газом! Производитель не несет ответственности за повреждения в результате выполнения работ лицами, не имеющими соответствующей квалификации. DANGER:
Перед выполнением каких-либо работ по монтажу газовых приборов перекройте подачу газа. Это может привести к взрыву! \- Тип и давление газа, на которые отрегулирован прибор, указаны на паспортной таблице или маркировке.  На ваше изделие может подаваться природный газ (NG). - Узел подачи природного газа должен быть надлежащим образом подготовлен к сборке перед установкой изделия. • Подключение вашего изделия к газораспределительной сети будет выполняться авторизованным персоналом. • Для подключения изделия к газораспределительной сети на выпускном отверстии узла должна быть гибкая труба, а конец трубы должен быть закрыт глухой заглушкой. Глухая заглушка должна быть удалена при выполнении соединения, а изделие подключается с использованием плоского соединительного устройства (рукава). - Глухая заглушка должна быть удалена при выполнении соединения, а изделие подключается с использованием плоского соединительного устройства (рукава). \- Если впоследствии возникнет необходимость перевести изделие на другой вид газа, обратитесь в авторизованный сервисный центр по вопросу выполнения соответствующей процедуры.If the appliance is equipped with one gas outlet pipe;
• Перед подсоединением газового шланга проверьте, что выпускное отверстие газового шланга в задней части изделия находится на той же стороне изделия, что и клапан подачи природного газа.  \- Если выпускное отверстие газового шланга и клапан подачи природного газа не расположены на одной стороне, проверьте, чтобы шланг при соединении не проходил через зону повышенной температуры. If the appliance is equipped with two gas outlet pipes;
• Один из двух газовыпускных патрубков закрыт глухой заглушкой, а другой закрыт пластмассовой заглушкой. Расположение глухой заглушки и пластмассовой заглушки может отличаться в зависимости от изделия.  1 Выпускное отверстие газового шланга 2 Глухая заглушка 3 Пластмассовая заглушка • Перед подключением к газораспределительной сети проверьте, что клапан природного газа и выпускное отверстие газового шланга подключаемого изделия находятся на одной стороне. - Если клапан природного газа и выпускное отверстие газового шланга, закрытое пластмассовой заглушкой, выходят на одну сторону, выполните подключение к газораспределительной сети как показано на рисунке ниже.  \- Если клапан природного газа и газовый шланг, закрытый глухой заглушкой, выходят на одну сторону, снимите и утилизируйте пластмассовую заглушку. Удалите глухую заглушку и закройте выпускное отверстие газового шланга новой (неиспользованной) уплотнительной прокладкой в месте, где не будет выполняться подключение к газораспределительной сети.  • Выполните подключение к газораспределительной сети на выпускном отверстии газового шланга возле клапана подачи природного газа как показано на рисунке ниже. Fire risk:
Выполнение подключения в нарушение представленных ниже инструкций влечет за собой риск утечки газа и пожара. Наша компания не несет ответственности за ущерб, понесенный в результате нарушения инструкций. - Подключение к газораспределительной сети должно выполняться только персоналом авторизованного поставщика услуг. • Подключение изделия к газораспределительной сети обязательно должно выполняться через выпускное отверстие газового шланга возле клапана природного газа. • Пластмассовая заглушка должна быть утилизирована, а выпускное отверстие газового шланга, который не будет использоваться, должно быть закрыто глухой заглушкой. - При закрытии глухой заглушкой выпускного отверстия газового шланга, который не будет использоваться, обязательно должна быть использована новая и неиспользованная уплотнительная прокладка. DANGER:
Гибкий газовый шланг должен быть подсоединен таким образом, чтобы он не касался окружающих его движущихся частей и чтобы они не зацепляли шланг при движении. (например, выдвижные ящики) Кроме того, шланг не должен располагаться в тех местах, где он может быть пережат. DANGER:
Газовый шланг не должен быть сдавлен, изогнут или зажат, а также не должен соприкасаться с нагревающимися компонентами изделия. Поврежденный газовый шланг может привести к взрыву.Checking the connection for gas leaks
- Установите все регуляторы изделия в положение «Выключено». Установите все регуляторы изделия в положение «Выключено». Для проверки утечки газа приготовьте мыльную пену и нанесите ее на место подсоединения шланга. • Для проверки утечки газа приготовьте мыльную пену и нанесите ее на место подсоединения шланга. В этом случае еще раз проверьте подсоединение газового шланга. - Если изделие оснащено двумя газовыпускными патрубками, обеспечьте, чтобы неиспользуемый газовыпускной патрубок был закрыт глухой заглушкой. Приготовьте мыльную пену и нанесите ее на точку установки глухой заглушки для проверки на наличие утечек газа. В случае утечки газа мыльная пена будет пузыриться. В этом случае еще раз проверьте установку глухой заглушки. • Вместо мыльной пены вы можете использовать имеющиеся в продаже спреи для проверки утечки газа.  Ни в коем случае не используйте для проверки утечки газа спички или зажигалку. • Придвиньте прибор к стене кухни. • Регулирование ножек духовки При наличии вибрации посуда во время приготовления может сдвигаться. Для предотвращения опасных ситуаций необходимо, чтобы прибор стоял ровно и устойчиво. В целях безопасности, выровняйте прибор с помощью 4 регулируемых ножек ножки. Для этого поворачивайте их влево и вправо до тех пор, пока прибор не будет ровно стоять на столешнице.Final check
1. Проверьте, работают ли электрические компоненты. 2. Откройте подачу газа. 3. Проверьте места подключение газа на надежность закрепления и герметичность. 4. Зажгите горелки и проверьте внешний вид пламени.  Пламя должно быть голубым и иметь обычную форму. Если пламя имеет желтоватый оттенок, проверьте положение накладки горелки или прочистите горелку.Conversion to a different gas type
 ОПАСНО: Перед выполнением каких-либо работ по монтажу газовых приборов перекройте подачу газа. Это может привести к взрыву! Для перехода на другой вид газа необходимо заменить все форсунки прибора и отрегулировать все краны для уменьшения подачи газа.Replacing the burner nozzles
1. Снимите накладку горелки и выньте корпус горелки. 2. Вывинтите форсунки, поворачивая против часовой стрелки. 3. Вставьте новые форсунки. 4. Проверьте соединения на надежность закрепления и герметичность.  Расположение новых форсунок указано на упаковке или в таблице на Характеристики горелок, стр. 16.  ((Может отличаться в зависимости от модели изделия.)) В некоторых моделях конфорок форсунка закрыта металлической крышкой. Для замены форсунки металлическую крышку необходимо снять.  1 Устройство газ-контроля (в зависимости от модели) 2 Свеча зажигания 3 Форсунка 4 Горелка  Не снимайте газовые краны горелок без особой необходимости. В случае необходимости замены кранов обращайтесь только в фирменный сервисный центр.Adjusting the gas taps to reduce gas supply
1. Зажгите горелку, которую нужно отрегулировать, и установите ручку регулятора в положение минимального пламени. 2. Снимите ручку регулятора с газового крана. 3. К винту регулировки подачи газа применяйте отвертку соответствующего размера. Для сжиженного нефтяного газа (бутан-пропан) следует повернуть винт по часовой стрелке. Для природного газа следует повернуть винт на один оборот против часовой стрелки. » Нормальная высота прямого пламени при установке регулятора в положение минимального пламени должна составлять 6-7 мм. 4. Если пламя выше, чем нужно, поверните винт по часовой стрелке, если ниже – поверните в противоположную сторону. 5. В качестве заключительной проверки установите регулятор конфорки в положение максимального и минимального пламени и проверьте воспламенение и выключение огня. Положение винта регулировки подачи зависит от типа газового вентиля, используемого в устройстве.  1 Винт регулировки подачи газа  1 Винт регулировки подачи газа  При замене типа газа необходимо также заменить и паспортную табличку прибора, содержащую информацию о потребляемом газе.Checking the nozzles for leaks
Перед выполнением конверсии изделия убедитесь, что все ручки управления находятся в выключенном положении. После правильной конверсии форсунок необходимо проверить каждую форсунку на утечку газа. 1. Убедитесь, что включена подача газа к изделию, при этом все ручки управления должны быть выключены. 2. Каждое отверстие в форсунке блокируется пальцем, прикладывая разумное усилие, чтобы остановить утечку газа, когда соответствующая ручка управления включается и удерживается в нажатом положении, позволяя газу попасть в форсунку. 3. Нанесите подготовленную мыльную воду на соединение форсунки с помощью небольшой щетки. Если в месте соединения форсунки есть утечка газа, мыльная вода начнет пениться. В этом случае затяните форсунку с разумным усилием и повторите шаг 3 еще раз. 4. Если пена появляется снова, необходимо немедленно отключить подачу газа на изделие и вызвать специалиста из авторизованного сервисного центра или мастера с лицензией. Не используйте изделие до проведения работ авторизованным сервисным центром. 4 Preparation for use
Recommendations for saving energy
Эти рекомендации помогут вам использовать изделие экологически чистым способом и экономить электроэнергию. - Используйте в духовом шкафу темную или эмалированную посуду: это позволит улучшить теплопередачу. - Прогревайте духовой шкаф перед приготовлением пищи, если это рекомендуется в руководстве пользователя или в инструкциях по приготовлению продуктов. • Во время приготовления пищи не открывайте дверцу духового шкафа слишком часто. - По возможности старайтесь готовить в духовом шкафу несколько блюд одновременно. При приготовлении пищи на решетку можно устанавливать по две емкости с продуктами. • Готовьте блюда одно за другим. Духовой шкаф уже будет прогрет. • Для экономии электроэнергии можно выключать духовой шкаф за несколько минут до окончания приготовления блюда. Не открывайте дверцу духового шкафа. - Размораживайте замороженные продукты перед приготовлением. • Готовьте пищу в закрытой посуде. При приготовлении в открытой посуде энергопотребление может возрасти в 4 раза. - Выбирайте конфорку соответственно размеру дна посуды. Обязательно выбирайте посуду соответственно объему приготовляемого блюда. Чем больше объем посуды, тем выше энергопотребление.Preparation for operation Cleaning the appliance before use
 Некоторые моющие средства и чистящие материалы могут повредить поверхность. Не используйте для чистки агрессивные моющие средства, чистящие порошки/кремы, а также острые предметы. 1. Снимите все упаковочные материалы. 2. Протрите поверхность прибора влажной тканью или губкой и вытрите насухо.Initial heating
Прогрейте прибор в течение 30 минут, а затем выключите. Это обеспечит выгорание и удаление производственных загрязнений и покрытий. WARNING!
Горячие поверхности могут причинить ожоги! Во время работы прибор может сильно нагреваться. Не прикасайтесь к горячим конфоркам, внутренним частям духового шкафа, нагревательным элементам и т.п. Не разрешайте детям приближаться к нему. Помещая продукты в горячий духовой шкаф или вынимая их оттуда, обязательно пользуйтесь термостойкими рукавицами.Electric oven
1. Выньте из духового шкафа все противни и решетку. 2. Закройте дверцу духового шкафа. 3. Выберите положение Static (Статический) 4. Включите гриль на максимальную мощность (см. раздел Правила эксплуатации электрической духовки, стр. 29). 5. Дайте духовому шкафу поработать около 30 минут. 6. Затем выключите духовой шкаф (см. раздел Правила эксплуатации электрической духовки, стр. 29).Oven with grill
1. Выньте из духового шкафа все противни и решетку. 2. Закройте дверцу духового шкафа. 3. Включите гриль на максимальную мощность (см. раздел Как пользоваться грилем, стр. 34). 4. Дайте духовому шкафу поработать около 15 минут. 5. Затем выключите духовой шкаф (см. раздел Как пользоваться грилем, стр. 34).  При первом включении в течение нескольких часов возможно выделение дыма и запаха. Это вполне нормально. Убедитесь, что кухня хорошо проветривается, чтобы удалить дым и запах. Не вдыхайте выделяющиеся дым и запахи.5 Operating rules for the hob
General information about cooking
 Не заполняйте кастрюлю растительным маслом более чем на одну треть. При нагревании масла не оставляйте варочную панель без присмотра. Остерегайтесь возгорания раскаленных масел. Не тушите огонь водой! При возгорании масла накройте посуду одеялом или влажной тканью. По возможности выключите варочную панель и позвоните в пожарную службу. • Перед жареньем продукты нужно обязательно обсушивать. Опускайте продукты в горячий жир с осторожностью. Замороженные продукты перед жареньем следует полностью разморозить. - Посуду, в которой разогревается жир, накрывать нельзя. - Посуду следует ставить на плиту таким образом, чтобы ручки не нагревались над горячей поверхностью плиты. Не ставьте на плиту неустойчивую посуду, которая легко опрокидывается. - Не ставьте на включенные конфорки пустую посуду – это может привести к ее повреждению. - Не оставляйте включенными конфорки, на которых нет посуды – это может привести к повреждению плиты. Обязательно выключайте конфорки после окончания приготовления пищи. - Не ставьте на плиту пластмассовую или алюминиевую посуду, так как на горячей поверхности они могут расплавиться. Такую посуду также не следует использовать для хранения пищевых продуктов. - Можно использовать только посуду с плоским дном. • Размер посуды должен соответствовать количеству продуктов. Тогда продукты не будут выплескиваться из посуды, и не придется лишний раз мыть плиту. Не кладите на конфорки крышки кастрюль. Размещайте посуду по центру конфорки. Если нужно переместить посуду на другую конфорку, поднимите ее и переставьте. Ни коем случае не передвигайте посуду по поверхности плиты.Cooking on a gas burner
• Диаметр пламени должен соответствовать размеру посуды. Пламя газовой конфорки следует регулировать таким образом, чтобы оно не выходило за пределы дна посуды. Посуду следует ставить по центру конфорки.Operating the hobs
 1 Нормальная конфорка 18-20 см 2 Конфорка быстрого нагрева 22-24 см 3 Дополнительная конфорка 12-18 см 4 Нормальная конфорка 18-20 см список рекомендованных диаметров посуды для использования на соответствующих конфорках. WARNING!
Не пользуйтесь посудой вне указанной зоны. Использование посуды большого размера вызывает опасность отравления угарным газом, перегрев прилегающих поверхностей и ручек управления. Использование небольшой посуды приводит к риску получения ожогов от пламени. Большой символ пламени соответствует максимальному уровню мощности, а маленький символ пламени – минимальному. В положении «выключено» (верхняя точка) подача газа к горелкам прекращается.Igniting the gas burners
1. Прижмите регулятор горелки и 2. поверните его против часовой стрелки в сторону большого символа пламени. » При этом вспыхнет искра, и газ загорится. 3. Установите нужный уровень мощности.Turning off the gas burners
Поверните регулятор зоны подогрева в положение «Выключено» (вверх). Система предотвращения утечки газа (в моделях с термопарой)  1. Система предотвращения утечки газа Горелки снабжены предохранительным механизмом, прекращающим подачу газа, если пламя внезапно погаснет, например, его зальет жидкость. • Для розжига прижмите регулятор и поверните его против часовой стрелки. - Чтобы включить систему защиты, после воспламенения газа удерживайте регулятор в нажатом положении еще 3-5 секунд. - Если после нажатия и отпускания регулятора пламя погаснет, повторите те же действия, удерживая регулятор в нажатом положении в течение 15 секунд. DANGER:
Если в течение 15 секунд розжиг горелки не произошел, отпустите кнопку. Повторите попытку не ранее, чем через 1 минуту. Существует риск накопления газа и взрыва!6 Operating rules for the oven
General information about baking, roasting, and grilling
WARNING!
Горячие поверхности могут причинить ожоги! Во время работы прибор может сильно нагреваться. Не прикасайтесь к горячим конфоркам, внутренним частям духового шкафа, нагревательным элементам и т.п. Не разрешайте детям приближаться к нему. Помещая продукты в горячий духовой шкаф или вынимая их оттуда, обязательно пользуйтесь термостойкими рукавицами. DANGER:
Будьте осторожны, открывая дверцу духового шкафа, так как наружу может выходить пар. Выпускаемый пар может обжечь вам руки, лицо и/или глаза.Baking tips
- Используйте антипригарные металлические тарелки или алюминиевые контейнеры с соответствующим покрытием, либо термостойкие силиконовые формы. • Рационально используйте площадь решетки. - Устанавливайте форму для выпекания в середине решетки. - Выбирайте правильное положение решетки перед включением духового шкафа или гриля. Не изменяйте положение решетки, когда духовой шкаф горячий. • Держите закрытой дверцу шкафа.Frying tips
- Тушку курицы или индейки и большие куски мяса перед приготовлением рекомендуется сбрызнуть лимонным соком и посыпать черным перцем. Тогда готовое блюдо будет вкуснее. - Мясо с костями следует жарить на 15-30 минут дальше, чем такое же количества мяса без костей. - На каждый сантиметр толщины мяса требуется приблизительно 4-5 минут времени приготовления. • По истечении времени приготовления мяса оставьте его в духовом шкафу примерно на 10 минут. Сок лучше распределится внутри куска жареного мяса и не будет вытекать, когда вы будете разрезать мясо. \- Рыбу в термостойкой посуде следует готовить на решетке, установленной на средний или нижний уровень.Grilling tips
При приготовлении на гриле мясо, рыба или птица быстро подрумянивается, сверху образуется хрустящая корочка, и продукт не пересыхает. На гриле можно отлично приготовить не только тонкие куски мяса, шашлыки и сосиски, но и овощи с большим содержанием жидкости (например, помидоры и лук). • Для приготовления на гриле разложите куски продуктов на решетке или на противне с решеткой так, чтобы площадь, занимаемая продуктами, соответствовала размерам нагревательного элемента. • Вставьте проволочную решетку или противень с решеткой в духовой шкаф на нужный уровень. Если продукты готовятся на проволочной решетке, то для сбора жира установите противень на нижний уровень. Используемый противень по размерам должен соответствовать площади, занимаемой готовящимися продуктами. Такой противень может не входить в комплект изделия. Для облегчения очистки противня налейте в него немного воды.  Продукты, которые не подходят для приготовления на гриле, могут привести к возгоранию. На гриле можно готовить только такие продукты, которые выдерживают интенсивный нагрев. Не размещайте продукты слишком близко к задней части гриля. Эта зона нагревается сильнее всего, и жирные продукты могут загореться.Operating instructions for the electric oven
Выберите температуру и режим работы  1 Ручка термостата 2 Ручка выбора функции 1. Настройте таймер духовки на нужную продолжительность приготовления (см. раздел Использование часов духовки, стр. 30). 2. Установите нужный режим работы с помощью ручки выбора функций. 3. Установите нужную температуру с помощью регулятора температуры. » После нагрева духовки в ней будет поддерживаться заданная температура. Во время нагрева будет светиться индикатор температуры.Switching off the electric oven
Переведите таймер духовки в положение отключения.  Когда таймер установлен на определенное время, он выключается автоматически (см. Использование часов духовки, стр. 30 Поверните ручку выбора функций и регулятор температуры в положение отключения (вверх).Oven levels (for models with grill)
Правильно устанавливайте решетку в направляющие. Решетку следует вставить между направляющими, как показано на рисунке. Следите за тем, чтобы решетка не упиралась в заднюю стенку духовки. Чтобы гриль нормально работал, выдвиньте решетку к передней части направляющих и отрегулируйте ее положение с помощью дверцы. (Может отличаться в зависимости от модели изделия.) Operating modes
Приведенная здесь последовательность режимов работы может отличаться от вашей модели.Top and bottom heating
 Работают оба нагревательных элемента — и верхний, и нижний. Продукты подогреваются одновременно сверху и снизу. Этот режим подходит, например, для тортов, разной выпечки, а также кексов и запеканок в формах.. Готовьте только с одним противнем.Bottom heating
 Работает только нижний нагревательный элемент. Подходит для выпечки пиццы и дополнительного обжаривания продуктов с нижней стороны. Эта функция также упрощает очистку паром. Top and bottom heating with fan
 Работают верхний и нижний нагревательные элементы, а также вентилятор, расположенный на задней стенке. Горячий воздух равномерно распределяется внутри духовки с помощью вентилятора. Готовьте только с одним противнем.Fan operation
 Духовой шкаф не нагревается. Работает только вентилятор, расположенный на задней стенке. Замороженные гранулированные продукты медленно размораживаются при комнатной температуре, а приготовленные продукты охлаждаются.Fan Heating (Harprev + fan)
 Работает нагревательный элемент с вентилятором (на задней стенке).  Горячий воздух равномерно распределяется внутри духовки с помощью вентилятора. Как правило, предварительный прогрев не нужен. Подходит для приготовления блюд на разных уровнях духовки. Подходит для приготовления с несколькими противнями. Эта функция также упрощает очистку паром."3D" function (volumetric heating)
 Работают верхний и нижний нагревательные элементы, а также нагревательный элемент с вентилятором, расположенный на задней стенке. Продукты готовятся быстро и равномерно со всех сторон. Готовьте только с одним противнем.Full grill (Enhanced grill)
 Работает большой гриль на потолке духовки. Подходит для приготовления на гриле больших порций мяса. • Для приготовления на гриле положите большие или средние порции под нагревательный элемент гриля на соответствующий уровень полки духового шкафа. - Когда пройдет половина времени, отведенного на приготовление, переверните продукт.Grill+Fan (Grill+fan)
 Действие гриля не такое сильное, как в режиме усиленного гриля • Для приготовления блюд в этом режиме расположите под нагревателем гриля на соответствующем уровне духовки небольшое или среднее количество продукта. - Когда пройдет половина времени, отведенного на приготовление, переверните продукт.Using the oven timer
Preparation and cooking
 Для подготовки духовки к работе необходимо выбрать нужный режим и температуру приготовления, а также установить время. В противном случае духовка работать не будет. 1. Задайте продолжительность приготовления, повернув ручку Time Adjustment (Установка времени) по часовой стрелке. 2. Поставьте блюдо в духовой шкаф. 3. Выберите режим работы и температуру (см. Правила эксплуатации электрической духовки, стр. 29. » Духовка разогреется до заданной температуры, которая будет поддерживаться до установленного времени окончания приготовления. 4. По истечении заданного времени приготовления ручка Time Adjustment (Установка времени) автоматически повернется против часовой стрелки. Прозвучит звуковой сигнал, означающий, что заданное время истекло, и прибор выключится.  Если таймер не используется, выключите его, повернув ручку против часовой стрелки к символу руки. 5. Духовку можно выключить с помощью регулятора времени, ручки выбора функций и регулятора температуры. Время приготовления блюд| i | Значения времени в этой таблице следует считать справочными. Они могут изменяться в зависимости от температуры продуктов, толщины, вида и ваших кулинарных предпочтений. |
Turning off the oven early
1. Поверните регулятор Time Adjustment (Установка времени) против часовой стрелки до упора. 2. Выключите духовку с помощью ручки выбора функций и регулятора температуры. Выпечка и жарение| i | 1-й полкой духового шкафа является нижняя полка. |
| Блюдо | Количество противней | Аксессуары для пользования | Режим работы | Уровень размещения | Температура (°C) | Примерное время приготовления (мин.) |
| Выпечка на противне | Один противень | Стандартный противень* | 3 | 180 | 25 ... 30 | |
| Выпечка в форме | Один противень | Формы для кексов на решетке** | 2 | 180 | 40 ... 50 | |
| Пирожные | Один противень | Стандартный противень* | 3 | 160 | 25 ... 35 | |
| Один противень | Стандартный противень* | 3 | 150 | 30 ... 40 | ||
| 2 противня | 1-Противень для выпечки*3-Стандартный противень* | 1 - 3 | 150 | 35 ... 50 | ||
| 3 противня | 1-Стандартный противень*3-Противень для выпечки*5-Глубокий противень* | 1 - 3 - 5 | 150 | 35 ... 50 | ||
| Бисквит | Один противень | Круглая пружинная сковорода диаметром 26 см на решетке** | 3 | 160 | 25 ... 35 | |
| Один противень | Круглая пружинная сковорода диаметром 26 см на решетке** | 2 | 150 | 30 ... 40 | ||
| 2 противня | 1-Круглая пружинная сковорода диаметром 26 см на решетке**4-Круглая пружинная сковорода диаметром 26 см на противне для выпечки** | 1 - 4 | 150 | 35 ... 45 | ||
| Печенье | Один противень | Противень для выпечки* | 3 | 180 | 25 ... 30 | |
| 2 противня | 1-Противень для выпечки*3-Стандартный противень* | 1 - 3 | 180 | 30 ... 40 | ||
| 3 противня | 1-Противень для выпечки*3-Стандартный противень*5-Глубокий противень* | 1 - 3 - 5 | 180 | 35 ... 45 | ||
| Изделия из теста | Один противень2 противня | Стандартный противень*1-Противень длявыпечки*5-Стандартныйпротивень* | 21 - 5 | 200200 | 30 ... 4045 ... 55 | |
| 3 противня | 1-Противень длявыпечки*3-Стандартныйпротивень*5-Глубокийпротивень* | 1 - 3 - 5 | 200 | 55 ... 65 | ||
| Сдобнаявыпечка | Один противень | Стандартныйпротивень* | 2 | 200 | 25 ... 35 | |
| 2 противня | 1-Противень длявыпечки*3-Стандартныйпротивень* | 1 - 3 | 200 | 35 ... 45 | ||
| 3 противня | 1-Противень длявыпечки*3-Стандартныйпротивень*5-Глубокийпротивень* | 1 - 3 - 5 | 190 | 45 ... 55 | ||
| Закваска | Один противень | Стандартныйпротивень* | 2 | 200 | 35 ... 45 | |
| Лазанья | Один противень | Стеклянная /металлическаяпрямоугольнаясковорода нарешетке** | 2 - 3 | 200 | 30 ... 40 | |
| Пицца | Один противень | Стандартныйпротивень* | 2 | 200 ... 220 | 15 ... 20 | |
| Бифштекс(куском)/жаркое | Один противень | Стандартныйпротивень* | 3 | 25 мин.250/max,затем 180 ...190 | 100 ... 120 | |
| Баранья нога(запеканка) | Один противень | Стандартныйпротивень* | 3 | 25 мин.250/max,затем 190 | 70 ... 90 | |
| Один противень | Стандартныйпротивень* | 3 | 25 мин.250/max,затем 190 | 60 ... 80 | ||
| Жаренаякурица (1,8-2кг) | Один противень | Стандартныйпротивень* | 2 | 15 мин.250/max,затем 180 ...190 | 60 ... 80 | |
| Один противень | Стандартныйпротивень* | 2 | 15 мин.250/max,затем 180 ...190 | 60 ... 80 | ||
| Индейка (5.5кг) | Один противень | Стандартныйпротивень* | 1 | 25 мин.250/max,затем 180 ...190 | 150 ... 210 | |
| Один противень | Стандартныйпротивень* | 1 | 25 мин.250/max,затем 180 ...190 | 150 ... 210 | ||
| Рыба | Один противень | Стандартныйпротивень* | 3 | 200 | 20 ... 30 | |
| Один противень | Стандартныйпротивень* | 3 | 200 | 20 ... 30 | ||
| Для всех типов продуктов рекомендуется произвести предварительный разогрев.* Эти аксессуары могут не поставляться с продуктом.** Эти аксессуары не поставляются с продуктом. Эти аксессуары доступны в продаже. | ||||||
| Блюдо | Количество противней | Аксессуары для пользования | Режим работы | Уровень размещения | Температура (°C) | Примерное время приготовления (мин.) |
| песочное печенье | Один противень | Стандартный противень* | 3 | 140 | 20 ... 30 | |
| Один противень | Стандартный противень* | 3 | 140 | 20 ... 30 | ||
| 2 противня | 1-Стандартный противень*3-Противень для выпечки* | 1 - 3 | 140 | 20 ... 30 | ||
| 3 противня | 1-Стандартный противень*3-Противень для выпечки*5-Глубокий противень* | 1 - 3 - 5 | 140 | 25 ... 35 | ||
| Пирожные | Один противень | Стандартный противень* | 3 | 160 | 25 ... 35 | |
| Один противень | Стандартный противень* | 3 | 150 | 30 ... 40 | ||
| 2 противня | 1-Противень для выпечки*3-Стандартный противень* | 1 - 3 | 150 | 35 ... 50 | ||
| 3 противня | 1-Стандартный противень*3-Противень для выпечки*5-Глубокий противень* | 1 - 3 - 5 | 150 | 35 ... 50 | ||
| Бисквит | Один противень | Круглая пружинная сковорода диаметром 26 см на решетке** | 3 | 160 | 25 ... 35 | |
| Один противень | Круглая пружинная сковорода диаметром 26 см на решетке** | 2 | 150 | 30 ... 40 | ||
| 2 противня | 1-Круглая пружинная сковорода диаметром 26 см на решетке**4-Круглая пружинная сковорода диаметром 26 см на противне для выпечки** | 1 - 4 | 150 | 35 ... 45 | ||
| Яблочный пирог | Один противень | Круглая металлическое блюдо диаметром 20 см на решетке** | 2 | 180 | 50 ... 60 | |
| Один противень | Круглая металлическое блюдо диаметром 20 см на решетке** | 2 | 170 | 50 ... 60 | ||
| 2 противня | 1-Круглая металлическое блюдо диаметром 20 см на решетке**4-Круглая металлическое блюдо диаметром 20 см на противне для выпечки** | 1 - 4 | 170 | 50 ... 60 | ||
| Для всех типов продуктов рекомендуется произвести предварительный разогрев.* Эти аксессуары могут не поставляться с продуктом.** Эти аксессуары не поставляются с продуктом. Эти аксессуары доступны в продаже. | ||||||
Baking tips
- Если изделие получается слишком сухим, следует повысить температуру примерно на 10°C и сократить время приготовления. - Если изделие получается сырым, следует уменьшить количество жидкости или понизить температуру на 10°C. - Если верхняя корочка слишком зарумянивается, следует поставить изделие ниже, понизить температуру и увеличить время приготовления. - Если изделие хорошо пропекается, но снаружи пригорает, следует уменьшить количество жидкости, понизить температуру и увеличить время приготовления.Baking tips
- Если изделие получается слишком сухим, следует повысить температуру примерно на 10°C и сократить время приготовления. Смажьте слои теста смесью из молока, растительного масла, яиц и йогурта. • Следите за тем, чтобы толщина изделия не превышала глубины противня, иначе оно будет долго выпекаться. - Если верхний слой изделия подгорает, а нижний остается сырым, возможно, в нижнем слое изделия слишком много начинки. Чтобы изделие ровно подрумянивалась, старайтесь равномерно распределять начинку между слоями теста и по поверхности изделия.  При выпечке изделий из теста соблюдайте режим и температуру, указанные в таблице рецептов. Если нижний слой изделия плохо пропекается, в следующий раз поставьте противень на один уровень ниже.Tips for cooking vegetable dishes
\- Если овощи выпускают сок и становятся слишком сухими, готовьте их не на противне, а в сковороде под крышкой. В закрытой посуде сок сохранится. \- Если овощное блюдо остается сыроватым, прежде чем готовить овощи в духовом шкафе, можно их проверить или пробланшировать.How to use the grill
 ПРЕДУПРЕЖДЕНИЕ! Закрывайте дверцу во время приготовления пищи на гриле. Горячие поверхности могут причинить ожоги! \- При приготовлении в режиме гриля поверните регулятор времени по часовой стрелке и установите на значок Hand (Рука).Turning on the grill
1. Поверните ручку выбора функций и установите на нужный значок режима «Гриль». 2. Затем установите нужную температуру жаренья. 3. При необходимости прогрейте гриль около 5 минут. » При этом включится индикаторная лампочка температуры.Turning off the grill
1. Поверните ручку выбора функций в положение отключения (вверх).  Продукты, которые не подходят для приготовления на гриле, могут привести к возгоранию. На гриле можно готовить только такие продукты, которые выдерживают интенсивный нагрев. Не размещайте продукты слишком близко к задней части гриля. Эта зона нагревается сильнее всего, и жирные продукты могут загореться Время приготовления блюд на гриле Приготовление блюд на электрическом гриле| Продукты | Аксессуары для пользования | Уровень размещения | Рекомендуемая температура (°C)** | Время приготовления на гриле (прибл.) |
| Рыба | Решетка | 4...5 | 250/max | 20...25 мин. * |
| Курица (куски) | Решетка | 4...5 | 250/max | 25...35 мин. |
| Отбивные из молодой баранины | Решетка | 4...5 | 250/max | 20...25 мин. |
| Ростбиф | Решетка | 4...5 | 250/max | 25...30 мин. # |
| Отбивные из телятины | Решетка | 4...5 | 250/max | 25...30 мин. # |
| Гренки * | Решетка | 4 | 250/max | 1...3 мин. |
| *в зависимости от толщины*Разогрейте в течение 5 минут.**Если температуру гриля вашего продукта невозможно отрегулировать, гриль будет работать при рекомендуемой температуре. | ||||
| Продукты | Аксессуары для пользования | Уровень размещения | Температура (°C) | Примерное время приготовления (мин.) |
| Гренки | Решетка | 4 | 250/max | 1...3 мин. |
| Тефтели (говядина) - 12 кусками | Решетка | 4 | 250/max | 25...35 мин. |
| Переверните еду после 2/3 от общего времени приготовления на гриле. Перед приготовлением любых блюд рекомендуется разогреть духовой шкаф в течение 5 минут. | ||||
7 Care and maintenance
General information
Регулярно выполняйте чистку прибора. Это позволит продлить срок его службы, а также избежать многих проблем. DANGER:
Перед выполнением работ по обслуживанию и чистке отключите прибор от электрической сети. Существует риск поражения электрическим током! DANGER:
Дайте изделию остыть, прежде чем приступить к чистке. Горячие поверхности могут причинить ожоги! - Прибор следует тщательно чистить после каждого использования. Так легче удалять остатки пищи, которые могут пригореть при следующем использовании прибора. • Для чистки прибора не требуются специальные чистящие средства. Прибор можно вымыть теплой водой с добавлением жидким моющего средства, используя мягкую ткань или губку. А затем протереть сухой тканью. - Обязательно протирайте прибор насухо после чистки и сразу же удаляйте попавшую на него жидкость. - Не используйте для чистки ручки и поверхностей из нержавеющей стали чистящие средства, содержащими кислоту или хлор. Эти детали можно протирать мягкой тканью, смоченной в жидком моющем средств (без абразивных добавок), стараясь тереть в одном направлении. • (Данная функция — дополнительная. Она может отсутствовать в вашем изделии.) Не используйте для чистки стеклянной крышки металлические скребки и абразивные чистящие средства, чтобы не повредить поверхность стекла.  Некоторые моющие средства и чистящие материалы могут повредить поверхность. Не используйте для чистки агрессивные моющие средства, чистящие порошки/кремы, а также острые предметы  Не используйте для чистки устройства пароочистители, поскольку это может привести к поражению электрическим током.Cleaning the hob
Cleaning the burner
1. Снимите решетки с варочной поверхности. 2. Снимите все съемные детали горелки и очистите (исключительно вручную) с помощью губки, чистящего средства и горячей воды. 3. Протрите все несъемные детали горелки мокрой тканью. 4. Протрите свечу и нагревательный элемент (если ваша модель оснащена системой розжига и нагревательным элементом) влажной тканью. После этого вытрите поверхность насухо чистой тканью. Отверстия для пламени и свеча должны быть полностью сухими. В противном случае искра при розжиге не возникнет. 5. При установке верхних решеток гриля следите за тем, чтобы горелки находились точно по центру решеток.Assembling the burner
После очистки горелки, разместите детали как указано ниже.  1 Накладка горелки 2 Головка горелки 3 Камера горелки 4 Свеча зажигания (в моделях, оснащенных системой розжига) 1. Установите головку горелки таким образом, чтобы она проходила через свечу зажигания горелки (4). Поверните головку горелки влево и вправо, чтобы убедиться, что она правильно установлена в камере горелки. 2. Установите накладку горелки на головку.Cleaning the control panel
Очистьте панель управления и ручки-регуляторы влажной тканью и вытрите насухо.  Если ваш прибор оснащен кнопками/ручками, не снимайте ручки-регуляторы для чистки панели управления. Так можно повредить панель управления!Cleaning the oven
Чистка боковых стенок(Может отличаться в зависимости от модели изделия.) (Данная функция — дополнительная. Она может отсутствовать в вашем изделии.) 1. Снимите переднюю часть боковой решетки, оттянув ее от боковой стенки. 2. Потяните боковую решетку к себе и полностью выньте ее из духовки.  Стенки с каталитическим покрытием (Данная функция — дополнительная. Она может отсутствовать в вашем изделии.) Внутренние боковые стенки (А) и (или) задняя стенка (В) вашего изделия могут быть покрыты каталитической эмалью. Стенки с каталитическим покрытием имеют светлую матовую пористую поверхность. Стенки духового шкафа с каталитическим покрытием не нуждаются в чистке. Благодаря перфорированной структуре, поверхности с каталитическим покрытием поглощают жир и при накоплении жира на поверхность начинают блестеть. В таком случае рекомендуется их заменить.  Simple steam cleaning
Это упрощает чистку, поскольку грязь (после кратковременного ожидания) смягчается паром, образовывающимся в духовом шкафу, и каплями воды, конденсирующимися на внутренних поверхностях духового шкафа. 1. Выньте из духового шкафа все принадлежности. 2. Налейте в противень 500 мл воды и поместите его на 2-ю решетку духовки.  3. Установите духовку до легкого режима очистки паром и работать на 100 °C в течение 25 минут. 4. Откройте дверцу и протрите внутренние поверхности духового шкафа влажной губкой или тканью. 5. Стойкую грязь следует удалять теплой водой с жидким моющим средством, используя мягкую ткань или губку, а после чистки следует вытирать прибор сухой тканью.  При работе в режиме упрощенной очистки паром, вода, налитая в лоток для размягчения образовавшихся осадков/грязи внутри духовки, испарится и конденсируется внутри духовки и на внутренней поверхности двери духовки, поэтому при открытии двери духовки может капать вода. Вытрите конденсат сразу после открытия дверей духовки.Cleaning the oven door
Мойте дверцу духовки мягкой тканью или губкой, смоченной в теплой воде с добавлением жидкого моющего средства, и вытирайте сухой тканью.  Не используйте для чистки дверцы моющие средства с абразивными веществами или металлические скребки. Они могут поцарапать поверхность и повредить стекло.Removing the oven door
1. Откройте переднюю дверцу (1). 2. Откройте зажимы на корпусе петли (2) с правой и левой стороны передней дверцы, нажав на них, как показано на рисунке.  1 Дверца 2 Шарнирный замок(закрытое положение) 3 Духовой шкаф 4 Шарнирный замок(открытая позиция)  3. Откройте переднюю дверцу наполовину.  4. Снимите переднюю дверцу, потянув ее вверх и освободив от правой и левой петли.  Для установки дверцы на место следует выполнить в обратном порядке действия по снятию. Не забудьте закрыть зажимы на корпусе петли при установке дверцы на место. Снятие внутреннего стекла дверцы (Данная функция — дополнительная. Она может отсутствовать в вашем изделии.) Внутреннее стекло панели дверцы духового шкафа можно снять для чистки. 1. Откройте дверцу духовки.  2. Потяните к себе и снимите пластмассовую накладку на верхней стороне дверцы.  3. Приподнимите первое внутреннее стекло (1) в направлении А и вытяните его в направлении В, как показано на рисунке.  1 Первое внутреннее стекло 2* Внутреннее стекло (Она может отсутствовать в вашем изделии.) 4. Если устройство оснащено панелью для внутреннего стекла(2); Чтобы вынуть среднее стекло (2), повторите эти же действия. 5. При сборке дверцы сначала следует вставить среднее стекло (2). чтобы скошенный угол стекла попал на фаску пластмассового держателя, как показано на рисунке. (Если устройство оснащено панелью для внутреннего стекла). Среднее стекло (2) следует установить в пластмассовый держатель рядом с первым внутренним стеклом (1). 6. Первое внутреннее стекло (1) следует устанавливать таким образом, чтобы надпись на стекле была обращена к среднему стеклу. Следите за тем, чтобы нижний угол первое внутреннее стекло (1) был правильно вставлен в нижний пластмассовый держатель. 7. Прижмите пластмассовую накладку к раме до щелчка.Replacing the oven light bulb
 ОПАСНО: Во избежание поражения электрическим током, прежде чем заменять лампочку, убедитесь в том, что электроприбор отсоединен от сети и остыл. Горячие поверхности могут причинить ожоги!  Расположение лампочки может отличаться от изображения на рисунке.  Лампа, используемая в этом приборе, не подходит для освещения бытовых помещений. Эта лампа предназначена для вспомогательной цели, позволяющей пользователю увидеть пищевые продукты.  В этой духовке используется лампа накаливания мощностью менее 40 Вт, высотой менее 60 мм, диаметром менее 30 мм или галогенная лампа с цоколем типа G9, мощностью менее 60 Вт. Лампы подходят для работы при температуре выше 300 °C. Лампы для духовки можно получить у авторизованных сервисных агентов или у технического специалиста с лицензией.  Лампы, используемые в этом приборе, должны выдерживать экстремальные физические условия, например температуру выше 50 °C.Replacing the round oven light bulb
1. Отсоедините духовой шкаф от электросети. 2. Снимите стеклянный плафон, повернув его против часовой стрелки.  3. Если в вашей духовке используется лампа типа (A), показанная на рисунке ниже, поверните ее в соответствии с рисунком, чтобы извлечь ее и заменить. Если используется лампа типа (B), потяните и извлеките ее, как показано на рисунке, и замените.   4. Установите на место стеклянный плафон.8 Troubleshooting
Steam is released from the oven during operation.
• Вполне нормально, если пар выделяется во время работы. >>> Это не является неисправностью.The appliance makes metallic noises when heating and cooling.
\- При нагревании металлические детали могут расширяться и издавать звуки. >>> Это не является неисправностью.The appliance does not work.
- Плавкий предохранитель неисправен или сработал. >>> Проверьте плавкие предохранители в блоке предохранителей. При необходимости замените их или включите. • Духовой шкаф не включен в (заземленную) розетку электросети. >>> Проверьте соединение штепсельной вилки.The oven light does not work.
- Лампочка освещения духового шкафа неисправна. >>> Замените лампочку освещения шкафа. - Нет электропитания. >>> Проверьте наличие электропитания. Проверьте предохранители в блоке предохранителей. При необходимости замените или включите предохранители.The oven does not heat up.
- Не задана функция или температура. >>> Выберите функцию и установите температуру с помощью переключателя функций и (или) регулятора температуры. • В моделях, оснащенных таймером, таймер не установлен. >>> Установите время. (В моделях с микроволновой печью управление по таймеру действует только для микроволновой печи). - Нет электропитания. >>> Проверьте наличие электропитания. Проверьте предохранители в блоке предохранителей. При необходимости замените или включите предохранители.No spark when igniting.
\- Нет тока. >>> Проверьте предохранители в блоке предохранителей. • Не установлено время. >>> Установите времяGas is not supplied.
• Перекрыт общий газовый кран. >>> Откройте газовый кран. • Перегиб газового шланга. >>> Правильно расположите газовый шланг.The burners burn poorly or not at all.
• Горелки засорены. >>> Очистите компоненты горелки. • Горелки влажные. >>> Просушите компоненты горелки. • Накладка горелки плохо установлена. >>> Правильно установите накладку горелки. • Перекрыт газовый кран. >>> Откройте газовый кран. • Газовый баллон пуст (при использовании сжиженного газа). >>> Замените газовый баллон.(In models with a timer) The digital time indicator flashes, or the clock symbol lights up.
• Ранее произошло отключение электроэнергии. >>> Установите время / Выключите духовой шкаф и включите снова.  Если вы не можете устранить неполадки, несмотря на выполнение инструкций, приведенных в данном разделе, обратитесь к представителю авторизованной сервисной службы. Не пытайтесь самостоятельно отремонтировать неисправный электроприбор. Изготовитель: «Arcelik A.S.» Юридический адрес: Караач Джаддеси № 2-6 34445 Сютлюдже Стамбул, Турция (Karaağaç Caddesi No:2-6 Sütlüce, 34445, Turkey) Произведено в Турции Импортер на территории РФ: ООО «БЕКО» Юридический адрес: 601021 Россия, Владимирская обл., Киржачский р-н, МОСП Першинское, дер. Федоровское, ул. Сельская, д. 49. Информацию о сертификации продукта Вы можете уточнить, позвонив на горячую линию 8-800-200-23-56. Дата производства включена в серийный номер продукта, указанный на этикетке, расположенной на продукте, а именно: первые две цифры серийного номера обозначают год производства, а последние две – месяц. Например, "10-100001-05» обозначает, что продукт произведен в мае 2010 года. Изготовитель оставляет за собой право на внесение изменений в конструкцию, дизайн и комплектацию электроприбора.beko
Stove
Vartotojo vadovas  LTFirst, read this user manual carefully!
Gerbiamas pirkėjau, Ačiū, kad pasirinkote „Beko“ gaminj. Tikimės, kad šiuo gaminiu, kuris buvo pagamintas naudojantis aukščiausios kokybės moderniausią technologiją, liksite patenkinti. Todėl prieš naudojantis šiuo prietaisu prašome perskaityti visą šį vartotojo vadovą ir prie jo pridedamus dokumentus ir pasiliki juos, jei jų prireiktų ateityje. Jeigu atiduotumėte šį gaminį kam nors kitam, kartu atiduokite ir šį vartotojo vadovą. Vadovaukitės visais šiame vartotojo vadove pateikiamais įspėjimais ir informacija. Atminkite, kad šis vartotojo vadovas taip pat taikytinas keletui kitų modelių. Šiame vadove nurodoma, kuo skiriasi įvairūs modeliai.Explanation of symbols
Šiame vartotojo vadove naudojami šie simboliai:  Svarbi informacija arba naudingi patarimai apie šio prietaiso naudojima.  Įspėjimai apie gyvybei ir / arba turtui pavojų keliančias situacijas ir sąlygas.  Jspėjimas dėl elektros smūgio.  Įspėjimas dėl gaisro pavojaus.  Įspėjimas dėl įkaitusių paviršių.1 Important instructions and warnings regarding safety and the environment 4
Bendrieji saugos reikalavimai....4 Sauga atliekant duju prijungimo darbus....4 Elektros sauga....6 Gaminio sauga....7 Numatytoji naudojimo paskirtis 9 Vaikų sauga....9 Seno gaminio išmetimas 9 Pakavimo medžiagų išmetimas....9 Būsimas transportavimas ....102 General information 11
Apžvalga 11 Komplekto turinys....12 Techniniai duomenys 13 Purkštuky lentelė....133 Installation 14
Prieš jrengiant....14 Irengimas ir prijungimas....15 Dujų konversija....184 Preparation Work 21
Patarimai, kaip taupyti energija....21 Naudojant pirmą kartą....21 Pirmasis prietaiso valymas....21 Pradinis šildymas 215 How to use this stove 22
Bendroji informacija apie maisto gaminima ..... 22 Kaitlenčių naudojimas....226 How to use the oven 24
Bendroji informacija apie kepimą, kepinimą ir kepimą grilyje....24 Kaip naudoti elektrine orkaite.... 24 Veikimo režimai....25 Orkaitės laikrodžio naudojimas.... 25 Maisto gaminimo laiko lentelè....26 Kaip naudoti grilj 29 Maisto gaminimo grilyje laiko lentelè 307 Technical service and maintenance31
Bendroji informacija....31 Kaitlentės valymas.... 31 Valdymo skydo valymas 31 Orkaitės valymas.... 31 Orkaitės durelių išėmimas.... 32 Dureliy vidinės stiklo plokštės išėmimas .... 33 Orkaitės lemputės keitimas.... 348 Troubleshooting 35
1 Important instructions and warnings regarding safety and the environment
Šiame skyriuje pateikiamos saugos instrukcijos, kurių laikydamiesi apsisaugosite nuo susižeidimo ar materialinės žalos pavojų. Nesilaikant šių instrukcijų bet kokia prietaiso garantija nebegalios.General safety requirements
- Šj prietaisą galima naudoti vaikams nuo 8 metų amžiaus ir asmenims, turintiems psichinių, jutiminių arba protinių negalių arba patirties bei žinių trūkumo, jeigu jie yra prižiūrimi arba instruktuojami, kaip saugiai naudoti šj prietaisą, ir supranta atitinkamus pavojus. Neleiskite vaikams žaisti su šiuo prietaisu. Vaikams draudžiama valyti ir techniškai prižiūrėti šį gaminį, nebent juos prižiūrėtų suaugusieji. \- Šio prietaiso negalima naudoti asmenims (jskaitant vaikus), turintiems fizinių, jutimo ar psichinių negalių arba neturintiems pakankamai patirties ir žinių, nebent jie būtų prižiūrimi arba instruktuoti. Neleiskite vaikams žaisti su šiuo prietaisu. \- Perduodant jrenginj kitam žmogui asmeniniam naudojimui ar atiduodant kaip panaudotą daiktą, taip pat būtina perduoti naudotojo vadovą, jrenginio etiketes ir kitus susijusius dokumentus. \- Niekada prietaiso nestatykite ant grindų su kilimine danga. Tokiu atveju dėl nepakankamos oro tėkmės po prietaisu elektrinės dalys gali perkaisti. Tai sukels problemų naudojantis šiuo prietaisu. \- Remonto ir techninės priežiūros darbus visuomet privalo atlikti įgaliotojo techninio aptarnavimo centro atstovai. Gamintojas nėra atsakingas už žalą, kilusią dėl darbų, kuriuos atliko neįgaliotieji asmenys; tokiu atveju garantija gali nebegalioti. Prieš montuodami atidžiai perskaitykite instrukcijas. \- Nenaudokite prietaiso, jeigu jis turi defektų arba yra regimai pažeistas. \- Po kiekvieno naudojimo patikrinkite, ar išjungėte prietaiso valdymo mygtukus.Safety during gas connection work
\- Darbus su bet kokiais dujiniais prietaisais ir sistemomis gali atlikti tik įgaliotieji kvalifikuoti asmys. \- Prieš pradėdami įrengimą, įsitikinkite, ar vietos dujų tiekimo sąlygos (slėgis ir dujų rūšis) atitinka šio buitinio prietaiso nustatymą. \- Šis prietaisas nėra prijungtas prie įtaiso, šalinančio degimo metu susidariusius produktus. Jį reikia įrengti ir prijungti atsižvelgiant į galiojančius prietaisų prijuntimo reglamentus. Ypač reikia atkreipti dėmesį į atitinkamus vėdinimo reikalavimus; žr. Prieš įrengiant, puslapis 14 \- DÉMESIO: Naudojant dujinę virykłę, patalpoje, kur ji jrengta, skleidžiama šiluma, drègmė ir degimo produktai. Pasirūpinkite, kad virtuvė būtų gerai védinama, kai prietaisas naudojamas: natūralias védinimo angas laikykite atviras arba jrenkite mechaninės ventiliacijos įtaisus (mechaninį gartraukį). Jeigu prietaisas intensyviai eksploatuojamas ilgą laiką, gali prireikti papildomos ventiliacijos, pavyzdžiui, padidinant mechaninės ventiliacijos (jeigu ji jrengta) pajėgumą. \- Dujiniai prietaisai ir sistemos turi būti regulariai tikrinami, ar jie tinkamai veikia. Privaloma regulariai tikrinti reguliatorių, žarną bei jos spaustuką ir keisti juos kas gamintojo rekomenduojamus laikotarpius arba esant būtinybei. \- Reguliariai valykite dujinius degiklius. Liepsna turi būti mėlyna ir degti tolygiai. \- Šj gaminj reikia naudoti patalpose, kuriose yra tinkamai sureguliuotas ir veikiantis anglies monoksido jutiklis. Ísitikinkite, kad anglies monoksido jutiklis veikia tinkamai ir dažnai atliekama techninė priežiūra. Anglies monoksido jutiklj reikia ïdiegti daugiausiai už 2 metru nuo gaminio. \- Dujiniuose prietaisuose privalo būti gerai sudeginamos dujos. Nevisiškai sudegus dujoms, gali susidaryti anglies monoksido (CO) duju. Anglies monoksidas - bespalvės, bekvapės, nepaprastai nuodingos dujos, kurių net maža dozė gali būti mirtina. \- Teiraukitės informacijos apie duju avarinės tarnybos telefono numerius ir saugos priemones tais atvejais, jei pajustumėte sklindantį duju kvapą.What to do if you smell gas
- Nenaudokite atviros ugnies ir nerūkykite. Nenaudokite jokių elektros mygtukų (pvz., lempos mygtuko, durų skambučio ir kt.). Nenaudokite laidinių ir mobiliojo ryšio telefonų. Sprogimo ir apsinuodijimo pavojus! - Atidarykite duris ir langus. - Uždarykite visas dujinių prietaisų ir dujų matavimo prietaisų sklendes. - Patikrinkite visus vamzdžius ir jungtis, ar jie tvirtai prijungti. Jei vis tiek uodžiate dujas, išeikite iš buto. • Jspėkite kaimynus. - Iškvieskite ugniagesių komandą. Skambinkite ne iš name esančio telefono. - Negrjžkite j patalpas, kol jums nebus leista tai padaryti.Electrical safety
- Jeigu gaminys turi defektu, jo negalima naudoti, kol jo nepataisys jgaliotojo techniniio aptarnavimo centro atstovas. Kyla elektros smūgio pavojus! - Prijunkite šj gaminį prie jžeminto lizdo/elektros linijos, apsaugoto tinkamos kategorijos saugikliu kaip nurodyta skyriuje „Techniniai duomenys“. Ir naudojant su transformatoriumi, ir be jo, įsitikinkite, ar jžeminimo instaliavimą atliko kvalifikuotas elektrikas. Mūsų bendrovė nėra atsakinga už jokius nuostolius, patirtus naudojant gaminį, kuris nėra jžemintas pagal vietos reglamentus. - Niekada neplaukite gaminio, purkšdami arba pildami ant jo vandenji! Kyla elektros smūgio pavojus! - Niekada nelieskite kištukinio lizdo šlapiomis rankomis! Išjungdami niekuomet netraukite už elektros laido, ištraukite laikydami už kištuko. - Atliekant montavimo, techninės priežiūros ir remonto darbus, šis gaminys privalo būti atjungtas nuo maitinimo tinklo. - Jeigu gaminio jungiamasis kabelis būtų pažeistas, jį privalo pakeisti gamintojas, techninės priežiūros specialistas arba kiti panašios kvalifikacijos asmenys, kad būtų išvengta pavojaus. - Prietaisą privaloma jrengti taip, kad prireikus jį galima būtų visiškai atjungti nuo tinklo. Nuo tinklo privaloma arba ištraukiant elektros kištuką, arba naudojant elektros sistemoje jrengtą jungiklj atsižvelgiant į statybos reglamentus. - Naudojimo metu orkaitės galinis paviršius įkaista. Galiniame paviršiuje negalima prijungti duju/elektros jungčių, nes jos gali būti pažeistos. - Neprispauskite jungiamujų laidų tarp orkaitės durelių ir korpuso; nenutieskite jo virš įkaitusių paviršių. Kitaip gali išsilydyti laido izoliacija ir dėl trumpojo jungimo kilti gaisras. - Darbus su bet kokiais elektriniais prietaisais ir sistemomis gali atlikti tik įgaliotieji kvalifikuoti specialistai. - Esant gedimui, išjunkite prietaisą ir atjunkite jį nuo maitinimo tinklo. Norint tai padaryti, pirma išjunkite namų tinklo saugiklj. - Patikrinkite, ar saugiklio elektros saugos klasė yra tinkama šiam gaminiui.Product safety
- JSPÉJIMAS: Prietaisas ir jo prieinamos dalys jkaista naudojimo metu. Būkite atsargūs ir neprisilieskite prie kaitinimo elementų. Neleiskite jaunesniems nei 8 metų amčiaus vaikams būti prie prietaiso, jeigu nuolat jų neprižiūrite. - Nesinaudokite virykle, kai jūsų dėmesys arba koordinacija yra susilpnėjusi dėl alkoholio ir/arba narkotikų vartojimo. - Būkite atsargūs, naudodami pateikaluose bet kokius alkoholinius gērimus. Esant aukštai temperatūrai, alkoholis garuoja; prisilietęs prie karšto paviršiaus, jis gali užsiliepsnoti ir sukelti gaisrą. - Nelaikykite šalia buitinio prietaiso jokių degių medžiagų, nes jo šonai naudojimo metu įkaista. - Eksploatavimo metu prietaisas jkaista Būkite atsargūs ir neprisilieskite prie kaitinimo elementų orkaitės viduje - Pasirūpinkite, kad visos ventiliacijos angos būtų atviros. - Nešildykite orkaitėje maisto skardinėse ir stiklainiuose. Skardinėje/stiklainyje susidaręs slėgis gali juos susprogdinti. - Nedėkite kepimo skardų, indų ar aliuminio folijos tiesiai ant orkaitės dugno. Susikaupusi šiluma gali sugadinti orkaitės dugną. - Orkaitės durelių stiklo nevalykite šiurkščiu abrazyviniu valikliu ar aštriais metaliniais gremžtukais, nes galite subraižyti paviršių ir dėl to stiklas gali sudužti - Nevalykite prietaiso gariniais valymo prietaisais, nes galite patirti elektros smūgj. - (Gali skirtis priklausomai nuo gaminio modelio.) Kaip tinkamai ant bėgelių uždėti grilio groteles ir skardą Svarbu tinkamai padėti grilio groteles ir (arba) riebalų surinkimo skardą ant bėgelių. Įstumkite grilio groteles arba riebalų surinkimo skardą tarp 2 skersinių ir, prieš dėdami ant jų maistą, patikrinkite, ar jie yra stabilūs (žr. toliau esantį paveikslėlj).  2 General information
Apžvalga   1 Priekinės durelės 2 Rankena 3 Apatinis stalčius 4 Skarda 5 Grilio grotelès 6 Valdymo skydelis 7 Degiklio plokšte 8 Viršutinis dangtis 9 Ventiliatoriaus variklis (už plieno plokštės) 10 Lemputé 11 Grilio šildymo elementas 12 Lentynos padétis  1 Termostato lemputé 2 Mechaninis laikmatis (Tai priklauso nuo modelio. Jūsų gaminio laikmatis gali būti 100 arba 90 minučių. Iliustracijoje kaip pavyzdžiai parodytos 100 minučių.) 3 Termostato rankenélé 4 Funkciju parinkimo rankenėlė 5 Jprastas degiklis Galinis kairysis 6 Greitasis degiklis Priekinis kairysis 7 Atsarginis degiklis Priekinis dešinysis 8 Jprastas degiklis Galinis dešinysisPackage contents
 Pateikti priedai gali skirtis priklausomai nuo gaminio modelio. Jūsų gaminyje gali būti ne visi vartotojo vadove aprašyti priedai.1. User manual
2. Standard tray
Naudojama pyragaičiams, šaldytiems maisto produktams ir dideliems kepsniams kepti. 3. Deep baking tray
Naudojama tešlainiams, dideliems kepsniams, sultingiems patiekalams gaminti ir riebalams surinkti kepant grilyje. 4. Grill grate
Naudojamos kepinimui ir maisto produktams, kurie bus kepami, kepinami arba gaminami troškinimo induose, dedamos ant pageidaujamų bėgelių.  5. How to properly insert the grill grate and tray onto the extendable rails
(Ši funkcija yra pasirinktinė. Jūsų gaminyje jos gali nebūti.) Ištraukiami bėgeliai leidžia lengvai įdėti ir išimti skardas bei grilio groteles. Naudodami skardą ir grilio groteles su ištraukiamais bėgeliais, įsitikinkite, kad ištraukiamų bėgelių galinėje dalyje esantys kaiščiai būtų atremti į grilio grotelių ir skardos kraštus.   Techniniai duomenys| BENDRA INFORMACIJA | |
| Išoriniai matmenys (aukštis / plotis / gylis) | 850 mm/600 mm/600 mm |
| Itampa/dažnis | 220-240 V ~ 50 Hz |
| Bendrosios energijos sąnaudos | 2.4 kW |
| Saugiklis | 16 A |
| Laido tipas/ skerspjūvis | min.H05W-FG 3 x 1,5 mm2 |
| Dujinio gaminio kategorija | II 2H3B/P / II 2H3+ |
| Dujų rūšis/slėgis | NG G 20/20 mbar |
| Bendros dujų sąnaudos | 7.9 kW |
| Dujų rūšies / splėgio keitimas$ | LPG G 30/28-30 mbar |
| - pasirenkama | NG G 20/10 mbar - NG G 20/13 mbar |
| VIRYKLĖ | |
| Degikliai | |
| Galinis kairysis | Jprastas degiklis |
| Energija | 2 kW |
| Priekinis kairysis | Greitasis degiklis |
| Energija | 2.9 kW |
| Priekinis dešinysis | Atsarginis degiklis |
| Energija | 1 kW |
| Galinis dešinysis | Jprastas degiklis |
| Energija | 2 kW |
| ORKAITĖ/GRILIS | |
| Pagrindinė orkaitė | Daugiafunkcė orkaitė |
| Vidaus lemputė | 15-25 W |
| Grilio energijos sąnaudos | 2.2 kW |
| Degiklio padėtis | 2 kWGalinis kairysis | 2.9 KWPriekinis kairysis | 1 KWPriekinis dešinysis | 2 KWGalinis dešinysis |
| Dujų rūšis/dujų slėgis | ||||
| G 20/10 mbar | 125 | 155 | 90 | 125 |
| G 20/13 mbar | 116 | 145 | 84 | 116 |
| G 20/20 mbar | 103 | 115 | 72 | 103 |
| G 30/28-30 mbar | 72 | 87 | 50 | 72 |
3 Installation
Prietaisą jrengti turi kvalifikuotas specialistas, vadovaudamasis galiojančiais teisės aktais. Kitaip nebegalios gaminio garantija. Gamintojas nėra atsakingas už žalą, kilusią dėl darbų, kuriuos atliko neįgaliotieji asmenys; tokiu atveju nebegalios ir garantija.  Vartotojas yra atsakingas už vietos, elektros ir duju instaliacijos paruošimą šiam gaminiui. DANGER:
Šis prietaisas turi būti jrengtas ir prijungtas latsižvelgiant į galiojančius vietos duju ir (arba) elektros prijungimo reglamentus. DANGER:
Prieš pradedant instaliaciją, apžiūrėkite šį gaminį, ar jis neturi kokių nors defektų. Jeigu turi, neinstaliuokite jo. Sugadinti gaminiai kelia pajovų jūsų saugai.Before installation
Siekiant užtikrinti, kad po šiuo gaminiu liktu būtinas tarpas orui cirkuliuoti, rekomenduojame statyti šj gaminj ant kieto pagrindo, kad jo kojelès nestovetu ant jokių kilimų ar minkstos kiliminės dangos. Virtuvės grindys turi būti pakankamai tvirtos, kad išlaikytų prietaiso svorį ir papildomą svorį: virtuvės reikmenis, kepimo indus ir maisto produktus.  \- Šj prietaisą galima naudoti spintelėse bet kurioje pusėje, bet, kad virš kaitvietės liktų mažiausiai 400 mm tarpas, tarpas tarp prietaiso ir šoninės sienos, sienelės ar aukštos spintelės turi būti bent 65 mm. - Šj prietaisą galima statyti ir atskirai. Virš viryklės privaloma palikti mažiausiai 750 mm tarpą. (*) Jeigu virš viryklės bus montuojamas gartraukis, žr. gartraukio gamintojo instrukciją dėl tinkamo montavimo aukščio (min. 650 mm). - Šis prietaisas atitinka 1 klasės prietaisų reikalavimus, t.y., jį galima statyti galine ir viena šonine sienele prie virtuvės sienų, virtuvės baldų arba bet kokio dydžio įrenginio. Iš kitos pusės virtuvės baldas ar įrenginys gali būti tik tokio paties dydžio arba mažesnis. - Bet koks prie šio prietaiso esantis virtuvės baldas privalo būti atsparus šilumai (bent iki 100 °C).Safety chain
If your product has 2 safety chains:
Prietaisas turi būti apsaugotas, kad neapvirstu, pritvirtinant ji dviem su orkaite pateiktomis apsauginėmis grandinėmis. Pritvirtinkite kabliuką (1) tinkamu varžtu prie virtuvės sienos (6) ir užkabinkite apsauginę grandinę (3) ant kabliuko, naudodami fiksavimo mechanizmą (2).    1 Stabilumo kabliukas 2 Fiksavimo mechanizmas 3 Apsauginé grandiné 4 Tvirtai pritaisykite grandinę prie viryklės galinės pusės 5 Viryklès galiné pusé 6 Virtuvės sienaIf your product has 1 safety chain:
Prietaisas turi būti apsaugotas, kad neapvirstų, pritvirtinant jį su orkaite pateikta apsaugine grandine. Vykdykite paveikslėlyje pavaizduotus veiksmus, kad pritvirtintumėte apsaugine grandine prie gaminio.  Stabilumo grandinė turi būti kuo trumpesnė, kad apsaugotų viryklę nuo pasvirimo į priekį, į šonus ir įstrižai. Stabilumo grandinė viryklėms, kuriose nėra angos grandinės laikikliui jkabinti.Room ventilation
Visose patalpose turi būti atidaromi langai arba juos atitinkančios vėdinimo priemonės, be to, kai kuriose patalpose reikės ir nuolatinės ventiliacijos angos. Oras degimo procesui palaikyti imamas iš kambario, o dujos ir garai išleidžiami tiesiai j tą patį kambarį. Todėl saugiam prietaiso veikimui užtikrinti būtinas geras vėdinimas.Rooms with doors and/or windows opening directly to the outside
Duryse ir (arba) languose, kurie atsidaro tiesiai j lauką, turi būti bendra ventiliacijos anga, kurios matmenys nurodyti toliau pateikiamoje lentelėje pagal bendrą prietaiso dujinę galią (bendros prietaiso duju sąnaudos parodytos šio vartotojo vadovo techninių specifikacijų lentelėje). Jei duryse ir (arba) languose néra bendros ventiliacijos angos, atitinkančios bendras prietaiso duju sąnaudas, nurodytas toliau pateikiamoje lentelėje, tada patalpoje privalo būti papildoma fiksuota ventiliacijos anga, kad būtų užtikrinti bendri minimalūs vėdinimo reikalavimai pagal prietaiso pasiekiamas bendras duju sąnaudas. Fiksuota ventiliacijos anga gali apimti esamų tuščiavidurių plytų angų, garintuvo vamzdyno angos matmenis ir kt.| Bendros duju sanaudos (kW) | min. ventiliacijos anga ( cm2 ) |
| 0-2 | 100 |
| 2-3 | 120 |
| 3-4 | 175 |
| 4-6 | 300 |
| 6-8 | 400 |
| 8-10 | 500 |
| 10-11,5 | 600 |
| 11,5-13 | 700 |
| 13-15,5 | 800 |
| 15,5-17 | 900 |
| 17-19 | 1 000 |
| 19-24 | 1 250 |
Rooms without doors and/or windows opening directly to the outside
Jei patalpoje, kurioje jrengtas prietaisas, nėra durų ir (arba) lango, kuris atsidaro tiesiai į lauką, reikia ieškoti kitų produktų, kurie suteiktų fiksuotą nereguliuojamą ir neuždaromą ventiliacijos angą, atitinkančią bendrus minimalius ventiliacijos angų reikalavimus, taikomus prietaisui pagal anksčiau pateiktoje lentelėje nurodytas bendras dujų sąnaudas. Taip pat reikia laikytis atitinkamų pastatų taisyklių rekomendacijų. Kai patalpoje arba vidinėje erdvėje yra daugiau nei vienas dujinis prietaisas, be reikalavimų, nurodytų anksčiau pateiktoje lentelėje, reikia jrengti papildomą ventiliacijos sritį. Papildomos ventiliacijos srities dydis turi atitikti kitų dujinių prietaisų reikalavimus. Patalpoje, kurioje jrengtas prietaisas, turi būti mažiausiai 10 mm atstumas po durimis, kurios atsidaro j vidines patalpas. Turite užtikrinti, kad tokie daiktai, kaip kilimai ir kitos grindų dangos, neturėtų poveikio atstumui, kai durys yra uždarytos. Viryklę galima statyti virtuvėje, virtuvėje/valgomajame arba miegamajame/svetainėje, bet ne kambaryje, kuriame yra vonia arba dušas. Viryklės negalima statyti miegamajame/svetainėje, kurios plotas yra mažesnis nei 20 m³. Nestatykite šio buitinio prietaiso patalpoje, kuri yra žemiau žemės lygio, nebent joje būtų atviras išėjimas i žemės paviršių bent iš vienos pusės.Installation and connection
Šj prietaisą reikia jrengti ir prijungti atsižvelgiant i istatymuose dėl prijungimo numatytas taisykles.  Nestatykite šio buitinio prietaiso prie šaldytuvo ar šaldiklio. Šio prietaiso skleidžiama šiluma padidins šaldymo prietaisų energijos sąnaudas. • Prietaisą turi nešti bent du žmonės. - Prietaisą būtina statyti tiesiai ant grindų. Jo negalima statyti ant pagrindo ar stovo.  Nekelkite ir neperstatinėkite prietaiso, laikydami už jo durelių ir (arba) rankenos. Apgadinamos durelės, rankenos ar vyriai.Electrical connection
Prijunkite gaminj prie jžeminto lizdo, apsaugoto tinkamos kategorijos miniatiūriniu grandinės pertraukikliu, kaip nurodyta techninių duomenų lentelėje. Ir naudojant su transformatoriumi, ir be jo, įsitikinkite, ar jžeminimo instaliavimą atliko kvalifikuotas elektrikas. Mūsų bendrovė nėra atsakinga už jokią žalą, kuri gali atsirasti naudojant gaminį, kuris nėra jžemintas atsižvelgiant i vietos reglamentus. DANGER:
Prietaisą prie maitinimo tinklo gali prijungti tik igaliotasis kvalifikuotas meistras. Prietaiso garantija galioja tik tinkamai ji prijungus. Gamintojas néra atsakingas už žalą, kilusią dė darbų, kuriuos atliko neįgaliotiejį asmenys. DANGER:
Maitinimo laido negalima prispausti, sulenkti ar suspausti, jis neturi liestis prie jkaitusių prietaiso dalių. Pažeistą maitinimo laidą privalo pakeisti kvalifikuotas elektrikas. Kitu atveju kyla elektros smūgio, trumpojo jungimo ar gaisro pavojus! Maitinimo tinklo duomenys turi atitikti ant prietaiso esančioje kategorijos plokštelėje nurodytus duomenis. Kategorijos plokštelæ pamatysite arba atidaræ dureles arba apatiná dangtá, arba ji bus ant galinės prietaiso sienelės, priklausomai nuo prietaiso modelio. Šio gaminio maitinimo laidas privalo atitikti techninių duomenų lentelėje nurodytus parametrus.  Irengus prietaisą, maitinimo laido kištukas turi būti lengvai pasiekiamas (nenutieskite laido virš viryklės).  Atliekant elektros instaliaciją, privalote laikytis nacionalinių / vietos elektros taisyklių ir naudoti korkaitei tinkančius kištukinį lizdą / elektros liniją ir kištuką. Jeigu gaminio galios apribojimai viršija elektros linijos lizdo ir kištuko srovės perdavimo gebą, gaminį reikia jungti naudojant stacionariąją elektros instaliaciją tiesiogiai, nenaudojant elektros linijos kištuko ir lizdo. DANGER:
Prieš pradėdami bet kokius elektros prijungimo darbus, išjunkite gaminį iš maitinimo tinklo. Kyla elektros smūgio pavojus! ljunkite maitinimo laido kištuką i elektros lizdą.Gas connection
DANGER:
Prietaisą prie duję tiekimo sistemos gali prijungti tik įgaliotas ir kvalifikuotas asmuo. Sprogimo ar apsinuodijimo rizika dėl nekvalifikuotai atliktų remonto darbų! Gamintojas nėra atsakingas už žalą, kilusią dėl darbų, kuriuos atliko nejgaliotieji asmenys. DANGER:
Prieš pradėdami bet kokius dujų prijungimo darbus, išjunkite dujų tiekimą. Kyla sprogimo pavojus! \- Dujų reguliavimo sąlygos ir dydžiai pateikti duomenų lentelėse (arba duomenų plokštelėje).  Šis prietaisas yra pritaikytas naudoti su gamtinémis dujomis (GD). • Gamtinių dujų prijungimas turi būti tinkamai paruoštas prieš prijungiant prietaisą. - Gamtines dujas prie gaminio prijungs jgaliotoji tarnyba. - Prie gaminio gamtinių dujų prijungimo angos turi būti pritaisyta lanksti žarna, o šio vamzdžio galas turi būti užsandarintas aklidangčiu. Prijungiant aklidangtis bus ištrauktas ir gaminys bus prijungtas naudojant plokščią prijungimo įtaisą (movą). • Patikrinkite, ar jrengta gamtinių dujų sklendė. - Jeigu vėliau jums reikės naudoti šį prietaisą su kita dujų rūšimi, privalote pasitarti su įgaliotaja technine tarnyba dėl atitinkamos pakeitimo procedūros.If the appliance has only one gas inlet:
\- Pieš prijungdami duju žarną, įsitikinkite, kad gaminio gale esanti žarnos anga yra toje pačioje gaminio pusėje kaip gamtinių duju sklendė.  \- Jei duju žarnos anga ir gamtinių duju sklendė nėra toje pačioje pusėje, prijungdami pasirūpinkite, kad žarna neitų per karštą sritį. If the appliance has two gas inlets:
\- Viena iš dviejų angų yra užsandarinta aklidangčiu, o kita – plastikiniu kaiščiu. Atsižvelgiant į gamini, aklidangčio ir plastikinio kaiščio vietos gali skirtis.  1 Dujų žarnos anga 2 Aklidangtis 3 Plastikinis kaištis - Prieš prijungdami dujas jsitikinkite, kad prie duju jungiamo gaminio gamtinių duju sklendė ir duju žarnos anga yra toje pačioje pusėje. - Jei gamtinių dujų sklendė ir plastikiniu kaiščiu užsandarinta dujų žarnos anga yra toje pačioje pusėje, prijunkite dujas, kaip parodyta toliau pateiktame paveikslėlyje.  \- Jei gamtinių dujų sklendė ir aklidangčiu užsandarinta dujų žarnos anga yra toje pačioje pusėje, išimkite ir išmeskite plastikinį kaištį. Išimkite aklidangtį ir uždenkite dujų žarnos angą, prie kurios nebus prijungiamos dujos, nauju (nenaudotu) sandarinimo tarpikliu.  \- Prijunkite dujas, kaip parodyta toliau pateiktame paveikslėlyje, prie duju žarnos angos šalia gamtinių duju sklendės. Fire hazard:
Jei prijungsite nesilaikydami toliau pateiktų nurodymų, kils dujų nuotėkio ir gaisro pavojus. Mūsų įmonė nebus atsakinga dėl žalos, padarytos dėl šios priežasties. - Dujas turi prijungti tik įgaliotasis paslaugos teikėjas. - Prie gaminio prijungiant dujas būtinai reikia naudoti duju žarnos angą šalia gamtinių duju sklendės. - Plastikinį kaištį reikia išmesti, o nenaudojamą duju žarnos angą – užsandarinti aklidangčiu. - Užsandarinant nenaudojamą duju žarnos angą aklidangčiu, būtina naudoti naują ir nenaudotą sandarinimo tarpiklj. DANGER:
Lanksti duju žarna turi būti prijungta tokiu būdu, kad nesiliestų prie aplink ją judančių dalių ir nejstrigtų, kai judančios dalys juda. (Pvz., stalčiai.) Be to, jos negalima laikyti ten, kur ji gali būti suspausta. DANGER:
Dujų tiekimo žarnos negalima prispausti, sulenkti ar suspausti, jis neturi liestis prie įkaitusių prietaiso dalių. Dėl sugadintos dujų tiekimo žarnos gali kilti sprogimo pavojus.Leak check at connection point
- Patikrinkite, ar išjungtos visos prietaiso rankenėlės. Patikrinkite, ar atsuktas dujų tiekimo čiaupas. Paruoškite muilo putų ir užtepkite jų ant žarnos prijungimo taško, kad patikrintumėte, ar nėra dujų nuotėkio. - Esant duju nuotėkiui, atsiras muilo burbulų. Tokiu atveju nedelsdami dar kartą patikrinkite žarnos prijungimą. - Jei gaminyje yra dvi dujų žarnos angos, pasirūpinkite, kad nenaudojama dujų anga būtų užsandarinta aklidangčiu. Paruoškite muilo putų ir užtepkite jų ant aklidangčio prijungimo taško, kad patikrintumėte, ar nėra dujų nuotėkio. Esant dujų nuotėkiui, atsiras muilo burbulų. Tokiu atveju nedelsdami dar kartą patikrinkite aklidangčio prijungimą. - Vietoj muilo galite naudoti parduodamus duju nuotėkio patikros aerozolius.  Dujų nuotėkio niekuomet netikrinkite degtukais ar žiebtuvėliu. \- Pristumkite prietaisą prie virtuvės sienos. \- Orkaitės kojelių reguliavimas Naudojant kylanti vibracija gali priversti prikaistuvius judėti. Šios pavojingos sitacijos galima išvengti tinkamai išlyginuts ir subalansavus prietaiso aukšti. Savo pačių saugumui pastatykite prietaisą tiesiai, reguliuodami keturias apačioje esančias kojeles, sukdami jas kairėn arba dešinėn, kad prietaisas būtų sulygintas su stalviršiu.Final check
1. Patikrinkite elektros veikimą. 2. Atsukite duju čiaupą. 3. Patikrinkite visas jungtis, ar jos tvirtai įtaisytos ir prijungtos. 4. Uždegike degiklius ir patikrinkite, kaip dega liepsna.  Liepsna turi būti mėlyna ir taisyklingos formos. Jei liepsna gelsva, patikrinkite, ar degiklio galvutė tvirtai uždėta arba nuvalykite degiklj.Gas conversion
DANGER:
Prieš pradėdami bet kokius dujų prijungimo darbus, išjunkite dujų tiekimą. Kyla sprogimo pavojus! Norėdami pakeisti buitiniame prietaise naudojamų dujų rūšį, pakeiskite visus purkštukus ir pareguliuoti visus vožtuvus, kad liepsna būtų mažesnė.Replacing burner nozzles
1. Nuimkite degiklio galvutę ir degiklio korpusą. 2. Išsukite purkštukus, sukdami prieš laikrodžio rodykle. 3. Itaisykite naujus purkštukus. 4. Patikrinkite visas jungtis, ar jos tvirtai įtaisytos ir prijungtos.  Nauju purkštukų padėtis yra pažymėta ant jų pakuotės arba ją galima rasti lentelėje Purkštukų lentelė, puslapis 13.  ((Gali skirtis priklausomai nuo gaminio modelio.)) Kai kurių degiklių purkštukai uždengti metalinių gaubtu. Keičiant purkštuką šį metalinį gaubtą reikia nuimti.  1 Duju išjungimo įtaisas (jeigu jrengtas) 2 Uždegimo žvaké 3 Purkštukas 4 Degiklis  Nebandykite nuimti dujinių degiklių čiaupų, nebent tai būtų būtina susidarius nejprastoms sąlygoms. Jeigu reikia keisti čiaupus, privalote iškviesti įgaliotąją tarnybą.Reduced gas flow setting for cooktop taps
1. Uždekite degiklj, kurj reikia pareguliuoti, pasukite rankenėlę j mažesnės liespnos padėtį. 2. Nuimkite rankenėlę nuo dujų čiaupo. 3. Norėdami pareguliuoti duju srauto reguliavimo varžta, naudokite tinkamo dydžio atsuktuvą. Jeigu naudojate suskystintąsias dujas, (butaną – propaną), sukite varztą pagal laikrodžio rodyklę. Naudojant natūralias dujas, varztą reikia vieną kartą pasukti prieš laikrodžio rodyklę. » Sumažinus duju vartojima, paprastai liepsna turi būti 6–7 mm aukščio. 4. Jei liepsna didesnė, negu reikia, pasukite varžtą pagal laikrodžio rodyklę. Jei ji mažesnė – prieš laikrodžio rodyklę. 5. Patikrinkite, kaip dega dujos minimalioje ir maksimalioje jungiklio padėtyje. 6. Reguliavimo varžto padėtis gali skirtis, priklausomai nuo buitiniame prietaise naudojamo duju čiaupo tipo.  1 Srauto greičio reguliavimo varžtas  1 Srauto greičio reguliavimo varžtas  Pakeitus prietaise naudojamų dujų rūšį, reikia pakeisti ir kategorijos plokštelę, kurioje nurodoma prietaise naudojamų dujų rūšis.Nozzle seal check
Prieš atlikdami gaminio keitimą, įsitikinkite, kad visi valdymo mygtukai yra išjungti. Teisingai pakeitus purkštukus, kiekvienam purkštukui turėtų būti patikrintas duju nutekėjimas. 1. Isitikinkite, kad duju tiekimas gaminiui jungtas, vis dar laikydami išjungtus visus valdymo mygtukus. 2. Kiekviena purkštuko anga blokuojama pirštu, pakankamai stipriai spaudžiant, kad būtų sustabdytas duju nutekėjimas, kai jjungtas atitinkamas valdymo mygtukas ir laikoma nuspaustoje padėtyje, kad dujos galėtų patekti į purkštuką. 3. Paruoštą muiluotą vandenį tepkite ant purkštuko jungties mažu šepetėliu: jei purkštuko jungtyje nutekėjo dujų, muiluotas vanduo pradės putoti. Tokiu atveju priveržkite purkštuką smarkiau ir dar kartą pakartokite 3 veiksmą. 4. Jei vanduo vistiek putoja, turite išjungti duju tekėjimą i produktą ir nedelsiant paskambinti įgaliotam techninės priežiūros agentui arba technikui, turinčiam licencija. Nenaudokite gaminio tol, kol gaminio neapžiūrėjo autorizuota tarnyba. 4 Preparation Work
Tips for saving energy
Ši informacija padės jums ekologiškiau naudoti šį buitinį prietaisą ir taupyti energiją. - Naudokite tamios spalvos arba emale padengtus prikaistuvius, nes jie geriau perduoda šilumą. - Gamindami patiekalus, įkaitinkite orkaitę, jeigu tai rekomenduojama vartotojo vadove arba pagal receptą. - Gaminant maistą, dažnai nedarinėkite orkaitės durelių. - Jeigu jmanoma, vienu metu orkaitėje stenkitės gaminti daugiau nei vieną patiekala. Galite gaminti, padėję du kepimo indus ant vielinių grilio grotelių. • Gaminkite daugiau nei vieną patiekalą vieną po kito. Orkaitė jau būtų įkaitusi. - Galite sutaupyti energijos išjungdami orkaitę kelias minutes prieš kepimo pabaigą. Neatidarykite orkaitės durelių. - Atšildykite užšaldytus maisto produktus prieš gamindami juos. - Kepimui naudokite puodus/keptuves su dangčiais. Nenaudojant dangčių, energijos sąnaudos gali padidėti iki 4 kartų. - Pasirinkite degiklj, labiausiai tinkamą pagal prikaistuvio, kurj naudosite, dugno dydj. Visuomet parinkite tinkamo dydžio prikaistuvius patiekalams ruošti. Didesniems prikaistuviams reikia daugiau energijos.First use: Initial appliance cleaning
 Tam tikros valymo priemonės ar valymo medžiagos gali apgadinti paviršių. Valydami nenaudokite ėsdinančių valymo priemonių, valymo miltelių/pienelio ar kokių nors aštrių daiktų. 1. Nuimkite visas pakavimo medžiagas. 2. Nuvalykite prietaiso paviršius drėgnu skudurėliu ar kempine, tuomet sausai nušluostykite.Initial heating
Pakaitinkite prietaisą mażdaug 30 minučių, tuomet išjunkite jį. Taip bus nudegintos ir pašalintos po gamybos likusios nuosėdos ir apsauginiai sluoksniai. ATTENTION
Karšti paviršiai gali nudeginti! Naudojamas prietaisas gali jkaisti. Niekuomet nelieskite karštu degikliu, vidiniu orkaitės daliu, šildytuvu ir pan. Neleiskite vaikų artyn. Dėdami į orkaitę ar ištraukdami iš jos indus, visuomet mūvėkite šilumai atsparias pirštines.Electric oven
1. Iš orkaitės išimkite visas kepimo skardas ir groteles. 2. Uždarykite orkaitės dureles. 3. Pasirinkite padėtį „Statinis“. 4. Parinkite didžiausią grilio galingumą; žr. Kaip naudoti elektrinę orkaitę, puslapis 24. 5. Pakaitinkite orkaitę mażdaug 30 minučių. 6. Išjunkite orkaitę; žr. Kaip naudoti elektrinę orkaitę, puslapis 24Oven with grill
1. Iš orkaitės išimkite visas kepimo skardas ir groteles. 2. Uždarykite orkaitės dureles. 3. Parinkite didžiausią grilio galingumą; žr. Kaip naudoti grilj, puslapis 29. 4. Pakaitinkite orkaitę mażdaug 15 minučių. 5. Išjunkite grilj; žr. Kaip naudoti grilj, puslapis 29  Pirmą kartą naudojant orkaitę, porą valandų gali kilti dūmų ir sklisti nemalonus kvapas. Tai visiškai normalu Būtinai gerai išvėdinkite patalpą, kad joje neliktų dūmų ir nemalonaus kvapo. Stenkitės nejkvépti dūmų ir jų skleidžiamo kvapo.5 How to use this cooktop
General information about cooking
 Aliejumi nepripildykite daugiau nei trečdalio keptuvės. Kaitindami aliejų kaitvietės nepalikite be priežiūros. Dėl perkaitusio aliejaus gali kilti gaisras. Niekuomet nebandykite gaisro gesinti vandeniu! Aliejui užsidegus, uždekite jì audiniu gaisrui gesinti ar drėgnu skudurėliu. Išjunkite kaitvietę, jei tai padaryti saugu, ir kvieskite ugniagesius. - Prieš kepdami maisto produktus, visada kruopščiai juos nusausinkite ir lėtai dėkite j karštą aliejų. Prieš kepimą būtinai visiškai atšildykite užšaldytus maisto produktus. • Kaitinkdami aliejų, neuždenkite prikaistuvio. - Puodus ir keptuves ant kaitlentės dėkite taip, kad jų rankenos nebūtų virš kaitviečių ir nejkaistų. Ant kaitlentės nedėkite nesubalansuotų ir lengvai virstančių indų. - Nedėkite tuščių indų ir prikaistuvių ant jungtų kaitviečių. Jie gali būti sugadinti. - Laikant jungtą kaitvietę be indo ar prikaistuvio, gaminys gali sugesti. Pabaigę gaminti, išjunkite kaitvietes. - Gaminio paviršius gali būti įkaitęs, todėl nedėkite ant jo plastikinių ir aliumininių indų. Tokiuose induose nereikėtų laikyti ir maisto produktų. - Naudokite tik prikaistuvius arba indus plokščiais dugnais. - Į prikaistuvius ir indus dékite tinkamą maisto produktų kiekį. Tuomet nereikės bereikalingai valyti, nes patiekalai neišbėgs. Nedėkite ant kaitviečių puodu arba keptuvių dangčių. Prikaistuvius dékite taip, kad jie būtų kaitviečių viduryje. Jeigu norite perkelti priekaistuvį ant kitos kaitvietės, pakelkite ir padėkite jį ant kaitvietės, o ne traukite jį paviršiumi.Cooking with gas
\- Indo dugno ir liepsnos skersmenys privalo atitikti vienas kitą. Pareguliuokite duju liepsnas, kad jų nesimatytu iš po puodo dugno; padėkite puodą ant puodu atramos, per vidurį.Using the hob
 1 Jprastas degiklis 18-20 cm 2 Greitasis degiklis 22-24 cm 3 Atsarginis degiklis 12-18 cm 4 Jprastas degiklis 18-20 cm yra rekomenduojamo skersmens puodu, kuriuos reikia naudoti ant atitinkamų degiklių, sąrašas. WARNING
Nenaudokite didesnių ar mažesnių nei anksčiau nurodyta matmenų kepimo indų. Naudojant didesnius kepimo indus kyla pavojus apsinuodyti anglies monoksidu, perkaitinti gretimus paviršius ir valdymo rankenėles. Naudojant mažesnius kepimo indus kyla pavojus apsideginti liepsna. Didelės liepsnos simbolis atitinka didžiausią virimo galingumą, mažos liepsnos simbolis - mažiausią virimo galingumą. Išjungimo padėtyje (viršutinėje), dujų tiekimas į degiklius yra išjungtas.Igniting the gas burners
1. Laikykite nuspaudę degiklio rankenėlę. 2. Sukite ją prieš laikrodžio rodyklę link didelės liepsnos simbolio. » Dujas uždega sukelta kibirkštis. 3. Nustatykite norimą virimo galingumą.Turning off the gas burners
Pasukite šilumos palaikymo srities rankenėlę i išjungimo (viršutinę) padėtį.Gas shut-off safety system (on models with a thermocouple)
 1. Duju išjungimo sauga Saugos priemonė: jeigu ant degiklių išsilieja skysčio ir liepsna užgęsta, suveikia saugos mechanizmas, kuris išjungia dujų tiekimą. \- Norėdami uždegti, įspauskite rankenėlę vidun ir sukite ją prieš laikrodžio rodyklę. - Dujoms užsidegus, palaikykite rankenėlę nuspaudę dar 3-5 sekundes, kad būtų jungta saugos sistema. - Jeigu paspaudus ir atleidus rankenėlę dujos neuždegamos, pakartokite tą pačią procedūrą, palaikydami rankenėlę nuspaudę 15 sekundžių. DANGER:
Jei degiklis neuždegamas per 15 sekundžių, atleiskite mygtuką. Prieš bandydami dar kartą, palaukite bent 1 minutę. Kyla duju susikaupimo ir sprogimo rizika!6 How to use the oven
General information about baking, roasting, and grilling
WARNING
Karšti paviršiai gali nudeginti! Naudojamas prietaisas gali jkaisti. Niekuomet nelieskite karštu degikliu, vidiniu orkaitės daliu, šildytuvu ir pan. Neleiskite vaikų artyn. Dėdami į orkaitę ar ištraukdami iš jos indus, visuomet mūvėkite šilumai atsparias pirštines. DANGER:
Atidarydami dureles, būkite atsargūs, nes pro jas gali išeiti garai. Karšti garai gali nudeginti rankas, veidą ir (arba) akis.Tips for baking
- Naudokite tinkamas nepridegančias metalines lėkštes, aliumininius indus arba šilumai atsparias silicio formas. • Geriausiai išnaudokite grotelių vietą. - Kepimo formą dékite grotelių viduryje. - Prieš jungdami orkaitę arba grilj, pasirinkite tinkamą grotelių padėtį. Nekeiskite grotelių padėties, kai orkaitė yra įkaitusi. • Orkaitės durelės turi būti uždarytos.Tips for roasting
- Visa višta, kalakutas ir dideli mėsos gabalai iškeps geriau, jeigu prieš tai juos palaikysite marinatuose, pavyzdžiui, citrinų sulčių ir juodųjų pipirų. - Mésai su kaulais iškepti reikia maždaug 15 - 30 minučių daugiau, nei kepant tokio paties dydžio kepsnį be kaulų. - Turètumète apskaičiuoti kepsnio kepimo laiką: vienas mėsos centimetras į aukštį iškepa per 4 - 5 minutes. - Mėsai iškepus, palikite ją orkaitėje dar maždaug 10 minučių. Sultys geriau pasiskirsto kepsnyje ir neišbėga, kai mėsa pjaustoma. - Šilumai atspariame inde gaminamą žuvį reikėtų dėti ant grotelių viduriniame arba apatiniame lygyje.Tips for grilling
Kepant mėsą, žuvį ir paukštieną grilyje, mėsa greitai apskrunda, pasidengia gražia plutele ir nebūna sausa. Grilyje ypač tinka kepti kepsnius, ant iešmų kepamą mėsą ir dešreles bei daržoves, kuriose yra didelis kiekis vandens, pavyzdžiui, pomidorus ir svogūnus. \- Paskirstykite gabalėlius, kuriuos kepsite grilyje, ant vielinės lentynos arba kepimo skardoje su vieline lentyna taip, kad padengtas plotas neviršytų šildytuvo dydžio. \- Jtaisykite vielinę lentyną arba kepimo skardą su grotelėmis pageidaujamame orkaitės lygyje. Jeigu kepate grilyje ant vielinės lentynos, jtaisykite kepimo skardą žemesniame lygyje, kad j ją nuvarvėtų riebalai. Jtaisoma kepimo skarda turi būti tokio dydžio, kad uždengtų visą kepimo grilyje sritį. Ši skarda su prietaisu gali būti nepateikta. J kepimo skardą pripilkite truputį vandens, kad ją būtų lengviau išvalyti.  Dėl kepimui grilyje netinkamo maisto gali kilti gaisro pavojus. Grilyje kepkite tik tuos maisto produktus, kurie yra tinkami dideliam karščiui. Nedėkite maisto per giliai į grilį. Tai karščiausia grilio vieta ir riebus maistas gali užsiliepsnoti.How to use the electric oven
Selecting the temperature and operating mode
 1 Termostato rankenèlè 2 Funkciju parinkimo rankenėlė 1. Nustatykite orkaitės laikmatį į norimą kepimo padėtį; žr Orkaitės laikrodžio naudojimas, puslapis 25. 2. Funkciju rankenèle nustatykite norimą darbo režima. 3. Temperatūros rankenėle nustatykite norimą temperatūrą. » Orkaitė jkaista iki nustatytos temperatūros ir palaiko ją. Šildymo metu lieka degti temperatūros lemputė.Turning off the electric oven
Nustatykite orkaitės laikmatį j išjungimo padėtį  Nustačius laikmatį tam tikram laikui, suskaičiavęs laiką, jis išsijungs automatiškai; žr. Orkaîtės laikrodžio naudojimas, puslapis 25 Pasukite funkciju ir temperatūros rankenėles i išjungimo (viršutinę) padėtį. Svarbu tinkamai padėti vielines groteles ant vielinių grotelių. Vielinės grotelės privalo būti įdėtos tarp grotelių taip, kaip parodyta paveikslėlyje. Neatremkite vielinių groltelių į orkaitės galinę sienelę. Pastumkite vielines groteles lentynos priekinės dalies link ir jtaisykite jas, naudodami dureles, kad grilis veiktų veiksmingiausiai. (Gali skirtis priklausomai nuo gaminio modelio.) Operating modes
Čia parodyta veikimo režimų tvarka gali skirtis nuo jūsų prietaiso režimų išdėstymo tvarkos.Traditional baking
 Veikia abu šildytuvai – ir viršutinis, ir apatinis. Maistas šildomas tolygiai - ir iš viršaus, ir iš apačios. Tinka, pavyzdžiui, tortams, pyragaičiams arba tortams ir troškiniams tešloje kepti. Kepkite jdėję tik vieną skardą.Bottom heating
 Veikia tik apatinis šildytuvas. Tinka picoms kepti ir paskesniam patiekalų apskrudinimui iš apačios. Šią funkciją taip pat reikia naudoti norint lengvai valyti garais. Bottom/top heating with fan
 Veikia viršutinis bei apatinis kaitinimo elementai ir ventiliatorius (galinėje sienelėje). Ventiliatorius tolygiai paskirsto karštą orą orkaitėje. Kepkite jdėję tik vieną skardą.Works with fan
 Orkaitė nešyla. Veikia tik apatinis ventilatorius (galinėje sienelėje). Tinkama užšaldytam granuliuotam maistui lėtai atitirpdytis kambario temperatūroje ir iškeptam maistui atvėsinti.Fan heating
 Ventiliatorius labai greitai ir tolygiai orkaitėje paskirsto karštą orą, kurį jšildo galinis šildytuvas. Kepant patiekalus, pravartu pasirinkti tinkamo lygio lentynas; daugeliu atveju orkaitės iš anksto pašildyti nereikia. Tinkama kepti jdėjus kelias skardas. Šią funkciją taip pat reikia naudoti norint lengvai valyti garais. "3D" function
 Veikia viršutinis bei apatinis kaitinimo elementai ir kaitinimas ventiliatoriumi (galinėje sienelėje). Patiekalas tolygiai ir gretai kepamas iš visų pusių. Kepkite jdėję tik vieną skardą.Strong grill
 Veikia orkaitės viršuje esantis didysis grilis. Kepimo grotelės tinkamos kepti didelį mėsos kiekį. - Dékite dideles arba vidutinio dydžio porcijas tinkamoje lentynos padėtyje po grilio šildytuvu. - Praëjus pusei numatyto kepimo grilyje laiko, apverskite patiekalą.Grill + fan
 Kepimo drilyje efektas néra toks stiprus, kaip naudojant didijji grilj. - Dékite mažas arba vidutinio dydžio porcijas tinkamoje lentynos padétyje po grilio šildytuvu. - Praëjus pusei numatyto kepimo grilyje laiko, apverskite patiekalą.Using the oven timer
Start of cooking
 Norėdami naudoti orkaitę, privalote nustatyti kepimo režimą, norimą temperatūrą ir laiką. Kitaip orkaitė neveiks. 1. Norėdami nustatyti kepimo laiką, sukite laiko reguliavimo rankenėlę pagal laikrodžio rodyklę. 2. Idėkite patiekalą j orkaitę. 3. Pasirinkite veikimo režimą ir temperatūrą; žr. Kaip naudoti elektrinę orkaitę, puslapis 24. » Orkaitė įkaista iki nustatytos temperatūros ir išlaiko šią temperatūrą iki kepimo pasirinkto kepimo laiko pabaigos. 4. Pasibaigus kepimo laikui, laiko nustatymo rankenėlė automatiškai pasisuks prieš laikrodžio rodyklę. Pasigirsta įspėjimo signalas, rodantis, kad laikas baigėsi, ir orkaitė išjungiama. Maisto gaminimo laiko lentelè| i | Šioje diagramoje parodytas laikas yra tik kaip orientyras. Laikas gali skirtis priklausomai nuo maisto temperatūros, storio, tipo ir jūsų pageidaujamo kepimo būdo. |
Turning off the oven before the set time has elapsed
1. Sukite laiko reguliavimo rankenėlę pagal laikrodžio rodyklę, kol ji nebesisuks. 2. Išjunkite orkaitę, pasukdami temperatūros ir funkcijos nustatymo rankenėles. Kepimas ir kepinimas| i | 1-ieji orkaitës bëgeliai yra apatiniai bëgeliai. |
| Patiekalas | Skardos numeris | Priedas, skirtas naudoti | Darbo režimas | Grotelių padėtis | Temperatūra (°C) | Kepimo laikas (apytikslis, min.) |
| Pyragėlial skardoje | Viena skarda | Standartinis padėklas* | 3 | 180 | 25 ... 30 | |
| Formose kepami pyragai | Viena skarda | Pyrago forma dėti ant grotelių** | 2 | 180 | 40 ... 50 | |
| Pyragėliai | Viena skarda | Standartinis padėklas* | 3 | 160 | 25 ... 35 | |
| Viena skarda | Standartinis padėklas* | 3 | 150 | 30 ... 40 | ||
| 2 skardos | 1-Skarda pyragaičiams*3-Standartinis padėklas* | 1 - 3 | 150 | 35 ... 50 | ||
| 3 skardos | 1-Standartinis padėklas*3-Skarda pyragaičiams*5-Gili kepimo skarda* | 1 - 3 - 5 | 150 | 35 ... 50 | ||
| Biskvitas | Viena skarda | Apvali forma, 26 cm skersmens, dėti ant grotelių** | 3 | 160 | 25 ... 35 | |
| Viena skarda | Apvali forma, 26 cm skersmens, dėti ant grotelių** | 2 | 150 | 30 ... 40 | ||
| 2 skardos | 1-Apvali forma, 26 cm skersmens, dėti ant grotelių**4-Apvali forma, 26 cm skersmens, dėti ant skardos** | 1 - 4 | 150 | 35 ... 45 | ||
| Sausainiai | Viena skarda | Skarda pyragaičiams* | 3 | 180 | 25 ... 30 | |
| 2 skardos | 1-Skarda pyragaičiams*3-Standartinis padėklas* | 1 - 3 | 180 | 30 ... 40 | ||
| 3 skardos | 1-Skarda pyragaičiams*3-Standartinis padėklas*5-Gili kepimo skarda* | 1 - 3 - 5 | 180 | 35 ... 45 | ||
| Tešlainiai | Viena skarda | Standartinis padėklas* | 2 | 200 | 30 ... 40 | |
| 2 skardos | 1-Skardapyragaičiams*5-Standartinis padėklas* | 1 - 5 | 200 | 45 ... 55 | ||
| 3 skardos | 1-Skarda pyragaičiams*3-Standartinis padėklas*5-Gili kepimo skarda* | 1-3-5 | 200 | 55...65 | ||
| Sviestiniai pyragaičiai | Viena skarda | Standartinis padėklas* | 2 | 200 | 25...35 | |
| 2 skardos | 1-Skarda pyragaičiams*3-Standartinis padėklas* | 1-3 | 200 | 35...45 | ||
| 3 skardos | 1-Skarda pyragaičiams*3-Standartinis padėklas*5-Gili kepimo skarda* | 1-3-5 | 190 | 45...55 | ||
| Miellnės tešla | Viena skarda | Standartinis padėklas* | 2 | 200 | 35...45 | |
| Lazanija | Viena skarda | Stiklinė / metalinė stačiakampio formos skarda, dėti ant grotelių** | 2-3 | 200 | 30...40 | |
| Pica | Viena skarda | Standartinis padėklas* | 2 | 200...220 | 15...20 | |
| Jautienos žlėgtainis (nepjaustytas) / kepsnys | Viena skarda | Standartinis padėklas* | 3 | 25 min. 250/max, tada 180...190 | 100...120 | |
| Eriuko koja (troškinys) | Viena skarda | Standartinis padėklas* | 3 | 25 min. 250/max, tada 190 | 70...90 | |
| Viena skarda | Standartinis padėklas* | 3 | 25 min. 250/max, tada 190 | 60...80 | ||
| Keptas vščiukas (1,8-2 kg) | Viena skarda | Standartinis padėklas* | 2 | 15 min. 250/max, tada 180...190 | 60...80 | |
| Viena skarda | Standartinis padėklas* | 2 | 15 min. 250/max, tada 180...190 | 60...80 | ||
| Kalakutas (5.5 kg) | Viena skarda | Standartinis padėklas* | 1 | 25 min. 250/max, tada 180...190 | 150...210 | |
| Viena skarda | Standartinis padėklas* | 1 | 25 min. 250/max, tada 180...190 | 150...210 | ||
| Žuvis | Viena skarda | Standartinis padėklas* | 3 | 200 | 20...30 | |
| Viena skarda | Standartinis padėklas* | 3 | 200 | 20...30 | ||
| Siūlome iš anksto įaitinti akmenį prieš kapant bet kokius patiekalus.* Šie priedai gali būti neparduodami su produktu.** Šie priedai neparduodami su produktu. Galima jsigyti papildomai. | ||||||
Preparation table for test dishes
Patiekalai ant šio maisto ruošimo stalo ruošiami pagal EN 60350-1, kad būtų lengviau kontroliuoti reikalavimus, taikomus produkty bandymams| Patiekalas | Skardos numeris | Priedas, skirtas naudoti | Darbo režimas | Grotelių padėtis | Temperatūra (°C) | Kepimo laikas (apytiksils, min.) |
| Skrudinta duona | Viena skarda | Standartinis padėklas* | 3 | 140 | 20 ... 30 | |
| Viena skarda | Standartinis padėklas* | 3 | 140 | 20 ... 30 | ||
| 2 skardos | 1-Standartinis padėklas*3-Skarda pyragačiams* | 1 - 3 | 140 | 20 ... 30 | ||
| 3 skardos | 1-Standartinis padėklas*3-Skarda pyragačiams*5-Gili kepimo skarda* | 1 - 3 - 5 | 140 | 25 ... 35 | ||
| Pyragėliai | Viena skarda | Standartinis padėklas* | 3 | 160 | 25 ... 35 | |
| Viena skarda | Standartinis padėklas* | 3 | 150 | 30 ... 40 | ||
| 2 skardos | 1-Skarda pyragačiams*3-Standartinis padėklas* | 1 - 3 | 150 | 35 ... 50 | ||
| 3 skardos | 1-Standartinis padėklas*3-Skarda pyragačiams*5-Gili kepimo skarda* | 1 - 3 - 5 | 150 | 35 ... 50 | ||
| Biskvitas | Viena skarda | Apvali forma, 26 cm skersmens, dėti ant grotelių** | 3 | 160 | 25 ... 35 | |
| Viena skarda | Apvali forma, 26 cm skersmens, dėti ant grotelių** | 2 | 150 | 30 ... 40 | ||
| 2 skardos | 1-Apvali forma, 26 cm skersmens, dėti ant grotelių**4-Apvali forma, 26 cm skersmens, dėti ant skardos** | 1 - 4 | 150 | 35 ... 45 | ||
| Obuolių pyragas | Viena skarda | Apvali juodo metalo forma, 20 cm skersmens, dėti ant grotelių** | 2 | 180 | 50 ... 60 | |
| Viena skarda | Apvali juodo metalo forma, 20 cm skersmens, dėti ant grotelių** | 2 | 170 | 50 ... 60 | ||
| 2 skardos | 1-Apvali juodo metalo forma, 20 cm skersmens, dėti ant grotelių**4-Apvali juodo metalo forma, 20 cm skersmens, pyragačiams** | 1 - 4 | 170 | 50 ... 60 | ||
| Siúlome iš anksto jaitinti akmenį prieš kepant bet koklus patiekalus.* Šie priedai gali būti neparduodami su produktu.** Šie priedai neparduodami su produktu. Galima jsigyti papildornai. | ||||||
Tips for baking cakes
- Jeigu tortas yra per sausas, padidinkite temperatūrą 10 ir sumažinkite kepimo laika. - Jeigu tortas yra per šlapias, paruoškite tirštesnę tešla arba sumažinkite temperatūrą 10 . - Jeigu tortas per smarkiai apkepęs viršuje, dėkite jį ant žemesnės lentynos, sumažinkite temperatūrą ir padidinkite kepimo laiką. - Jeigu jis gerai iškepęs viduje, bet lipnus viršuje, paruoškite tirstesnę tešlą, sumažinkite temperatūrą ir padidinkite kepimo laiką.Tips for baking pastry products
- Jeigu tešlos kepinys yra per sausas, padidinkite temperatūrą 10 ir sumažinkite kepimo laiką. Sudrėkinkite tešlos sluoksnius kremu, pagamintu iš pieno, aliejaus, kiaušinių ir jogurto. - Jeigu tešlos kepinys kepa pernelyg ilgai, pasirūpinkite, kad paruošto kepinio storis neviršytų formos gylio ir būtų lygus su formos kraštais. - Jeigu kepinio viršutinė pusė apskrunda, o apatinė dalis neiškepa, įsitikinkite, kad kremas, kurį naudojate kepiniui, nebūtų pernelyg arti kepinio apačios. Pabandykite vienodai paskirstyti kremą tarp ir ant tešlos sluoksnių, kad kepinys tolygiai keptų.  Kepkite tešlos gaminius atsižvelgdami j kepimo lentelėje rekomenduojamą kepimo režimą ir temperatūrą. Jeigu kepinio apačia vis tiek nepakankamai iškepa, kitą kartą kepinį dėkite ant žemesnės lentynos.Tips for baking vegetables
\- Jeigu daržoviu patiekalas išdžiūsta ir tampa pernelyg sausas, kepkite inde su dangčiu, o ne skardoje. Uždaruose induose patiekalas išliks sultingas. \- Jeigu daržovių patiekalas neiškepa, prieš tai apvirkite daržoves arba pamarinuokite jas, tuomet kepkite jas orkaitėje.How to use the grill
ATTENTION
Naudodami grilj, uždarykite orkaitės dureles. Karšti paviršiai gali nudeginti! \- Naudodami grilj, pasukite laiko reguliavimo rankenėlę prieš laikrodžio rodyklę, ties rankos simboliu.Turning on the grill
1. Pasukite funkciju rankenėlę ties norimu grilio simboliu. 2. Tuomet pasirinkite norimą kepimo grilyje temperatūrą. 3. Jeigu reikia, iš anksto pašildykite orkaitę 5–7 minutes. » Užsidega temperatūros lemputėTurning off the grill
1. Pasukite funkciju rankenėlę i išjungimo (viršutinę) padėti.  Dėl kepimui grilyje netinkamo maisto gali kilti gaisro pavojus. Grilyje kepkite tik tuos maisto produktus, kurie yra tinkami dideliam karščiui. Nedėkite maisto per giliai į grilį. Tai karščiausia grilio vieta ir riebus maistas gali užsiliepsnoti. Maisto gaminimo grilyje laiko lentelė Kepimas elektriniame grilyje| Maisto produktas | Priedas, skirtas naudoti | Grotelių padėtis | Rekomenduojama temperatūra (°C)** | Kepimo grilyje laikas (maždaug) |
| Žuvis | Grilio grotelės | 4..5 | 250/max | 20..25 min. * |
| Pjaustytas viščiukas | Grilio grotelės | 4..5 | 250/max | 25..35 min. |
| Erienos žlegtainiai | Grilio grotelės | 4..5 | 250/max | 20..25 min. |
| Rostbifas | Grilio grotelės | 4..5 | 250/max | 25..30 min. # |
| Veršienos kotletai | Grilio grotelės | 4..5 | 250/max | 25..30 min. * |
| Duonos skrebučiai * | Grilio grotelės | 4 | 250/max | 1..3 min. |
| * priklaisomai nuo storio*Pakaitlinimas 5 minutes**Jel jūsy gaminio grotelių temperatūros negalima suregulluoti, grotelės veiks rekomenduojamoje temperatūroje. | ||||
| Maisto produktas | Priedas, skirtas naudoti | Grotelių padėtis | Temperatūra (°C) | Kepimo laikas (apytikslis, min.) |
| Duonos skrebučiai | Grillo grotelės | 4 | 250/max | 1...3 min. |
| Mėsos kukuliai (jautiena) - 12 gabaliukai | Grillo grotelės | 4 | 250/max | 25...35 min. |
| Apversklte ruošiamą maistą po 2/3 kepimo laiko.Prieš kepant maistą rekomenduojama 5 minutes įkaitinti orkaite. | ||||
7 Technical service and maintenance
General information
Prietaisą reguliai valant, pailgėja gaminio naudojimo laikas ir sumažėja trikčių atveju. DANGER:
Prieš atlikdami techninę priežiūrą ir prieš valydami, prietaisą atjunkite nuo maitinimo tinklo. Kyla elektros smūgio pavojus! DANGER:
Prieš valydami viryklę, leiskite jai atvěsti. Karšti paviršiai gali nudeginti! - Kruopščiai išvalykite gaminį po kiekvieno panaudojimo. tada gaminimo likučius bus lengviau pašalinti, jie nepridegs orkaitę naudojant kitą kartą - Prietaisui valyti nereikia jokių specialių valymo priemonių. Naudokite šiltą vandenį su trupučiu indų plovimo skysčio, minkštą skudurėlj ar kempinę gaminiui valyti ir sausą skudurėlj drėgmei iššluostyti. - Būtinai visada sausai nuvalykite bet kokius išsiliejusius arba po valymo likusius skysčius. - Nerūdijančio plieno paviršiams ir rankenai valyti nenaudokite valymo priemonių, kurių sudėtyje yra rūgšties ar chloro. Tokias dalis valykite skystoje valymo priemonėje (be šveičiamųjų medžiagų) sudrėkintu skudurėliu; būtinai braukite viena kryptimi. - (Ši funkcija yra pasirinktinė. Jūsų gaminyje jos gali nebūti.) Stikliniam gaubtui valyti nenaudokite jokių kietų metalinių grandyklių arba šlifuojamųjų valymo priemonių. Gali būti pažeistas stiklo paviršius.  Tam tikros valymo priemonės ar valymo medžiagos gali apgadinti paviršių. Valydami nenaudokite ėsdinančių valymo priemonių, valymo miltelių/pienelio ar kokių nors aštrių daiktų.  Šiam prietaisui valyti nenaudoktie garinių valymo prietaisų, nes gali kilti elektros smūgis.Cleaning the hob
Cleaning the burner
1. Nuimkite puody laikiklius nuo kaitlentės. 2. Nuimkite visas nuimamas degiklio dalis ir išplaukite rankomis karštame vandenyje, naudodami kempinę ir šiek tiek indu. 3. Nuvalykite nenuimamas degiklio dalis šlapia šluoste. 4. Drėgna šluoste nuvalykite žvakę ir kaitinimo elementą (modeliuose su uždegikliu ir kaitinimo elementu). Po to nusausinkite sausa šluoste. Užtikrinkite, kad angos liepsnoms ir žvakė būtų visiškai sausos. Antraip bandant uždegti nekils kibirkštis. 5. Montuodami viršutines groteles, puodu laikiklius būtinai dékite taip, kad degikliai būty centruose.Assembling the burner parts
Išvalius degiklj, montuokite dalis taip, kaip parodyta paveikslėlyje.  1 Degiklio dangtelis 2 Degiklio galvutė 3 Degiklio lizdas 4 Žvakė (gaminiuose su uždegikliu) 1. Degiklio galvutę dékite ant degiklio lizdo taip, kad ji praljstų pro žvakės (4) angą. Pasukite degiklio galvutę į dešinę ir į kairę bei įsitikinkite, ar tinkamai įsistatė į degiklio lizda. 2. Ant degiklio uždėkite dangtelj.Cleaning the control panel
Nuvalykite valdymo skydelj ir rankenėles drėgnu skudurėliu, paskui nušluostykite sausa šluoste.  Jei jūsų gaminyje įtaisyti mygtukai / rankenėlės, valydami valdymo skydelį, nenuimkite valdymo rankenėlių. Galite sugadinti valdymo skydelj!Cleaning the oven
To clean the side wall (may vary depending on the product model).
(Ši funkcija yra pasirinktinė. Jūsų gaminyje jos gali nebūti.) 1. Ištraukite priekinę šoninę grotelių dalį, traukdami ją šalin nuo šoninės sienelės. 2. Visiškai išimkite šonines groteles, traukdami jas link savęs. Catalytic surfaces
(Ši funkcija yra pasirinktinė. Jūsų gaminyje jos gali nebūti.) Vidinės šoninės (A) ir (arba) galinė jūsų gaminio sienelė (B) gali būti padengta kataliziniu emaliu. Katalizinės sienelės yra šviesios matinės spalvos ir akyto paviršiaus. Katalizinių orkaitės sienelių valyti negalima. Dėl jų perforuotos konstrukcijos, kataliziniai paviršiai absorbuoja riebalus, o paviršiui užsipildžius riebalais, jie pradeda blizgėti. Šiuo atveju rekomenduojama pakeisti dalis. Easy steam cleaning
Ši funkcija užtikrina lengvą valymą, nes laiku neišvalytus (jisisenėjusius) nešvarumus suminkština orkaitėje esantys garai ir nuo jų orkaitėje susidaręs vandens lašelių kondensatas. 1. Išimkite iš orkaitės visus priedus. 2. Pripilkite i orkaitės kepimo skarda 500 ml vandens, ir jstatykite skarda i 2-ą orkaitės lentyną.  3. Pasirinkite valymas garais režimą ir leiskite jai paveikti 25 minutes, nustatę 100°C temperatūrą. 4. Atidarykite dureles ir drėgna kempine arba šluoste nušluostykite vidinius orkaitės paviršius. 5. Isisenejusius nešvarumus valykite minkštu drėgnu skudurėliu arba kempine su trupučiu indų plovimo skysčio, o paskui iššluostykite sausu skudurėliu.  Naudojant lengvo valymo garais režimą, vanduo, esantis ant skardos, kuris skirtas šiek tiek suminkštinti orkaitės ertmėje susidariusiems likučiams ir (arba) nešvarumams, išgaruos ir kaip kondensatas susikaups ant orkaitės durelių stiklo vidinės pusės, todėl atidarant orkaitės dureles, vanduo gali lašėti. Nušluostykite kondensatą iš karto, kai atidarysite dureles.Cleaning the oven door
Norėdami išvalyti orkaitės dureles, naudokite šiltą vandenį su trupučiu indų plovimo skysčio, minkštą skudurėlj ar kempinę gaminiui valyti ir sausą skudurėlj drėgmei iššluostyti.  Orkaitės durelėms valyti nenaudokite jokių šiurkščių šlifuojamųjų valiklių arba sunkiųjų metalų grandyklių. Kitaip galite subraižyti paviršių ir sugadinti stiklą.Removing the oven door
1. Atidarykite priekines dureles (1). 2. Atlenkite spaustukus, esančius prie dešinės ir kairės priekinių durelių pusės vyrių korpusų (2), paspausdami juos žemyn, kaip parodyta paveikslėlyje.  1 Durelés 2 Vyris užrakintas(uždaryta pozicija) 3 Orkaitè 4 Vyris užrakintas(atidaryta pozicija)  3. Pusiau praverkite priekines dureles.  4. Nuimkite priekines dureles, traukdami jas aukštyn, kad jos atsikabintu nuo dešiniojo ir kairiojo vyrių. Norint vél sumontuoti dureles, nuémimo proceso metu atliktus žingsnius reikia atlikti atvirkščia tvarka. Vél įstatę dureles, nepamirškite užspausti prie vyrių korpusų esančių spaustukų.Removing the inner glass panel of the door
(Ši funkcija yra pasirinktinė. Jūsų gaminyje jos gali nebūti.) Vidinę orkaitės durelių stiklo plokštę galima išimti ir išvalyti. 1. Atidarykite orkaitės dureles.  2. Nuimkite plastmasinę, priekinių durelių viršuje sumontuotą dalį, patraukdami ją link savęs.  3. Truputį kilstelėkite toliausią vidinę stiklo plokštę (1) A kryptimi kaip parodyta paveikslėlyje ir ištraukite ją, traukdami B kryptimi.  1 Toliausiai viduje esanti stiklo plokšte 2* Vidinė stiklo plokštė (Jūsų gaminyje jos gali nebūti.) 4. Jei jūsų gaminys turi vidinę stiklo plokšte (2); pakartokite šiuos veiksmus, kad išimtumėte vidinę stiklo plokšte (2). 5. Pirmasis žingsnis norint perdėti dureles – vėl įdėti vidinę stiklo plokštę (2). Dėkite nusklembtą stiklo plokštės kampa, kad jis atsiremtų i nusklembtą plastikinės angos kampa. (Jei jūsu gaminys turi vidinę stiklo plokštę). Vidinė stiklo plokštė (2) privalo būti sumontuota plastikinėje angoje, šalia toliausiai viduje esančios stiklo plokštės (1). 6. Ídedant tolimiausiai viduje esančią stiklo plokšte (1), šios plokštės spausdinta pusė turi būti nukreipta vidinės stiklo plokštės link. Svarbu, kad tolimiausiai viduje esančią stiklo plokšte (1) apatinis kampas būtų įtaisytas apatinėje plastikinėje angoje. 7. Spauskite plastikinę dalį rėmo link tol, kol pasigirs spragtelėjimas.Replacing the oven light bulb
DANGER:
Prieš keisdami orkaitės lemutė, įsitikinkite, kad prietaisas yra išjungtas iš elektros tinklo ir atvėsęs, kad išvengtumėte galimo elektros smūgio. Karšti paviršiai gali nudeginti!  Lemputės padėtis gali skirtis nuo pavaizduotosios paveikslėlyje.  Šiame prietaise naudojama lempa netinkama kambarių apšvietimui. Ši lempa skirta naudotojui padėti geriau matyti maistą.  Šiame prietaise naudojamos lempos turi atlaikyti ekstremalias sąlygas, pavyzdžiui, didesnę nei 50 °C temperatūra.If the oven has a round bulb:
1. Ištraukite gaminio kištuką iš elektros tinklo. 2. Pasukite stiklinj gaubtelj prieš laikrodžio rodyklę ir nuimkite ji.  Šioje krosnyje naudojama kaitrinė lempa, kurios galia mažesnė nei 40 W, aukštis mažesnis nei 60 mm, skersmuo mažesnis nei 30 mm, arba halogeninė lempa, kurios lizdas yra G9, galia mažesnė nei 60 W. Lempos yra tinkamos naudoti esant aukštesnei nei 300 ° C temperatūrai. Orkaitės lempas galima įsigyti iš įgaliotų techninės priežiūros agentų arba techniko, turinčio licencija.  3. Jei orkaitėje jrengta (A) tipo lemputė (žr. iliustracija), ją išsukite ir pakeiskite kaip parodyta. Jei orkaitėje jrengta (B) tipo lemputė, ją ištraukite ir pakeiskite kaip parodyta.   4. Uždėkite stiklinį gaubtelį.8 Troubleshooting
The oven emits steam during use.
• Tai normalu, nes viryklei veikiant pasišalina garai. >>> Tai néra gedimas.Metal parts of the appliance make sounds when heating and cooling.
• Kai metalinės dalys kaista, jos gali plėstis ir kelti triukšmą. >>> Tai nėra gedimas.The appliance does not work.
- Perdegė arba suveikė elektros tinklo saugiklis. >>> Patikrinkite saugiklius saugiklių dėžėje. Jeigu reikia, pakeiskite arba atitaisykite juos. • Gaminio laido kištukas nejkištas i (ižeminta) lizda. >>> Patikrinkite kištumo jjungimą.The oven light is not working.
• Perdegé orkaitės lemputė. >>> Pakeiskite orkaitės lemputę. - Nutrūko elektros tiekimas. >>> Patikrinkite, ar nenutrūko elektros tiekimas. Patikrinkite saugiklius saugiklių dėžėje. Jeigu reikia, pakeiskite arba vėl jjunkite saugiklius.The oven is not heating.
- Gali būti nenustatyta tam tikra kepimo funkcija ir (arba) temperatūra. >>> Nustatykite tam tikrą orkaitės kepimo funkciją ir (arba) temperatūrą. - Modeliuose su laikmačiu nenustatytas laikmatis. >>> Nustatykite laiką. (Prietaisuose su mikrobangų krosnele laikmačio valdikliais valdoma tik mikrobangų krosnelė.) - Nutrūko elektros tiekimas. >>> Patikrinkite, ar nenutrūko elektros tiekimas. Patikrinkite saugiklius saugiklių dėžėje. Jeigu reikia, pakeiskite arba vėl jjunkite saugiklius.There is no spark.
- Nutrūko elektros tiekimas. >>> Patikrinkite saugiklius saugiklių dėžėje. • Nustatytas laikas. >>> Laiko nustatymasGas is not being supplied.
• Užsukta pagrindinė dujų sklendė. >>> Atsukite dujų sklendę. - Sulenktas duju vamzdelis. >>> Tinkamai jrenkite duju vamzdelj.The burners burn unevenly or do not burn at all.
- Degikliai yra purvini. >>> Nuvalykite sudedamąsias degiklio dalis. • Degikliai šlapi. >>> Nusausinkite sudedamąsias degiklio dalis. • Netinkamai uždėta degiklio galvutė. >>> tinkamai uždėkite degiklio galvutę. • Užsukta duju sklendė. >>> Atsukite duju sklendę. - Ištuštėjo duju balionas (naudojant suskystintąsias dujas). >>> Pakeiskite duju balioną.(On models with a timer) The clock display is flashing or the clock symbol is lit.
\- Prieš tai buvo nutrūkęs elektros tiekimas. >>> Nustatykite laiką / išjunkite ir vėl jjunkite gaminį.  Jeigu atlikus visus šiame skyriuje aprašytus nurodymus trikties atitaisyti nepavyksta, kreipkitės i įgaliotojo techninio aptarnavimo centro atstovą. Niekada nebandykite patys taisyti sugedusio gaminio.

- PLEASE READ THIS USER MANUAL FIRST
- EXPLANATION OF SYMBOLS
- IMPORTANT INSTRUCTIONS AND WARNINGS FOR SAFETY AND ENVIRONMENT
- GENERAL INFORMATION
- INSTALLATION
- PREPARATION
- HOW TO USE THE HOB
- HOW TO OPERATE THE OVEN
- MAINTENANCE AND CARE
- TROUBLESHOOTING
- GENERAL SAFETY
- SAFETY WHEN WORKING WITH GAS
- WHAT TO DO WHEN YOU SMELL GAS
- ELECTRICAL SAFETY
- PRODUCT SAFETY
- INTENDED USE
- SAFETY FOR CHILDREN
- DISPOSING OF THE OLD PRODUCT
- COMPLIANCE WITH THE WEEE DIRECTIVE AND DISPOSING OF THE WASTE PRODUCT
- COMPLIANCE WITH ROHS DIRECTIVE
- PACKAGE INFORMATION
- FUTURE TRANSPORTATION
- PACKAGE CONTENTS
- USER MANUAL
- STANDARD TRAY
- DEEP TRAY
- WIRE GRILL
- PLACING THE WIRE SHELF AND TRAY ONTO THE TELESCOPIC RACKS PROPERLY
- BASICS: INFORMATION ON THE ENERGY LABEL OF ELECTRICAL OVENS IS GIVEN IN ACCORDANCE WITH THE EN 60350-1 / IEC 60350-1 STANDARD. THOSE VALUES ARE DETERMINED UNDER STANDARD LOAD WITH BOTTOM-TOP HEATER OR FAN ASSISTED HEATING (IF ANY) FUNCTIONS
- BEFORE INSTALLATION
- SAFETY CHAIN
- IF YOUR PRODUCT HAS 2 SAFETY CHAINS
- IF YOUR PRODUCT HAS 1 SAFETY CHAIN
- ROOM VENTILATION
- ROOMS WITH DOORS AND/OR WINDOWS WHICH OPEN DIRECTLY TO THE OUTER ENVIRONMENT
- ROOMS THAT DO NOT HAVE OPENABLE DOORS AND/OR WINDOWS THAT OPEN DIRECTLY TO THE OUTER ENVIRONMENT
- INSTALLATION AND CONNECTION
- ELECTRICAL CONNECTION
- DANGER
- GAS CONNECTION
- IF YOUR PRODUCT HAS ONLY ONE GAS OUTLET
- IF YOUR PRODUCT HAS TWO GAS OUTLETS
- RISK OF FIRE
- LEAKAGE CHECK AT THE CONNECTION POINT
- FINAL CHECK
- GAS CONVERSION
- EXCHANGE OF INJECTOR FOR THE BURNERS
- REDUCED GAS FLOW RATE SETTING FOR HOB TAPS
- LEAKAGE CHECK AT THE INJECTORS
- TIPS FOR SAVING ENERGY
- INITIAL USE
- FIRST CLEANING OF THE APPLIANCE
- INITIAL HEATING
- WARNING
- ELECTRIC OVEN
- GRILL OVEN
- GENERAL INFORMATION ABOUT COOKING
- GAS COOKING
- USING THE HOBS
- IGNITING THE GAS BURNERS
- TURNING OFF THE GAS BURNERS
- GAS SHUT OFF SAFETY SYSTEM (IN MODELS WITH THERMIC COMPONENT)
- GENERAL INFORMATION ON BAKING, ROASTING AND GRILLING
- TIPS FOR BAKING
- TIPS FOR ROASTING
- TIPS FOR GRILLING
- HOW TO OPERATE THE ELECTRIC OVEN
- SELECT TEMPERATURE AND OPERATING MODE
- SWITCHING OFF THE ELECTRIC OVEN
- RACK POSITIONS (FOR MODELS WITH WIRE SHELF)
- OPERATING MODES
- TOP AND BOTTOM HEATING
- BOTTOM HEATING
- FAN SUPPORTED BOTTOM/TOP HEATING
- OPERATING WITH FAN
- FAN HEATING
- D" FUNCTION
- FULL GRILL
- GRILL+FAN
- TURNING OFF THE OVEN BEFORE THE SET TIME
- COOKING TABLE FOR TEST MEALS
- TIPS FOR BAKING CAKE
- TIPS FOR BAKING PASTRY
- TIPS FOR COOKING VEGETABLES
- HOW TO OPERATE THE GRILL
- SWITCHING ON THE GRILL
- SWITCHING OFF THE GRILL
- CLEANING THE HOB
- CLEANING THE BURNER
- ASSEMBLING THE BURNER PARTS
- CLEANING THE CONTROL PANEL
- CLEANING THE OVEN
- TO CLEAN THE SIDE WALL (VARIES DEPENDING ON THE PRODUCT MODEL.)
- CATALYTIC WALLS
- (THIS FEATURE IS OPTIONAL. IT MAY NOT EXIST ON YOUR PRODUCT.)
- EASY STEAM CLEANING
- CLEAN OVEN DOOR
- REMOVING THE OVEN DOOR
- REMOVING THE DOOR INNER GLASS
- REPLACING THE OVEN LAMP
- IF YOUR OVEN IS EQUIPPED WITH A ROUND LAMP
- OVEN EMITS STEAM WHEN IT IS IN USE
- PRODUCT EMITS METAL NOISES WHILE HEATING AND COOLING
- PRODUCT DOES NOT OPERATE
- OVEN LIGHT DOES NOT WORK
- OVEN DOES NOT HEAT
- THERE IS NO IGNITION SPARK
- THERE IS NO GAS
- BURNERS ARE NOT BURNING PROPERLY OR AT ALL
- (IN MODELS WITH TIMER) CLOCK DISPLAY IS BLINKING OR CLOCK SYMBOL IS ON
- BEKO
- READ THIS USER MANUAL BEFORE USING THE PRODUCT
- DISPOSAL OF OLD PRODUCT
- COMPLIANCE WITH THE EU DIRECTIVE ON RESTRICTION OF HAZARDOUS SUBSTANCES (ROHS)
- DISPOSAL OF PACKAGING MATERIALS
- FOR FUTURE TRANSPORTATION
- STANDARD BAKING TRAY
- DEEP BAKING TRAY
- WIRE RACK
- DEGREE OF PROTECTION IP
- SAFETY CIRCUIT
- IF THE APPLIANCE IS EQUIPPED WITH TWO SAFETY CIRCUITS (2)
- IF THE APPLIANCE IS EQUIPPED WITH ONE SAFETY CIRCUIT (1)
- ROOMS WITH DOORS AND/OR WINDOWS THAT OPEN DIRECTLY TO THE OUTSIDE
- ROOMS WITHOUT DOORS AND/OR WINDOWS THAT CAN OPEN DIRECTLY TO THE OUTSIDE
- IF THE APPLIANCE IS EQUIPPED WITH ONE GAS OUTLET PIPE
- IF THE APPLIANCE IS EQUIPPED WITH TWO GAS OUTLET PIPES
- FIRE RISK
- CHECKING THE CONNECTION FOR GAS LEAKS
- CONVERSION TO A DIFFERENT GAS TYPE
- REPLACING THE BURNER NOZZLES
- ADJUSTING THE GAS TAPS TO REDUCE GAS SUPPLY
- CHECKING THE NOZZLES FOR LEAKS
- PREPARATION FOR USE
- RECOMMENDATIONS FOR SAVING ENERGY
- PREPARATION FOR OPERATION CLEANING THE APPLIANCE BEFORE USE
- OVEN WITH GRILL
- OPERATING RULES FOR THE HOB
- COOKING ON A GAS BURNER
- OPERATING THE HOBS
- OPERATING RULES FOR THE OVEN
- GENERAL INFORMATION ABOUT BAKING, ROASTING, AND GRILLING
- BAKING TIPS
- FRYING TIPS
- GRILLING TIPS
- OPERATING INSTRUCTIONS FOR THE ELECTRIC OVEN
- OVEN LEVELS (FOR MODELS WITH GRILL)
- TOP AND BOTTOM HEATING WITH FAN
- FAN OPERATION
- FAN HEATING (HARPREV + FAN)
- D" FUNCTION (VOLUMETRIC HEATING)
- FULL GRILL (ENHANCED GRILL)
- GRILL+FAN (GRILL+FAN)
- USING THE OVEN TIMER
- PREPARATION AND COOKING
- TURNING OFF THE OVEN EARLY
- TIPS FOR COOKING VEGETABLE DISHES
- HOW TO USE THE GRILL
- TURNING ON THE GRILL
- TURNING OFF THE GRILL
- CARE AND MAINTENANCE
- ASSEMBLING THE BURNER
- SIMPLE STEAM CLEANING
- CLEANING THE OVEN DOOR
- REPLACING THE OVEN LIGHT BULB
- REPLACING THE ROUND OVEN LIGHT BULB
- STEAM IS RELEASED FROM THE OVEN DURING OPERATION
- THE APPLIANCE MAKES METALLIC NOISES WHEN HEATING AND COOLING
- THE APPLIANCE DOES NOT WORK
- THE OVEN LIGHT DOES NOT WORK
- THE OVEN DOES NOT HEAT UP
- NO SPARK WHEN IGNITING
- GAS IS NOT SUPPLIED
- THE BURNERS BURN POORLY OR NOT AT ALL
- (IN MODELS WITH A TIMER) THE DIGITAL TIME INDICATOR FLASHES, OR THE CLOCK SYMBOL LIGHTS UP
- STOVE
- FIRST, READ THIS USER MANUAL CAREFULLY
- IMPORTANT INSTRUCTIONS AND WARNINGS REGARDING SAFETY AND THE ENVIRONMENT
- PREPARATION WORK
- HOW TO USE THIS STOVE
- HOW TO USE THE OVEN
- TECHNICAL SERVICE AND MAINTENANCE
- GENERAL SAFETY REQUIREMENTS
- SAFETY DURING GAS CONNECTION WORK
- WHAT TO DO IF YOU SMELL GAS
- CHILDREN'S SAFETY
- COMPLIANCE WITH THE WEEE DIRECTIVE AND RULES FOR DISPOSAL OF OLD PRODUCTS
- COMPLIANCE WITH THE ROHS DIRECTIVE
- FUTURE TRANSPORT
- GRILL GRATE
- HOW TO PROPERLY INSERT THE GRILL GRATE AND TRAY ONTO THE EXTENDABLE RAILS
- ROOMS WITH DOORS AND/OR WINDOWS OPENING DIRECTLY TO THE OUTSIDE
- ROOMS WITHOUT DOORS AND/OR WINDOWS OPENING DIRECTLY TO THE OUTSIDE
- IF THE APPLIANCE HAS ONLY ONE GAS INLET
- IF THE APPLIANCE HAS TWO GAS INLETS
- FIRE HAZARD
- LEAK CHECK AT CONNECTION POINT
- REPLACING BURNER NOZZLES
- REDUCED GAS FLOW SETTING FOR COOKTOP TAPS
- NOZZLE SEAL CHECK
- FIRST USE: INITIAL APPLIANCE CLEANING
- ATTENTION
- HOW TO USE THIS COOKTOP
- COOKING WITH GAS
- USING THE HOB
- GAS SHUT-OFF SAFETY SYSTEM (ON MODELS WITH A THERMOCOUPLE)
- HOW TO USE THE ELECTRIC OVEN
- SELECTING THE TEMPERATURE AND OPERATING MODE
- TURNING OFF THE ELECTRIC OVEN
- TRADITIONAL BAKING
- BOTTOM/TOP HEATING WITH FAN
- WORKS WITH FAN
- STRONG GRILL
- GRILL + FAN
- START OF COOKING
- TURNING OFF THE OVEN BEFORE THE SET TIME HAS ELAPSED
- PREPARATION TABLE FOR TEST DISHES
- TIPS FOR BAKING CAKES
- TIPS FOR BAKING PASTRY PRODUCTS
- TIPS FOR BAKING VEGETABLES
- TO CLEAN THE SIDE WALL (MAY VARY DEPENDING ON THE PRODUCT MODEL)
- CATALYTIC SURFACES
- REMOVING THE INNER GLASS PANEL OF THE DOOR
- IF THE OVEN HAS A ROUND BULB
- THE OVEN EMITS STEAM DURING USE
- METAL PARTS OF THE APPLIANCE MAKE SOUNDS WHEN HEATING AND COOLING
- THE OVEN LIGHT IS NOT WORKING
- THE OVEN IS NOT HEATING
- THERE IS NO SPARK
- GAS IS NOT BEING SUPPLIED
- THE BURNERS BURN UNEVENLY OR DO NOT BURN AT ALL
- (ON MODELS WITH A TIMER) THE CLOCK DISPLAY IS FLASHING OR THE CLOCK SYMBOL IS LIT
Brand : BEKO
Model : FSM62120DW
Category : Hob