
HII 72505 TBO - Hob BEKO - Free user manual and instructions
Find the device manual for free HII 72505 TBO BEKO in PDF.


| Product Type | Built-in Induction Hob |
| Model | HII 72505 TBO |
| Brand | Beko |
| Number of Cooking Zones | 4 |
| Dimensions (W x D x H) | 77 x 51 x 5.5 cm |
| Cutout Dimensions (W x D) | 75 x 49 cm |
| Weight | Approx. 8.5 kg |
| Power Supply | 220-240 V ~ 50/60 Hz |
| Total Power | 7.2 kW |
| Control Type | Touch control with sliders |
| Display | Digital display with timers |
| Boost Function | Yes, on all zones |
| Timer | Minute minder, automatic switch-off |
| Child Lock | Yes |
| Residual Heat Indicator | Yes, for each zone |
| Automatic Pan Detection | Yes |
| Safety Features | Overheat protection, automatic shut-off, child lock |
| Cleaning | Smooth ceramic glass surface; wipe with damp cloth |
| Spare Parts | Available from Beko authorized service centers |
| Repairability | Modular design; repair by qualified technician |
| Energy Efficiency Class | A+ |
Frequently Asked Questions - HII 72505 TBO BEKO
User questions about HII 72505 TBO BEKO
0 question about this device. Answer the ones you know or ask your own.
Ask a new question about this device
Download the instructions for your Hob in PDF format for free! Find your manual HII 72505 TBO - BEKO and take your electronic device back in hand. On this page are published all the documents necessary for the use of your device. HII 72505 TBO by BEKO.
USER MANUAL HII 72505 TBO BEKO
HII 72508 TBO
HII 72505 TBO
EN
Dear Customer,
Please read this manual before using the product.
Thank you for choosing a Beko product. We want your product, manufactured with high quality and technology, to offer you the best efficiency. To do this, carefully read this manual and any other documentation provided before using the product and keep it as a reference. If you give the product to someone else, give the manual with it. Follow the instructions, taking into account all the information and warnings stated in the user manual.
Heed all information and warnings in the user manual. This way, you will protect yourself and your product against the dangers that may occur.
Keep the user manual. If you give the product to someone else, give the manual with it.
The user manual contains the following symbols:

Hazard that may result in death or injury.
NOTICE: Hazard that may result in material damage to the product or its environment.

Hazard that may result in burns due to contact with hot surfaces.

Important information or useful usage tips.

Read the user manual.
1 Safety instructions 4
Purpose of usage 4
Child, vulnerable person and pet safety ..... 4
Electrical safety 5
Transportation safety 6
Installation safety 7
Safety of use....7
Temperature warnings 7
Accessory use 8
Cooking safety 8
Induction 8
Maintenance and cleaning safety ...... 9
2 Environmental Instructions 10
Waste regulation.... 10
Compliance with the WEEE Directive and Disposing of the Waste Product ..... 10
Package information.... 10
Recommendations for energy saving ..... 10
3 Your product 11
Product introduction 11
Product control panel introduction and usage 11
Hob control....11
Technical specifications 12
4 Installation 13
Before you install the hob, make sure that13
Selection of installation equipment ..... 13
When you have installed the hob, make sure that .... 14
Before locating the fixing brackets ..... 14
Adjusting the bracket position .... 14
Connecting the hob to the mains power supply 15
5 First use 16
First cleaning 16
6 How to use the hob 17
General information on hob usage ..... 17
Control panel 20
7 General information about cooking 25
General warnings about cooking with hob 25
Cooking Tips 25
8 Maintenance and care 27
General cleaning information 27
Cleaning the hob 28
Cleaning the control panel 28
9 Troubleshooting 29
1 Safety instructions
- This section contains safety instructions that will help prevent any risks of personal injuries or material damage.
- If the product is transferred to another person or used second hand, the operating manual, product labels, other relevant documents and accessories should be delivered with the product.
- Our company shall not be held responsible for any damage that may occur as a result of failure to comply with these instructions.
- Failure to comply with these instructions shall render any warranty void. Always have the installation and repair work performed by the manufacturer, the authorized service, or a person specified by the importer.
- Use genuine spare parts and accessories only.
- Do not attempt to repair or replace any part of the product unless it is clearly specified in the operating manual.
Do not perform technical modifications on the product.
Purpose of usage
- This product is designed for home use. It is not suitable for commercial use.
- Do not use the product in gardens, balconies, or other outdoor environments. The appliance is intended to be used in household and staff kitchen areas in shops, offices, and other working environments.
- WARNING: This product should be used for cooking purposes only. It should not be used for different purposes, such as heating the room.
Child, vulnerable person and pet safety
This product can be used by children 8 years of age and older, and people who are underdeveloped in physical, sensory, or mental skills, or lack experience and knowledge, as long as they are supervised or trained about the safe use and hazards of the product.
Children should not play with the product. Cleaning and user maintenance should not be performed by children unless there is someone overseeing them. This product should not be used by people with limited physical, sensory, or mental capacity (including children), unless they are kept under supervision or receive the necessary instructions. Children should be supervised to ensure that they do not play with the product. Electrical products are dangerous for children and pets. Children and pets must not play with, climb on, or enter the product. Do not put objects that children may reach on the product. Turn the handle of the pots and pans to the side of the workbench so that children cannot grab and burn. WARNING: During use, the accessible surfaces of the product are hot. Keep children away from the product. Keep the packaging materials out of the reach of
children. There is a hazard of injury and suffocation.
(Not all products are supplied with a plug, so if your product DOES have a plug) For the safety of children, disconnect the power plug and make the product inoperable before disposing of the product.
Electrical safety
Connect the product into a grounded outlet protected by a fuse that matches the current ratings indicated on the type label. Have the grounding installation made by a qualified electrician. Do not use the product without grounding in accordance with local / national regulations.
- The plug or the electrical connection of the product should be in an easily accessible place (where it will not be affected by the flame of the stove). If this is not possible, there should be a mechanism (fuse, switch, etc.) on the electrical installation to which the product is connected, in compliance with the electrical regulations and
separating all poles from the network.
- The product must not be connected to the outlet during installation, repair, and transportation.
- Connect the product to an outlet that meets the voltage and frequency values specified on the type label.
- (Not all products are supplied with a supply cord, so if your product DOES NOT have a supply cord)
Use only the connecting cable specified in the "Technical specifications" section.
- Do not jam the power cord under or behind the product. Do not put a heavy object on the power cord. The power cord should not be bent, crushed, or come into contact with any heat source.
- Use original cable only. Do not use cut or damaged cables or extension leads.
- If the power cord is damaged, it must be replaced by the manufacturer, an authorized service, or a person specified by the importer company to prevent possible dangers.
(Not all products are supplied with a plug, so if your product DOES have a plug)
- Do not plug the product into an outlet that is loose, has come out of its socket, is broken, dirty, oily, or has risk of water contact (for example, water that may leak from the counter).
- Never touch the plug with wet hands! To unplug, do not hold the cord, always hold the plug.
- Make sure that the product plug is securely plugged into the outlet to avoid arcing.

Transportation safety
- Disconnect the product from the mains before transporting the product.
- When you need to transport the product, wrap it with bubble wrap packaging material or thick cardboard and tape it tightly. Secure the product tightly with tape to prevent the removable or moving parts of the product and the product from damage.
- Check the overall appearance of the product for any damage that may
have occurred during transportation.

Installation safety
- Before the product is installed, check the product for any damage. If the product is damaged, do not install it.
- Do not install the product near heat sources (radiators, stoves, etc.).
- Keep all ventilation ducts open around the product.

Safety of use
- Make sure that the product is turned off after each use.
- If you do not use the product for a long time, disconnect it or turn off the fuse from the fuse box.
- Do not operate defective or damaged product. If any, disconnect the electricity / gas connections of the product and call the authorized service.
- WARNING: If the surface is cracked, switch off the appliance to avoid the possibility of electric shock.
- Do not climb on the product to reach anything or for any other reason.
- Do not use the product in situations that may affect
your judgment, such as drug intake and / or alcohol use. - Flammable objects kept in the cooking area may catch fire. Never store flammable objects in the cooking area. - Cast iron, aluminum or cookware with damaged / rough bottom parts may lead to scratching the glass surface. When replacing cookware, always raise the containers, do not slide on the surface. - Vapour pressure that build up due to the moisture on the hob surface or at the bottom of the pot can cause the pot to move. Therefore, make sure that the hob surface and bottom of the pots are always dry. - This product is not suitable for use with a remote control or an external clock.

Temperature warnings
- WARNING: While the product is operating, exposed parts will be hot. Do not touch the product and heating elements. Children under the age of 8 should not be brought close to the product without an adult.
- Do not place flammable / explosive materials near the
product, as the edges will be hot while it is operating.
- WARNING: Danger of fire: Do not store items on the cooking surfaces.

Accessory use
- WARNING: Use only hob guards designed by the manufacturer of the cooking appliance or indicated by the manufacturer of the appliance in the instructions for use as suitable or hob guards incorporated in the appliance. The use of inappropriate guards can cause accidents.

Cooking safety
- WARNING: The cooking process must be observed. Short-term cooking processes must be constantly observed.
- WARNING: Unattended cooking on a hob with fat or oil can be dangerous and may result in fire. NEVER try to extinguish a fire with water, but switch off the appliance and then cover flame e.g. with a lid or a fire blanket.
- Be careful when using alcohol in your food. Alcohol evaporates at high
temperatures and may catch fire when exposed to hot surfaces, causing a fire.

Induction
- Hotplates are equipped with "Induction" technology. Your induction hob that provides both time and money savings must be used with pots suitable for induction cooking; otherwise hotplates will not operate. For detailed information, see the section "Pot selection".
- As induction hobs create a magnetic field, they may cause harmful impacts for people who use devices such as insulin pump or pacemaker.
- Close the hotplate from its control panel after use, do not rely on the pot sensor.
- Metal objects such as knives, forks, spoons and lids should not be placed in the hotplate as they will get hot.
- Metal items stored in drawers under the hob may become very hot during long and intensive use. Do not store metal objects in drawers under the hob.
- Do not put electronic products such as mobile phones, tablets, computers
on the induction hob. Your product may be damaged.

Maintenance and
cleaning safety
- Wait for the product to cool before cleaning the product. Hot surfaces may cause burns!
- Never wash the product by spraying or pouring water on it! There is an electric shock hazard!
- Do not clean the product with steam cleaners as this may cause electric shock.
- Salt, sugar residues on the bottom of the cookware or such particles on the glass surface can cause the glass to scratch and crack. Make sure that the bottom is clean before placing the cookware. Keep the glass ceramic surface clean.
2 Environmental Instructions
Waste regulation
Compliance with the WEEE Directive and Disposing of the Waste Product
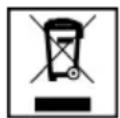
This product complies with EU WEEE Directive (2012/19/EU). This product bears a classification symbol for waste electrical and electronic equipment (WEEE).
This product has been manufactured with high quality parts and materials which can be reused and are suitable for recycling. Do not dispose of the waste product with normal domestic and other wastes at the end of its service life. Take it to the collection center for the recycling of electrical and electronic equipment. Please consult your local authorities to learn about these collection centers.
Appropriate disposal of used appliance helps prevent potential negative consequences for the environment and human health.
Compliance with RoHS Directive:
The product you have purchased complies with EU RoHS Directive (2011/65/EU). It does not contain harmful and prohibited materials specified in the Directive.
Package information
- Packaging materials of the product are manufactured from recyclable materials in accordance with our National Environment Regulations. Do not dispose of the packaging materials together with the domestic or other wastes. Take them to the packaging material collection points designated by the local authorities.
Recommendations for energy saving
Information on energy efficiency according to EU 66/2014 can be found on the product fiche given with the product. The following suggestions will help you use your product in an ecological and energy-efficient way:
- Defrost frozen food before cooking.
- Turn off the product 5 to 10 minutes before the end time of cooking for prolonged cooking. Now you can save up to 20% electricity by using heat.
- Use pots / pans with a size and lid suitable for the hotplate. Always choose the right size pot for your meals. More than necessary energy is needed for containers of the wrong size.
- Keep hob cooking surfaces and pot bases clean. Dirt reduces the heat transfer between the cooking area and the pot base.
3 Your product
Product introduction
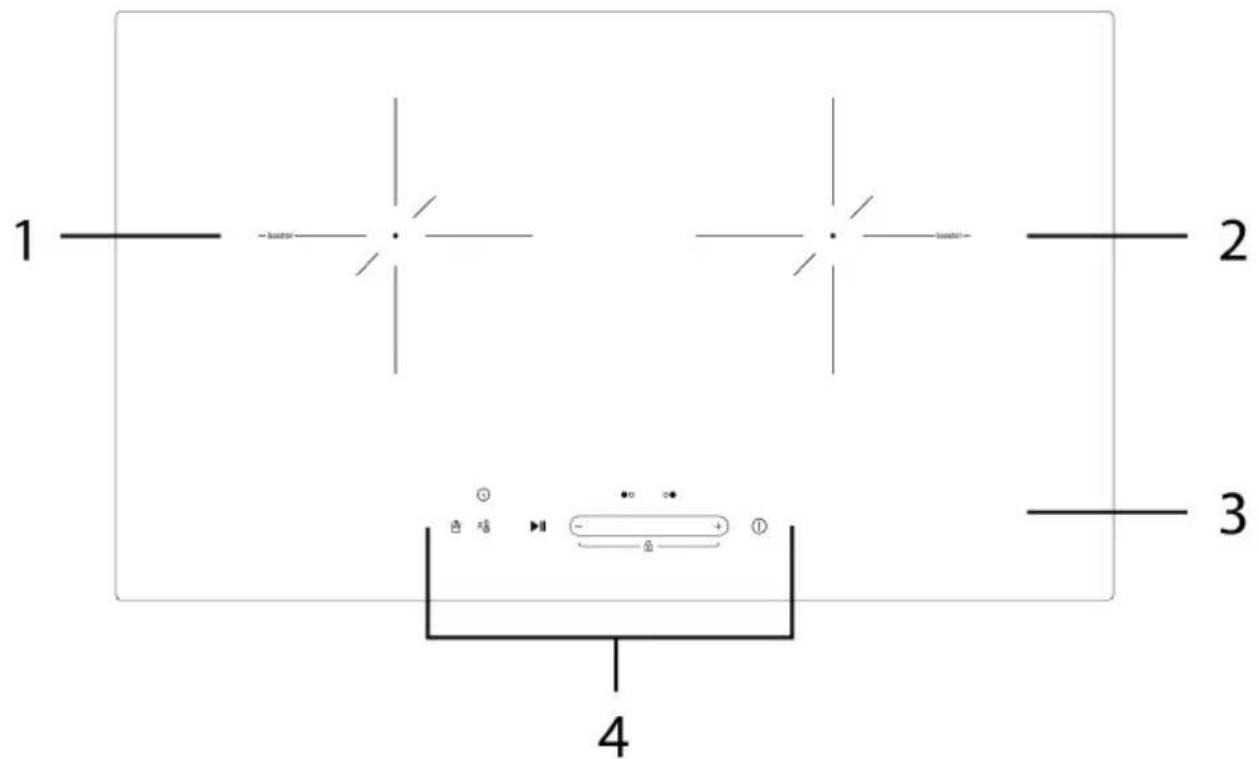
1 Induction cooking zone
3 Glass cooking surface
2 Induction cooking zone
4 Control panel
Product control panel introduction and usage
In this section, you can find the overview and basic uses of the product's control panel. There may be differences in images and some features depending on the type of product. Hob control
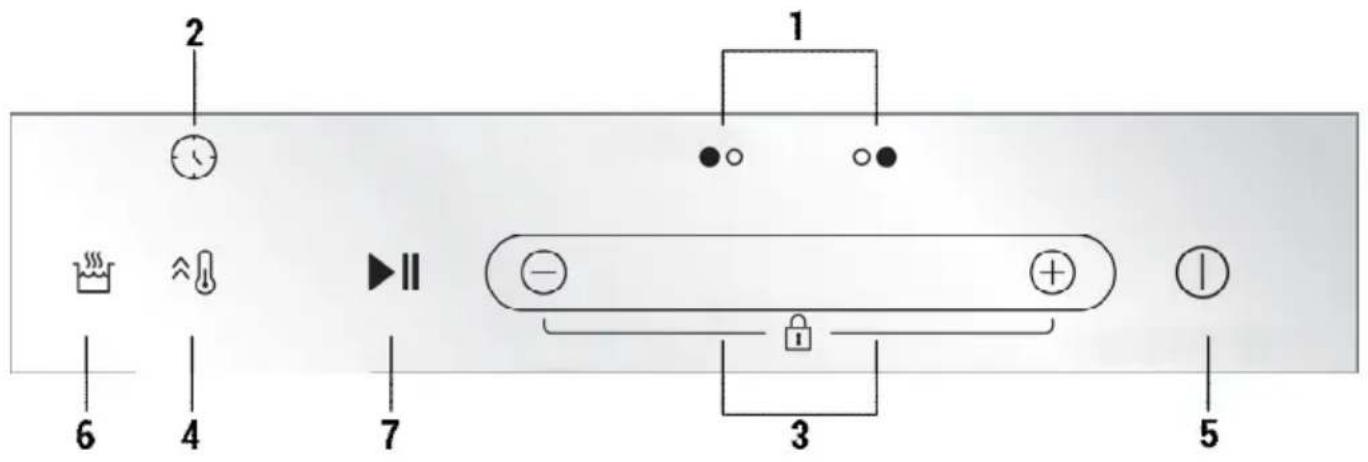
1 Heating zone selecting controls
5 ON/OFF control
2 Timer Control
6 Keep warm function control
3 Power/Timer regulating key/Child Lock control
7 Stop and go function control
4 Boost function control
Technical specifications
| General specifications | |
| Product external dimensions (height/width/depth) | 62 mm*/730 mm/430 mm |
| Hob installation dimensions (width/depth) | 680 mm /380 mm |
| Voltage / frequency 1N~ 220-240 V 50-60 Hz | |
| Cable type and cross section used / suitable for use in the product | min. H05VV-F 3 x 2,5 mm2 |
| Total power consumption max. 4,6 kW | |
| Burners | |
| Left Induction cooking zone | |
| Power 2000 W / Booster: 2300 W | |
| Right Induction cooking zone | |
| Power 2000 W / Booster: 2300 W | |

Technical specifications may be changed without prior notice to improve the quality of the product.

Figures in this manual are schematic and may not exactly match your product.

Values stated on the product labels or in the documentation accompanying it are obtained in laboratory conditions in accordance with relevant standards. Depending on operational and environmental conditions of the product, these values may vary.

Weight and dimensions are approximate. Because we continually strive to improve our products we may change specifications and designs without prior notice.
4 Installation
Before you install the hob, make sure that
- the work surface is square and level, and no structural members interfere with space requirements
- the work surface is made of a heat-resistant material
- if the hob is installed above an oven, the oven has a built-in cooling fan
- the installation will comply with all clearance requirements and applicable standards and regulations
- a suitable isolating switch providing full disconnection from the mains power supply is incorporated in the permanent wiring, mounted and positioned to comply with the local wiring rules and regulations.
The isolating switch must be of an approved type and provide a 3 mm air gap contact separation in all poles (or in all active [phase] conductors if the local wiring rules allow for this variation of the requirements)
ing rules allow for this variation of the requirements)
- The isolating switch will be easily accessible to the customer with the hob installed.
- Consult local building authorities and by-laws if in doubt regarding installation.
- Use heat-resistant and easy-to-clean finishes (such as induction tiles) for the wall surfaces surrounding the hob.
Selection of installation equipment
Cut out the work surface according to the sizes shown in the drawing.
For the purpose of installation and use, a minimum of 5 cm space shall be preserved around the hole.
Be sure the thickness of the work surface is at least 30mm. Please select heat-resistant work surface material to avoid larger deformation caused by the heat radiation from the hotplate. As shown below:
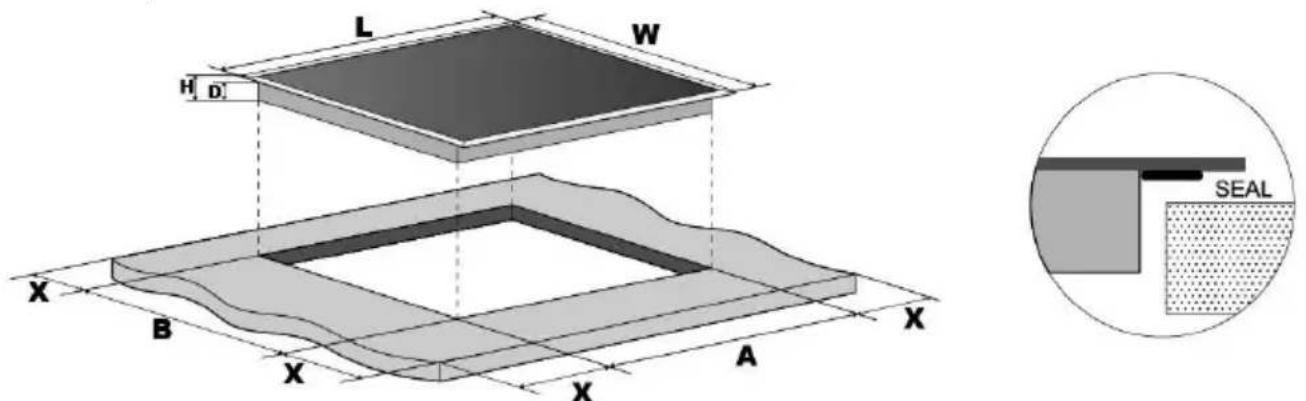
| L(mm) | W(mm) | H(mm) | D(mm) | A(mm) | B(mm) | X(mm) |
| 730 430 | 62 58 | 680 380 | 50 mini |
Under any circumstances, make sure the Induction cooker hob is well ventilated and the air inlet and outlet are not blocked. Ensure the Induction cooker hob is in good work state. As shown below.

The safety distance between the hotplate and the cupboard above the hotplate should be at least 760mm.
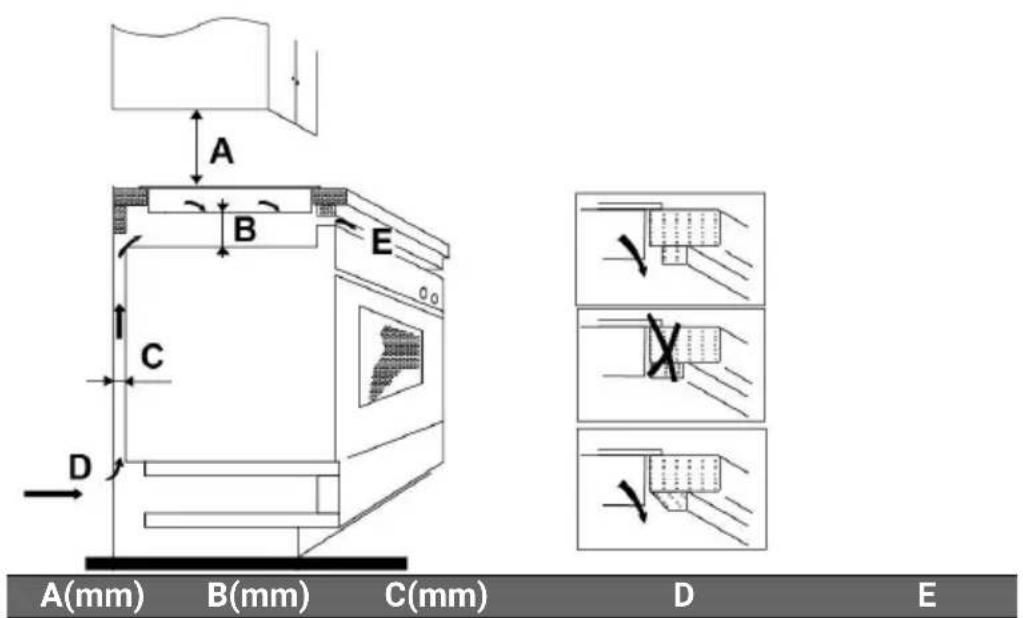
A(mm)
B(mm)
C(mm)
D
E
When you have installed the hob, make sure that
- the power supply cable is not accessible through cupboard doors or drawers
- there is adequate flow of fresh air from outside the cabinetry to the base of the hob
- If the hob is installed above a drawer or cupboard space, a thermal protection barrier is installed below the base of the hob.
- The isolating switch is easily accessible by the customer.
Before locating the fixing brackets
The unit should be placed on a stable, smooth surface (use the packaging). Do not apply force onto the controls protruding from the hob.
Adjusting the bracket position
Fix the hob on the work surface by screwing the 4 brackets on the bottom of the hob (see picture) after installation.

5mm
| A | B | C | D |
| Screw | Bracket | Screw | Bottom case |
| hole | |||
| glass | |||
| B | retaining bracket | ||
| A | screw | ||
| ST3.5*8 | |||
| D | Bottom case | ||
| worktop/kitchen cabinet | |||
Cautions
- The induction hotplate must be installed by qualified personnel or technicians. We have professionals at your service. Please never conduct the operation by yourself.
- The hob will not be installed directly above a dishwasher, fridge, freezer, washing machine or clothes dryer, as the humidity may damage the hob electronics.
- The induction hotplate shall be installed such that better heat radiation can be ensured to enhance its reliability.
- The wall and induced heating zone above the table surface shall withstand heat.
- To avoid any damage, the sandwich layer and adhesive must be resistant to heat.
Connecting the hob to the mains power supply

This hob must be connected to the mains power supply only by a suitably qualified person. Before connecting the hob to the mains power supply, check that:
- the domestic wiring system is suitable for the power drawn by the hob.
- the voltage corresponds to the value given in the rating plate
- the power supply cable sections can withstand the load specified on the rating plate. To connect the hob to the mains power supply, do not use adapters, reducers, or branching devices, as they can cause overheating and fire.
The power supply cable must not touch any hot parts and must be positioned so that its temperature will not exceed 75°C at any point.

Check with an electrician whether the domestic wiring system is suitable without alterations. Any alterations must only be made by a qualified electrician.
The power supply should be connected in compliance with the relevant standard, or a single-pole circuit breaker. The method of connection is shown below.

- If the cable is damaged or to be replaced, the operation must be carried out by the after-sales agent with dedicated tools to avoid any accidents.
- If the appliance is being connected directly to the mains, an omnipolar circuit-breaker must be installed with a minimum opening of 3mm between contacts.
- The installer must ensure that the correct electrical connection has been made and that it is compliant with safety regulations.
- The cable must not be bent or compressed.
- The cable must be checked regularly and replaced by authorised technicians only.
- The yellow/green wire of the power supply cable must be connected to the earth of both power supply and appliance terminals.
- The manufacturer cannot be held responsible for any accidents resulting from the use of an appliance which is not connected to earth, or with faulty earth connection continuity.
5 First use
Before you start using your product, it is recommended to do the following in the following sections.
First cleaning
- Remove all packaging materials.
- Wipe the surfaces of the product with a wet cloth or sponge and dry with a cloth.
NOTICE The surface might get damaged by some detergents or cleaning materials. Do not use aggressive detergents, cleaning powders/creams or any sharp objects during cleaning.
NOTICE Smoke and smell may emit for a couple of hours during the initial operation. This is quite normal. Ensure that the room is well ventilated to remove the smoke and smell. Avoid directly inhaling the smoke and the smell that emits.
NOTICE Smoke and smell may emit for a couple of hours during the initial operation. This is quite normal. Ensure that the room is well ventilated to remove the smoke and smell. Avoid directly inhaling the smoke and the smell that emits.
6 How to use the hob
General information on hob usage
General warnings
- Do not let any objects fall on the hob. Even small objects such as saltshakers may damage the hob. Do not use cracked hobs. Water may seep through these cracks and cause a short circuit. If the surface is damaged in any way (e.g. visible cracks), turn off the fuse first, then call the authorized service to unplug the product to reduce the risk of electric shock.
- Do not use unbalanced and easily tilting pots/pans on the hob.
- Do not heat empty pots/pans. The pots and the appliance may be damaged. Always turn off the hob's burners after each use.
- You may damage the appliance if you operate the hobs without any pot or pots/pans. Always turn off the hobs after each operation. After each use, the cooking surface will be hot, so do not place plastic pots/pans on the cooking surface. Clean such material on the surface immediately.
- Sudden temperature changes on the glass cooking surface may cause damage. Be careful not to spill cold liquids during cooking.
- Put a sufficient amount of food in pots and pans. Thus, you can prevent food from pouring out of the pots/pans and will not need to clean unnecessarily.
- Do not place the covers of pots and pans on burners/zones.
- Place the pots by centering them on the burners/zones. If you wish to place a pot on a different burner/zone, do not slide it towards the desired burner; rather, lift it first and then put it on the other burner.
Operating principle of the induction hob
The induction hob is like an open circuit. The circuit completes when a cooking pot or pan suitable for induction cooking is placed on it, and an electronic system below the glass surface generates a magnetic field. The metal base of the pot or pan is heated by taking energy from this magnetic field. Thus, the heat is not generated on the surface of the hob, but directly on the pot or pan above it. The glass surface is heated with the heat of the cooking pot or pan.
Advantages of cooking with induction
Induction hobs offer some advantages as the heat is transferred directly to the cooking pots/pans.
- Foods that overflow during cooking do not burn rapidly as the glass cooking surface is not heated directly. It is cleaned more easily.
- Cooking shall be faster as the heat is generated directly on the cooking pots/pans. Thus, it saves time and energy with respect to other hob types.
- As the heat is given directly to the cooking pots/pans, there is no heat loss, and it provides more efficient cooking.
- The fact that the heat transfer stops and the cooking surface is not heated directly when the cooking pots/pans are removed from the cooking surface provides safer use against possible accidents while cooking.
For safe operation:
- Do not select high heating levels when using non-stick cooking pots/pans coated with little oil or used without oil (Teflon type).
- Do not use the glass cooking surface as a surface to place things on or as a cutting surface.
- Do not place metal objects such as cutlery or pot lids on your hob, as they may get hot.
- Never use aluminum foil for cooking. Never place food wrapped in aluminum foil on the induction zone.
- Keep magnetic objects such as credit cards or tapes away from the hob while it is operating.
- If there is an oven under your hob and it is being operated, the sensors on the hob may reduce the cooking level or turn off the hob.
- Your hob has an automatic shut-off system. Detailed information about this
system is provided in the following sections. However, if you use thin-based pots for cooking, these pots will heat up very quickly and the bottom of the pan may melt and damage the cooking surface and the appliance before the automatic shut-off system is activated.
Cooking pots/pans
You shall use ferromagnetic, quality cooking pots/pans that bear a label or warning indicating they are compatible for induction cooking only with your induction hob. Generally, the higher the iron content, the better the cooking pots/pans will perform. The base diameter of the cooking pots/pans shall match the induction zone. Suggested dimensions are listed below.
Suitable pots/pans:
- Cast iron pots/pans
- Enamelled steel pots/pans
- Steel and stainless steel pots/pans (with label or warning indicating that they are induction compatible)
Unsuitable pots/pans:
- Aluminium pots/pans • Copper pots/pans
- Brass pots/pans
- Glass pots/pans
- Pottery • Ceramic and porcelain
Recommendations:
- Use flat bottomed cooking pots/pans only. Do not use pots/pans with convex or concave bases.
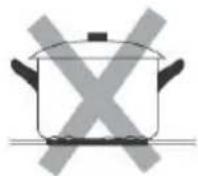
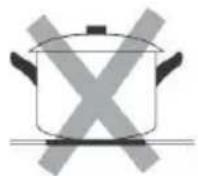
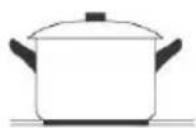
- Use cooking pots/pans with thick, processed bases only. If you use thin based pots, these pots shall heat up very quickly and the bottom of the pan may melt and damage the cooking surface and the appliance before the automatic shut-off system is activated. Sharp edges may cause scratches on the surface.
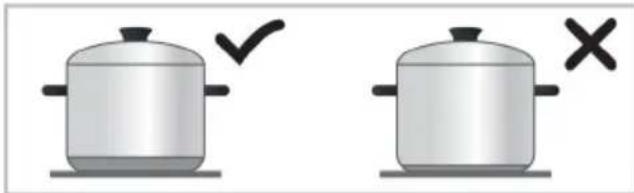
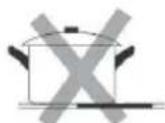
• Make sure that the base of your pan is smooth, sits flat against the glass, and is the same size as the cooking zone. Always centre your pan on the cooking zone.
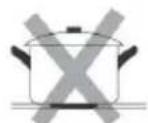
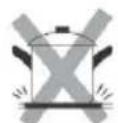

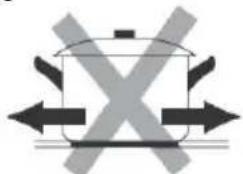
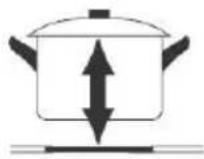
• Always lift pans off the Induction hob – do not slide, or they may scratch the glass
- The bases of some cooking pots/pans have a smaller ferromagnetic field than its true diameter. Only this area is heated by the hob. Therefore, the heat is not evenly distributed and the cooking performance is decreased. Moreover, such cooking pots/pans may not be detected by large induction hobs. Thus, the cooking hob shall be selected according to the size of the ferromagnetic field.
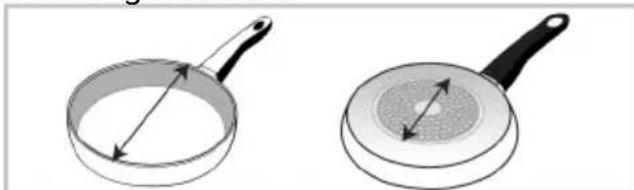
- Some cooking pots/pans have a base that contains non-ferromagnetic materials such as aluminium. These types of cooking pots/pans may not heat adequately or may not be detected by the induction hob at all. In some cases, a bad pots/pans warning may appear.
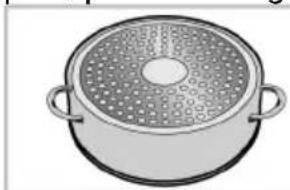
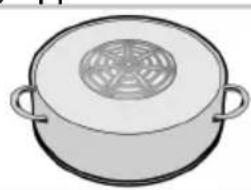

Equal distribution of the cookware on the right and left and center hobs for the selection of hobs affects the cooking performance positively while cooking multiple meals on the induction hobs.

Only use 180 mm diameter cookware for induction cooking.
energy at induction hobs, because the heat is only created in the relevant pot area.
Automatic detection of the cooking pots/pans
When you place any cooking pots/pans compatible with induction on your hob, your hob automatically detects which hob the cooking pots/pans is placed on and provides directions on the control panel.
Cooking pots/pans test
Test whether your pot is compatible with cooking with an induction hob using the methods below.
- It is compatible if the base of your pot holds a magnet.
- It is compatible if ☐ does not flash when you place your pot on the induction hob and turn on the hob.
If the display flashes alternately with the heat setting for induction hob
This means that:
- you have not placed a pan on the correct cooking zone or,
- the pan you're using is not suitable for induction cooking or,
- the pan is too small or not properly centred on the cooking zone.
No heating takes place unless there is a suitable pan on the cooking zone. The display will automatically turn off after 1 minute if no suitable pan is placed on it.
The detection of cooking pots/pans by the induction hobs depends on the diameter and material of the ferromagnetic in the base of the pots/pans. To ensure detection of the cooking pots/pans and achieve efficient cooking, the cooking pots/pans shall be selected as per the size of your hob. The cooking pots/pans sizes recommended for hob sizes are given above.
Boiling behavior may vary depending on the pot types, size of the pot and size of the cooking zone. For a more homogenous boiling behavior, a one step larger cooking zone might be used. To use a larger cooking zone does not cause wasting of
Control panel

Keys and symbols
1 Heating zone selecting controls 2 Timer Control 3 Power/Timer regulating key/Child Lock control 4 Boost function control 5 ON/OFF control 6 Keep warm function control 7 Stop and go function control
To start cooking
After power on, the buzzer beeps once, all the indicators light up for 1 second then go out, indicating that the hob has entered the state of standby mode.
- Touch the ON/OFF control, all the indicators show "-".

- Place a suitable pan on the cooking zone that you wish to use.
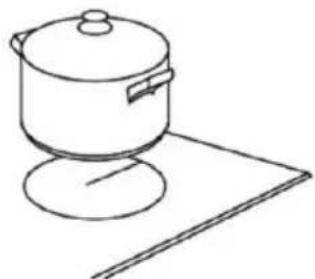
Make sure the bottom of the pan and the surface of the cooking zone are clean and dry.
- Touching the heating zone selection control, and a indicator next to the key will flash.
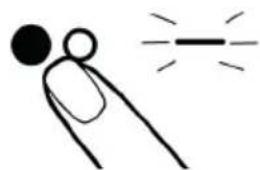
- Set a power level by touching the "-", "+", or slide along the "—" control or just touch any point of the "—".
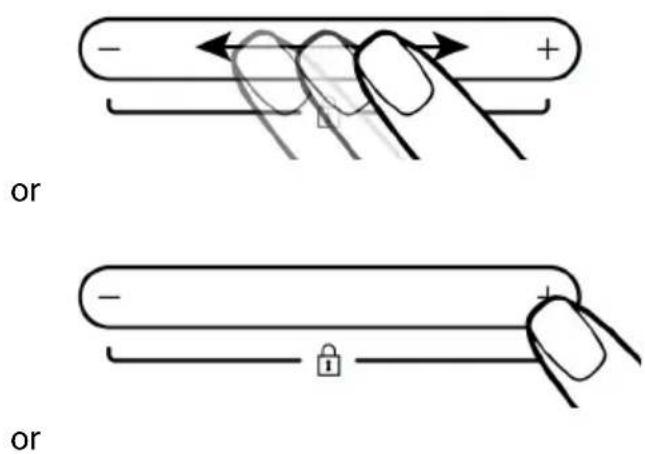
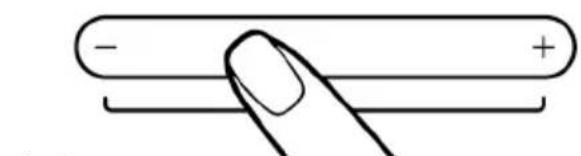
a) If you don't select a heat zone within 1 minute, the induction or infrared hob will automatically switch off. You will need to start again at step 1. b) You can modify the heat setting at any time during cooking.
c) If slide along the "—", power will vary from stage 2 to stage 8. Press "-", power will decrease by one stage each time till stage 0. Press "+", power will increase by one stage each time till stage 9.
When you have finished cooking
- Touching the heating zone selection control that you wish to switch off.
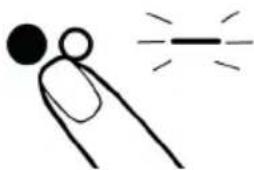
- Turn the cooking zone off by touching the "-" and scrolling down to "0".

- Turn the whole cooktop off by touching the ON/OFF control.

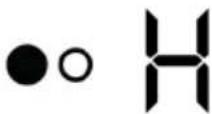
- Beware of hot surfaces
"H" will show which cooking zone is hot to touch. It will disappear when the surface has cooled down to a safe temperature. It can also be used as an energy saving function if you want to heat further pans, use the hotplate that is still hot.
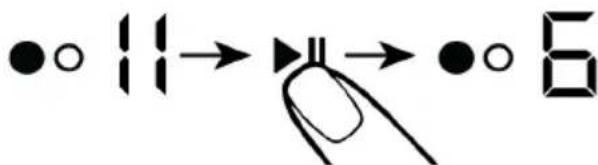
How to use Pause Function
Pause function can be used at any time during cooking. It allows to stop the hob and come back to it keeping all the settings.
- Make sure that the cooking zone is working.
- Touch the pause button. All the cooking zone displays will show "ll". The operation of the hob will be deactivated except the Pause, ON/OFF and Child lock.

- To cancel the pause status, touch pause button, then the cooking zones will go back to the power level which you set before.
Using the Keep Warm
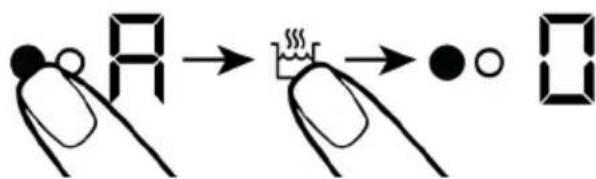
Keep warm function is suitable for keeping food warm.
Using the Keep warm to get stable temperature
- Touch the heating zone selection button that you wish to use keep warm, the indicator will flash.
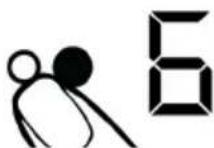
- Touch the button ☑, the cooking zone indicator will display "A".

- If you want to cancel the keep warm, touch the heating zone selection button, and then touch the button 🎨 The heating zone will go back to "0" power stage.
Using the Boost induction hob
Boost is the function that allows one zone to rise to a larger power in one second and last for 5 minutes. Thus you can get a more powerful and faster cooking.
Using the Boost to get larger power
- Touch the heating zone selection button that you wish to boost, an indicator next to the key will flash.
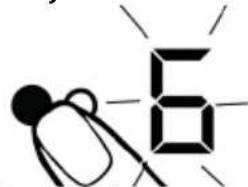
- Touch the Boost button, the heating zone will begin to work at Boost mode. The power display will show "P" to indicate that the zone is boosting.
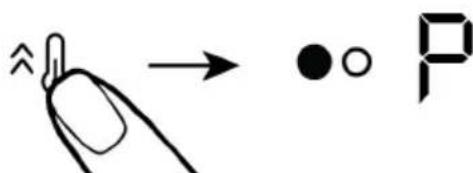
- After we set Boost function, the Boost power will last for 5 minutes. After 5 minutes, the zone will switch back to the power stage which was set before boost function.

- If you want to cancel the Boost during this 5 minutes, touch the heating zone selection button, an indicator next to the key will flash. And then touch the Boost button. The heating zone will go back to the power stage which was set before boost.

For zone 1 and zone 2, if you use boost on one zone, first make sure that the other zone is working on/below power level 5. When you select one zone and press 'boost' button, if
the other zone is working above power level 5, the "P" and "9" symbols will flash on the display of the selected zone and power level will be automatically set as 9.
Using the Timer
You can use the timer in two different ways:
a) You can use it as a minute minder. In this case, the timer will not turn any cooking zone off when the set time is up.
b) You can set it to turn one cooking zone off after the set time is up. You can set the timer up to 99 minutes.
Using the Timer as a Minute Minder If you are not selecting any cooking zone:
- Make sure the cooktop is turned on. NOTE: you can use the minute minder even if you're not selecting any cooking zone.
- Touch timer control, The minder indicator will start flashing and "30" will show in the timer display.
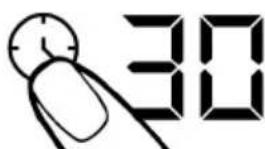
- Set the time by touching the "-" or "+" control of the timer.
i Touch the "-" or "+" control of the timer once to decrease or increase by 1 minute. Hold the "-" or "+" control of the timer to decrease or increase by 10 minutes.

- To cancel the timer, touch the "Timer", the timer is cancelled, and the "00" will show in the minute display, and then "--".

- When the time is set, it will begin to count down immediately. The display will show the remaining time and the timer indicator will flash for 5 seconds.

- Buzzer will bips for 1 second and the timer indicator was disappears, meaning the timer finished.

Setting the timer to turn one cooking zone off:
- Touching the heating zone selection control that you want to set the timer for. (e.g. zone 1#)
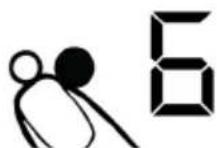
- Touch timer control, The minder indicator will start flashing and "30" will show in the timer display.
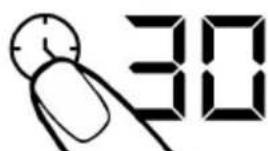
- Set the time by touching the control of the timer.
i Touch the "-" or "+" control of the timer once will decrease or increase by 1 minute. Touch and hold the "-" or "+" control of the timer will decrease or increase by 10 minutes. If the setting time exceeds 99 minutes, the timer will automatically return to 0 minute.
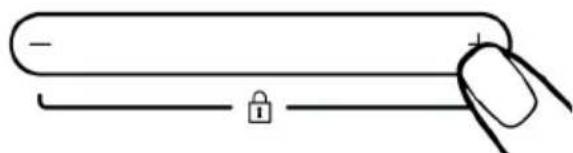
- To cancel the timer, touch the heating zone selection control, and then touch the "Timer", the timer is cancelled, and the "00" will show in the minute display, and then "--".

- When the time is set, it will begin to count down immediately. The display will show the remaining time and the timer indicator flash for 5 seconds.
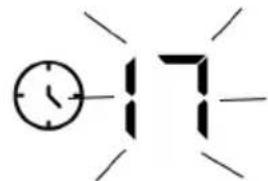
The red dot next to the power level indicator will illuminate, indicating that the zone is selected.
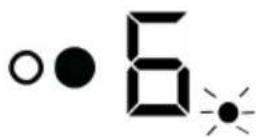
- When the cooking timer expires, the corresponding cooking zone will automatically switch off and show "H". Other cooking zones will keep operating if they were turned on previously.

Setting the timer to turn off more than one cooking zone
- If more than one heating zone uses this function, the timer indicator will show the lowest time. (e.g., zone 1# setting time of 3 minutes, zone 2# setting time of 6 minutes, the timer indicator shows "3").

The flashing red dot next to the lower level indicator means the timer indicator is showing the time of the heating zone. If you want to check the set time of another heating zone, touch the heating zone selection control. The timer will indicate its set time.
- When the cooking timer expires, the corresponding heating zone will automatically switch off and show "H".
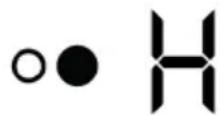

If you want to change the time after the timer is set, you have to start from step 1.
Locking the Controls
- You can lock the controls to prevent unintended use (for example, children accidentally turning the cooking zones on).
- When the controls are locked, all the controls except the ON/OFF control are disabled.
To lock the controls
- Touch the "+" and "-" buttons at the same time. The timer indicator will show 'Lo'.
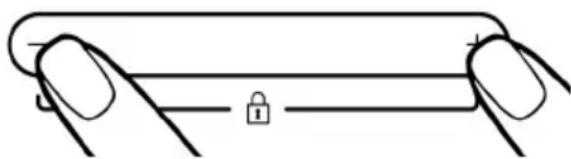
To unlock the controls
- Make sure the Induction hob is turned on.
- Touch and hold the "+" and "-" buttons at the same time for 3 seconds.
- You can now start using your hob.

When the hob is in lock mode, all controls are disabled except the ON/OFF control. You can always turn the hob off with the ON/OFF control in an emergency, but you shall unlock the hob first in the next operation.
Over-Temperature Protection
- A temperature sensor monitors the temperature inside the hob. When an excessive temperature is detected, the hob will stop operation automatically.
Residual Heat Warning
- When the hob has been operating for some time, there will be residual heat. The letter "H" appears to warn you to keep away from it.
Detection of Small Articles for Induction Hob
- When an unsuitable size or non-magnetic pan (e.g., aluminium), or some other small item (e.g., knife, fork, key) has been left on the hob, the hob automatically goes to standby in 1 minute. The fan will keep cooling down the induction hob for a further 1 minute.
Auto Shutdown
- Another safety feature of the hob is auto shutdown. This occurs whenever you forget to switch off a cooking zone. The default shutdown times are shown in the table below:
| Power level | 1 | 2 | 3 | 4 | 5 | 6 | 7 | 8 | 9 | A | II |
| Default working timer (hour) | 8 | 8 | 8 | 4 | 4 | 4 | 2 | 2 | 2 | 2 | 2 |

People with a heart pacemaker should consult with their doctor before using this unit.
7 General information about cooking
This section describes tips on preparing and cooking your food.
General warnings about cooking with hob
- Never fill the pan with oil more than one third of it. Do not leave the hob unattended when heating oil. Overheated oils bring risk of fire. Never attempt to extinguish a possible fire with water! When oil catches fire, cover it with a fire blanket or damp cloth. Turn off the hob if it is safe to do so and call the fire department.
- Before frying foods, always remove their excess water and put them inside the heated oil slowly. Make sure that frozen foods are defrosted before frying.
- When heating oil, make sure that the pot you use is dry and keep its lid open.
- For recommendations on cooking with power saving, refer to the "Environmental Instructions" section.
- The cooking temperature and time values given for foods may vary depending on the recipe and amount. For this reason, these values are given as ranges.
Cooking Tips
- When food comes to the boil, reduce the temperature setting.
- Using a lid will reduce cooking times and save energy by retaining the heat.
- Minimise the amount of liquid or fat to reduce cooking times.
- Start cooking on a high setting and reduce the setting when the food has heated through.
Simmering, cooking rice
- Simmering occurs below boiling point, at around 85°C, when bubbles are just rising occasionally to the surface of the cooking liquid. It is the key to delicious soups and tender stews because the flavours develop without overcooking the food. You should also cook egg-based and flour thickened sauces below boiling point.
- Some tasks, including cooking rice by the absorption method, may require a setting higher than the lowest setting to ensure the food is cooked properly in the time recommended.
Searing steak
To cook juicy flavour some steaks:
- Stand the meat at room temperature for about 20 minutes before cooking.
- Heat up a heavy-based frying pan.
- Brush both sides of the steak with oil. Drizzle a small amount of oil into the hot pan and then lower the meat onto the hot pan.
- Turn the steak only once during cooking. The exact cooking time will depend on the thickness of the steak and how cooked you want it. Times may vary from about 2 – 8 minutes per side. Press the steak to gauge how cooked it is – the firmer it feels the more ‘well done’ it will be.
- Leave the steak to rest on a warm plate for a few minutes to allow it to relax and become tender before serving.
For stir-frying
- Choose an Induction compatible flat-based wok or a large frying pan.
- Have all the ingredients and equipment ready. Stir-frying should be quick. If cooking large quantities, cook the food in several smaller batches.
- Preheat the pan briefly and add two tablespoons of oil.
- Cook any meat first, put it aside and keep warm.
- Stir-fry the vegetables. When they are hot but still crisp, turn the cooking zone to a lower setting, return the meat to the pan and add your sauce.
- Stir the ingredients gently to make sure they are heated through.
- Serve immediately.
Heat Settings
The settings below are guidelines only. The exact setting will depend on several factors, including your cookware and the amount you are cooking. Experiment with the induction hob to find the settings that best suit you.
| Heat setting | Suitability |
| 1 - 2 | ·delicate warming for small amounts of food·melting chocolate, butter, and foods that burn quickly·gentle simmering·slow warming |
| 3 - 4 | ·reheating·rapid simmering·cooking rice |
| 5 - 6 | ·pancakes |
| 7 - 8 | ·sautéing·cooking pasta |
| 9 | ·stir-frying·searing·bringing soup to the boil·boiling water |
8 Maintenance and care
General cleaning information ⚠️ General warnings
- Wait for the product to cool before cleaning the product. Hot surfaces may cause burns!
- Do not apply the detergents directly on the hot surfaces. This may cause permanent stains.
- The appliance shall be thoroughly cleaned and dried after each operation. Thus, food residues shall be easily cleaned and these residues shall be prevented from burning when the appliance is used again later. Thus, the service life of the appliance extends and frequently faced problems are decreased.
- Do not use steam cleaning products for cleaning.
- Some detergents or cleaning agents may damage the surface. Do not use abrasive detergents, cleaning powders, cleaning creams, descalers or sharp objects during cleaning.
- There is no need for a special cleaning agent for cleaning after each use. Clean the appliance using dish soap, warm water and a soft cloth or sponge and dry with a dry microfiber cloth.
- Be sure to completely wipe off any remaining liquid after cleaning and immediately clean any food splashing around during cooking.
- Do not wash any component of your appliance in a dishwasher.
For the hob:
- Acidic dirt such as milk, tomato paste and oil may cause permanent stains on the hobs and components of the burners/hotplates, clean any overflown fluids immediately after cooling down the hob by turning it off.
Inox and stainless surfaces
- Do not use acid or chlorine-containing cleaning agents to clean stainless or inox surfaces and handles.
- Stainless or inox surfaces may change colour over time. This is normal. After each operation, clean with a detergent suitable for the stainless or inox surface.
- Clean with a soft soapy cloth and liquid (non-scratching) detergent suitable for inox surfaces, taking care to wipe in one direction.
- Remove lime, oil, starch, milk and protein stains on the inox-stainless and glass surfaces immediately without waiting. Stains may rust under long periods of time.
Glass surfaces
- When cleaning glass surfaces, do not use hard metal scrapers and abrasive cleaning materials. They can damage the glass surface.
- Clean the appliance using dishwashing detergent, warm water and a microfiber cloth specific for glass surfaces and dry it with a dry microfiber cloth.
- If there is residual detergent after cleaning, wipe it with cold water and dry with a clean and dry microfiber cloth. Residual detergent residue may damage the glass surface next time.
- Under no circumstances should the dried-up residue on the glass surface be cleaned off with serrated knives, wire wool or similar scratching tools.
- You can remove the calcium stains (yellow stains) on the glass surface with the commercially available descaling agent, with a descaling agent such as vinegar or lemon juice.
- If the surface is heavily soiled, apply the cleaning agent on the stain with a sponge and wait a long time for it to work properly. Then clean the glass surface with a wet cloth. • Discolorations and stains on the glass surface are normal and not defects.
- Clean plastic parts and painted surfaces using dishwashing detergent, warm water and a soft cloth or sponge and dry them with a dry cloth.
- Do not use hard metal scrapers and abrasive cleaners. It may damage the surfaces.
- Ensure that the joints of the components of the appliance are not left damp and with detergent. Otherwise, corrosion may occur on these joints.
Plastic parts and painted surfaces
Cleaning the hob Glass cooking surface
Follow the cleaning steps described for the glass surfaces in the "General cleaning information" section for the cleaning of glass cooking surface. You may complete your cleaning as per the information below for special cases.
- Sugar-based foods such as dark cream, starch and syrup should be cleaned immediately, without waiting for the surface to cool. Otherwise, the glass cooking surface may be permanently damaged.
- Do not use cleaning agents for cleaning operations you perform while the hob is hot, otherwise permanent stains may occur.
Cleaning the control panel
- When cleaning the panels with knob control, wipe the panel and knobs with a damp soft cloth and dry with a dry cloth. Do not remove the knobs and gaskets underneath to clean the control panel. The control panel and knobs may be damaged.
- While cleaning the inox panels with knob control, do not use inox cleaning agents around the knobs. The indicators around the knobs may be deleted.
- Clean the touch control panels with a damp soft cloth and dry with a dry cloth. If your product has a key lock feature, set the key lock before performing control panel cleaning. Otherwise, incorrect detection may occur on the keys.

Troubleshooting
Consult the Authorised Service Agent or technician with license or the dealer where you have purchased the product if you cannot remedy the trouble although you have implemented the instructions in this section. Never attempt to repair a defective product yourself.
Product does not operate.
- The mains fuse is defective or has tripped. >>>Check fuses in the fuse box. If necessary, replace or reset them.
- Product is not plugged into the (grounded) socket. >>> Check the plug connection.
- Buttons/knobs/keys on the control panel do not function. >>> If your product is equipped with key lock function, key lock may be enabled. Please disable it.
- If the display does not light up when you switch the hob on again. >>> Disconnect the appliance at the circuit breaker. Wait minimum 20 seconds and then reconnect it. • Overheat protection is active. >>> Allow your hob to cool down.
- The cooking pot is not suitable. >>> Check your pot.
"symbol appears on the cooking zone display.
- You have not placed the pot on the active cooking zone. >>> Check if there is a pot on the cooking zone.
- Your pot is not compatible with induction cooking. >>> Check if your cooking pot is compatible with induction hob.
- The cooking pot is not centered properly or the bottom surface of the pot is not wide enough for the cooking zone. >>> Choose a pot wide enough and center the pot on the cooking zone properly.
- Cooking pot or cooking zone is overheated. >>> Allow them to cool down.
Selected cooking zone suddenly turns off during operation
- Cooking time for the selected cooking zone may be over. >>> You may set a new cooking time or finish cooking. • Overheat protection is active. >>> Allow your hob to cool down.
- An object may be covering the touch control panel. >>> Remove the object on the panel.
The pot does not get warm even if the cooking zone is on
- Your pot is not compatible with induction cooking. >>> Check if your cooking pot is compatible with induction hob.
- The cooking pot is not centered properly or the bottom surface of the pot is not wide enough for the cooking zone. >>> Choose a pot wide enough and center the pot on the cooking zone properly.
Cooling fan continues operating although the hob is turned off
- This is not a fault. The cooling fan will continue operating until the electronics in the hob cool down to a suitable temperature.
Noise from the cooker during cooking
Some sounds may be heard from the cooker while cooking. These sounds are due to the composition of the cooking vessel. These sounds are normal, they are not a malfunction, and they are a part of induction technology.
Possible noises and reasons
- Fan noise: The cooker is equipped with a fan that activates automatically according to the temperature of the appliance. The fan has various operating levels and operates at different levels as per the temperature.
- Lower buzz like the operating noise of a transformer: This is due to the nature of induction technology. As heat is transmitted directly to the base of the cooking vessel, such buzz sounds may be heard depending on the material of the cooking vessel. Thus, different noises may be heard with different cookware.
- Cracking noise: The reason for this is the structure and material of the base of the cooking vessel. A cracking sound may be heard if the cooking vessel is made of various layers with different materials.
- Whining noise: A whining sound may be heard when two cooking zones on the same side of the cooker are used to cook with different cooking levels.
Failure Display and Inspection for Induction Hob
If an abnormality comes up, the induction hob will enter the protective state automatically and display corresponding protective codes:
| Problem | Possible causes | What to do |
| F3/F4 | Temperature sensor of the induction coil failure | Please contact the supplier. |
| F9/FA | Temperature sensor of the IGBT failure. | Please contact the supplier. |
| E1/E2 | Abnormal supply voltage Please inspect whether power supply is normal.Power on after the power supply is normal. | |
| E3 | High temperature of the induction coil temperature sensor | Please contact the supplier. |
| E5 | High temperature of the IGBT temperature sensor | Please restart after the hob cools down. |
The above are the judgment and inspection of common failures.
Please do not disassemble the unit by yourself to avoid any dangers and damages to the induction hob.


- DEAR CUSTOMER
- PLEASE READ THIS MANUAL BEFORE USING THE PRODUCT
- SAFETY INSTRUCTIONS
- ENVIRONMENTAL INSTRUCTIONS
- YOUR PRODUCT
- INSTALLATION
- FIRST USE
- HOW TO USE THE HOB
- GENERAL INFORMATION ABOUT COOKING
- MAINTENANCE AND CARE
- TROUBLESHOOTING
- PURPOSE OF USAGE
- CHILD, VULNERABLE PERSON AND PET SAFETY
- ELECTRICAL SAFETY
- (NOT ALL PRODUCTS ARE SUPPLIED WITH A PLUG, SO IF YOUR PRODUCT DOES HAVE A PLUG)
- TRANSPORTATION SAFETY
- INSTALLATION SAFETY
- SAFETY OF USE
- TEMPERATURE WARNINGS
- ACCESSORY USE
- COOKING SAFETY
- INDUCTION
- MAINTENANCE AND
- CLEANING SAFETY
- WASTE REGULATION
- COMPLIANCE WITH ROHS DIRECTIVE
- PACKAGE INFORMATION
- RECOMMENDATIONS FOR ENERGY SAVING
- PRODUCT INTRODUCTION
- PRODUCT CONTROL PANEL INTRODUCTION AND USAGE
- BEFORE YOU INSTALL THE HOB, MAKE SURE THAT
- SELECTION OF INSTALLATION EQUIPMENT
- WHEN YOU HAVE INSTALLED THE HOB, MAKE SURE THAT
- BEFORE LOCATING THE FIXING BRACKETS
- ADJUSTING THE BRACKET POSITION
- CAUTIONS
- CONNECTING THE HOB TO THE MAINS POWER SUPPLY
- FIRST CLEANING
- GENERAL INFORMATION ON HOB USAGE
- GENERAL WARNINGS
- OPERATING PRINCIPLE OF THE INDUCTION HOB
- ADVANTAGES OF COOKING WITH INDUCTION
- FOR SAFE OPERATION
- COOKING POTS/PANS
- SUITABLE POTS/PANS
- UNSUITABLE POTS/PANS
- RECOMMENDATIONS
- AUTOMATIC DETECTION OF THE COOKING POTS/PANS
- COOKING POTS/PANS TEST
- IF THE DISPLAY FLASHES ALTERNATELY WITH THE HEAT SETTING FOR INDUCTION HOB
- CONTROL PANEL
- KEYS AND SYMBOLS
- TO START COOKING
- WHEN YOU HAVE FINISHED COOKING
- HOW TO USE PAUSE FUNCTION
- USING THE KEEP WARM
- USING THE KEEP WARM TO GET STABLE TEMPERATURE
- USING THE BOOST INDUCTION HOB
- USING THE BOOST TO GET LARGER POWER
- USING THE TIMER
- YOU CAN USE THE TIMER IN TWO DIFFERENT WAYS
- USING THE TIMER AS A MINUTE MINDER IF YOU ARE NOT SELECTING ANY COOKING ZONE
- SETTING THE TIMER TO TURN ONE COOKING ZONE OFF
- SETTING THE TIMER TO TURN OFF MORE THAN ONE COOKING ZONE
- LOCKING THE CONTROLS
- TO LOCK THE CONTROLS
- TO UNLOCK THE CONTROLS
- OVER-TEMPERATURE PROTECTION
- RESIDUAL HEAT WARNING
- DETECTION OF SMALL ARTICLES FOR INDUCTION HOB
- AUTO SHUTDOWN
- GENERAL WARNINGS ABOUT COOKING WITH HOB
- COOKING TIPS
- SIMMERING, COOKING RICE
- SEARING STEAK
- FOR STIR-FRYING
- HEAT SETTINGS
- GENERAL CLEANING INFORMATION ⚠️ GENERAL WARNINGS
- FOR THE HOB
- INOX AND STAINLESS SURFACES
- GLASS SURFACES
- PLASTIC PARTS AND PAINTED SURFACES
- CLEANING THE HOB GLASS COOKING SURFACE
- CLEANING THE CONTROL PANEL
- PRODUCT DOES NOT OPERATE
- SYMBOL APPEARS ON THE COOKING ZONE DISPLAY
- SELECTED COOKING ZONE SUDDENLY TURNS OFF DURING OPERATION
- THE POT DOES NOT GET WARM EVEN IF THE COOKING ZONE IS ON
- COOLING FAN CONTINUES OPERATING ALTHOUGH THE HOB IS TURNED OFF
- NOISE FROM THE COOKER DURING COOKING
- POSSIBLE NOISES AND REASONS
- FAILURE DISPLAY AND INSPECTION FOR INDUCTION HOB
Brand : BEKO
Model : HII 72505 TBO
Category : Hob