
ATV4300SM - Television ASPES - Free user manual and instructions
Find the device manual for free ATV4300SM ASPES in PDF.


| Product Type | LED Television |
| Brand | Aspes |
| Model | ATV4300SM |
| Screen Size | 43 inches (109 cm diagonal) |
| Resolution | Full HD (1920 x 1080 pixels) |
| Refresh Rate | 60 Hz |
| Dimensions (without stand) | 967 x 562 x 86 mm |
| Dimensions (with stand) | 967 x 610 x 197 mm |
| Weight (without stand) | 7.5 kg |
| Weight (with stand) | 8.2 kg |
| Power Supply | AC 100-240 V, 50/60 Hz |
| Power Consumption (typical) | 70 W |
| Standby Power Consumption | < 0.5 W |
| Energy Class | A+ |
| Connectivity | 2 x HDMI, 1 x USB 2.0, 1 x VGA, 1 x SCART, 1 x RF Input, 1 x AV Input, 1 x Headphone Jack |
| Audio Output | 2 x 8 W speakers |
| Supported TV Standards | DVB-T/T2, DVB-C, DVB-S/S2 |
| Smart TV | No |
| Color | Black |
| Package Contents | Television, Remote Control, Batteries (AAA), Power Cable, Stand Base & Screws, User Manual |
| Safety Instructions | Use on stable surface; do not block ventilation; avoid moisture; unplug during storms |
| Cleaning Instructions | Wipe with soft, dry cloth; do not use liquid cleaners |
| Spare Parts & Reparability | Remote control and stand available; repair by qualified technician recommended |
| Reparability Score | 7/10 (basic components replaceable) |
Frequently Asked Questions - ATV4300SM ASPES
User questions about ATV4300SM ASPES
0 question about this device. Answer the ones you know or ask your own.
Ask a new question about this device
Download the instructions for your Television in PDF format for free! Find your manual ATV4300SM - ASPES and take your electronic device back in hand. On this page are published all the documents necessary for the use of your device. ATV4300SM by ASPES.
USER MANUAL ATV4300SM ASPES
natural_image
Modern flat-screen TV displaying a vibrant aerial view of a swirling landscape with blue forest and a bright light source (no text or symbols visible on screen)ATV4300SM
HDMI®
HIGH-DEFINITION MULTIMEDIA INTERFACE
Índice
Controle Remoto....6
natural_image
Diagram of a device with a hand holding a cable, showing a curved arrow indicating rotation (no text or symbols present)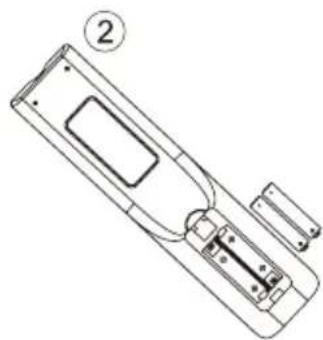
natural_image
Technical line drawing of a remote control panel with labeled component (no text or symbols)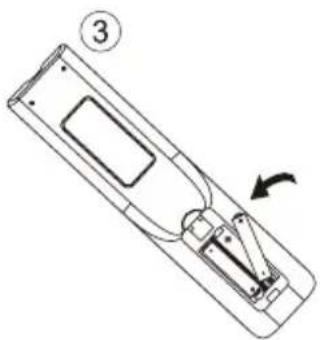
natural_image
Diagram of a remote control panel with an arrow indicating rotation (no text or symbols present)Precauciones
natural_image
Cartoon illustration of a computer with a sad face emerging from its case, surrounded by arrows and a remote (no text or symbols)
natural_image
Cartoon illustration of a computer monitor with a sad face, accompanied by a lightbulb and a remote (no text or symbols)natural_image
Cartoon illustration of a computer monitor with a smiling face and a remote, no text or symbols present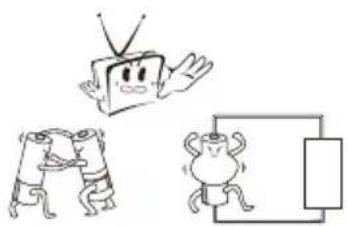
natural_image
Cartoon illustration of a TV set, a person holding a phone, and a person reacting with surprise (no text or symbols)Botones TV e interfaz terminal
Botón TV
natural_image
Scenic mountain landscape with green lake and snow-capped peaks, displayed within a desktop interface (no readable text or symbols on the landscape itself)Reproducir lista
DLC (DownLoadable Content)
AVC (Audio Video Coding)
Salida de audio digital
pie
Searching for Programs | Aircraft Type | Air | |---|---| | ATV | 0 | | Air | 0 | | Programs | 0 |pie
Searching for Programs | Antenna Type | Count | |---|---| | OTV | 10 | | S | 5 | | Programs | 1 |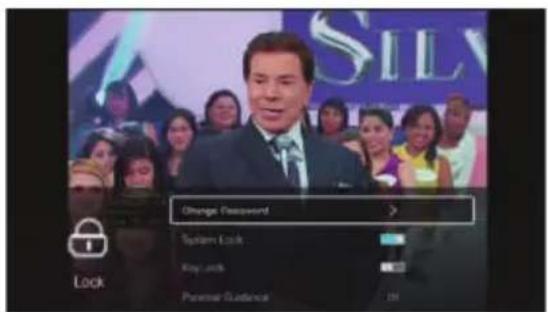
natural_image
Modern flat-screen TV displaying a vibrant aerial view of a winding mountain landscape with greenery and blue water, featuring the 'aspas' brand logo on the front screen.ATV4300SM
HDMI®
HIGH-DEFINITION MULTIMEDIA INTERFACE
Content
Warning and Precautions 1
Important Safety Instructions 2
Remote Control Operation 4
TV Buttons and Terminal Interface 5
Remote Control 6
Setup Wizard 7
Home page 9
Settings 12
Media 16
Input 20
TV Setting 21
Picture 22
Sound 25
Channel 28
Lock 38
Common 39
Help 43
Specifications 44
Warning and Precautions
Warning
Risk of electric shock. Do not open.

Warning: To avoid the risk of electric shock, do not remove cover (or back).
No user-serviceable parts inside.
Refer servicing to qualified service personnel.
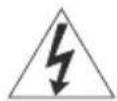
The lightning flash with arrowhead symbol, within an equilateral triangle is intended to alert the user to the presence of uninsulated "dangerous voltage" within the product's enclosure that may be of sufficient magnitude to constitute a risk of electric shock to a person.
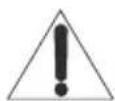
The exclamation point within an equilateral triangle is intended to alert the user to the presence of important operating and maintenance (servicing) instructions in the literature accompanying the appliance.
WARNING: TO PREVENT FIRE OR SHOCK HAZARDS, DO NOT EXPOSE THIS UNIT TO RAIN OR MOISTURE.
CAUTION: TO ENSURE PERSONAL SAFETY, OBSERVE THE FOLLOWING RULES REGARDING THE USE OF THIS UNIT.
- Operate only from the power source specified on the unit.
- Avoid damaging the AC plug and power cord.
- Avoid improper installation and never position the unit where good ventilation is unattainable.
- Do not allow objects or liquid into the cabinet openings.
- In the event of trouble, unplug the unit and call a service technician. Do not attempt to repair it yourself or remove the rear cover.
* When you don't use this TV set for a long period of time, be sure to disconnect both the power plug from the AC outlet and antenna for your safety.
* To prevent electric shock do not use this power plug with an extension cord, receptacle or other outlet unless the blades can be fully inserted to prevent blade exposure.
Do not attempt to service the product yourself
Caution
To prevent electrical shock, do not open the TV casing.
There are no user serviceable parts inside.
Please refer to qualified service personnel for repairs.
Important Safety Instructions
1) Read these instructions.
2) Keep these instructions.
3) Heed all warnings.
4) Follow all instructions.
5) Do not use this unit near water.
6) Clean only with dry cloth.
7) Do not block any ventilation openings. Ventilation should not be impeded by covering the ventilation openings with items such as newspapers, table-cloths, curtains etc. There must be a minimum distance of 5cm clear space around the unit at all times to ensure proper ventilation.
8) Do not install near any heat sources such as radiators, heat registers, stoves or other apparatus (including amplifiers) that produce heat. No naked flame sources such as lit candles, should be placed on or near the unit.
9) Protect the power cord from being walked on or pinched particularly at plugs, convenience receptacles and the point where they exit from the unit.
10) Only use attachments/accessories specified by the manufacturer.
11) Use only with a cart, stand, tripod, bracket or table specified by the manufacturer or sold with the unit. When a cart is used, use caution when moving the cart/unit combination to avoid injury from tip-over.

natural_image
Silhouette of a person climbing a ladder inside a circular frame with a diagonal line (no text or symbols)12) Unplug this unit during lightning storms or when unused for long periods of time.
13) Refer all servicing to qualified service personnel. Servicing is required when the unit has been damaged in any way, such as power-supply cord or plug is damaged, liquid has been spilled or objects have fallen into the unit, the unit has been exposed to rain or moisture, does not operate normally or has been dropped.
14) The unit should not be exposed to dripping or splashing and no objects filled with liquids, such as vases, should be placed on the unit.
15) Place the television on a stable, flat surface. Failure to do so can result in the television falling, causing injury.
16) Do not allow young children to play around or on the television. Do not hang from the unit. Failure to do so can result in the television falling, causing injury.
17) Do not allow young children to play with the plastic bag that came with the television when you unpacked it. Failure to do so can result in suffocation, which may lead to death.
18) Avoid improper installation and never position the unit where good ventilation is impossible. When installing this unit, distance recommendations must be maintained between the set and the wall, as well as inside a tightly enclosed area or piece of furniture. Keep to the minimum distance guidelines shown for safe operation.
19) Cautions for installation
— Do not tilt the unit towards the left or right or towards the back.
— Ensure the power cord is out of the path of foot traffic.
— The unit will generate a slight amount of heat during operation. Ensure that sufficient space is available around the unit to allow satisfactory cooling.
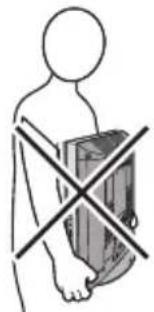
— Have two people remove the unit from the box with the screen facing away from you. It's possible your clothing (such as a belt buckle or button) may scratch the front of the unit. Do the same when moving the unit to another location.
natural_image
Human figure with a cross symbol crossed by a box, indicating no movement or restriction (no text or symbols present)20) This unit shall be connected to a mains socket outlet with a protective earthing connection.
21) Make enough room for inserting and removing the power plug. Place the unit as close to the outlet as possible. The main power supply for this unit is controlled by inserting or removing the power plug. Physically disconnecting the power plug is the only way to completely disconnect the unit from the mains power source.
22) Batteries shall not be exposed to excessive heat such as sunshine, fire or the like.
23) When this unit is connected to the wall outlet, it is always on standby even when all the LED lamps are not lit. To shut down the unit, unplug the unit from the wall outlet.
24) If the supply cord is damaged, it must be replaced before further use by the manufacturer, its service agent or similarly qualified persons in order to avoid a hazard.
25) Always place the TV on furniture that can safely support the TV. Make sure the ends of the TV do not overhang the edge of the supporting furniture.
26) Do not place the TV on tall furniture (for example, cupboards or bookcases) without anchoring both the furniture and the TV to a wall or other suitably strong support.
27) Do not stand the TV on cloth or other materials placed between the TV and the supporting furniture.
28) Where the mains plug is used as the disconnect device, the disconnect device shall remain readily operable.
IMPORTANT INFORMATION
Televisions that are not positioned in sufficiently stable locations can present potential falling hazards. To avoid injuries, particularly to children, take the following simple precautions:
- Place this television only on furniture that can safely support it.
- Use only a cabinet or stand recommended by the manufacturer of the television.
- Ensure the television does not hang over the edge of supporting furniture.
- Do not place the television on tall furniture (such as cupboards or bookcases) without anchoring both the furniture and the television to a suitable support.
- Do not place cloth or other materials between the television and the supporting furniture.
- Do not let children climb on furniture to reach the television or its controls.
Remote Control Operation
Installing Batteries
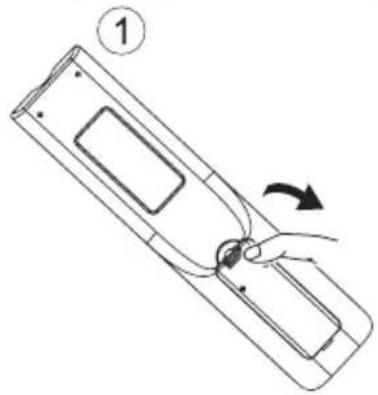
- Slide in the direction shown by the arrow in Image 1 below to open the cover of the batteries on the back of the remote control.
- Load two AAA alkaline batteries in the compartment.
- Replace the cover of the batteries.
natural_image
Diagram of a device with a hand holding a cable, showing motion direction (no text or symbols)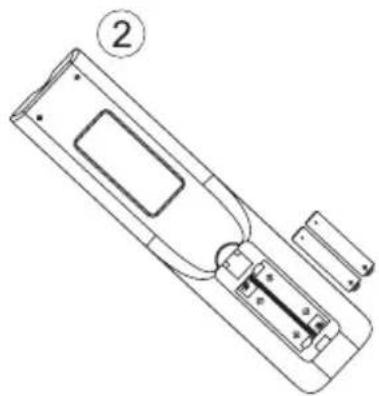
natural_image
Line drawing of a remote control device with labeled part (2), no text or symbols present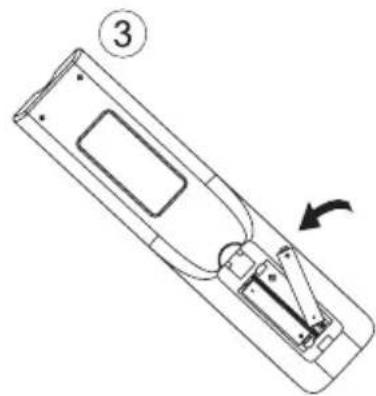
natural_image
Line drawing of a remote control device with an arrow indicating rotation (no text or symbols)Precautions
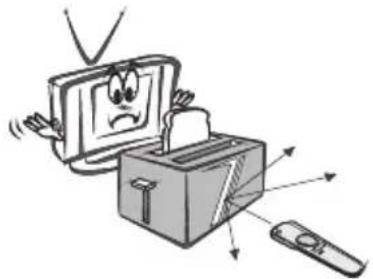
Make sure that there is no obstacle between the remote control and television set.
natural_image
Cartoon illustration of a computer with a sad face emerging from a box, connected to a remote via arrows (no text or symbols)Keep the remote control away from heat sources and humid areas to ensure effective performance of the remote control.
natural_image
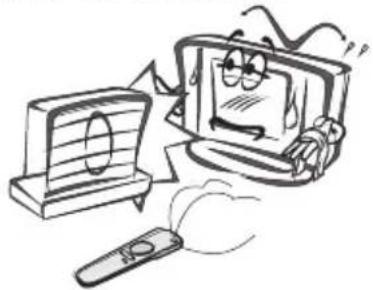
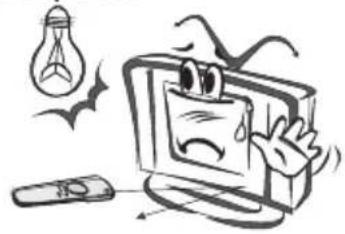
Cartoon illustration of a distressed computer monitor and remote with a broken screen (no text or symbols)As strong light may interfere with the signals, change your position to operate the remote control if the television cannot be turned on or off as you expect.
natural_image
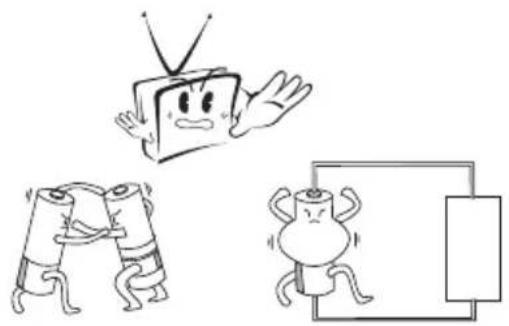
Cartoon illustration of a sad computer monitor with a frowning face, accompanied by a lightbulb and a remote (no text or symbols)Make sure that two AAA 1.5V alkaline batteries are loaded correctly.
natural_image
Cartoon illustration of a TV showing a surprised character, two anthropomorphic characters, and a stylized insect-like figure (no text or symbols)TV Buttons And Terminal Interface
TV Buttons
Note: The following is only functional schematic, And the actual position and arrangement of different models may be different.
VOL+
VOL -
CH+
CH-
MENU
SOURCE

(●):Turn ON/OFF Power.
SOURCE: External Signal Input Selection.
MENU:Display Main MENU And Confirm MENU Item Selection.
CH+/-:Selecting Channel.
VOL+/-:Adjusting Volume.
Terminal Interface
Note: The following are the various terminal interface, the actual position and arrangement, the number of different models may be different.
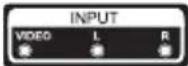 | AV InputExternal AV Signal Input AndRelevant Right/Left Sound Channel |  | EARPHONE outputWhen earphones are plugged in,speakers are disabled(Some models without this interface) |
 | HDMI InputDigital signal input from HDMI video connector. |  | USB inputConnect a USB device here to play its media files |
 | ANT 75Connect the antennal/cadle tv input (75/VHF/UHF) | 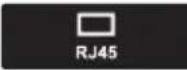 | RJ45Connect the Internet. |
 | COAXIALConnect the SPDIF receiver.(Some models without this interface) | 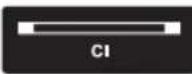 | CIConnect the Data TV decryption card |
Remote Control
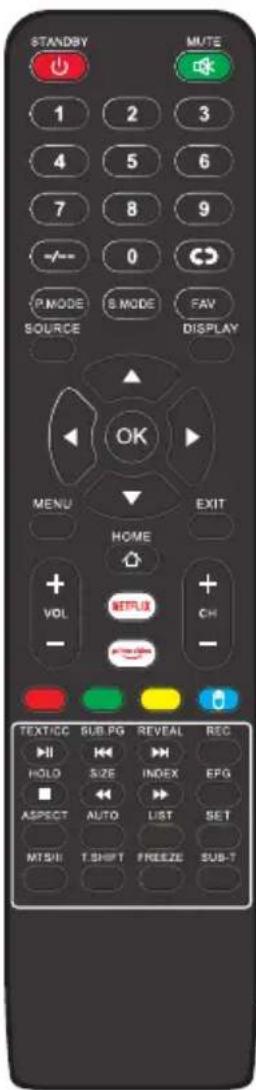
STANDBY: Turn on and standby.
MUTE:Silence status.
0-9 : Choose channel
-/-:Press to select channel.
Switch to the previously viewed channel.
PMODE: then picture will change as following: Standard-Mild-User Dynamic. Press once, the current picture setup will be shown.
FAV: Press to add or remove your favorite
SMODE: then sound will change as following: Standard-Music-Movie Sports-User. Press once, the current sound setup will be shown
SOURCE: Displays the source list of input signal.
DISPLAY: Displays the Channel Bar.
OK: Confirmation button./Select the OSD menu option.
MENU: Accesses the Main Menu, or return to the upper level of a sub-menu.
EXIT: Exits the current menu or function.
HOME: Android homepage shortcut
NETFLIX: Access the Netflix interface.
Prime Video: Access the Prime Video interface.
VOL+/-: Increase/decrease the sound volume.
CH+/-:Switch the program number intum.
Red/Green/Yellow/Blue:Press these buttons directly to select corresponding function on the screen
MOUSE:Show or hide the mouse.
TEXT/CC /▶ :Teletext./CC subtitles. / Play/Pause.
SUB.PG/◀:Display the subpage on the teletext screen./previous.
REVEAL/▶:Reveal hidden information such as the answer to a quiz in teletext/next.
REC:Record
HOLD/■ :Teletext hold./Stop.
SIZE/◄◄: Select the size of the display screen. /Backward.
INDEX/▶:Press to select the page number of the index from teletext.
/Forward.
EPG:Display the EPG
ASPECT: Switches between the preset screen size mode.
AUTO:PC-Mode: Automatic Image Adjustment.
LIST:Programme list
SET: Open the network settings menu
T.SHIFT: When the user leaves, it will auto stop the TV program and record the program into the remote store device. Available when the PVR function is effective).
FREEZE:Freeze the current screen frame.
SUB-T: Display the subtitle witch is broadcast with the program
MTS/II:Press to select the MTS mode/II mode.
Setup Wizard
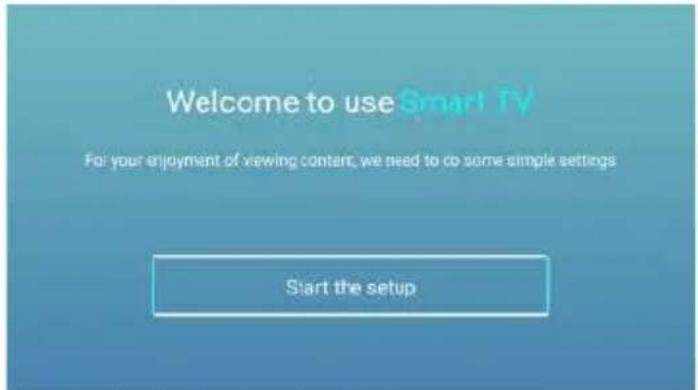
The system setting will appear when you open the TV on the first time. Please set according to the on-screen guide. Press OK button to start the setup.
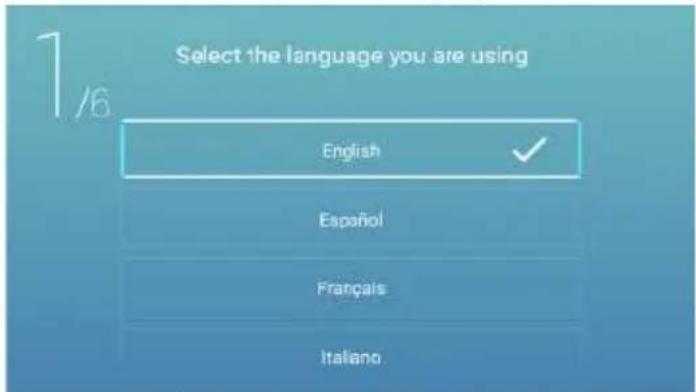
Press ▼ / ▲ button to select the language.
Press ◀ / ▶ button to select the time zone.
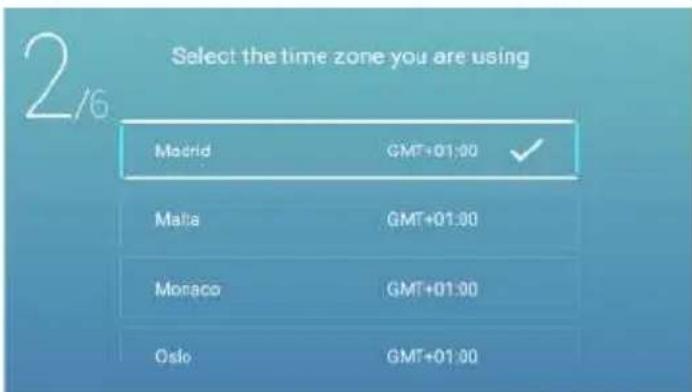
Press◀/▶button to select the ECO.
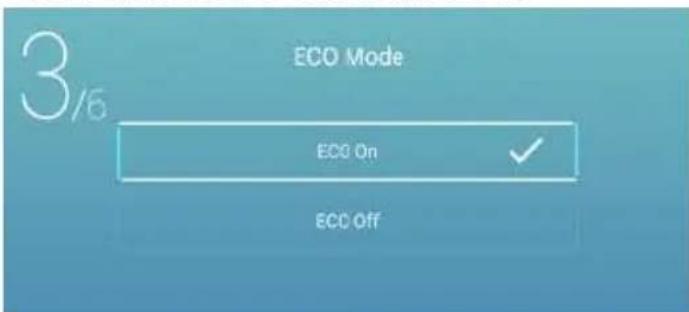
Note: The illustration is a reference image, your device may differ
Press ◀ / ▶ button to select Set your TV network.
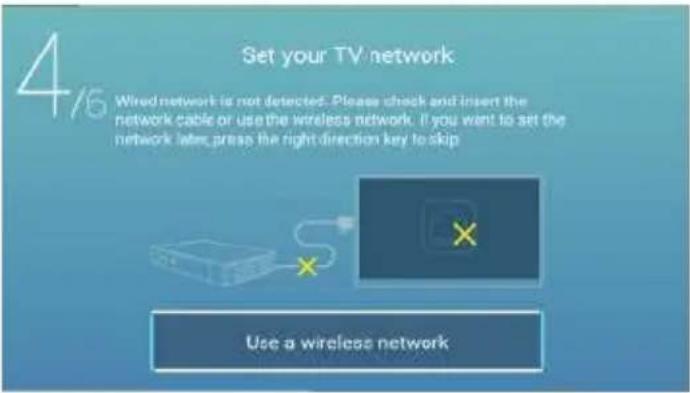
Press ◀ / ▶ button to select Connect the TV as
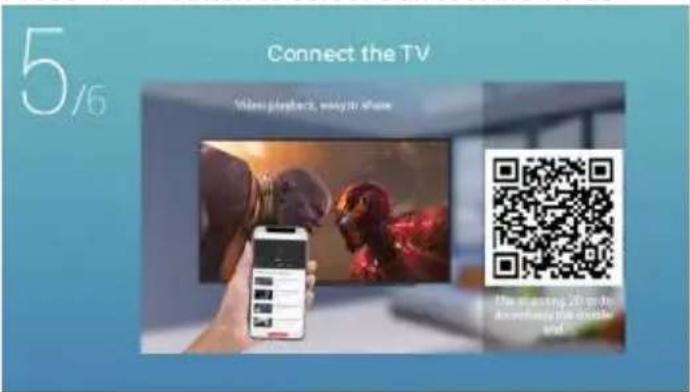
Press ◀ / ▶ button to select TV viewing guide.
Press ▼ / ▲ button to choose the way you watch TV programs or source: Home page/DTV/ATV/AV/HDMI 1.
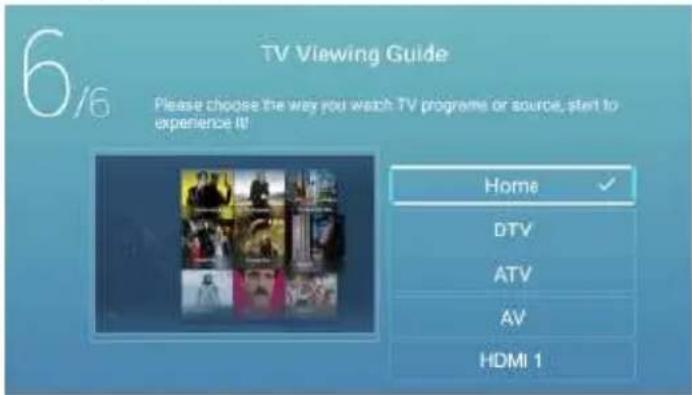
Note: The illustration is a reference image, your device may differ
Home page
Press ▼ / ▲ button to select Home page in Setup Wizard or press ◀ / ▶ button to select Home in the menu of TV input.
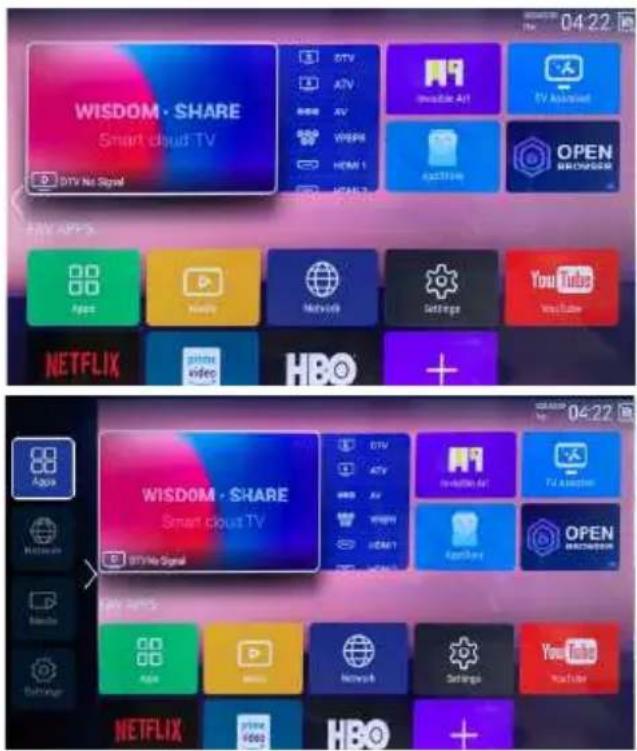
Press ▼ / ▲ / ◀ / ▶ button to select Movie/TV/HOT APP/FAV APP/MUSIC.
You can choose the program you want on the home page.
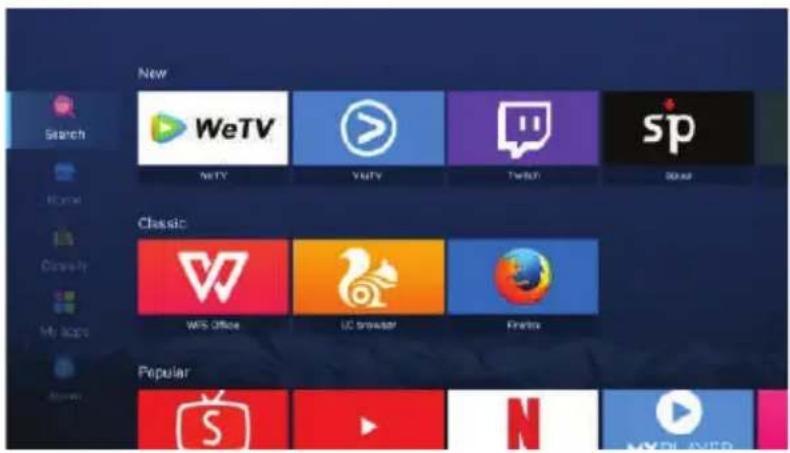
App Store
Press ▼ / ▲ / ◀ / ▶ button to select Apps.
Press ◀ / ▶ button to select App Store, and press OK button to enter the sub-menu.
Press ▼ / ▲ button to select Home/Classify/My app/About, and press ▼ / ▲ / ◀ / ▶ button to select the app you want.
Note: The illustration is a reference image, your device may differ
App Store
Press ▼ / ▲ / ◀ / ▶ button to select Apps.
Press ◀ / ▶ button to select App Store, and press OK button to enter the sub-menu.
Press ▼ / ▲ button to select Home/Classify/My app/About, and press ▼ / ▲ / ◀ / ▶ button to select the app you want.
Classify
Press ▼ / ▲ / ◀ / ▶ button to select Classify .Press ▼ / ▲ / ◀ / ▶ button to select.
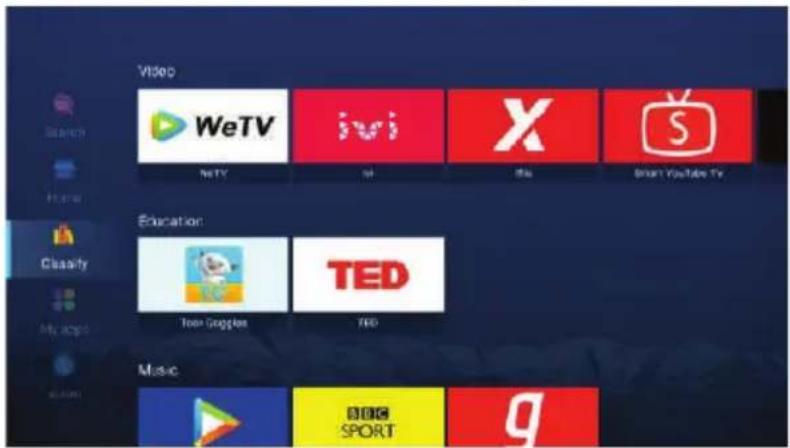
Note: The illustration is a reference image, your device may differ
User App
Press ▼ / ▲ / ◀ / ▶ button to select My app.
Press ◀ / ▶ button to select My App, and press OK button to enter the User App list.
Press ▼ / ▲ / ◀ / ▶ button to select.
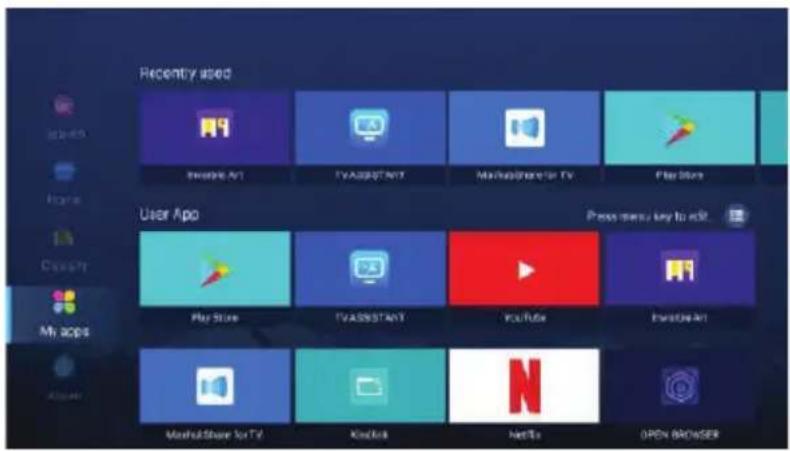
Note: The illustration is a reference image, your device may differ
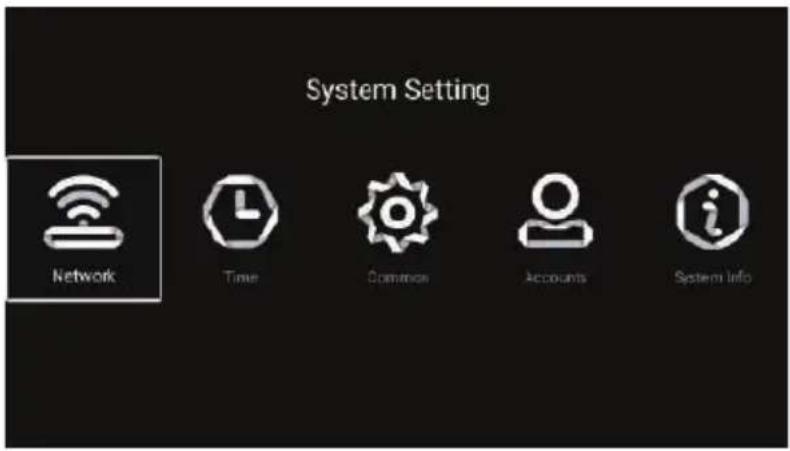
SETTINGS
Press ▼ / ▲ / ◀ / ▶ button to select OTHERS.
Press ◀ / ▶ button to select the SETTINGS, and press OK button to enter the System Setting.
Press ◀ / ▶ button to select Network/Time/Commen/Bluetooth/Aaccounts/System Info.
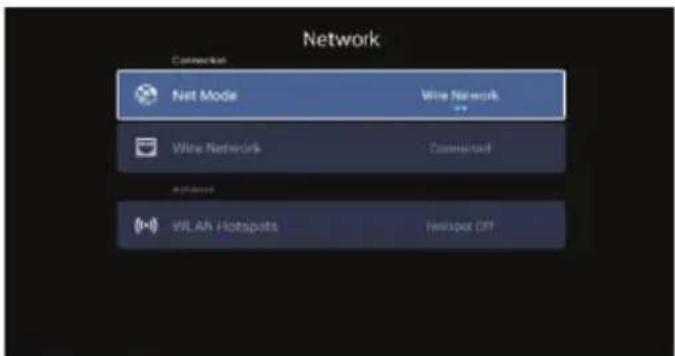
Network
Press ◀ / ▶ button to select Network.
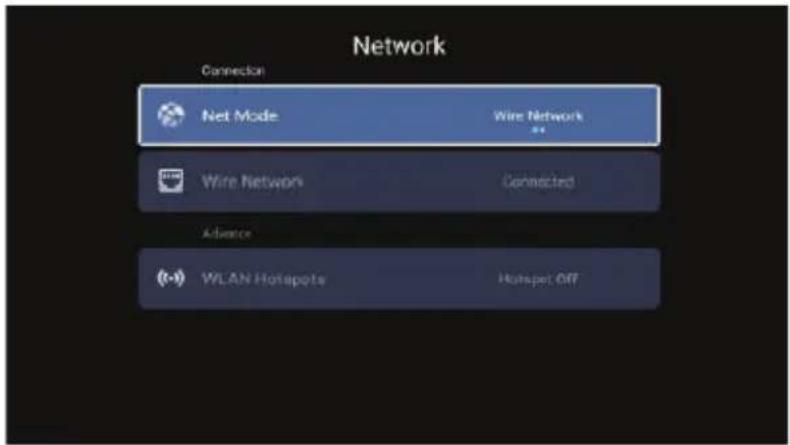
Note: The illustration is a reference image, your device may differ
Time
Press ◀ / ▶ button to select Time.
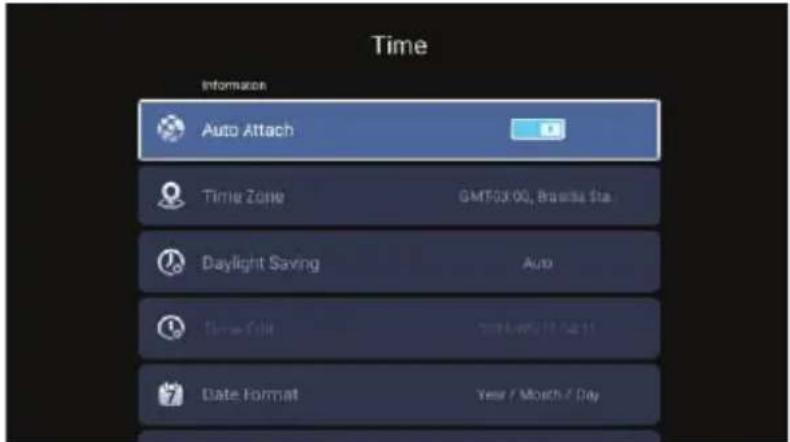
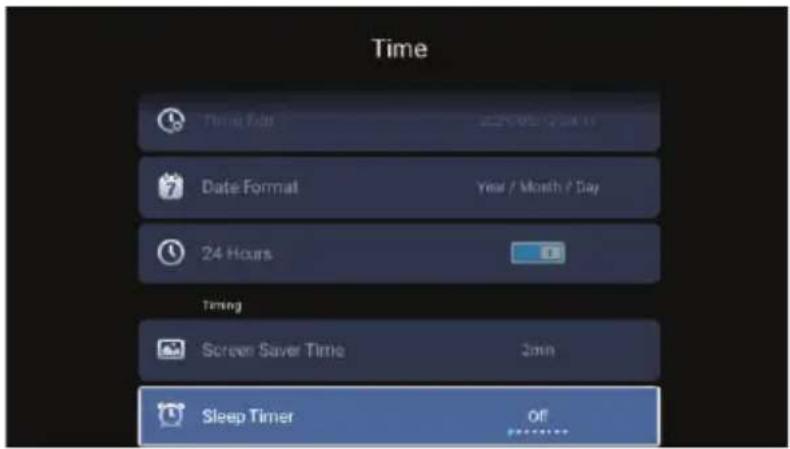
Press ▼ / ▲ button to select Auto Attach/Time Zone/Daylight Saving/Time Edit/Date Format/
24 Hours/Screen saver time/Sleep Timer.
Auto Attach Get the current time and date automatically.
Time Zone Set the current time zone.
Daylight Saving Set the daylight saving Auto/On/Off.
Time Edit Set the current time.
Date Format Set the current date.
24 Hours Select the 12 hours or 24 hours.
Screen saver time Set the screen saver time as Off/1min/2min/5min.
Sleep Timer Set the sleep timer as Off/15min/30min/45min/60min/90min/120min/240min.
Note: The illustration is a reference image, your device may differ
Common
Press ◀ / ▶ button to to select Common.
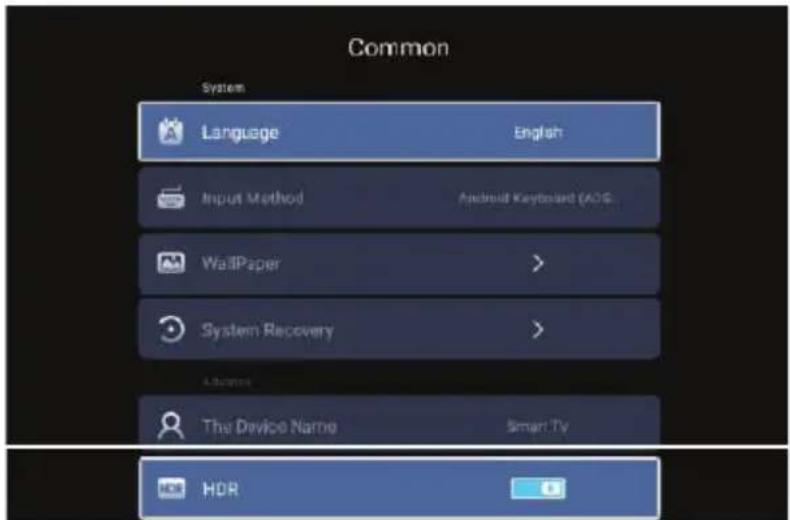
Press ▼ / ▲ button to select Language/Input Method/Wallpaper/System Recovery/
Blue Screen/The device name/HDR.
Language Set the current display language. The default language is English.
Input Method Set the remote controller input method.
WallPaper Set the Wallpaper.
System Recovery Recovery system to original state.
The device name Set the device name.
HDR Set the HDR On/Off.
Note: The illustration is a reference image, your device may differ
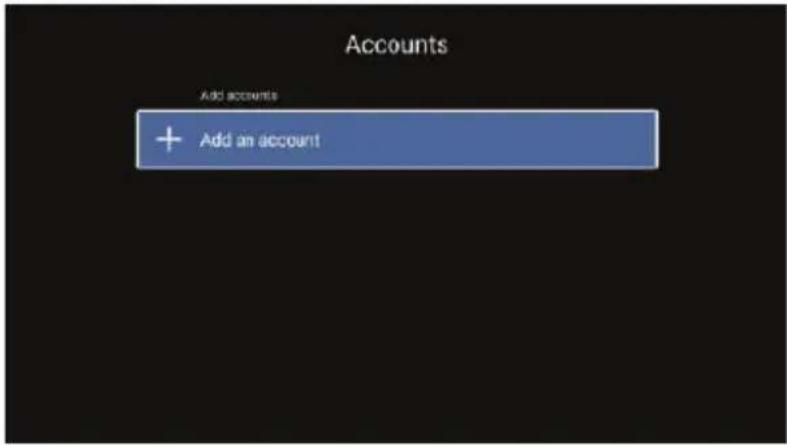
Accounts
Press ◀ / ▶ button to to select Account.
System Info
Press ◀ / ▶ button to to select System Info.
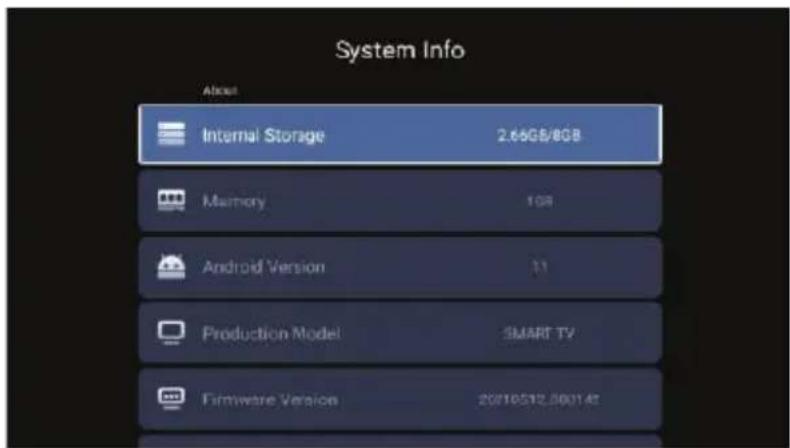
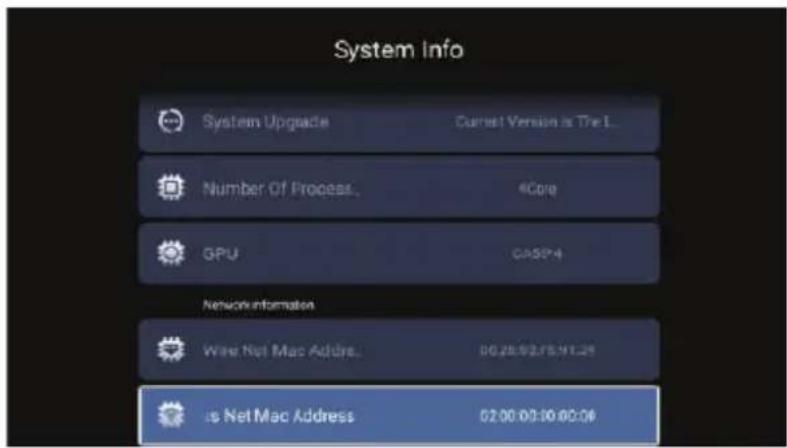
Note: The illustration is a reference image, your device may differ
Media
Press ▼ / ▲ / ◀ / ▶ button to select Multimedia in OTHERS on the Home page or press MEDIA button on the remote, and press OK button to enter enter the Media Center.
Press ◀ / ▶ button to select All/Video/Audio/Image.
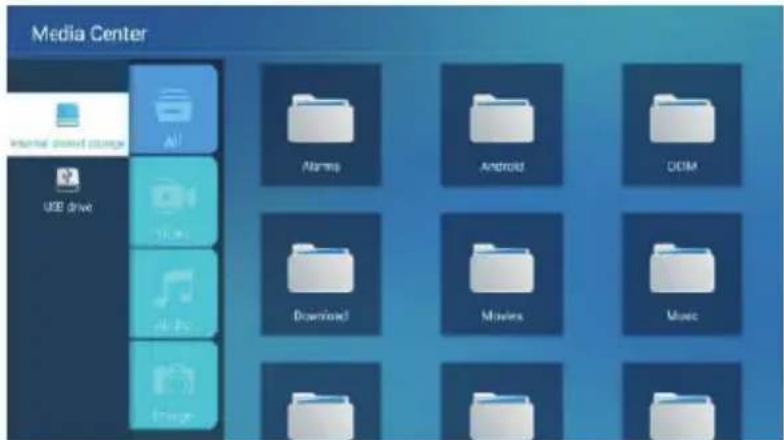
Video
Press ▼ / ▲ button to select Video or All, and press ▼ / ▲ / ◀ / ▶ button to select Movies.
Press Menu button to display the setting options on the left side.
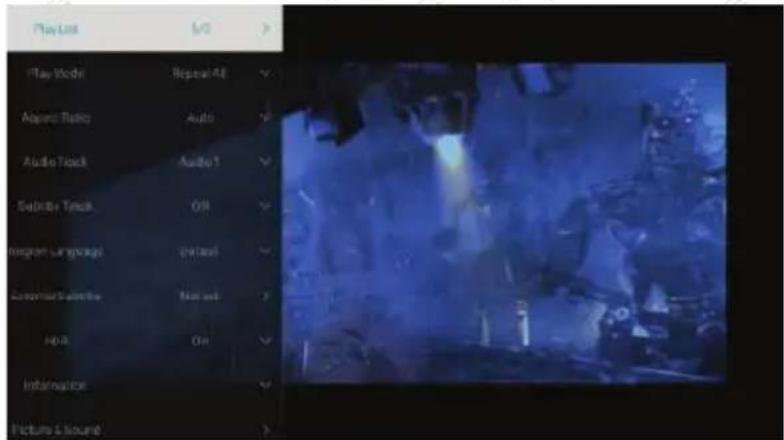
Play List
Press ▼ / ▲ button to select Play List, and press OK button to display all available videos.
Play Mode
Press ▼ / ▲ button to select Play Mode, and press OK button to select.
(Options: Repeat All/Auto exit /Repeat One/Random/Play List)
Note: The illustration is a reference image, your device may differ
Aspect Ratio
Press ▼ / ▲button to select to select Aspect Ratio and press OK button to select.
(Option:Auto/16:9/4:3/Zoom1/Zoom2)
Audio Track
Press ▼ / ▲button to select to select Audio Track and press OK button to select.
Subtitle Track
Press ▼ / ▲button to select to select Subtitle Track and press OK button to select close.
Region Language
Press▼ / ▲button to select Region Language and press OK button to select.
External Subtitle
Press ▼ / ▲button to select to select External Subtitles and press OK button to select.
HDR
Press ▼ / ▲button to select to select Progress Jump and press OK button to select.
Information
Press ▼ / ▲ button to select Information and press OK button to view.
Picture&Sound
Press ▼ / ▲ button to select Picture&Sound and press OK button to select.
(For detailed instructions, please refer to Picture & Sound mode.)
Audio
Press ▼ / ▲ button to select Audio or All, and press ▼ / ▲ / ◀ / ▶ button to select Music.
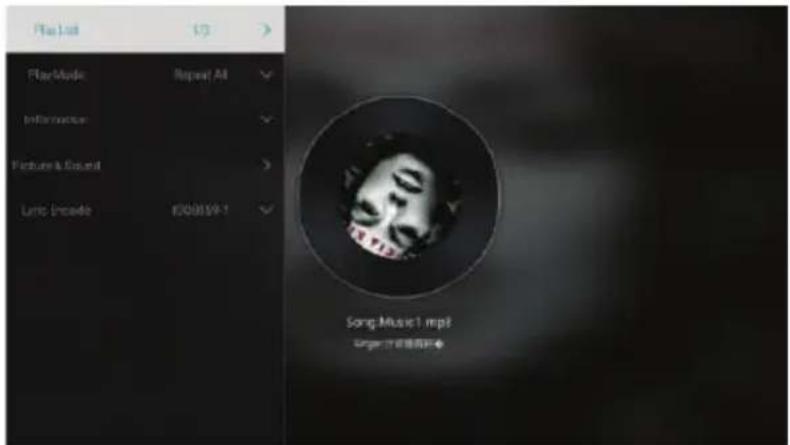
Play List
Press ▼ / ▲ button to select Play List, and press OK button to display all available Audios.
Play Mode
Press ▼ / ▲ button to select Play Mode, and press OK button to select. (Options: Repeat All/Auto exit / Repeat One/Random/Play List)
Information
Press ▼ / ▲ button to select Information and press OK button to view.
Picture&Sound
Press ▼ / ▲ button to select Picture&Sound and press OK button to select. (For detailed instructions, please refer to Picture & Sound mode.)
Lyric Encode
Press ▼ / ▲ button to select Lyric Encode and press OK button to select.
Note: The illustration is a reference image, your device may differ
Image
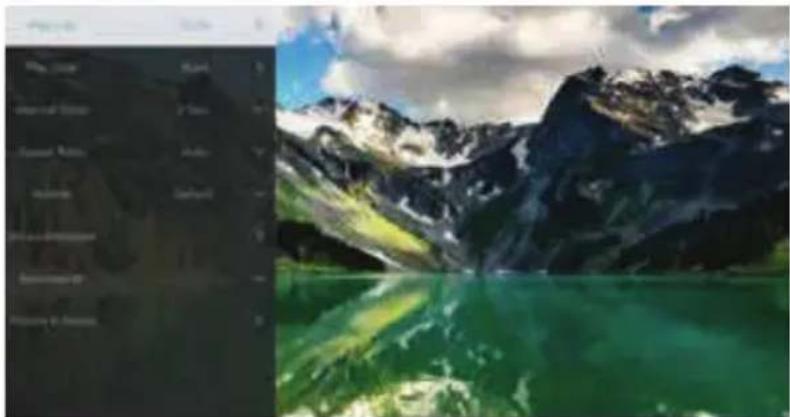
Press ▼ / ▲ button to select Image or All, and press ▼ / ▲ / ◀ / ▶ button to select Pictures.
natural_image
Split image showing a black-and-white photo of snow-capped mountains reflected in green water, alongside a dark panel with menu items (no readable text or symbols)Play List Playable picture list display.
Play Slide You can choose to start the slide show.
Interval Time Select slide show interval. (Optional:3/5/8/12Sec.)
Aspect ratio Set the aspect ratio. (Optional: Auto/Full screen/Zoom Out/Original/Zoom1/Zoom2)
Rotate Set the rotate. (Optional: Default/Rotate Right/Rotate left)
Set as wallpaper Set the current play picture as wallpaper.
Information View the information of the photo.
Picture&Sound For detailed instructions, please refer to Picture & Sound mode
Input
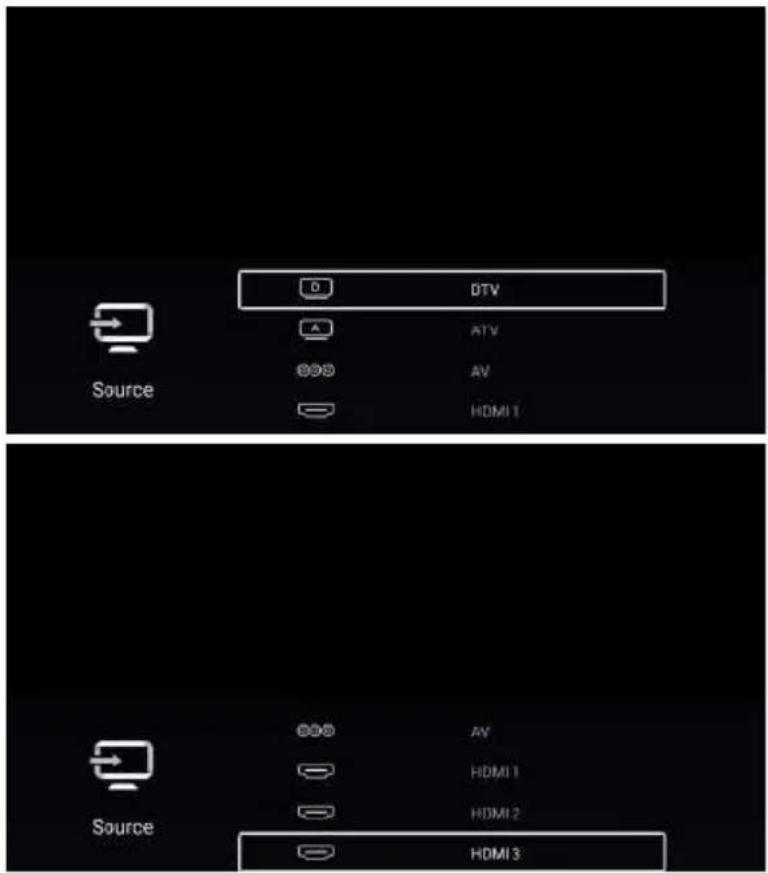
Press ▼ / ▲ / ◀ / ▶ button to select More under the "WISDOM SHARE" on the Home page.
Press ◀ / ▶ button to select DTV/ATV/AV/HDMI1/HDMI2/HDMI3.
Or press Menu button, and press ◀ / ▶ button to select Source.
Press ▼ / ▲ button to select the input source you want.
Press OK button to enter. Press EXIT button to quit.
Note: The illustration is a reference image, your device may differ
TV Setting
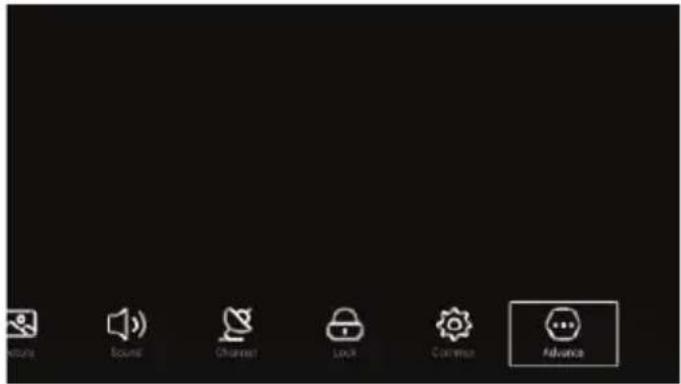
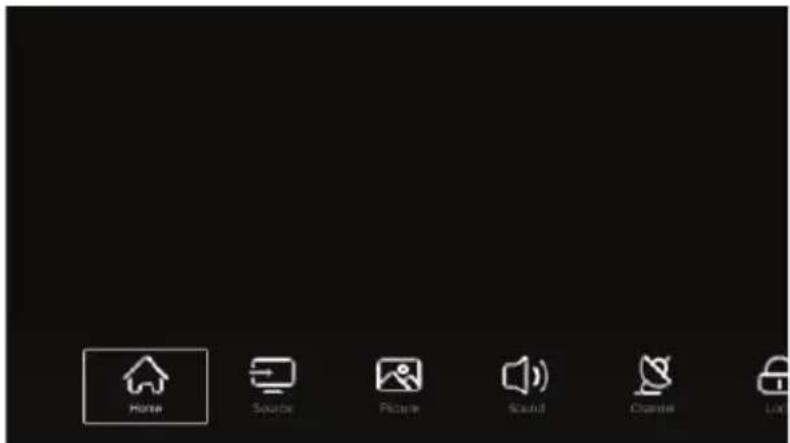
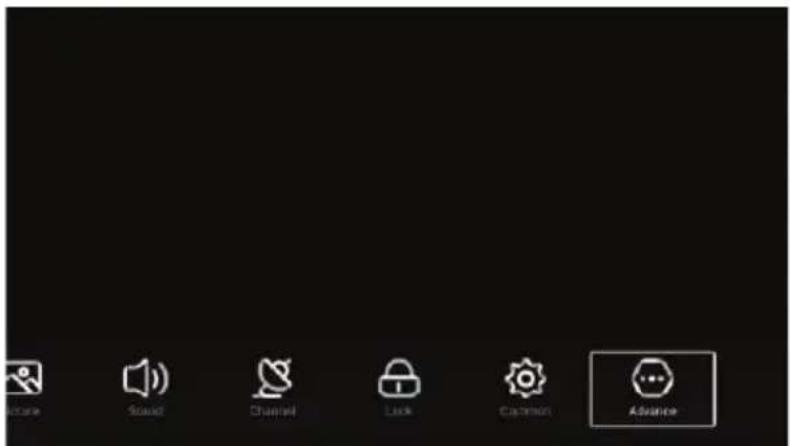
Press MENU button to enter the TV Setting.
Press ◀ / ▶ button to highlight the desired menu icon, and press OK button to select.
(Optional:Home/Source/Picture/Sound/Channel/Lock/Common/Advance)
Note: The illustration is a reference image, your device may differ
Picture
Press MENU button to enter the main menu.
Press ◀ / ▶ button to select the Picture.
Press OK button to enter the sub-menu.
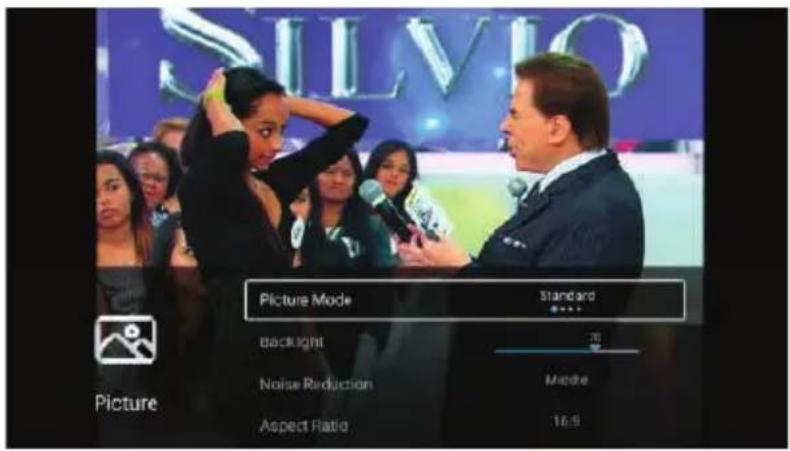
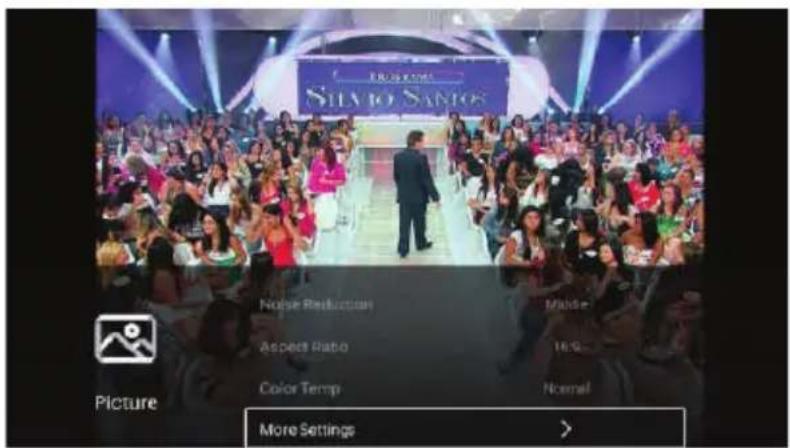
Press ▼ / ▲ button to select Picture Mode/Contrast/Brightness/Color/Sharpness/Backlight/Noise Reduction/Aspect Ratio/Color Temp/More Settings.
Press MENU or EXIT button to quit.
Note: The illustration is a reference image, your device may differ
Picture Mode
Highlight the item and press OK button to enter the sub-menu, that shows the picture mode you can choose.
Press ◀ / ▶ button to select Standard/Dynamic/Soft/User.
Standard Produces a standard image.
Dynamic Enhance the contrast, color and clarity of the screen, so that the picture in the dynamic will balance the color.
Soft Reduce the screen contrast, color and clarity to make the screen looks soft.
User Select to customize picture settings.
Contrast/Brightness/Color/Sharpness
These terms are available only when "User" is selected in Picture Mode.
Press ▼ / ▲ button to select Contrast/Brightness/Color/Sharpness.
Press ◀ / ▶ button to adjust.
Contrast Adjust the contrast of the image.
Brightness Adjust the brightness of the image.
Color Adjust the color intensity of the image.
Sharpness Adjust the edge sharpness of the image.
Backlight
Press ▼ / ▲ button to select Backlight.
Press ◀ / ▶ button to adjust.
Noise Reduction (Only available under ATV/AV/HDMI source.)
Set up options to eliminate the image noise intensity.
Press ▼ / ▲ button to select Noise Reduction.
Press ◀ / ▶ button to select Off/Low/Middle/High/Auto.
Aspect Ratio
Press ▼ / ▲ button to select Aspect Ratio.
Press ◀ / ▶ button to select 16:9/4:3/Zoom1/Zoom2/Auto.
Note: The illustration is a reference image, your device may differ
Color Temp
Adjust the overall color of the image.
Press ▼ / ▲ button to select Color Temp.
Press ◀ / ▶ button to select Cool/Normal/Warm.
| Cool | The picture is in favor of green-blue and less red. |
| The whole color is in favor of light. The picture is more fresh and elegant. | |
| Normal | The picture does not in favor of any color. The color is moderate. |
| Warm | The picture is in favor of red-green and less blue to make the color more vivid and soft. |
More Settings
Press ▼ / ▲ button to select More Settings.
Press OK button to enter the sub-menu.
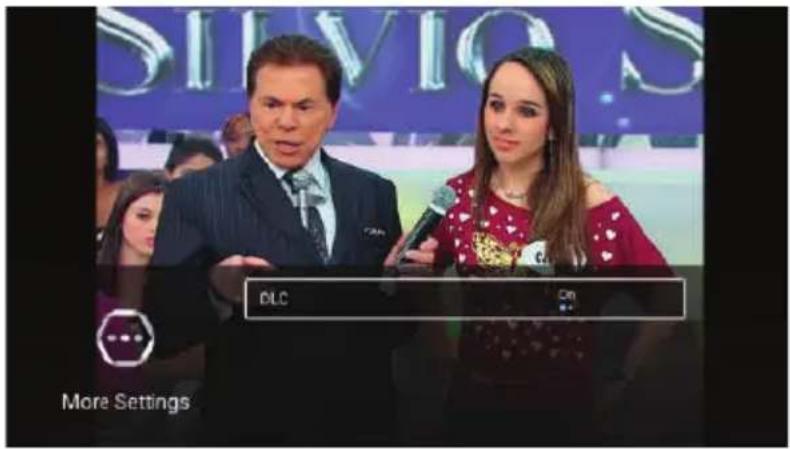
DLC
Press ▼ / ▲ button to select DLC.
Press ◀ / ▶ button to select On/Off.
Note: The illustration is a reference image, your device may differ
Sound
Press MENU button to enter the main menu.
Press ◀ / ▶ button to select the Sound.
Press OK button to enter the sub-menu.
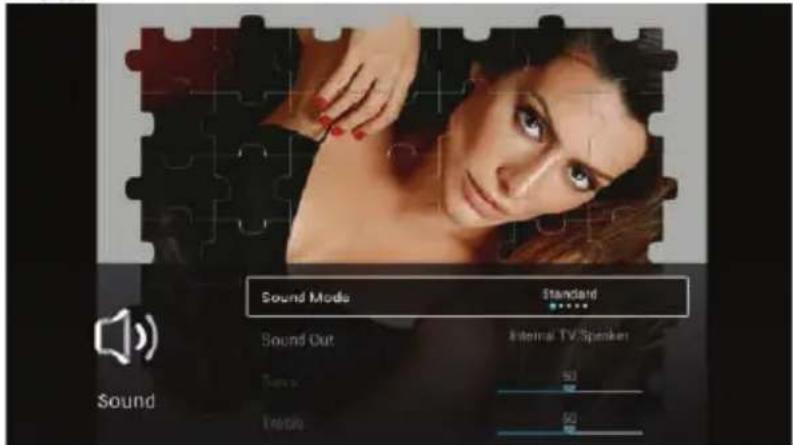
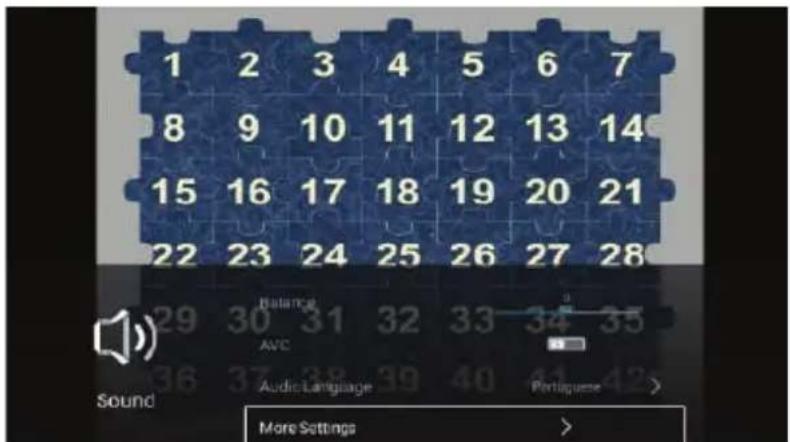
Press ▼ / ▲ button to select Sound Mode/Sound Out/Bass/Treble/Balance/AVC/Audio Language /More Settings.Press MENU or EXIT button to quit.
Sound Mode
Press▼ / ▲ button to select Sound Mode.
Press ◀ / ▶ button to select Standard/Music/Movie/News/User.
| Standard | Emit balanced sound under any circumstances. |
| Music | Enhance the high pitch and reduce the bass. |
| Movie | Enhances treble and bass for a rich sound experience. |
| News | Enhance the voice. |
| User | Select to customize sound settings. |
Note: The illustration is a reference image, your device may differ
Sound Out
Press▼ / ▲ button to select Sound Out.
Press ◀ / ▶ button to select Internal TV Speaker/SPDIF/HDMI ARC/Headphone.
Bass
Adjust the low frequency sounds.
Press▼ / ▲ button to select Bass. Press ◀ / ▶ button to adjust.
Treble
Adjust the high frequency sounds.
Press▼ / ▲ button to select Treble.Press ◀ / ▶ button to adjust.
Balance
Balanced left and right channels.
Press ▼ / ▲ button to select Balance. Press ◀ / ▶ button to adjust.
AVC
Press ▼ / ▲ button to select AVC. Press ◀ / ▶ button to select On/Off.
Note: After open the "AVC", once the volume is set up, it can keep the volume of the speaker steady no matter what kind of difference among the TV sound of each channel.
Audio Language
Press ▼ / ▲ button to select Audio Language .Press OK&▼ / ▲button to select audio language.
More Settings
Press▼ / ▲ button to select More Settings. Press OK button to enter the sub-menu.
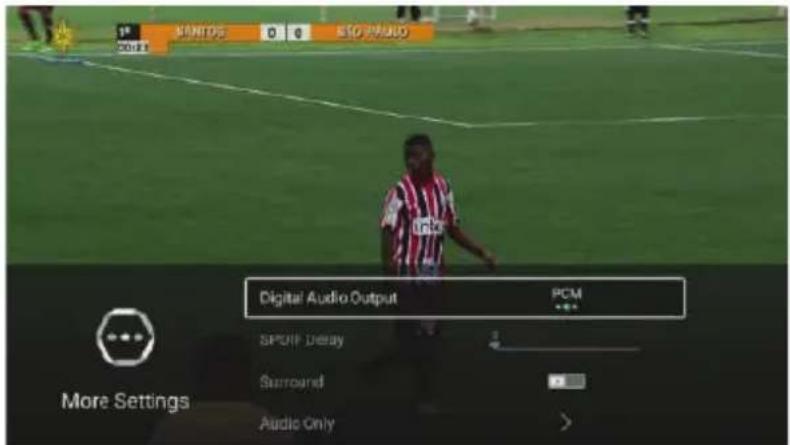
Digital Audio Output
Press ▼ / ▲ button to select Digital Audio Output. Press ◀ / ▶ button to select Off/PCM/RAW.
SPDIF Delay
Press ▼ / ▲ button to select SPDIF Delay. Press ◀ / ▶ button to adjust.
Surround
Press ▼ / ▲ button to select Sorround. Press ◀ / ▶ button to select On/Off.
Audio Only
Press ▼ / ▲ button to select Audio Only. Press OK button enter the sub-menu.
Note: The illustration is a reference image, your device may differ
Channel
Press MENU button to enter the main menu.
Press ◀ / ▶ button to select Channel.
Press OK button to enter the sub menu.
ATV
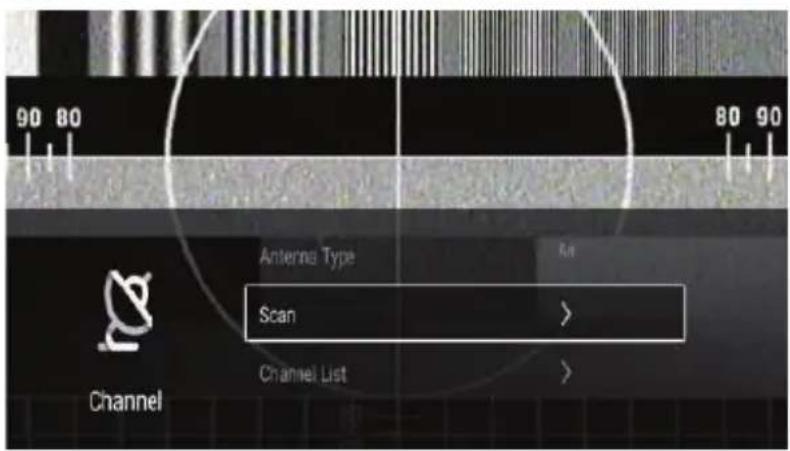
Press ▼ / ▲ button to select Antenna Type/Scan/Channel List.
Press MENU or EXIT button to quit.
Scan
Press ▼ / ▲ button to select Scan. Press OK button to enter the sub-menu.
Press ▼ / ▲ button to select Search Type/AutoScan/Digital Manual Scan.
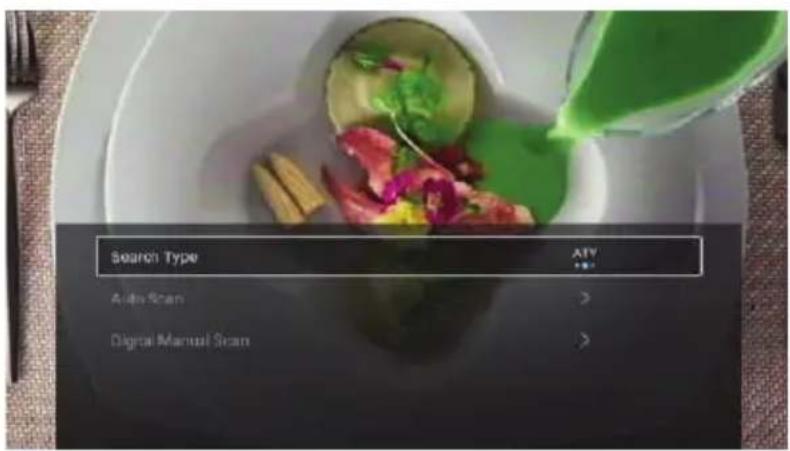
Note: The illustration is a reference image, your device may differ
Search Type
Press ▼ / ▲ button to select Search Type. Press ◀ / ▶ button to select ATV/DTV/ATV+DTV.
Auto Scan
Automatic search can search for effective program channel automatically.
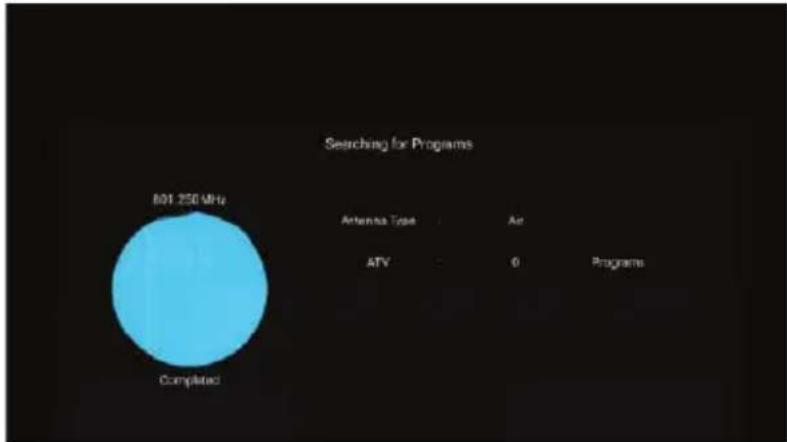
Press ▼ / ▲ button to select Auto Scan, then press OK button to start auto search.
If you want to stop searching, press EXIT or MENU button to stop searching.
pie
Searching for Programs | Antenna Type | Am | |---|---| | ATV | 0 | | Programs | 0 |Digital Manual Scan
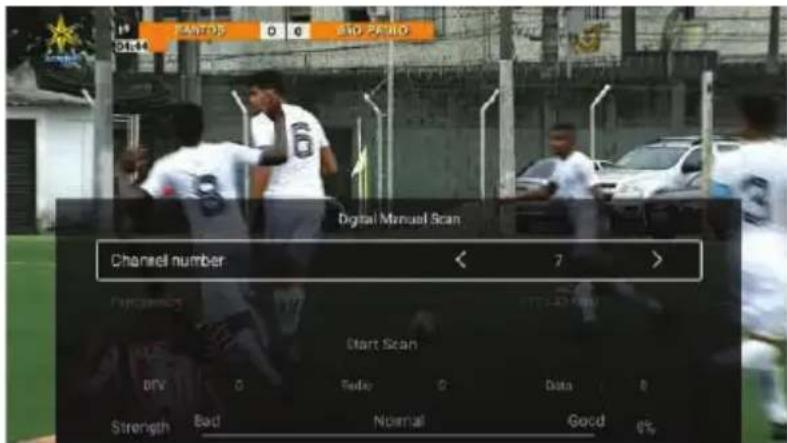
Digital manual search can search for effective simulation program channel manually.
Press ▼ / ▲ button to select Digital Manual Scan, and press OK button to enter the sub-menu.
Press EXIT or MENU button to quit.
Note: The illustration is a reference image, your device may differ
Channel List
View all of the existing programs.
Press ▼ / ▲ button to select Channel List. Press OK button to enter the sub-menu.
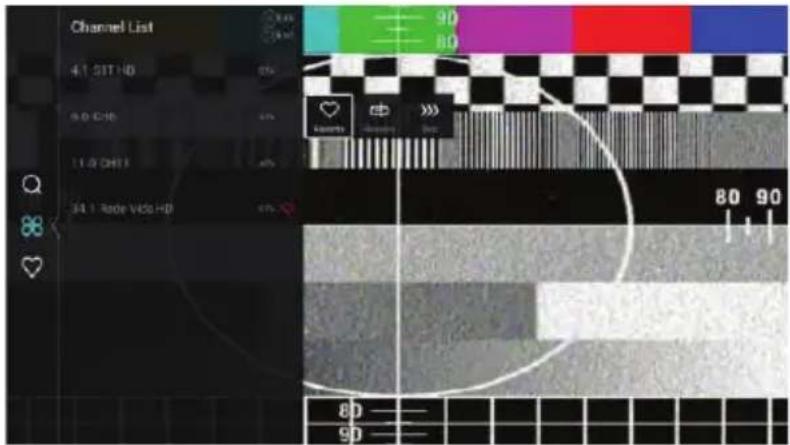
Press ▼ / ▲ button to select All/Favorite.
All
Press ▼ / ▲ button to select All. Press MENU button to edit the program.
(Optional:Favorite/Skip.)
Favorite
Press ▼ / ▲ button to select Favorite. Press MENU button to edit the Favorite Channel.
(Optional:Favorite/Rename.)
Note: The illustration is a reference image, your device may differ
DTV
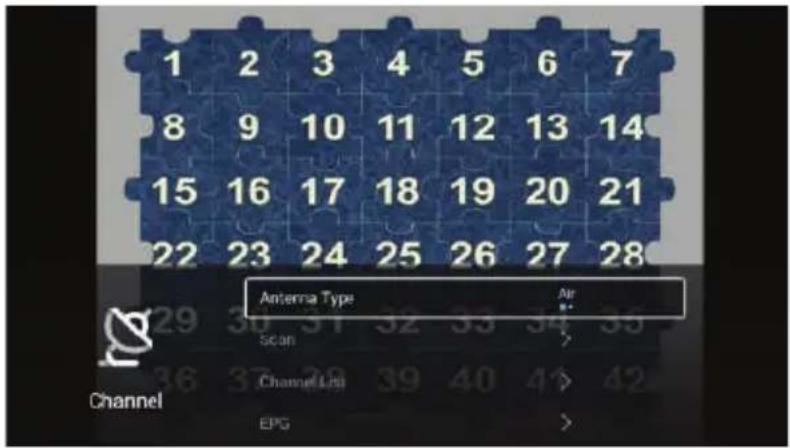
Press ▼ / ▲ button to select Antenna Type/Scan/Channel List/EPG.
Press MENU or EXIT button to quit.
Antenna Type
Press ▼ / ▲ button to select Antenna Type. Press ◀ / ▶ button to select Air/Cable.
Scan
Press ▼ / ▲ button to select Scan. Press OK button to enter the sub-menu.
Press ▼ / ▲ button to select Search Type/AutoScan/Digital Manual Scan.
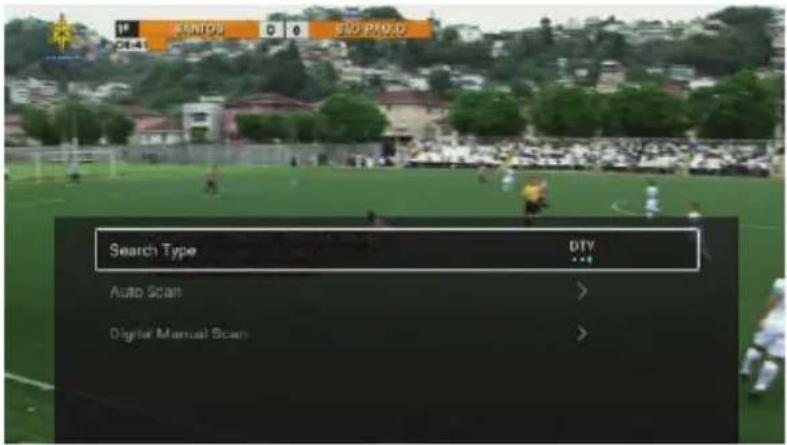
Note: The illustration is a reference image, your device may differ
Search Type
Press ▼ / ▲ button to select Search Type. Press ◀ / ▶ button to select ATV/DTV/ATV+DTV.
Auto Scan
Automatic search can search for effective program channel automatically.
Press ▼ / ▲ button to select Auto Scan, then press OK button to start auto search.
If you want to stop searching, press EXIT or MENU button to stop searching.
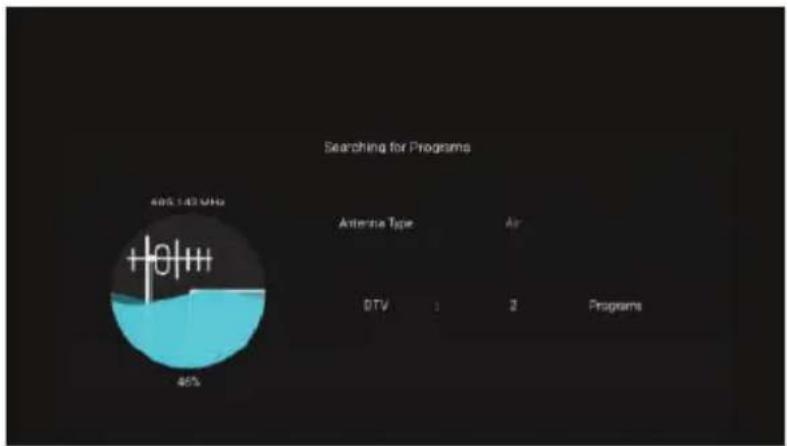
pie
Searching for Programs | Antenna Type | Count | |---|---| | OTV | 1 | | Air | 2 | | Programs | 40% |Digital Manual Scan
Digital manual search can search for effective simulation program channel manually.
Press ▼ / ▲ button to select Digital Manual Scan, and press OK button to enter the sub-menu.
Press EXIT or MENU button to quit.
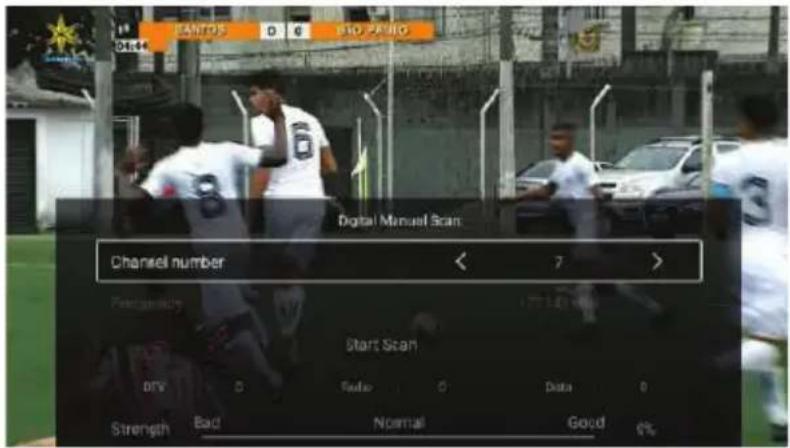
Note: The illustration is a reference image, your device may differ
Channel List
View all of the existing programs.
Press ▼ / ▲ button to select Channel List. Press OK button to enter the sub-menu.
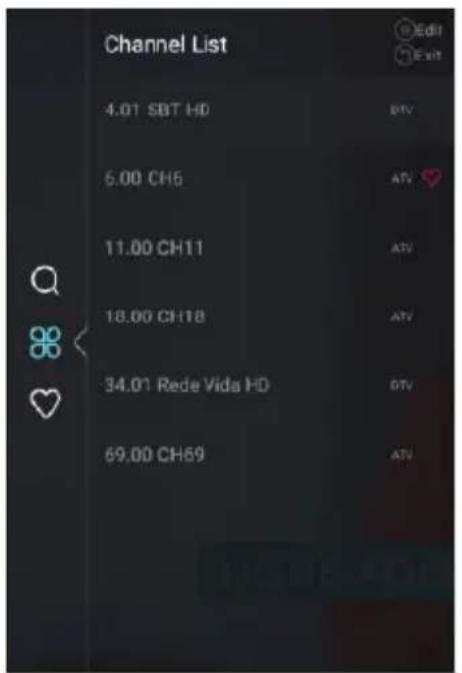
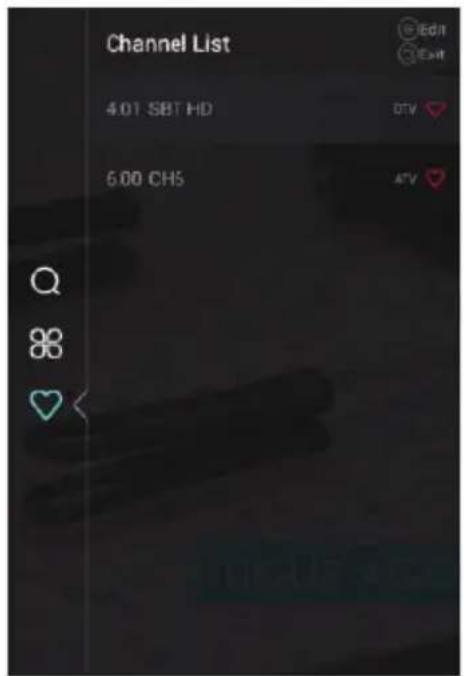
Press ▼ / ▲ button to select All/Favorite.
All
Press ▼ / ▲ button to select All. Press MENU button to edit the program.
(Optional:Favorite/Skip.)
If the program is selected as an analog signal, the program can be renamed.
Favorite
Press ▼ / ▲ button to select Favorite. Press MENU button to edit the Favorite Channel.
(Optional:Favorite.)
Note: The illustration is a reference image, your device may differ
EPG
Press ▼ / ▲ button to select EPG. Press MENU button to enter the sub-menu.
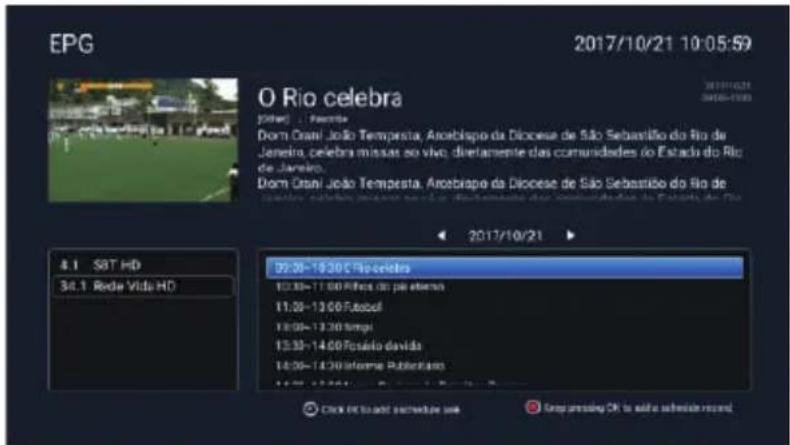
Note: The illustration is a reference image, your device may differ
ATV+DTV
Country/Antenna Type/Audio Language are same as DTV.
Press MENU or EXIT button to quit.
Scan
Press ▼ / ▲ button to select Scan. Press OK button to enter the sub-menu.
Press ▼ / ▲ button to select Search Type/AutoScan/Digital Manual Scan.
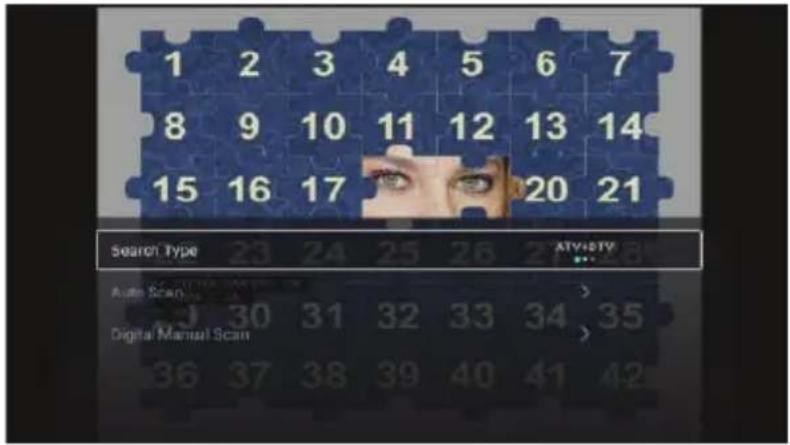
Search Type
Press ▼ / ▲ button to select Search Type. Press ◀ / ▶ button to select ATV/DTV/ATV+DTV.
Auto Scan
Automatic search can search for effective program channel automatically.
Press ▼ / ▲ button to select Auto Scan, then press OK button to start auto search.
If you want to stop searching, press EXIT or MENU button to stop searching.
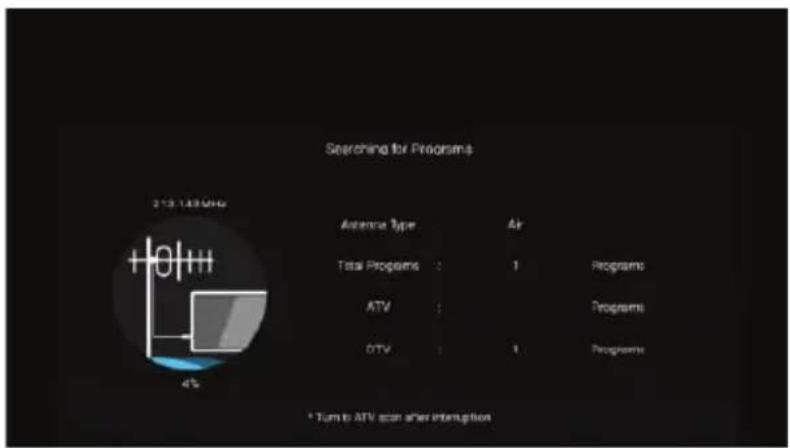
Note: The illustration is a reference image, your device may differ
Channel List
View all of the existing programs.
Press ▼ / ▲ button to select Channel List. Press OK button to enter the sub-menu.
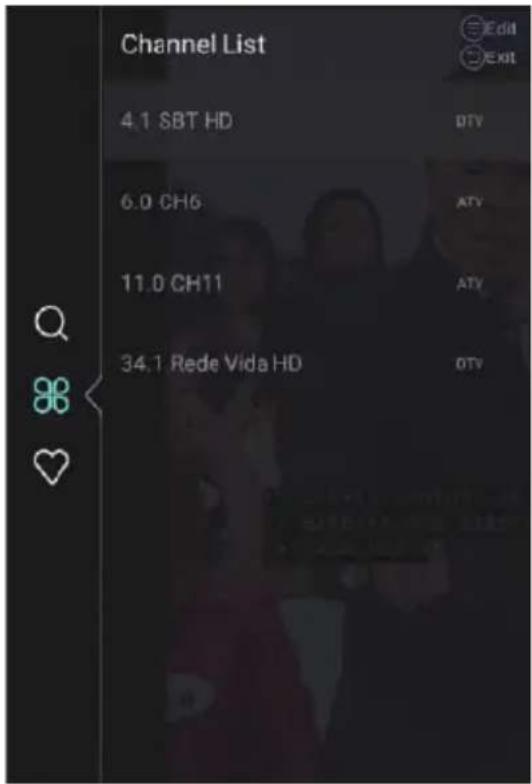
Press ▼ / ▲ button to select All/Favorite.
(Optional function is same as ATV&DTV search type.)
Note: The illustration is a reference image, your device may differ
EPG
Press ▼ / ▲ button to select EPG. Press MENU button to enter the sub-menu.
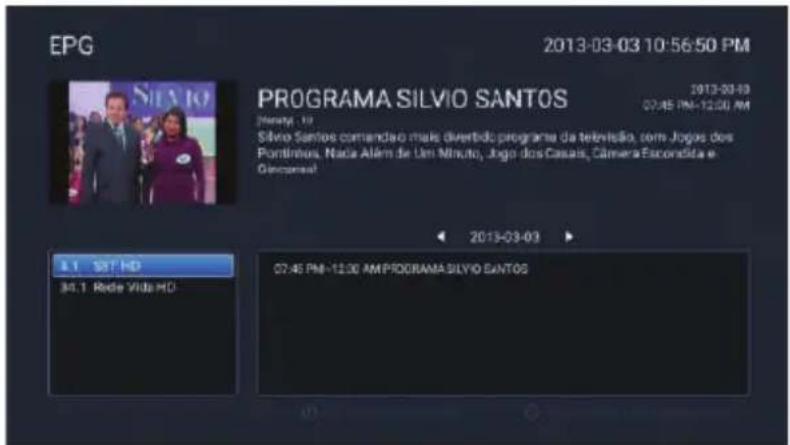
Note: The illustration is a reference image, your device may differ
Lock
Press MENU button to enter the main menu.
Press ◀ / ▶ button to select Lock.
Press OK button to input password to enter the sub-menu.(Supper password is 4711)
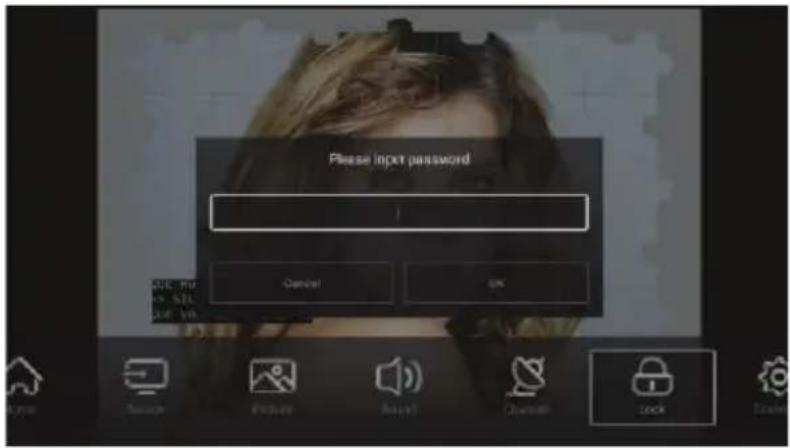
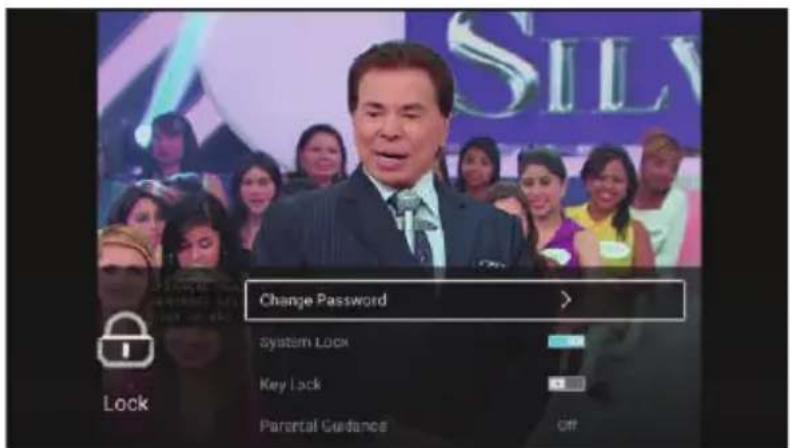
Press▼ / ▲ button to select Change Password/System Lock/Key Lock/Parental Guidance.
Change Password
Press ▼ / ▲ button to select Change Password. Press ENTER button to set Password.
System Lock
Press ▼ / ▲ button to select System Lock. Press ◀ / ▶ button to select On/Off.
Key Lock
Press ▼ / ▲ button to select Key Lock. Press ◀ / ▶ button to select On/Off.
Parental Guidance
Press ▼ / ▲ button to select Parental Guidance.Press ◀ / ▶ button to select Off/10/12/14/16/18.
Note: The illustration is a reference image, your device may differ
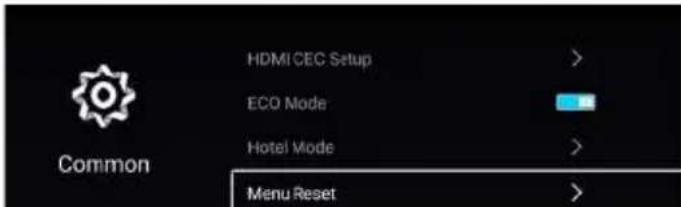
Common
Press MENU button to enter the main menu.
Press ◀ / ▶ button to select Common.
Press OK button to enter the sub-menu.
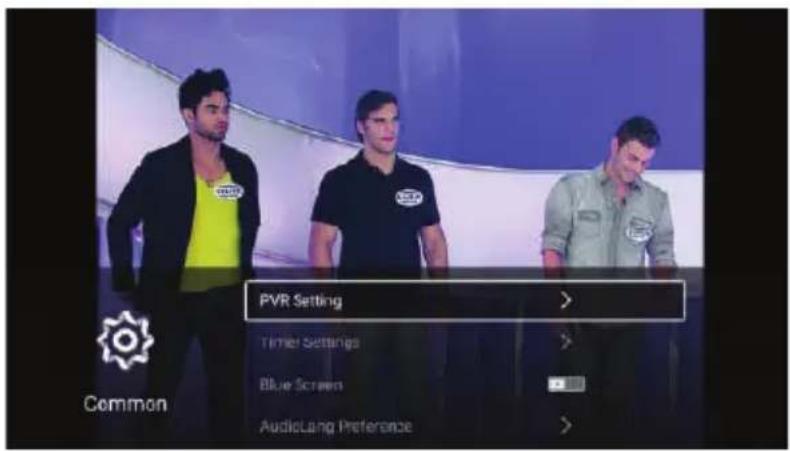
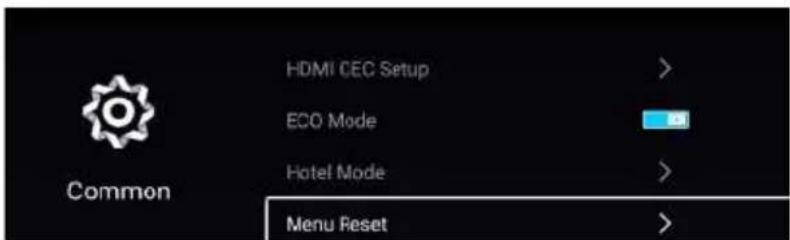
Note: The illustration is a reference image, your device may differ
Press▼ / ▲ button to select PVR Setting/Timer Settings/Blue Screen/AudioLang Perference/Digital CC Option/HDMI CEC Setup/ECO Mode/MenuReset.
PVR Setting
Press ▼ / ▲ button to select PVR Setting.
Press ▼ / ▲button to select Select Disk/Format/Speed/Record List/Schedule List.
Press ENTER button to enter sub-mune.
Timer Settings
Press ▼ / ▲ button to select Timer Settings.
Press ▼ / ▲button to select OSD Timer/Autostandby Timer/Sleep Timer.
Press ENTER button to enter sub-mune.
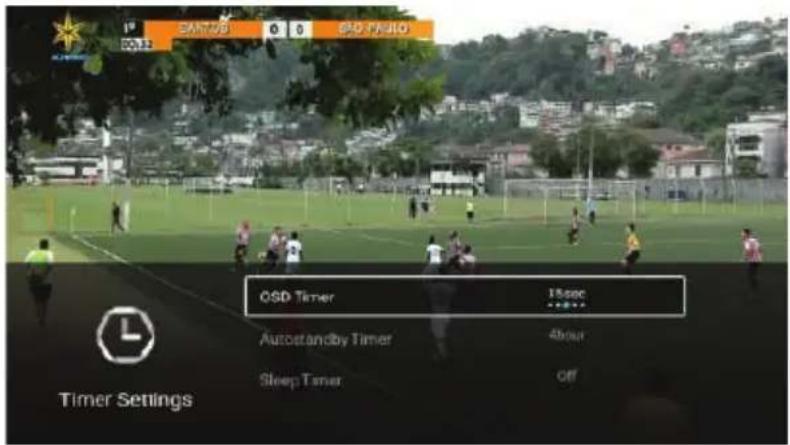
OSD Timer
Press ▼ / ▲ button to select OSD Timer.
Press ◀ / ▶ button to select Off/5sec/15sec/30sec/40sec.
Auto Standby Timer
Press ▼ / ▲ button to select Autostandby Timer.
Press ◀ / ▶ button to select Off/3hour/4hour/5hour.
Sleep Timer
Press ▼ / ▲ button to select Sleep Timer.
Press ◀ / ▶ button to select Off/15min/30min/45min/60min/90min/120min/240min.
Note: The illustration is a reference image, your device may differ
Blue Screen
Set the background color to blue when there is no input signal.
Press ▼ / ▲ button to select Blue Screen. Press ◀ / ▶ button to select On/Off.
AudioLang Preference
Press ▼ / ▲ button to select AudioLang Preference. Press OK&▼ / ▲ button to select .
Digital CC Option
Press ▼ / ▲ button to select Digital CC Option. Press ◀ / ▶ button to select On/Off.
HDMI CEC Setup
Press ▼ / ▲ button to select HDMI CEC Setup.
Press OK button to enter the sub-menu.
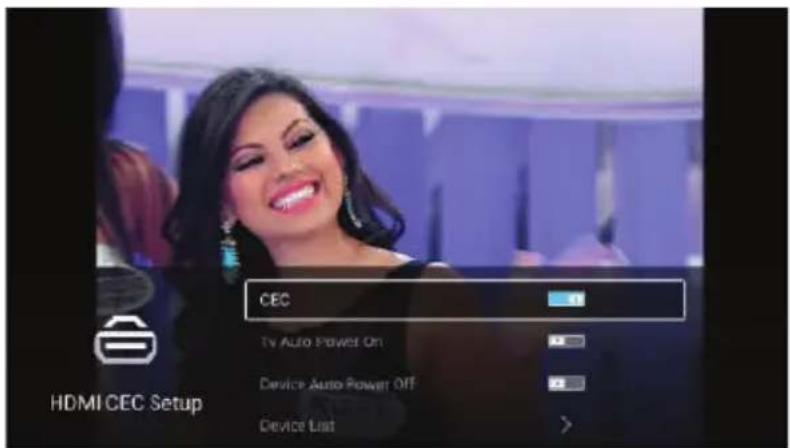
Press ▼ / ▲ button to select CEC/Tv Auto Power On/Device Auto Power Off/Device List.
Note: All the Options are available only when the CEC select On.
CEC
Press ▼ / ▲ button to select CEC, and press ◀ / ▶ button to select On/Off.
The following terms are available only when "On" is selected in CEC.
Tv Auto Power On
Press ▼ / ▲ button to select TV Auto Power On, and press ◀ / ▶ button to select On/Off.
Note: The illustration is a reference image, your device may differ
Device Auto Power Off
Press ▼ / ▲ button to select Device Power Off, and press ◀ / ▶ to select On/Off.
Device List
Press ▼ / ▲ button to select Device List, and press ENTER button to enter.
ECO Mode
Press ▼ / ▲ button to select ECO Mode. Press ◀ / ▶ button to select On/Off.
Menu Reset
Recall the default setting.
Press ▼ / ▲ button to select Menu Reset.
Press ENTER button to enter to reset the setting.
Advance
Press MENU button to enter the main menu.
Press ◀ / ▶ button to select Advance.
Press ENTER button to enter the System Setting.
(Please refer to the home page--Setting part)
Help
| No Power | Check the AC cord of TV is plus in or not. If still no power, please pull out the plug and replug in after 60 seconds. And open the TV again |
| Signal receive not properly | To cause double image or phantom if there has high building or high mountain round TV. You can adjust image effect by manually operation: consult instruction of vernier regulation or change the direction of external antenna.If you use the indoor antenna, under certain circumstance, receive will be more difficult .So you can change the direction of the antenna to adjust the image effect . If can't change image receiving effect either , you have to use external antenna. |
| No picture | Check the antenna at the back of TV is connected properly or not.Try to select other channels and check whether the TV problem itself or not |
| but,Video is ok without audio | Increase the volume.Check the TV is in mute mode or not , and please press the mute button to make sound resume. |
| but, Audio is ok color error or no picture | Increase contrast and brightness. |
| Snow statics picture and noise | Check the antenna at the back of TV is connected or not. |
| Level broken line | Vacuum, such as hair drier, Maybe has electrical appliance interfere. please turn off these kinds of electrical appliance, cleaner and so on. |
| Image or-Dual "simulacrum" The TV no response with the Remote | Perhaps the location for the antenna is not good.Use the tall beamed antenna can be improved quality of the display image.Operate the remote direct to the remote sensor on the TV.If still no response for the TV, please check if the plastic bag on the remote take or not. And check if the location for the battery is correct.Change the new battery.The TV will shift to the STAND BY if no response from the remote in the few minutes. |
| NO Video In (PC Mode) | Please check if the display cable connect to the VGA correcte .Please check if there has the bend on the display cabl . |
| Vertical twinkling (PC Mode) | Enter the main menu. Use the clock regulator for the video display noise to eliminate the vertical line. |
| Horizontal ripping (PC Mode) | Adjust the Audio sound horizontal in the main menu to clear the horizontal ripping line. |
| The screen is too bright or too dark (PC Mode) | Adjust the contrast ratio or brightness in the main menu. |
| PC Function no response | Check the computer setting in the state of compatible display resolution |
| Ripping line in RCA connecting | Please use good quality connecting cable. |
| Problem still exist | Unplug the power cable and wait for 30 seconds, then connect.If there is some problem with our TV, do not repair it by yourself, please contact with the customer service center. |
There will be complete picture and the brightness will come down if the TV is in Note. So please do not keep the TV in a state of same, the static picture for too long time. Menu or same picture that has much difference in brightness and contrast ratio for too long time.
Note : TV panel is built with very high precision technology giving you fine picture details in vibrant color. Occasionally, a few non-active pixels may appear on the screen as fixed point of red, green, blue or white. Please note this does not affect the performance of the product.
Specifications
Product Specifications
| ◆ Resolution: | 1920x1080 |
| ◆ Power supply: | AC 100-240V~50/60Hz |
| ◆ Power: | Less than 90W |
| ◆ Video: | avi,MPEG,MPEG-4 |
| ◆ Music: | mp3 |
| ◆ Photo: | jpg,jpeg,bmp,png |
natural_image
Symbol of a trash bin crossed with a diagonal line and a horizontal bar below (no text or labels)Dispose of packaging in an environmentally-friendly manner.
This appliance is labelled in accordance with European Directive 2012/19/EU concerning used electrical and electronic appliances (waste electrical and electronic equipment - WEEE). The guideline determines the frame work for the return and recycling of used appliances as applicable throughout to the EU.
PACKAGE INFORMATION: Packaging materials of the product are manufactured from recyclable materials in accordance with our National Environment Regulations. Do not dispose of the packaging materials together with the domestic or other wastes. Take them to the packaging material collection points designated by the local authorities.
. aspes
www.aspes.es
aspes@sareteknika.es; 902 99 69 01 / 944 04 14 08
- Índice
- Precauciones
- Botones TV e interfaz terminal
- Botón TV
- AVC (Audio Video Coding)
- Salida de audio digital
- Content
- Warning and Precautions
- Warning
- Do not attempt to service the product yourself
- Caution
- Important Safety Instructions
- 19) Cautions for installation
- IMPORTANT INFORMATION
- Remote Control Operation
- Installing Batteries
- Precautions
- TV Buttons And Terminal Interface
- TV Buttons
- Terminal Interface
- Remote Control
- Setup Wizard
- Home page
- App Store
- Classify
- User App
- SETTINGS
- Network
- Time
- Common
- Accounts
- System Info
- Media
- Video
- Play List
- Play Mode
- Audio
- Image
- Input
- TV Setting
- Picture
- Picture Mode
- Contrast/Brightness/Color/Sharpness
- Backlight
- Aspect Ratio
- Color Temp
- More Settings
- Sound
- Sound Mode
- Sound Out
- Bass
- Treble
- Balance
- AVC
- Audio Language
- Digital Audio Output
- SPDIF Delay
- Surround
- Audio Only
- Channel
- Scan
- Search Type
- Auto Scan
- Digital Manual Scan
- Channel List
- All
- Favorite
- Antenna Type
- EPG
- ATV+DTV
- Lock
- Change Password
- System Lock
- Key Lock
- Parental Guidance
- PVR Setting
- Timer Settings
- OSD Timer
- Auto Standby Timer
- Sleep Timer
- Blue Screen
- AudioLang Preference
- Digital CC Option
- HDMI CEC Setup
- CEC
- Tv Auto Power On
- Device Auto Power Off
- Device List
- ECO Mode
- Menu Reset
- Advance
- Specifications
- aspes
Brand : ASPES
Model : ATV4300SM
Category : Television