
DDS04-E01 - Steam cleaner DIRT DEVIL - Free user manual and instructions
Find the device manual for free DDS04-E01 DIRT DEVIL in PDF.


| Product Type | Multi-function steam cleaner (5-in-1 / 11-in-1) |
| Model Number | DDS04-E01 |
| Voltage | 220-240 V ~ 50/60 Hz |
| Power Rating | 1500 W |
| Water Tank Capacity | 330 ml |
| Heating Time | Approximately 30 seconds |
| Weight (approximate) | 2.5 kg |
| Dimensions (H × W × D) | 25 × 30 × 110 cm |
| Floor Types | Hard floors (tile, sealed wood, laminate) and carpets (refreshing only) |
| Main Functions | Steam cleaning, handheld steam, carpet refreshing, grout cleaning, window cleaning, upholstery cleaning |
| Accessories (5-in-1) | 1 Microfiber Pad, Carpet Glider / Cooling Tray, Concentration Nozzle, Small Round Brush, Grout Brush |
| Accessories (11-in-1) | 2 Microfiber Pads, Carpet Glider / Cooling Tray, Concentration Nozzle, Small Round Brush, Grout Brush, Utility Head, Utility Head Pad, Window Squeegee, Measuring Cup, Hose, Metal Brush |
| Pad Material | Microfiber, machine washable (max 40°C) |
| Safety Features | Thermostat, thermal cut-out (auto shut-off on overheating) |
| Warranty | 1 year (upon registration) |
| Power Cord Length | Approximately 5 m |
| Noise Level | Not specified (typically low for steam cleaners) |
Frequently Asked Questions - DDS04-E01 DIRT DEVIL
User questions about DDS04-E01 DIRT DEVIL
0 question about this device. Answer the ones you know or ask your own.
Ask a new question about this device
Download the instructions for your Steam cleaner in PDF format for free! Find your manual DDS04-E01 - DIRT DEVIL and take your electronic device back in hand. On this page are published all the documents necessary for the use of your device. DDS04-E01 by DIRT DEVIL.
USER MANUAL DDS04-E01 DIRT DEVIL
MULTI-FUNCTION STEAM CLEANER
(5-in-1 and 11-in-1)

1·2·3...
USER GUIDE
DDS04-E01/DDS04-P01
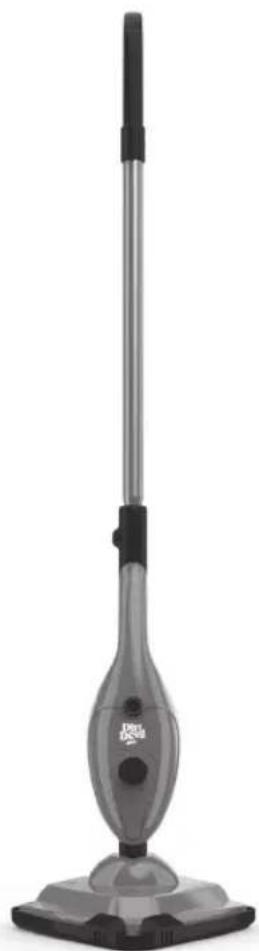
natural_image
Exterior view of a modern vacuum cleaner (no text or symbols visible)LET'S GO.™

WARNING

BASIC SAFETY PRECAUTIONS
This steamer is intended for household use only and NOT for commercial or industrial use.
- Only use the steamer indoors and keep the area you're cleaning well lit.
- Keep fingers, hair and loose clothing away from moving parts and openings whilst using the steamer.
- This steamer can be used by persons with reduced physical, sensory or mental capabilities or lack of experience and knowledge if they have been given supervision or instruction concerning use of the appliance in a safe way and understand the hazards involved.
-
Children shall not play with the steamer. Cleaning and user maintenance shall not be performed by children without supervision
-
Please refer to floor manufacturer's care recommendations before use, and test your flooring/carpet/rugs by running the steamer over a small hidden area, if no pile distortion or no damage occurs continue cleaning. Not suitable for use on wax polished floors or furniture, acrylic surfaces and synthetic, velvet or steam/water sensitive materials
- This steamer should not be used to clean electrical appliances such as microwaves, televisions and electrical heating systems etc.
- Only Dirt Devil recommended cloths and accessories should be used with this steamer. This steamer is a water only product, using detergents will invalidate the guarantee.
DON'TS
- Don't touch any hot areas/accessories on your steamer. It's normal for the steamer and accessories to heat up during use, always allow them to cool down before handling.
- Don't leave the steamer turned on when unattended.
-
Don't use the steamer if it has been dropped, damaged, immersed in water or left outdoors.
-
Don't run over the power cord or use steamer if the power cord or plug is damaged. Please contact our Customer Care Line.
- Don't handle the plug or use the steamer with wet hands. Don't pull or carry the steamer by the power cord.
- Don't use the power cord as a handle, don't pull the power cord around corners or sharp edges or close a door over the power cord.

WARNING

DON'TS CONTINUED...
- Don't unplug the steamer by pulling on the power cord.
- Don't attempt to remove blockages with sharp objects as this may cause damage to the steamer, remove blockages only as instructed in this guide.
- Don't aim the steamer at people, animals, plants and electrical components or wires. Never
touch the steam jet (there is a risk of scalding).
- Don't use the steamer with incorrect voltage as this may result in damage or injury to the user. The correct voltage is listed on the ratings label.
- Don't use the steamer to clean or refresh any items of clothing that are still being worn on the body.
DO'S
- Always fill the water tank with water only. Never add perfume, stain remover or products containing alcohol. Filling the water tank with hot or boiling water will damage the steamer and invalidate the guarantee.
- Always vacuum your carpets thoroughly and ensure hard floor areas are free from grit and debris before using your steamer.
- Always unplug the steamer and allow to cool before carrying out any maintenance.
- Turn off all controls on the steamer before disconnecting or connecting the power cord, after use always wrap the power cord around the cord clips.
-
Take extra care when cleaning on the stairs.
-
Always replace the fuse in the plug with a British 13amp fuse. Always protect the power cord from heated surfaces and open flames.
- Use only CE approved 13amp extension cords, non-approved extension cords can overheat. Care should be taken to arrange the extension cord as it could be a trip hazard.
- Store the steamer in a cool, dry area away from children. Before storing the steamer please make sure the water tank is thoroughly clean and empty.
HI. WELCOME.
Congrats on purchasing your new MULTI FUNCTION STEAM CLEANER. Inside, you'll find everything you want to know from tools to how to.
So what are you waiting for? LET'S GO.™

PRODUCT REGISTRATION
Guarantee Registration
Be sure to register your product online at www.DirtDevil.co.uk
Hint: Attach your sales receipt to this User Guide. Verification of date of purchase may be required for warranty service of your Dirt Devil ^® product.
For quick reference, please record your product information below.
Model #:
Serial number:
(serial number located on the back or bottom of product)
TABLE OF CONTENTS
Let's talk safety 3
Overview 6
Before use 8
Assembly 9
How to 10
Care & Maintenance — 16
Troubleshooting 16
Guarantee 19
OVERVIEW
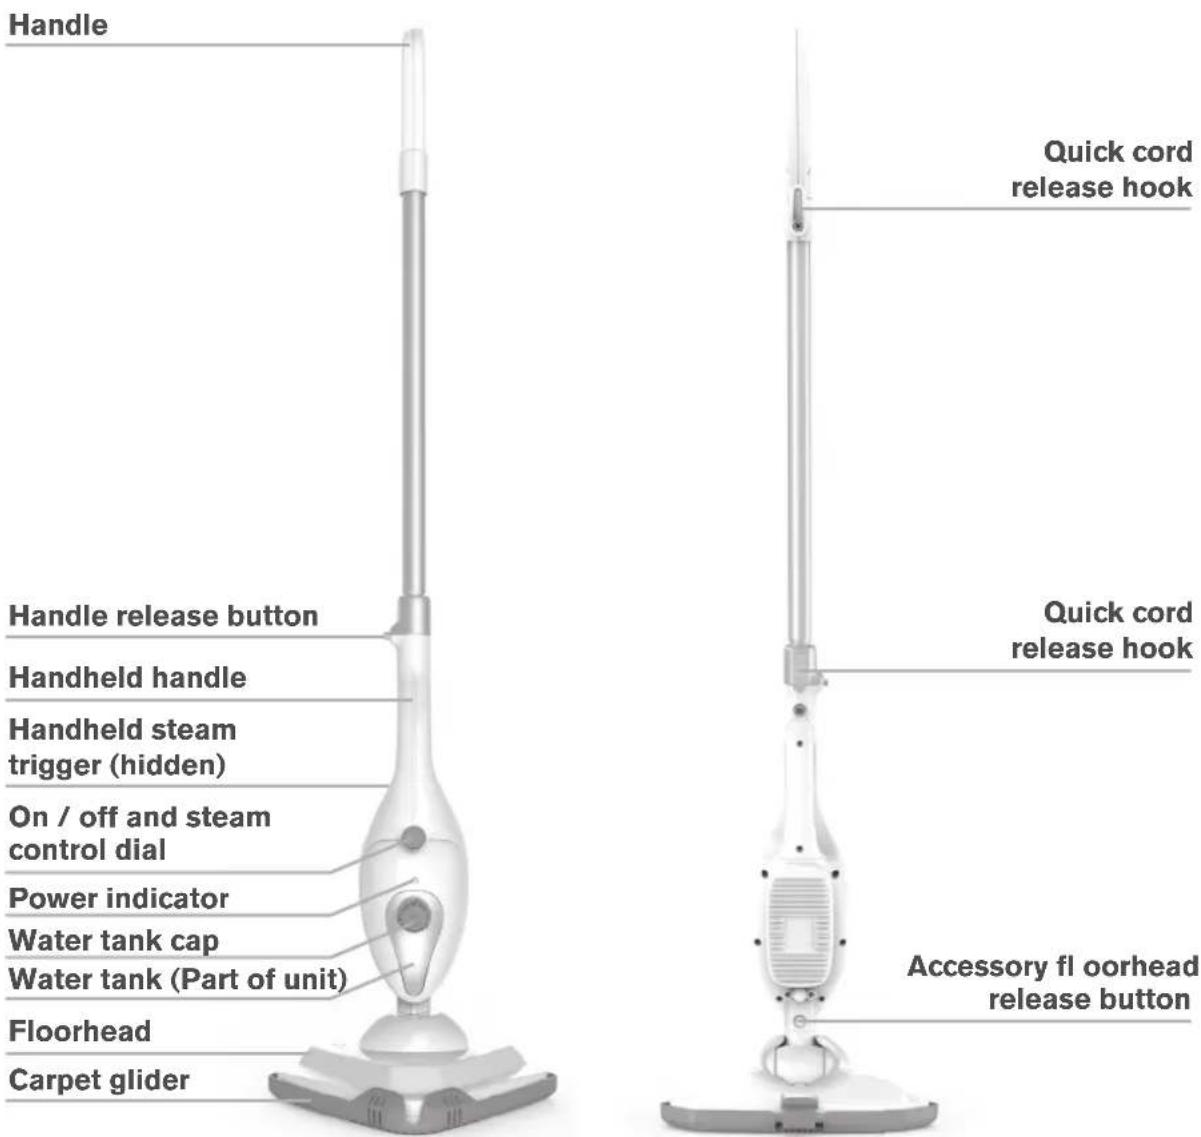
TECHNICAL DATA
Type of appliance:
Multi function steam cleaner
Model name:
5-in-1 / 11-in-1
Model number:
We reserve the right to make changes to technical and design specifications in the interest of continuous product improvement.
© Dirt Devil.
INCLUDED WITH YOUR MACHINE
5-in-1
x1 Microfi bre Pad
x1 Carpet Glider / Cooling Tray
x1 Concentration Nozzle
x1 Small round brush
x1 Grout brush
11-in-1
x2 Microfi bre Pad
x1 Carpet Glider / Cooling Tray
x1 Concentration Nozzle
x1 Small round brush
x1 Grout brush
x1 Utility Head
x1 Utility Head Pad
x1 Window Squeegee
x1 Measuring Cup
x1 Hose
x1 Metal Brush
BEFORE USE

CAUTION
The steamer head gets very hot during use. Always switch off the steamer before emptying the water tank or changing the cleaning pads/accessories.
- Test for colour fastness in a small hidden area of upholstery/fabric to check for colour removal before use.
- When using the steamer, basic safety precautions should always be observed.
- Don't aim the steamer at people, animals, plants and electrical components or wires. Never touch the steam jet or floorhead from a short distance (there is a risk of scalding).
- The steamer is equipped with a thermostat and a thermal cut-out. If for any reason the steamer overheats it will switch off. If this happens turn off and unplug the steamer, allow to cool for at least 2 to 4 hours and re-try.
- Don't use hot or boiling water to fill or clean water tank.

IMPORTANT: Please refer to floor manufacturer's care recommendations before use and test the amer on a hidden area of flooring/surface to begin with.
ASSEMBLY
ASSEMBLING YOUR STEAMER
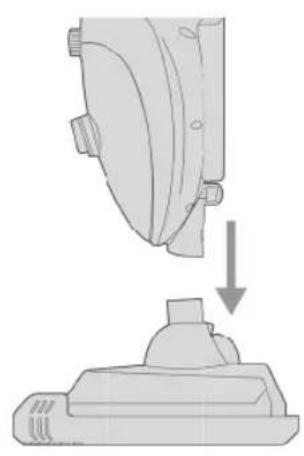
natural_image
Mechanical assembly diagram showing a component being lowered into a base (no text or symbols)1
Push the main body down into the fl oorhead until it clicks into place.
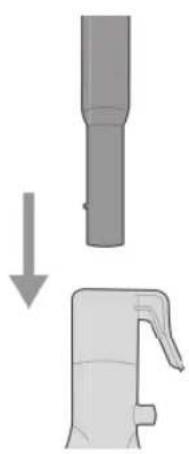
natural_image
Diagram showing a mechanical component with a downward arrow, no text or symbols present2
Push the handle into main body until it clicks into place.
natural_image
Line drawing of a vacuum cleaner with a base and top component (no text or symbols)3
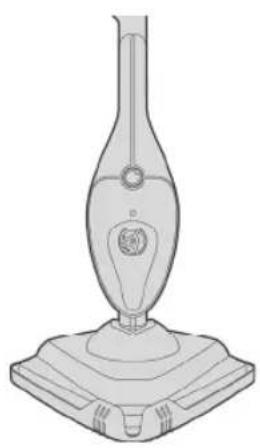
Stand the steamer upright by pushing the main body forward to lock into position.
YOUR MULTI FUNCTION STEAM CLEANER IS READY TO CLEAN!
LET'S GO.™

NEED HELP?
Go to www.DirtDevil.co.uk or contact our Customer Service Department at 0330 026 2626 (Mon-Fri 9:00am to 5:00pm)
HOW TO
FILL THE WATER TANK
natural_image
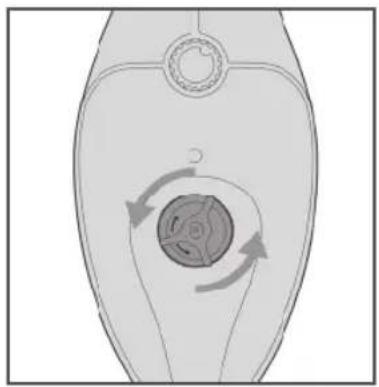
Diagram of a biological structure with circular organelles and curved arrows indicating rotation or movement (no text or labels)- Remove fl oorhead and handle and place steamer on fl at surface. Twist water tank cap anti clockwise and lift to remove.
natural_image
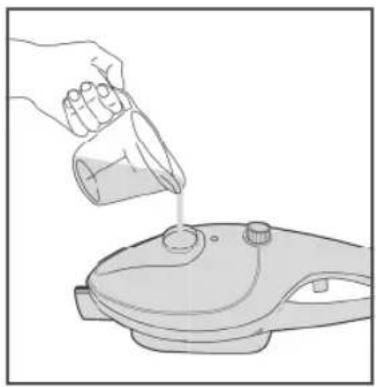
Illustration of a hand pouring liquid into a small container on a surface (no text or symbols)- Do not fi ll directly from tap or over sink. Keep steamer on fl at surface. Use the measuring jug and fi ll the tank with 330ml (2 x 165ml) of fi itered water.
natural_image
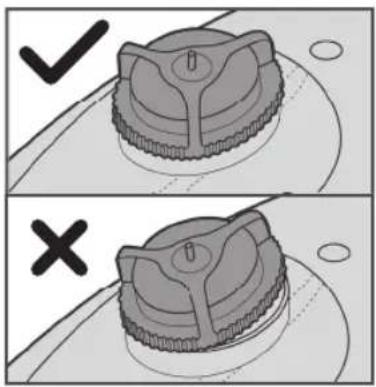
Two-panel illustration showing a mechanical component with check and cross symbols (no text or labels)- Replace cap, align tabs and twist clockwise to tighten.
HOW TO
CLEAN HARD FLOORS
natural_image
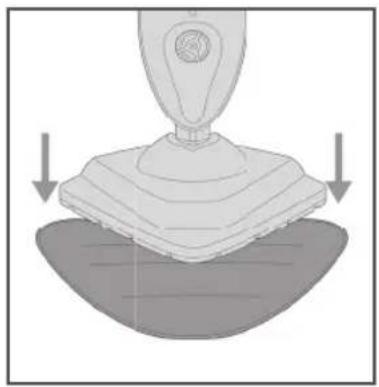
Diagram of a robotic device with a base and top component, showing downward arrows indicating motion (no text or symbols)- Place the microfi bre pad on the fl oor white side facing up. Place the fl oorhead onto microfi bre pad making sure the microfi bre pad covers the entire fl oorhead.
natural_image
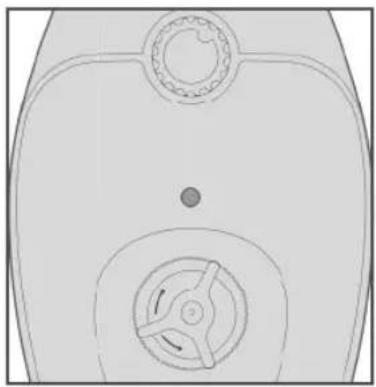
Top-down schematic of a mechanical component with circular and radial features (no text or symbols)- Plug into mains, turn dial to 'ON'; the amber light will illuminate to indicate power on. The steamer will be ready after approximately 30 seconds.
natural_image
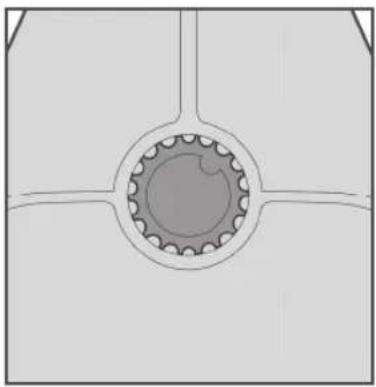
Pure mechanical gear diagram without any text, numbers, or symbols- To steam your fl oors twist the steam control dial to desired setting. Steam is activated automatically. Take care when changing settings during cleaning.

TIP: Product needs to be assembled after fi lling the tank. Attach the fl oorhead and handle before cleaning fl oors.
natural_image
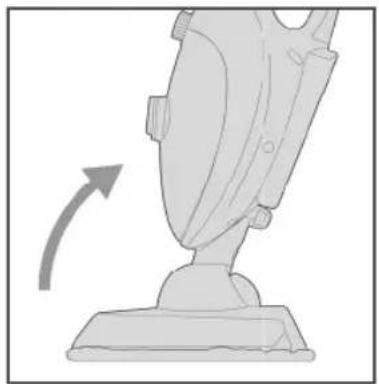
Illustration of a vacuum cleaner with an arrow indicating motion (no text or symbols)- Place foot onto the floor and pull handle backwards to recline.
natural_image
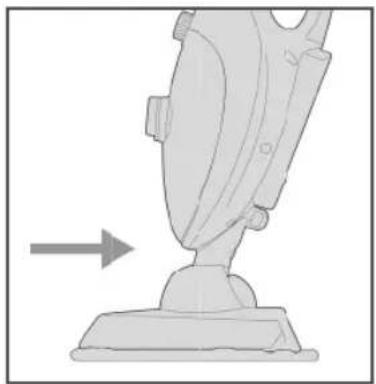
Diagram of a mechanical device with an arrow indicating direction (no text or symbols present)- Move the steamer slowly backwards and forwards across the floor paying particular attention to high traffic areas.
natural_image
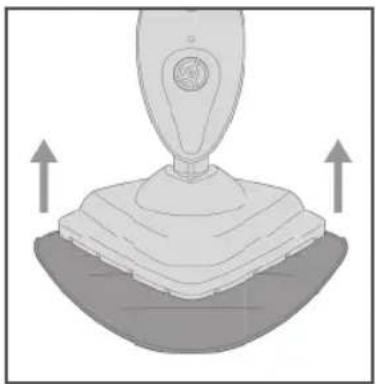
Diagram of a mechanical device with upward arrows indicating motion or force (no text or symbols)- Turn dial to 'OFF' position and allow steamer to cool, the amber light will switch off. Hold corner of pad down with your foot and lift steamer to peel away.
IMPORTANT: Never use the steamer without a cleaning pad attached to the floorhead.
IMPORTANT: Never leave the steamer on one spot for an extended period of time or with a damp or wet microfi bre pad attached as this may damage the floor surface.
HOW TO
USE THE MACHINE AS A HANDHELD
natural_image
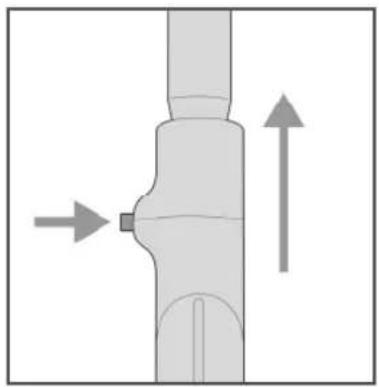
Pure mechanical component diagram with no text, numbers, or symbols- Push handle release button and lift handle to remove.
natural_image
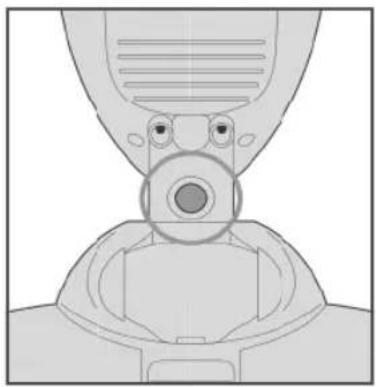
Technical line drawing of a mechanical component with no visible text or symbols- Press accessory release button and lift steamer to release fl oorhead.
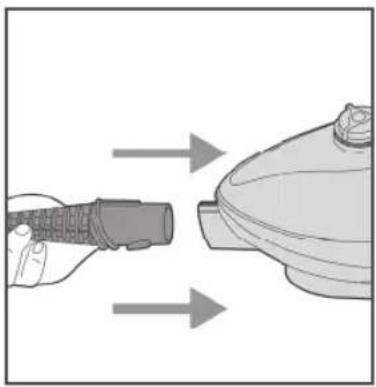
natural_image
Illustration of a hand holding a connector to a device, with arrows indicating direction (no text or symbols)- Push concentration nozzle into steamer until it clicks into place.
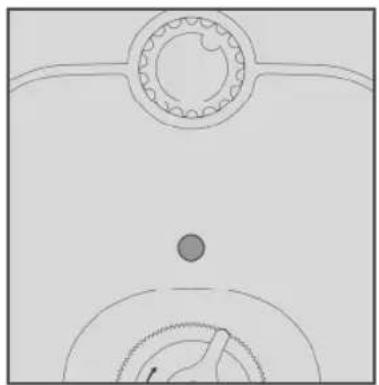
natural_image
Simple line drawing of a mechanical component with two circular features and a central dot (no text or symbols)- Plug into mains, turn the dial to 'ON' position. The amber light will illuminate to indicate power on. The steamer will be ready after approximately 30 seconds.
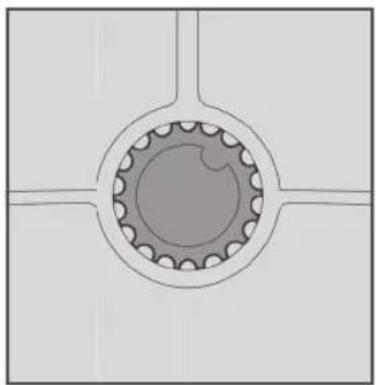
natural_image
Cross-sectional diagram of a mechanical gear or sprocket with four teeth, no text or symbols present- Twist the steam control dial to desired setting.
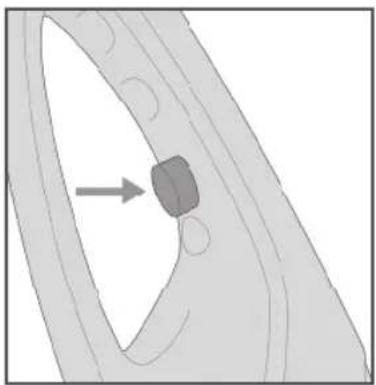
natural_image
Diagram of a mechanical component with an arrow indicating direction, no text or symbols present- To produce steam squeeze the trigger in short bursts. Don't hold the trigger continuously to prevent over wetting.
HOW TO

CAUTION
Always allow tools and accessories to cool down before removing.
ATTACH THE ACCESSORIES
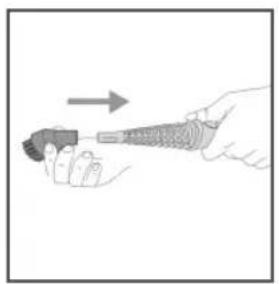
ATTACH THE BRUSHES
natural_image
Illustration of a hand holding a tool with an arrow indicating direction (no text or symbols)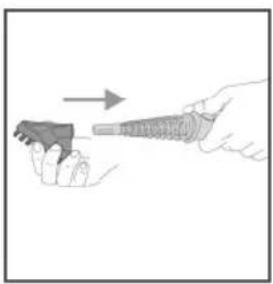
natural_image
Illustration of a hand holding a small object with an arrow pointing to it, no text or symbols present- Small tools can be attached via the concentration nozzle. Push together to click into position and secure.
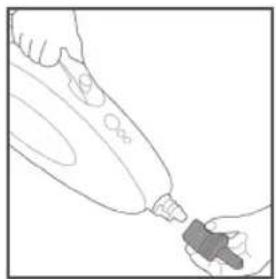
ATTACH THE ACCESSORY HOSE
natural_image
Line drawing of a hand holding a small object, possibly a device or tool, with no visible text or symbols.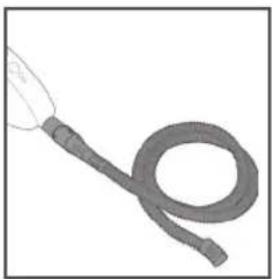
natural_image
Simple line drawing of a coiled cable or wire with a pointed tip (no text or symbols)- Push the accessory connector onto the steamer nozzle until it clicks into place.
- Line up hose with the accessory connector, twist and push to lock into place.
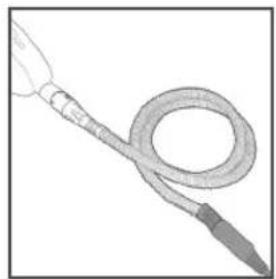
natural_image
Medical catheter or tube device with a coiled tube and bulbous end (no text or symbols visible)- Line up concentration nozzle with the hose, twist and push to lock into place.
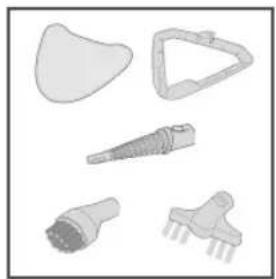
natural_image
Collection of five different medical or electrical component designs, including a triangular shape, needle, and plug (no text or symbols visible)- Choose an accessory.
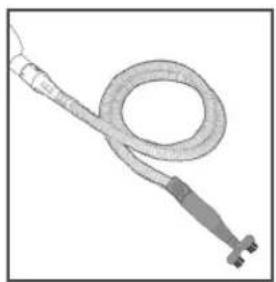
natural_image
Medical catheter device with coiled tube and connector (no text or symbols visible)- Line up accessory with concentration nozzle, twist and push to lock into place.
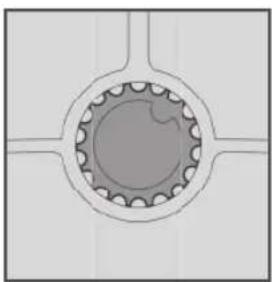
natural_image
Cross-sectional diagram of a mechanical gear or cam component (no text or symbols)- Adjust the steam control dial to switch On/Off and for adjusting steam control.
natural_image
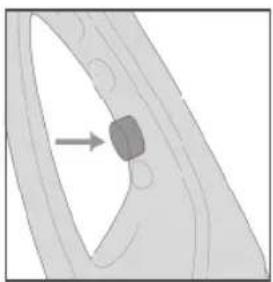
Diagram of a car wheel with a highlighted component and directional arrow (no text or symbols)- To produce steam, squeeze the steam trigger.
HOW TO

CAUTION
Always allow tools and accessories to cool down before removing.
USE THE ACCESSORIES
natural_image
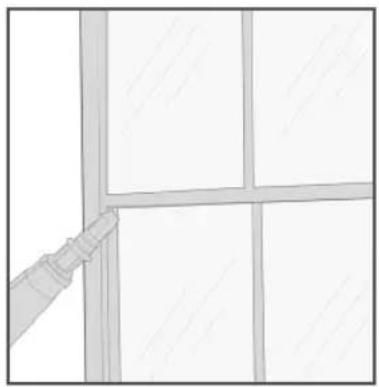
Simple line drawing of a window with a handle, no text or symbols presentCONCENTRATION NOZZLE
Use to remove soap scum in baths and shower enclosures and to clean heavily soiled areas in kitchens.
natural_image
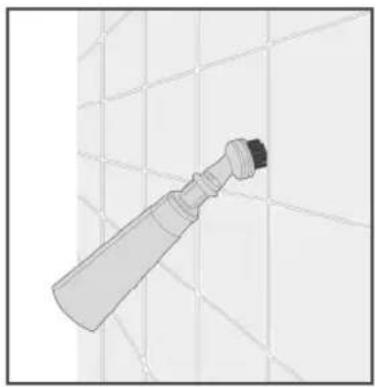
Illustration of a cylindrical object with a pointed tip, placed on a grid-patterned surface (no text or symbols)SMALL BRUSH
Ideal for any surface from tiles, sinks, toilets and oven tops.
natural_image
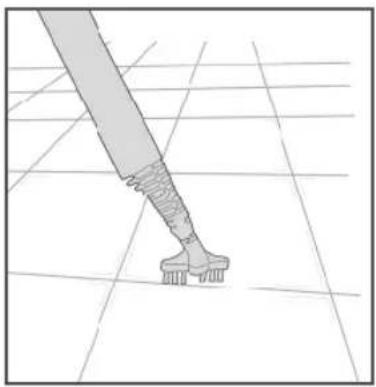
Diagram of a hand holding a tool over a tiled floor, no text or symbols presentGROUT BRUSH
Lifts embedded dirt from in between tiles.
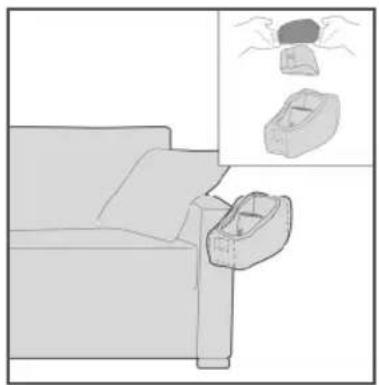
natural_image
Illustration of a sofa with a handbag and inset showing a hand holding a small object (no text or symbols)UTILITY HEAD AND PAD
Attach utility pad to utility head for use on upholstery and clothes. Do not use detergent on fabrics and upholstery.
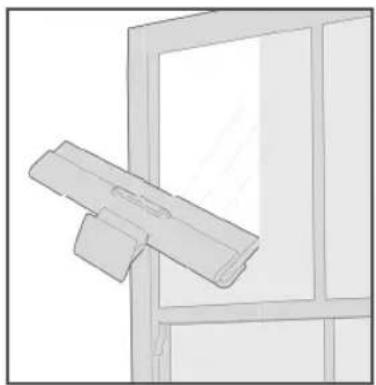
natural_image
Simple line drawing of a door with a handle and window (no text or symbols)SQUEEGEE
Great for leaving your windows, tiles and mirrors gleaming.
natural_image
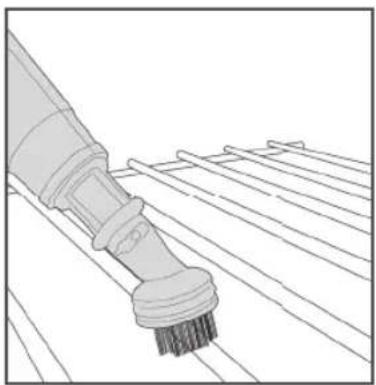
Line drawing of a mechanical component with a textured handle and rod, mounted on a grid-like surface (no text or symbols)METAL BRUSH
Strong metal bristles to lift resilient grime from tough surfaces. Use when deep cleaning your oven, wire racks or BBQ to make light work of diffi cult cleaning tasks. Not for use on soft or delicate surfaces or material/ upholstery.
HOW TO

CAUTION
Always switch OFF the steamer when fi tting and removing the microfi bre cleaning pads.
USE ON CARPETS
REFRESHING CARPETS
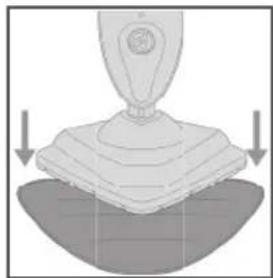
natural_image
Diagram of a robotic arm gripping a layered object, with two downward arrows indicating force or movement (no text or symbols present)- Place the microfi bre pad on the fl oor white side facing up. Place steamer onto pad making sure the entire pad covers the fl oorhead.
natural_image
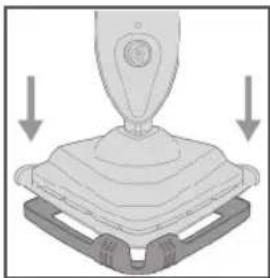
Mechanical assembly diagram showing a component being lowered into a base plate (no text or symbols)- With microfi bre pad attached, push steamer into front of the carpet glider, then place back of the fl oorhead into the clip. The carpet glider should only be used when refreshing carpets.
natural_image
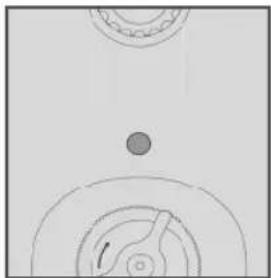
Simple line drawing of a mechanical component with no text or symbols- Plug into mains, turn dial to 'ON' position, the amber light will illuminate to indicate power on.
natural_image
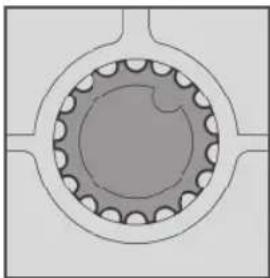
Cross-sectional diagram of a mechanical gear or cam mechanism (no text or symbols)4.Twist the steam control dial to desired setting. Steam is activated automatically. Take care when changing settings during cleaning.
natural_image
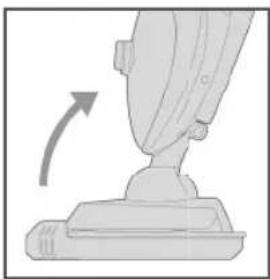
Illustration of a mechanical device with an arrow indicating rotation or movement (no text or symbols)- Place your foot on fl oorhead and pull handle backwards to recline.
natural_image
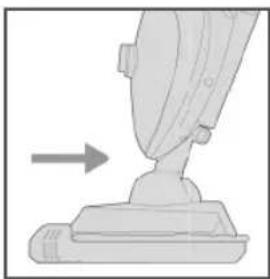
Illustration of a mechanical device with an arrow pointing to a component (no text or symbols present)- Move the steamer slowly backwards and forwards across the carpet paying particular attention to high traffic areas.
natural_image
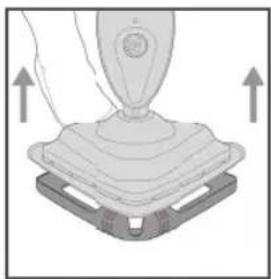
Diagram of a robotic arm gripping a mechanical component (no text or symbols visible)- To release the carpet glider, place your foot on clip and push down. Lift steamer to remove.
IMPORTANT: Take care removing carpet glider with foot. Make sure steamer is OFF and has cooled down.
IMPORTANT: Always allow the steamer to fully cool down before removing the microfi bre cleaning pad.
CARE & MAINTENANCE
EMPTYING THE WATER TANK
natural_image
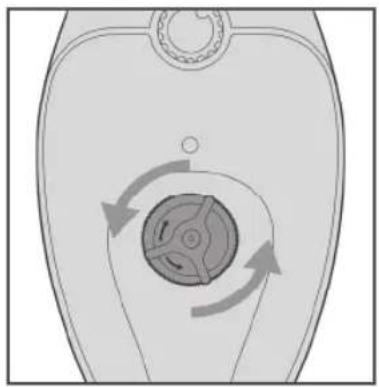
Diagram of a toilet fan with circular vent and directional arrows indicating circulation (no text or symbols)- Remove fl oorhead and handle and place steamer on fl at surface. Twist water tank cap anti clockwise and lift to remove.
natural_image
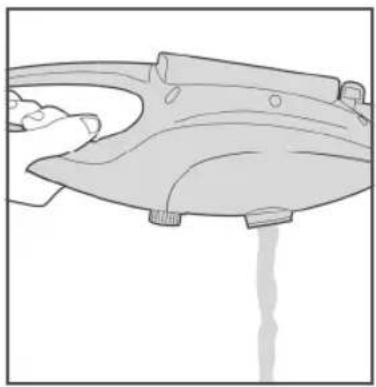
Line drawing of a mechanical device with a pointed tip and base, showing internal components (no text or symbols)- Empty any excess water over the sink.
IMPORTANT: Don't use bleach or fabric softener when washing the microfi bre cleaning pad.
IMPORTANT: Never remove the water tank cap with the product upright as water could leak out – always remove the fl oorhead and handle and place handheld on a fl at surface before removing the water tank cap.
CLEANING THE MICROFIBRE/ UTILITY CLEANING PAD
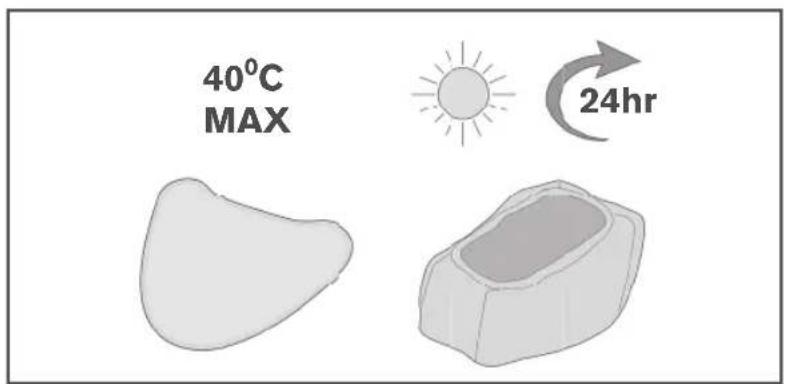
The microfi bre/utility cleaning pads are machine washable (Max 40°C) allow to fully dry before use.
CARE & MAINTENANCE
CLEARING BLOCKAGES
IMPORTANT: Turn dial on steamer to 'OFF' position, switch off at mains and unplug safely. Allow to fully cool down before performing maintenance or troubleshooting checks.
natural_image
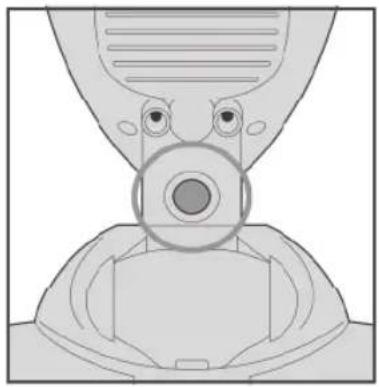
Illustration of a stylized helmet with a circular head and wide eyes, no text or symbols present- Push the fl oorhead release button and lift the main body from the fl oorhead to remove. Also remove the handle.
natural_image
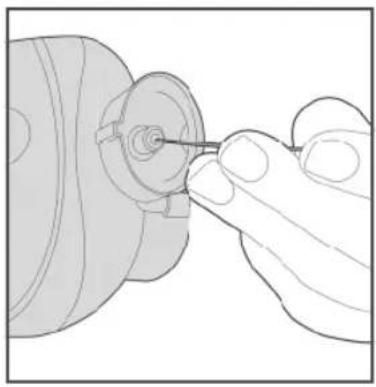
Line drawing of a hand turning a mechanical component (no text or symbols)- Use a small thin object such as a paper clip to insert into the nozzle and clear any blockage.
natural_image
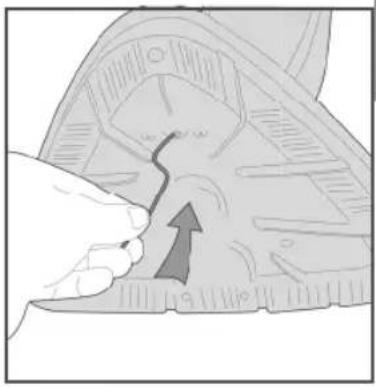
Hand holding a tool interacting with a mechanical component, showing a curved arrow indicating motion (no text or symbols present)- To clear a blockage in the fl oorhead, remove the microfi bre pad from the fl oorhead, insert a small thin object, such as a paper clip, into the steam holes to remove any blockage.
TROUBLESHOOTING
| Problem | Solution |
| Is there an accessory missing? | Check the ‘This pack contains’ panel on the box to make sure the part is included with your steamer. |
| Why does my steamer have no power? | Check the on/off control dial position. |
| Check the amber light is illuminated. | |
| The plug may not be fully pushed into the electrical socket. | |
| Check the fuse in the plug if this needs replacing, always replace with a British 13amp fuse. | |
| Why is the steamer not producing steam? | There may be no water in water tank, check the water tank has water. |
| Check the water tank cap is securely fitted onto the water tank. | |
| The water may not yet be at temperature. The steamer will take approximately 30 seconds to heat up. | |
| Steam path may be blocked. Go to ‘Let’s talk technical’. | |
| Check steam control dial has been turned to ‘on’. | |
| Water tank level may be low, refill with water. | |
| Why won’t the microfibre pad pick up dirt? | The microfibre pad may already be saturated or dirty. |
| Wash the microfibre cleaning pad, go to ‘Taking care of your machine’. |
NOTE:
If you were unable to solve the problem using the information in the table above, please contact our Customer Service (UK) 0330 026 2626.
GUARANTEE

LIMITED GUARANTEE
It's quick and easy to register for your free 1 year guarantee online at www.DirtDevil.co.uk.
Please retain your original receipt for proof of purchase.
Please make a note of the serial number and model number of the product before calling.
Dirt Devil

Call our Customer
Service Department at
0330 026 2626
Monday-Friday 9:00am to 5:00pm.
www.DirtDevil.co.uk
Dirt Devil. 2 Colmore Square, 38 Colmore Circus, Queensway, Birmingham, B4 6BN.

EEC Statement of Compliance: Manufacturer/EEC importer: Vax Ltd trading as Dirt Devil, hereby on our own responsibility, declare that the DDS04-E01/DDS04-P01 series is manufactured in compliance with the following Directives: Safety: 2006/95/EC Low Voltage Directive. EMC: 2004/108/EC Electromagnetic Compatibility Directive.

Waste electrical products should not be disposed of with household waste. Please recycle where facilities exist. Check with your Local Authority or retailer for recycling advice.
- MULTI-FUNCTION STEAM CLEANER
- WARNING
- BASIC SAFETY PRECAUTIONS
- This steamer is intended for household use only and NOT for commercial or industrial use.
- DON'TS
- DON'TS CONTINUED...
- DO'S
- WELCOME.
- PRODUCT REGISTRATION
- Guarantee Registration
- TABLE OF CONTENTS
- OVERVIEW
- TECHNICAL DATA
- INCLUDED WITH YOUR MACHINE
- 5-in-1
- 11-in-1
- BEFORE USE
- CAUTION
- ASSEMBLY
- ASSEMBLING YOUR STEAMER
- HOW TO
- FILL THE WATER TANK
- CLEAN HARD FLOORS
- USE THE MACHINE AS A HANDHELD
- ATTACH THE ACCESSORIES
- USE THE ACCESSORIES
- USE ON CARPETS
- REFRESHING CARPETS
- CARE & MAINTENANCE
- EMPTYING THE WATER TANK
- CLEANING THE MICROFIBRE/ UTILITY CLEANING PAD
- CLEARING BLOCKAGES
- TROUBLESHOOTING
- NOTE:
- GUARANTEE
- LIMITED GUARANTEE
Brand : DIRT DEVIL
Model : DDS04-E01
Category : Steam cleaner