
St Ives Wardrobe - Wardrobe Silver Cross - Free user manual and instructions
Find the device manual for free St Ives Wardrobe Silver Cross in PDF.


| Product Type | Wardrobe |
| Brand | Silver Cross |
| Model | St Ives Wardrobe |
| Overall Height | 180 cm |
| Overall Width | 90 cm |
| Overall Depth | 55 cm |
| Weight | 45 kg |
| Material | Manufactured wood (MDF) with laminated finish |
| Finish | White |
| Assembly Required | Yes (instructions included) |
| Number of Doors | 2 |
| Hanging Rod | Yes (1 rod) |
| Shelves | 2 (1 fixed, 1 adjustable) |
| Drawers | None |
| Anti-Tip Kit | Included |
| Cleaning Instructions | Wipe with soft damp cloth and dry immediately |
| Warranty | 1 year |
| Recommended Use | Bedroom |
| Country of Origin | China |
Frequently Asked Questions - St Ives Wardrobe Silver Cross
User questions about St Ives Wardrobe Silver Cross
0 question about this device. Answer the ones you know or ask your own.
Ask a new question about this device
Download the instructions for your Wardrobe in PDF format for free! Find your manual St Ives Wardrobe - Silver Cross and take your electronic device back in hand. On this page are published all the documents necessary for the use of your device. St Ives Wardrobe by Silver Cross.
USER MANUAL St Ives Wardrobe Silver Cross
IMPORTANT RETAIN FOR FUTURE REFERENCE READ CAREFULLY
Silver Cross®
St Ives Wardrobe
IMPORTANT: THE ASSEMBLY OF THIS PRODUCT REQUIRES TWO PEOPLE


Fittings list:
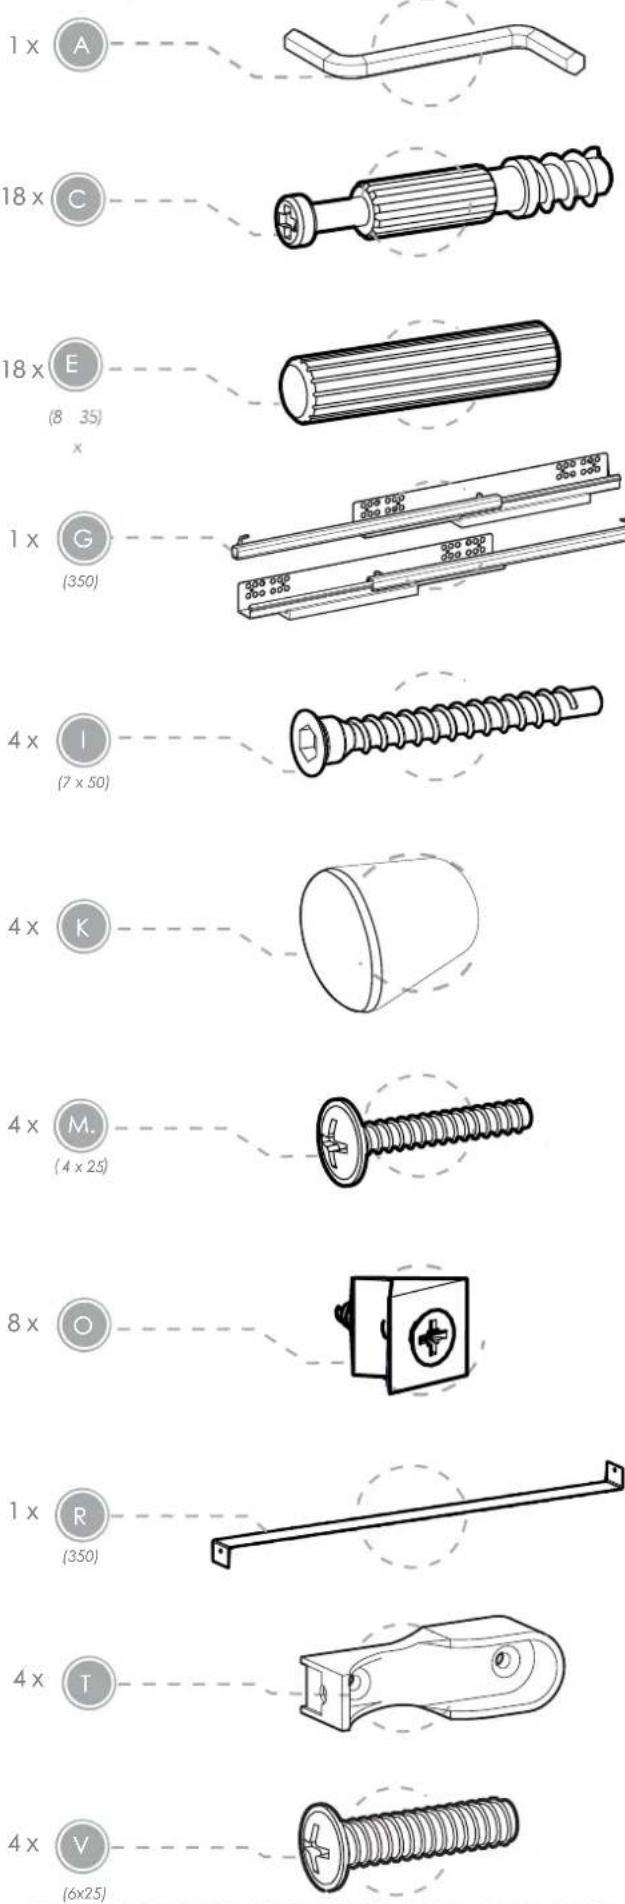


natural_image
Technical illustration of a mechanical component with a 6x magnified view (no text or symbols)
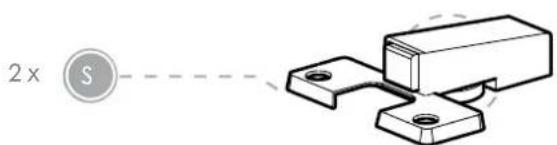
natural_image
Technical illustration of a mechanical bracket with mounting holes and a circular symbol labeled '2 x' (no text or symbols on the diagram itself)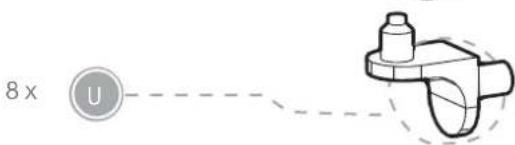
Step 1:

Step 2:

Step 3:

Step 4:

Step 5:

Step 6:

Step 7:

Step 8:


Step 10:
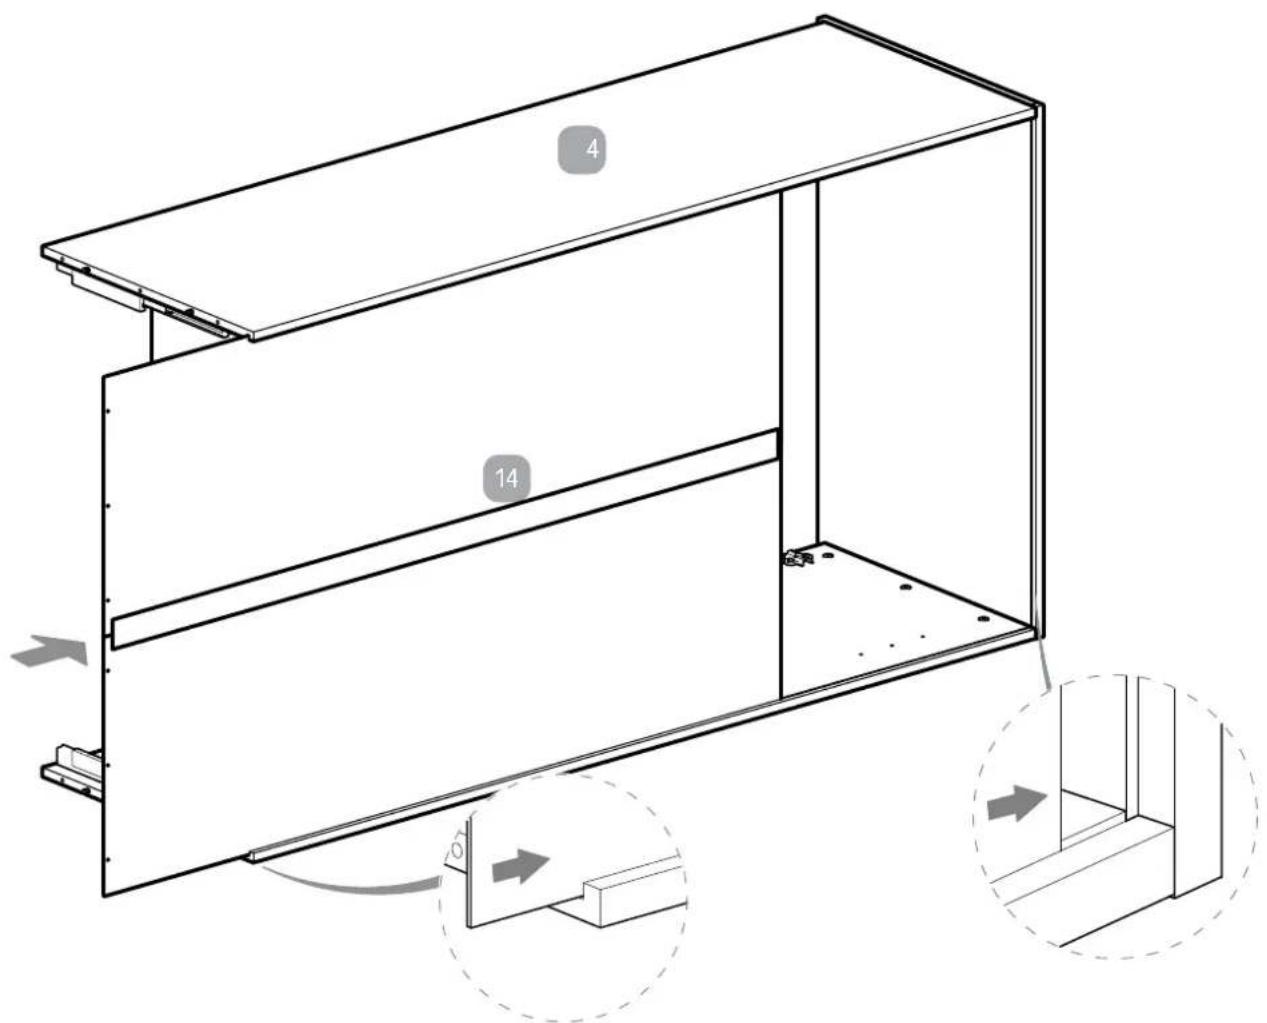
Step 11:

Step 12:

Step 13:

Step 14:
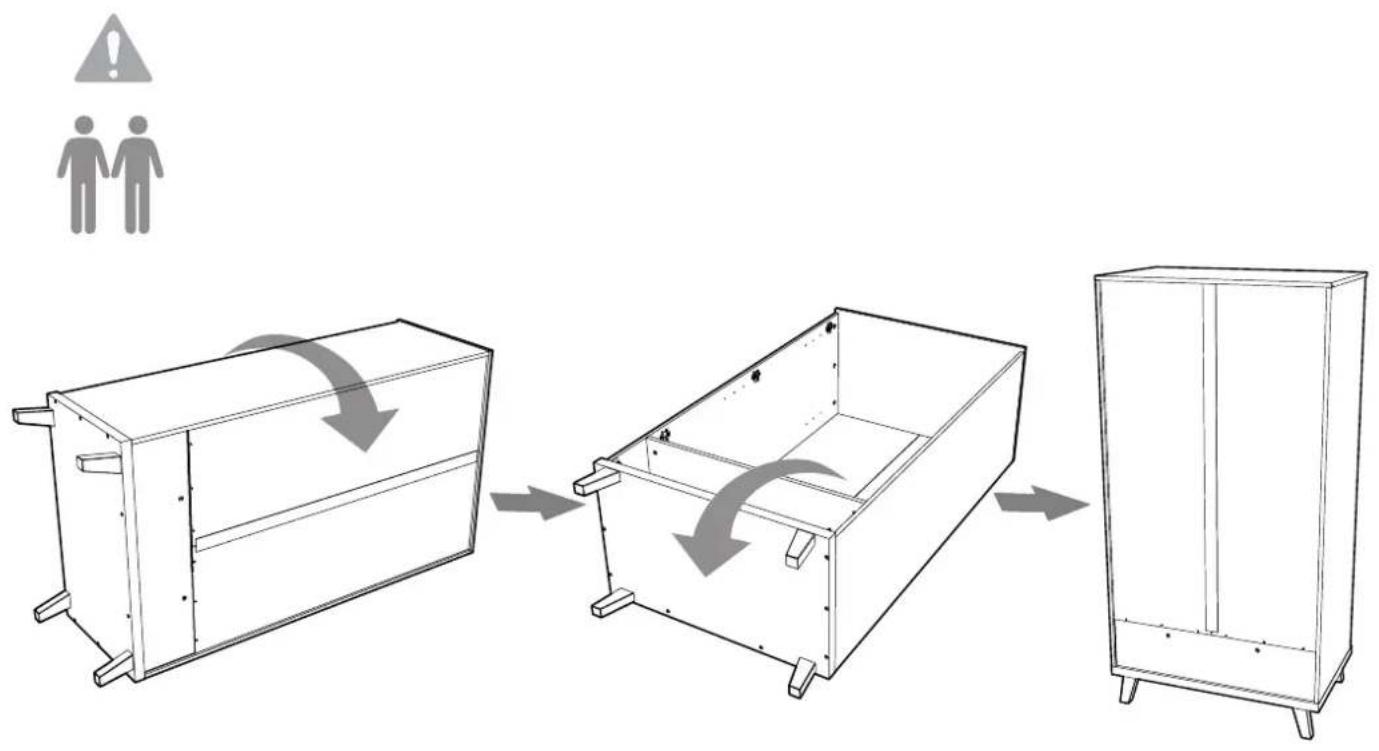
flowchart
graph TD
    A["Initial Box"] --> B["Step 1: Downward Arrow"]
    B --> C["Step 2: Downward Arrow"]
    C --> D["Step 3: Rightward Arrow"]
    D --> E["Final Box"]
Step 15:

Step 16:

Step 17:
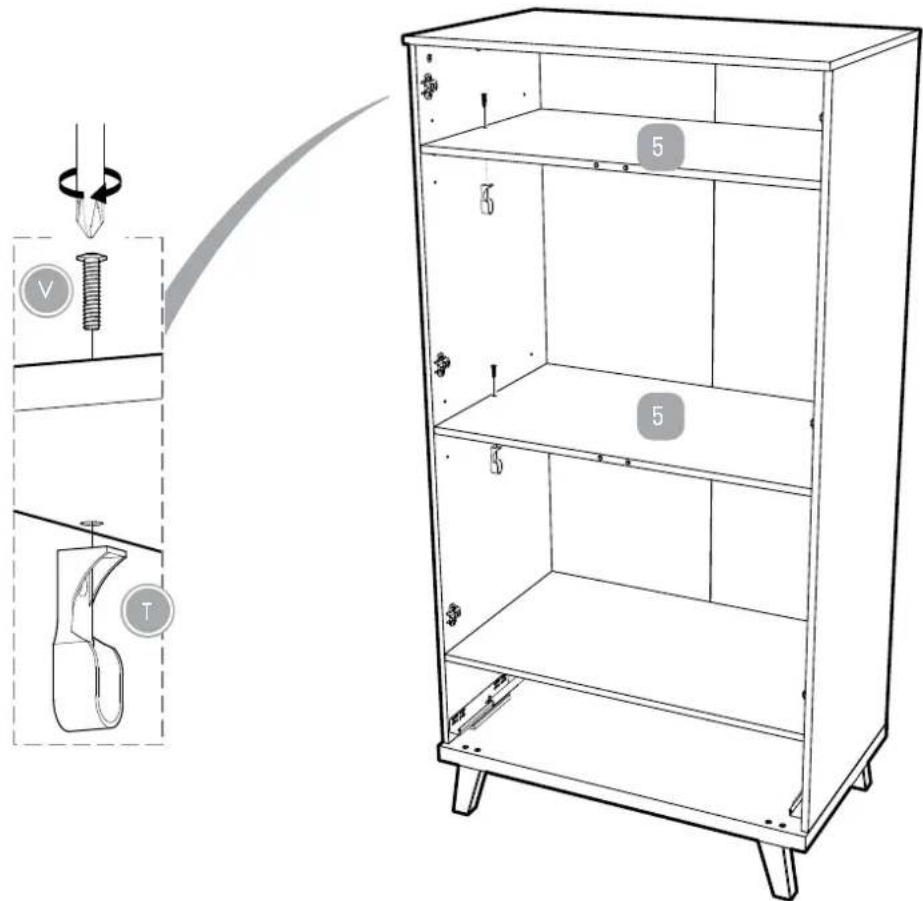
Step 18:

Step 19:

Step 20:

Step 21:
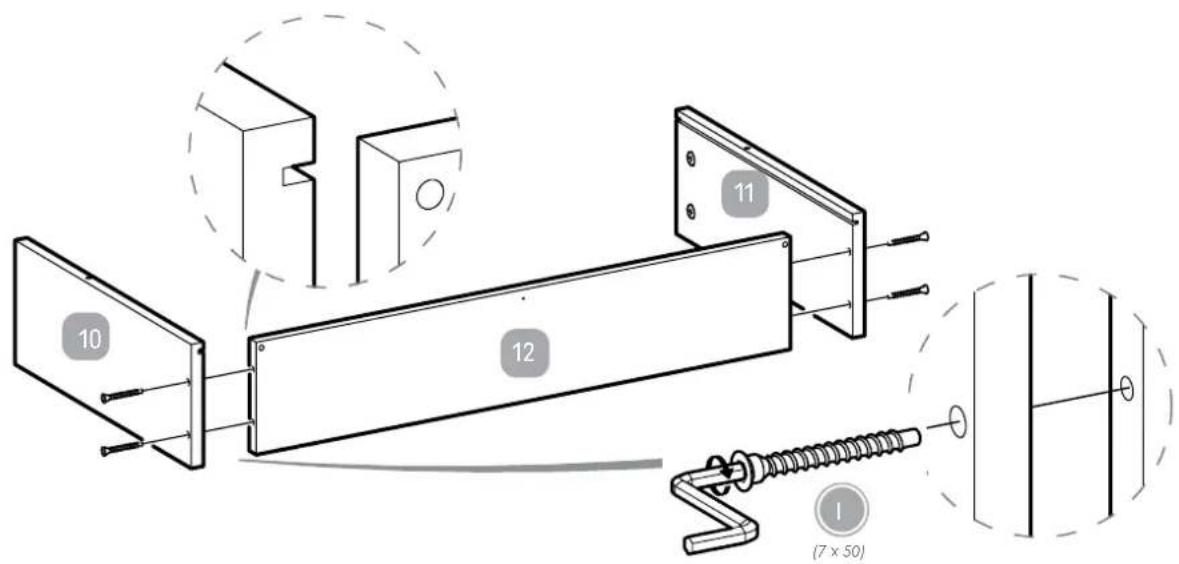
Step 22:

natural_image
Technical illustration of a screwdriver assembly on a flat plate, showing tool path and mounting base (no text or symbols)Step 23:

Step 24:

Step 25:

Step 26:

Step 27:

Step 28:

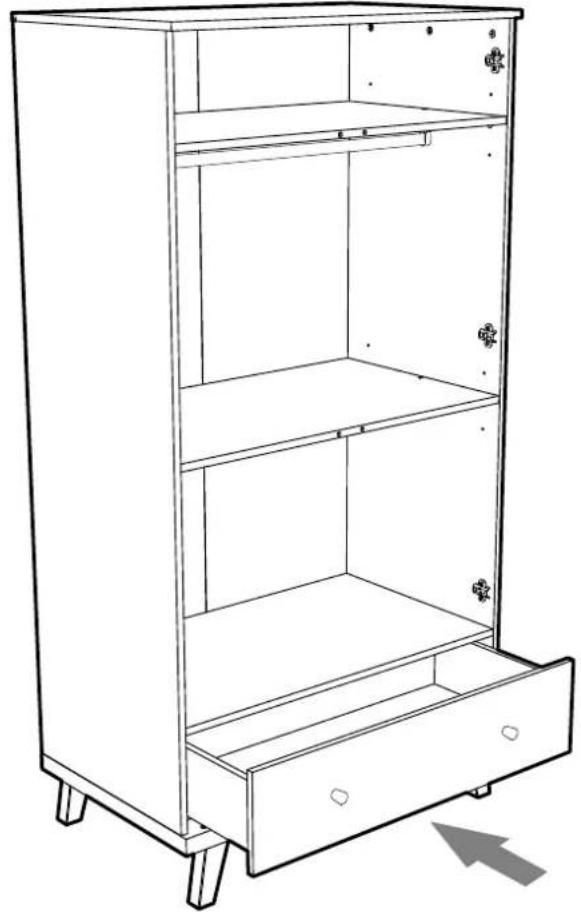
natural_image
Line drawing of a multi-level cabinet with one drawer and two shelves, no text or symbols present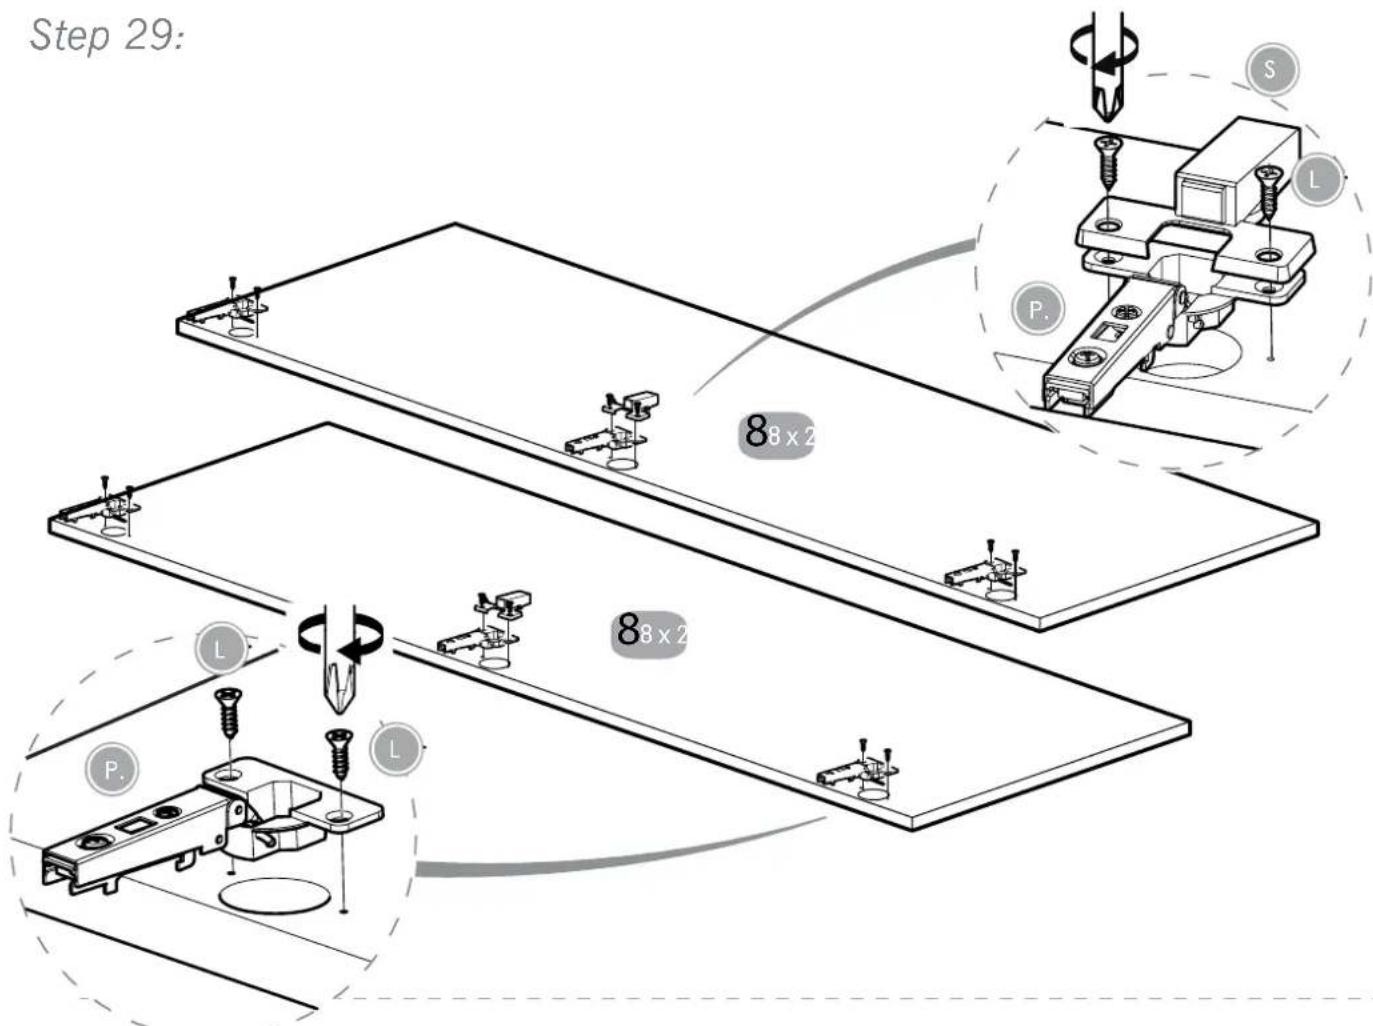
Step 30:

Step 31:


natural_image
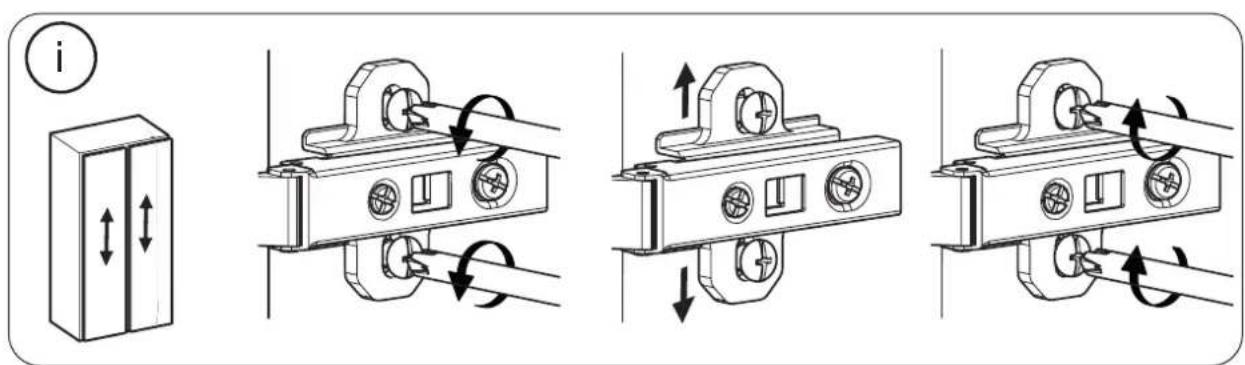
Technical illustration showing four mechanical assembly steps with arrows indicating motion direction (no text or symbols)Step 32:

natural_image
Line drawing of a simple cabinet with two doors and four legs, no text or symbols presentIt is advised for safety reasons that the wardrobe is connected to the wall using the wall strap provided. All walls are different composition and it is important the correct fittings are used. Wall fittings are not supplied with this furniture and it is advised to consult a professional before fitting.
Step 33:

natural_image
Line drawing of a cabinet with four legs and two doors, showing a pencil sketching the front panel (no text or symbols)Step 34:


Fix the wall strap to the furniture as shown with the fittings provided – do not use these fittings to connect to the wall. Consult a professional before fitting the strap to the wall.
Step 35:

natural_image
Line drawing of a cabinet with two doors, one inserted into a circular inset showing a hand using a screwdriver to adjust the base (no text or symbols present)Warnings & Instructions For Safe Use & Maintenance
Safety notes
This item is a high quality Silver Cross product. With correct use and maintenance it will give you good service. If however you should have any problems with your product, please contact your Silver Cross retailer who will take appropriate action.
WARNING: DO NOT LEAVE THE CHILD UNATTENDED
The safety of your child is your responsibility. WARNING:
Regularly check all fittings and components of the changer are fully tightened and in good working order. If any parts have become worn or damaged then do not use the product and seek advice from your retailer or Silver Cross. Only use spare parts supplied by Silver Cross.
WARNING:
Be aware of the risk of open fire and other sources of strong heat, such as electric bar fires, gas fires etc. in the near vicinity of the wardrobe.
WARNING:
Never use the wardrobe if any parts are broken or missing.
WARNING:
Never drag or pivot the wardrobe. If must be lifted and moved by ay least two people.
WARNING:
Before ensure the wardrobe is on a level, stable surface.
WARNING:
Do not allow children to climb on the wardrobe. The wardrobe can be cleaned with a damp cloth. Never use bleach, abrasive or strong detergents.
Thoroughly dry immediately after cleaning.
WALL STRAP INFORMATION
Never modify or change the wall strap in any way. Never use any other fittings other than those supplied to attach the wall strap to the dresser.
The wall strap provided is to be used with this product only.
Never use the screw provided to attach the strap to the wall. All walls are of different composition and it is important that the correct wall fittings are used. Consult a professional before attempting to attach the strap to the wall. No wall fittings are supplied with this product.
The wall strap must not be used to replace any other fittings supplied with this piece of furniture
We recommend the wall strap is used in all cases. To improve the stability of the furniture an even wood or tiled floor is best. A carpeted or warped floor can enable the furniture to rock, increasing the potential of the furniture to fall over.
IMPORTANT: KEEP THESE INSTRUCTIONS FOR FUTURE REFERENCE

Silver Cross (UK) Ltd, Micklethorn, Broughton, Skipton, North Yorkshire, BD23 3JA
silvercrossbaby.com
IND.1129916
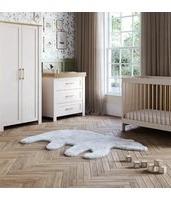
Brand : Silver Cross
Model : St Ives Wardrobe
Category : Wardrobe