C8.1T - Loudspeaker Martin Audio - Free user manual and instructions
Find the device manual for free C8.1T Martin Audio in PDF.


| Product Type | Passive Loudspeaker |
| Brand | Martin Audio |
| Model | C8.1T |
| Speaker Type | 2-way, bass-reflex |
| Woofer | 8-inch (200 mm) cone |
| Tweeter | 1-inch (25 mm) soft dome |
| Frequency Response | 60 Hz - 20 kHz (±3 dB) |
| Power Handling | 200 W RMS, 400 W peak |
| Impedance | 8 ohms |
| Sensitivity | 90 dB (1W/1m) |
| Maximum SPL | 116 dB peak |
| Dispersion | 90° x 60° (H x V) |
| Crossover Frequency | 2.5 kHz |
| Enclosure Material | Plywood with durable paint |
| Grille | Perforated steel with foam backing |
| Connectors | 2x Neutrik speakON NL4 |
| Rigging | Integrated M8 flying points |
| Dimensions (H x W x D) | 450 x 250 x 250 mm |
| Weight | 10 kg |
| Power Supply | Passive (no internal amplifier) |
| Applications | Live sound, fixed installation |
| Maintenance | Clean with dry cloth, avoid solvents |
| Safety | Ensure proper rigging, use rated hardware |
| Spare Parts | Contact authorized service center |
Frequently Asked Questions - C8.1T Martin Audio
User questions about C8.1T Martin Audio
0 question about this device. Answer the ones you know or ask your own.
Ask a new question about this device
Download the instructions for your Loudspeaker in PDF format for free! Find your manual C8.1T - Martin Audio and take your electronic device back in hand. On this page are published all the documents necessary for the use of your device. C8.1T by Martin Audio.
USER MANUAL C8.1T Martin Audio
C4.8T, C.6.8T, C8.1T
User's Guide
natural_image
White circular speaker grille with mesh grille, mounted on a white base (no text or symbols visible)
The Martin Experience
natural_image
Three white circular filter or speaker modules with mesh surfaces, displayed against a plain background (no text or symbols visible)Description
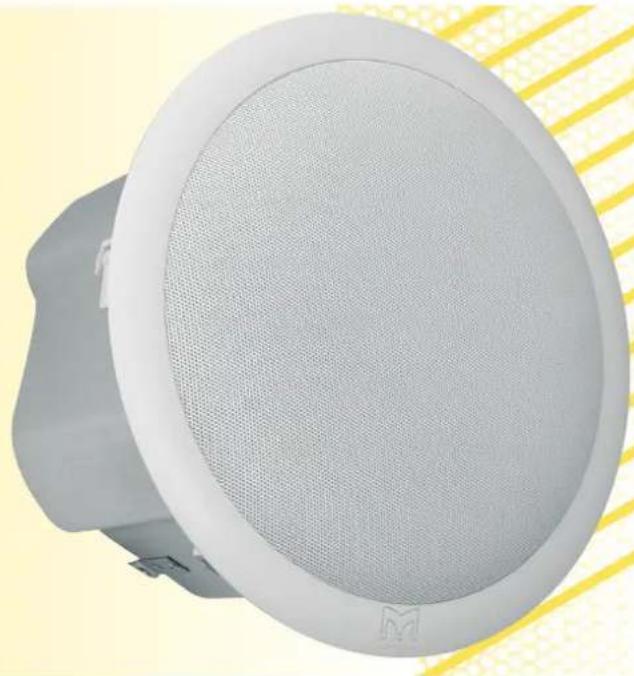
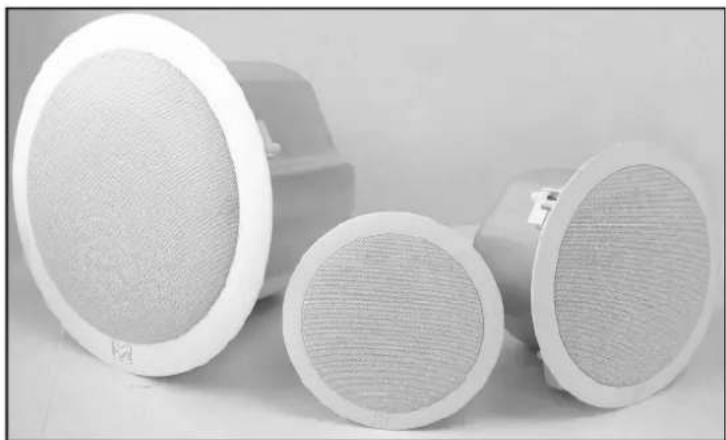
Martin Audio C4.8T, C6.8T and C8.1T ceiling loudspeakers are all 2-way designs using soft dome tweeters for the widest dispersion and excellent off-axis performance. All models have perforated steel grilles, UL94 V-0 baffle materials, steel back cans and feature rising clamp connectors that accept up to 2.5sqm conductors.
Unpacking
Thank you for purchasing a Martin Audio ceiling loudspeaker system. Every Martin Audio product is built to the highest standard and thoroughly inspected before it leaves the factory. After unpacking, examine the product carefully. Inform your dealer if transit damage is found. We suggest that you retain the original packaging so that the system can be repacked at a future date if necessary. Martin Audio and its distributors cannot accept responsibility for product damaged through the use of non-approved packaging.
Compliance

These products conform to:
EMC Directive 89/336/EEC Low Voltage Directive 73/23/EEC
These products comply with UL2043 Fire Tests for Heat & Visible Smoke Release for Discrete Products and their Accessories Installed in Air Handling Spaces.
Listed UL1480 General Signaling Speakers.
SUITABLE FOR USE IN AIR HANDLING SPACES

LISTED
General Signaling Equipment 3JTM
See page 3 for recommended ceiling hole sizes >>
See appendix for outline dimensions >>
A steel cover plate with a clamped cable entry protects the input connector against fire in accordance with BS5839: Part 8, Section 10.3.
All models are fitted with a thermal fuse to prevent the loudspeaker from short circuiting and disabling other loudspeakers in its group under the influence of fire.
Model Drivers Dispersion
| C4.8T | 4" (100mm) LF0.75" (19mm) HF | 180deg |
| C6.8T | 6.5" (165mm) LF0.75" (19mm) HF | 150deg |
| C8.1T | 8" (200mm) LF1" (25mm) HF | 90deg |
The exceptionally wide mid-high dispersion of the Martin Audio C4.8T and C6.8T makes them particularly suitable for low ceilings.
Voltage & power settings
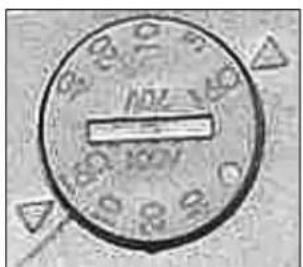
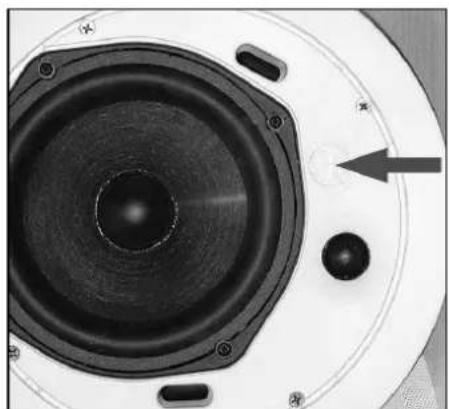
All models are 16ohms direct or via line transformers selected with a baffle-mounted switch for 100V or 70V operation as follows:
natural_image
Close-up of a circular mechanical knob or dial with measurement markings (no readable text or symbols)Baffle switch (C6.8T shown)
natural_image
Close-up of a speaker cone with circular head and central hub, showing concentric rings and buttons (no text or symbols visible)Baffle switch location
| Model | 16ohm | 100V operation | 70V operation |
| C4.8T | 40W | 25W, 12.5W, 6W | 25W, 12.5W, 6W, 3W |
| C6.8T | 75W | 40W, 20W, 10W | 40W, 20W, 10W, 5W |
| C8.1T | 125W | 60W, 30W, 15W | 60W, 30W, 15W, 7.5W |
Note that all models are protected with a PTC (positive temperature coefficient) device and will quieten, if overdriven. The PTC device will reset itself once the signal is reduced to a more sensible level.
Installation
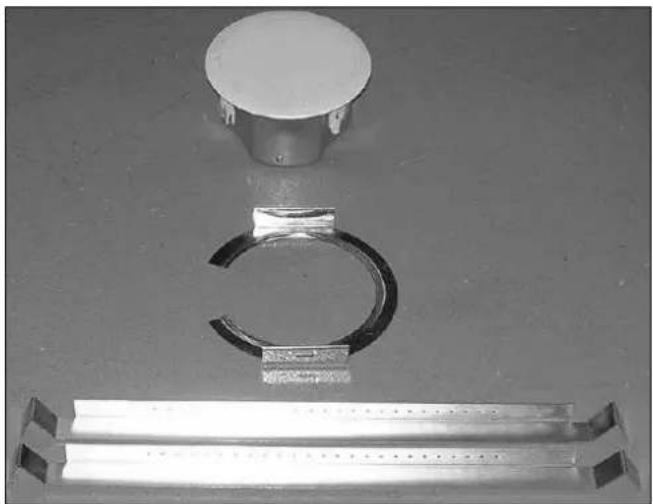
natural_image
Three metallic components and a ruler on a plain surface (no text or symbols visible)Ceiling loudspeaker with C-bracket and tile rails (foreground)
Please note carefully
Martin Audio ceiling loudspeakers must be installed by experienced ceiling loudspeaker installation personnel using the full installation kit provided
The installer must check with all relevant local, national and international electrical, fire and building safety authorities to ensure that all regulations are being complied with
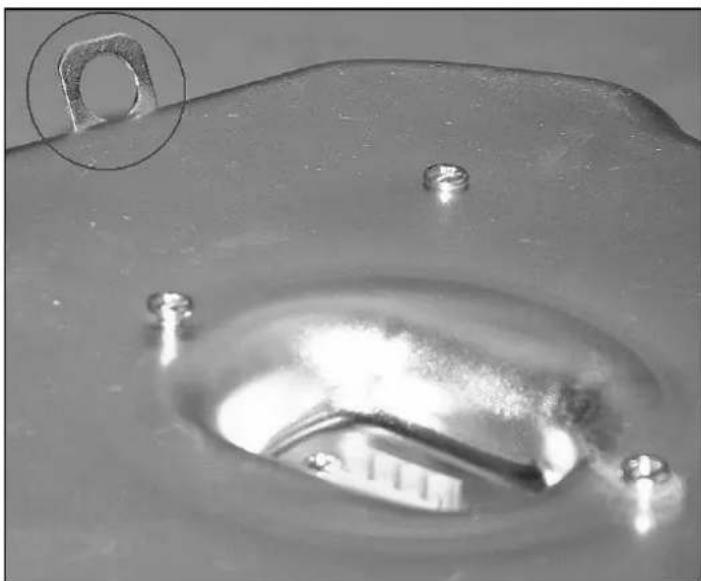
Every ceiling loudspeaker must be fitted with a steel safety wire between its rear can safety tag and a suitable overhead supporting structure to provide backup support in the event of ceiling damage
When installed in an air handling space the steel cover plates must be sealed to the loudspeaker back cans with firestop putty or a suitable alternative to ensure plenum tight enclosure of the electrical connections
Step 1
Cut the ceiling hole as follows using the template provided:
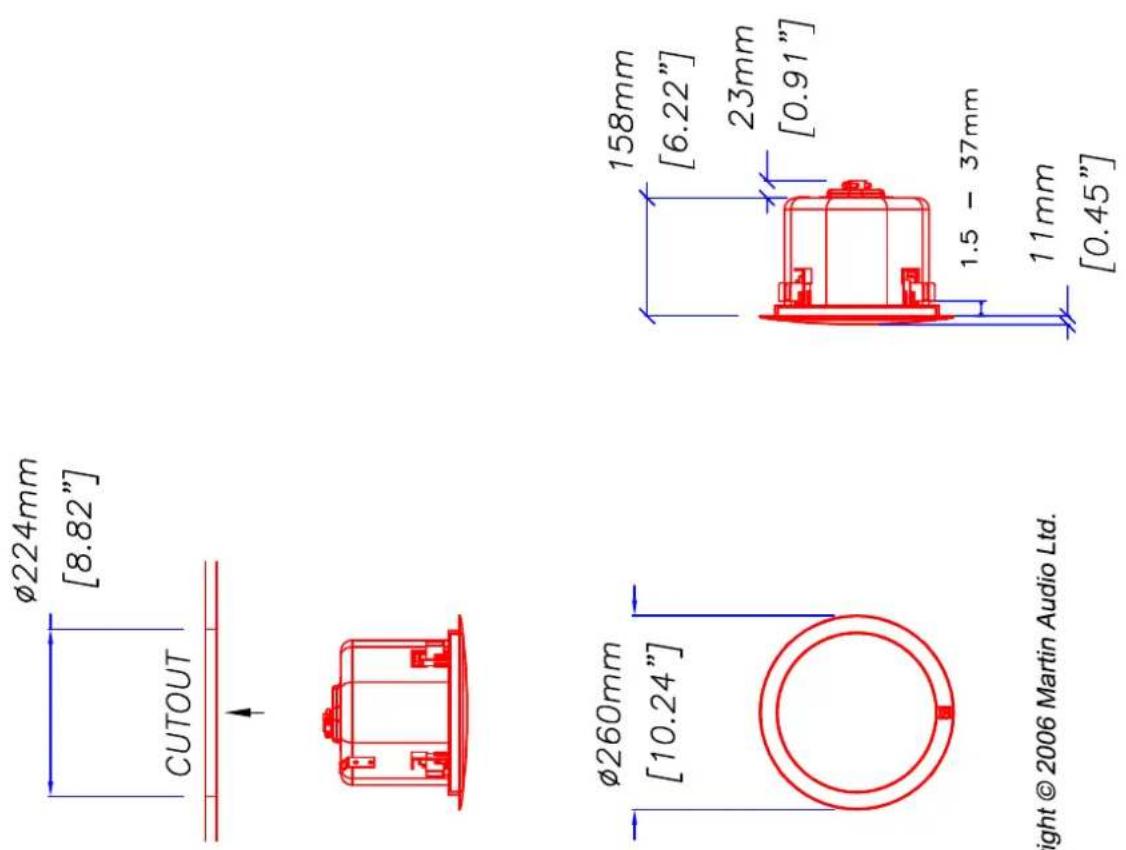
C4.8T 178mm dia cut-out C6.8T 224mm dia cut-out C8.1T 308mm dia cut-out
Suitable hole cutting methods will depend on the ceiling structure, local conditions, personnel, equipment etc and must be determined by the installer.
Step 2
Place a tile rail either side of the ceiling hole and clip the C-bracket over the upright edges of the tile rails.
Note the rail orientations – outwards for the C4.8T and C6.8T, inwards for the C8.1T.
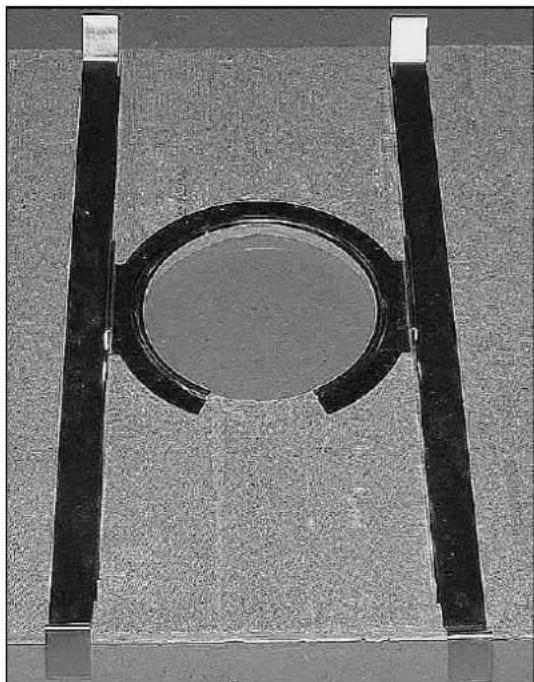
natural_image
Close-up of a circular mechanical component mounted on a textured surface with two vertical bars (no visible text or symbols)C4.8T & C6.8T rail orientation (rails placed outwards)
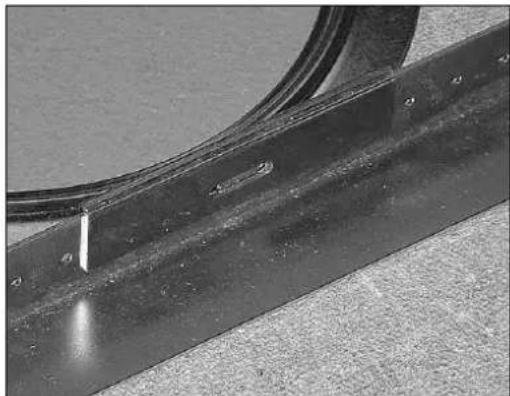
natural_image
Close-up of a metallic mechanical component with visible surface texture and bolt holes (no text or symbols)C-bracket clipped over rail
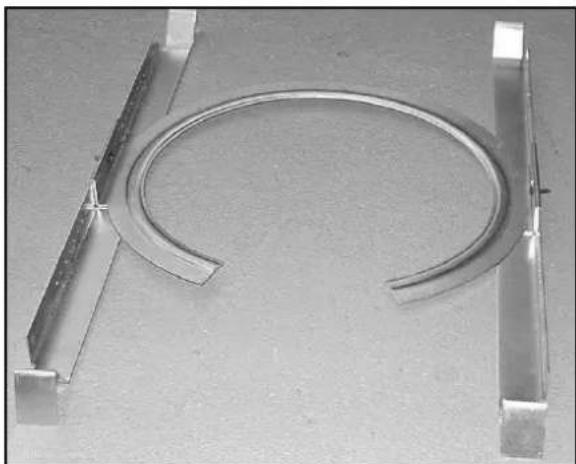
natural_image
Metallic mechanical component with a curved wire and metal brackets, no visible text or symbolsC8.1T rail orientation (rails placed inwards)
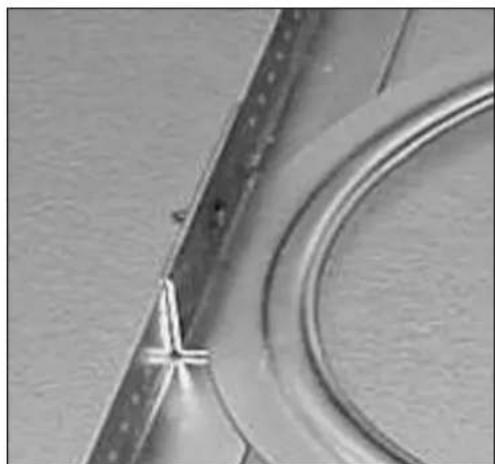
natural_image
Close-up of a metallic pipe joint with a circular end, showing no text or symbolsC-bracket clipped over rail
Note that the tile rail ends may be reshaped to suit your particular ceiling structure.
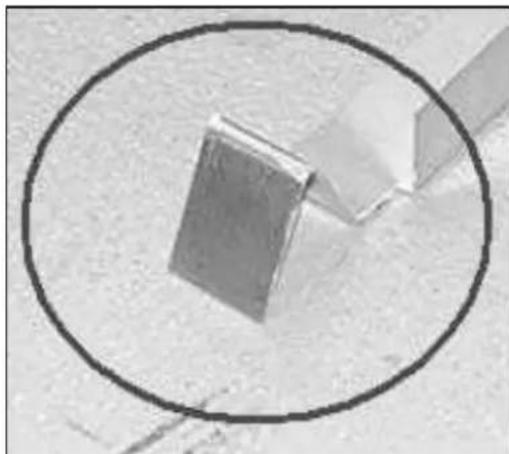
natural_image
Close-up of a metallic object with a circular outline highlighting its surface (no text or symbols visible)Tile rail end
Step 3
Screw the C-bracket to the tile rails with the screws provided.
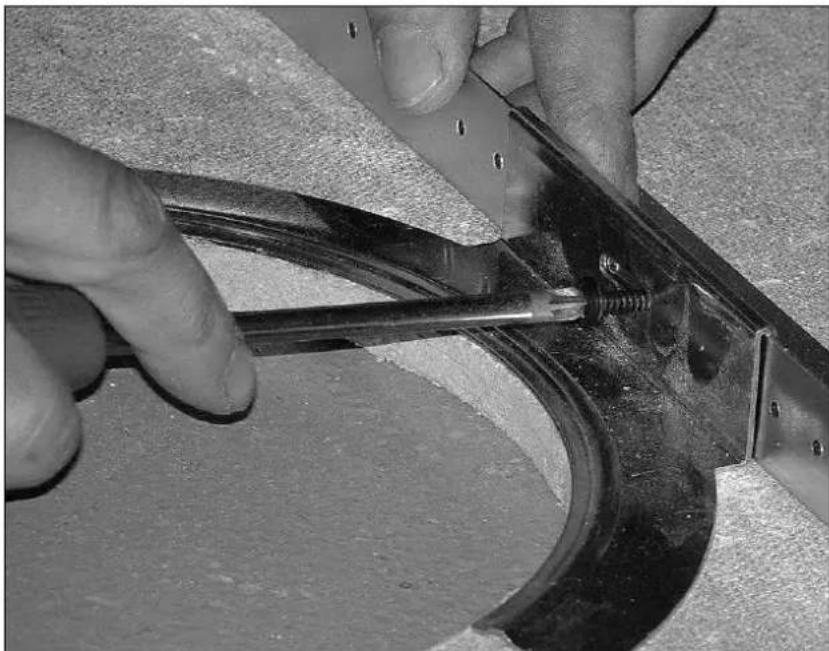
natural_image
Close-up of hands using scissors to cut a metal pipe or cable component (no text or symbols visible)C-bracket screwed to tile rail
Step 4
Place the loudspeaker into the ceiling hole (and through the centre of the C-bracket) from the underside. Align the loudspeaker so that an imaginary line between the woofer and tweeter runs along the corridor or concourse. This provides the smoothest sound coverage.
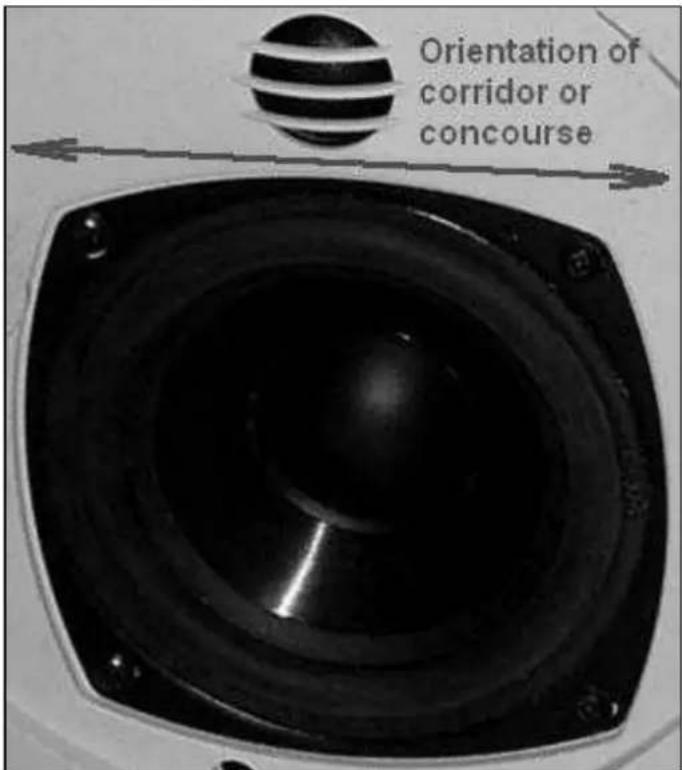
2-way ceiling loudspeaker orientation
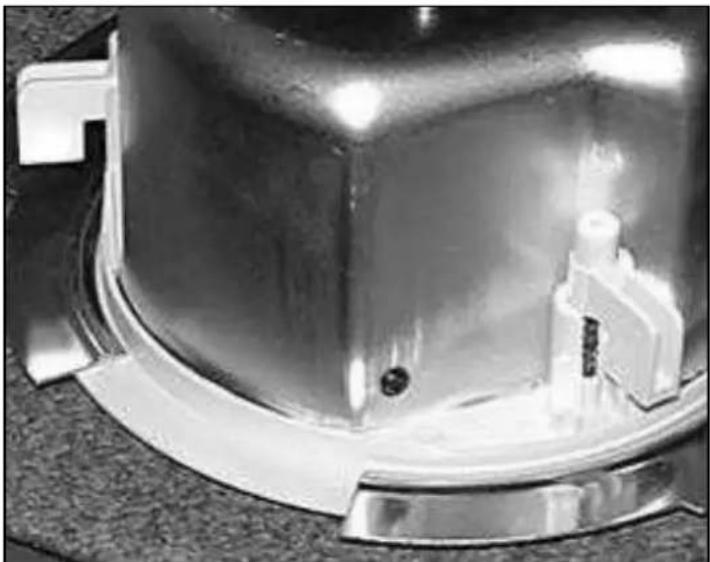
Make sure that the C4.8T and C6.8T swivel-tabs do not coincide with the C-bracket gap.
natural_image
Close-up of a metallic mechanical component with reflective surfaces and mounting brackets (no visible text or symbols)Loudspeaker in place. Note swivel-tab positions before fully tightening
It is permissible for one of the five C8.1T swivel-tabs to coincide with a C-bracket gap in order to maintain driver orientation.
Step 5
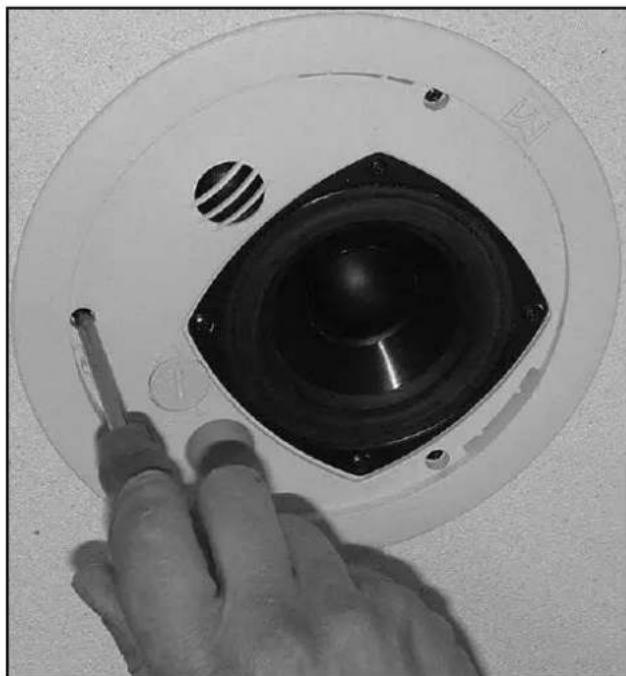
Screw the loudspeaker to the C-bracket by tightening the screws from the underside of the baffle.
natural_image
Close-up of a hand holding a screwdriver touching a speaker cone (no text or symbols visible)Tightening the swivel-tab screws
Step 6
Connect your pre-installed amplifier cable to the ceiling loudspeaker.
Amplifier power input is via a 4-pin rising clamp plug providing + and - inputs and + and - Loop Through connections at the top of the loudspeaker can.
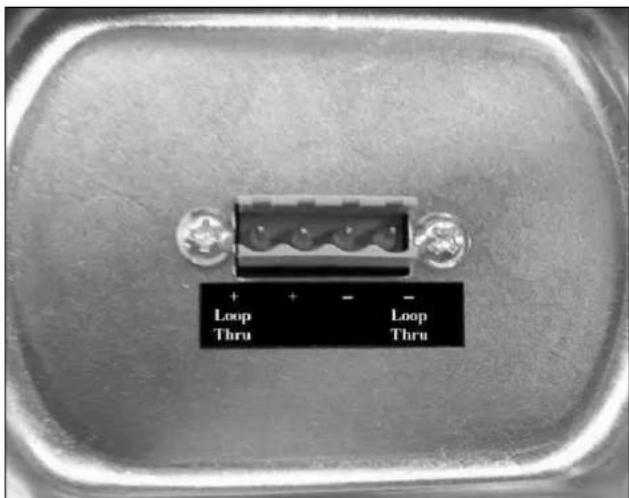
Input & Loop Through connector
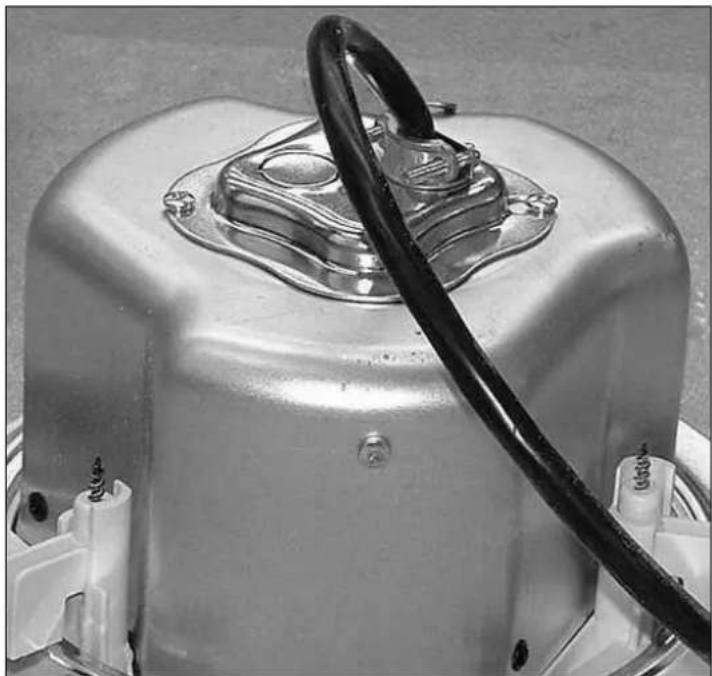
The input and loop connectors must be fireproofed using the steel cover and screws provided. This cover has a 0.75" (19mm) knockout and a clamped cable entry.
natural_image
Close-up of a metallic industrial component with a coiled cable and mounting base (no visible text or symbols)Ceiling loudspeaker rear can – fireproof steel cover fitted
Step 7
Fit a steel safety wire between its rear can safety tag and a suitable overhead supporting structure to provide backup support in the event of ceiling damage.
natural_image
Close-up of a metallic component with a circular hole and four evenly spaced pins, no visible text or symbols.Safety tag location
Step 8
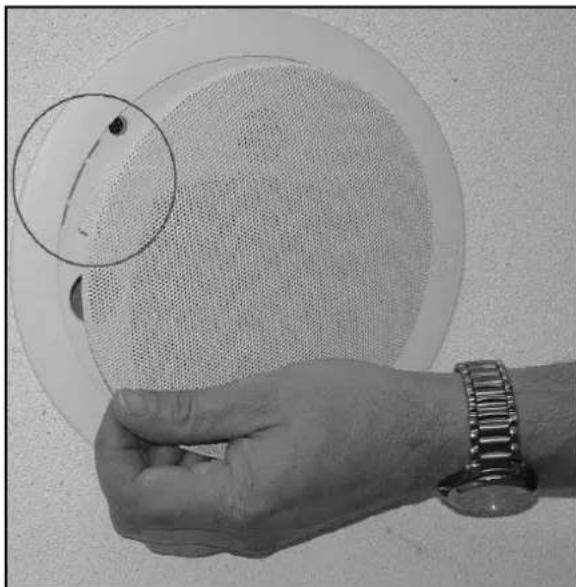
Push the grille into position ensuring that the grille is properly located in the baffle slots.
natural_image
Hand holding a circular object with a magnified inset showing a small dark spot, no text or symbols visible.Locate grille tags into slots
Your Martin Audio ceiling loudspeaker is now ready for use.
Warranty
Martin Audio ceiling loudspeaker products are warranted against manufacturing defects in materials or craftsmanship over a period of 5 years from the date of original purchase.
During the warranty period Martin Audio will, at its discretion, either repair or replace products which prove to be defective provided that the product is returned in its original packaging, shipping prepaid, to an authorised Martin Audio service agent or distributor.
Martin Audio Ltd. cannot be held responsible for defects caused by unauthorised modifications, improper use, negligence, exposure to inclement weather conditions, act of God or accident, or any use of this product that is not in accordance with the instructions provided by Martin Audio. Martin Audio is not liable for consequential damages.
This warranty is exclusive and no other warranty is expressed or implied. This warranty does not affect your statutory rights.
This publication is copyright © 2007 Martin Audio Ltd.
![Ø178mm [7.01"] CUTOUT](/content/2026/05/978920/images/2315b5151247a29ff0c3e48c5de68b5f0992b75715acd6d589546ea7c23e4005.jpg)
![107mm [4.19"] 24mm [0.93"] 0 - 35mm 13mm [0.50"]](/content/2026/05/978920/images/fe1dae4df211d5eac15046afd647a334a3569dbbe4d28f72339fdd8bf7b21a78.jpg)
![φ205mm [8.07"]](/content/2026/05/978920/images/742a5ff72d9ff979b8ef5559cd64b6afdf8c35f75cca0fa6868c963ff9fac98c.jpg)
All information is Copyright © 2006 Martin Audio Ltd.
All information is Copyright © 2006 Martin Audio Ltd.
![Ø308mm [12.13"] CUTOUT](/content/2026/05/978920/images/941bc988f54b5046e224fcdd5369434ec085f9e7023cc6156a554593cce0eaa0.jpg)
![Ø354mm [13.94"]](/content/2026/05/978920/images/6ca1d9868dfbff9ca7ef057d44856211d315f785834c2875b5484725059e31fd.jpg)
All information is Copyright © 2006 Martin Audio Ltd.
![235mm [9.25"] 23mm [0.91"] 3 - 42mm 24mm [0.94"]](/content/2026/05/978920/images/93a7fb17655206f61dc0ced7854524e9b5daa3f9fba65af00be85401537308c1.jpg)


Brand : Martin Audio
Model : C8.1T
Category : Loudspeaker