ILCO ATLAS - Lock Dormakaba - Free user manual and instructions
Find the device manual for free ILCO ATLAS Dormakaba in PDF.


| Product Type | Electronic Locking System (Hotel Access Control) |
| Model | ILCO ATLAS by Dormakaba |
| Dimensions (Typical Lock Unit) | Approx. 4 x 5 x 1 inches (100 x 125 x 25 mm) |
| Weight (Typical Lock Unit) | Approx. 2 lbs (0.9 kg) |
| Power Supply | 3 AA alkaline batteries (Generation E-760) or 4 AA alkaline batteries (Solitaire 710-II) |
| Battery Life | Up to 50,000 insertions (E-760) or 100,000 openings (Solitaire 710-II); typically 2-3 years |
| Keycard Technology | Magnetic stripe (Lo-C or Hi-C coercivity) |
| Max Property Size | 16,000 rooms, 1,000 suites (8 inner doors per suite) |
| Audit Trail Capacity | 200 transactions (E-760) or 350 transactions (Solitaire 710-II) in non-volatile memory |
| Communication | Infrared (IR) via Maintenance Unit (M-Unit) and Infrared Programming Module (IPM) |
| Keycard Validity | Selectable from 1 hour to 7 years |
| Main Functions | Guest and staff access control, keycard encoding, lock programming, audit trail retrieval, timezone restrictions, privacy override, passage mode |
| Security Features | Encrypted keycards, unique hotel code, audit trail, multiple keycard levels (Guest, Submaster, Master, Emergency), lockout options |
| Spare Parts | Batteries, keycards (Lo-C and Hi-C), cleaning cards, IPM module, M-Unit (PDA) |
| Repairability | Field-replaceable batteries; locks can be replaced; high-security cylinder re-usable; return for repair with RMA number |
| Maintenance | Regular battery testing and replacement, encoder cleaning with cleaning card, periodic lock time reset twice a year |
| Environmental | Indoor use only; batteries may leak if not replaced in time |
Frequently Asked Questions - ILCO ATLAS Dormakaba
User questions about ILCO ATLAS Dormakaba
0 question about this device. Answer the ones you know or ask your own.
Ask a new question about this device
Download the instructions for your Lock in PDF format for free! Find your manual ILCO ATLAS - Dormakaba and take your electronic device back in hand. On this page are published all the documents necessary for the use of your device. ILCO ATLAS by Dormakaba.
USER MANUAL ILCO ATLAS Dormakaba
natural_image
Collection of various desktop devices including ATLAS, IBM, and various handbags (no visible text or labels)
ATLAS
Version 1.2 User Guide
ATLAS VERSION 1.2 USER GUIDE
PK 3529_08_07-ATLAS Version 1.2 User Manual
Table Of Contents
Chapter 1 – Overview....1
1.1 How to Use This Manual....1
1.2 System Description....2
1.3 System Capabilities....3
Chapter 2 Network & Hardware Components....4
2.1 Electronic Locks....4
2.1.1 Electronic Locks – Parts View....5
2.1.2 Lock Models – features....6
2.1.3 Differences in Lock Models....8
2.2 RAC....8
2.3 RAC 4.0....9
2.4 Exit Device Operators....10
2.5 Server and Client Workstations....10
2.6 Software Version....10
2.7 Magnetic Keycards....10
2.7.1 Coercivity....11
2.8 Encoder - Select and Clean....12
2.8.1 Select an Encoder....15
2.8.2 Clean an Encoder....14
2.8.3 Cancel an Encoder....15
2.9 Maintenance Unit (M-Unit)....16
2.10 Infrared Programming Module (IPM)....17
2.10.1 Null Modem Cable....18
Chapter 3 - Before Getting Started....19
3.1 Electronic Lock Profiles....19
3.1.1 Lock Addresses in Memory....19
3.1.2 Guest Rooms....20
3.1.3 Common Door Suites....21
3.1.4 Amenities....22
3.1.5 Staff Common Area....23
3.1.6 Restricted Area....23
3.2 Time....23
3.2.1 Timestamps in Lock....23
3.2.2 Keycard Creation Date and Time Stamp....23
3.2.3 Audit Trail....24
3.2.4 Keycard Expiry Date and Time....24
3.2.5 Keeping the System Time Synchronized....24
3.2.6 Synchronization of Windows Time....25
3.3 Keycards – New vs. Duplicate....26
3.3.1 New Keycards....26
3.3.2 Duplicate Keycards....26
3.3.3 When to Use New or Duplicate Staff Keycards....27
3.4 Timezones....28
3.4.1 Fixed Timezones....28
3.4.2 Fixed Timezones - Daylight Saving Time....29
3.4.3 Flexible Timezones....30
3.4.4 Flexible Timezones - Daylight Saving Time....31
3.5 Audits....31
3.6 Interfaces....32
3.6.1 Property Management System (PMS) Interface....32
3.6.2 Point of Sale (POS) Interface....32
3.7 Employees and Operators....32
3.7.1 Operator Levels: Definition....33
Chapter 4 - Getting Started....35
4.1 First Operator....35
4.2 Modify/Delete Employees and Operators?......41
4.3 Configuring System Defaults....42
4.4 Programming Locks....43
4.4.1 Programming Common Area Locks and Card readers.....43
4.4.2 Programming Restricted Area Locks....44
4.4.3 Programming Guest or Meeting Room Locks....44
4.4.4 Programming Common and Inner Door Locks....44
Chapter 5 - System Setup....45
5.1 Hotel Setup....45
5.1.1 Log In to System Setup....45
5.1.2 Generic Settings....47
5.1.3 Locks....48
5.1.4 Guest....50
5.1.5 Staff....51
5.1.6 Interfaces....51
5.1.7 Encoding Options....51
5.2 Access Points....53
5.2.1 Access Points Tree View....53
5.2.2 Rooms....54
5.2.3 Specific Room or Suite of Rooms....54
5.2.4 Description....54
5.2.5 Room Type....54
5.2.6 Lock Types....55
5.2.7 Bed Type....55
PK 3529_08_07-ATLAS Version 1.2 User Manual
5.2.8 Smoking or Non-Smoking....56
5.2.9 Amenities....56
5.2.10 Submaster Levels....63
5.2.10.1 Staff Common Areas....64
5.2.10.2 Restricted Area....71
5.2.10.3 Common Door Suites....78
5.2.10.4 Guest Rooms....89
5.2.11 Site View....97
5.3 Submaster LevelsKeycard....98
5.3.1 Types of Submaster Levels....99
5.3.2 Submaster Levels....99
5.3.3 Room Tree View....100
5.3.4 Name....101
5.4 Flexible Timezones....104
5.4.1 Overview....105
5.4.2 Intervals....105
5.4.3 Modify Flexible Timezones....105
5.4.4 Reset Flexible Timezones....105
5.5 Fixed Timezones....106
5.5.1 Overview....106
5.5.2 Intervals....106
5.5.3 Fixed Timezones on Staff Keycards....107
5.5.4 Modify Fixed Timezones....107
5.5.5 Resetting Fixed Timezones....108
5.6 Keycard Attributes....109
5.7 Log out of System Setup....112
5.8 ATLAS Web Functions....113
5.8.1 Change Password....113
5.8.2 Web-based User Application....115
Chapter 6 Making Keycards....116
6.1 Web Client....116
6.1.1 Internet Security Settings for Web....116
6.1.2 Web-based Application - Log on and Off....120
6.1.3 Web-based Application - Set Computer Name.....122
6.1.4 Logging on and off ATLAS Web Application....125
6.1.5 Set Computer Name....127
6.2 Encoder - Select and Clean....128
6.2.1 Cancel an Encoder....131
6.3 Operator Types....131
6.3.1 Guest Service Attendant....131
6.3.2 Front Desk Manager....132
6.3.3 Maintenance / Engineering....133
6.3.4 Bellman....134
6.3.5 Administrator....135
6.3.6 Access Control Administrator....135
6.3.7 KABA Technical Support....136
6.4 Entering Guest Keycard Information....136
6.4.1 Rooms....136
6.4.2 Check-in Date and Time....137
6.4.3 Check-out Date and Time....137
6.4.4 Room Type....138
6.4.5 Coercivity....138
6.4.6 Guest Keycard Options....138
6.4.7 Folio Number....138
6.4.8 Disability....139
6.4.9 Salesman Lockout....139
6.5 Make a Guest Keycards....139
6.5.1 Encoder Status Lines....143
PK 3529_08_07-ATLAS Version 1.2 User Manual
6.5.2 Table of Encoder Status Line Messages....144
6.6 Manage Guest Keycards....145
6.7 Verify Guest Keycards....150
6.8 Types of Staff Keycards....152
6.8.1 Submaster Level Keycards....153
6.8.2 Master Level Keycards....153
6.8.3 Emergency Keycards....154
6.8.4 Reset Keycards....154
6.8.5 Lockout / Unlock Keycards....155
6.8.6 Special Keycards....157
6.9 Create Initial Set of Staff Keycards....158
6.10 How do I Make a Batch of Staff Keycards?....159
6.11 Make a Staff Keycard for a Specific Employee....165
6.12 Assign and Re-assign Staff Keycards....169
6.13 Verify a Staff Keycard....172
Chapter 7 - Maintenance Unit....175
7.1 Maintenance Unit (M-Unit)....175
7.1 Infrared Programming Module – Programming.....176
7.2 How do I Synchronize ATLAS with the M-Unit?......180
7.3 Creating a Lock Configuration File....183
7.4 Transferring files from Workstation to M-Unit....184
7.5 Logging on and off the M-Unit....187
7.6 Programming a Lock....189
7.7 Programming a Keycard Reader....194
7.8 Audits....196
7.9 Resetting Lock Time....202
7.10 How do I Override a Lock? 205
7.11 Transferring Audit Files....208
Chapter 8 – Reports....211
8.1 Reports – Operator Levels Access to Reports....211
8.2 Report Examples....212
8.2.1 Lock Audits....212
8.2.2 Employee List....215
8.2.3 Operator List....217
8.2.4 Access Point List....219
8.3 Reports - System Activities Examples....221
8.3.1 Database Management....222
8.3.2 Employee List Management....224
8.3.3 Keycard Encoding....226
8.3.4 Keycard Verification....228
8.3.5 Keycard Assignments....230
8.3.6 Network & Hardware Management....232
8.3.7 System Management....234
8.3.8 Operator Logins and Logouts....236
8.3.9 Lock Operations....238
8.3.10 All Operation Types....240
8.4 Exporting Reports....242
8.5 Viewing and Printing Reports....247
Chapter 9 - Database Management....248
9.1 Database Management - Operator Levels....248
9.2 Database Location....248
9.2.1 Database Backup....249
9.2.2 Scheduled Database Backups....251
9.2.3 Database Restore....255
9.2.4 Database Emergency Recovery....258
PK 3529_08_07-ATLAS Version 1.2 User Manual
Chapter 10 - Monitoring Manager....261
10.1 System Definition/Description....261
10.2 Monitoring Manager - Client Information....262
10.3 Client Transactions....265
Chapter 11 - Security Procedures....271
11.1 Security – Installation....271
11.2 Set Computer Name....272
11.3 Security – User....274
11.4 Security – Network....275
11.5 Basic Keycard Security....276
11.5.1 Inform Guests and Staff about Keycard Security......276
11.5.2 Do Not Write the Room Number on the Keycard....276
11.5.3 Make the Audit Trail Public Knowledge....276
11.6 Encoding, Issuing and Replacing Keycards....277
11.6.1 Invalidate lost keycards....277
11.6.2 Safe Storage of Staff Keycards (when not in use)......277
11.6.3 Access to Keycards....277
11.6.4 Infrequently Used Keycards....278
11.6.5 Access to Emergency Keycards....278
11.6.6 Handle Returned Keycards Appropriately....278
11.7 Lock Overrides....278
11.7.1 Electronic Overrides....280
11.7.2 Mechanical Overrides....281
11.7.3 How do I Override a Lock? 282
11.8 Emergency Procedures....285
Chapter 12 - Maintenance and Troubleshooting....289
12.1 Regular Preventive Maintenance....289
12.1.1 Battery Testing and Replacement....289
12.1.2 KABA Electronic Locks....289
12.1.3 The Locking Mechanism....290
12.1.4 The Override Cylinder....290
12.1.5 Lock Responses to Keycards....291
12.1.6 Battery Operating Voltages....292
12.2 Troubleshooting....292
12.2.1 Operating vs. Malfunction Problems....292
12.2.2 Operating Problems....292
12.2.3 Malfunction Problems....297
12.3 Replacing a Battery....334
12.4 Warranty....303
12.5 Replacing a Lock....303
Chapter 13 – Service....304
13.1 Returning an Encoder, IPM, or Lock for Repair....304
Lists and Glossary....307
List of Acronyms and Abbreviations....307
List of Keycard Types....307
Glossary....312
PK 3529_08_07-ATLAS Version 1.2 User Manual
1.1 How to Use This Manual

natural_image
Product display of various electronic devices including desktop, keyboard, monitor, and door (no visible text or labels)This Help provides information on the implementation and use of the ATLAS system. It explains the principles of the system, defines the terms used and provides procedures for the operation of the system. This Help does not replace training provided by the manufacturer, which is strongly recommended for a complete understanding of the system. For further information or for assistance, contact KABA.
This Help is intended for reference by management, the Hotel Access Control Administrator, Maintenance/Engineering and Front Desk Managers. The Administration User Guide should be kept in a secure location exclusively for the use of those personnel.
A separate GSA User Guide (PK3067 02/06) is available for reference by Guest Service Attendants/Front Desk Clerks, providing instructions for all procedures accessible to them. A separate manual is also provided for Network & Hardware Setup (PK 3065 02/06).
PK 3529_08_07-ATLAS Version 1.2 User Manual
1.2 System Description
KABA designed its Lodging Access Control System specifically for use in lodging facilities (hotels, resorts, etc.), where key control is a major concern. ATLAS uses a proprietary keycard encryption unique to each installation. The access levels have been designed to allow each guest or staff member to carry a single keycard, for their own convenience, and to simplify the management of keycards.
An operator login and password is required for any system operation: there are eight operator levels, each with its own well-defined rights. The graphic table at the beginning of each procedure shows that the tasks are usually (but not always) performed by the operator levels where there is a checkmark (√). A higher level operator can usually perform the tasks of the lower levels in addition to his/her own tasks.
The system includes an audit trail in both the electronic locks and the ATLAS database. These audit trails show who entered a room, when they entered it, and who made the keycard that was used to gain access.
The system uses a variety of electronic lock and card reader models, including the Solitaire series and the latest Generation E-760 locks. Some options of the ATLAS System and details of lock operation may differ depending on the type of lock.
The interface is intuitive and interactive with clear menus and a Help button on each screen of both the Web pages and the Windows applications. Since the users are learning in these two environments that they are already familiar with, they can become fully functional in ATLAS within a short training period.
ATLAS currently interfaces with Sankyo (Serial) Encoders (producing Lo-C keycards) and Sankyo Dual (USB) encoders (producing Lo-C and Hi-C keycards) ATLAS can interface with most popular Property Management Systems (PMS) and also allow the guest keycard to post charges at the Point-of-sale (POS).
ATLAS can operate on a single Application/Server workstation or it can be fully networked, using TCP/IP protocol. It can be fully linked with up to 50 terminals.
Locks are programmed and audited using Infrared (IR) communication with the electronic locks using an off-the-shelf low cost Personal Digital Assistant (PDA) used as the Maintenance Unit (M-Unit).
PK 3529_08_07-ATLAS Version 1.2 User Manual
1.3 System Capabilities
- Maximum Property size - 16,000 rooms and 1,000 suites (8 inner doors per suite).
• Eight Common Areas for Guest access and sixteen for Staff access.
• 200 Restricted Areas. - Three Master levels for staff and 5 Sub-Master levels per lock: 255 sections, 255 floors, 255 areas, 255 groups, and 255 zones.
• 64 character alphanumeric Room #.
• Keycard validity selectable from one hour to seven years.
• Keycard encoding on Hi-C or Lo-C keycards. - Pre-registered Guests - Keycards can be made up to ten days in advance. Predefined timezones available for Staff keycards in locks.
- Eight customer defined timezones available for Guest, Staff & Passage Option in RAC 3.5 Card Reader.
Chapter 2 Network & Hardware Components
The system makes use of the following major components:
2.1 Electronic Locks
natural_image
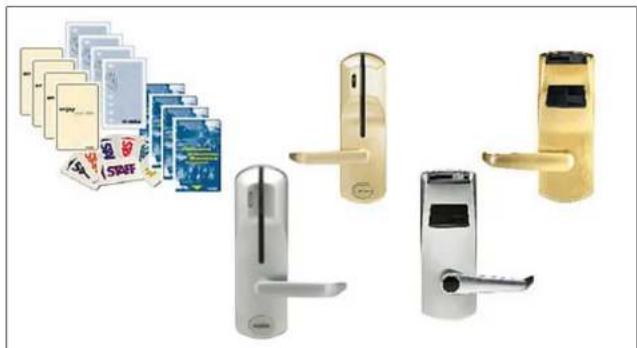
Product display of various digital door holders including USB, gold, and silver (no visible text or labels)KABA locks are battery-operated units that are installed on each door to provide access control throughout the property. There is no wiring. Each lock is controlled by a microprocessor with an internal clock that is synchronized with the ATLAS System.
The lock can read keycards, process the information on a keycard to determine whether the keycard is valid for access to the room, and lock and unlock the electromechanical hardware that controls access to the room.
On the outside of the door, the lock has a card reader, an indicator light, and a handle. An infrared transceiver is located behind the indicator light. The lock communicates with the Maintenance Unit by infrared light using the IPM or the IPM plus a null modem cable to receive its programming or to transfer the audit trail (see Infrared Programming Module (IPM) - Description).
PK 3529_08_07-ATLAS Version 1.2 User Manual
2.1.1 Electronic Locks - Parts View

To operate the lock, the user simply inserts and removes their keycard as shown, then turns the handle. The lock responds with visible and audible feedback.
Legend: (1) Reader Slot; (2) Indicator LEDs; (3) Battery Compartment; (4) Privacy Thumbturn.
PK 3529_08_07-ATLAS Version 1.2 User Manual
2.1.2 Lock Models - features
1. Generation E-760 Series
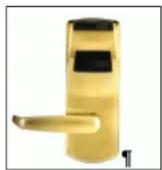
• ADA compliant for physically disabled guests and staff
• Interfaces with most major Property Management Systems (PMS)
- All electronics in the front housing.
• All-metal, heavy-duty electronic mortise and cylindrical lockset.
• Audit trail records last 200 lock transactions.
• Foreign objects are removed easily from open reader slot.
- Low battery indicator.
- Magnetic stripe keycard insertion reader.
• Three override options available. See How do I Override a Lock?
• Precision-engineered mechanics and circuitry.
- Requires 3 AA standard alkaline batteries yielding 50,000 insertions (or last two to three years, based on 10 insertions per day).
2. Generation E-730

- Same lock design as the Generation E-760 lock and operates like an E-760 but with this lock, an Exit device operator can be placed on a controlled access door for registered guests and staff to use as entry doors.
• Three override options are available. See How do I Override a Lock? - Can be installed in any hotel that uses our magnetic card based system (FDU based or ATLAS based).
- Last 200 transactions from the exit device operator can be retrieved.
3. Solitaire 710-II

natural_image
Metal door handle with handle strap and circular button (no text or symbols visible)- ADA compliant for physically disabled guests and staff.
- Emergency access by emergency keycard or mechanical key override reduces risk of drilling lock.
PK 3529_08_07-ATLAS Version 1.2 User Manual
- Can be integrated into an existing master key system.
• Interfaces with most major Property Management Systems (PMS).
• Audit trail records last 350 transactions.
• Low battery indicator. - Operates with keycard in swipe motion in open reader slot so foreign objects are easily removed.
- Requires 4 AA batteries that last up to 100,000 openings (approximately 2 years).
4. Lock Installation
KABA locks are shipped with installation instructions. Keep a copy of these instructions for each type of lock on the property, in case there is a need to service or replace a lock.
2.1.3 Differences in Lock Models
- Disability Option - available on Generation E-760 only.
- Salesman's Lockout - available on all locks except Generation E-760.
- Number of records in audit trail - may depend on type of lock.
- Flexible timezones, only available in RAC 3.5; fixed timezones are ignored by these devices.
- Fixed timezones- available in all locks except RAC 3.0/ 3.5.
- Communication between M-Unit and RAC: cable required.
- Communication between M-Unit and lock for Solitaire 710-II/710 and Generation E-760/730 is Infrared: no cable required.
2.2 RAC
A Remote Access Controller (RAC) is the device that operates a special door, such as access to elevators, parking, other electrically operated doors, as well as doors requiring an electric strike or electromagnetic lock.
PK 3529_08_07-ATLAS Version 1.2 User Manual
Card readers operate similarly to locks. In addition, the RAC 3.5 offers flexible timezones for controlling access by guest, staff, and passage keycards. A reader mounted in a convenient location, such as within a driver's reach at the entrance to a garage, or beside an elevator call button, is connected to the controller. The reader can be located up to 490 feet (150 meters) away from the RAC. When a user presents their keycard to the reader, the controller, which is programmed with user access information appropriate for the entire hotel, grants or denies access according to their privileges. See Programming a Keycard Reader.
2.3 RAC 4.0
RAC 4.0 card reader may be either single or dual. Single means it reads cards only when someone enters OR exits a room or area. With dual readers, there are two physical reader installations - one at the entry and one at the exit. The dual RACs read both the entry and exit card swipes and both times are visible on the audit report.
In System Setup, Access Points, every time you select the RAC 4.0 card reader as lock type for a door, the choice of Dual or Single will appear.
KABA Swipe Card Reader

PK 3529_08_07-ATLAS Version 1.2 User Manual
2.4 Exit Device Operators
An exit device operator is an electronic lock that connects with exit door hardware, such as a panic bar. Such a lock converts an exit-only door into a two-way door that permits guests and staff with a valid keycard to re-enter from the outside. The exit device operator is operated like any other lock, and is usually programmed as a Staff Common Area door.
2.5 Server and Client Workstations
Refer to Network & Hardware Installation, PK3065 02/06.
2.6 Software Version
The software version of ATLAS is given under the Help Menu in the ATLAS applications.
2.7 Magnetic Keycards
- In the system, keycards replace keys. Each guest receives a new keycard, which gives them access to only the lock on their room or suite, and to any Amenities such as the main entrance and elevator, or paid amenities such as parking or sports facilities. Staff also carry keycards for their access needs throughout the property. Different key levels manage staff
- Each time a room is rented, the lock is re-keyed automatically by the inserting of a new keycard with a later timestamp. Locks can be instantly re-keyed by authorized staff without dismantling the lock. Locks recognize a variety of Guest and Staff access levels, which can be reconfigured individually.
- Keycards have an expiry date, after which a lost or stolen keycard poses no threat to security. Keycards can be cancelled at any time, without dismantling the lock, by using a Reset keycard. Returned keycards can
PK 3529_08_07-ATLAS Version 1.2 User Manual
be re-encoded and re-used many times. The information on the keycard is encrypted, and there is no way to determine from the data which room the keycard opens.
- The keycards are standard 0.030" thick cards similar to those used in the banking industry. The magnetic stripe is encoded with a unique pattern of magnetic fields containing the encrypted code. Magnetic Stripe keycards work in all Solitaire locks and card readers.
- Visually, you can differentiate between Low and High Coercivity cards. Lo-C cards (guest keycards) have a brownish colored stripe, while Hi-C cards (staff and special) feature a darker, almost black stripe.
Note: All magnetic stripe keycards are subject to erasure by strong magnetic fields. Keycards may be unreadable by locks or the encoder if they are scratched, bent or dirty. Worn out keycards should be discarded. Keycards should be treated with the same respect as mechanical keys, and should never be identified by writing the room number on the keycard.
2.7.1 Coercivity
In terms of keycards, the higher the coercivity, the longer the magnetic stripe on the keycard will last.
The KABA ATLAS System may be used with either high or low coercivity keycards (Hi-C or Lo-C).
-
Lo-C- Guest Keycards
-
Cards are less expensive.
- Lo-C encoded keycards are better used as shorter term keycards.
-
Magnetic stripes are less robust than Hi-C.
-
Hi-C - Staff and Special Keycards
• Keycards are more expensive.
- Hi-C magnetic stripes are better for keycards used for longer periods of time.
- Magnetic stripes are More robust and durable.
The keycards are standard 0.030" thick cards similar to those used in the banking industry. The magnetic stripe is encoded with a unique pattern of magnetic fields containing the encrypted code.
Visually, you can differentiate between Low and High coercivity cards. Lo-C cards have a brownish colored stripe, while Hi-C cards feature a darker, almost black stripe.
2.8 Encoder
2.8.1 How do I Select the Encoder?
- On the main menu, click on Options.

then Select Encoder

PK 3529_08_07-ATLAS Version 1.2 User Manual
The following screen appears:
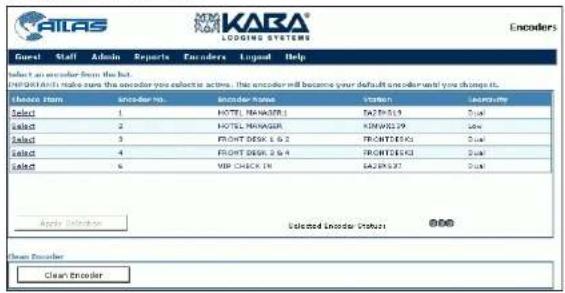
- From the list of encoders available in your network, select the one you want your computer to use as a default. This will be the encoder that will always make keycards at your workstation unless you return to this page to change it.
- When you select the encoder, check at the bottom of the list to make sure that this encoder is available for you to use. If it is not, select a different one. The following illustration shows an encoder that has been selected but is not available. The left-hand LED is red and the message is "Not Active".

PK 3529_08_07-ATLAS Version 1.2 User Manual
- When you have selected an active encoder, (the right hand LED is green and the message is "Ready") click on Apply Selection.

The encoder is now set up with your PC to encode keycards.
2.8.2 Clean Encoder
If you see the message "Clean encoder" on the right of the
status line, it means that you should clean your encoder right now or risk incorrect encoding of keycards. If keycards are badly encoded they will not work in the locks.
- To clean the encoder, take one Cleaning Card pouch from the box supplied by KABA
with ATLAS. - Remove card from pouch.
- Click on the button "Clean Encoder" and insert the cleaning keycard into the encoder.
- The encoder itself will pull the card in and push it out five or six times.
-
After the encoder stops pulling in and pushing out the card, remove it and wait a few seconds to allow the cleaning card to dry.
-
Re-insert it into the encoder one more time in case any stubborn dirt remains.
- Discard the used cleaning card.
- The "clean encoder" icon will disappear from the status line.

Caution: Flammable. Contains 99% isopropyl alcohol
2.8.3 Cancel an Encoder
Refer to Network & Hardware Setup, PK3065 02/06
PK 3529_08_07-ATLAS Version 1.2 User Manual
2.9 Maintenance Unit (M-Unit)

flowchart
graph TD
    A["GUEST SERVICE ATTENDANT"] --> B["FRONT DESK MANAGER"]
    B --> C["MAINTENANCE ✓"]
    C --> D["BELLMAN"]
    D --> E["IT ADMIN"]
    E --> F["MASTER ✓"]
    F --> G["ACCESS CONTROL ADMIN ✓"]
    G --> H["KABA TECHNICAL SUPPORT"]

The Maintenance Unit (M-Unit) is a PDA with the ATLAS M-Unit software installed on it, which communicates with the locks. The M-Unit communicates via an Infrared Programming Module (IPM). The M-Unit attaches to the workstation's USB or serial port (whether it attaches directly or sits in a cradle attached to the port.) The M-Unit communicates with the IPM via an infrared signal and the IPM communicates with the lock via an infrared signal or a null modem serial cable for RACs.
PK 3529_08_07-ATLAS Version 1.2 User Manual
2.10 Infrared Programming Module (IPM)

The Infrared Programming Module (IPM) sits over the keycard slot on the door lock to receive data transmitted from the M-Unit. The infrared receiver and transmitter on the M-Unit are aligned with the IrDA window (the small red glass window) on the IPM and data is transmitted from the Handheld M-Unit to the lock via the IPM or from the lock to the Handheld M-Unit via the IPM - in the case of an audit.

natural_image
Close-up of a white handheld device with black control panel and indicator lights (no readable text or symbols)
natural_image
Hand holding a digital blood glucose meter next to a black device (no visible text or symbols)PK 3529_08_07-ATLAS Version 1.2 User Manual
2.10.1 Null Modem Cable
For a card reader (used for Remote Access Controllers and Remote Exit Devices, see Programming a Keycard Reader for picture) the IPM uses a null modem (RS-232) serial cable. The ninepin connector is plugged into the front of the IPM and the other end is connected to the serial port in the card reader.
PK 3529_08_07-ATLAS Version 1.2 User Manual
Chapter 3 - Before Getting Started
3.1 Electronic Lock Profiles
Every lock in the system has a specific address programmed into the lock and also a door type, or profile, according to the type of room or suite it gives access to. This profile is programmed into the lock by the M-Unit. The profile affects the pattern of addresses that must be programmed into the lock. For example, a Restricted Area door can only be opened by a Restricted Area keycard with the correct address or by the Emergency keycard, but a guest room door can be opened by guests, authorized staff, master keys and the Emergency keycard. The same lock hardware can be used for both doors. The only difference between the two locks is in the profiles programmed into them, using the ATLAS System.
3.1.1 Lock Addresses in Memory
Each lock in the system, whatever the type of hardware (lock, card reader, exit device controller, etc.), contains a list of addresses in its memory programmed into it by downloading files via the M-Unit. The lock or card reader on each door has its own unique set of addresses. The addresses tell the lock which door it controls. The lock opens for keycards with the correct address, date and time only. An incorrect address, date or time will result in access being denied. An example of the addresses in a lock is shown below.
| Address Level | Room #501 | Room#502 |
| Guest | 501 | 502 |
| Section | 10 | 10 |
| Floor | 5 | 5 |
| Group | 2 | 2 |
| Zone | 10 | 10 |
| Area | 1 | 1 |
The different types of doors used in the system are as follows:
3.1.2 Guest Rooms
All guest room doors (including conference rooms) and suites that can be rented as a single unit, except for Common Door Suites.
Example 1 - Guest Room
Example: 101, 104 and 112 are all Guest Rooms on Floor 1

PK 3529_08_07-ATLAS Version 1.2 User Manual
Example 2 - Adjoining Suite
In an Adjoining Suite, the keycard opens each door of a combination of up to 15 individual guest rooms, within a 15 room number range. No resetting of the individual door locks is required. There is no difference in the lock between regular guest rooms and guest rooms forming part of an adjoining suite.

Examples of possible adjoining suites on Floor 1 (shown above)
| Possible | Not Possible* | Not Possible** |
| 106 | 101 | 1 16 |
| 107 | 122 | 1 17 |
| 108 | 123 | 1 18 |
| 114 |
*Rooms not within a 15-room number range.
^48 Rooms belong to a Common Door Suite
3.1.3 Common Door Suites
Example - Common Door Suite
Suites with a common door where the rooms inside - Inner Doors (up to eight) - can be rented separately or together. Multiple guests can have access to the common door, and to any non-overlapping combination of
PK 3529_08_07-ATLAS Version 1.2 User Manual
inner doors. Guests renting different inner rooms of a Common Door Suite do not cancel each other's keycards in the common door. Each Guest receives a New keycard when they check in, with access to the appropriate inner doors.

Examples of Possible Key Distribution
| Keys for Guest 1 | Keys for Guest 2 | All Keys for a single guest |
| 116 | 116 | 116 |
| 117 120 117 | ||
| 118 | 118 | |
| 119 | 119 | |
| 120 |
3.1.4 Amenities
Doors accessible by groups of guests, using the same keycard that also gives them private access to their own room or suite. Staff access can also be permitted. Examples: pool, parking, elevator.
PK 3529_08_07-ATLAS Version 1.2 User Manual
3.1.5 Staff Common Area
Doors accessible by groups of staff, using the same keycard that gives them access to the doors they require for their work. Examples: locker rooms, cafeteria, staff lounge.
3.1.6 Restricted Area
Doors to sensitive areas such as computer rooms, General Manager's office, liquor storage rooms, etc. For extra information on auditing doors to Restricted Areas. See Audit a lock.
3.2 Time
3.2.1 Timestamps in Lock
Time is a major component of the KABA Lodging Access Control System and a security advantage compared with systems that do not use time. Both the ATLAS System and the locks are time-sensitive, meaning that they have an accurate internal clock and that time is used to determine whether a keycard is valid. Locks operate in Standard Time only.
3.2.2 Keycard Creation Date and Time Stamp
When a keycard is encoded using the ATLAS System, it is date and time stamped and an expiry time is also encoded on the keycard. The lock uses this information to grant or deny access. Not only must the keycard be for the correct room (address) but also the current time in the lock must be earlier than the expiry time encoded on the keycard. A table in the lock's memory records the time stamp of the most recently encoded keycard that has been
PK 3529_08_07-ATLAS Version 1.2 User Manual
inserted in the lock for each access level (e.g. Guest and Section, Floor, Group, Zone, Area levels for a standard guest room). The keycard is only considered valid by the lock if it was made at the same time as the value recorded in the table, or if it is more recent.
When a more recent keycard is inserted, its date and time stamp replaces the previous information, automatically invalidating any keycard for the same access level that was created earlier (except if the keycard is a duplicate).
This ensures that, once a new guest or staff keycard is inserted in a lock, all previous keycards for the same level are cancelled automatically (and no longer have access). A Reset keycard can be used to update the time stamp without giving access to the room, providing another way to instantly cancel all previous keycards.
3.2.3 Audit Trail
When a keycard is inserted in a lock, the lock audit trail is updated, including information on the keycard that was inserted, and the date and time that the entry occurred. The time of each transaction is also recorded in the ATLAS audit.
3.2.4 Keycard Expiry Date and Time
Each keycard has an expiry time stored directly on the keycard, after which the keycard is no longer valid.
3.2.5 Keeping the System Time Synchronized
Because of the importance of time, it is recommended that all the M-Units on a property be synchronized periodically, usually twice a year, by transferring data from the server to all M-Units. Each time an M-Unit is used to program a lock or reset lock addresses, and after every battery replacement in a lock, the lock's internal time is reset by the M-Unit to ensure the entire system remains synchronized. The lock time should be reset in each lock twice per year, if the M-Unit has not communicated with the lock during the past six months.
PK 3529_08_07-ATLAS Version 1.2 User Manual
3.2.6 Synchronization of Windows Time
It is important to make sure that all the ATLAS client workstations, as well as the ATLAS server, have the Windows Time Startup Type set to Automatic so that all the times are synchronized. Follow the steps below for the server and for all the workstations.
Go to the Windows Start menu, then select Administrative Tools > Services >Windows Time.

PK 3529_08_07-ATLAS Version 1.2 User Manual
Click on Windows Time and then select Automatic from the pulldown menu in the dialog box shown below.

3.3 Keycards - New vs. Duplicate
3.3.1 New Keycards
Whenever a keycard designated as New is made and used in the lock, the timestamp in lock memory is updated for that level and all previous keycards (New or Duplicate) are cancelled.
3.3.2 Duplicate Keycards
The system also provides for the addition of users in situations where we do not want to invalidate existing keycards. In cases where it is necessary to add a user (for example, an additional occupant arriving to join an existing guest in the same
PK 3529_08_07-ATLAS Version 1.2 User Manual
room), Duplicate keycards should be made. A Duplicate keycard is accepted under the following conditions:
• The keycard access level and address are the same as that of the lock;
- The time stamp of the Duplicate keycard is more recent than the most recently used New keycard
• The keycard has not yet expired.
As a result.
- The Duplicate keycard does not invalidate the existing keycards at that level.
- Both the New keycard and the Duplicate keycard remain valid until they expire, or until a more recent New keycard is inserted in the lock.
3.3.3 When to Use New or Duplicate Staff Keycards
New guests must always receive New keycards, thereby assuring that the previous guest's keycard is invalidated after they insert their keycard in all locks leading to their room. When a guest registers, the number of keycards needed by the guest's party is encoded together, and they are all identical New keycards (e.g. a family of three staying in a single suite would receive three New keycards made together). As soon as one of the New keycards is used in the lock, the previous guest's access is cancelled. Any Entry keycards made to invalidate keycards that have been lost must also be New keycards.
Note that the Bellman's Master, Grand Master and Emergency keycards are always duplicates, in order to avoid a situation in which a new Master level keycard could invalidate other Master keycards in some or all of the locks, leading to confusion in an emergency.
To invalidate keycards, a Reset keycard must be used in all locks. To avoid mistakenly invalidating current keycards, ensure that new keycards are not issued when a duplicate is required.
PK 3529_08_07-ATLAS Version 1.2 User Manual
Imagine that a guest checks out, and the room is rented to a new guest. The previous guest's keycard was created at the beginning of their registration (Time A). The current guest's keycard is created at a later time (Time B). The following figure illustrates how the new guest's keycard invalidates all previous Guest level keycards when it is first used in the lock.

flowchart
graph LR
    A["Before"] --> B["Time A Valid"]
    B --> C["New Guest Keycard Encoded at Time B"]
    C --> D["Time A Invalid Time B Valid"]
    D --> E["After"]
3.4 Timezones
3.4.1 Fixed Timezones
There are six fixed timezones that can be used to limit staff access to any lock in the Gen-E Solitaire system, except for the RAC card reader.
• Timezone 1 -12:00 AM to 04:00 AM
• Timezone 2 - 4:00 AM to 08:00 AM
• Timezone 3 - 8 00 AM to 12:00 PM
• Timezone 4 -12 00 PM to 16:00 PM
PK 3529_08_07-ATLAS Version 1.2 User Manual
• Timezone 5 - 16 00 PM to 20:00 PM
• Timezone 6 - 20 00 PM to 24:00 PM
Each timezone may be assigned to all staff, to certain staff, or to no staff. Each Staff keycard may be used for 1 to 6 timezones. When a timezone is encoded on a keycard, the locks grant access during that certain timezone.
Keycards with fixed timezones: Area, Floor, Group, Section, Zone, Grand Master
Default
The Default is configured in System Setup.
3.4.2 Fixed Timezones - Daylight Saving Time
The locks function on internal time only, and do not “know” when time changes from Standard Time to Daylight Savings Time. Fixed timezones are actually five hours long to compensate for the time change.
- In Standard time, keycards will be valid from one hour before the start of the selected timezone to the exact end time of the timezone.
- In Daylight Saving time, keycards will be valid from the exact start time until one hour following the end of the selected timezone.
Remember that timezones cannot cross midnight. Therefore if you program a lock with a timezone of four hours from midnight to 4:00 am, it will really be from 1:00 to 5:00 in Daylight Saving time but only from midnight to 4:00 in Standard time because it cannot start before the beginning of the selected timezone - midnight - as that would involve crossing midnight.

3.4.3 Flexible Timezones
The RAC card reader does not use the Fixed Timezones that can be encoded on a Staff keycard. Instead, it has its own set of eight Flexible Timezones, that are defined in the ATLAS settings (see Flexible Timezones). The timezones restrict Guest access, Staff access and the hours during which Passage Mode can be active. One of the eight timezones (1-8) or no timezone (0) can be selected for each of the following types of keycards when the card reader is programmed:
| Timezone Level | Applies to Keycards |
| Guest keycards Guest, One-shot, Adjoining Suite, Common Door Suite | |
| Staff Access keycards | Section, Floor, Group, Zone, Area, Bellman's Master, Grand Master |
| Passage Mode Passage | |
Using these timezones, RACs, which are often used for common areas such as a pool or other amenities or in other high traffic situations, can be customized to offer a higher degree of security based on the hours when access should be permitted. Guest, Staff, and Passage Mode access can all be restricted individually on each card reader.
Note: The six Fixed Timezones that are encoded on Staff Sub-master level keycards to restrict access to other Solitaire locks are not available on the RAC 3.5.
Each Flexible Timezone consists of four intervals. All keycards of the appropriate type (Guest, Staff or Passage) will be valid during the intervals in the assigned Flexible Timezone but are not valid (access denied) outside of those intervals.
Default
Configured in System Setup. You can select among the time intervals for the eight Flexible Timezones. The choice of which Flexible Timezone will apply to each of Guest, Staff or Passage keycards is set up in the Timezone tabs of the System Setup application. The configuration is then transferred to the M-Unit and subsequently programmed into the card reader. The keycards of the type (Guest, Staff or Passage) will be valid for these timezones after you use the M-Unit to program the card reader.
3.4.4 Flexible Timezones - Daylight Saving Time
The RAC card readers Flexible Timezones represent the internal (Standard) time, not the local time. There is no one-hour "grace period" built in to allow for the change from Standard Time to Daylight Saving Time. Reprogram the card reader twice per year to compensate when you change the clocks.
3.5 Audits
The administrator uses ATLAS to configure employee profile and access employee data for internal auditing and to determine an employee's location. Because of the wide variety of system and lock reports the Administrator can now target which employee (who) went in at a particular location (where) and at what time (when). ATLAS gives the Administrator the security of access to archived information, and also maintains an active list of current keycard owners.
The lock audit can be consulted in the event of unauthorized access to determine which keycard was used, when entry occurred, and the identity of the operator who issued the keycard. The lock audit trail also records the use of special keycards such as Reset, Lockout, Programming, Initialization and override usage. The M-Unit and IPM are used to read the audit stored in the lock.
Keycards that are rejected by the lock (wrong address, expired, locked-out by the privacy thumbturn or by a lockout keycard) are not recorded in the audit.
Solitaire 710-II locks and RAC store the last 350 audit records, while Generation E-760 locks store 200 audit records. The lock audit is a strong deterrent to crime, particularly employee theft. It protects offices, storerooms and other back-of-the-house doors, as well as guest rooms, and can be useful in tracking the use of parking facilities. All keycards, even multiple copies of a keycard made at the same time, have different sequence numbers that can be traced. All staff should be made aware of the audit trail in order to maximize the deterrent effect. The audits are stored in non-volatile memory, which means that they cannot be erased, even if power to the lock is interrupted.
All times shown in audits are Standard Time only.
PK 3529_08_07-ATLAS Version 1.2 User Manual
3.6 Interfaces
The ATLAS computer network can be used in conjunction with a PMS (Property management System). Another interface mode, the POS (Point-of-Sale) interface, is also available.
3.6.1 Property Management System (PMS) Interface
The PMS interface permits hotels that use PMS software for managing guest reservations and billing to transfer the information on the guest's keycard directly from the PMS computer to ATLAS. Human error in re-entering the information is thus eliminated.
3.6.2 Point of Sale (POS) Interface
For properties that wish to use keycards to post charges for restaurants, boutiques and other amenities to a guest's account, or to track the use of parking by guests, use Track 2 to encode information in the worldwide ABA standard that is used on bank cards and credit cards. Point-of-Sale readers in cash registers or other equipment that use the ABA standard format can read this information from Track 2 to post charges automatically to the room account over a network. The data used to post charges (e.g. the guest's folio number) can be either entered manually or transferred automatically from the ATLAS Database when encoding the keycard.
3.7 Employees and Operators
Employees
Refers to all employees in the Hotel database, who use keycards to access the areas where they work.
PK 3529_08_07-ATLAS Version 1.2 User Manual
Operators
Refers to the employees who have logins and passwords at different levels to access and use the ATLAS Web and/or Windows applications according to the rights granted to their level.
3.7.1 Operator Levels: Definition
There are eight levels of operator access to the ATLAS Web and Windows applications. For a detailed view of each level's rights, see Operator Types
PK 3529_08_07-ATLAS Version 1.2 User Manual
Chapter 4 - Getting Started
4.1 First Operator
All procedures in "Getting Started" require the Operator Level of Access Control Administrator, the level selected in the table below. The table will not be repeated at the beginning of each procedure in this section.

How do I Create the First Employee/Operator?
See Operator Types for definitions of employees and operators.
PK 3529_08_07-ATLAS Version 1.2 User Manual
- Click on the icon for the Operators and Passwords application that appeared on your
desktop when you installed ATLAS. . The following screen appears.

- Log in for the first time with "kaba" as login name and "atlas" as password. The following screen appears:

-
Click on New.
-
Enter required data for the first employee in the Name section and enter the employee ID.
-
Click on the ellipse button beside Department if you want to add a new department or delete an old one. The complete list appears so you can edit it.
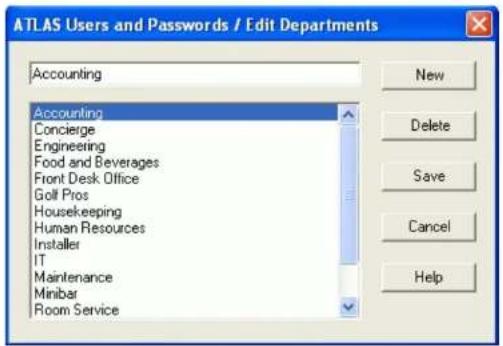
- Select the employee's department from the dropdown list.

Here, we have selected Upper Management because, when you define this first employee as an Operator, he/she must be an Access Control Administrator in order to create all the other users and operators. Access Control Administrator is usually a person from the hotel Management staff.
- Enter the employee's home address and telephone number if you wish. These fields are optional.
- Click on Save. You have now created the first employee in the system.
Refresh
button should be used if you have had the
application open but not saved any changes for some time and/or if other operators are also entering and changing information.. "Refresh" updates the screen.
- Click on the Operators tab and the screen below appears.

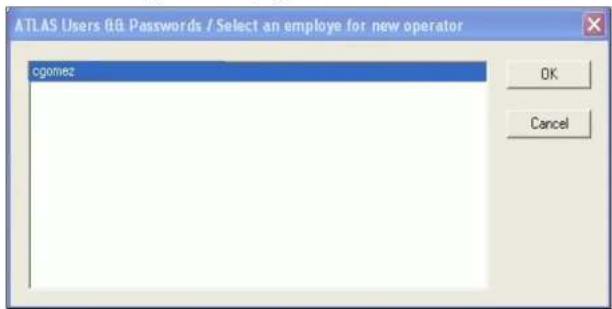
- Click on New and a new window appears with a list of the current employees who are not already operators. (in this case, only cgomez, since he was your first employee.
PK 3529_08_07-ATLAS Version 1.2 User Manual
- Click the pulldown menu in the Operator ID field and you see a list of available numbers. Select one.
| Operator ID: | |
| Password: | 2 |
| 10 | |
| 12 | |
| Confirm Password: | 13 |
| 14 | |
| Language: | 15 |
| 16 | |
| 17 |
- For operator level, select Access Control Administrator, remembering that When you define this first employee as an Operator, he/she must be an Access Control Administrator in order to create all the other users and operators.


- Click on Save. Carlos Gomez is now an Access Control Administrator level Operator.
- Login as cgomez and you can continue to create as many employees and operators as you need by following this procedure.
The example below shows a list of employees now created as operators in addition to Carlos.

PK 3529_08_07-ATLAS Version 1.2 User Manual
4.2 Modify/Delete Employees and Operators?
How do I Modify/Delete Employees and Operators?
- Log in following the procedure in First Operator.
- Click on the Operators tab The following screen appears.

- Select the name of the employee.
- To modify, change the data you want to modify, (login name, operator level, password, etc.) and then click on Save.
- To delete the selected employee, click on the Delete button.
- You will see a confirmation request.
-
Click on Yes.
-
If the employee is an Operator, you will receive a second confirmation request.

-
If you select Yes, the employee/operator will be deleted. If you select No, the deletion is cancelled.
-
If you delete an Operator, the employee will not be deleted, only his/her status as an operator.
4.3 Configuring System Defaults
The Access Control Administrator is the "in-house expert" on the system. All major operations that underlie the security of the system, such as programming locks, maintaining records, issuing the higher level keycards, and performing critical procedures such as Hotel Restart should only be done by the Access Control Administrator. Whenever the assistance of KABA is required, the Access Control Administrator is the appropriate person to describe the problem to our support staff, and to obtain and implement advice and solutions. Having one direct contact helps us to serve you better.
These defaults have been configured by KABA in accordance with the expressed preferences of the client. The Access Control Administrator can change these values to better suit the requirements of the hotel. Some values are read-only and cannot be changed. There are defaults for each of the following groups of parameters:
Hotel Setup
Access Points
Submaster Levels
- Flexible Timezones
Fixed Timezones
PK 3529_08_07-ATLAS Version 1.2 User Manual
4.4 Programming Locks
Please refer to the procedure Programming a Lock.
4.4.1 Programming Common Area Locks and Card readers
Guest Amenity or Staff Common Area locks may be programmed to accept keycards with different addresses (for example, Guest Amenity Lock "Pool" programmed as Area 1, 2 and 3 will accept Guest Keycards that have access to either 1, 2 or 3.
RAC card readers support Flexible Timezones, which are programmed separately, see Flexible Timezones. Access for the Staff keycards to the Guest Amenities is given to all or none of the Submaster Levels (Bellman's Master does not have access).
RAC 4.0 card reader may be either single or dual. Single means it reads cards only when someone enters OR exits a room or area. With dual readers, there are two physical reader installations - one at the entry and one at the exit. The dual RACs read both the entry and exit card swipes and both times are visible on the audit report.
Every time you select the RAC 4.0 card reader as lock type for a door, the choice of Dual or Single will appear.
PK 3529_08_07-ATLAS Version 1.2 User Manual
4.4.2 Programming Restricted Area Locks
The only keycards accepted by Restricted Area locks are the correctly addressed Restricted Area keycard, and the Emergency keycard. Only one address needs to be programmed into the lock, which is the Restricted Area number.
4.4.3 Programming Guest or Meeting Room Locks
Meeting rooms are programmed as normal Guest rooms except that they can be set to Passage Mode. When you select a Meeting room, Restricted Area, Amenity or Staff Common Area, you will see a checked grayed-out checkbox indicating that it is possible to put this door in Passage Mode.
4.4.4 Programming Common and Inner Door Locks
Common Door Suites are multi-room configurations with a common door and several inner doors to a maximum of eight. If the inner doors are to be rented separately and are fitted with electronic locks, the common door and the inner doors require a special program. The common door must recognize keycards for the inner doors. If the inner doors are rented to different guests, their New keycards DO NOT invalidate each other in the common door. See Electronic Lock Profiles.
PK 3529_08_07-ATLAS Version 1.2 User Manual
Chapter 5 - System Setup
5.1 Hotel Setup

5.1.1 Log In to System Setup

Log in to the System Setup application by clicking on the icon 📄. Then log in using the Access Control Administrator password. See First Operator.
PK 3529_08_07-ATLAS Version 1.2 User Manual
The following screen appears.
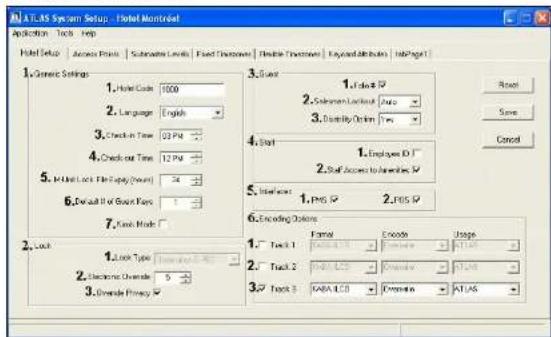
The first page of the ATLAS System Setup appears in the screen above, with seven tabs, each indicating a page packed with information regarding your hotel setup. The first tab is Hotel Setup where there are default settings that you can change as circumstances in the hotel change. Of course, as mentioned previously, some settings cannot be changed because they can only be set by a KABA Tech Support employee. The settings were configured in accordance with the Site Survey conducted by KABA.
The Hotel Setup page shown above is divided into six sections, each of which deals with a different set of parameters. The sections (screen panels) are as follows:
- Generic Settings
- Interfaces
• Guest (keycard options) - Staff
- Interfaces
- Encoding Options
Click your cursor on any numbered field and it will take you directly to the description and explanation of that field.
5.1.2 Generic Settings
1. Hotel Code
The Access Control Administrator specifies a confidential Hotel Code. The Hotel Code ensures that each installation is unique and secure. Each component of the ATLAS system (locks, card readers, ATLAS software on workstations, and every type of keycard) makes use of the Hotel Code to prevent tampering. The M-Units transfer the correct Hotel Code to the locks when the locks are first programmed, and each keycard is automatically encoded with the correct Hotel Code by the ATLAS encoder.
2. Language
From the dropdown list, select the language to appear by default on the ATLAS screens. On the login screens for the various applications, there is a field that the user can select if he/she wants to change the language to be used during the session. Therefore, selecting the language here will not prevent the individual system users from using a different one during their sessions in ATLAS.
3. & 4. Check-in/Check-out time Default
These times may be changed if the hotel decides to change the default hours for Check-in and Check-out. These defaults appear in the Web page Guest >Make Keycards
5. M-Unit Lock file expiry
This time period (usually 24 hours) sets the time that files may be kept in the M-Unit.
6. Default Number of Guest Keys
Enter the default number of Guest keys that the encoder should produce. The default is usually one, since the GSA and FDM can change this setting on their screens if multiple guest access is required.
PK 3529_08_07-ATLAS Version 1.2 User Manual
7. Full Screen Mode
Select Full Screen Mode here if desired. If full screen Mode is selected, the ATLAS Web application fills the whole screen. If the users are in several ATLAS Applications at the same time (for example ATLAS Web application, Monitoring Manager and System Setup) they can cycle through all the open screens by using the Alt + Tab keyboard sequence. The icons of all open applications appear and the users stop hitting Alt + Tab when they get to the icon of the application screen they want to see.
Important: If Full Screen mode is selected and the ATLAS user has Popup Blocker selected on his/her Internet Explorer, the user will not be able to access the ATLAS Web page because it will not be able to pop up on the screen. Ensure that each workstation has the Popups Allowed setting enabled on Internet Explorer. See Web-based User Application - Security Settings ____.
5.1.3 Locks
1. Lock Type
Lock Type is read-only here. Lock Type is set to the type of lock installed in your property according to the Site Survey. See Electronic Lock Profiles .
2. Electronic Override
A number must be selected here. This number will determine the maximum number of electronic overrides that an M-Unit can perform on a lock. For example, if 4 is selected, the lock can be overridden 4 times but after that it must be opened manually. This is a security feature in case an M-Unit is lost or stolen.
3. Override Privacy
The Privacy Override option in ATLAS allows the keycard holder to override the privacy lock (when a door is locked with a deadbolt from the inside). The Privacy Override option must be selected in the System Setup software, Hotel Setup tab, as shown below. The default is to allow Privacy Override.
It must also be enabled in the lock, using the procedure How do I Enable/Disable Privacy Override in the Lock? below. When the Privacy Override is enabled, a Guest Keycard for that room/suite will be allowed to gain access to a room with
the Privacy activated. In addition, the Section keycard and of course the Emergency keycard will override the privacy thumbturn.
Any lock can be enabled to allow Privacy Override but in the ATLAS system, selecting Privacy Override only applies to the Common door of a Common Door Suite.
How do I Enable/Disable Privacy Override on the Lock?
The following procedure is for all Generation E-760 locks (firmware version 0 and higher) and Solitaire 710-II locks (firmware version 2.0 and higher).
Before completing this procedure, ensure that
- The lock is properly installed on the door
-
Batteries have been installed in the lock
• The lock is NOT INITIALIZED. -
To verify whether the lock is initialized or not, insert the TEST KEYCARD; there is no reaction if the lock is initialized.
- If the lock is initialized, remove the battery pack from the lock, wait at least 60 seconds, then re-install the battery pack.
- If the lock is not initialized proceed to Step 4. below.
- Ensure that the Thumbturn Knob located on the inside lock housing is turned to the NORMAL (vertically aligned) position;
- Insert the Test Keycard, the visual indicator (GREEN LED) will flash for 5 seconds
Note: the motor will also unlock and then relock if in Virgin Mode.
- During this 5-second time period, turn the thumbturn to its ACTIVE position (Horizontally aligned).
- If the Privacy Override is enabled, a solid RED LED will turn ON for 5 seconds;
-
Turn the thumbturn to its NORMAL position to disable the Privacy Override or; Wait until the RED LED turns OFF to keep the Privacy Override.
-
If the Privacy Override is disabled, a solid GREEN LED will turn ON for 5 seconds;
-
Turn the thumbturn to its NORMAL position to enable the Privacy Override or;
-
Wait until the GREEN LED turns OFF to keep the Privacy disabled. Reset to Default
-
If you change several settings but then decide to return to the defaults, just click on the Reset button at top right and all the settings will return to the defaults.
5.1.4 Guest
1. Folio Number
Click on the checkbox Folio Number, if your ATLAS application deals with a POS interface. The folio number field appears on the Guest > Make Keycard Web page.
2. Salesman lockout
Salesman Lockout feature offers increased protection for the guests privacy and valuables when the guest is not in the room. When added to the guests keycard, the guest can control staff access to their room by locking out all but their own keycard and the emergency keycard.
- The Salesman lockout is engaged by the guest by inserting the keycard after leaving the room, without turning the handle. The lock response is a single green flash.
- When the guest returns and enters their room, the lockout is automatically removed.
- The lockout expires when the keycard that was used to set the feature expires.
- To ensure privacy when occupying the room, the guest may activate the inside thumbturn to throw the deadbolt.
Note: Option not available on E-760 Series locks. If this option is encoded on the keycard it will have no effect if the lock on the guest room door is an E-760 series model.
3. Disability
The Disability Option changes the length of time during which the door can be opened immediately after a valid guest keycard is swiped. It changes the delay from 4 seconds to 15 seconds, to assist guests who may have difficulty turning the handle. The Disability Option has no effect when the keycard is used in locks other than the Generation E-760.
5.1.5 Staff
1. Employee ID
2. Staff Access to Amenities
If selected, staff keycard will automatically give access to all amenities.
5.1.6 Interfaces
1. PMS
Select if the ATLAS includes a Property Management System (PMS) interface. The PMS interface permits hotels that use PMS software for managing guest reservations and billing to transfer the information regarding the guests keycard directly from the PMS computer to ATLAS. Human error in re-entering the information is thus eliminated. PMS interface is configured with the instructions in Network & Hardware Setup User Manual, PK3065 02/06.
2. POS
Select (√) if ATLAS deals with a POS interface. Selecting this allows you to select the Folio number in the Guest section below.
5.1.7 Encoding Options
You may select Track 1, 2, or 3 from the pulldown menu to encode access data. All of KABA's newer locks can read keycards encoded with either Thrift or ILCO proprietary data encryption on Track 1, 2 or 3. However, folio numbers can only be encoded on Track 2, ABA compliant. Your choice of encoding track will be
PK 3529_08_07-ATLAS Version 1.2 User Manual
determined at the Site Survey when you have listed the numbers and types of locks in the hotel.
- Track 1 - Encodes in Thrift or ILCO mode
- Track 2 Encodes in Thrift or ILCO mode AND in ABA compliant encryption.
- Track 3 - Encodes in Thrift mode or ILCO
If you select TRACK 2 for your Thrift or ILCO encoding, you cannot have a folio or POS number. The fields for entering the Folio number and POS number will be disabled. You will receive the CONFIRMATION REQUEST SHOWN IN THE NEXT ILLUSTRATION BELOW.
Tables of ATLAS Encoding Variations
Kaba data ILCO Format
| Track | No Folio/ POS | No Folio/ POS | No Folio/ POS | With Folio/POS | With Folio/ POS | With Folio/ POS |
| 1 | ILCO | - | - | ILCO | IATA | |
| 2 | - ILCO - | ABA ILCO | ABA | |||
| 3 | - | - | ILCO | - | - |
IATA
ILCO
Kaba data Thrift Format
| Track | No Follo/POS | With Follo/POS |
| 1 | - | IATA |
| 2 | - | ABA |
| 3 | THRIFT | THRIFT |
PK 3529_08_07-ATLAS Version 1.2 User Manual
IMPORTANT: To change encoding track information and encoding format you must change each encoder's configuration file.
The system default encoding is:
• POS on Track 2 - ABA Format
- Access Information on Track 3 - ILCO/THRIFT
5.2 Access Points

The Access Point tab of the System Setup application contains six pages of fields, allowing you to configure most aspects of the specific rooms in the hotel, including Guest rooms, suites, and amenities as well as Restricted Areas and Staff common areas.
5.2.1 Access Points Tree View
The Access points configured here are the guest rooms, suites and meeting rooms, as well as both Guest and Staff Common Areas and Restricted Areas. The screen above shows a floor of rooms in the hotel.
PK 3529_08_07-ATLAS Version 1.2 User Manual
5.2.2 Rooms
Click on the Hotel name, and then a list of floors appears. Rooms are divided into floors according to the configuration set by the Access Control Administrator working with KABA.
5.2.3 Specific Room or Suite of Rooms
Room number can be the number of a single room, an outer door of a common door suite or the inner door of a common door suite, as well as the doors to common areas/amenities, meeting rooms, restricted areas, etc.
5.2.4 Description
Often refers to the name or number on the door to the room or rooms but may be anything you wish to use to identify the room. May also contain information added to the lock name/number – usually information such as “sea view” or “parking lot view” – again it is just in the system, not on the door.
5.2.5 Room Type
A Guest Room is selected in the illustration below. For a Guest Room, you can change description, lock type, bed type, select smoking or non-smoking and select pre-defined amenities that go with certain rooms.
Depending on the type of room that has been configured, the other defaults shown will vary.
When you select a Common or an inner door, a number appears grayed-out to the right of the Description field. For a common door, this number indicates the number of the suite. For an inner door, one number specifies the suite and the other number shows the order of the door in the suite. For example, the number 2/2 would mean that the suite door is 2 and the inner door is 2.

When you select a Meeting room, Restricted Area, Amenity or Staff Common Area, you will see a checked grayed-out checkbox indicating that it is possible to put this door in Passage Mode.
5.2.6 Lock Types
The following are the Lock Types shown:
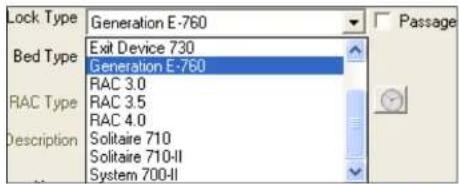
For an explanation of the Lock Types, see Electronic Lock Profiles.
5.2.7 Bed Type
Select a bed type for the room by selecting one from the pulldown list.

PK 3529_08_07-ATLAS Version 1.2 User Manual
5.2.8 Smoking or Non-Smoking
Designate this room as Smoking or Non-Smoking.
5.2.9 Amenities

The Amenities page is shown below. Amenities refers to facilities available to guests on a free, per pay, or paid-with-the-room rate basis. The Amenities page shows you all the configurable amenities in the hotel. It allows you to configure new ones and modify or delete existing ones. In addition, it allows you to rename the hotel or the floor. See Access Points - Guest Rooms for these last two procedures.
How do I Configure an Amenity?
Modify
- Click on the Access Points tab and the following screen appears. The Amenities tab is selected.
PK 3529_08_07-ATLAS Version 1.2 User Manual
- To modify an amenity, click on the All radio button at the bottom left of the list of Amenities Areas. This removes the filter of enabled amenities only and shows all available amenity areas including those currently not used.
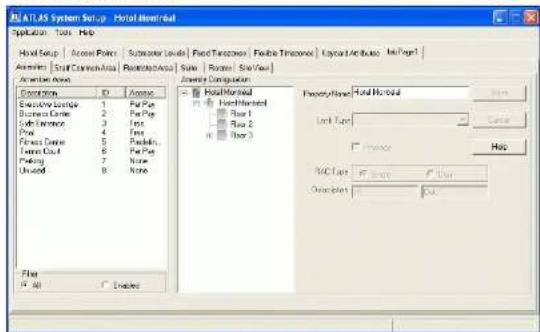
-
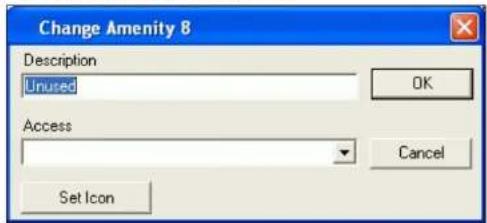
Select the area that you want to modify and double click on it. In this example we have selected Amenity 8 and are planning to change it into a cigar lounge.
-
The following dialog box appears.
-
Enter a name describing the amenity.
-
Select the type of access from the pulldown menu.

-
When set to Free, the amenities icons appear on the Web Guest page but are shown as read-only (grayed-out) Access is automatically encoded on the keycard.
-
When set to Per Pay, the amenities are shown as checkboxes and the GSA, while making a Guest level keycard, selects the amenities that the guest is paying for.
- When set to Predefined, the amenities icons will only appear as read-only (grayed-out) for rooms pre-configured with these amenities.
- When set to None there will be no amenities shown on the Guest > Make Keycard screen
Set Icon
- Click on ____ to set the icon that you want to appear on the ATLAS Web application screen. The following type of screen appears showing all the available icons in the database.

-
Click on OK.
-
The new amenity now appears on the list of amenities but it has not yet been assigned to a door. See the next part of this procedure for how to assign it.
Assign
- To view the enabled amenities, click on the Enabled radio button at the bottom right of the list.
-
To assign an amenity to a physical door, click on the amenity from the list of Amenities Areas shown at left. Cigar Lounge is selected in the example below.
-
In the Amenity Configuration panel, right-click on the floor where you want to place the amenity. The menu appears as shown below.
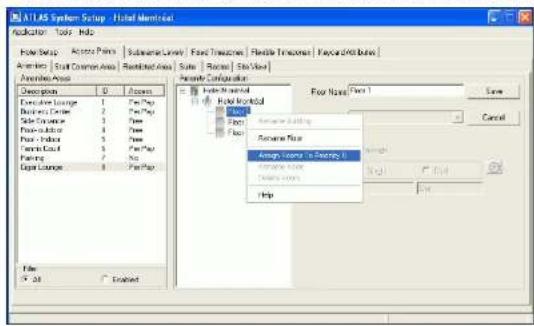
- Select "Assign Rooms to Amenity 8" on the menu. The following dialog box appears.

-
The door's floor and description are already filled in.
-
Enter the room name - 10 for example, and select the lock type.
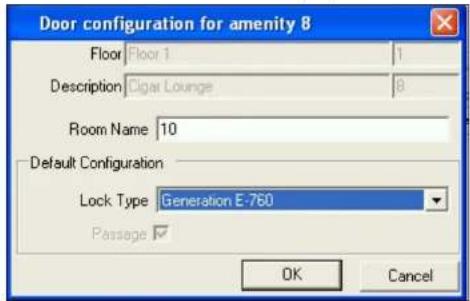

- If you selected RAC 4.0, you can also select either the single or dual RAC type.

-
Click on OK to save.
-
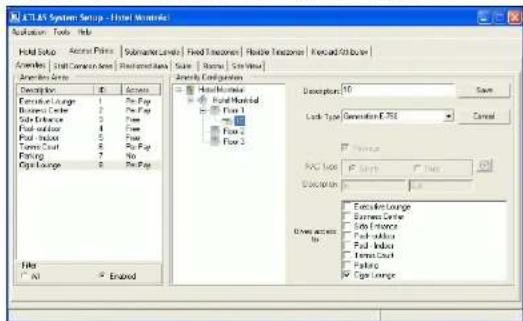
Now, if you select Cigar Lounge, Room 10 appears under Floor 1.
-
Click on Room 10 and the following screen appears.
-
If the door 10 also leads to the Executive Lounge and Business Center, for example, click in the checkboxes next to those amenities. This just means that if you go through Door 10, you can get to the others. It does not mean that access to Door 10 grants access to those other amenities. A guest cardholder whose card gives him access to the Executive lounge only would be able to go through Door 10 and then enter the Executive Lounge but not the Cigar Lounge or Business Center.
-
Click on Save
Note: If you remove all access to amenities from a Door, this door will be automatically removed.
Access to Amenities
The Access Control Administrator can configure up to eight Guest Common Areas, called Amenities, such as a pool, parking, elevators, etc. These are low security zones that may include services for which the guest has paid an extra fee.
Each Guest Amenity is set to Free, Predefined, Per Pay or None.
When set to Free, the amenities icons appear on the Web Guest page but are shown as read-only (grayed-out) Access is automatically encoded on the keycard.
- When set to Per Pay, the amenities are shown as checkboxes and the GSA, while making a Guest level keycard, selects the amenities that the guest is paying for.
- When set to Predefined, the amenities icons will only appear as read-only (grayed-out) for rooms pre-configured with these amenities.
- When set to None there will be no amenities shown on the Guest > Make Keycard screen.
See the procedure How do I Configure Guest Amenities? on the following page for how to set up these amenities.
5.2.10 Submaster Levels
Submaster Levels are grayed-out here on the Access Points configuration screen because you can only configure them on a different screen, reached by clicking on the Submaster Levels Tab.
5.2.10.1 Staff Common Areas

The Staff Common Area page shows you all the configurable staff areas in the hotel. It also allows you to configure new SCAs and modify or delete existing ones. In addition, it allows you to rename the hotel or the floor. See Access Points - Guest Rooms for these last two procedures.
How do I Configure a Staff Common Area?
Modify
- Click on the Access Points tab.
PK 3529_08_07-ATLAS Version 1.2 User Manual
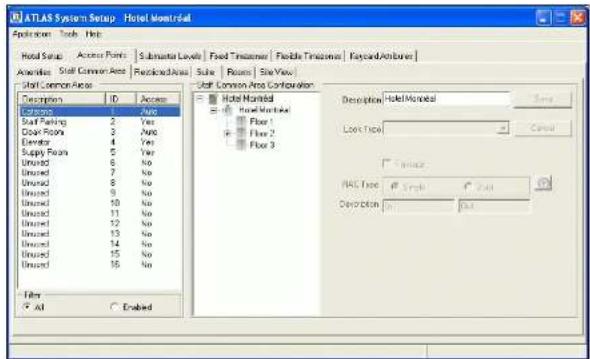
- Click on the Staff Common Areas tab and a screen like the one below appears..

- Click on the All radio button at the bottom left of the list of staff common areas Areas. This removes the filter of enabled staff common areas only and shows all available staff common areas.
-
Select an area from the list (Area 8, for example) and double click on it.
-
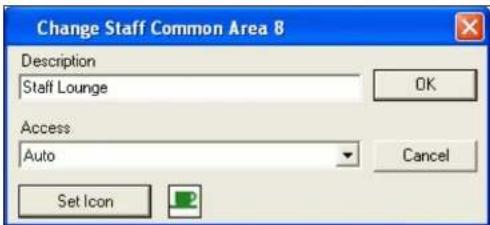
The following dialog box appears.

-
Enter a name describing the Staff Common Area.
-
Select the type of access from the pulldown menu.
-
Yes – Staff may be given access to this area when keycard is encoded. The Common Area appears as a selectable icon on the Staff > Make Keycard page in the ATLAS Web application.
- No – Staff has no access to this Common Area so it is never encoded on the keycards. Icons for these Common Areas do not appear on the Web application screen.
- Auto – Staff always has access to these common areas, so they appear grayed-out on the Web application screen.
Set Icon
- Click on Set icon to set the icon that you want to appear on the ATLAS Web application screen. The following type of screen appears showing all the available icons in the database.

- Select the icon you want and click Open. The icon appears on the dialog box as shown below.
10. Click on OK to save.
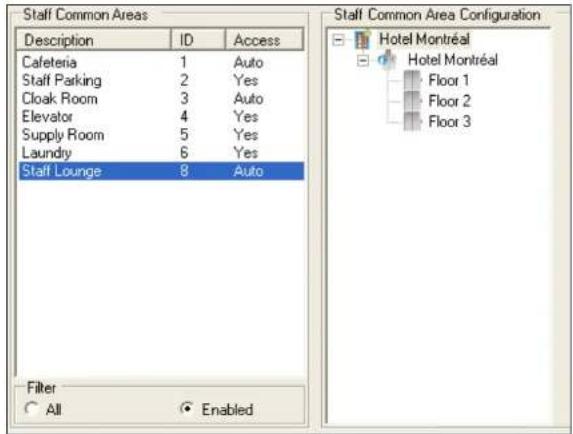
The Staff Lounge common area now appears on the list of common areas but it has not yet had a door or doors assigned to access it. See the next part of this procedure for how to assign doors to a common area..
Assign
- Click on an area from the list of Staff Common Areas shown at left. Staff Lounge is selected in the example below.
PK 3529_08_07-ATLAS Version 1.2 User Manual
- In the tree view of the Staff Common Area Configuration panel, right-click on the floor where you want to place the Staff Common Area access. The menu appears as shown below.

- Select "Assign Rooms to Staff Common Area (SCA) 8" on the menu. The following dialog box appears.

PK 3529_08_07-ATLAS Version 1.2 User Manual
- The door's floor and description are already filled in.
- Enter the room name - 300L for example.
- Select the Lock type.

- If you selected RAC 4.0, you can also select the RAC type.

- Click on OK to save.
- Now, if you select Staff Lounge, Room 300L appears, as shown below.

- Enter a description if you wish.
- If the Staff Lounge door also leads to the Supply Room and Cloakroom, for example, click in the checkboxes next to those amenities. This just means that if you go through Door 300L, you can get to the others. It
does not mean that access to Door 300L grants access to those other Staff Common Areas. A staff member whose card gives him/her access to the Staff lounge only would be able to go through Door 300L and then enter the lounge but could not enter the Supply Room or Cloakroom.
- Click on
Save
The Staff Lounge is now assigned to Door 300L on Floor 3 and is selected for staff on an Auto basis.
Note: For setting Flexible timezones for staff, guests and Passage Mode, please see Access Points - RAC 4.0 Flexible Timezones.
5.2.10.2 Restricted Area
| GUEST SERVICE ATTENDA NT | FRONT DESK MANAGE R | MAINTENANCE | BELLMAN | IT ADMINISTRATOR | MASTER | ACCESS CONTROL ADMINISTRATOR | KABA TECHNIC AL SUPPORT |
This page allows you to enable restricted areas and assign them to a room. In addition, it allows you to rename the hotel or the floor
For renaming the hotel or floor, see the procedure in Access Points - Guest Rooms
PK 3529_08_07-ATLAS Version 1.2 User Manual
How do I Configure a Restricted Area?
Modify
- Click on the Access Points tab.
- Click on the Restricted Area tab and a screen like the one below appears

- Click on the All radio button at the bottom left of the list of Restricted Areas. This removes the filter of enabled Restricted Areas only and shows all available Restricted Area areas including those currently not accessible.
- Select an area from the list and double click on it.
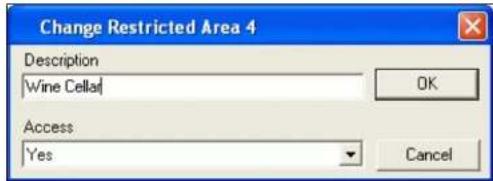
5. The following dialog box appears.

6. Enter a name describing the Restricted Area.
Basic Keycard Security
7. Select the type of access from the pulldown menu.
- Yes – Staff may be given access to this area when keycard is encoded.
- No – Staff have no access to this area so it is never encoded on their keycards.
8. Click on OK to save.
The Restricted Area now appears on the list of restricted areas but it has not yet had a door assigned to it. See the next part of this procedure for how to assign a door to a restricted area.
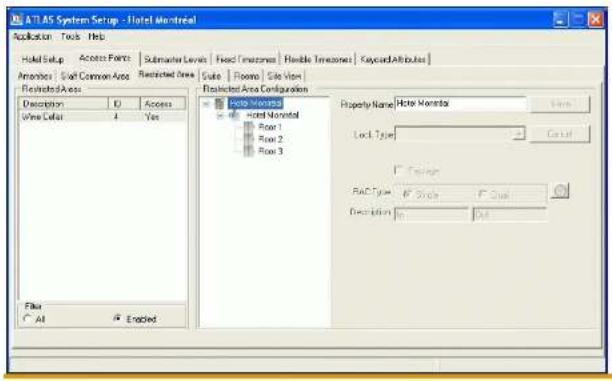
Assign
- To view the enabled Restricted Areas, click on the Enabled radio button at the bottom right of the list.
Note: If a Restricted area is configured as No Access it does not appear on the list of Enabled Restricted areas
- To assign a door to a Restricted Area, click on a Restricted Area from the list of Restricted Areas shown at left. Restricted Area Wine Cellar is selected in the example below.
PK 3529_08_07-ATLAS Version 1.2 User Manual

- In the tree view of the Restricted Area Configuration panel, right-click on the floor where you want to place the Restricted Area. The menu appears as shown below.

- Select "Assign Rooms to Restricted Area 4" on the menu. The following dialog box appears.
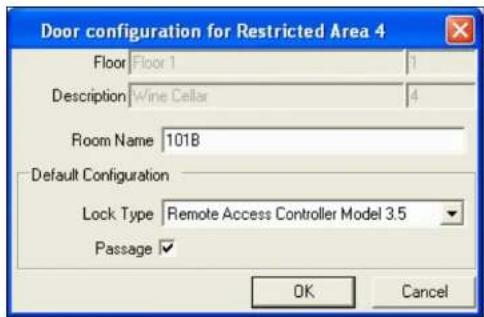
- The door's floor and description are already filled in.
- Enter the room name - 101B for example.
- Click on OK to save
- Now, if you select Restricted Area 4, Room 101B appears, as shown below.

- Select the Lock type.
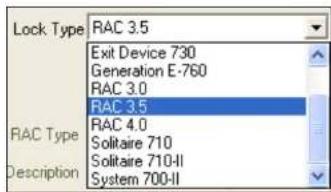
- If you selected RAC 4.0, you can also select the RAC type.

- For Restricted Areas, Passage Mode is a selectable option, so if you want to designate this restricted area as able to be placed in
Passage Mode, click on the checkbox ☑ Passage. Submaster Levels for this room have already been selected (in the Submaster Levels tab) and cannot be modified here. Restricted Areas obviously have no access to Amenities.
Note: For setting Flexible timezones for staff and timezones eligible for Passage Mode, please see Access Points - RAC 4.0 Flexible Timezones.

The Restricted Area is now assigned to Room 100B on Floor 1.
5.2.10.3 Common Door Suites

The Suite page shows you all the configured suites in the hotel, both Common and inner doors. It also allows you to create new Suites and modify or delete existing ones. In addition, it allows you to rename the hotel or the floor
Rename the Hotel
- Click on the Access Points tab and the Suite tab. The following screen appears.

PK 3529_08_07-ATLAS Version 1.2 User Manual
- Click on the plus sign to see the tree view showing the floors in the hotel
- Right click on the name of the Hotel and you can rename the hotel by selecting it from the pop-up menu.

A box appears around the hotel name.
4. Type in the new name as shown below and then click on Save.

Rename a Floor
1. Select Rename Floor from the pop-up menu.

A box appears around the hotel name.
- Type in the new name as shown below and then click on Save.

PK 3529_08_07-ATLAS Version 1.2 User Manual
To add a Common Door suite to a floor, right click on a floor,(Floor 1 in the example below.) The popup menu appears as shown below.
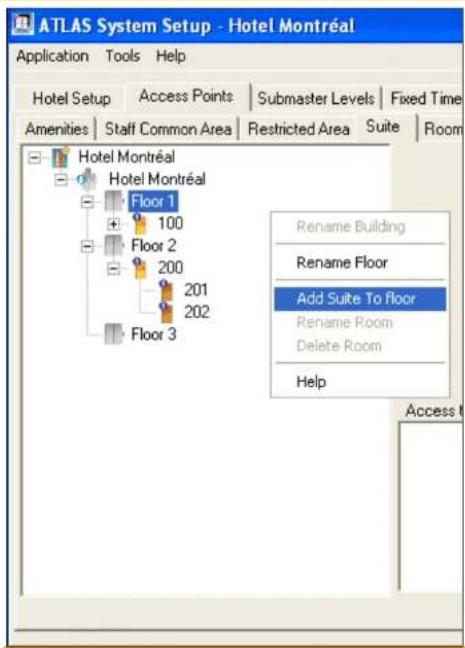
- Select Add Suite to Floor .The following dialog box appears.
-
The Suite ID is already filled in. Enter a name or number for the Common Door.
-
Enter a name or number in the New Door Number field and then click on the Add Door button. This creates an inner door for the Common Door you just created in step 3.
- The new door is then moved to the left list - "Inner Doors".
- In the illustration, we have created a new suite named "Presidential" and added two inner doors, "Lincoln" and "Washington". When Add Door is clicked, "Washington" will move to the inner door column at left.
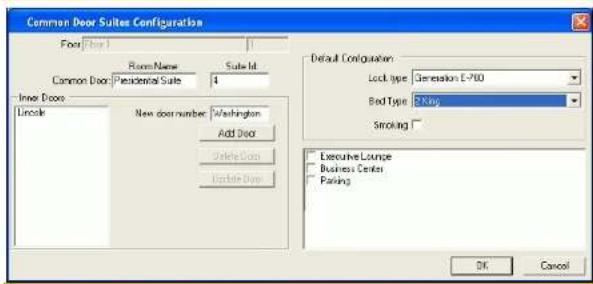
- Change the default settings for the lock and bed types and check Smoking if you wish to create a suite where smoking is permitted.
- In this example, there are two amenities pre-defined as available with these suites; check off the ones you want.
-
Click on OK to save this Suite.
-
Now the new suite appears on the Tree View of Floor 1.

-
Submaster Levels for this suite have already been selected and cannot be modified here.
-
To modify a Common Door Suite, click on the tree view of the hotel. The common door suites for each floor are shown, with their common and inner doors.

- Select the suite that you want to rename and right click on it. In this example we have selected Suite 100. The menu allows you to select Rename or Delete Room.

If you select an Inner door (101 for example) you cannot delete the door, you can only rename it.
- Enter a name describing the Common Door Suite.
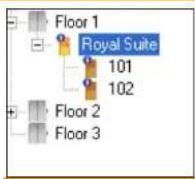
- Rename one or both of the inner doors if you wish.

flowchart
graph TD
    A["Hotel Montréal"] --> B["Floor 1"]
    B --> C["Royal Suite"]
    C --> D["King"]
    D --> E["Queen"]
    E --> F["Floor 2"]
    F --> G["200"]
    G --> H["201"]
    H --> I["202"]
    I --> J["211"]
    J --> K["212"]
    K --> L["213"]
    L --> M["Floor 3"]
- There are two amenities available for this room. Click on the box next to each amenity that you want to enable (encode on the keycard) for the room.
![A.1.AS System Set.3 - Portal Manager Application Tools Help Hotel Setup | Access Points | Subsector Levels | Fixed Timelines | Possible Timelines | Kecad At/bules | IdPage1 Amenses | Shift Connection/Data | Restrictions/Chips | Safe | Rooms | StartView | Form Manager Form Method Floor 1 Pre-Vertical Side Fond Style King Layer Floor 2 Floor 3 Description: [10] Room Type: Wall Street 2 Box Lock Type: Dimension 1. Box Bed Type: 1. Box MAC Type: 1. Box Descartion: Access to Amenses: Substrate Level Basic Level Basic Center Parking Save Cancel](/content/2026/05/978683/images/c9cde77973eef4cd46a86c9d8eb9aaeabc47a223b9519d6655e802e6a0bd4be6.jpg)
- Submaster Levels for this suite have already been selected (in the Submaster Levels tab) and cannot be modified here.
Delete
- Select the suite that you want to delete and right click on it. In this example we have selected Suite 200.
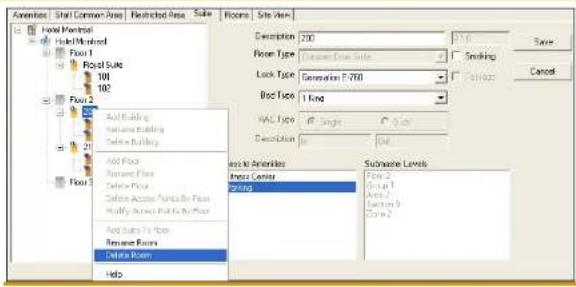
- The following confirmation request appears.

- Click Yes to delete the Common Door Suite, Common Door and all inner doors.
Note: For setting Flexible timezones for staff, guests and Passage Mode, please see Access Points - RAC 4.0 Flexible Timezones.
5.2.10.4 Guest Rooms

The Guest Rooms page shows you all the guest rooms in the hotel, including Meeting Rooms but excluding suites. It allows you to create new rooms and modify or delete existing ones. In addition, it allows you to rename the hotel or the floor.
Rename the Hotel
- Click on the Access Points tab and the Rooms tab. The following screen appears.
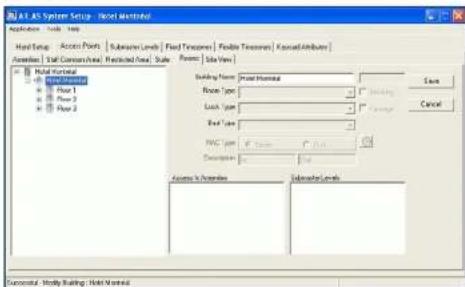
PK 3529_08_07-ATLAS Version 1.2 User Manual
- Click on the plus sign to see the tree view showing the floors in the hotel
- Right click on the name of the Hotel and you can rename the hotel by selecting it from the pop-up menu.

A box appears around the hotel name.
- Type in the new name as shown below and then click on Save.
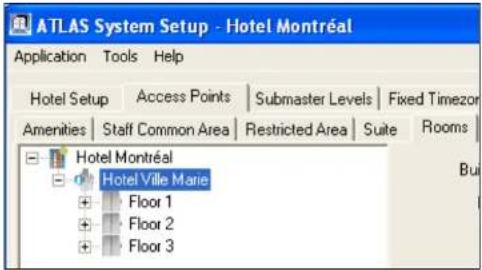
Rename a Floor
- Click on the plus sign to see the tree view showing the floors and rooms on each floor of the hotel.
- Select the floor you wish to rename.
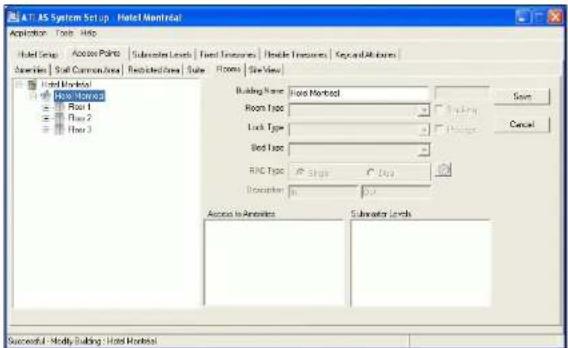
3. Right-click and the pop-up menu appears as shown below.
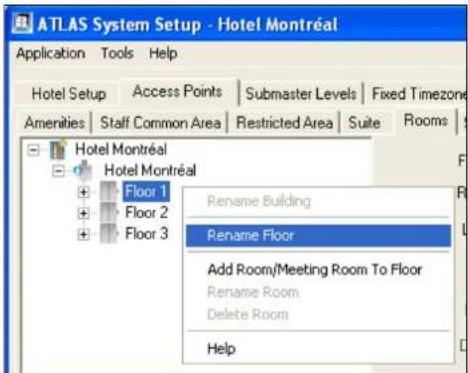
PK 3529_08_07-ATLAS Version 1.2 User Manual
- Rename the floor by selecting the floor and typing in the new name.

- Click on Save
Add Rooms/Meeting Rooms
- Select the floor where you want to add a room and right-click. The following pop-up menu appears
- Select Add Room/Meeting Room.

The following dialog box appears.
PK 3529_08_07-ATLAS Version 1.2 User Manual
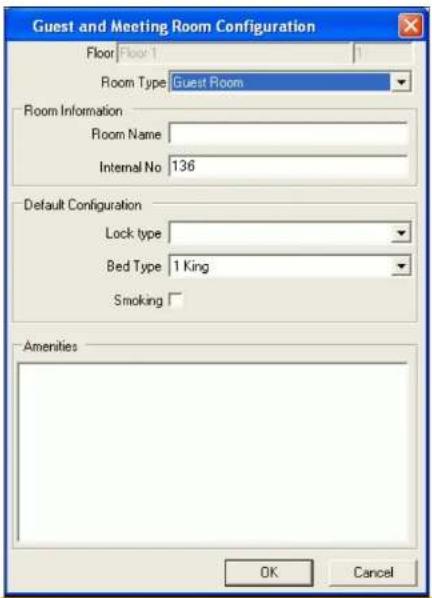
- The floor and internal ID of the room are pre-selected.
- Select Guest Room or Meeting Room as Room type.
- Enter the room name (usually a number)..
- Select the lock type and bed type from the pulldown menus.
- Click on Smoking if desired.
- Any amenities that may be pre-selected for that room will appear here. In the example below, there are no amenities because it is a meeting room. Submaster Levels for this room have already been selected in Submaster Levels and cannot be modified here
- When the fields are all filled out as shown in the example below, click OK to save.

The new room appears on the list of rooms for that floor.
PK 3529_08_07-ATLAS Version 1.2 User Manual

Here is an example of a room with Amenities that you can select.
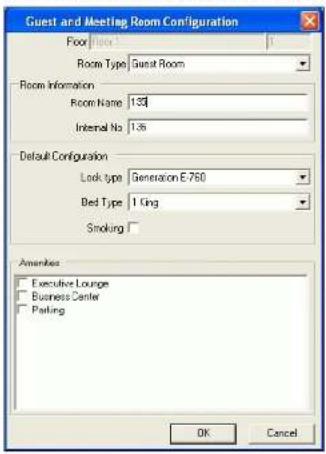
Note: For setting Flexible timezones for staff, guests and Passage Mode for rooms with RAC 4.0 access, please see Access Points - RAC 4.0 Flexible Timezones.
5.2.11 Site View

Site View allows you to see the "big picture" of the hotel configuration. The tree view shows a graphic representation of all the floors, rooms, amenities, suites and restricted areas and also provides a detailed view of their properties. However, Site View is only a total view of the facility. Nothing can be configured or changed in this view. To make any changes, click on the relevant tab and make the changes in that page. For example, if you want to change a lock type for an amenity, click on the Amenity tab and follow the procedure in Access Points_Amenities. To make a change to anything in a guest room, go to the Rooms tab and see Access Points - Guest Rooms.
This tab brings up a view of all the rooms in the hotel. Each room has an icon to indicate how it has been configured.

PK 3529_08_07-ATLAS Version 1.2 User Manual

Click on an individual room and all the fields on the right are filled in, so you get a full description of the properties of the room, as shown in the example below. Amenities pre-defined for the room are shown checked-off in the Amenities panel. Extra per pay amenities can still be assigned at guest registration time.

5.3 Submaster Levels Keycard
PK 3529_08_07-ATLAS Version 1.2 User Manual

5.3.1 Types of Submaster Levels
Each lock is programmed with the access levels that apply to the specific door it controls lock accepts Entry keycards if their date and time stamp is valid, if they have not expired, and if their Room, Submaster or Master level address matches the addresses programmed in the lock. The Guest and Restricted Area level addresses can only be changed by programming the lock using the ATLAS System, and they are known as fixed addresses.
The Submaster levels (Section, Floor, Group, Zone and Area) are used for access by staff who do not have master key privileges (e.g. housekeepers and housekeeper managers, maintenance workers, laundry, room service, etc.). Rooms to which the same staff member or team of staff members require access should be keyed alike.
There is no hierarchy of Submaster levels. For example, if Section addresses are used to divide the property according to the housekeeper who is assigned to clean a combination of rooms, then in high season there may be more than one Section per floor. Conversely, in low season a single Section may span more than one floor. The Section addresses would be changed at the start of either season using ATLAS and then programmed into the locks using the M-Unit. See the Procedures How do I create/Assign/Delete Submaster Levels? below and Programming a Lock.
5.3.2 Submaster Levels
PK 3529_08_07-ATLAS Version 1.2 User Manual
Section, Floor, Group, Zone, and Area are the names used in the ATLAS application.
5.3.3 Room Tree View
The "tree" listing of all the hotel rooms appears at the right and shows the rooms belonging to submaster levels. To see only one or certain types of submaster levels, select a type and click on the search icon. Then, only the selected type of submaster levels will appear at the left. Select a submaster level and the tree listing will show the access points that are part of it. The first screen below shows all types selected and the second one shows 2 levels, Area and Section.

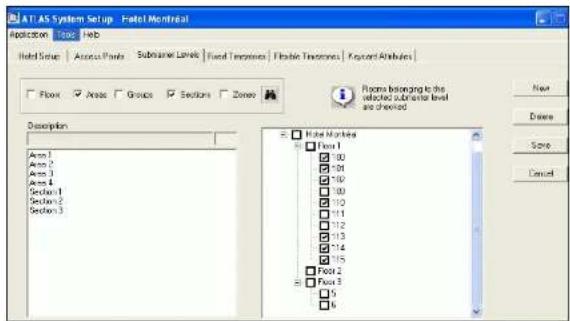
PK 3529_08_07-ATLAS Version 1.2 User Manual
5.3.4 Name
This is the field where you can name each Submaster level. Often descriptive names such as "Ocean View 2 Area" are better than just numbers.
How do I Create/Assign/Delete Submaster Levels?
Create
- Click on the New button and the following appears.
PK 3529_08_07-ATLAS Version 1.2 User Manual

- Select the type of submaster level you want to create and enter a brief description like the one shown below and click on Save.

The new submaster level is added
PK 3529_08_07-ATLAS Version 1.2 User Manual

Assign
- Click on each checkbox beside an item to place the item in the submaster level you have selected at the left. The same access point can be part of only one submaster level by type.
When an access point is grayed out, that is because it is already part of one submaster level of the same type as the one selected at the left.
- Click on Save
PK 3529_08_07-ATLAS Version 1.2 User Manual

- After the submaster levels have been configured, and the configuration transferred to the M-Unit, program the locks and the new submaster level will be transferred to the appropriate locks.
Delete
- Select the submaster level you want to delete and click on the Delete button on the right. The following confirmation request appears.
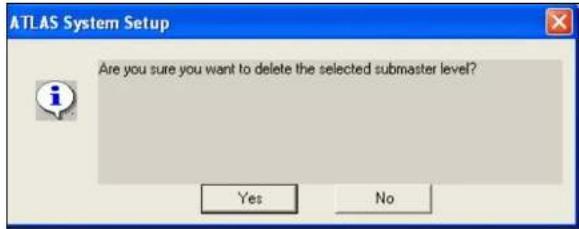
- Click on Yes and the level will be deleted. The rooms with that level programmed into their locks must now be re-programmed.
5.4 Flexible Timezones
PK 3529_08_07-ATLAS Version 1.2 User Manual
5.4.1 Overview
The RAC card reader does not use the Fixed Timezones that can be encoded on a Staff keycard. Instead, it has its own set of 8 Flexible Timezones Guest, Staff and Passage keycards can be assigned to one of the Flexible Timezones that are programmed into the card reader. These timezones are programmed in the memory of the card reader and not when encoding the keycards.
5.4.2 Intervals
Each Flexible Timezone consists of four intervals that can be individually selected. All keycards of the appropriate type (Guest, Staff or Passage) will be valid during the intervals in the assigned Flexible Timezones but are not valid (access denied) outside of those intervals.
5.4.3 Modify Flexible Timezones
You can modify which time intervals to program into the card reader from among the eight Flexible Timezones. The choice of the Flexible Timezones is made in the Access Points tab and this configuration is entered into the card reader when you program it. For example, if you program the card reader outside the pool door to accept Guest keycards only during the "Pool A" timezone (10:00 to 18:00) but Staff during both "Pool A" and "Pool B" (8:00 to 20:00) timezones, this means that Staff would have access for longer hours than guests, so they can clean the pool, etc.
5.4.4 Reset Flexible Timezones
PK 3529_08_07-ATLAS Version 1.2 User Manual
To reset all the flexible Timezone values to the factory default, click on the Reset button. You will see a confirmation request as follows:

All timezones are now reset to Always. Reprogram all the RAC 3.5 card readers to reflect the changed timezone values.
5.5 Fixed Timezones
5.5.1 Overview
There are six fixed timezones that can be used to limit staff access to any lock in the ATLAS system, except for the RAC card reader, which uses flexible timezones.
5.5.2 Intervals
Timezone 1 - 0 00:AM to 04:00 AM
Timezone 2 - 4:00 AM to 08:00 AM
Timezone 3 - 8 00 AM to 12:00 PM
Timezone 4 - 12:00 PM to 04:00 PM
Timezone 5 - 04 00 PM to 08:00 PM
Timezone 6 - 00:00 PM to 00:00 AM
5.5.3 Fixed Timezones on Staff Keycards
Each timezone may be assigned to all staff, to certain staff, or to no staff. Each Staff keycard may be encoded with 1 to 6 timezones. When a timezone is encoded on a keycard, the locks grant access during that certain timezone. If no timezones are encoded on a Staff keycard, the locks will grant access regardless of the time.
Timezone on Staff keycard
YES - (enabled - Timezone can be set to YES or NO)
If YES is selected, each timezone appears on the ATLAS Web application screen for Staff >Make Keycards and can be selected by clicking on the checkbox.
NO - (disabled, timezone is never assigned)
If NO is selected, the ATLAS Web application screen for Staff > Make Keycards will not show the timezone field.
AUTO - Timezone is to be encoded automatically on all staff keycards.
If Auto is selected, the ATLAS Web application will show the timezone in read-only mode (grayed-out).

5.5.4 Modify Fixed Timezones
You can modify the timezones only in terms of the description and whether they are Yes, No, or Auto as defined above. To modify the timezone, select each interval to modify, make your modifications, and then Save. You must
click on Save after each interval that you change. You will see the
message Successful - Modify Fixed Timezone : 20-24 at the bottom left of the screen each time you save. If you change the timezones to the following:
00-04-No
04-08 - Auto
08-12 - Yes
12-16 - Yes
16-20-No
20-24-No
Your Web application Timezones field will look like the following on the Web screen.
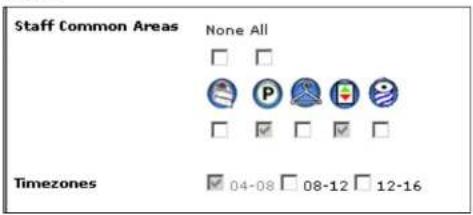
5.5.5 Resetting Fixed Timezones
To reset all the fixed Timezones for an area to default, click on the button. You will see a confirmation request as follows:

5.6 Keycard Attributes

- List of keycards
PK 3529_08_07-ATLAS Version 1.2 User Manual
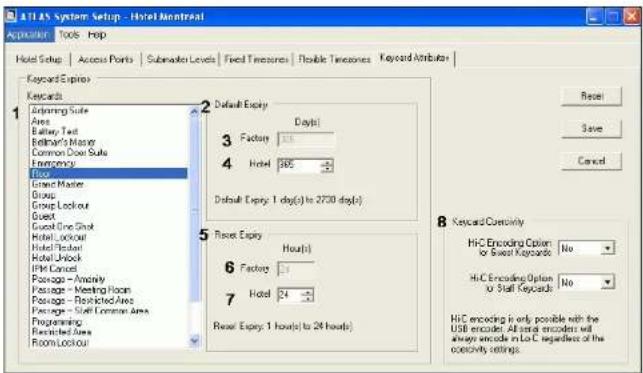
List of all keycards that have an expiry time automatically encoded when they are made.
2. Default Expiry
Provides the range you can select from – in the example above, you can select any number from 1 day to a maximum of 2370 days for the Floor Keycard expiry. Information is relative to the keycard selected at left and to the corresponding Reset keycard if there is one
3. Factory-set expiry date
Already on card when you receive it.
4. Hotel-set expiry date
Set by the Hotel Access Administrator when configuring the hotel.
5. Reset Expiry
Provides the range you can select from – in the example above, you can select any time from hour to a maximum of 24 hours for the Floor Reset Keycard expiry.
6. Factory Expiry
Each keycard has a factory-set default that can be changed. For example 24 hours for the Floor keycard.
7. Factory Default
Change the factory default or select the same number. The expiry you select here will automatically be entered on the Zone keycard each time one is encoded.
Resetting Keycard Expiry : Select a keycard and reset the default expiry by clicking on the Reset button at the right.
8. Keycard Coercivity
Select Yes, No or Auto for coercivity settings for Guest keycards and then for Staff keycards.
- YES - The option to encode Hi-C keycards will be offered on screen whenever you encode on the currently used Sankyo Dual (Hi or Lo-C) USB encoder.
| Coercivity | □ High |
- NO - The option to encode Hi-C keycards will NOT be available. For example, if you only have Lo-C keycards available, you could use this setting even if you have Dual encoders.
- AUTO - The coercivity option is set automatically according to the type of currently used Sankyo encoder you have. Auto = Hi-C (for Dual USB) Auto = Lo-C (for Lo-C Serial), so the choice will appear greyed-out on screen.
| Coercivity | High |
The settings must be selected in the System Setup according to the encoders you have. The currently used Sankyo Lo-C serial encoder cannot produce Hi-C cards even if you select that setting here.
Note: When Reset keycards are made, they are always considered as Staff keycards, even though a GSA makes the card at the front desk where they normally only issue only Guest keycards. The Reset keycard is made on the Make Guest Keycard page - see Manage Guest Keycards - but will encode as Hi-C if the coercivity option is set to AUTO and you have the Dual USB encoder. If the coercivity option is set to YES, the option of Hi-C will be offered on screen and the employee encoding the card must select it for Reset keycards.
5.7 Log out of System Setup
To log out of the System Setup, select Exit under the Application menu.
PK 3529_08_07-ATLAS Version 1.2 User Manual
5.8 ATLAS Web Functions
5.8.1 Change Password
All levels of operator in the ATLAS web-based application have the right to change their password. it is a good idea to change the password at certain intervals, or immediately if you suspect an unauthorized person of having seen your password.
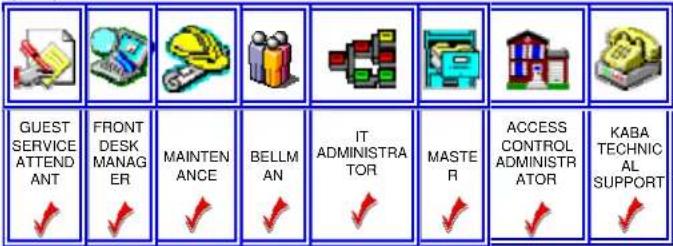
How do I change my password?
- From the main menu, select Options, then Change Password.
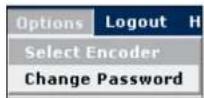
PK 3529_08_07-ATLAS Version 1.2 User Manual
The following screen appears.

- Enter name and passwords as required and
Save
The following confirmation screen appears.
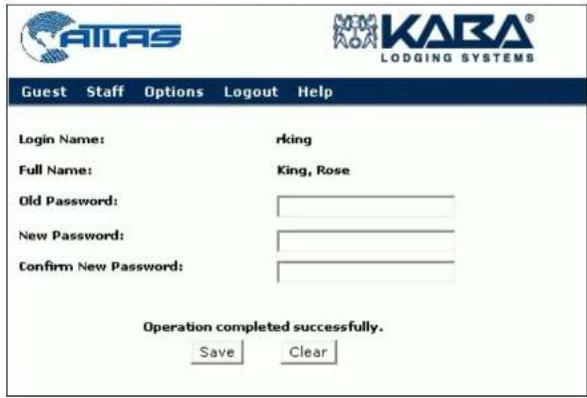
Your password has been changed to the new one. If you ever forget your password, just ask your supervisor to do a Password Reset for you so you can create another one.
5.8.2 Web-based User Application
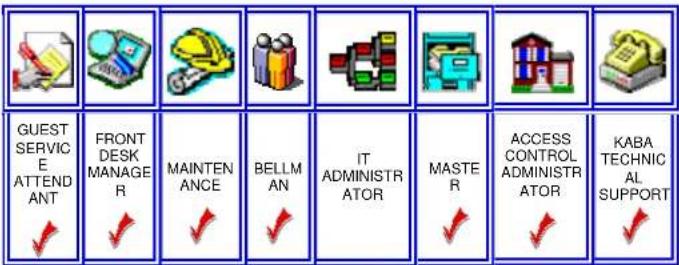
All levels of operator except IT Admin can perform all the Web-based procedures, including making Types of Staff Keycards.
PK 3529_08_07-ATLAS Version 1.2 User Manual
Chapter 6 Making Keycards
6.1 Web Client
6.1.1 Internet Security Settings for Web
Certain settings in Internet Explorer may interfere with the user's ability to create a configuration file or even access some Web pages.
The following are the settings that may cause problems. Please ensure that the settings for all ATLAS Web client workstations are correct before they attempt to log on to the Web application following Web-based Application -Log on and Off.
- Click on the Internet Explorer icon to open the Web application
- Adjust the following settings from the Tools menu.
- If the Tools > Internet Options > Security > Default Level = High: Impossible to access the Web pages for ATLAS. Please change this setting to Medium as shown below.
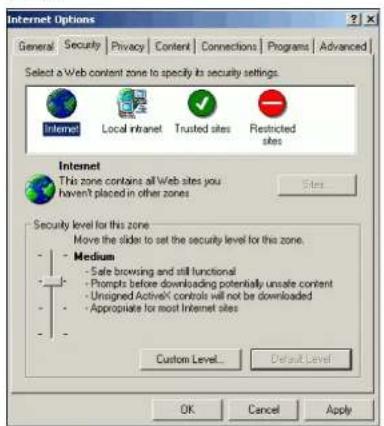
PK 3529_08_07-ATLAS Version 1.2 User Manual
- Tools > Internet Options > Security > Custom Level > File Download = Disable: Impossible to transfer a configuration file. Please change to Enable.

- Tools > Internet Options > Security > Custom Level > Submit non-encrypted form data = Disable: Impossible to access the Web pages for ATLAS. Please change to Enable.
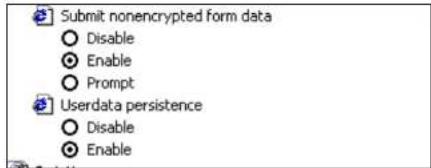
- Tools > Internet Options > Security > Custom Level > Logon = Anonymous Logon:
Impossible for any user to access the Web pages for ATLAS. Change to Prompt for user name and password.

- Tools > Internet Options > Privacy > Default Level > High: Impossible to access the Web pages for ATLAS. Please change to Medium as shown below.

- Tools > Internet Options > Privacy > Default Level > Block All Cookies: Impossible to access Web pages. Please set to Medium as shown above.
PK 3529_08_07-ATLAS Version 1.2 User Manual
- Tools > Internet Options > Advanced > Multimedia > Show Pictures = No: no images are shown. Please select "Show pictures" by checking the box as shown below.

- If you have changed your internet settings to match the ones shown above, continue to the next procedure to log on to the ATLAS Web client application.
Important: If Full Screen mode is selected and the ATLAS user has "Popup Blocker" selected on Internet Explorer, the user will not be able to access the ATLAS Web page since it will not be able to pop up on the screen. Ensure that each workstation has the "Popups Allowed" setting enabled on Internet Explorer.
6.1.2 Web-based Application - Log on and Off
How do I Log On and Off the ATLAS User Application?
- After installation of the ATLAS system, click on the ATLAS Web application shortcut on your desktop.
- The following screen appears.

- Log in with assigned login name and password.
- Click on Login or click Enter on keyboard.
-
The ATLAS default page for the operator level that you have logged in as appears.
-
Depending on the Operator Level, different menus will appear. Each operator only sees

-
The screen above shows the screen viewed by the Operator Level 1 Guest Service Attendant.
-
Select Logout from any window you are in, whenever you want to log out. A confirmation request will ask if you are sure you want to log out.
-
Click on Yes, and the Login screen appears again.

PK 3529_08_07-ATLAS Version 1.2 User Manual
ATLAS Timeouts
The time-out is the period of time between operations during which the ATLAS Web application remains active, before an automatic logout of the current operator, showing the message "You have been logged out." Once timed out, an Operator login and password must be entered again to access any functions of ATLAS. The default time-out is set during the ATLAS sever installation. If you require any change in the time-out, please contact ATLAS Technical Support.
6.1.3 Web-based Application - Set Computer Name
How do I Set my Computer Name in the Web Application?
- If you log in to your level of the ATLAS System and there is no computer shown on the login screen, enter your login name, password, and computer name as shown below.

PK 3529_08_07-ATLAS Version 1.2 User Manual

- Click on Login. This brings up the default page for your level, in the example, the Guest >
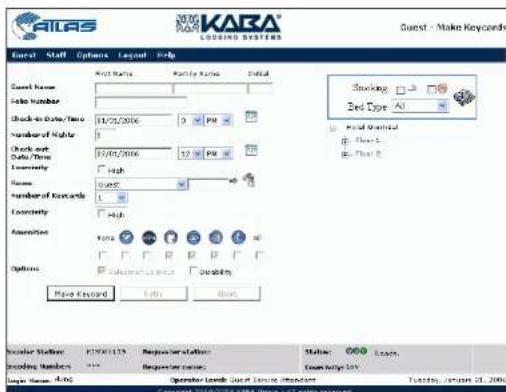
- Log out.
PK 3529_08_07-ATLAS Version 1.2 User Manual
- The next time you log in, you will see the Login screen with your computer name (the computer name you entered) and Set Computer Name button for a time when you might want to change the computer.

PK 3529_08_07-ATLAS Version 1.2 User Manual
6.1.4 Logging on and off ATLAS Web Application
How do I Log on and off the ATLAS Web User Application?
- After installation of the ATLAS system, click on the ATLAS Web application shortcut on your desktop. The following screen appears.

- Login with assigned login name and password.
- Click on Login or click Enter on keyboard. The ATLAS default page for the operator level that you have logged in as appears.
-
Depending on the Operator Level, different menus will appear. Each operator only sees the actions that he is entitled to perform at his/her operator level.
-
The screen below shows the screen viewed by the Operator Level 1 Guest Service Attendant.

-
Select Logout from any window you are in, whenever you want to log out. A confirmation request will ask if you are sure you want to log out.
-
Click on Yes, and the Login screen appears again.
PK 3529_08_07-ATLAS Version 1.2 User Manual
6.1.5 Set Computer Name
- If you log in to the ATLAS System and there is no computer shown on the login screen, enter your Operator Name, Password, and Computer name as shown below.

- Click on Login. This brings up the Guest, Make Keycard page.

- Now, Log out. See Logging on and off the ATLAS Web User Application
PK 3529_08_07-ATLAS Version 1.2 User Manual
- Log in again and you will see the Login screen with your computer name (the computer name you entered) and a Set Computer Name button for a time in the future when you might want to change the computer name.
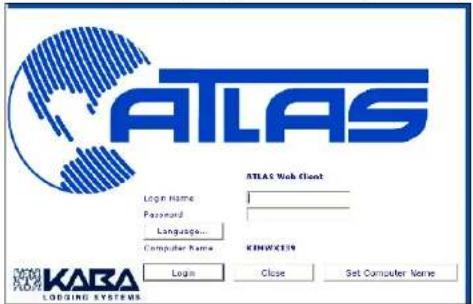
6.2 Encoder - Select and Clean
How do I Select and Clean the Encoder?
- On the main menu, click on Options.

PK 3529_08_07-ATLAS Version 1.2 User Manual
The following screen appears:

- From the list of encoders available in your network, select the one you want your computer to use as a default. This will be the encoder that will always make keycards at your workstation unless you return to this page to change it.
- When you select the encoder, check at the bottom of the list to make sure that this encoder is available for you to use. If it is not, select a different one. The following illustration shows an encoder that has been selected but is not available. The left-hand LED is red and the message is "Not Active".

PK 3529_08_07-ATLAS Version 1.2 User Manual
- When you have selected an active encoder, (the right hand LED is green and the message is "Ready") click on Apply Selection.

The encoder is now set up with your PC to encode keycards.
Clean Encoder
If you see the message "Clean encoder" on the right of the
status line, it means that you should clean your encoder right now or risk incorrect encoding of keycards. If keycards are badly encoded they will not work in the locks.
- To clean the encoder, take one Cleaning Card pouch from the box supplied by KABA with ATLAS.
- Remove card from pouch.
- Click on the button "Clean Encoder" and insert the cleaning keycard into the encoder.
- The encoder itself will pull the card in and push it out five or six times.
- After the encoder stops pulling in and pushing out the card, remove it and wait a few seconds to allow the cleaning card to dry.
- Re-insert it into the encoder one more time in case any stubborn dirt remains.
- Discard the used cleaning card.
- The "clean encoder" icon will disappear from the status line.

Caution: Flammable. Contains 99% isopropyl alcohol
6.2.1 Cancel an Encoder
Refer to Network & Hardware Setup, PK3065 02/06
6.3 Operator Types
| GUEST SERVICE ATTEN DANT | FRONT DESK MANAGE R | MAINT EN ANCE | BELL MAN | IT ADMIN | MASTER | ACCESS CONTROL ADMIN | KABA TECHNICAL SUPPO RT |
6.3.1 Guest Service Attendant
The GSA works at the front desk and deals primarily with registering and making Guest keycards and Reset keycards. Grants access to screens of the GSA level tasks.
PK 3529_08_07-ATLAS Version 1.2 User Manual
GSA Functions Available
| Guest > Make Keycards | Guest > Verify Keycards | Guest > Manage Keycards | Staff > Make Keycards | Staff > Verify Keycards | Reports | Admin | Encoders |
| Make all types of Guest keycards | Verify all types of Guest keycards | Make Additional, Replacement, Reset, and Extended Stay Guest keycards | Make Battery Test keycards | Verify Staff keycards that GSA can make (Battery Test or Guest Reset keycards) | No | No | Change Encoder Clean Encoder |
6.3.2 Front Desk Manager
The FDM supervises the Front Desk activities. Grants access to all the same functions as the GSA. Additionally, under Staff > Make Keycard, this level grants rights to Make Passage and Reset Passage keycards for Meeting Rooms and amenities as well as Battery Test Keycards. In addition, staff access to meeting rooms is also available by using the Meeting Room and Reset Meeting keycards which do not provide access to amenities and do not activate Passage. Under Reports, accesses System activities Report for Keycard Encoding and Keycard Verification operation types.
PK 3529_08_07-ATLAS Version 1.2 User Manual
FDM Functions Available
| Guest > Make Keycards | Guest > Verify Keycards | Guest > Manage Keycards | Staff > Make Keycards | Staff > Verify Keycards | Reports | Admin Encoders | |
| Make all types of Guest keycards | Verify all types of Guest keycards | Make Additional, Replacement, Reset, and Extended Stay Guest keycards | Make Passage and Reset Passage keycards for Meeting Rooms and Amenities. Make Battery Test and Meeting Room keycards. | Verify Passage and Reset Passage keycards for Meeting Rooms and Amenities. Verify Battery Test and Meeting Room keycards. | System activities: Report for Keycard encoding and Keycard verifying operation types | No | Change Encoder Clean Encoder |
6.3.3 Maintenance / Engineering
The Maintenance and Engineering person in the hotel is responsible mainly for programming and auditing locks. This Operator level grants access to all the functions related to programming/auditing locks, including the creation of Initialization and Programming keycards.
PK 3529_08_07-ATLAS Version 1.2 User Manual
Maintenance/Engineering Functions Available
| Guest > Make Keycards | Guest > Verify Keycards | Guest > Manage Keycards | Staff > Make Keycards | Staff > Verify Keycards | Reports | Admin | Encoders |
| No | No | Make Guest keycards | MakeRestLock, Battery Test, Programming and Initialization keycards | Verify Test Lock, Battery Test, Programming and Initialization keycards | View System activities Reports for Lock Operation and Lock Audit Reports | Create and Transfer Lock Flies and audit files. | Change Encoder Clean Encoder |
6.3.4 Bellman
The Bellman Operator level allows only the creation of the Bellman Master access keycard. This keycard permits Bellman access to all rooms (except Restricted Areas, Common Areas and Locked Out rooms) on his particular shift. Under the Staff menu grants access only to Make and Verify keycard menu.
Bellman Functions Available
| Guest > Make Keycards | Guest > Verify Keycards | Guest > Manage Keycards | Staff > Make Keycards | Staff > Verify Keycards | Reports | Admin Encoders | |
| No | No | No | Make only Bellman's Master keycards | Verify Bellman's Master keycards | No | No | Change Encoder Clean Encoder |
PK 3529_08_07-ATLAS Version 1.2 User Manual
6.3.5 Administrator
Refer to Network & Hardware Setup, PK3065 02/06.
Grants access to all functions of ATLAS except making and verifying Room and Hotel Lockout, Unlock keycards and Hotel Restart keycard.
Master Functions Available
| Guest > Make Keycards | Guest > Verify Keycards | Guest > Manage Keycards | Staff > Make Keycards | Staff > Verify Keycards | Reports | Admin | Encoders |
| Make all types of Guest Keycards | Verify all types of Guest Keycards | Make additional, Replacement, reset and extended stay Guest keycards | All keycards except Room Lockout/Unlock, Hotel Lockout/Unlock and Hotel Restart.Assign and unassign keycards | Verify all keycards except Room Lockout/Unlock Hotel Lockout/Unlock and Hotel Restart. | Create and view System activities Reports for keycard encoding keycard verification and Lock Operations | Create and Transfer lock files and audit files. | Change Encoder Clean Encoder |
6.3.6 Access Control Administrator
Grants access to all functions of ATLAS. This level grants you COMPLETE SYSTEM RIGHTS. Intended for the highest level of user System Administrator/Hotel Configuration.
Access Control Administrator Functions Available
| Guest > Make Keycards | Guest > Verify Keycards | Guest > Manage Keycards | Staff > Make Keycards | Staff > Verify Keycards | Reports | Admin Encoders | |
| Make all types of Guest Keycards | Verify all types of Guest Keycards | Make additional, Replacement , Reset and extended stay Guest keycards | Make all keycard types | Verify all keycard types.Assign/Unassign keycards. | All reports | Create and transfer lock and Audit flies | Change EncoderClean Encoder |
PK 3529_08_07-ATLAS Version 1.2 User Manual
6.3.7 KABA Technical Support
This level is only available to KABA technical support personnel for troubleshooting advanced configuration and application issues.
6.4 Entering Guest Keycard Information

6.4.1 Rooms
Rooms are selected from a tree structure which expands from the building to the floor to the individual room. Click on the plus sign beside each level to see the next level open up. Rooms are selected from the list on screen by clicking on the desired room or rooms or by entering the room number in the field in the left-hand panel.
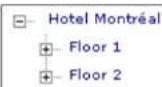
PK 3529_08_07-ATLAS Version 1.2 User Manual
6.4.2 Check-in Date and Time
The check-in date/time is set to a default but you can change it if you wish. Enter start date of stay if different from current date. Click on the calendar icon. The calendar opens.

Click on the date/time for the check-in (Feb 3 in the example). Select a start date of no more than ten days in the future from current date. The field for Start date becomes filled in.

6.4.3 Check-out Date and Time
There are two ways to select Check-out date/time.
- Enter the number of nights in the next field. Check-out time is adjusted according to the number of nights you selected.
OR
- Click on the calendar icon next to the Check-out field. When the calendar icon pops up, click on the day for the end of the stay. The example below shows 7 nights, therefore from Feb 3 to Feb 10.

The check-out date/time is set to a default but you can change it if you wish.
6.4.4 Room Type
Select the required number of keycards - from 1 to 127.

6.4.5 Coercivity
You will see the following field, if you have a Dual (USB) encoder and if Hi-C enable has been set to Yes in System Setup, Keycard Attributes. Leave the box unchecked for Guest keycards, except when making a Reset keycard. In the case of a Reset, check this box for Hi-C. Hi-C is also used for all Staff keycards and is recommended for Battery Test keycards also.

6.4.6 Guest Keycard Options
See Hotel Setup for definitions of Guest keycard options.

See Hotel Setup and Glossary for definitions of the fields below.
6.4.7 Folio Number
PK 3529_08_07-ATLAS Version 1.2 User Manual
| Folio Number | 12234567 |
Applies to Keycards: Guest, Adjoining Suite and Common Door Suite.
See List of Keycards for explanation and definition.
6.4.8 Disability
Applies to Guest Keycards only: Available on Generation E-760 locks only.
6.4.9 Salesman Lockout
Applies to keycards: Guest, Adjoining Suite and Common Door Suite.
Amenities
See Electronic Lock Profiles for description. When making a Guest keycard, select All, None or certain amenities which are selectable and are requested by the guest. Amenities represented by grayed-out icons are free and are encoded automatically on the keycard.

6.5 Make a Guest Keycards
How do I Make Guest Keycards?
All the information in the fields in Make Guest Keycards must be filled in. Guest keycards are usually encoded as Lo-C.
- Verify that the name of the encoder is shown.
- Ensure that the status bar reads "Ready".
| Encoder Station: | KIMWY139 | Requester station: | Status: | Ready: |
| Encoding Number: | *** | Requester name: | Toercivity: | Low |
3. Click on the Make Keycard button
Make Keycard
- After the encoder gives two short beeps and/or the Ready LED flashes green, insert a blank keycard into the slot with the magnetic stripe on the right-hand side of the card and facing downwards. The status bar will show the cartoon keycard going into the slot at the bottom right.
The Encoder will "grab" the card when it is inserted and push it out when the encoding is finished.

natural_image
Black Kawasaki USB flash drive with control buttons (no visible text or symbols on body)- During the encoding, the Status bar will show a yellow light and say "Busy".
| Encoder Station: | KINWAL25 | Requester stations: | KINWAL35 | Status: | ### | sury. |
| Encoding Number: | 1 OF 1 | Requester name: | FANG | Toorivity: | Low | |
| Login Name: | KING | Operator Level: Guest Service Attendant | Friday, January 20, 2016 | |||
Note: Click the Abort button at the bottom of the screen during encoding, if you have made a mistake or if the Guest decides not to take the room, to take another one or to change some amenities.
- When the card is encoded, the status changes to "Ready" and the cartoon disappears.
| Encoder Station: | KINWX139 | Requester station: | Status: | Ready, |
| Encoding Number: | *** | Requester name: | Coercivity: | Low |
Keycards must be swiped in the locks for the rooms or suites as soon as possible to prevent any unauthorized entry.
Other Keycard Types
If you select one-shot for a guest room, enter the name of the room that the person wants a one-shot access to. The following screen will appear. "Room" is the only field selectable for a one-shot card
If you select a type of keycard other than "Guest", different fields will appear for you to fill in. Some examples are shown below.. Click on Make Keycard to encode a one-shot keycard that will grant access to the selected room only once.
![KARAS LOBSING SYSTEMS Guest - Make Keycards Guest Staff Options Logout Help Guest Name: Full Folio Number: Shock-in State/Time: 1/1/2000 Number of Nights: Shock-out Date/Time: 1/1/2000 Room Number of Keycards: Guest One Shot 100 Opacity: High ScreenSize: High Options: Make Keycard Entry Alert Smoking Red Type All Hotel Montréal Floor 1 105 [s Queen] 104 [s Queen] 105 [s Queen] 106 [s Queen] 107 [s Queen] Floor 2 202 [s Queen] 204 [s Queen] 205 [s Ring] 206 [s Ring] 207 [s Ring]](/content/2026/05/978683/images/7c31114ccc3d4f12bf7fd4f57b1493b47244ee6f0a76bb0986e0008ce2f5e301.jpg)
Reminder
A One-shot keycard does not give access to amenities.
If you select Common Door Suite you will see only that type of suite listed, giving the common door and inner doors of each one. Click on the Suite and select the inner doors.
![Smoking Bed Type All Hotel Montréal Floor 1 100 [2 Single] 101 [1 Queen] 102 [2 Queen] Floor 2 200 [None] 201 [1 Queen] 202 [2 Queen]](/content/2026/05/978683/images/0a64f4e707bc9aca406745cbace49c86e398b3cb34edc31cb569f34e071d7d9f.jpg)
If you select Adjoining Suite you will see only guest rooms on the room tree. You must then select at least two of these rooms.
![Hotel Montréal Floor 1 103 [2 Queen] 104 [2 Queen] 105 [2 Queen] 106 [1 Queen] 107 [1 Queen] Floor 2 203 [1 Queen] 204 [1 Queen] 205 [1 King] 206 [1 King] 207 [1 King]](/content/2026/05/978683/images/44e01c9ccfcdd947ef9cb4b2d4ac774953fdcfca7ca39a3872eae687e36fbadb.jpg)
6.5.1 Encoder Status Lines
The first line shows the information about the encoder – workstation, status etc. If the encoder is ready, it shows Ready. If there is a problem it shows "Please check your encoder" and the Make Keycard button is grayed out. The second line shows the status of the encoding. The encoder status changes from Ready to Busy after you insert a card and the encoding status changes from "Ready" to "In Progress" to "Completed" or to "Completed with errors" after the card is made. If encoding multiple cards, the encoding status line shows "Encoding No.: 1 of 4, 2 of 4", etc., then "Completed" when all four cards are complete. If there is a problem during encoding, such as the card is inserted backwards or upside down, or it is bent or scratched, the encoder will show "Completed with Errors" but a message like the following will appear on screen. "Encoding failed, press Retry or Abort".

PK 3529_08_07-ATLAS Version 1.2 User Manual
6.5.2 Table of Encoder Status Line Messages
| Line 1 | Encoder Station | Requester Station | Status | Lights |
| Number visible | always only during encoding) | Ready | One green light illuminated. | |
| Restart Service | One red light illuminated. | |||
| Busy or Restarting service | One yellow light illuminated | |||
| Completed | One green light illuminated. | |||
| One red light illuminated, message to retry or abort appears on screen above Status Line | ||||
| Line 2 | Encoding Number | Requester Name | Coercivity | |
PK 3529_08_07-ATLAS Version 1.2 User Manual
| Visible only formultiple cards.Example 1 of 4, 2of 4,3 of 4...... | Visible only duringencoding. Used if morethan one user is on thesame encoder. | High or Low |
| Line 3 LogIn Namerking | Operator LevelGuest ServiceAttendant | Date - Day, Month Date, YearTues., Jan 31, 2006 |
6.6 Manage Guest Keycards
You may need to encode more that just regular guest keycards for guests registering for a stay. There are four cases where you may need to encode other keycards for the guest in addition to their basic guest room card.
• Additional - for another person joining the guest in their room or suite
- Replacement - for a lost or stolen card
- Modified Stay - new keycard for an existing guest who wants to extend his stay beyond what is encoded on his current card..
- Reset keycard - to lock out the previous guest keycard until a new keycard is made, if, for example the guest has lost his/her keycard while away from the hotel and cannot come to the desk to have a new one (replacement) made
Making Additional Guest Keycards
Additional Guest keycards are made by going to the Guest - Manage Keycard page. Additional cards are encoded with all the room information of an already-registered guest.
Note: The Additional keycard is a duplicate of the existing keycards for the room/suite, so it will not invalidate the other keycards. The three other types
are all new, so they will invalidate any previous keycards issued for that room/suite.
Making Replacement Guest Keycards
Replacement keycards are made if the guest has lost their keycard or it has been stolen.
Making Modified Stay Guest Keycards
Modified Stay keycards are made when a guest wants to leave earlier or stay longer than the check-out date encoded on his keycard. To save time, go to the Manage Keycards page and make a Modified Stay keycard. As soon as you select that option, ATLAS returns you to the Guest - Make Keycard screen but with the information already entered. You just need to change the date without having to make a new keycard and re-enter the name, etc.
Making Reset Guest Keycards
Reset Guest keycards will cancel guest keycards for that guest room when they are swiped in the lock. They are also used to update the timestamp without giving access to the room, providing another way to instantly cancel all previous keycards. You could do this if guests were away but phoned and reported their keycard stolen. Create a Reset keycard and use it in the lock so that nobody else can get into the room, then issue the guests a replacement keycard when they get back. See procedure on the following page.
How do I Make Additional, Replacement, Modified Stay or Reset Keycards?
- Select Manage Keycards from Guest menu.
PK 3529_08_07-ATLAS Version 1.2 User Manual

The following screen appears.
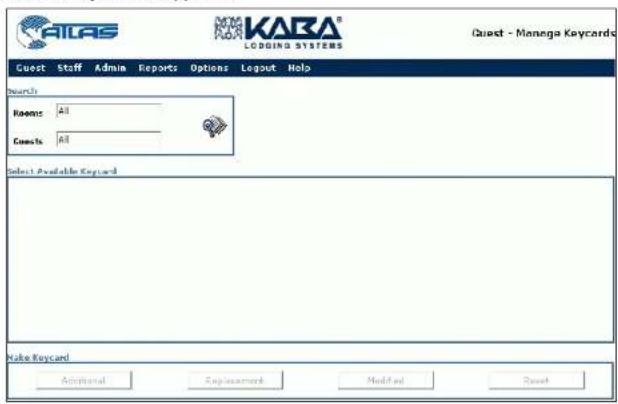
- Click on the Search button and the following screen appears.
PK 3529_08_07-ATLAS Version 1.2 User Manual

- To make one of any of the four types of extra keycards for a Guest Room, first select the room by clicking on Select. (room 106 in the example). Guest information appears as in the screen below. The room reservation period is shown.

-
Select the room or rooms for which you want to make another keycard by clicking on Select.
-
Click on Additional, Replacement, Reset or Modified Stay.
- The Guest > Make Keycard screen appears. At the top right of the screen, you will see the type of keycard you are making.

- Some options are selectable depending on the type of keycard you want to make. See table below.
Fields that can be modified on each keycard type
| Additional | Replacement | Modified | Stay |
| Number of keycards, Amenities and Options | Number of keycards All* | Number of keycards |
*except name, check-in date/time, room and folio number.
Note: Because the room cannot be changed, you can only make an Modified Stay keycard if that particular room is free for the time period that the guest wants. If it is not free and he/she must change rooms, make a new keycard.
- Click on Make Keycard.

Reminder
- If you are dealing with a common door or Adjoining Suite like the one shown below, usually all the checkboxes are selected.
- If you de-select one or more suite doors, you can only make Reset keycards for the selected doors. When making the other keycards, you want the guest to have access to all the same rooms for which the original keycards were made, but may want to invalidate (reset) only one or several of the doors in the suite.
- Only the Reset button will be activated.

Note: If you have a Dual USB encoder and you encode a Reset keycard, the card will be encoded as a Hi-C keycard and not Lo-C like all the other Guest keycards.
6.7 Verify Guest Keycards
PK 3529_08_07-ATLAS Version 1.2 User Manual
How do I Verify Guest Keycards?
- Select Verify Keycards from Guest Menu.
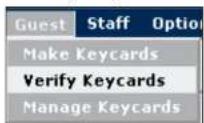
The following screen appears.
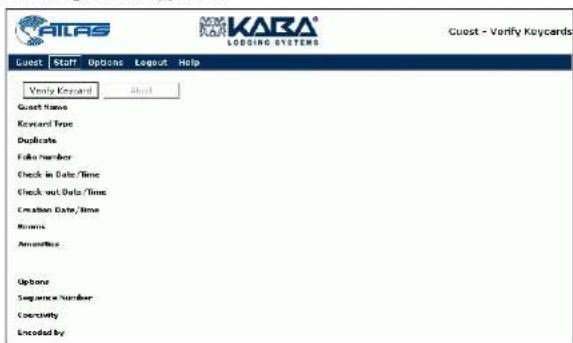
- Click on Verify Keycard and insert keycard into encoder. The information on the keycard should appear at left, as shown in the screen below.
Note: You cannot read ILCO encoded keycards in the Verify Keycard function if the encoder is configured to read/encode THRIFT, nor can you read THRIFT encoded keycards if the encoder is configured to read/encode ILCO. You will receive an error message.
PK 3529_08_07-ATLAS Version 1.2 User Manual
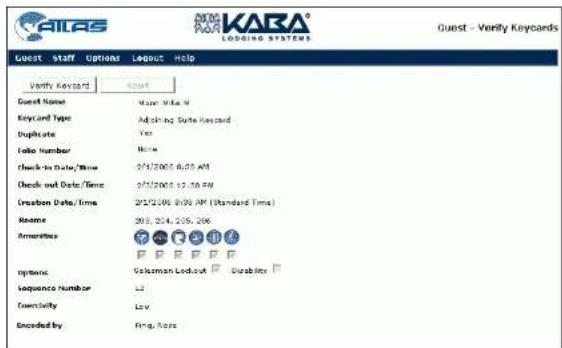
Now you know who owns the keycard and you can read the other information encoded.
- Continue to insert more keycards if there are others that need to be verified. Remember to click on the Verify button each time.
√ Reminder
- After you have verified the keycard, never leave this information sitting on the screen where unauthorized people could see it; click on the Guest > Make Keycard menu again to return to the main screen.
■ Always destroy discarded keycards (bent or scratched) to prevent unauthorized use.
6.8 Types of Staff Keycards
For definitions of types of Staff keycards, see Submaster Levels. Each lock is programmed with the access levels that apply to the specific door it controls. The lock accepts entry keycards if their date and time stamp is valid, if they have not expired, and if their Room, Submaster or Master level address matches the addresses programmed in the lock.
PK 3529_08_07-ATLAS Version 1.2 User Manual
The Master level address is the same for all locks, so that it gives access to all doors throughout the property. The security of the Master level is provided by controlling the encoding and distribution of the Master keycards, and by the presence of the audit trail.
The Guest and Restricted Area level addresses (known as fixed addresses) can only be changed by programming the lock using the ATLAS system.
Staff Keycards
Staff and Special keycards should be Hi-C as they need to be more durable.
6.8.1 Submaster Level Keycards
Section, Floor, Group, Zone, Area
Opens doors with the appropriate Submaster level and address (e.g. Zone 3, Group 2, etc.). The Submaster levels (Section, Floor, Group, Zone and Area) are used for access by staff (office staff, housekeepers and housekeeper managers, maintenance workers, laundry, room service, etc.) Rooms to which the same staff member or team of staff members require access should be keyed alike.
A room cannot be part of two of the same type of submaster levels but it can be part of two different types. For example, Room 100 can be part of Area 1, Section 2 and Zone 4 but it cannot be part of Area 1 and Area 2 or Zone 3 and Zone 4.
6.8.2 Master Level Keycards
Grand Master
Opens every room on the property, except for Restricted Areas or rooms that have been locked out using the deadbolt or privacy lock, Salesman's Lockout, Room Lockout or Hotel Lockout. The Grand Master keycard opens all Common Area doors, but may be restricted to specific Timezones. Use of the Grand Master keycard should be tightly restricted since it can open any room in the property and is usually set for a relatively long expiry.
Note: The Grand Master is always a duplicate keycard, so that it cannot be cancelled unintentionally by a more recently encoded keycard if Grand Master
PK 3529_08_07-ATLAS Version 1.2 User Manual
keycards are issued to more than one employee. If it is necessary to cancel this keycard, use a Grand Master Reset keycard in every lock in the facility before issuing replacements. If a valid Grand Master keycard is lost, cancel it immediately.
Bellman Master
Opens every guest room on the property, except for rooms that have been locked out using the deadbolt or privacy lock, the Salesman's Lockout, a Room Lockout keycard or a Hotel Lockout keycard. The Bellman's Master keycard operates at the room and suite levels only and is not valid for common areas. There are no Timezones with this keycard, because the expiry should be set to the length of a shift (or less) in the Expiry Menu.
Note: The Bellman's Master is always a duplicate keycard, so that it cannot be cancelled unintentionally by a more recently encoded keycard if more than one Bellman is on duty. If it is necessary to cancel this keycard, use a Bellman's Reset keycard in every lock in the facility before issuing replacements.
6.8.3 Emergency Keycards
The Emergency keycard can open any door in any situation, provided that the lock is working properly. The Emergency keycard overrides the deadbolt or Privacy lock, as well as the Room, Hotel, and Salesman Lockouts. Use of the Emergency keycard is usually restricted to the security staff and is strictly controlled because a lost keycard can open any room in the property. The Emergency keycard is always a duplicate keycard. It does not invalidate previous issued keycards. If an Emergency keycard is lost, it is absolutely necessary to issue an Emergency Reset keycard and insert this keycard in all locks. Replacement Emergency keycards may then be issued.
6.8.4 Reset Keycards
Reset keycards have two purposes: (i) to invalidate a circulating keycard for a specific access level, and/or (ii) to change the variable addresses Section/Group/Floor/Zone/Area Submaster levels) in a lock. Each Entry keycard level has a corresponding Reset keycard that cancels any keycard for the specified level encoded prior to the Reset keycard. A circulating Passage keycard can also be cancelled by its corresponding Reset keycard. A Reset keycard can be used in one or more locks, depending on its function. New
PK 3529_08_07-ATLAS Version 1.2 User Manual
keycards must be made after the Reset keycard is encoded in order for them to work in the locks that have been reset.
Note: All staff keycards should be Hi-C and Guest Keycards Lo-C. However, a Reset keycard for a guest room is considered like a Staff keycard, so if it is possible, select Hi-C as the coercivity option when making a Guest Reset card.
| Coercivity | ✓ High |
The Submaster (Section, Floor, Group, Zone and Area) levels are variable addresses, which can be changed by inserting the corresponding Reset keycard in the lock. Since the Reset keycard also updates the time stamp table in the lock, it cancels the previous Guest or Submaster (Section/Floor/Group/Zone/Area) level keycard.
6.8.5 Lockout / Unlock Keycards
Lockout keycards are used in emergencies to protect property or evidence or to prevent unauthorized entry into closed parts of the property
| Lockout Level | Rooms Affected | Access Levels Locked Out | Lockout Removal |
| Room | Specific room | All except Emergency Room | Room Unlock or Hotel Unlock keycard |
| Hotel | Any room All except Emergenc y Hotel Unlock keycard | ||
| Group | Rooms in specific Group | Guest Only | New Guest keycard |
| Salesman | Specific Guest room | All except Emergency and Guest | Guest keycard or whenever the guest keycard that was used to set the lockout expires. |
Hotel Lockout
Locks out all but the Emergency keycard. The Hotel Lockout keycard is valid throughout the property. The locks remain locked-out until unlocked by a Hotel Unlock keycard. Minimum Operator level to create the card: Grand Master.
Hotel Unlock
Unlocks any room locked-out by the Hotel Lockout or Room Lockout keycard. Minimum Operator Level to create the card: Grand Master.
Room Lockout
Locks out all but the Emergency keycard. The Room Lockout keycard is valid for a specified room. The lock remains locked-out until unlocked by a Room or Hotel Unlock keycard. Minimum Operator Level to create the card - Grand Master.
Room Unlock
Unlocks a specified room locked-out by a Room Lockout keycard. Minimum Operator Level to create the card: Grand Master.]
Group Lockout
Invalidates the previous Guest level keycard and prevents guests from returning to rooms from which they have checked out. This keycard is made for the Group address assigned to the lock and is intended to be used by the housekeeper supervisor after inspecting the room. For this reason, Group addresses are usually assigned according to the duties of each housekeeper supervisor.
Note: The Group Lockout keycard does not work in the common door of a Common Door Suite. The Group Lockout keycard will not invalidate Guest keycards issued up to 45 minutes prior to its use in the lock.
Passage Keycard Types
Passage Keycard puts the lock in Passage mode, in which a keycard is no longer required to open the door. Passage mode is removed by re-inserting the Passage keycard. Typically, rooms such as Common Areas/Amenities and Meeting rooms are appropriate for the use of Passage mode. Rented Guest rooms should not be put in Passage mode.
PK 3529_08_07-ATLAS Version 1.2 User Manual
Meeting Room Keycard Types
Meeting Room Keycard allows staff access to meeting rooms without putting the lock in Passage mode and does not grant access to amenities. Meeting Room keycard access is removed by inserting a Meeting Room Reset keycard.
6.8.6 Special Keycards
Battery Test
This keycard prompts a low battery indicator in locks where the battery is below acceptable voltage. If the red and green lights flash together when the Battery Test keycard is inserted in the lock, the battery is low. This should occur from 2 to 4 weeks prior to battery failure. There is a single green flash if the battery is still good. The Battery Test keycard does not give access to the door. Any Submaster or Master keycard will also prompt the low battery indicator just before giving access to the door, and the same sequence of indicator lights will be displayed (i.e. a low battery is indicated by red and green lights flashing together). Usually, you can determine the battery voltage from the lock audit.
Programming
Prepares the lock for communication with the M-Unit. If the lock has never been initialized or following a battery replacement, the Initialization keycard must be inserted prior to the Programming keycard. If communication with the lock does not begin within 30 seconds, the lock will return to the normal state with no changes to its programming.
Hotel Restart
Used to set or change the Hotel Code when installing the system or if a severe breach of security has occurred. The property should assign its own external Hotel Code and make new Grand Master keycards when the system is first installed, or if security is compromised. This procedure for choosing the new code and transferring it to all the locks and keycards is called a Hotel Restart.
PK 3529_08_07-ATLAS Version 1.2 User Manual
Once changed, the external Hotel Code is classified information; only select staff members should know the code. Typically, GMA cardholders should know what the code is. Because the procedure is somewhat complex and involves reprogramming all the locks and keycards, it is recommended that the Hotel Restart be performed at night. Write down the external Hotel Code and keep it in a secure place! The Hotel Restart procedure is divided into several tasks:
• Selecting a new Hotel Code
• Making a Hotel Restart keycard.
- Swiping the Hotel Restart keycard in all the locks.
• Making new Initialization keycard
• Storing the new Hotel Code and spare Initialization keycards in a safe.
• Re-issuing all Staff and Guest keycards
The Hotel Restart keycard has a factory default 24-hour expiry, so before you make the keycard be sure that there is sufficient manpower to pass this keycard through each lock in the property. If necessary, make more than one Hotel Restart. Consult KABA if in doubt concerning the need to perform a Hotel Restart.
Initialization
Initializes the lock during a first-time installation, or after an interruption of battery power (e.g. during a battery replacement, or whenever the battery power is temporarily disconnected).
Test Lock
Tests locks before they are programmed and grants access to rooms during the installation. Test Lock keycards do not work after a lock has been programmed (i.e. after the lock has received its addresses). (Refer to lock installation instructions.)
6.9 Create Initial Set of Staff Keycards
PK 3529_08_07-ATLAS Version 1.2 User Manual
If you require more than one copy of a Staff Submaster level keycard (Section/Floor/ Group/Zone/Area), make a new keycard and select the number of keycards in the pulldown menu box. DO NOT encode them one at a time. All the keycards will be identical NEW keycards with the same timestamp, so that they will not cancel each other when used in the locks. Their serial numbers will be different, so that the employees can be identified individually from the audit trail. If you need to add an employee to a level for which you have already made a number of keycards, you can do so by selecting DUPLICATE.
Example: Group 1 will be used by a team of 3 housekeepers, supervised by one housekeeper manager with a Group 1 lockout keycard for canceling the previous guest's access when the room has been cleaned and inspected. These four employees all need access to the doors in Group 1 and need to carry a Group 1 keycard.
WRONG: If the keycards are encoded in four separate operations, then each one will have a different time stamp. The housekeeper with the most recent Group 1 keycard will cancel all the others when he/she first uses the keycard in one of the Group 1 locks.
RIGHT: If the keycards are encoded together in one operation as four identical copies, then all four will remain valid until they expire or are reset, and any of the three housekeepers or the housekeeper manager will have access to any of the rooms in Group 1. If after making the first four Group 1 keycards, you realize that you require another two Group 1 keycards for two other employees, encode two DUPLICATE Group 1 keycards that will not cancel the first four.
To create the keycards, follow the procedure in How do I Make a Batch of Staff Keycards? Staff keycards should be encoded as Hi-C for durability.
6.10 How do I Make a Batch of Staff Keycards?
PK 3529_08_07-ATLAS Version 1.2 User Manual

How do I make a batch of Staff Keycards?
-
Log in at Master or Access Administrator level.
-
First select Staff>Make Keycard from the pull down menu:
The following screen appears.
PK 3529_08_07-ATLAS Version 1.2 User Manual

- If you don't want to select a particular employee, but you want to make a
batch of staff keycards do not click on the employee search icon.

- Click on down arrow to right of box to select keycard type from pull down menu. The list contains all the keycards in the list in List of Keycard Types, so it is long.
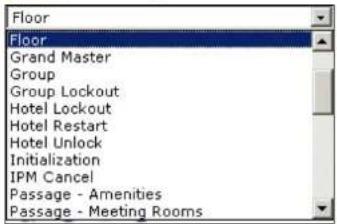
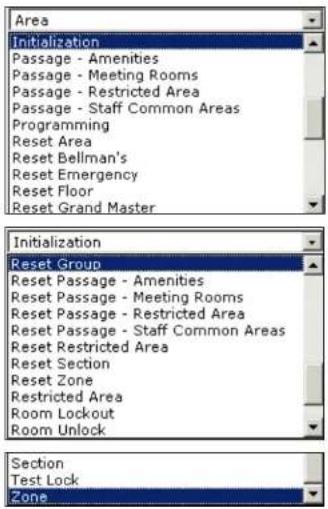
Note: All these keycard types are defined in the List of Keycard Types.
PK 3529_08_07-ATLAS Version 1.2 User Manual
- Depending on which type of keycard you selected, the next field name changes to "Area" etc., "Floor" in the example below, and the hotel rooms belonging to that keycard type are shown in the field.

-
Duplicate becomes a selectable parameter. For example if you are making five keycards for the five newly hired employees in that same Housekeeping department, select Duplicate.
-
Coercivity - you will see the following field, if you have a Dual (USB) encoder and if Hi-C enable has been set to Yes in System Setup, Keycard Attributes. Leave the box unchecked for Guest keycards, except when making a Reset keycard. In the case of a staff keycard, check this box for Hi-C. Hi-C is also recommended for Battery Test keycards.

Note: Timezones and/or amenities for staff sub master cards appearing on the screen are pre-determined by the System Administrator - you cannot change the parameters. However, you can sometimes select which one(s) to assign to a specified employee.
The administrator has assigned certain hours for Group 1 that cannot be changed but you can add extra amenities and/or shifts as in the example above. Cafeteria, cloakroom and supply room have been added to the given amenities of Parking and Elevator Time shifts of 4:00 am to 8:00 am and 4:00 pm (16:00) to 8:00 pm (20:00) have been added to the basic 8-12 and 12-16.
- Check the status of the encoder by looking at the status line at the bottom of your screen – it should show a green light and say "Ready".
| Encoder Station: | KIMAX139 | Requester station: | Status: | DDO | Ready: |
| Encoding Number: | *** | Requester name: | Coordvity: | High: | |
-
Click on the Make Keycard button.
-
When you hear two shrill beeps and/or see the encoder's Ready LED flash green, insert the keycard gently into the encoder. The encoder will pull the keycard in, encode it and then push it out.
- The Abort button only becomes active after you have started to encode. If you change your mind about the procedure you can cancel it by clicking on Abort.
- If you are encoding multiple cards, watch the status line each time you remove a keycard to see that the light turns green.
| Encoder Station: | KIMWK100 | Requester station: | KIMWK155 | Status: | OD | Busy. |
| Encoding Number: | 2 OF 2 | Requester name: | cpomec | Coercivity: | Is-6 | |
| Login Name: | cpomec | Operator Level: | Access Control Administrator | Friday, January 20, 2005 | ||
- The status line will tell you if each keycard was encoded successfully or not. If you are encoding multiple cards, the status line will inform you as it completes each card.
- If there was an error during the encoding, for example you forgot to insert one of the five cards, it will show that the process was completed but with errors.
- If the encoding was successful, the status line appears as follows:
| Encoder Station: | KIMWX139 | Requester station: | Status: | Ready. |
| Encoding Number: | Completed. | Requester name: | Coercivity: | High |
| Login Name: cgomez | Operator Level: Access Control Administrator | |||
- You should now have a batch of Staff keycards for the selected floor.
6.11 Make a Staff Keycard for a Specific Employee
How do I Make a Keycard for a Specific Employee?
- First select Staff > Make Keycard from the pull down menu:

- If you want to select an employee name, view them under the list of departments.
- Click on the department name on the pulldown list of departments.
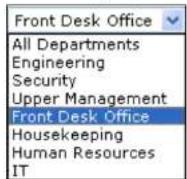
PK 3529_08_07-ATLAS Version 1.2 User Manual
- Click on the employee icon and a list of employees in that department appears below.

-
Select the Employee name from the list.
-
The Employee name and ID appear, as in the example below.

Note: The Staff member identification appears if specific employee has been selected. (The number is linked to the employee name in the System database). This field is read only; you cannot change anything here.
- Select the keycard type and description by clicking on down arrow to right of box to select keycard type from pull down menu.

- Depending on which type of keycard you selected, the next field name changes to "Area" etc., "Floor" in the example below
- Remember to set the coercivity for Hi-C by checking the box.
- Staff Common Areas for staff keycards appearing on the screen are predetermined by the Hotel Access Control Administrator. You can select All, None or certain ones (parking, elevator and supply room in the illustration above) from the selectable items. Read-only (grayed-out) common areas (cafeteria and cloakroom in the example above) are automatically encoded on that type of staff keycard.
- Select the timezones that you want for the working hours of this employee.
Note: The time period covered by each Timezone is entered by the Access Control Administrator – you cannot change the hours. However, you can sometimes select which one(s) to assign to a specified employee. In the example above, the employee will work for at least the two read-only shifts. 8:00 to 12:00 and 12:00 to 16:00), and optionally the 16:00 to 20:00 shift (4 in the afternoon to 8 at night).

- Check the status of the encoder by looking at the status line at the bottom of your screen – it should show a green light and say "Ready". See Make Guest Keycards.
| Encoder Station: | KJNWXL59 | Requester statione | Status: | 000 | Ready. |
| Encoding Numbers | xxx | Requester name: | Coercivity: | High | |
- Click on the Make Keycard button.
Note: The Abort button only becomes active after you have begun encoding. If you change your mind about the procedure you can cancel it by clicking on the Abort button.
-
Insert the keycard gently into the encoder. The encoder will pull the keycard in, encode it and then push it out. If you are encoding multiple cards, watch the status line each time you remove a keycard to see that the light turns green. If there was an error during the encoding it will show that the process was completed but with errors. Refer to the table in Encoding Guest Keycards for explanations of possible errors. When you receive a message to retry, if you have not encoded all 3 cards in a set of 3, for example, just re-encode the last card, not all 3 of them again.
-
If the encoding was successful, the status line again shows the following message.
| Encoder Station: | KIMNX139 | Requestor station: | Status: | ODD Ready: |
| Encoding Number: | *** | Requestor name: | Coercivity: | High |
6.12 Assign and Re-assign Staff Keycards
 |  |  |  |  |  |  |  |
| GUEST SERVICE ATTENDANT | FRONT DESK MANAGER | MAINTENANCE | BELLMAN | IT ADMIN | MASTER | ACCESS CONTROL ADMIN | KABA TECHNICAL SUPPORT |
How do I Assign/Re-assign Staff Keycards?
- Click on the Verify Keycard button.
- Insert the Staff keycard into the encoder.
The screen appears, containing all the information encoded on the keycard, including the date it was made and the person who encoded it.
![New Growth, Steve Keycard Assignment Completed Keycard Assignment: New Growth, Steve Keycard Information NEW WORK Selected for New FLOOR L. Created on 1/20/2006 2:41:00 PM Entry on file: 30/05/2007 2:41:00 PM Access to smart or ENWLED Shift Common Area size: CATTELDA, STAT PADKIND, CLOAR ROOM, ELDWATER, SAPLAB ROOM Access closing time access: [09:55] [12:16] [16:00] Last session number is 2; Executed by operator ONTO, CATLDO on osclear HOLT, ENWLED for employee N/A employee 10 is 8K. Assignment History (Last 20 accounts) Select Assigned: Long Barbara 1/20/2006 2:45:44 PM Select Assigned: Active, Active 1/20/2006 2:45:44 PM Member Status: ENWLED Requester status: ##ing Number: ##ing Name: ##ing Address: ##ing Location: ##ing Address: ##ing Address: ##ing Address: ##ing Address: ##ing Address: ##ing Address: ##ing Address: ##ing Address: ##ing Address: ##ing Address: ##ing Address: ##ing Address: ##ing Address: ##ing Address: ##ing Address: ##ing Address: ##ing Address: ##ing Address: ##ing Address: ##ing Address: ##ingAddress : ##ingAddress : ##ingAddress : ##ingAddress : ##ingAddress : ##ingAddress : ##ingAddress : ##ingAddress : ##ingAddress : ##ingAddress : ##ingAddress : ##ingAddress : ##ingAddress : ##ingAddress : ##ingAddress : ##ingAddress : ##ingAddress : ##ingAddress : ##ingAddress : ##ingAddress : ##ingAddress: #engg hsdh #engg hsdh #engg hsdh #engg hsdh #engg hsdh #engg hsdh #engg hsdh #engg hsdh #engg hsdh #engg hsdh #engg hsdh #engg hsdh #engg hsdh #engg hsdh #engg hsdh #ongg hsdh #ongg hsdh #ongg hsdh #ongg hsdh #ongg hsdh #ongg hsdh #ongg hsdh #ongg hsdh #ongg hsdh #ongg hsdh #ongg hsdh #ongg hsdh #ongg hsdh #ongg hsdh #ongg kndh #ongg kndh #ongg kndh #ongg kndh #ongg kndh #ongg kndh #ongg kndh #ongg kndh #ongg kndh #ongg kndh #ongg kndh #ongg kndh #ongg kndh #ongg kndh #ongg kndh](/content/2026/05/978683/images/85fe8db105ab649b51c0c584462fda6c57f23fda58ad5e2eb022b20bba2bd689.jpg)
- To re-assign the same keycard to another employee, select the employee's name from the list at the right. Steve, also from Housekeeping, is selected in the example below.
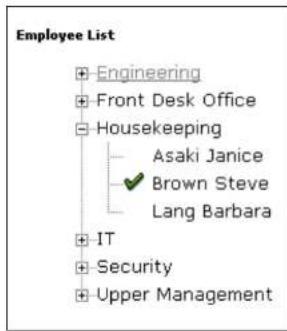
flowchart
graph TD
    A["Engineering"] --> B["Front Desk Office"]
    B --> C["Housekeeping"]
    C --> D["Asaki Janice"]
    C --> E["Brown Steve"]
    C --> F["Lang Barbara"]
    C --> G["IT"]
    C --> H["Security"]
    C --> I["Upper Management"]
PK 3529_08_07-ATLAS Version 1.2 User Manual
- Click on Assign and the keycard is re-assigned to Steve, as shown below.
![KARA KARA® LOGGING SYSTEMS Staff - Verify & Assign Keycards Guest Staff Admin Reports Escoders Legend Help Verify keyboard Assign Unassign Short Keycard Assignment Completed Keycard Assignment Comments/Drawn, Share Next : Keycard Information NEW FLOOR #200# for floor FLOOR 1 Created on a system, 243-198-00 am Equity is set for 1/20/2007 2:45:30 PM Access to areas/Res is ENABLED Staff Common Area available: CAFETERIA, STAFF PARKING, CLOCK ROOM, ELEVATOR, SUPPLY ICON Access during the zone: [08-12] [16-18] [16-20] Card Sequence Number is 2 Involved by: Operation GOMEZ, CARLOS on operator HOTEL MANAGER for employee N/A Employee ID is MA Assignment History (Last 10 assignments) Record Assigned Even Status 1/20/2006 2:52:16 PM Record Assigned Largo-Sobero 1/20/2006 2:55:14 PM Employee List Engineering Front Bank Office Heurysleeping Aviation Service Brown, Share Lang, Platform Marshall, Matcha Human Resources IT Safety Upper Management Escalment Station: HIMK132 Requester stations: Encoding Numbers: 100 Requesters status: 000 Ready, Community Live](/content/2026/05/978683/images/695e48c386326db05b29969e1fceb05505bd0fb6789c0e96efc92c1be570e9aa.jpg)
- Re-assign the keycard as often as you like to different employees who are working the same Section, floor or area, etc.
![KARA® LOGOING SYSTEMS Staff - Verify & Assign Keywords Contact Staff Admin Reports Encoders Layout Help Verify record Assign Unknown Start Designed Forward Completed Reported August 2006 Summary Data Name Reported Information NET LOCK Location For Issue ROOM 2 Checked on 1/23/2006 2:10:00 PM Order is set for 1/23/2007 2:14:00 PM Access to interview is NotLED Staff Complete fees available: CASHION, START FROCK, GLOME ROOM, ELISAFTOR, SUTCH ROOM Access during time series: [M-12] (13:15) [16:01] Card Expense Number 2 Included to request name: CASHION on editor HOURS, Minimum for employee Show: TES Employee ID: 918 Management History (Last 30 assignments) Report Unassigned Price, State 1/23/2006 1:31:24 AM Employee List Engineering Print Back Office Unloading Human Resources IT Security Upper Management Member Station: CPWSLTD Response station Status: COD ENS Listing Number: NPT Request name: Specialty Info Login Number: COMPLER Operator Email Access Control Administration Monday, January 23, 2006 Copyright 2004-2005 KARA Group All rights reserved.](/content/2026/05/978683/images/d78f65536655d32b2868391db7753cfbef5402cca6d05297ace1f3423448f6fb.jpg)
PK 3529_08_07-ATLAS Version 1.2 User Manual
Because you have the Assignment History, you can check who held the keycard and when by just doing this Verify rather than a complete audit.
At the GSA level, the user can read/verify certain cards (guest/reset cards) but not others. In this case the user will see a message like the following and must then call the supervisor or someone with a higher Operator level to read the keycard.

6.13 Verify a Staff Keycard
This procedure is used when a keycard is lost or stolen to verify the information encoded on it.
- Master is the minimum Operator Level required to verify most staff keycards.
- A GSA can verify only Guest Keycards and the Battery Test keycard.
- A Front Desk Manager can verify only the keycards that he can make, namely the following:
PK 3529_08_07-ATLAS Version 1.2 User Manual

The procedure in Assign and Re-assign Staff Keycards is used to distribute Staff keycards to the employees according to their daily tasks.
How do I Verify Staff Keycards?
- Select Verify from the Staff menu.

The main screen appears as below:

PK 3529_08_07-ATLAS Version 1.2 User Manual
Abort
Note: The Abort button ____ abort only becomes active after you have clicked the Verify Keycard button. If you change your mind about the procedure you can cancel it by clicking on the Abort button.
-
Click on the Verify keycard button.
-
Insert the keycard into the encoder.
Note: You cannot read ILCO encoded keycards in the Verify Keycard function if the encoder is configured to read/encode THRIFT, nor read THRIFT encoded keycards if the encoder is configured to read/encode ILCO. You will receive an error message.
The encoder reads the keycard and then pushes it out. The following screen appears, containing all the information encoded on the keycard, including the date it was made and the person who encoded it.
![KABA LOGING STATENS Staff - Verify is Assign Keycard Guest Staff Admin Reports Encoders Logout Help Verify Keycard ASSIGN Unassign Alert Keycard Assignment CurrentForm, Jose New Keycard Information SUP-STATE 2007 Legend for zone ZONE 1 Created on 1/22/2006 11:27:00 AM Empty is set for 1/22/2007 11:27:00 AM Access to armanksa is ENABLED Staff Common Area available: CAFETERIA, STAFF PARKING, CLONK ROOM, ELEVATOR Access during time scores: [30-04] [04-06] [09-15] [12-16] Card Sequence Number is 2 Enrolled by operator ANTONIO, MARCO on encoder HOTEL MANAGER for employees PER12, ASSE Employee ID is N/A Assignment History (Last 12 assignments) Keycard Assigned Paper, Jose 1/22/2006 12:27:46 AM Encoder Station: KANX129 Requestor stations Status: 000 Ready Encoding Number: Requestor name Community: Low](/content/2026/05/978683/images/2bace995077b900725c5fc929e895dd2d237681db15183f47fcdcf9792dcdbd2.jpg)
Chapter 7 - Maintenance Unit
7.1 Maintenance Unit (M-Unit)

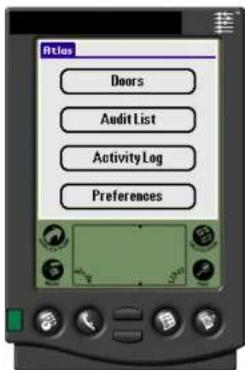
The Maintenance Unit (M-Unit) is a PDA with the ATLAS M-Unit software installed on it, which communicates with the locks. The M-Unit communicates via an Infrared Programming Module (IPM). The M-Unit attaches to the workstation's
PK 3529_08_07-ATLAS Version 1.2 User Manual
USB or serial port (whether it attaches directly or sits in a cradle attached to the port.) The M-Unit communicates with the IPM via an infrared signal and the IPM communicates with the lock via an infrared signal or a null modem serial cable for RACs.
7.1 Infrared Programming Module
- Programming
How do I Program the IPM?
- Go to the main page of the ATLAS application on the M-Unit.
- Login with the same name and password you use for the main application.

PK 3529_08_07-ATLAS Version 1.2 User Manual
The main screen appears.

- Click on ATLAS at top left, and it changes to Tools, with a dropdown menu.
- Select IPM from the pulldown menu under Tools.

PK 3529_08_07-ATLAS Version 1.2 User Manual
- Click on IPM Configuration. A list of available IPMs appears.

- Select the IPM you want to use.

- Click on Program and hold the M-Unit up to the IPM you are programming. It does not matter where you put the IPM – it could be on a table, on a hook near a RAC, etc.
The screen appears like the following.
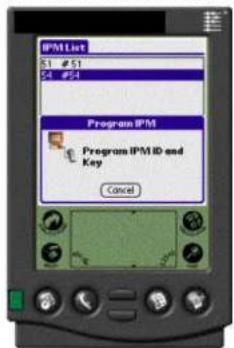
The M-Unit must be at least 5 cm. away from the IPM and the panel on top of the M-Unit must be parallel to the IrDA window (small red glass panel) in the IPM, with the M-Unit screen facing upwards.

natural_image
Hand holding a digital blood glucose meter next to a black device (no visible text or symbols)You have now programmed the IPM to receive data files from the M-Unit and transfer them to the lock.
PK 3529_08_07-ATLAS Version 1.2 User Manual
Resetting the IPM
The IPM may be reset if there is a new Hotel Code because of a Hotel Restart. In that case, selecting Hotel Restart from the tools menu allows you to reset the values to 0 and then you can use the IPM again with the new Hotel code.

7.2 How do I Synchronize ATLAS with the M-Unit?
Before you can perform any operations with the M-Unit, either programming or auditing, you must synchronize the PDA where the M-Unit software is installed with your computer where the ATLAS is running. This operation is called a "HotSync".
PK 3529_08_07-ATLAS Version 1.2 User Manual
How do I perform the "Hotsync"?
- Turn on your M-Unit. The following screen appears.


- Click on the Hotsync icon HotSync. The following screen appears, informing you when you last did a HotSync.

-
Ensure that your M-Unit is resting securely in the cradle and that the cradle is connected to your computer's COM port, or that the M-Unit is connected directly to the COM or USB port.
-
Click on the HotSync icon and you will receive a message that the HotSync is in progress.
PK 3529_08_07-ATLAS Version 1.2 User Manual
Each item is synchronized and the HotSync screen shows each one as it progresses; in the example below it was synchronizing the Address book as the photograph was taken.

- When all the functions have been synchronized, the following message appears.
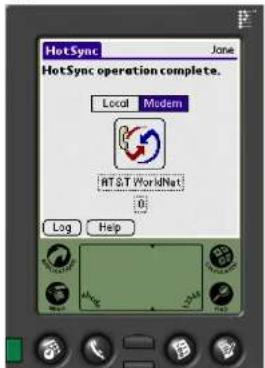
Return to the main screen by clicking on the applications icon

7.3 Creating a Lock Configuration File
ATLAS keeps track of all keycards generated by the system. Tracking information includes: owner, creator, date created and expiry. ATLAS cross-references lock audit information with the database by matching keycard, employee name, and date (who owned the keycard at the time of the audit).
Select Rooms
Rooms are selected from the list of rooms that appears when you click on the tree of rooms at right of the main Admin screen. These are the locks that you can program with the M-Unit.
Allow Electronic Override / Number of Overrides
Select the maximum number of times that you want the lock to permit an electronic override. After that number of overrides, the lock will have to be opened manually.
Set Number of Hours before Expiry
Select Expiry for the files you want to transfer to the M-Unit – 24 hours is the default. In other words, the files you transfer to the M-Unit will stay there for 24 hours or until you close the ATLAS M-Unit application.
PK 3529_08_07-ATLAS Version 1.2 User Manual
7.4 Transferring files from Workstation to M-Unit
How do I Transfer Files from the Workstation to the M-Unit?
The Admin page permits you to transfer lock files from the workstation to the M-Unit The M-Unit is then used to program the locks with the new data contained in the files (employees, submaster levels, etc.).
- If you are Operator Level 6 to 8, (6 = Master, 7 = Access Control Administrator or 8 = KABA tech support) log in and select Transfer Files M-Unit > PC from the main Admin menu.

OR
- Log in as Operator Level 3, Maintenance/Engineering The main Admin screen appears.
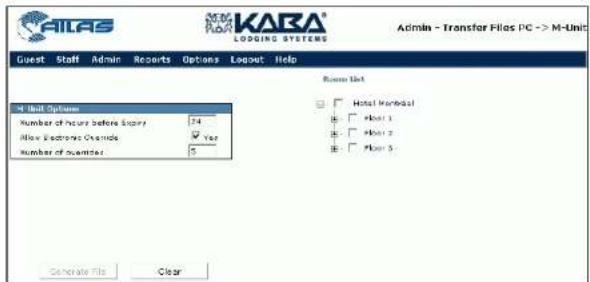
-
Select Expiry for the length of time you want the files to remain in the M-Unit. 24 hours is the default. See Hotel Setup
-
If you select "Yes" to Electrical Override, another field "Number of Overrides" appears, enabling you to limit the maximum number of times a person can perform an electronic override in the lock. After that maximum is reached, the lock must be opened manually.
- The tree list of rooms appears on the right.
- Select room(s) from list of rooms that appears when you click on the tree at right. Click on the + sign beside each floor to see the individual rooms. Click on the floor name to select all rooms on that floor. Select or deselect only the rooms you have modified to be in the downloaded file.


- Select the rooms and click on the following screen appears Generate File button. The

-
Click on Save.
-
The following type of screen appears

- The folder to hold your files to transfer to the locks, is called ATLAS M-Unit and is located in the Main folder for your ATLAS application.
- Leave the default name that shows the date the file was created. The extension is .lcf for "lock configuration file".
- Click Save and the file is saved in your M-Unit.
- Click on Close.
OR
- Click on the Clear button on the main screen to delete all fields and make another entry.
7.5 Logging on and off the M-Unit

PK 3529_08_07-ATLAS Version 1.2 User Manual
How do I Log on and off the M-Unit?
- Turn on the M-Unit—follow the instructions for your particular model of PDA. The main screen appears as shown below on the ATLAS application icon.

The login screen appears.

- Enter your chosen login name and password – a maximum of 10 characters. The password itself will actually appear on the screen (not as *****) so keep the screen out of view of any onlookers
PK 3529_08_07-ATLAS Version 1.2 User Manual
- The main screen of the ATLAS M-Unit application appears.
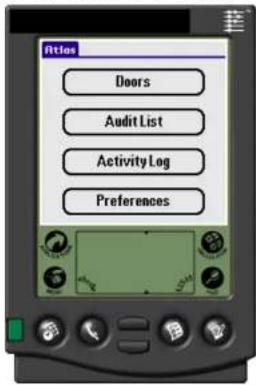

- To log out, click on the applications icon icon at the bottom left of the M-Unit. This will take you out of the application. If you just turn off your M-Unit, when you turn it on again you will still be in the application.
7.6 Programming a Lock
PK 3529_08_07-ATLAS Version 1.2 User Manual
How do I Program a lock?
- Click on ATLAS on the M-Unit screen.

-
This brings you to the main screen where you have the four choices shown above.
-
Tap on Doors. The list appears with all the lock numbers that need to be programmed – the door files that you transferred from the workstation – see Transferring files from the Workstation to the M-Unit.
-
Go to the door to be programmed and select desired lock number from Door List.
PK 3529_08_07-ATLAS Version 1.2 User Manual
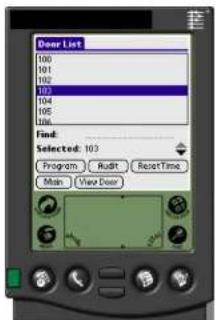
Note: If the lock number is not the same as the lock you are trying to program, a confirmation request will appear asking if you really want to do this. Answer No if you did this by mistake. If you answer Yes, the door will be programmed anyway. However, if you try to program a door as a different TYPE of door, you will receive a warning that this not possible. The TYPE of door must be changed in System Setup
- More detailed information is available for each door by tapping on View Door. A description like the following for door 103 appears.

- Tap on one of the buttons at the top for a more detailed view of each lock feature. For example, tapping on Submaster Levels brings up the following screen:
PK 3529_08_07-ATLAS Version 1.2 User Manual

Note: You can program or audit a door from this detailed view if you wish. Tap on Program and follow the steps below. Or, you can return to the List of doors by tapping List and program the door with the door name highlighted.
- Go to the door and insert or swipe the programming keycard in the lock.
- Make sure the green LED in the lock is on.
- Place the IPM over the lock as shown below.

natural_image
Close-up of a white handheld digital door with a black control panel and a metallic handle (no visible text or symbols)- Tap on Program and a message appears telling you what to do when you are ready to communicate with the lock. Please check the door name (lock).
- If you are at the correct lock (103) and want to program it, go to step 13.
-
If you are not at the correct lock (for example you discover you are at 102 rather than 103) when you program the lock you will overwrite the existing data for 102 with that from 103.
-
If you want to overwrite the existing data in the lock, click on Overwrite.
- If you don't want to overwrite the data in the lock, click on Cancel and move to the correct lock.

-
Tap on OK on the M-Unit screen.
-
The following screen appears:

- Hold the M-Unit up to the lock at a distance of AT LEAST 5 cm with the top edge of the M-Unit parallel to the IrDa window (small red glass panel) window located on the IPM, and with the M-Unit screen facing upwards. Try to keep your hand as still as possible.
PK 3529_08_07-ATLAS Version 1.2 User Manual

natural_image
Close-up of hands using a blood glucose meter to test blood pressure (no visible text or symbols)- In a few seconds you will receive a message that the programming has been successful.
- Continue to the next door on your list and repeat the procedure (Steps 4 to 15) until all the doors have been programmed.
- If you receive a message that the communication has failed, repeat the procedure, Checking that you are holding the M-Unit in the correct position pointing straight at the IrDA window (small red glass panel) and at the distance given in Step 15.
7.7 Programming a Keycard Reader
How do I Program a Card reader?
Perform steps 1. to 5. from How do I Program a Lock?, going to the card reader to be programmed.
Part 1 – Optional – Use IPM Kit For RAC – Kit # 064-511161
- Attach the IPM to the card reader with the Velcro kit provided by Kaba containing:
■ 1 Black Velcro strip (Hook)
■ 1 Black Velcro strip (Loop) – soft side
■ 1 6' DB-9 Serial cable RS-232.
-
Cut a piece of each type of Velcro from the strip provided
-
Depending on the configuration of your RAC installation, find the most appropriate location to stick the Velcro (Hook)
-
on the side of the Remote Access Controller (RAC) Enclosure OR
-
on the side of the optional Remote Programming Interface (RPI).
-
Stick the other Velcro (Loop) to the side of the IPM (Part # 064-511146).
RAC Enclosure Example
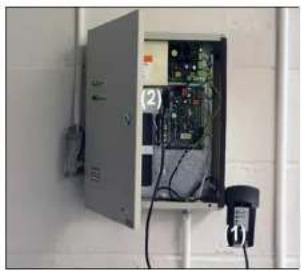
natural_image
Interior view of an electrical enclosure with visible circuit board and wiring (no text or symbols)RPI Enclosure Example

natural_image
Laboratory setup with two labeled components (1) and (2), no visible text or symbols on the main objects.Part 2 -
- Connect one side of the DB-9 Serial cable to the IPM, whether attached with Velcro or on a nearby surface. (1)
- Connect the other side to the DB-9 connector of the RAC (2).
- Hold the M-Unit (with the reader configuration files loaded into it) up to the IPM so that the M-Unit is at least 5 cm away from the IPM and the panel on top of the M-Units parallel to the IrDA window (small red glass panel) in the IPM, with the M-Unit screen facing upwards. Try to keep your hand as still as possible.
- In a few seconds you will receive a message that the programming has been successful.
7.8 Audits
The administrator uses ATLAS to configure employee profile and access employee data for internal auditing and to determine an employee's location. Because of the wide variety of system and lock reports the Administrator can now target which employee (who) went in at a particular location (where) and at what time (when). ATLAS gives the Administrator the security of access to archived information, and also maintains an active list of current keycard owners.
The lock audit can be consulted in the event of unauthorized access to determine which keycard was used, when entry occurred, and the identity of the operator who issued the keycard. The lock audit trail also records the use of special keycards such as Reset, Lockout, Programming, Initialization and override usage. The M-Unit and IPM are used to read the audit stored in the lock.
Keycards that are rejected by the lock (wrong address, expired, locked-out by the privacy thumbturn or by a lockout keycard) are not recorded in the audit.
Solitaire 710-II locks and RAC store the last 350 audit records, while Generation E-760 locks store 200 audit records. The lock audit is a strong deterrent to crime, particularly employee theft. It protects offices, storerooms and other back-of-the-house doors, as well as guest rooms, and can be useful in tracking the use of parking facilities. All keycards, even multiple copies of a keycard made at the same time, have different sequence numbers that can be traced. All staff should be made aware of the audit trail in order to maximize the deterrent effect. The audits are stored in non-volatile memory, which means that they cannot be erased, even if power to the lock is interrupted.
All times shown in audits are Standard Time only.
How do I Audit a lock?
Log on as described in Logging on and off the M-Unit.
PK 3529_08_07-ATLAS Version 1.2 User Manual
- Tap on ATLAS on the M-Unit screen.
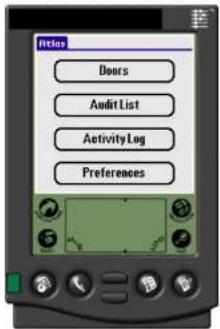
-
This brings you to the main screen where you have the four choices shown above.
-
Tap on Doors. The list appears with all the door (lock) numbers.

-
Go to the door to be audited and select desired lock number from Door List.
-
More detailed information is available for each door by tapping on View Door. A description like the following for door 103 appears.

- Tap on one of the buttons at the top for a more detailed view of each lock feature. For example, tapping on Submaster Levels brings up the following screen:
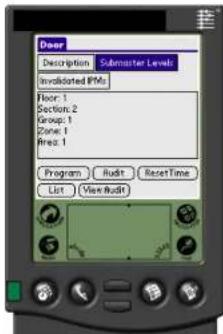
- You can tap on Invalidated IPMs to see a list of IPMs that do not work in this door.
Note: You can program or audit a door from this detailed view if you wish. Tap on Audit and follow the steps below. Or, you can return to the List of doors by tapping List and audit the door with the door name highlighted. Tapping on View audit shows the last audit performed on this door if it is still in the M-Unit memory, or tells you there is no audit still in memory for this door.
PK 3529_08_07-ATLAS Version 1.2 User Manual
- Swipe the programming keycard in the lock.
- Place the IPM over the lock as shown below.
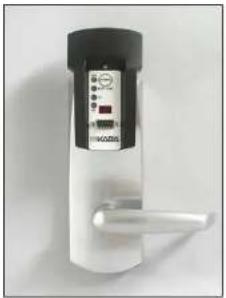
natural_image
Close-up of a black and white handheld digital door with a control panel and handle (no visible text or symbols)-
Tap on Audit.
-
A message appears telling you what to do when you are ready to communicate with the lock.
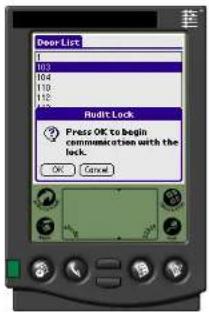
PK 3529_08_07-ATLAS Version 1.2 User Manual
- Hold the M-Unit up to the lock at a distance of AT LEAST 5 cm with the top edge of the M-Unit parallel to the IrDA window small red glass panel) located on the IPM with the screen facing upwards. Try to keep your hand as still as possible.

natural_image
Close-up of hands using a digital blood glucose meter to test blood pressure (no visible text or symbols)-
In a few seconds you will receive a message that the audit has been successful.
-
Continue to the next door on your list and repeat the procedure (Steps 4 to 14) until all the doors have been audited.
-
If you receive a message that the communication has failed, repeat the procedure, Checking that you are holding the M-Unit in the correct position pointing straight at the IrDa window (small red glass panel) and at the distance given in Step 13.
To audit a door that is NOT on your list of doors but you decide to audit it anyway, you can do the following:
- Go to the door or doors to be audited
- Return to the main menu on the M-Unit and click on ATLAS at the top left.
- This changes to a Tools dropdown menu.
-
Tap on Audit Unselected Door as shown in the following illustration.
-
Repeat steps 11. to 14.

Note: Locks programmed by the FDU.
When reviewing the list of audited doors, you may see doors labeled as "Unknown". These locks were programmed by the FDU before you switched to the ATLAS system. In the FDU, there is no database to which the audit would be cross-referenced. ATLAS, on the other hand, refers audit files to a database of doors, and unless the (FDU) door has been reprogrammed with an ATLAS M-Unit, this field will be empty, and so will be classed as an unknown door. The problem will disappear as doors are progressively reprogrammed with the ATLAS M-Unit.
Note: Restricted areas with more than one door.
Some Restricted areas may have more than one exterior door. If you place all three doors on your "doors to be audited" list, for example, 103, 104, and 105, only the lowest numbered door (103) will be shown on the audit, even though all the events on all the doors are shown. This shows you, for example, that someone was in that room at the critical time, although you may not be able to know by which door they entered. If it is crucial to know which event took place at which door, return to the doors, re-do the audit and as you are standing in front of each of the doors, notice the events that appear on the audit list.
Refer to page Transferring Audit Files for how to transfer the audit files to the PC. Important
PK 3529_08_07-ATLAS Version 1.2 User Manual
If you are viewing Audits in the summer in an area that has Daylight Savings Time, remember that audits show Standard Time only, so add one hour to see the time in DST.
7.9 Resetting Lock Time
How do I Reset the Time in a lock?
-
Go to the first door you wish to reset the time.
-
Tap on ATLAS on the M-Unit screen.

- This brings you to the main screen where you have the four choices shown above.
PK 3529_08_07-ATLAS Version 1.2 User Manual
- Tap on Doors. The door list appears, containing all the doors that can be reset.

-
Go to the door to be reset and select desired lock number from Door List. (103 in the example above).
-
For Reset Time, it is not necessary to swipe the programming keycard in the lock.
-
Place the IPM over the lock as shown below.

natural_image
White and black handheld device with a handle and control panel (no visible text or symbols)- Tap on Reset Time.
PK 3529_08_07-ATLAS Version 1.2 User Manual
- A message appears telling you what to do when you are ready to communicate with the lock.

-
Tap on OK on the M-Unit screen.
-
The following screen appears.

PK 3529_08_07-ATLAS Version 1.2 User Manual
- Hold the M-Unit up to the lock at a distance of AT LEAST 5 cm with the top edge of the M-Unit parallel to the IrDA (small red glass panel) located on the IPM with the screen facing upwards.

natural_image
Close-up of hands using a blood glucose meter to test blood pressure using a digital display (no visible text or symbols)- In a few seconds you will receive a message that the time reset has been successful.
- Continue to the next door on your list and repeat the procedure (Steps 4 to 13) until all the doors have been reset.
- If you receive a message that the communication has failed, repeat the procedure, Checking that you are holding the M-Unit in the correct position pointing straight at the IrDA window (small red glass panel) and at the distance given in Step 12.
Locks operate in Standard Time only.
7.10 How do I Override a Lock?
For a table with the types of locks on which you can perform an electronic override, see Lock Overrides.
How do I Perform an Electronic Override?
- Go to the first door with the lock that you wish to electronically override.
PK 3529_08_07-ATLAS Version 1.2 User Manual
- Tap on ATLAS on the M-Unit screen.
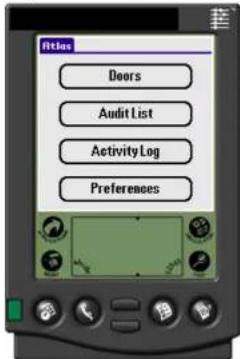
-
This brings you to the main screen where you have the four choices shown above.
-
Tap ATLAS and select Tools > Electronic Override from the dropdown menu that appears..

PK 3529_08_07-ATLAS Version 1.2 User Manual
- The following screen appears first, showing how many overrides you have left for that lock.

DO NOT swipe the programming keycard in the lock. If you do, it will reset the lock time rather than overriding it.
- Tap on Override. The following screen appears.

PK 3529_08_07-ATLAS Version 1.2 User Manual
- Hold the M-Unit up to the lock at a distance of AT LEAST 5 cm with the top edge of the M-Unit parallel to the IrDA (small red glass panel) located on the IPM with the screen facing upwards.
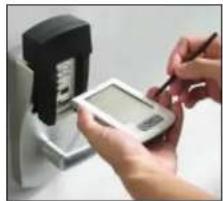
natural_image
Close-up of hands using a digital blood glucose meter to test blood pressure (no visible text or symbols)- In a few seconds you will receive a message that the lock has been electronically overridden and you will be able to open the door.
- Continue to the next door on your list and repeat the procedure (Steps 4 to 8) until all the required overrides have been performed.
- If you receive a message that the communication has failed, repeat the procedure, Checking that you are holding the M-Unit in the correct position pointing straight at the IrDA window (small red glass panel) and at the distance given in Step 7.
7.11 Transferring Audit Files
How do I Transfer Files from M-Unit to Workstation?
- Take the M-Unit to your workstation.
-
Connect the M-Unit to the cradle or directly to the COM port of your workstation, depending on which type of M-Unit you are using.
-
Perform a Hot sync by tapping on the Hot sync icon and waiting until you receive a message that it has been successful.
Note: Every time you transfer data, the list of current IPMs is updated.
- To view and print the Lock Audit files, go to the Web application and log in. You must be an Operator level that has access to Audits. See Operator Types.
- Go to the Admin menu and select Transfer M-Unit->PC.
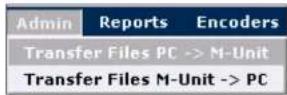
The following screen appears:

-
Browse for the lock audit files you want to transfer.
-
You should see the .laf (Lock Audit files) in your Lock Audit directory that you created previously. The files are default-
namedKABA_Year_Month_Day_Hour_Minute_Seconds.laf (in that order) when the audit took place.

- Select the file to transfer and click on Open.
The name of the file appears in the field as
KABA_Year_Month_Day_Hour_Minute_second.laf as shown below.

- Click on Load Audit File
The file has now been transferred to your Workstation PC.
Chapter 8 - Reports
8.1 Reports – Operator Levels Access to Reports
Different reports are available to different Operator Levels as follows:
ATLAS – Operator Levels Required to Access Reports
| GSA | FDM | Maintenance | Bellman | Master | Access Control Administrator | |
| Lock Audits | X | X | ||||
| Employee List | X | |||||
| Operator List | X | |||||
| Access Point List | X |
System Activities
| Keycard Encoding | X | X X | ||||
| Keycard Verification | X | X | ||||
| Database Management | X | |||||
| Employee List Management | X | |||||
| Network &Hardware Management | X |
PK 3529_08_07-ATLAS Version 1.2 User Manual
| System Management | X | |||||
| Operator Login/Logout | X | |||||
| Lock Operations | X | X X | ||||
| All activities | X |
8.2 Report Examples
All reports can be viewed and printed in Word or PDF format. They can also be exported to other formats.
Each report header allows you to go to the next/previous page or to the beginning or end of the whole report. The report shows the date, time and page you are viewing and total number of pages.
8.2.1 Lock Audits
With audits you can determine:
• WHICH keycard was used.
- WHEN an access occurred (Audits show)
• WHO owned the keycard at the time of access
• WHAT action was performed:
The audits are stored in the lock's non-volatile memory, which means that they cannot be erased, even if power is interrupted. Select Lock Audit and select filter criteria: dates, room, operator, and/or Keycard Holder: If you are viewing Audits in the summer in an area that has Daylight Savings Time, remember that audits show Standard Time only, so add one hour to see the time in DST.

PK 3529_08_07-ATLAS Version 1.2 User Manual
Here is an example of the audit report generated without a filter.

Because the time period is long and because there is no filter selected, the report is 22 pages. Each door has a complete description and then a list of all transactions that took place in that door. For a more manageable report, select a shorter time period to audit, or use one of the available filters. Here is an example filtered by Room – Room 105. Now the report is only 2 pages long.
PK 3529_08_07-ATLAS Version 1.2 User Manual

8.2.2 Employee List
Select from the Reports Screen as below. The report generated by this request is shown below. To get a report on employees, select Employee List from the "Select a Report" field.

PK 3529_08_07-ATLAS Version 1.2 User Manual
| Employees Name | Employee ID | Department |
| Antono, Monte | 578543219 | Upper Management |
| Aoki, Janice | 763012045 | Housekeeping |
| Brown, Steve | 678901214 | Housekeeping |
| Crander, Tim | 965780012 | Upper Management |
| Gonz, Coffee | 765432019 | Upper Management |
| King, Rose | 901238987 | Hotel/Hotel Office |
| Lina, Evonla | 507590012 | Housekeeping |
| Marshall, Wartis | 278550 | Housekeeping |
| Perez, Jolo | 206678909 | Security |
| Fresley, Polkola | 90704201 | Hotel/Hotel Office |
| Sosh, Joyce | 588123015 | Hotel/Hotel Office |
| Savara, Sue | 21 | Security |
| Stone, Dee | 123456799 | Human Resources |
| Tuner, Joe | 346878001 | Engineering |
| Cheng, Jeff | 054321038 | IT |
You can use the field "by Department" as a filter if you want a list for just one department.
PK 3529_08_07-ATLAS Version 1.2 User Manual
8.2.3 Operator List
Select Operator List from the dropdown menu to see a complete list of Operators. The list can be filtered by Operator level. The selection and a sample report are shown below.

PK 3529_08_07-ATLAS Version 1.2 User Manual
| Operator | Login Name | Access Level |
| Antonio, Marco | montonio | Access Control Administrator |
| Chander, Tom | Ischander | Master |
| Gomez, Carlos | ogomez | Access Control Administrator |
| King, Rose | King | Guest Service Attendant |
| Perez, Jose | perez | Maintenance / Engineering |
| Presley, Patricia | presley | Guest Service Attendant |
| Smith, Joyce | smith | Front Desk Manager |
| Stone, Glenn | gstone | IT Administrator |
| Turner, Joe | turner | Front Desk Manager |
| Wong, Jeff | Iwong | Access Control Administrator |
| Operator | Login Name | Access Level |
| King, , Rose | King | Guest Service Abendant |
| Presley, , Patricia | pressey | Guest Service Abendant |
8.2.4 Access Point List
Select from the Reports Screen as below. In the example, we used Guest Room as the Access Point Type filter. The report generated by this request is shown on the next page.
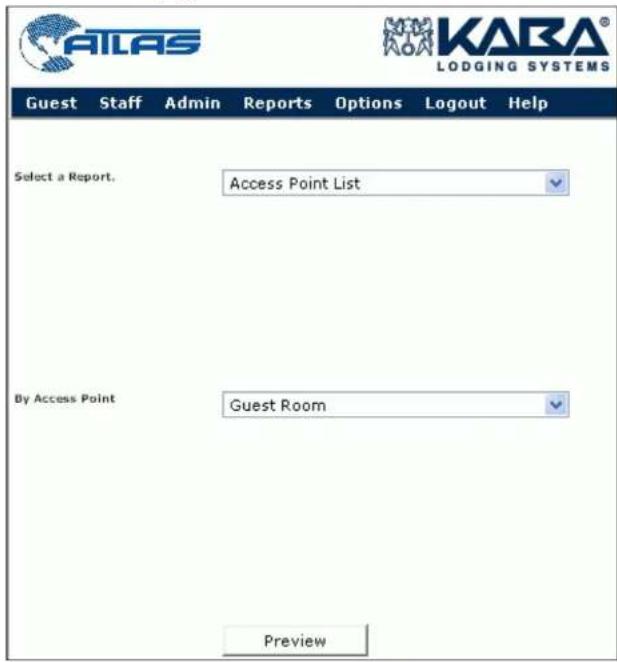
PK 3529_08_07-ATLAS Version 1.2 User Manual
PK 3529_08_07-ATLAS Version 1.2 User Manual
8.3 Reports - System Activities Examples
You can view system operations by selecting System Activities from the list of reports shown below.
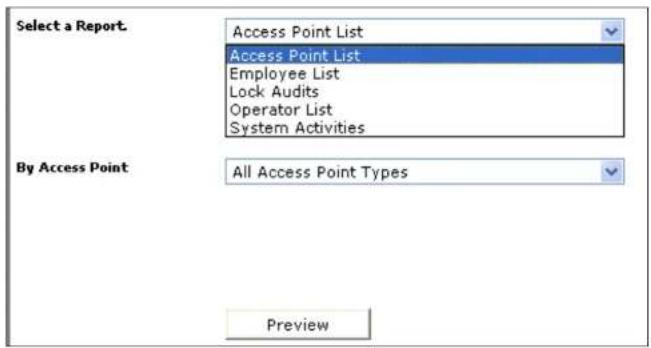
PK 3529_08_07-ATLAS Version 1.2 User Manual
8.3.1 Database Management
The report category of DB Management Activities brings up the following screen showing when backups were made and by whom. These reports can be filtered by operator.

PK 3529_08_07-ATLAS Version 1.2 User Manual
| Date/Time | Operator | Operation Name |
| 9/20/2005 10:42 AM | Gomez, Carlos | Database Backup |
| 9/20/2005 10:41 AM | Gomez, Carlos | Database Backup |
| 7/22/2005 10:08 AM | Gomez, Carlos | Database Backup |
| 7/22/2005 10:06 AM | Gomez, Carlos | Create Backup Job |
| 7/22/2005 10:06 AM | Gomez, Carlos | Database Backup |
| 7/15/2005 5:29 PM | Gomez, Carlos | Database Backup |
| 7/15/2005 5:28 PM | Gomez, Carlos | Database Backup |
| 7/15/2005 5:27 PM | Gomez, Carlos | Database Backup |
PK 3529_08_07-ATLAS Version 1.2 User Manual
8.3.2 Employee List Management
This report category shows the list of employees and any changes made affecting the employee data, such as modifying an employee's operator level or keycard assignments.

PK 3529_08_07-ATLAS Version 1.2 User Manual

Parameters selected for this report
Free Date / Time: 3/7/2005 01:55 PM
Operator Name:
System Activities
Employee List Management
Tuesday, March 7, 2000
2:12 PM
Hotel Montréal
| Date Time | Operator | Operation Name | Operation Details |
| 2/17/2006 9:45 AM | Gomez, Carlos | Modify Operator | gstone |
| 2/10/2006 9:58 AM | Antonio, Marco | Modify Operator | lveng |
| 2/1/2006 12:33 AM | Gomez, Carlos | Keycard Assigned | Presley, Patricia |
| 2/1/2006 9:55 AM | Gomez, Carlos | Keycard Assigned | King, Ross |
| 12/31/2006 10:30 AM | King, Ross | Modify Operator | King |
| 1/23/2006 11:27 AM | Antonio, Marco | Keycard Assigned | Perez, Jose |
| 1/23/2006 11:16 AM | Antonio, Marco | Keycard Assigned | King, Ross |
| 1/23/2006 9:31 AM | Gomez, Carlos | Keycard Unassigned | |
| 1/20/2006 2:53 PM | Gomez, Carlos | Keycard Assigned | Brown, Steve |
| 1/20/2006 2:45 PM | Gomez, Carlos | Keycard Assigned | Lang, Barbara |
| 1/20/2006 2:45 PM | Gomez, Carlos | Keycard Assigned | Asahi, Janice |
| 7/19/2005 3:29 PM | Gomez, Carlos | Modify Operator | gstone |
| 7/19/2005 3:13 PM | Gomez, Carlos | Modify Employee | Marshall, Martha |
| 7/19/2005 3:10 PM | Gomez, Carlos | Modify Employee | Chandler, Tom |
8.3.3 Keycard Encoding
Selecting Keycard Encoding from the list of System Activities brings up the screen shown below: This report shows the list of keycards encoded during a specific period of time.

PK 3529_08_07-ATLAS Version 1.2 User Manual
You can filter the report by Room, by Operator (Encoded by), by keycard type, or by keycard holder. You can also ask for All keycard types. Here is an example of this type of report.
| New/Dualone: | Double | Keyboard Holder | - |
| Sequence #: | 8 | Folio @Employee ID: | # |
| Creation Date/Time | 2/4/2006 8:24 AM | Disability Options | No |
| Valid from: | 2/4/2006 8:24 AM | Salesman Lockout Option | No |
| Valid unit: | 2/4/2007 8:24 AM | Staff Access to Amenities | Yes |
| Encoded by: | Gomez, Cather | Amended/CCAs | Caterina at Staff Parking,Loan |
| Encoded ex: | HOTEL MANAGER | Room/Revoter Supply Room | |
| Encoding Status: | Completed Successfully | ||
| Fixed Times: | 03-12, 12-15, 16-29 | Coertrity | Low |
8.3.4 Keycard Verification
Selecting Keycard Verification as report type will provide a report showing each time the transaction took place. You can filter by Operator name, Room or Keycard type verifications.

PK 3529_08_07-ATLAS Version 1.2 User Manual
| Parameters selected for this report: | |
| From Date / Time : 1/6/2006 07:37 AM | To Date / Time : 3/7/2006 07:37 AM |
| Encoded by : <All> | |
| Verified by : <All> | |
| Keyboard Type : <All> | |
Keycard Information
| Battery Test | |||
| New/Duplicate: | Duplicate | Encoded by: | Perez, Jose |
| Sequence #: | 6 | Keycard Holder: | H/A |
| Creation Date/Time: | 2/21/2006 7:51 AM | Folio #/Employee ID: | H/A |
| Verify Date/Time: | 2/21/2006 7:51 AM | Disability Option: | Ho |
| Valid from: | 2/21/2006 7:51 AM | Salesman Lockout Option: | Ho |
| Valid until: | 8/13/2013 8:51 AM | Staff Access to Amenities: | H/A |
| Verified by: | King, Rose | Amenities/SCAs: | H/A |
| Verified on: | HOTEL MAHAIGER | ||
| Verify Status: | Completed Successfully | ||
| Fixed Timezones: | H/A | ||
| Rasat Common Door Susta | .201, 202, 200 | ||
| New/Duplicate: | New | Encoded by: | King, Rose |
| Sequence #: | 2 | Keycard Holder: | II/A |
| Creation Date/Time: | 2/17/2006 11:42 AM | Folio #:Employee ID: | II/A |
| Verity Date/Time: | 2/17/2006 11:43 AM | Disability Option: | No |
| Valid from: | 2/17/2006 11:42 AM | Salesman Lockout Option: | No |
| Valid until: | 2/18/2006 11:42 AM | Staff Access to Amenities: | II/A |
| Verified by: | King, Rose | Amenities/SCAs: | II/A |
| Verified on: | HOTEL MAIAGER | ||
| Verity Status: | Completed Successfully | ||
8.3.5 Keycard Assignments
This report allows you to track when a keycard was assigned to a particular staff member and for how long.
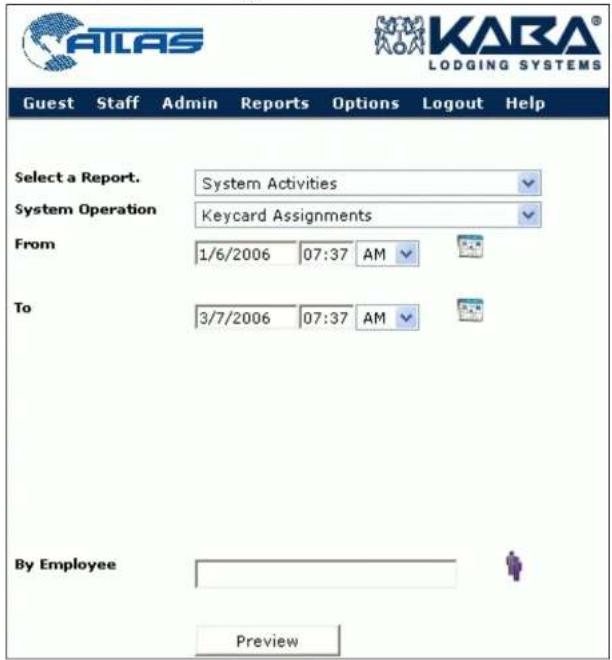
PK 3529_08_07-ATLAS Version 1.2 User Manual

PK 3529_08_07-ATLAS Version 1.2 User Manual
8.3.6 Network & Hardware Management
This provides a report on Network and Hardware activities, like the example shown below.

PK 3529_08_07-ATLAS Version 1.2 User Manual
| Date/Time | Operator | Operation Name | Operation Details |
| 2/21/2006 11:49 AM | Antonio, Marco | Add Network & Hardware Setup | FRONT DESK 2 |
| 2/21/2006 11:48 AM | Antonio, Marco | Add Network & Hardware Setup | FRONT DESK 2 |
| 2/21/2006 11:46 AM | Antonio, Marco | Modify Network & Hardware Setup | FRONT DESK 2 |
| 2/21/2006 11:46 AM | Antonio, Marco | Modify Network & Hardware Setup | FRONT DESK 1 |
| 2/21/2006 11:39 AM | Antonio, Marco | Modify Network & Hardware Setup | FRONT DESK 1 |
| 2/21/2006 11:38 AM | Antonio, Marco | Modify Network & Hardware Setup | MANAGER |
| 2/21/2006 11:36 AM | Antonio, Marco | Modify Network & Hardware Setup | FRONT DESK 1 |
| 2/21/2006 11:36 AM | Antonio, Marco | Modify Network & Hardware Setup | FRONT DESK 2 |
| 2/21/2006 11:35 AM | Antonio, Marco | Modify Network & Hardware Setup | MANAGER |
| 2/21/2006 11:34 AM | Gomez, Carlos | Modify Network & Hardware Setup | MANAGER |
| 2/21/2006 11:32 AM | Gomez, Carlos | Add Network & Hardware Setup | FRONT DESK 2 |
| 2/21/2006 11:31 AM | Gomez, Carlos | Add Network & Hardware Setup | KIMWX139 |
| 2/21/2006 11:30 AM | Gomez, Carlos | Add Network & Hardware Setup | KIMWX139 |
| 2/21/2006 11:29 AM | Gomez, Carlos | Add Network & Hardware Setup | KIMWX139 |
| 2/21/2006 7:50 AM | Gomez, Carlos | Delete Network & Hardware Setup | MAIN LOBBY |
| 2/21/2006 7:50 AM | Gomez, Carlos | Modify Network & Hardware Setup | MANAGER |
| 2/21/2006 7:49 AM | Gomez, Carlos | Modify Network & Hardware Setup | MANAGER |
| 2/21/2006 7:48 AM | Gomez, Carlos | Modify Network & Hardware Setup | KIMWX139 |
| 2/21/2006 7:46 AM | Gomez, Carlos | Modify Network & Hardware Setup | MANAGER |
| 2/21/2006 7:45 AM | Gomez, Carlos | Add Network & Hardware Setup | MAIN LOBBY |
PK 3529_08_07-ATLAS Version 1.2 User Manual
8.3.7 System Management
This provides a report on System Management activities, like the example shown below.

PK 3529_08_07-ATLAS Version 1.2 User Manual
| Date/Time | Operator | Operation Name | Operation Details |
| 29/2006 10:07 AM | Gomez, Carico | Modify Fixed Timezone | 20-24 |
| 29/2006 9:46 AM | Gomez, Carico | Reset Flexible Timezones | |
| 29/2006 9:39 AM | Gomez, Carico | Modify Submaster Level | Area 4 |
| 29/2006 9:34 AM | Gomez, Carlos | Add Submaster Level | Area / Area 4 |
| 29/2006 9:26 AM | Gomez, Carico | Delete Submaster Level | Area 4 |
| 29/2006 8:19 AM | Antonio, Marco | Modify Room Configuration | Ametry - Pool |
PK 3529_08_07-ATLAS Version 1.2 User Manual
8.3.8 Operator Logins and Logouts
This report enables you to track which operators were logged in at a specific date and time.

PK 3529_08_07-ATLAS Version 1.2 User Manual

System Activities Operator Login/Logout
Hotel Montreal
Tuesday, March 7, 2006 2:24 PM
Parameters selected for this report: Pon Date/Time: 116/2006 01:55 PM Operator time: < 01>
To Cib/7:3/7/2006 01:55:48
Jace 1 of
| Date Time | Operator | Operator Level | Operation Name |
| 3/7/2008 11:45 AM | Gomez, Carlos | Access Control Administrator | WEB Loguit |
| 3/7/2008 11:29 AM | Gomez, Carlos | Access Control Administrator | WEB Login |
| 3/7/2008 11:29 AM | Gomez, Carlos | Access Control Administrator | WEB Automatic Loguit |
| 3/7/2008 11:27 AM | Antono, Marco | Access Control Administrator | WEB Automatic Loguit |
| 3/7/2008 11:27 AM | Gomez, Carlos | Access Control Administrator | WEB Login |
| 3/7/2008 11:27 AM | Antono, Marco | Access Control Administrator | WEB Login |
| 3/7/2008 9:14 AM | Gomez, Carlos | Access Control Administrator | WEB Loguit |
| 3/7/2008 9:25 AM | Gomez, Carlos | Access Control Administrator | WEB Login |
| 3/7/2008 9:16 AM | Gomez, Carlos | Access Control Administrator | WEB Automatic Loguit |
| 3/7/2008 7:37 AM | Gomez, Carlos | Access Control Administrator | WEB Login |
| 3/5/2008 3:30 Rx | Gomez, Carlos | Access Control Administrator | WEB Automatic Loguit |
| 3/5/2008 3:36 Rx | Gomez, Carlos | Access Control Administrator | WEB Login |
| 2/2-2008 1:47 PM | Gomez, Carlos | Access Control Administrator | Access Management Login |
| 2/2-2008 1:219 PM | Antono, Marco | Access Control Administrator | Network & Hardware Setup Automatic Loguit |
| 2/2-2008 11:51 AM | Ferez, Jose | Maintenance / Engineering | WEB Loguit |
| 2/2-2008 11:59 AM | Ferez, Jose | Maintenance / Engineering | WEB Login |
| 2/2-2008 11:59 AM | Ferez, Jose | Maintenance / Engineering | WEB Login |
| 2/2-2008 11:46 AM | Ferez, Jose | Maintenance / Engineering | WEB Login |
| 2/2-2008 11:46 AM | Ferez, Jose | Maintenance / Engineering | WEB Loguit |
| 2/2-2008 11:45 AM | Ferez, Jose | Maintenance / Engineering | WEB Login |
| 2/2-2008 11:35 AM | Antono, Marco | Access Control Administrator | Network & Hardware Setup Login |
PK 3529_08_07-ATLAS Version 1.2 User Manual
8.3.9 Lock Operations
You can obtain reports on initialization, programming, and overrides of locks as well as Audits and M-Unit Audits by selecting Lock Operations.
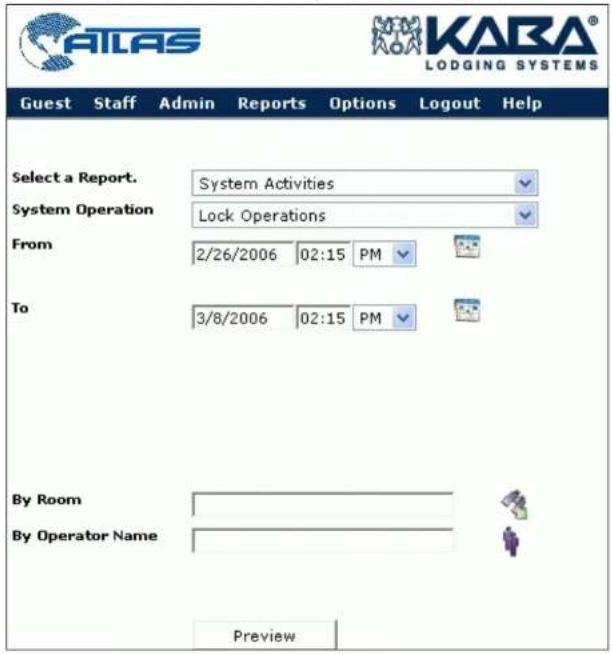
PK 3529_08_07-ATLAS Version 1.2 User Manual

PK 3529_08_07-ATLAS Version 1.2 User Manual
8.3.10 All Operation Types
If you select all activities for a long period of time, the amount of data may be too large to be displayed. If the message "Request returns too many records. Change your selection." is displayed, it is better to use a filter. Select one or more filters, such as the Operator or the time period. If you want a report on all System activities, choose a shorter time period. Both types of reports are shown below.
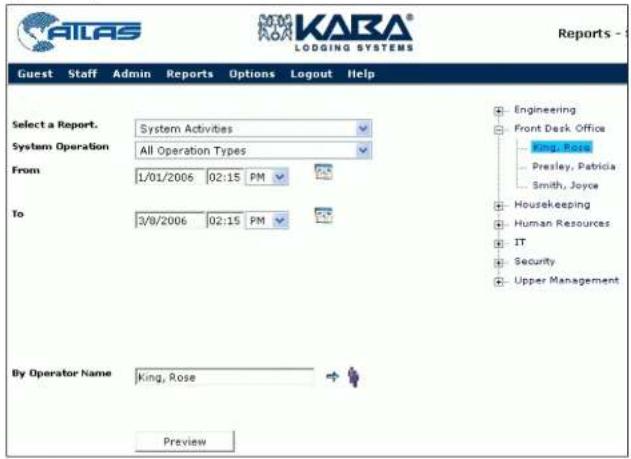
PK 3529_08_07-ATLAS Version 1.2 User Manual
| Date/Time | Operator | Operation Name | Status* | Keycard Type | Room Name |
| 24/2006 2:06 PM | Kng,Rose | AEB Login | S | ||
| 24/2006 19:52 AM | Kng,Rose | Responded Read Gout Keycard | S | Common Door Suite | 201,202,206 |
| 24/2006 9:24 AM | Kng,Rose | AEB Logut | S | ||
| 24/2006 9:34 AM | Kng,Rose | Respond to Read Gout Keycard | S | Adjoining Suite | 201,204,205,206 |
| 24/2006 8:36 AM | Kng,Rose | Request Guest Encoding | S | Adjoining Suite | 201,204,205,206 |
| 24/2006 8:13 AM | Kng,Rose | AEB Login | S | ||
| 1/61/2006 3:05 PM | Kng,Rose | AEB Automatic Logut | S | ||
| 1/61/2006 3:05 PM | Kng,Rose | AEB Login | S | ||
| 1/61/2006 2:45 PM | Kng,Rose | AEB Logut | S | ||
| 1/61/2006 2:25 PM | Kng,Rose | Request Guest Encoding | S | Common Door Suite | 200,202,201 |
| 1/61/2006 2:25 PM | Kng,Rose | Request Guest Encoding | F | Common Door Suite | 200,202,201 |
| 1/61/2006 1:65 PM | Kng,Rose | Request Guest Encoding | S | Quot One Shot | 100 |
| 1/61/2006 1:62 PM | Kng,Rose | AEB Login | S | ||
| 1/61/2006 12:10 PM | Kng,Rose | AEB Logut | S | ||
| 1/61/2006 11:50 AM | Kng,Rose | AEB Login | S | ||
| 1/61/2006 11:49 AM | Kna,Rose | AEB Logut | S | ||
| 1/61/2006 11:29 AM | Kng,Rose | AEB Logut | S | ||
| 1/61/2006 11:29 AM | Kng,Rose | AEB Logut | S | ||
| 1/61/2006 11:09 AM | Kng,Rose | AEB Logut | S | ||
| 1/61/2006 10:59 AM | Kng,Rose | AEB Logut | S | ||
| 1/61/2006 10:59 AM | Kng,Rose | Modify Operator | S | ||
| 1/61/2006 10:59 AM | Kng,Rose | AEB Logut | S | ||
| 1/61/2006 10:19 AM | Kng,Rose | AEB Logut | S | ||
| 1/61/2006 9:57 AM | Kng,Rose | AEB Logut | S |
PK 3529_08_07-ATLAS Version 1.2 User Manual
8.4 Exporting Reports
How do I Export Reports to Different Formats?
IMPORTANT: Reports may be tampered with by dishonest staff if there has been a theft or any type of unauthorized access to a room. To create a report that is read-only so that nobody can change any data you must select the Adobe Acrobat Reader® format.
- Open the report that you want to export by clicking the Preview button. Here we have selected the report on Operator Logins/logouts.
| Date/Time: 11/07/2006 01:55 PM Operator: New + AF's | |||
| System Activities Operator Login/Logout Hotel Montréal Tuesday, March 7, 2005 2:34 PM | |||
| Parameters selected for this report: Free Date/Time: 11/07/2006 01:55 PM Operator: New + AF's |
- Click on the Export button.
The following screen appears:

- Select the report's format from the pulldown menu for Exporting Formats. In the example, we selected Microsoft Excel.

The following appears:

PK 3529_08_07-ATLAS Version 1.2 User Manual
- Click on the link to open the report file.
- The following Excel format appears. At the same time, the file is saved in your Download directory as shown below the following report example.


Here are some examples of the same report in other formats:
Word
| Date/Time | Operator | Operator Level | Operation Name |
| 3/5/2008 7:14 AM | Omez Carlos | Access Control Administrator | Monitoring Manager Logout |
| 3/5/2008 7:14 AM | Omez Carlos | Access Control Administrator | Monitoring Manager Login |
| 3/5/2008 7:14 AM | Omez Carlos | Access Control Administrator | Network & Hardware Setup Logout |
| 3/5/2006 7:14 AM | Omez Carlos | Access Control Administrator | Network & Hardware Setup Login |
| 3/5/2006 7:13 AM | Omez Carlos | Access Control Administrator | Users and Passwords Logout |
| 3/5/2006 7:13 AM | Omez Carlos | Access Control Administrator | Users and Passwords Lugh |
| 3/5/2006 7:10 AM | Omez Carlos | Access Control Administrator | System Setup Lughout |
| 3/5/2006 7:09 AM | Omez Carlos | Access Control Administrator | System Setup Lughin |
| 3/5/2006 7:08 AM | Omez Carlos | Access Control Administrator | WEB Lughout |
| 3/5/2006 7:08 AM | Omez Carlos | Access Control Administrator | WEB Lughin |
| 3/7/2000 3:17 PM | Omez Carlos | Access Control Administrator | WEB Automatics Lughout |
| 3/7/2000 1:55 PM | Omez Carlos | Access Control Administrator | WEB Lughin |
| 3/7/2000 11:45 AM | Omez Carlos | Access Control Administrator | WEB Lughout |
| 3/7/2000 11:29 AM | Omez Carlos | Access Control Administrator | WEB Lughin |
| 3/7/2000 11:20 AM | Omez Carlos | Access Control Administrator | WED Automatics Lughout |
| 3/7/2000 11:27 AM | Antonio, Marco | Access Control Administrator | WED Automatics Lughout |
| 3/7/2000 11:27 AM | Omez Carlos | Access Control Administrator | WEB Lughin |
| 3/7/2000 11:27 AM | Antonio, Marco | Access Control Administrator | WEB Lughin |
| 3/7/2006 8:14 AM | Omez Carlos | Access Control Administrator | WEB Lughout |
PK 3529_08_07-ATLAS Version 1.2 User Manual
Acrobat Reader (.PDF)
See note at beginning of this procedure for reasons to use this format. You can select Export, then Acrobat Reader from the pulldown menu of file formats appearing in the Export screen.

PK 3529_08_07-ATLAS Version 1.2 User Manual
8.5 Viewing and Printing Reports
- To view reports, click on the Preview button after you have selected the criteria for the report.
- To print reports, follow the procedures in Exporting Reports. After you have exported the report to the desired format (Word, Excel etc.) use that software to print the report.

PK 3529_08_07-ATLAS Version 1.2 User Manual
Chapter 9 Database Management
9.1 Database Management - Operator Levels
Database Management is an very useful feature that enables you to do periodic backups of the ATLAS database, restore previous databases and schedule backups and purges..
The following table showing required operator level applies to all procedures in Database Management.

9.2 Database Location
- This ATLAS Windows application permits you to back up your ATLAS database to a specific location set up by the ATLAS software installation and to restore it if required.
- You can make backups on a scheduled basis or at a specific time for a specific reason, for example, if you are about to install a new version of the application.
PK 3529_08_07-ATLAS Version 1.2 User Manual
- Backed up databases may be copied from their location and kept elsewhere but when you want to restore a database, it must be done from the original drive where the database backup is located (not necessarily from the same folder).
9.2.1 Database Backup
How do I Back up an ATLAS Database?
- Click on the icon for Database Management that appeared on your
desktop after installation of ATLAS.

- Log in with your name and password.

- The following screen appears with the Backup/Restore selected. The name of your database and the location of the folder for the backup are filled in.
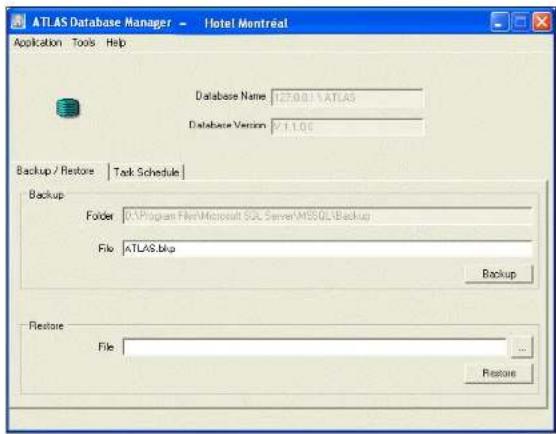
-
Click on Backup.
-
When the "Backup Done" message appears at the bottom left of the screen, the database has been saved in your Backup folder (C:\Program Files\Microsoft SQL Server\MSSQL\Backup).
The system automatically adds a date to the ATLAS.bkp file so that when you look in your files you can identify that specific backup.

PK 3529_08_07-ATLAS Version 1.2 User Manual
How do I Create a Schedule for Database Backups?
- If you want to create a schedule for backup, click on the Task Schedule Tab.
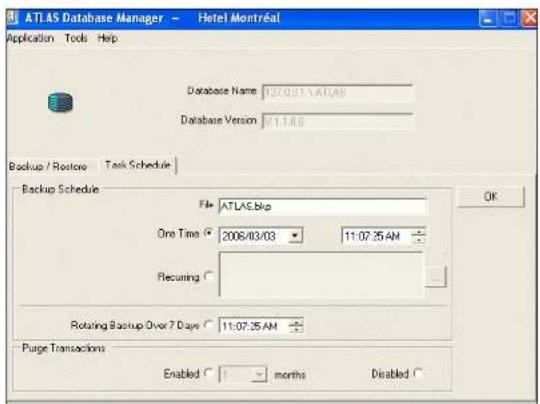
- Select One time, as in the example above and adjust the time and date. Click OK. A backup will be made automatically at that date and time.
OR
Select Recurring and click on the ellipse button .... The following dialog box appears.

- Select Daily, Weekly or Monthly and you have the following choices. Select on which daily basis you want to backup (every 4 days in the example below).

- The middle panel allows you to select the time of day the backup is to be done.

- Select Weekly and fill in the day and frequency of occurrence.
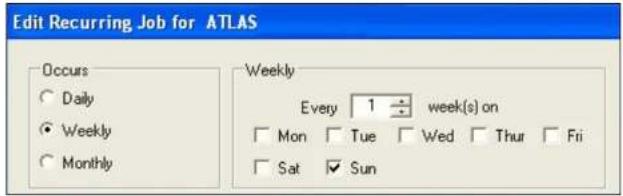
- Select Monthly and fill in the day and frequency of occurrence.

- The bottom panel allows you to select when the recurring schedule will start and end, using the calendar, or if it will continue indefinitely, an option you can select by clicking on No end date.

- The bottom panel of the main screen also offers you the choice of making rotating backups. This means that you make your first backup on this Monday (for example) and it backs up the database back to and including the previous Monday. Your next backup on Tuesday backs up to the previous Tuesday, and so on through to the following week when your Monday backup will override the backup you did this Monday.

- To purge transactions from the database, select Enabled and then select what you want to clear out of the database. If you select 5 months, for example, five months of logged transactions will be kept and everything older than five months will be purged. If you select two months, then only the latest two months will be kept. If you select Disabled, the database will never be purged and all data will be kept. Of course, at a
certain point, this will take up too much memory and it will have to be purged.

- Click on OK to save and activate your schedule.
Important: If you HAVE a previously created schedule for backups and purges and you create a new one by entering the data and clicking on OK at this point, the previous schedule will be overwritten. Only one schedule can be enabled at one time..
Remember, when you want to restore a database, it must be done from the original drive of the database backup.
PK 3529_08_07-ATLAS Version 1.2 User Manual
- Click on the Backup/Restore tab of the main application screen.

-
Click on the ellipse button to see a list of your backed-up databases.
-
Select the file name of the database you want to restore.
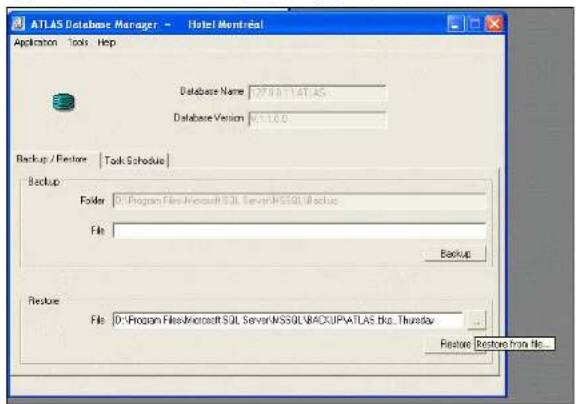
PK 3529_08_07-ATLAS Version 1.2 User Manual
Note: Before restoring any previous databases, make sure you have a backup of your current one in case you want to return to it.
- Click on Restore. Depending on your selection, you may receive a message like the following - a warning just to make sure you do not accidentally override a database.
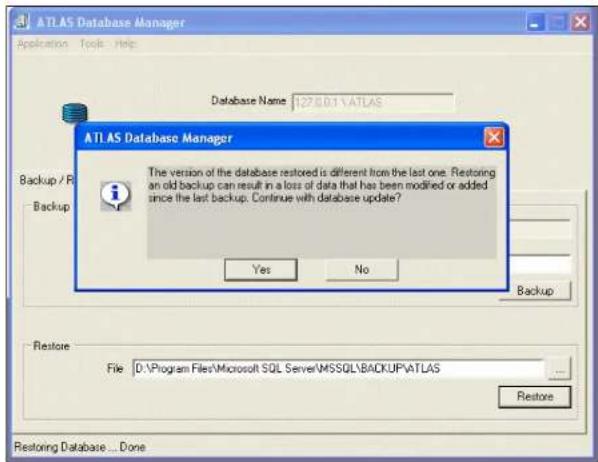
- You will see a message at the bottom left of the dialog box telling you when the restoration is complete.
9.2.4 Database Emergency Recovery
If the ATLAS application will not start, it could be a Database problem. Look in your Event Viewer and if the message is "Cannot connect to database" you need to follow this procedure. Only an IT Administrator or possibly the Access Administrator will have the right to perform this procedure. First, they will need to call KABA to find out how to log in to the ATLAS Server to fix the problem.
| GUEST SERVICE ATTEND ANT | FRONT DESK MANAGE R | MAINTENANCE | BELLMAN | IT ADMINISTRATOR | MASTER | ACCESS CONTROL ADMINISTRATOR | KABA TECHNIC AL SUPPORT |
How do I Recover the ATLAS Database?
- Call KABA to get instructions on logging into the ATLAS server.
- Look in your file C:\Program
Files\MicrosoftSQLServer\MSSQL\BACKUP to see if you have a valid database backup, for example, the March 6th one shown below. You can use any valid backup, even a very old one. If you have no backups whatsoever, call KABA. It will be necessary to re-install ATLAS Database from scratch.

- Open ATLAS Server.exe.config file. You will see a list of keys in SQL Server like the following. SQLUser and SQLPassword may be encrypted. Put the non-encrypted values.
<SQLServer Nike
<SQLDatabase Nike
<SQLUserName>
<SQLPassword>
- Add the following keys to the list.
<ATLASEmergencyBkpfile/>
<ATLASLogin>
<ATLASPassword>
<updateToV1100>
<updateSinceV1100>
<updateSoftVersion>
The three "update" files ensure that, even if you have an old backup, it will be updated so that it is synchronized with the current ATLAS code. These update files are already installed in
C:\ProgramFiles\MicrosoftSQLServer\MSSQL\Data.
- Verify that you now see all these keys.
<SQLServer>
<Database>
<SQLUserName>
<SQLPassword>
<ATLASEmergencyBkpfile/>
<ATLASLogin>
<ATLASPassword>
<updateToV1100>
<updateSinceV1100>
<updateSoftVersion>
-
ATLAS server now begins an automatic restoration and update of the database. If the server stops operating, look in the Event Viewer to see why. The Event Viewer will show the status of the database restoration process and may ask you to perform an action – for example, verify that your login is correct. (SQLUserName and SQLPassword must already have been defined in SQLServer at installation.) If you do not have them, please call KABA.
-
If the process stops and you cannot continue, even after looking in Event Viewer, please call KABA for help.
-
If the process is successful, the keys that you entered (shown below) are deleted automatically.
<ATLASEmergencyBkpfile/>
<ATLASLogin>
<ATLASPassword>
<updateToV1100>
<updateSinceV1100>
<updateSoftVersion>
You should now be able to log into ATLAS with your selected ATLAS login and ATLAS password and the system should be up and running.
Chapter 10 - Monitoring Manager
10.1 System
Definition/Description
ATLAS provides supervisors with the ability to monitor the activities closely and efficiently. With ATLAS, supervisors can better manage the personnel work flow, determine problems on the front desk and minimize paperwork in these areas. ATLAS "Monitoring Manager," gives the Supervisor a complete view on one screen to help make informed business decisions. The supervisor can see who is in, what they are working on, any issues that need attention, view historical information and more.
The Monitoring Manager is the application that enables ATLAS operators to observe all the transactions between all the workstations and encoders on the ATLAS network. This application is read-only, you cannot change any of the data in the system but merely observe transactions taking place. This enables you to troubleshoot any workstations or encoders having problems.
You must be at one of the operator levels indicated in the following table for access to the Monitoring Manager Application.

PK 3529_08_07-ATLAS Version 1.2 User Manual
10.2 Monitoring Manager - Client Information
 |  |  |  |  |  |  |  |
| GSA | FDM | MAINT | BELLMAN | ITADMIN | MASTER | ACCCONTROLADMIN | KABATECHSUPPORT |
How do I View Client Information?
- Click on the ATLAS Monitoring Manager icon that appeared on your

PK 3529_08_07-ATLAS Version 1.2 User Manual
- Enter your Login name and Password, configured in the application called Users and Passwords. The following main screen appears:

The top panel presents client information. The bottom panels show the transactions for the client selected in the top panel or for all clients if the "View all Client Transactions" checkbox has been checked).
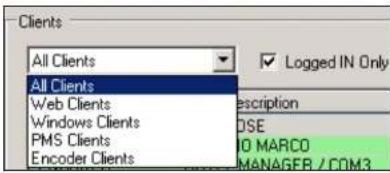
- Click on Logged IN only if you want to see information on just the clients logged in at the present time. If the checkbox is left blank, you will see all currently logged in and logged off clients since the last ATLAS Server reboot.
-
Select the client that you would like a more detailed view of.
-
When you select a client type, the status is given as logged in or logged out (if you have not selected Logged IN Only.)
- You can restrict the list of clients by selecting different client types. For Windows Clients, the name of the specific application is shown in the Client Type column of the lower panel.
Note: When you select a client type, you may find the same user logged in as several different client types.
- If you are not sure that the details are the most recent, click on
Refresh Clients to get a more up-to-date picture of Client Status, Last Login and Last Logout. Dates are shown in the format of Month/Day/Year.
- To see details of client transactions, see How do I View Client Transactions? below.
- Log out by clicking on Exit under the File menu at top left.
10.3 Client Transactions
How do I View Client Transactions?
- Log in, following steps 1. to 3. in Monitoring Manager - Client Information. The following main screen appears.
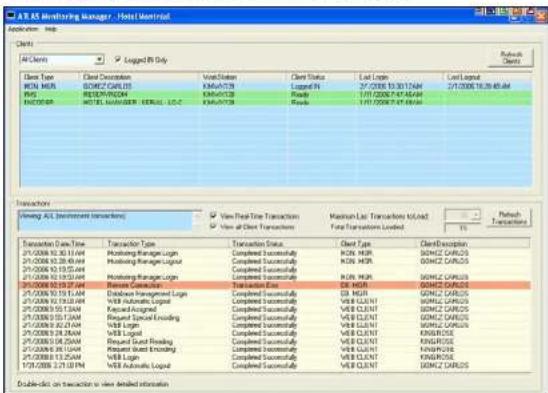
- The top panel presents the client status and information. The bottom panel shows more detailed information on each client transaction.
PK 3529_08_07-ATLAS Version 1.2 User Manual
- If you have selected All Clients, you must check All transactions in the bottom panel. If you do not check this box, you will see a message in the middle Transactions Panel as shown below.

- If you select an individual client, you will see a screen like the one below, with User Carlos Gomez selected, showing only his transactions. The checkbox "View all client transactions" will automatically be unchecked.

If the "View Real-Time Transactions" checkbox is checked, the bottom panel shows the last 15 transactions for the client selected in the top panel or for all clients (if the "View all Client Transactions" checkbox has been checked). The transactions are continuously refreshed to display the most recent client activity. To ensure that you are viewing the most recent data you can click on


- To select the "Maximum number of transactions to view, you must de-select real-time transactions. The field "Max Last Trans to Load" becomes enabled, allowing you to select the maximum number of last transactions to load. -200 in the example below.
| Transaction | ||||
| View: ALL (load return transactional) | ||||
| View Real-Time Transaction | Max. Lost Time, No Load | 200 | Network Transaction | |
| View All-Store Transaction | Total Time, Loaded | 16 | ||
- The column headings show the types of transaction information available.
| Transaction Type | Transaction Status | Client Type | Client Description | |
| 1/2/006 1078-11.4M | Transacted Serial PC - ML Unit | Completed Occasional | VNET CLIENT | GEMZE CARDOS |
| 2/1/006 1078-11.4M | Transacted Serial PC - ML Unit | Transacted Exp | VNET CLIENT | GEMZE CARDOS |
| 2/1/006 1078-12.4M | Reserved Serial Crossing | Completed Occasional | VNET CLIENT | GEMZE CARDOS |
| 3/1/006 1078-12.4M | Reserved Serial Crossing | Completed Occasional | VNET CLIENT | GEMZE CARDOS |
| 3/1/006 1078-12.4M | Reserved Serial Crossing | Completed Occasional | VNET CLIENT | GEMZE CARDOS |
| 3/1/006 1078-12.4M | Reserved Special Crossing | Completed Occasional | VNET CLIENT | GEMZE CARDOS |
| 3/1/006 1078-12.4M | Reserved Serial Crossing | Completed Occasional | VNET CLIENT | GEMZE CARDOS |
| 3/1/006 1078-12.4M | VNET Login | Completed Occasional | VNET CLIENT | GEMZE CARDOS |
| 3/1/006 1078-12.4M | VNET Automatic Logial | Completed Occasional | VNET CLIENT | GEMZE CARDOS |
| 3/1/006 1078-12.4M | Reserved Serial Crossing | Completed Occasional | VNET CLIENT | GEMZE CARDOS |
| 3/1/006 1078-12.4M | Reserved Special Crossing | Completed Occasional | VNET CLIENT | GEMZE CARDOS |
| 30/006 1078-12.4M | VNET Login | Completed Occasional | VNET CLIENT | GEMZE CARDOS |
| 1/2/006 207-27 PM | VNET Automatic Logial | Completed Occasional | VNET CLIENT | GEMZE CARDOS |
| 1/2/006 207-27 PM | VNET Login | Completed Occasional | VNET CLIENT | GEMZE CARDOS |
| 1/2/006 207-27 PM | VNET Automatic Logial | Completed Occasional | VNET CLIENT | GEMZE CARDOS |
| 1/2/006 207-27 PM | VNET Login | Completed Occasional | VNET CLIENT | GEMZE CARDOS |
■ Transaction ID - numbers generated automatically by the database
Transaction Date - Month/Day/Year/Time/
Transaction Type - login, logout, request, etc.
- Transaction Status - Transactions with errors are highlighted in a different color
- Client Type - one of the client types in the pulldown menu in the Client Information panel at top
- Client Description - Usually an employee's name or encoder name.
- Double-click on a transaction on the list to view detailed information about that transaction. In the example below, Request Special Reading has been selected and double-clicked.

The following screen appears. The screen provides all the details already given in the main panel but sometimes also has additional information in the Transaction Information section.
![ATLAS Monitoring Manager / Detailed Transaction Information Transaction Data/Time: Transaction Type Transaction Status: 2/7/2006 10:33:32 AM Request Special Reading Completed Successfully Client Type Client Description Computer Name: WEB CLIENT GOMEZ CARLOS KIMAVLUS Transaction Information: NEW AREA recorded for area AREA 1 Created on 1/20/2006 11:50:00 AM (Standard Time) Employ is set for 1/20/2007 11:50:00 AM Access to emailless is ENABLED Staff Common Access available: CAFETERIA, CLOAK ROOM Access during time zones: [08-12] [12-16] Card Sequence Number is 2 Encoded by operator GOMEZ CARLOS on encoder HOTEL MANAGER for employee N/A Employee ID is 322](/content/2026/05/978683/images/2920a0d4ff5128403bfc18fd1e7d2a088dce4609408da61481f788de4e5fc0b0.jpg)
Some transactions do not contain any more detail than what is given in the main panel, as in the following example.
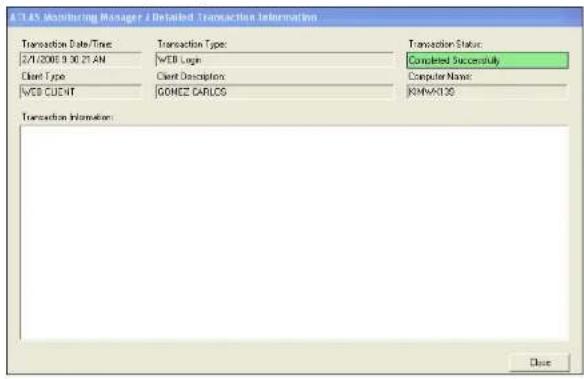
PK 3529_08_07-ATLAS Version 1.2 User Manual
Chapter 11 - Security Procedures
11.1 Security - Installation
Permissions
- The person installing the software should have the appropriate system permissions to install the software. This will vary for the system and location, being especially critical for more recent Windows platform: 2000/XP.
Storage
• Install the ATLAS server in a secure area.
- Keep the database password in a secure place.
- Keep your installation CD with the serial number in a locked area.
Anti-Virus
• Install anti-virus protection on the server and the network.
Hotel Code
- Installing a unique Hotel Code ensures that each installation is secure. Each component of the ATLAS system (locks, card readers, ATLAS software on workstations, and every type of keycard) makes use of the Hotel Code to prevent tampering.
11.2 Set Computer Name
- If you log in to the ATLAS System and there is no computer shown on the login screen, enter your Operator Name, Password, and Computer name as shown below.

PK 3529_08_07-ATLAS Version 1.2 User Manual
- Click on Login. This brings up the Guest, Make Keycard page.

-
Now, Log out. See Logging on and off the ATLAS Web User Application.
-
Log in again and you will see the Login screen with your computer name (the computer name you entered) and a Set Computer Name button for a time in the future when you might want to change the computer name.

PK 3529_08_07-ATLAS Version 1.2 User Manual
11.3 Security - User
Permissions
- The user should be granted the appropriate permission to use the software; this is especially critical for more recent Windows platform: 2000/XP.
- Network and PC passwords should be kept absolutely private and changed frequently.
- Ensure that all user names have been entered into the System by the supervisors and that there is an activated encoder for each keycard-generating workstation (encoders can be shared by two or more workstations). If the login screen does not appear, Internet security settings may need adjusting. See Web-based User Application - Security Settings.
Expires
- Configure keycard expiries for the shortest periods possible.
- In the M-Unit, keep the file expiry period short so that no one can pick up an idle M-Unit and read the door files. See Hotel Setup, point number 5.
- Electronic Override – set a maximum number of electronic overrides that an M-Unit can perform on a lock. This is a security feature in case an M-Unit is lost or stolen. See Hotel Setup, point number 15.
Web Settings
- Certain settings in Internet Explorer may interfere with your ability to create a configuration file or even access some Web pages. Please ensure that the settings for all ATLAS Web client workstations are correct before users attempt to log on to the Web application, See Web-based User Application - Security Settings.
- Update your windows Internet Explorer regularly.
PK 3529_08_07-ATLAS Version 1.2 User Manual
- Palm M-Unit- When entering your login name and password – a maximum of 10 characters - the password itself will actually appear on the screen (not *****) so keep the screen out of view of any onlookers.
- Back up all data files on a regular basis and especially prior to installing new software.
11.4 Security - Network
Network Security
- Ensure that the ATLAS network is a virtual private network (VPN) for internal use only.
- Keep a tight control over passwords and administrative rights on your networks.
- When dealing with a PMS interface Select Enable Operator ID. This option increases security because it means that the PMS must provide a valid Operator ID to the ATLAS system in order for it to process the request.
- Have a reliable firewall for your network.
- Check your server disk space regularly.
Web Services
- Configure the ATLAS Server web with the SSL option (certificate).
- Activate authentication for PMS web services.
11.5 Basic Keycard Security
11.5.1 Inform Guests and Staff about Keycard Security
Keycards must be treated as carefully as keys. They should never be lent or left unattended. The loss or theft of a keycard must be reported immediately. Magnetic stripe keycards can be erased by strong magnetic fields, and should be handled with the same precautions as a credit card.
Guests must insert their keycard in all of the doors leading to their room or suite, as soon as they check in. If multiple identical keycards are issued, only one has to be inserted in the lock(s). If Staff use a Reset keycard or a Lockout keycard to remove access to a guest room, the Reset or Lockout keycard must be inserted in all the locks leading to the room or suite.
Each staff member's keycard is his/her responsibility. If anyone makes unauthorized use of their keycard, loses it and does not report it, or fails to return it, they can be held accountable.
11.5.2 Do Not Write the Room Number on the Keycard
Keycards are often lost or may occasionally be stolen. If a Guest keycard is marked "Room 100" for the convenience of the guest, anyone finding that keycard will know which room it unlocks. NEVER write Guest room numbers on the keycard. Staff keycards may be marked with a serial number, as this does not identify the rooms to which the keycards have access.
11.5.3 Make the Audit Trail Public Knowledge
The audit trail is a deterrent to inappropriate access to rooms. Inform staff that detailed records of every access to any KABA lock or card reader and of all the ATLAS transactions are available.
PK 3529_08_07-ATLAS Version 1.2 User Manual
11.6 Encoding, Issuing and Replacing Keycards
11.6.1 Invalidate lost keycards
Staff should be encouraged to report any missing keycard immediately. Not reporting lost keycards could result in unauthorized access and theft, thus incurring a much greater expense than simply replacing the keycards.
Any Entry keycard can be invalidated by encoding a new one, or by encoding a Reset keycard and inserting either one in ALL affected locks. Reset keycards do not give access to the room and are intended for use by staff to invalidate a keycard without entering the room. If a Reset keycard is used, it should be made before the new keycard is made. Making a Reset keycard later than a new keycard will advance the lock beyond the creation time for the new keycard and the new keycard will not function.
Guests occasionally report lost keycards as they leave to go out for the day or the evening. Making a new guest keycard should not wait for the guest's return. Either the guest with his/her new keycard or a staff member with a Reset keycard should go to the room as soon as possible.
11.6.2 Safe Storage of Staff Keycards (when not in use)
For the highest possible security, it is common practice to ensure that valid Staff keycards do not leave the premises. This can be done by
- encoding new Submaster keycards each day, with an expiry time of one night, or
■ storing the keycards between shifts. Storing valid keycards is acceptable as long as the returned keycards are properly secured when not in use.
11.6.3 Access to Keycards
Keycards should be restricted to those who require them, and each person should be issued the lowest level keycard that he/she requires.
PK 3529_08_07-ATLAS Version 1.2 User Manual
11.6.4 Infrequently Used Keycards
All keycards that are used infrequently should be accounted for regularly. In general, it is good security policy to issue keycards only to those who need them. It is a common error to issue high-level Master Entry keycards to senior staff members that they in fact rarely use. Keycards rarely used are rarely accounted for, so a rarely used keypad may be missing for some time before the loss is noticed. Issue keycards on the basis of their projected use. All valid keycards should be kept in a secure location when not in use.
11.6.5 Access to Emergency Keycards
In general, the Emergency keycard should be available but not in circulation. With the exception of its ability to override the deadbolt/privacy lock, and the other lockouts, its functions are the same as those of the Grand Master keycard. Some properties do prefer that their security officers carry the Emergency keycard in case they must enter a double-locked room. However, security officers carrying the Emergency keycard should be careful when opening doors routinely.
11.6.6 Handle Returned Keycards Appropriately
If a guest returns one copy of a keycard for which they still hold other valid copies, re-encode the keycard as a Battery Test keycard in order to erase the information it contains. Destroy keycards that are discarded due to wear and tear by cutting them into pieces. Damaged or worn keycards may still work intermittently in the lock until they expire or are cancelled by a more recent New keycard or a Reset keycard. Destroying the worn keycard prevents illicit use, and even prevents unauthorized persons from posing as guests or staff in possession of a keycard.
11.7 Lock Overrides
PK 3529_08_07-ATLAS Version 1.2 User Manual
Lock Override Table
Possible Lock Overrides
| Electronic | Electric | Mechanical | Audit Trail | |
| Generation E-760 | Override with M-Unit (via IPM). See Overriding a Lock for the complete procedure | N.A. N.A. | Logs override | with time performed and number of M-Unit and IPM. |
| Generation E-760 K | Override with M-Unit (via IPM). See Overriding a Lock for the complete procedure | N.A. Insert | key in Lock.Key turns handle. | Logs electronic override with time performed and number of M-Unit and IPM.Logs mechanical override with time only - other fields as 0's. |
| Generation E-730 | Override with M-Unit (via IPM). See Overriding a Lock for the complete procedure | N.A. | N.A | Logs electronic override with time performed and number of M-Unit and IPM.Logs mechanical override with time only - other fields as 0's. |
| Generation E-730K | Override with M-Unit (via IPM). See Overriding a Lock for | N.A. Insert | key in Lock.Key turns | Logs electronic override with time performed and number |
PK 3529_08_07-ATLAS Version 1.2 User Manual
| the complete procedure. | handle | of M-Unit and IPM. Logs mechanical override with time only - other fields as 0's. | ||
| Solitaire 710-II Firmware Versions lower than 0 | N.A N.A Insert | key in Lock.Key turns handle. | Logs mechanical override with time only - other fields as 0's. | |
| Solitaire 710-II Firmware Versions 0 or higher | Override with M-Unit (via IPM). See Overriding a Lock for the complete procedure. | N.A Insert | key in Lock.Key turns handle. | Logs electronic override with time performed and number of M-Unit and IPM.Logs mechanical override with time only - other fields as 0's. |
| RAC 3.5 N.A Activate | Manual bypass by using the switch on the board in the card reader. | N.A Not logged | ||
11.7.1 Electronic Overrides -
When to use the electronic override
PK 3529_08_07-ATLAS Version 1.2 User Manual
Electronic Overrides should always be tried first before resorting to mechanical overrides in locks that have both features.
Try the keycard for the lock and if there is a red light response, try the Emergency keycard. If the lock does not respond at all to either of the keycards, perform a mechanical override.
Locks using the electronic override
For properties with the E-760 lock, the M-Unit and the IPM are used to perform the electronic override.
Generation E-760 and the new (Firmware Version 0) 710-II Thrift locks feature electronic override capability. For the enabling of a specified number of electronic overrides, see . For the procedure for performing the overrides, see Overriding a Lock.
11.7.2 Mechanical Overrides
Some people view a key override as a poor feature for a keycard access control system. Why should the system allow a mechanical key to override the need for a keycard? Some users prefer an override option in the event of damaged or failed electronics.
The following locks that can be used with the ATLAS System can be mechanically overridden. They all have a cylinder cap that conceals access to a cylinder where you can use mechanical key override for use in emergencies.
E-760K
E730K
E-710-II, all firmware versions.
Advantages
PK 3529_08_07-ATLAS Version 1.2 User Manual
Solitaire series locks have an optional high-security removable-core cylinder override for the following reasons.
- Access is assured even if the electronics do not work.
- Access can be tightly restricted (key blanks are factory restricted).
- Use of the mechanical override key is audited in the lock.
In the unlikely event of a lost key, cylinders can be removed and re-pinned.
Security
The override key should not circulate. It should always be available to an authorized person on each shift who can sign out for it in an emergency. After use, the override key must be secured again.
All override keys, the cylinder change key, and the cylinders should be strictly controlled. KABA keeps a small stock of spare keys and cylinders so it is not necessary for the property to keep any spares that could be stolen or misused. The cylinder of a defective lock removed from a door should be removed and installed immediately in the replacement lock. Any spare cylinder should be well secured. Report any loss of keys or cylinders to KABA. Do not install any lock without the cylinder in place.
11.7.3 How do I Override a Lock?
For a table with the types of locks on which you can perform an electronic override, see Lock Overrides.
How do I Perform an Electronic Override?
- Go to the first door with the lock that you wish to electronically override.
- Tap on ATLAS on the M-Unit screen.
PK 3529_08_07-ATLAS Version 1.2 User Manual

- This brings you to the main screen where you have the four choices shown above
- Tap ATLAS and select Tools > Electronic Override from the dropdown menu that appears..

- The following screen appears first, showing how many overrides you have left for that lock.

DO NOT swipe the programming keycard in the lock. If you do, it will reset the lock time rather than overriding it.
- Tap on Override. The following screen appears.

- Hold the M-Unit up to the lock at a distance of AT LEAST 5 cm with the top edge of the M-Unit parallel to the IrDA (small red glass panel) located on the IPM with the screen facing upwards.
PK 3529_08_07-ATLAS Version 1.2 User Manual
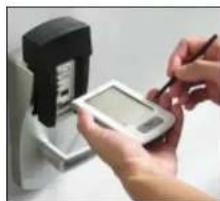
natural_image
Close-up of hands using a digital blood glucose meter to test blood pressure (no visible text or symbols)- In a few seconds you will receive a message that the lock has been electronically overridden and you will be able to open the door.
- Continue to the next door on your list and repeat the procedure (Steps 4 to 8) until all the required overrides have been performed.
- If you receive a message that the communication has failed, repeat the procedure, Checking that you are holding the M-Unit in the correct position pointing straight at the IrDA window (small red glass panel) and at the distance given in Step 7.
11.8 Emergency Procedures
This topic describes situations that require prompt action by staff to ensure the safety and/or security of guests. All staff should know which managers to contact in an emergency to deal with access control.
The Emergency keycard, spare batteries, override keys for locks equipped with a mechanical override, tools necessary to uncover the override, and spare replacement locks should be kept in a location that is secure but instantly accessible to authorized employees in an emergency.
This topic also deals with certain situations that are not emergencies, but require immediate action.
If a lock cannot be opened:
If the batteries are dead,
PK 3529_08_07-ATLAS Version 1.2 User Manual
The red and green LED indicators will flash together when a Battery Test or Staff submaster (Section, Floor, Group, Zone or Area) keycard is inserted in the lock. You must replace the lock batteries, and reset the lock time using the ATLAS System. If the batteries are on the inside of the door, you must use the electrical or mechanical override first to enter the room. On a Generation E-760 series lock, replace the batteries on the outside of the door, reset the lock time, and then open the door normally with any valid keycard (Guest or Staff). (Battery replacement procedures are described in Replacing a Battery.)
If the deadbolt is thrown
or if the door has been locked out with the Hotel Lockout keycard, Room Lockout keycard, or the Salesman's Lockout feature, consult management before opening the door. Use the Emergency keycard for authorized emergency access, which will be recorded in the lock audit.
If there is electrical/mechanical failure,
Activate the override. Override use is recorded in the audit. Call for service on the defective lock from your KABA dealer. DO NOT provide guests with the mechanical override key. Remove the mechanical override cylinder before shipping a lock for repair. Once a new or repaired lock is installed, reset the addresses from a nearby lock.
If the mechanical override key switch is jammed,
If a lock with mechanical override capability does not respond (no LEDs illuminated) even to the Emergency keycard, it is possible that the mechanical key switch in the lock has become jammed in the "on" position, so it does not respond, even though the card reader in the lock is functional. Do an audit on that lock. If the audit shows "Override" for every action you tried, then you know that this is the case. In such a case, the lock must be returned to KABA.
If a Guest Keycard is missing:
If a guest has lost a keycard and is on the property:
Issue a Replacement keycard to the guest and instruct them to immediately insert it in all the guest room locks to which they have access, including all doors of a Common Door Suite or Adjoining Suite. If a guest or their party had more than one copy of the lost keycard, all of the keycards must be replaced with duplicates of the new keycard, which can all be made together, or as each guest returns their cancelled keycard, by using the Additional keycard option. The
PK 3529_08_07-ATLAS Version 1.2 User Manual
guests need not insert their new keycards in common area doors such as entrances, pool, etc.
If a guest has lost their keycard and is away
The room must be protected from unauthorized entry until the guest returns. A Replacement Guest keycard should therefore NOT be issued right away. Instead, a Group Lockout or Guest Reset keycard should be inserted in the lock to cancel any circulating guest keycards. A Replacement keycard can be issued to the guest when they return.
If a pre-registered keycard is missing before guest arrives:
Make a pre-registered Reset keycard and insert it in the affected locks to prevent the missing keycard from becoming valid. Make a new Pre-Registered keycard or wait for the guest to arrive, and issue them a new Guest level keycard. If a Pre-Registered keycard is no longer needed and was never given to a guest, simply re-encode it to use as another guest keycard.
If a keycard becomes jammed in the encoder:
Turn off the power switch at the back of the encoder and then turn it on again. Turn off and then re-start the Encoder Manager Service (EMS).
If a Staff Keycard is missing:
If a Staff keycard is lost or stolen:
These keycards include all Submaster (Section, Floor, Group, Zone, Area), Master (Bellman's and Grand Master), and Emergency and Passage keycards. Cancel the missing keycard by issuing the appropriate Reset keycard or a new keycard (for Submaster levels only), and inserting it immediately in all affected locks. Re-encode the keycards of other employees affected by this change as duplicates of the new card, or issue them duplicate keycards and collect the cancelled keycards. The Bellman's Master, and Emergency keycards are always duplicates, so a new Reset keycard must be used in all locks on the property if one of these three keycards is missing.
If security is compromised
If an employee leaves or is fired:
The operator (if the employee is an operator in the ATLAS system) must be deleted from the Users & Passwords application (see Modifying and Deleting Employees and Operators.) and access keycards for the employee must be revoked. If their keycards have been returned, they can be re-assigned to a new employee. If the keycards were not returned or may have been copied, follow the procedures described above for lost or stolen Staff keycards.
If the Hotel Code becomes known:
The property must be re-keyed with a new Hotel Code. Contact KABA for assistance. All locks, card readers and keycards must be reprogrammed with the new Hotel Code using a Hotel Restart keycard. A new configuration must be transferred to the M-Unit and all the IPMs must be re-programmed. Refer to Transferring files from the Workstation to the M-Unit and IPM.
If an IPM is stolen:
Cancel the IPM at once, following the procedure in Network & Hardware Setup Manual, PK3065 02/06.
If a crime occurs in a room:
Immediately lock out the room using a Room Lockout or Hotel Lockout keycard. Download and print the audit trail from the lock to provide evidence for any investigation.
PK 3529_08_07-ATLAS Version 1.2 User Manual
Chapter 12 - Maintenance and Troubleshooting
12.1 Regular Preventive Maintenance
12.1.1 Battery Testing and Replacement
Regular testing of the batteries in all locks is probably the most important regular maintenance task, since replacing a battery before it fails avoids the need to use the override to open the door. Have staff check the indicator lights routinely when they insert their submaster (Section, Floor, Group, Zone, Area) keycard. If the red and green indicators flash together, the battery is low and should be replaced promptly. See Replacing a Battery for instructions.
12.1.2 KABA Electronic Locks
The locks require very little preventative maintenance. The reader is vertically mounted and is designed with an open track for the specific purpose of being dirt resistant. The card reader should be cleaned every two months. Simply insert and withdraw a cleaning keycard several times in each card reader. You will notice that the cleaning keycard becomes dirty. If your locks are exposed to high levels of dust or salt, they should be cleaned more often. Cleaning cards are commercially available or you may buy them from www.keycard.com. The lock housing should be cleaned and polished every two months with a clean dry rag in normal environments. Harsh environments may require weekly cleaning. Do not use harsh cleaners or abrasives, as they will damage the finish. Locks mounted on exterior doors should be treated, and then maintained regularly, with a wax-based product to prevent corrosion from the elements. Some of our customers have used LPS3 Heavy Duty Rust Inhibitor, manufactured by LPS Laboratories Inc., Tucker, Georgia, 1-800-241-8334. Another effective protectant is Satin Chrome Turtle Wax. Please contact your local cleaning products supplier for another appropriate product to use.
PK 3529_08_07-ATLAS Version 1.2 User Manual
12.1.3 The Locking Mechanism
The locking mechanism (mortise or cylindrical) may require occasional maintenance. These devices are similar to those used in standard key locks and require the same periodic attention.
Mortise locks should be inspected occasionally to ensure that the retraction is still adequate (the latch can be drawn into the door completely) from both the inside and outside. The mortise should also be checked to ensure that the deadbolt can be easily thrown and retracted, and to ensure that the dead latch is functioning (the latch is deadlocked when the auxiliary latch is depressed.
It is also important that the doors themselves be inspected to ensure that the door-to-frame alignment is correct and is allowing the latch bolt to engage in the strike. At the same time, the gap between the door and the frame should be small enough to allow the strike to depress the auxiliary latch.
A leading cause of mortise lock failure is the habit of using the deadbolt to keep the door ajar. Often the door is allowed to slam against the deadbolt, which damages the mortise and the frame. Make sure that the cylindrical lock functions properly. Check the dead latching, the privacy lockout, and the fit of the door.
12.1.4 The Override Cylinder
All override cylinders should be tested every month, especially in humid environments, to ensure emergency access is possible when required.
PK 3529_08_07-ATLAS Version 1.2 User Manual
12.1.5 Lock Responses to Keycards
After a lock has been installed and configured as part of the ATLAS or Solitaire system, it gives an audible and visible response when a keycard is inserted, providing valuable information about the lock status.
| Indicator Light | Condition and Action Required |
| Flashing Green. | Access granted. Turn handle to open door. |
| Flashing Red | Access granted to Emergency keycard while a lockout is in place. Turn handle to open door. |
| Single Green | Input from Reset or Lockout keycard accepted. No action required. |
| Single Red | Keycard valid but locked out. Unlock the deadbolt from inside the room, or remove security lockout. (Access is not granted.) |
| No light | Invalid keycard or misread. Verify the keycard. |
| Flashing Green and Red | Low battery indicator when using Staff keycard. Change the battery. |
| Green, then Red | Lock not programmed or keycard misread. Try again. If this response continues, troubleshoot the keycard and lock. |
| Red LED always on | Halt Mode (Batteries are too low to continue operation). Batteries need to be changed.* |
| Red LED flashes every half second | Power-on or reset while mechanical override is on. Disengage mechanical override and reconnect the batteries (cam not engaged). |
| Double short flash of Red LED every 4 sec. | Advanced fail mode (memory failure). Circuit board needs to be changed. ** |
PK 3529_08_07-ATLAS Version 1.2 User Manual
*Can also happen during installation. Solution: Disconnect the batteries, wait 5 seconds and reconnect the batteries.
**In fail mode (one short flash of red led every 4 seconds), the Emergency keycard can be used to unlock the door. (It is important to change the batteries at this point). The Generation E-760 lock can report the battery voltage level in the lock audit
12.1.6 Battery Operating Voltages
| Normal | Low | Fail(Inhibit) | Halt |
| 4.0V - 6.2V | 4V 3.6V Between | 3.0 | and 3.5V |
12.2 Troubleshooting
Having read the sections of this manual relating to the information encoded on the keycard, how keycards are cancelled, how the levels and addresses work, when keycards expire, etc., you now have a good knowledge of the logical processes occurring inside the locks and the ATLAS database. This knowledge allows you to understand any reported problems with the system and determine the cause and solution.
12.2.1 Operating vs. Malfunction Problems
When troubleshooting, first determine whether the problem is caused by the equipment, or by the way it is being used. If a lock does not recognize a specific keycard, but it recognizes other keycards, the problem is probably in the keycard or its encoding. If no keycard is acceptable, then it is probably a lock problem, such as a dead battery or improper programming.
12.2.2 Operating Problems
Problem: The lock does not respond to the keycard.
PK 3529_08_07-ATLAS Version 1.2 User Manual
Possible causes:
■ Keycard is not properly encoded.
- Keycard is encoded for the wrong room/section/group, etc.
■ Keycard has been cancelled by a newer keycard or has expired.
■ Keycard has been cancelled by the Group Lockout.
■ Keycard has been cancelled by a Reset keycard.
■ Keycard valid for different timezone.
Solutions:
It is quite common to make errors in encoding, such as assigning the wrong room number. It may also be possible that the keycards have not been properly encoded but the operator has not noticed the confirmation request from the ATLAS screen. In most cases, a new keycard will work in the lock.
If the problem persists, the addresses in the lock should be verified using the Reset Addresses function. It is common to find one room in Section 10 programmed as Section 0, for example.
In the days following installation, it is common to have problems with staff keycards. If your staff keycards appear to be denied access to certain rooms for no reason, you may have issued new keycards instead of duplicates or original copies of the New keycard made in a single transaction. In this case, each new keycard cancels the existing keycards in all the locks in which it is used, creating what appears to be a random pattern of malfunctions. The solution is to reset the rooms in that address (Section/Group/etc.) and issue a new keycard. Subsequent keycards to other individuals should be encoded as duplicates.
Problem: The lock displays a red light in response to the keycard.
Possible causes:
The deadbolt has been thrown from the inside.
The Hotel, Room or Salesman's Lockout has been used.
Solutions:
Before removing a Room or Hotel Lockout, it is advisable to check with security to see what the purpose of the lockout was. The room may have been locked out to secure valuables or to protect evidence of a crime. In any case, an Access Control Administrator Operator Level is required to make the Unlock keycard to remove the lockout. An Emergency keycard can override the deadbolt without removing the lockout.
Problem: The keycard works intermittently in the same lock.
Possible causes:
The reader head needs to be cleaned.
Solutions:
- Clean the reader head using a standard head-cleaning card.
- Re-encode the keycard. If this does not solve the problem, discard the keycard and use a fresh one.
Problem: The keycard works intermittently in different locks.
Possible causes:
- The keycard is worn out, defective or improperly encoded.
Solutions:
- Re-encode the keycard. If this does not solve the problem, discard the keycard and use a fresh one.
Problem: Keycards expire before the guest Check-out date/time.
Possible causes:
The Group lockout is being used on occupied rooms.
The Guest expiry date is being improperly set.
Solutions:
- Check with Housekeeping to see that users of the Group Lockout understand its function.
- Check the expiry default; it may be set for a short expiry that the front desk staff is selecting automatically.
- Issue a new keycard to the guest.
Problem: Lock flashes both red and green when staff keycard used.
Possible causes:
■ The batteries are getting low.
Solutions:
- Change the batteries. Follow the instructions in Replacing a Battery.
Problem: Lock cannot communicate with the M-Unit.
Possible causes:
- A Programming keycard has not been inserted into the lock prior to the placing of the IPM.
- 30 seconds have elapsed since the Programming keycard was inserted in the lock.
Solutions:
- In the case of a battery change, insert the Initialization keycard, then the Programming keycard, followed by the placement of the IPM.
- You must start the M-Unit communication within 30 seconds of inserting the Programming keycard in the lock.
Problem: Encoder does not encode card.
Possible causes:
- Power cable and/or cable connected between encoder and COM ports on workstation are not connected properly.
■ EMS service has not been started. - ATLAS System Setup has not been started
Solutions:
- Check all cable connections
■ Stop and restart EMS Service - Stop and restart ATLAS System Setup
Problem: ATLAS Web pages are very slow
Possible causes:
- Lack of bandwidth
Solution:
- Check available bandwidth
Problem: ATLAS Web page does not come up
Possible cause: Incorrect Internet Explorer version
- Popup blocker is enabled. (see Web-based User Application - Security Settings.
Solution:
- Log in, log out and log in again.
- Verify that you have Internet Explorer Version 6, with all the security settings described in Web-based User Application - Security Settings.
- Verify that Popup blocker is turned off.
12.2.3 Malfunction Problems
If none of the above operational solutions is effective, the lock may have failed mechanically. If a lock requires replacement, have an authorized person remove the security override cylinder (if the lock has the mechanical key override option), and replace it in the new lock. An override cylinder removed from a lock should be carefully secured until it is replaced. A replacement lock or a lock from which the battery has been temporarily disconnected will need to be connected to the M-Unit in order to set the lock time and/or the lock addresses. To avoid shipping damage, please ensure that defective locks are properly packaged for return.
Problem: Responds to keycard (flashing green light) but latch does not retract.
Possible causes:
The mortise is malfunctioning.
Solutions:
- Open the door using the mechanical override and try to provoke the malfunction while the door is open. While the door is open, verify the movement of the latch by rotating the inside lever. If the latch is binding while rotating the inside lever, change the mortise.
PK 3529_08_07-ATLAS Version 1.2 User Manual
- Open the door from the inside and verify that the latch is moving freely. If the malfunction does not persist when the door is open, and the latch moves freely, change the lock.
- If the malfunction does not persist when the door is open, then the strike needs to be filed. File the strike on the side of the latch that is rubbing. Refer to the installation instructions shipped with the lock for more details.
Problem: Lock allows entry without reading cards.
Possible causes:
■ The lock is in passage mode.
- The door and the frame are misalignment.
■ The actuator is defective.
Solutions:
■ Take the lock out of passage mode.
- Try opening the door without a keycard and without rotating the lever. Verify the latch and strike alignments. Make sure that the latch is entering the strike.
- If the latch does not enter the strike, check if the door bumper pad insulation or the door closers are impeding the full closing of the door; if not, it may be necessary to file the strike. Always file the strike plates the minimum amount required.
- If the latch does enter the strike properly and the door can still be opened without keycards, then change the lock.
Problem: Latch is binding and not returning to the rest position.
Possible causes:
■ The mortise faceplate and the latch are misaligned.
■ The mortise is improperly installed.
■ The mortise is malfunctioning.
Solutions:
■ Make sure that the latch is not rubbing against the mortise faceplate. Remove the plate and verify the latch movement.
- Verify the mortise bevel angle (see the lock installation instructions). If the latch moves freely when the plate is removed, replace the mortise faceplate by using the thrown deadbolt as a guide. If the latch binds when the front plate is removed, try to readjust the mortise's bevel angle. If the mortise still binds, remove it from the door. If the latch binds when it is removed from the door, replace the mortise. If the latch does not bind while it is removed, then use a wood chisel to enlarge the cutout.
Problem: The latch does not move freely.
Possible causes:
The lock's anti-friction mechanism is broken.
Solutions:
- Depress the auxiliary latch (lowest of the three bolts or latches on the mortise). The latch bolt, including the anti-friction, should be dead latched. If not, the mechanism is broken. Change the mortise.
Problem: There is an incomplete retraction of the latch bolt.
Possible causes:
■ The mortise is malfunctioning.
■ The stop plate is malfunctioning.
Solutions:
- Turn the inside and outside levers to test the retraction. The latch must not protrude from the mortise front plate.
- If the latch does not fully retract it may start to bind on the strike.
- Replace the mortise. If the retraction is still not full, replace the lock.
Problem: Both the red and green indicators flash then the red one flashes.
Possible causes:
The lock battery is dead.
Solutions:
- Use the mechanical override key to open the door. (On Generation E-760 locks, the batteries are easily accessible on the outside of the door). Change the batteries and reset the lock time, see Audit a lock.
- Avoid dead batteries by testing all locks periodically using the Battery Test keycard or a Staff Submaster keycard. Maintenance and Troubleshooting.
12.3 Replacing a Battery
The expected life of the battery pack depends on the use of the lock. Guest Amenity and Staff Common Area locks, for instance, may require more frequent battery replacements than regular guest rooms. In any case, the same procedure is followed.
Only the time needs to be reset when the batteries are changed. The lock does NOT need to be reprogrammed. Any lock taken off battery power for more than a few seconds stops counting time and ceases to function even when the batteries are replaced. This is a precaution that forces maintenance staff to reset the time using the ATLAS to keep the two synchronized. You do not have to reprogram the addresses (see the
PK 3529_08_07-ATLAS Version 1.2 User Manual
procedure Programming a Lock, since the Room, Submaster, and Master addresses remain saved in the lock.
How do I Replace the Batteries in the Lock?
Carry the new batteries, the M-Unit and the IPM to the lock. Replace the batteries, following the procedure below:
Generation E-760

- Remove the 6-32 x 5/16" (7.9mm) Torxx screw (B).
- Pull down the battery holder (A).
- Take out the three AA batteries by gently tapping the battery holder (A) on the palm of your hand.
- Replace the three AA batteries making sure that the positive ends of the batteries are facing downward in the battery holder (A).
- Insert the battery holder (A) into the outside housing and secure it using the 6-32 x 5/16" (7.9mm) Torxx screw (B).
710-II

- Find the battery container at the top of the inside housing. (A)
- Remove the screw from the battery cover by unscrewing it with the Torxx screwdriver.
- Unsnap and remove the old battery pack.
- Snap the battery connector (B) onto the new sealed battery pack.
- Place the battery pack into the battery compartment.
- Replace the battery compartment cover, screwing it into place with the Torxx screwdriver.
The battery replacement is now complete.
Note: The Initialization keycard must be inserted prior to the Communication keycard..
- Insert the Initialization keycard
- Insert the Programming keycard.
- Place the IPM on the lock.
- Turn on the IPM.
- Using the Maintenance Unit, program the lock to reset the time. See Resetting Lock Time.
Warning: You must reset the time to the exact time of the ATLAS server or the keycards will not operate properly in the lock.
12.4 Warranty
The KABA Lodging Access Control System is covered by a two-year replacement warranty. Please read your warranty documentation for coverage specifics. You may choose to extend your warranty beyond two years. Under the warranty, defective equipment should be returned to KABA for repair or replacement. In order to be repaired under warranty, the equipment must be returned with a completed RMA card, which explains the reason for the return. The reason should be more specific than "not working"; this will help us to find the defect quickly and return the equipment to you as soon as possible. Product deterioration and failure resulting from improper maintenance is not covered by your warranty.
12.5 Replacing a Lock
If you have determined that the malfunction is caused by a defect in the lock, then the lock should be changed. During the installation of the ATLAS system, a KABA representative is available to train your maintenance staff in the proper procedures for removing and replacing locks. Keep the installation instructions shipped with the locks in your facility for future reference.
If your locks have the mechanical override option, it is very important that the high-security cylinder be removed from the defective lock and placed in the new lock. (Replacement locks are not supplied with cylinders).
Note: When a new lock (i.e. a lock that has never been programmed for the property) is installed, or after changing the batteries the Initialization keycard must be inserted prior to the Programming keycard.
PK 3529_08_07-ATLAS Version 1.2 User Manual
Chapter 13 - Service
13.1 Returning an Encoder, IPM, or Lock for Repair
Step 1: Obtain an RMA Number and Prepare an RMA Card.
You cannot return a unit for repair unless you obtain an RMA (Return Materials Authorization) number. If you return the unit without the RMA number, there will be a \$50.00 charge.
- Call KABA at (800) 906-4526 or (514) 340-9025 (local calls), and explain the problem
to the service technician. He or she will give you an RMA number. - Write the RMA number in the appropriate box on the RMA card.
- Fill in the problem section on the RMA card with the assistance of the service technician.
- Remove the protective backing from the RMA card and stick the card to the top of the box.
- Fill in your return address on the RMA card.
Step 2: Pack the Unit Properly.
- Pack the unit in a factory-supplied box.
- Pack only one unit per box.
- Pack the unit so that it does not move around in the box during transit.
- If you are returning a lock with the mechanical override option, make sure to remove
the override cylinder so that you can use it in the replacement lock. Replacement locks ship without override cylinders.
Step 3: Ship the Unit to the Correct Address.
There is a shipping address on the RMA card. Confirm that you are shipping the unit to the correct address. If shipping from outside Canada, the declaration on the shipping documents must include:
- Quantity
Full description
Unit price
- Total value
The statement "Canadian Returned Goods."
Shipping from Canada:
Ship to:
KABA INC.
7301 Decarie Blvd.
Montreal, Quebec
H4P 2G7
Shipping from the USA:
Ship to:
Precision Telecom & Security (PTS)
6805 Crosstimbers Dr.
Corpus Christi, TX
78431
OR
KABA INC.
c/o Fritz Starber Inc.
25 Railroad Ave.
Highway 114 East
Norton, VT
05907
Returning by air or by sea from overseas:
Ship to:
KABA ILCO INC.
7301 Decarie Blvd.
Montreal, Quebec
H4P 2G7
OR, for repairs to model 700 locks only,
Precision Telecom & Security (PTS)
6805 Crosstimbers Dr.
Corpus Christi, TX
78431
PK 3529_08_07-ATLAS Version 1.2 User Manual
Lists and Glossary
List of Acronyms and Abbreviations
| EMS | Encoder Service Manager |
| FDM | Front Desk Manager |
| GMA | Grand Master Access |
| GSA | Guest Service Attendant |
| IPM | Infrared Programming Module |
| IrDA | Infrared Data Association, |
| KABA | KABA ILCO Montreal |
| Lo-C | Low coercivity |
| MA | Master Access |
| Maint | Maintenance/Engineering |
| PMS | Property Management System |
| POS | Point of Sale |
| RAC | Remote Access Controller |
| USB | Universal Serial Bus |
List of Keycard Types
Keycard Function
Adjoining Suite
Keycards for a combination of up to 15 individual guest rooms, within a 15 room number range. All the encoded keycards work in all the locks of the
PK 3529_08_07-ATLAS Version 1.2 User Manual
suite.
| Area A submaster level keycard. The Submaster levels (Section, Floor, Group, Zone and Area) are used for access by staff (e.g. housekeepers and housekeeper managers, maintenance workers, laundry, room service, etc.) | |
| Battery Test | Prompts a low battery indicator in locks where the battery is below acceptable voltage. Battery Test keycard does not give access to the door. |
| Bellman's Master | Opens any guest room on the property, except for rooms that have been locked out using the deadbolt or Salesman's Lockout as many times as required |
| Common Door Suite | Suites with a common door where the rooms inside (up to eight inner doors) can be rented separately or together. Each keycard opens the common door and at least one and up to eight inner doors. |
| Emergency | The Emergency keycard can open ANY door in ANY situation, if the lock is working properly; overrides deadbolt or privacy lock, as well as Room, Hotel and Salesman's Lockouts. |
| Floor | A submaster level keycard granting access to the rooms on a floor or floors. The Submaster levels (Section, Floor, Group, Zone and Area) are used for access by staff (e.g. housekeepers and housekeeper managers, maintenance workers, laundry, room service, etc.) |
| Grand Master Opens every room on the property, except Restricted Areas or rooms that have been locked out using the deadbolt or privacy lock, the Salesman's Lockout, Room Lockout or Hotel Lockout. The Grand Master keycard opens all Common Area/Amenity doors | |
| Group | A submaster level keycard. The Submaster levels (Section, Floor, Group, Zone and Area) are used for access by staff (e.g. housekeepers and housekeeper managers, maintenance workers, laundry, room service, etc.) |
| Group Lockout | Locks out a group of guest rooms according to the Group submaster address in the lock. Group addresses are usually assigned according to the duties of each housekeeping supervisor. Group lockout is used after inspecting a room after check-out and after it has been cleaned, so that the previous guest cannot enter. |
| Guest Gives guests access to specified room/s with specified options for defined time period. | |
| Guest One-Shot | Opens a specific room only once, for use by checked-out guest to retrieve an item, for maintenance by an external contractor, etc. |
| Hotel Lockout | Locks out all but the Emergency keycard. The locks remain locked-out until unlocked by a Hotel Unlock keycard. |
| Hotel Restart | Used to set or change the Hotel Code when installing the ATLAS system or if a severe security problem has occurred. |
| Hotel Unlock | Unlocks any room locked by the Hotel Lockout or Room Lockout keycard. |
| Initialization | Initializes the lock during a first-time installation, or after an interruption of battery power (e.g. during a battery replacement, or whenever the battery power is temporarily disconnected). |
| IPM Cancel | Cancels a specified IPM so that it can no longer be used to programs locks. This must be swiped through all locks. The IPM must also be cancelled in the M-Unit software, using the procedure in the Network & Hardware Installation Manual PK3065 02/06. |
| Meeting Room Provides access to meeting room with passage mode not available. The keycard does not provide access to Amenities and is valid for a period of 24 hours by default. This keycard is used for access by staff. | |
| Passage | Puts the lock in Passage mode, in which a keycard is no longer required to open the door. Passage mode is removed by re-inserting the Passage keycard. Typically, rooms such as Staff Common Areas/Amenities and Meeting rooms are appropriate for the use of Passage mode. Rented Guest rooms should not be put in Passage mode. |
| Programming | Prepares the lock for communication with the M-Unit. |
| Reset Adjoining Suite | Invalidates all current adjoining suite keycards. The Reset keycard must be inserted in all doors in the suite. Keycards encoded before the Reset keycard was encoded will not work in the locks. |
| Reset Area | Invalidates all keycards for a given area. The keycard must be swiped through all doors in the area. Keycards encoded before the Reset keycard was encoded will not work in the locks. |
| Reset Bellman's Master | Cancels Bellman's Master Keycard that is missing or stolen. Use a Reset Bellman's keycard in every lock in the facility before issuing the replacement Bellman's Master Keycard. Keycards encoded before the Reset keycard was encoded will not work in the locks. |
| Reset Common Door Suite | Invalidates all current common door suite keycards for the specified suite. The Reset keycard must be inserted in the common door and all inner doors in the suite. Keycards encoded before the Reset keycard was encoded will not work in the locks. Keycards encoded before the Reset keycard was encoded will not work in the locks. |
| Reset Emergency | Invalidates all circulating Emergency keycards. Must be swiped through all locks on the property. Keycards encoded before the Reset keycard was encoded will not work in the locks. |
| Reset Grand Master | Invalidates all circulating Grand Master keycards. Must be swiped through all locks on the property. Keycards encoded before the Reset keycard was encoded will not work in the locks. |
| Reset Group | Invalidates all keycards for a selected group of staff. Must be swiped through all doors accessed by that group. Keycards encoded before the Reset keycard was encoded will not work in the locks. |
| Reset Guest | Invalidates the corresponding room or suite entry keycard. The Reset keycard must be inserted in all locks leading to the specified guest room. Entry keycards encoded before the Reset keycard was encoded will not work in the lock. Keycards encoded before the Reset keycard was encoded will not work in the locks. |
| Reset Meeting Room | Used to invalidate any circulating Meeting Room keycard for a specific meeting room door. Keycards encoded before the Reset keycard was encoded will not work in the locks. |
| Reset Passage Mode | Used to invalidate any circulating Passage keycards for a specific door. Does not cause the lock to revert to normal mode from Passage mode. Keycards encoded before the Reset keycard was encoded will not work in the locks. |
| Reset Restricted Area | Invalidates all current keycards for the specified restricted area. Keycards encoded before the Reset keycard was encoded will not work in the locks. |
| Restricted Area | This keycard is intended for rooms that do not fit into the normal master-keyed structure e.g. GM office, computer room, liquor storage areas. Locks programmed as Restricted Area doors accept only two types of entry keycards: Restricted Area and Emergency. |
| Room Lockout | Locks out all but the Emergency keycard. The Room Lockout keycard is valid for a specified room. The lock remains locked-out until unlocked by a Room or Hotel Unlock keycard. |
| Room Unlock | Unlocks a specified room locked-out by a Room Lockout keycard. |
| Section | A Submaster level (Section, Floor, Group, Zone and Area) are used for access by staff (e.g. housekeepers and housekeeper managers, maintenance workers, laundry, room service, etc.) |
| Test Lock | Used by the lock installers to access rooms during the installation of the locks. Test Lock keycards do not work after a lock has been programmed. |
Glossary
| Access Control Administrator | Hotel employee, who, working with KABA, configures the ATLAS system with default settings for all aspects of the hotel. |
| Access Point | Any point that permits entrance to and/or exit from, for example: guest room door, gate, fire exit, garage door, etc. With the electronic locks, access to points is granted by the use of an encoded keycard. |
| Adjoining Suite | A combination of up to 15 individual guest rooms, within a 15 room number range. No resetting of the individual door locks is required to assign this type of suite. |
| Amenities | Facilities such as pool, gym, business centre, parking etc. offered by the hotel to clients. Access is encoded on the same keycards used to access guest rooms or staff working areas. |
| Audit, Lock | The lock audit is stored in non-volatile memory, and cannot be erased by disconnecting the batteries, or by any programming function. |
| Bellman | Staff member with access to all guest rooms for the duration of his shift(s) to deliver baggage to rooms. |
| Coercivity | Coercivity is the intensity of the magnetic field required to reduce the magnetization of material to zero. In terms of keycards, the higher the coercivity, the longer the magnetic stripe on the keycard will last. The KABA |
PK 3529_08_07-ATLAS Version 1.2 User Manual
| ATLAS System may be used with either high or low coercivity keycards (Hi-C or Lo-C). | |
| Common Door Suite | Outside access door and up to 8 inner doors. Multiple guests can have access to the common door, and to any non-overlapping combination of inner doors. Guests renting different inner rooms of a Common Door Suite do not cancel each other's keycards in the Common Door. Each Guest receives a new keycard when they check in, with access to the appropriate inner door(s). |
| Deadbolt | Mechanical device operated from the inside of a door. It locks out all keycards except Emergency. |
| Disability Option | Changes the time delay during which the door is unlocked after a valid guest level keycard is swiped. The time delay changes from 4 seconds to 15 seconds, to assist guests who may have difficulty turning the handle. The Disability Option has no effect when the keycard is used in locks other than the Generation E-760. |
| Encoder, ATLAS | The KABA ATLAS system encoder is a Three Track encoder, managed by the software Encoder Manager Service (EMS). Produces a keycard used in a door or reader. |
| Exit Device Controller | An electronic lock that connects with exit door hardware, such as a panic bar. Such a lock converts an exit-only door into an two-way door that permits guests and staff with a valid keycard to re-enter from the outside. |
| Expiry | Date encoded on a keycard after which it will no longer work in the lock or card reader. Keycard default expiry dates/times are set by the Access Control Administrator for each keycard type. |
| FDM | The Front Desk Manager (FDM) represents Operator Level Two for accessing the ATLAS System. |
| Folio Number | Number used to post charges from Point-of-Sale locations (such as restaurants, bars, casinos or other paying services) to the correct guest account. The option of using Folio numbers is enabled by the Access Control Administrator an selected by the GSA. |
| GSA | Guest Service Attendant also often known as Front Desk Clerk, Reception clerk represents Operator Level One for accessing the ATLAS System. |
| Guest Keycard | Gives guests access to specified room/s with specified options for defined time period. |
| Handheld | A small computer such as a Palm that can be held in one hand. |
| Hotel Code | The Hotel Code assigned by the Access Control Administrator ensures that each installation is unique and secure. |
| Housekeeping | Refers to all Hotel staff who perform cleaning or physical maintenance tasks, such as maids and cleaners. |
| IPM | Infrared Programming Module (IPM).The module sits over the card slot on the door lock to receive data transmitted from the M-Unit. The infrared receiver and transmitter on the M-Unit are aligned with the IrDA window (the small red glass window) on the IPM and data is transmitted from the M-Unit to the lock via the IPM or from the lock to the M-Unit via the IPM - in the case of an audit. |
| IrDA | Official acronym for Infrared Data Association, a group of device manufacturers that developed a standard for transferring data via infrared light waves. The IPM uses an IrDA beam to program the locks. |
| IT Administrator | Operator Level Five in the ATLAS System for the hotel employee who performs Server and Network System Maintenance, Application Troubleshooting, System Integration with other Vendors and System - PMS Interface. |
| Lock Programming | Transferring lock configuration files from the M-Unit to lock. |
PK 3529_08_07-ATLAS Version 1.2 User Manual
| Lockout | Lockout keycards are used in emergencies to protect property or evidence or to prevent unauthorized entry into closed parts of the property. |
| Lockout, Group | Locks out a group of guests that have checked out according to the Group address in the lock. Group addresses are usually assigned according to the duties of each housekeeping supervisor. Group lockout is used after inspecting a room after check-out and after it has been cleaned, so that the previous guest cannot enter. |
| Lockout, Hotel | Locks out all but the Emergency keycard. The keycard is valid throughout the entire hotel. The locks remain locked-out until unlocked by a Hotel Unlock keycard. |
| Lockout, Room | Locks out all but the Emergency keycard. The Room Lockout keycard is valid for a specified room. The lock remains locked-out until unlocked by a Room or Hotel Unlock keycard. |
| Login Name | Name used by operator to gain access to an ATLAS application. Must be paired with the correct password in order to be valid. |
| Maintenance Unit (M-Unit) | A handheld computer containing the ATLAS M-Unit software downloaded from the CD. The M-Unit is used to program and audit locks and card readers. |
| Operator Password | Passwords granting access to different levels of privileges within the ATLAS system. There are 8 levels. |
| Override, Electronic | Generation E-760 and Solitaire 710-II (latest version) features electronic override capability that is activated by the M-Unit (using the IPM or IPM). Opens all locks in all situations. |
| Override, Privacy | The Privacy Override option allows the keycard holder to override the privacy lock (when a door is locked with a deadbolt from the inside). Some restrictions apply. |
| PMS Interface | Interface between ATLAS and the PropertyManagement System used by the hotel. |
| Reports | Reports generated by the ATLAS software to show System activities or lists of employees, operators and access points. |
| Reset keycard | Keycard that, when used in a lock invalidates all current keycards for that level and address by updating the timestamp. |
| Restricted Area | Rooms that need very limited access - General Manager's office, computer room, wine cellars. Locks programmed as Restricted Area doors accept only two types of entry keycards: Restricted Area and Emergency. |
| Room, Guest | Room or suite that is normally rented as a single unit (room or suite). |
| Salesman lockout | The Salesman Lockout feature (available on all locks except the E-760) offers increased protection for the guest's privacy and valuables when the guest is not in the room. When added to the guest's keycard, the guests can control staff access to their room by locking out all but their own keycards and the emergency keycard. The Salesman's lockout is engaged by the guests by inserting their keycards after leaving the room, without turning the handle. The lock response is a single green flash. |
| Sequence Number | Number between 1 and 255 encoded on a keycard. Keycard type + creation date/time + sequence number is a unique combination for each keycard. |
| Submaster Levels | The Access Control Administrator configures these levels (Section, Floor, Group, Zone and Area) that are used for access by Staff. Guest Rooms and common/inner doors can be grouped by submaster levels and keycards for these levels can be assigned to staff. |
| System Setup | ATLAS application that allows the Access Control Administrator to configure default settings for Hotel Setup, Access Points, Submaster Levels, fixed and flexible |
PK 3529_08_07-ATLAS Version 1.2 User Manual
| timezones and keycard expiries. | |
| Timestamp | Creation date/time encoded on a keycard. |
| Timezone, fixed | One or more time periods encoded on staff keycards. There are six fixed periods of 4 hours each. Encoded on Submaster level and Grand Master keycards. |
| Timezone, flexible | Eight time periods of four intervals that can be individually selected. All keycards of the appropriate type (Guest, Staff or Passage) will be valid during the intervals in the assigned Timezone but are not outside of those intervals. Flexible Timezones apply only to RAC 3.5. |
| Unlock, Hotel | Unlocks any room locked by the Hotel Lockout or Room Lockout keycard. |
| Unlock, Room | Unlocks a specific room locked-out by a Room Lockout keycard. |
PK 3529_08_07-ATLAS Version 1.2 User Manual

by Kaba
Kaba Ilco Inc.
7301 Boul. Décarie
Montréal (QC) H4P 2G7
T.:1.877.468.3555
F.:1.514.735.6589
www.ilcolodging.com
- ATLAS
- ATLAS VERSION 1.2 USER GUIDE
- Table Of Contents
- Chapter 3 - Before Getting Started....19
- Electronic Lock Profiles....19
- Time....23
- Keycards – New vs. Duplicate....26
- Timezones....28
- Audits....31
- Interfaces....32
- Employees and Operators....32
- Chapter 4 - Getting Started....35
- Chapter 5 - System Setup....45
- Chapter 6 Making Keycards....116
- Web Client....116
- Encoder - Select and Clean....128
- Operator Types....131
- Entering Guest Keycard Information....136
- Make a Guest Keycards....139
- Chapter 7 - Maintenance Unit....175
- Chapter 8 – Reports....211
- Chapter 9 - Database Management....248
- Chapter 10 - Monitoring Manager....261
- Chapter 11 - Security Procedures....271
- Chapter 12 - Maintenance and Troubleshooting....289
- Regular Preventive Maintenance....289
- Troubleshooting....292
- Replacing a Battery....334
- Chapter 13 – Service....304
- Returning an Encoder, IPM, or Lock for Repair....304
- Lists and Glossary....307
- Glossary....312
- How to Use This Manual
- System Description
- System Capabilities
- Chapter 2 Network & Hardware Components
- Electronic Locks
- Electronic Locks - Parts View
- Lock Models - features
- Generation E-760 Series
- Generation E-730
- Solitaire 710-II
- Lock Installation
- Differences in Lock Models
- RAC
- RAC 4.0
- Exit Device Operators
- Server and Client Workstations
- Software Version
- Magnetic Keycards
- Coercivity
- Encoder
- How do I Select the Encoder?
- Clean Encoder
- Cancel an Encoder
- Maintenance Unit (M-Unit)
- Infrared Programming Module (IPM)
- Null Modem Cable
- Chapter 3 - Before Getting Started
- Electronic Lock Profiles
- Lock Addresses in Memory
- Guest Rooms
- Example 1 - Guest Room
- Example 2 - Adjoining Suite
- Common Door Suites
- Example - Common Door Suite
- Amenities
- Staff Common Area
- Restricted Area
- Time
- Timestamps in Lock
- Keycard Creation Date and Time Stamp
- Audit Trail
- Keycard Expiry Date and Time
- Keeping the System Time Synchronized
- Synchronization of Windows Time
- Keycards - New vs. Duplicate
- New Keycards
- Duplicate Keycards
- When to Use New or Duplicate Staff Keycards
- Timezones
- Fixed Timezones
- Default
- Fixed Timezones - Daylight Saving Time
- Flexible Timezones
- Flexible Timezones - Daylight Saving Time
- Audits
- Interfaces
- Property Management System (PMS) Interface
- Point of Sale (POS) Interface
- Employees and Operators
- Operators
- Operator Levels: Definition
- Chapter 4 - Getting Started
- First Operator
- How do I Create the First Employee/Operator?
- Modify/Delete Employees and Operators?
- How do I Modify/Delete Employees and Operators?
- Configuring System Defaults
- Programming Locks
- Programming Common Area Locks and Card readers
- Programming Restricted Area Locks
- Programming Guest or Meeting Room Locks
- Programming Common and Inner Door Locks
- Chapter 5 - System Setup
- Hotel Setup
- Log In to System Setup
- Generic Settings
- Hotel Code
- Language
- & 4. Check-in/Check-out time Default
- M-Unit Lock file expiry
- Default Number of Guest Keys
- Full Screen Mode
- Locks
- Lock Type
- Electronic Override
- Override Privacy
- How do I Enable/Disable Privacy Override on the Lock?
- Guest
- Folio Number
- Salesman lockout
- Disability
- Staff
- Employee ID
- Staff Access to Amenities
- Interfaces
- PMS
- POS
- Encoding Options
- Access Points
- Access Points Tree View
- Rooms
- Specific Room or Suite of Rooms
- Description
- Room Type
- Lock Types
- Bed Type
- Smoking or Non-Smoking
- Amenities
- How do I Configure an Amenity?
- Assign
- Access to Amenities
- Submaster Levels
- Staff Common Areas
- How do I Configure a Staff Common Area?
- Click on OK to save.
- Restricted Area
- How do I Configure a Restricted Area?
- Modify
- The following dialog box appears.
- Enter a name describing the Restricted Area.
- Select the type of access from the pulldown menu.
- Click on OK to save.
- Common Door Suites
- Rename the Hotel
- Type in the new name as shown below and then click on Save.
- Rename a Floor
- Select Rename Floor from the pop-up menu.
- Delete
- Guest Rooms
- Right-click and the pop-up menu appears as shown below.
- Add Rooms/Meeting Rooms
- Site View
- Submaster Levels Keycard
- Types of Submaster Levels
- Submaster Levels
- Room Tree View
- Name
- How do I Create/Assign/Delete Submaster Levels?
- Create
- Flexible Timezones
- Overview
- Intervals
- Modify Flexible Timezones
- Reset Flexible Timezones
- Fixed Timezones
- Overview
- Intervals
- Fixed Timezones on Staff Keycards
- Timezone on Staff keycard
- Modify Fixed Timezones
- Resetting Fixed Timezones
- Keycard Attributes
- Default Expiry
- Factory-set expiry date
- Hotel-set expiry date
- Reset Expiry
- Factory Expiry
- Factory Default
- Keycard Coercivity
- Log out of System Setup
- ATLAS Web Functions
- Change Password
- How do I change my password?
- Web-based User Application
- Chapter 6 Making Keycards
- Web Client
- Internet Security Settings for Web
- Web-based Application - Log on and Off
- How do I Log On and Off the ATLAS User Application?
- ATLAS Timeouts
- Web-based Application - Set Computer Name
- How do I Set my Computer Name in the Web Application?
- Logging on and off ATLAS Web Application
- How do I Log on and off the ATLAS Web User Application?
- Set Computer Name
- Encoder - Select and Clean
- How do I Select and Clean the Encoder?
- Clean Encoder
- Cancel an Encoder
- Operator Types
- Guest Service Attendant
- Front Desk Manager
- Maintenance / Engineering
- Bellman
- Administrator
- Access Control Administrator
- KABA Technical Support
- Entering Guest Keycard Information
- Rooms
- Check-in Date and Time
- Check-out Date and Time
- OR
- Room Type
- Coercivity
- Guest Keycard Options
- Folio Number
- Disability
- Salesman Lockout
- Amenities
- Make a Guest Keycards
- How do I Make Guest Keycards?
- Click on the Make Keycard button
- Other Keycard Types
- Reminder
- Encoder Status Lines
- Table of Encoder Status Line Messages
- Manage Guest Keycards
- Making Additional Guest Keycards
- Making Replacement Guest Keycards
- Making Modified Stay Guest Keycards
- Making Reset Guest Keycards
- How do I Make Additional, Replacement, Modified Stay or Reset Keycards?
- Verify Guest Keycards
- How do I Verify Guest Keycards?
- √ Reminder
- Types of Staff Keycards
- Staff Keycards
- Submaster Level Keycards
- Master Level Keycards
- Grand Master
- Bellman Master
- Emergency Keycards
- Reset Keycards
- Lockout / Unlock Keycards
- Hotel Lockout
- Hotel Unlock
- Room Lockout
- Room Unlock
- Group Lockout
- Passage Keycard Types
- Meeting Room Keycard Types
- Special Keycards
- Battery Test
- Programming
- Hotel Restart
- Initialization
- Test Lock
- Create Initial Set of Staff Keycards
- How do I Make a Batch of Staff Keycards?
- How do I make a batch of Staff Keycards?
- Make a Staff Keycard for a Specific Employee
- How do I Make a Keycard for a Specific Employee?
- Assign and Re-assign Staff Keycards
- How do I Assign/Re-assign Staff Keycards?
- Verify a Staff Keycard
- How do I Verify Staff Keycards?
- Chapter 7 - Maintenance Unit
- Maintenance Unit (M-Unit)
- Infrared Programming Module
- - Programming
- How do I Program the IPM?
- Resetting the IPM
- How do I Synchronize ATLAS with the M-Unit?
- How do I perform the "Hotsync"?
- Creating a Lock Configuration File
- Select Rooms
- Allow Electronic Override / Number of Overrides
- Set Number of Hours before Expiry
- Transferring files from Workstation to M-Unit
- How do I Transfer Files from the Workstation to the M-Unit?
- Logging on and off the M-Unit
- How do I Log on and off the M-Unit?
- Programming a Lock
- How do I Program a lock?
- Programming a Keycard Reader
- How do I Program a Card reader?
- Part 2 -
- Audits
- How do I Audit a lock?
- Note: Locks programmed by the FDU.
- Note: Restricted areas with more than one door.
- Resetting Lock Time
- How do I Reset the Time in a lock?
- How do I Override a Lock?
- How do I Perform an Electronic Override?
- Transferring Audit Files
- How do I Transfer Files from M-Unit to Workstation?
- Chapter 8 - Reports
- Reports – Operator Levels Access to Reports
- Report Examples
- Lock Audits
- Employee List
- Operator List
- Access Point List
- Reports - System Activities Examples
- Database Management
- Employee List Management
- Keycard Encoding
- Keycard Verification
- Keycard Assignments
- Network & Hardware Management
- System Management
- Operator Logins and Logouts
- Lock Operations
- All Operation Types
- Exporting Reports
- How do I Export Reports to Different Formats?
- Acrobat Reader (.PDF)
- Viewing and Printing Reports
- Chapter 9 Database Management
- Database Management - Operator Levels
- Database Location
- Database Backup
- How do I Back up an ATLAS Database?
- How do I Create a Schedule for Database Backups?
- Database Emergency Recovery
- How do I Recover the ATLAS Database?
- Chapter 10 - Monitoring Manager
- System
- Definition/Description
- Monitoring Manager - Client Information
- How do I View Client Information?
- Client Transactions
- How do I View Client Transactions?
- Chapter 11 - Security Procedures
- Security - Installation
- Permissions
- Storage
- Anti-Virus
- Hotel Code
- Set Computer Name
- Security - User
- Expires
- Web Settings
- Security - Network
- Network Security
- Web Services
- Basic Keycard Security
- Inform Guests and Staff about Keycard Security
- Do Not Write the Room Number on the Keycard
- Make the Audit Trail Public Knowledge
- Encoding, Issuing and Replacing Keycards
- Invalidate lost keycards
- Safe Storage of Staff Keycards (when not in use)
- Access to Keycards
- Infrequently Used Keycards
- Access to Emergency Keycards
- Handle Returned Keycards Appropriately
- Lock Overrides
- Lock Override Table
- Electronic Overrides -
- Locks using the electronic override
- Mechanical Overrides
- Advantages
- Security
- How do I Override a Lock?
- Emergency Procedures
- If the deadbolt is thrown
- If an employee leaves or is fired:
- If the Hotel Code becomes known:
- If an IPM is stolen:
- If a crime occurs in a room:
- Chapter 12 - Maintenance and Troubleshooting
- Regular Preventive Maintenance
- Battery Testing and Replacement
- KABA Electronic Locks
- The Locking Mechanism
- The Override Cylinder
- Lock Responses to Keycards
- Troubleshooting
- Operating vs. Malfunction Problems
- Operating Problems
- Possible causes:
- Solutions:
- Solution:
- Malfunction Problems
- Replacing a Battery
- How do I Replace the Batteries in the Lock?
- Warranty
- Replacing a Lock
- Chapter 13 - Service
- Returning an Encoder, IPM, or Lock for Repair
- Step 1: Obtain an RMA Number and Prepare an RMA Card.
- Step 2: Pack the Unit Properly.
- Step 3: Ship the Unit to the Correct Address.
- Shipping from Canada:
- Lists and Glossary
- List of Acronyms and Abbreviations
- List of Keycard Types
Brand : Dormakaba
Model : ILCO ATLAS
Category : Lock