
RXMBS4 - Electric heating DIMPLEX - Free user manual and instructions
Find the device manual for free RXMBS4 DIMPLEX in PDF.


| Product Type | Electric Fan Heater |
| Brand | Dimplex |
| Model | RXMBS4 |
| Power Source | 230 V ~ 50 Hz |
| Heating Power | 2000 W |
| Fan Speeds | 2 (low / high) |
| Thermostat | Adjustable thermostat |
| Overheat Protection | Yes |
| Tip-Over Switch | Yes |
| Dimensions (H x W x D) | 240 x 200 x 120 mm |
| Weight | 1.5 kg |
| Heating Element | Ceramic |
| Noise Level | < 45 dB |
| Coverage Area | Up to 20 m² |
| Color | White |
| Display | LED digital display (optional) |
| Remote Control | Not included |
| Timer | 24-hour programmable timer (optional) |
| Energy Saving Mode | Eco mode |
| Cleaning | Wipe with a dry cloth; do not use water |
| Filter | Washable dust filter |
| Safety Certifications | CE, RoHS |
| Included Accessories | User manual |
| Warranty | 2 years |
Frequently Asked Questions - RXMBS4 DIMPLEX
User questions about RXMBS4 DIMPLEX
0 question about this device. Answer the ones you know or ask your own.
Ask a new question about this device
Download the instructions for your Electric heating in PDF format for free! Find your manual RXMBS4 - DIMPLEX and take your electronic device back in hand. On this page are published all the documents necessary for the use of your device. RXMBS4 by DIMPLEX.
USER MANUAL RXMBS4 DIMPLEX
Heating Operating Guide
PLEASE READ THIS GUIDE CAREFULLY BEFORE USING YOUR HEATING SYSTEM
In Comfort Mode the heating system reaches the desired temperature set by you on the control on the top of the heaters.
In Setback Mode the heating system will not function unless the room temperature falls beyond an uneconomical point (It uses less energy to keep a back ground temperature when the room is unoccupied than it does to allow the dwelling to chill too much). Your heating system will automatically monitor this for you and adjust, if necessary in the Setback Mode.
The Wall controller which operates your heating system is split into Zones; the guide below is an example of which zone applies to which room.
Zone 1 = Living room & Hall
Zone 3 = Bedroom Two (if applicable)
Zone 2 = Bedroom One
Zone 4 = (Spare - not in use)
Your heaters
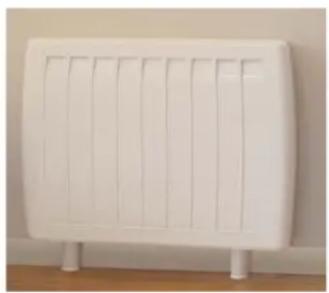
Your heating system comprises of two types of heater the “DuoHeat” and the “Panel Heater” all linked to a “Central Wall Controller”.
natural_image
White portable air conditioner unit with vertical slots and mounting feet (no text or symbols visible)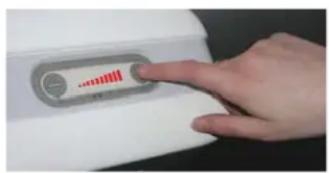
Duo Heater
- The DuoHeat provides the majority of the heat you will require.
- Therefore it may remain hot most of the day from heat stored when cheap electricity is available.
- The heater intelligently selected the cheapest energy available, combining both low cost and standard rate electricity.
- To control the heaters' temperature press the illuminated panel – for less heat & + for more.
- Child lock function – this disables the controls to prevent tampering. Press and hold both – and + buttons for 5 seconds to activate, repeat to cancel (the wall controller overrides the control on the heater – it is only adjustable when in the Comfort Mode).
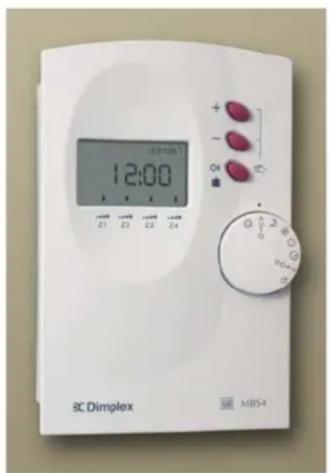
Wall controller
- The wall Controller provides you with the flexibility to control the whole heating system from one point
- Should you wish to override the system from the preset times turn the Mode Selector Knob to select the desired mode.
- If you are absent for long periods of time i.e a short break or holiday there is a simple Holiday Mode function. This function switches the heating system in to a frost protection mode. In this mode the dwelling is continually monitored, should the temperature drop below the minimum set level the system will respond to minimize any potential damage. To set refer to the instruction on the back page.
- Should you wish to change the pre-set times refer to the instructions on the back page.
This displays the current time. Time is set by Ⓛ selecting and using the – and + buttons to adjust. Press “OK” to confirm
This indicates the current mode for each zone.
1 bar = Setback
Mode
4 bars = Comfort Mode
Mode Selector Mark. Line up the symbol on the mode selector knob to the dot to select mode.
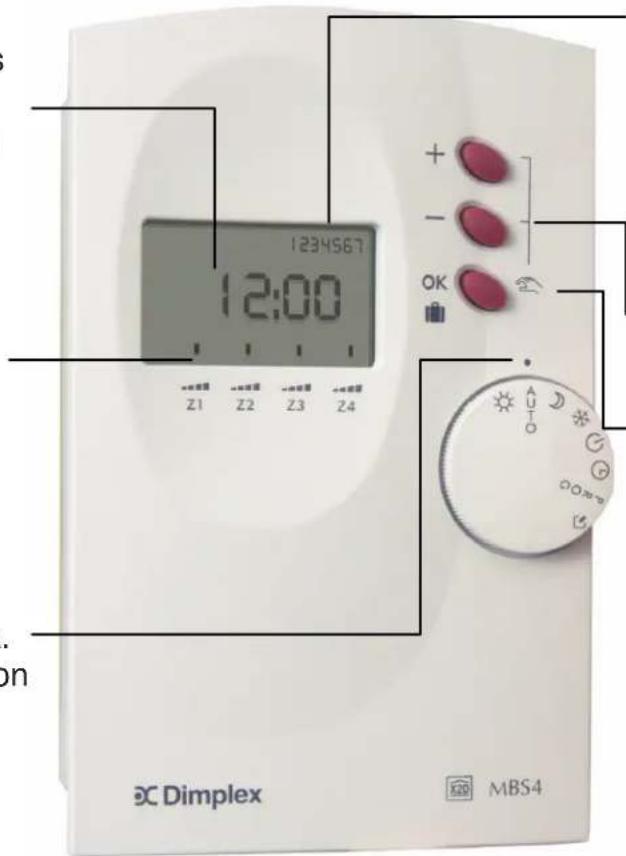
This displays the day of the week day 1 = Monday. Adjust in the same way as the Time. Tip hold down the - and + buttons to scroll through time in greater increments.
Modification Buttons for adjusting times.
Modification Buttons for confirming adjustments. This is also the Holiday Mode function. Press & hold for 5 seconds, display shows "AB01" use the - and + buttons to select the amount of days you are away. The days will automatically count down and switch back to Auto Mode for your return. Should you return earlier than expected just turn the mode selector knob to Comfort Mode and then back to Auto Mode to reset.
Trouble Shooting Guide
If you have no heat from your heaters first check they are switched on both at the wall and on the heater.
Next make sure the Wall Controller has the Mode Selector Knob in the correct position (to test put it in the Comfort Mode).
Remember if the temperature setting on your DuoHeat is not function or responding it is likely that the Wall Controller is not in a Comfort Mode. You can check this by looking at the display on the Wall Controller you should see 4 bars lit above the zone indicator, any other display on the screen would indicate you are not in Comfort Mode. Remember when in Auto Mode your system will change between Comfort Mode & Set Back Mode depending on the time. It is Pre – set to be in Comfort Mode between 8AM & 10AM – 3PM & 9PM. If there is no display on the controller contact your house manager.
Mode Selector Knob

select to override into Comfort Mode

select Auto Mode to run on pre set times

select to override into Set Back Mode

select to override into Holiday/Frost Protection Mode

select to switch system off

select to adjust clock and day of the week

select this mode to change the pre-set times of operation

Configuration options for installer use only
PLEASE READ THIS ONLY IF YOU WANT TO CHANGE THE PRE-SET TIMES
The Pre-set time of your heating system can be adjusted to suit your own life style
1 Turn the Mode Selector Knob to the position
2 The display will show P=1
3 Using the – and + buttons scroll through to the correct zone P=1 is zone 1, P=2 is zone 2 and so on. If you go beyond the zone you desire press the – button to go back. When you have selected the required zone press the OK button to confirm
4 The display will now show
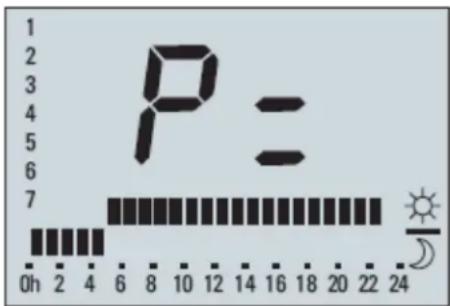
This line indicates the hour in Setback Mode
This line indicates the hour in Comfort Mode
The day of the week is indicated by a number in the top right side of the display 1= Monday, 2= Tuesday and so on. To change the day without altering the pre-set time press OK
5 Using the – and + buttons scroll through the hours at the bottom selecting the appropriate mode you want for that hour i.e. pressing the – button the hour is selected as Setback Mode 📋 and pressing the + button the hour is selected as Comfort Mode.
6 When you get to the 24th hour it reverts back to hour 0, so if you make a mistake just go through the 24 hour period again selecting the mode as before.
7 When you have set the day as you desire press the OK button.
8 You can copy the same hours of operation for the next day if you wish. To do this keep the OK button held down for a few seconds, the day will change, keep the OK button depressed and the copied pre-set will appear. If you do not wish to copy the same hour just press the OK button once and repeat the process.
Further Information
Brand : DIMPLEX
Model : RXMBS4
Category : Electric heating