C-SUB-12a - Subwoofer Citronic - Free user manual and instructions
Find the device manual for free C-SUB-12a Citronic in PDF.


| Product Type | Active Subwoofer |
| Model | C-SUB-12a |
| Brand | Citronic |
| Driver Size | 12 inches |
| Amplifier | Built-in active |
| Power Output (estimated) | 500W |
| Input Connectors | Combo XLR/jack |
| Output Connectors | XLR, IEC (daisy-chain) |
| Controls | Level, High Cut, Phase Inversion (INV button) |
| Mounting Socket | Top socket for 35 mm pole |
| Power Supply | 100-240V AC, 50/60Hz |
| Dimensions (estimated) | 600 x 500 x 600 mm |
| Weight (estimated) | 25 kg |
| Enclosure Material | Wood |
| Placement | Floor, against wall or corner for enhanced bass |
| Phase Reversal | Yes (INV button) |
| Disposal | WEEE compliant, do not dispose with household waste |
| Maintenance | Clean with dry cloth, do not use liquids |
| Safety | Ensure proper ventilation, avoid overloading |
| Spare Parts / Repairability | Contact dealer or manufacturer for service |
Frequently Asked Questions - C-SUB-12a Citronic
User questions about C-SUB-12a Citronic
0 question about this device. Answer the ones you know or ask your own.
Ask a new question about this device
Download the instructions for your Subwoofer in PDF format for free! Find your manual C-SUB-12a - Citronic and take your electronic device back in hand. On this page are published all the documents necessary for the use of your device. C-SUB-12a by Citronic.
USER MANUAL C-SUB-12a Citronic
natural_image
Exterior view of a rectangular electronic device with grid pattern and two mounting holes (no text or symbols visible)C-SUB Series Subwoofer
C-SUB-12 178.661UK
C-SUB-12a 178.662UK
User Manual

Caution: Please read this manual carefully before operating Damage caused by misuse is not covered by the warranty
Introduction
Thank you for choosing a C-SUB series subwoofer as part of your sound reinforcement system. This unit has been designed for long reliable operation, delivering powerful low frequencies. Please read and keep this manual to get the best results from your equipment.
Setting up
Position the C-SUB cabinet on a stable surface capable of supporting the weight and vibrations from the unit. For the best results, please the cabinet on the floor, against a wall, ideally in a corner to enhance the bass output. A 35mm speaker pole may be inserted to the top socket for mounting a mid-top or full-range cabinet.
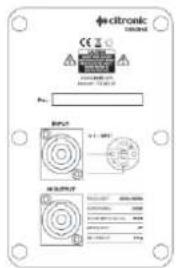
For the passive model C-SUB-12, connect to the amplifier output via the SPK input connector, ensuring that the amplifier is capable of a minimum load of at least 4Ω. A mid-top cabinet may be connected to the SPK output connector for full-range output (maintaining an overall 4Ω impedance). Do not connect further Subwoofers to this output.
For the active model C-SUB-12a, connect a line level audio source to the combo XLR/jack input and further active cabinets may be connected from the XLR output. Set the Level and High Cut controls to minimum and connect to the mains using the supplied IEC power lead, checking that the supply voltage is correct for the C-SUB active cabinet. Power may be daisy-chained from the IEC output to further active cabinets for convenience.
Switch power on to the unit and ensure that the audio source is playing whilst gradually increasing the Volume control.
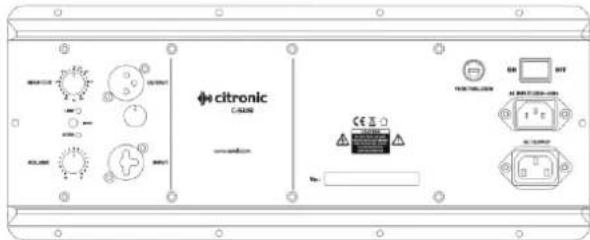
Rotating the High Cut control clockwise introduces higher bass frequencies to the cabinet and increases the output.
When the correct balance of bass frequencies is achieved, set the Volume control to the required output level.
For situations where 2 or more subwoofers are used together, it is possible for low frequencies to cancel each other out. If the bass from 2 subwoofers is sounding less effective than expected, try pushing in the INV button on one unit. This button reverses the phase of the speaker and can fix bass cancellation issues or even help to avoid feedback. Use whichever setting of this switch gives the best result or leave it out if there is no benefit.
Before powering down, turn the Volume control fully down to avoid loud pops or bangs through the speaker.


Disposal: The "Crossed Wheelie Bin" symbol on the product means that the product is classed as Electrical or Electronic equipment and should not be disposed with other household or commercial waste at the end of its useful life. The goods must be disposed of according to your local council guidelines.
Errors and omissions excepted. Copyright© 2021.
AVSL Group Ltd. Unit 2-4 Bridgewater Park, Taylor Rd. Manchester. M41 7JQ
AVSL (EUROPE) Ltd, Unit 3D North Point House, North Point Business Park, New Mallow Road, Cork, Ireland.
Brand : Citronic
Model : C-SUB-12a
Category : Subwoofer