
XWC-2000 - Access Point Luxul - Free user manual and instructions
Find the device manual for free XWC-2000 Luxul in PDF.


| Product Type | Wireless Access Point Controller |
| Brand | Luxul |
| Model | XWC-2000 |
| Dimensions | 9.5 x 6.2 x 1.2 inches (241 x 157 x 30 mm) |
| Weight | 1.2 lbs (0.54 kg) |
| Power Supply | PoE (802.3af) or 12V DC adapter |
| Power Consumption | 12W max |
| Wireless Standard | IEEE 802.11 a/b/g/n/ac Wave 2 |
| Frequency Band | Dual-band 2.4 GHz and 5 GHz |
| Maximum Data Rate | 1.733 Gbps (5 GHz) + 300 Mbps (2.4 GHz) |
| MIMO Configuration | 4x4 in 5 GHz, 2x2 in 2.4 GHz |
| Antenna Type | Internal omnidirectional |
| Ethernet Ports | 1x Gigabit LAN (PoE PD) |
| Management | Web-based GUI, CLI, SNMP |
| Security | WPA2, WPA3, 802.1X, MAC filtering |
| Mounting | Ceiling/wall mountable |
| Operating Temperature | 0°C to 40°C |
| Cleaning Instructions | Use a dry, soft cloth. Do not use liquid cleaners. |
| Safety Precautions | Do not expose to water or heat sources. Follow local electrical codes. |
| Spare Parts | Power adapter and mounting kit are available separately. |
| Repairability | Not user-serviceable. Contact Luxul support for repairs. |
Frequently Asked Questions - XWC-2000 Luxul
User questions about XWC-2000 Luxul
0 question about this device. Answer the ones you know or ask your own.
Ask a new question about this device
Download the instructions for your Access Point in PDF format for free! Find your manual XWC-2000 - Luxul and take your electronic device back in hand. On this page are published all the documents necessary for the use of your device. XWC-2000 by Luxul.
USER MANUAL XWC-2000 Luxul
natural_image
Exterior view of a black LUXUL device with visible ports and control buttons (no readable text beyond branding)Wireless Controller
XWC-2000
Package Contents:
XWC-2000 Wireless Controller
Rack mount kit
Rubber feet
Power cord
BEFORE YOU BEGIN INSTALLATION
Access Point Firmware: Be sure that the firmware of any APs you intend to manage with the Wireless Controller is v5 or newer. Visit the AP Firmware upgrade page at luxul.com/ap-upgrade for details.
Controller Setup Sequence: Once you configure the XWC-2000 Wireless Controller, the Controller will automatically configure and manage all compatible APs on the same subnet. APs can be added or removed at any time, however. A DHCP server is required on the network.
Firmware Updates: The XWC-2000 Wireless Controller automatically checks for firmware updates of Controller-compatible APs and the Wireless Controller itself, but requires Internet access to do so. The Wireless Controller will still operate without Internet access, but firmware updates will not be available.
1 Physical Installation
Connecting Devices: The XWC-2000 Wireless Controller simply connects to the network along with any compatible Access Points.

flowchart
graph TD
    A["LAN"] --> B["AP"]
    B --> C["PoE Injector or Compatible PoE Switch"]
    C --> D["Wireless Controller"]
    D --> E["AP"]
    E --> F["PoE Injector or Compatible PoE Switch"]
Access Point Placement: Place APs to ensure adequate coverage, but not so far apart that there is no signal overlap. You may have to experiment with AP placement to optimize the roaming experience. The APs should overlap enough that the client device has a good connection to the AP to which it is currently attached, but also sees the next-nearest AP.
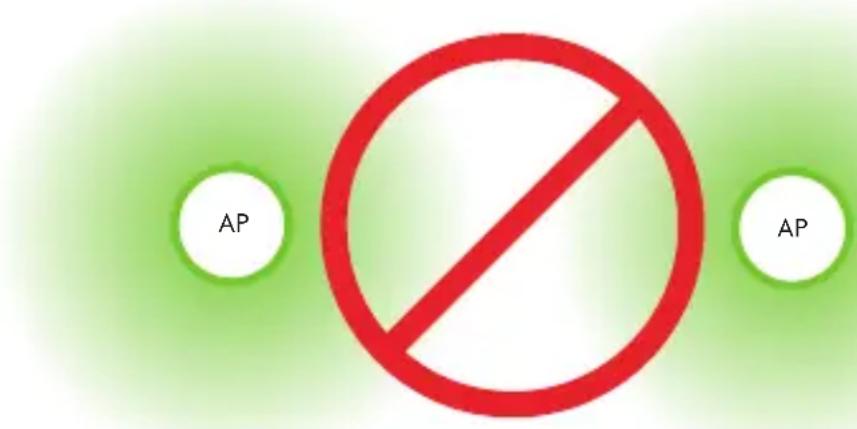
Ideally, roaming clients should see signal strength of two overlapping APs in the range of -60 to -70 dBm at the midway point between two APs.


Note: Visit luxul.com/ap-placement for details on how to select and optimize AP placement.

Note: Consider using Ekahau HeatMapper to assist with this process, available from www.ekahau.com. Luxul also offers an informative “How-To” video on HeatMapper at luxul.com/how-to-videos.
Physical Installation (cont)
Connect Ethernet and Power
Use an Ethernet cable to plug the XWC-2000 Wireless Controller into the network, then connect the Wireless Controller power cable.
Connect any APs to the network (or ensure they're connected).

Preparing for Access
IP Addressing
If the XWC-2000 is connected to a network with a 192.168.0.X address scheme, and your computer shares a similar address on the same network, you can skip to the next step, Access and Setup.

Note: Be sure a DHCP server is present on the network and that all Luxul APs and the XWC-2000 Wireless Controller will share the same subnet.

Note: If your network uses a 192.168.0.X IP address scheme, you are ready to start the setup process. If not, you will need to manually change the IP address of your computer to be able to configure the XWC-2000 Wireless Controller so that it is on the same subnet as your network. For help setting the IP address of your particular operating system, visit luxul.com/ip-addressing.
3 Getting Connected
Access the Setup Wizard by opening your web browser and enter the Wireless Controller's default 192.168.0.19 IP address in the address field. Log in to the Wireless Controller using the default user name and password:
Default IP: 192.168.0.19
Username: admin
Password: admin
Caution: If there is another device on the network already using the 192.168.0.19 address, you'll need to either temporarily disconnect or reconfigure that other device, or manually configure the Wireless Controller with a different address on a separate isolated network.
4 Wireless Controller Configuration
Follow the built-in Setup Wizard in the Wireless Controller. The Wizard will walk you through creating a configuration profile, then it will automatically configure and manage all available APs on the same network. You may add or remove APs to or from the managed profile at any time.
Smart Tip: For more information on setup and configuration best practices, visit luxul.com/smart-tips.

Hardware Operation
Selecting front-panel LED color
Use the switch on the rear panel of the XWC-2000 Wireless Controller to switch the Power and System LEDs on the front panel between green and blue to best match the equipment in the rack where the Wireless Controller is sharing space.
Resetting the Controller
Reset/Reboot: Use a paper clip to briefly press and release the Reset button on the rear panel of the Controller to force it to reboot. The front panel LEDs will go dark once the button is released, then the System LED will blink slowly while the controller reboots.
Restore Factory Defaults: To restore the controller to Factory Default configuration, press and hold the Reset button for at least 5 seconds. The System LED will blink quickly to indicate that the Controller is returning to Factory Default configuration, go dark for a few seconds, then blink slowly while the controller boots.
Normal Operation: When the controller is operating normally, the System LED will blink like a heartbeat, i.e. blink-blink-dark.
Sales
801-822-5450
sales@luxul.com
Technical Support
801-822-5450
support@luxul.com
Copyright and Trademark Notices
No part of this document may be modified or adapted in any way, for any purposes without permission in writing from Luxul. The material in this document is subject to change without notice. Luxul reserves the right to make changes to any product to improve reliability, function, or design. No license is granted, either expressly or by implication or otherwise under any Luxul intellectual property rights. An implied license only exists for equipment, circuits and subsystems contained in this or any Luxul product.
© Copyright 2018 Luxul. All rights reserved. The name Luxul, the Luxul logo, the Luxul logo mark and Simply Connected are all trademarks and or registered trademarks of Luxul Wireless, Inc. All other trademarks and registered trademarks are property of their respective holders.
LUX-QIG-XWC-2000-v1 0811802
A brand of legrand®

natural_image
Abstract network diagram with interconnected nodes and lines on a dark background (no text or symbols)
- Wireless Controller
- Package Contents:
- BEFORE YOU BEGIN INSTALLATION
- Physical Installation
- Physical Installation (cont)
- Connect Ethernet and Power
- Preparing for Access
- IP Addressing
- Getting Connected
- Wireless Controller Configuration
- Hardware Operation
- Selecting front-panel LED color
- Resetting the Controller
- Sales
- Technical Support
- Copyright and Trademark Notices
Brand : Luxul
Model : XWC-2000
Category : Access Point