
AKR 562 IX - Range hood WHIRLPOOL - Free user manual and instructions
Find the device manual for free AKR 562 IX WHIRLPOOL in PDF.


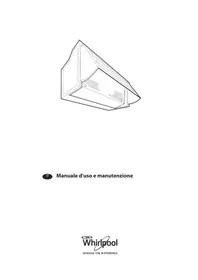
| Product Type | Range Hood |
| Brand | Whirlpool |
| Model | AKR 562 IX |
| Color | Stainless Steel |
| Width | 60 cm (approx.) |
| Depth | 50 cm (approx.) |
| Height | 60 cm (approx.) |
| Weight | 12 kg (approx.) |
| Power Supply | 220-240 V, 50 Hz |
| Motor Power | 200 W (approx.) |
| Number of Motors | 1 |
| Extraction Rate | 650 m³/h (max, approx.) |
| Noise Level | 65 dB (max speed, approx.) |
| Number of Speeds | 3 |
| Lighting | 2 x 40 W halogen (or similar) |
| Filter Type | Aluminum Grease Filter (washable) |
| Carbon Filter | Optional, for recirculation mode |
| Installation Type | Wall-mounted |
| Exhaust Diameter | 150 mm |
| Energy Class | B (approx.) |
| Safety Features | Motor overload protection, automatic shut-off |
| Maintenance | Grease filter monthly; carbon filter replace every 3-6 months |
| Spare Parts Availability | Filters, bulbs, motor (via authorized service) |
Frequently Asked Questions - AKR 562 IX WHIRLPOOL
User questions about AKR 562 IX WHIRLPOOL
0 question about this device. Answer the ones you know or ask your own.
Ask a new question about this device
Download the instructions for your Range hood in PDF format for free! Find your manual AKR 562 IX - WHIRLPOOL and take your electronic device back in hand. On this page are published all the documents necessary for the use of your device. AKR 562 IX by WHIRLPOOL.
USER MANUAL AKR 562 IX WHIRLPOOL
IMPORTANT SAFETY INSTRUCTIONS
YOUR SAFETY AND THAT OF OTHERS IS PARAMOUNT
This manual and the appliance itself provide important safety warnings, to be read and observed at all times.

This is the attention symbol, pertaining to safety, which alerts users to potential risks to themselves and others.
All safety warnings are preceded by the attention symbol and the following terms:

DANGER:
indicates a hazardous situation which, if not avoided, will cause serious injury.

WARNING:
Indicates a hazardous situation which, if not avoided, could cause serious injury.
All safety warnings give specific details of the potential danger/warning present and indicate how to reduce risk of injury, damage and electric shock resulting from improper use of the appliance. Carefully observe the following instructions:
- Installation and maintenance must be carried out by a qualified technician, in compliance with the manufacturer's instructions and local safety regulations. Do not repair or replace any part of the appliance unless specifically stated in the user manual.
- The appliance must be disconnected from the power supply before carrying out any installation work.
- Regulations require that the appliance is earthed. (not possible for class II hoods) • The power cable must be long enough for connecting the appliance, once fitted in its housing, to the power supply socket.
- Do not pull the power supply cable in order to unplug the appliance.
- The electrical components must not be accessible to the user after installation.
- Do not touch the appliance with any wet part of the body and do not operate it when barefoot.
- The appliance is not intended for use by persons (including children) with any physical, sensory or mental impairment, or without experience and knowledge of the appliance, unless supervised or previously instructed in its use by those responsible for their safety.
- Customer care: do not repair or replace any parts of the appliance, unless specifically recommended by the manual. All other maintenance operations must be carried out by a qualified technician.
- When drilling through the wall pay attention not to damage electric connections and/or pipes: • Air vents must always discharge to the outside.
- The manufacturer rejects all responsibilities for any damage caused by improper use or wrong settings.
- Appropriate maintenance and cleaning ensure the good working order and the best performance of the appliance. Regularly clean all stubborn surface dirt to avoid grease build up. Remove and clean or change the filter regularly.
- Never flame cook food (flambé) under the appliance. Using free flames might cause fire.
- The discharge air must not be discharged in ducts that are being used to discharge combustion fumes from gas heaters or heaters using any other combustible materials. The appliance must have its own dedicated discharge outlet. All national requirements of art. 7.12.1 of CEI EN 60335-2-31 must be strictly complied with.
- If the hood is being used at the same time as other appliances using gas or other combustible materials, the negative pressure of the room must not exceed 4 Pa (4x 10⁻⁵ bars). For this reason ensure that the room is well ventilated.
- Do not leave frying pans unattended when frying, as the frying oil may catch fire.
- Before touching the light bulbs, ensure that they are cold.
- Do not use or leave the hood without the light bulb correctly fitted, as this may cause electric shock.
- The hood is not a worktop, therefore do not place any objects on top of it or overload it.
- During all installation and maintenance operations wear appropriate working gloves. • This appliance is not suitable for outdoor use.
Scrapping of household appliances
- This appliance is manufactured with recyclable or reusable materials. Dispose of it in accordance with local waste disposal regulations. Before scrapping, cut off the power supply cable.
- For further information on the treatment, recovery and recycling of household electrical appliances, contact your competent local authority, the collection service for household waste or the store where you purchased the appliance.
KEEP THIS BOOKLET FOR FUTURE CONSULTATION.
INSTALLATION
After unpacking the appliance, check for any transport damage. In the event of problems, contact the dealer or your nearest After-sales Service. To prevent any damage, only remove the appliance from its polystyrene foam packaging at the time of installation.
PREPARING FOR INSTALLATION

WARNING:
This is a heavy product; the hood should only be lifted and installed by two or more people.
The minimum distance between the cooking pans on top of the cooker and the bottom of the hood must not be less than 50 cm for electric cookers and 65 cm for gas or mixed cookers.
Before installation also check the minimum distances stated in the manual of the cooker.
ELECTRICAL CONNECTION
Make sure the power voltage specified on the appliance rating plate is the same as the mains voltage.
This information may be found on the inside of the hood, under the grease filter.
Power cable replacement (type H05 RR-F 3 x 1.5 mm) must be carried out by a qualified electrician. Contact an authorized service centre.
If the hood is fitted with an electric plug, connect the plug to a socket complying with current regulations, located in an accessible place. If no plug is fitted (direct wiring to the mains), or if the socket is not located in an accessible place, install a standardised double pole power switch that will enable complete isolation from the mains in case of category III overvoltage conditions, in accordance with installation rules.
GENERAL RECOMMENDATIONS
Before use
Remove cardboard protection pieces, protective film and adhesive labels from accessories.
Check the appliance for any transport damage.
During use
To avoid any damage do not place any weights on the appliance.
Do not expose the appliance to atmospheric agents.
SAFEGUARDING THE ENVIRONMENT
Disposal of packing
The packing material is 100% recyclable and is marked with the recycle symbol (△). The various parts of the packing must therefore be disposed of responsibly and in full compliance with local authority regulations governing waste disposal.
Scrapping the product
- This appliance is marked in compliance with European Directive 2002/96/EC, Waste Electrical and Electronic Equipment (WEEE).
- By ensuring this product is disposed of correctly, you will help prevent potential negative consequences for the environment and human health, which could otherwise be caused by inappropriate waste handling of this product.
- The symbol on the product or on the accompanying documentation indicates that it should not be treated as domestic waste but must be taken to an appropriate collection centre for the recycling of electrical and electronic equipment.
TROUBLESHOOTING GUIDE
The appliance does not work:
- Check for the presence of mains electrical power and if the appliance is connected to the electrical supply.
- Turn off the appliance and restart it to see if the fault persists.
The hood's suction level is not sufficient:
- Check the suction speed and adjust as necessary:
- Check that the filters are clean:
- Check the air vents for any obstructions;
The light does not work;
- Check the light bulb and replace if necessary;
- Check that the light bulb has been correctly fitted;
AFTER-SALES SERVICE
Before calling the After-Sales Service:
- See if you can solve the problem yourself with the help of the suggestions given in the "Troubleshooting guide".
- Switch the appliance off and back on again to see if the fault persists.
If after the above checks the fault still occurs, get in touch with the nearest After-sales Service.
Always specify:
- a brief description of the fault; • the exact type and model of the appliance;
- your full address;
- your telephone number.
- the service number (number after the word Service on the rating plate), located on the inside of the appliance. The service number is also indicated on the guarantee booklet;
SERVICE
0000 000 00000

If any repairs are required, please contact an authorised After-sales Service (to guarantee that original spare parts will be used and repairs carried out correctly).
CLEANING

WARNING
- Never use steam cleaning equipment.
- Disconnect the appliance from the power supply.
IMPORTANT: do not use corrosive or abrasive detergents. If any of these products accidentally comes into contact with the appliance, clean immediately with a damp cloth.
- Clean the surfaces with a damp cloth. If it is very dirty, add a few drops of washing up detergent to the water. Finish off with a dry cloth.
IMPORTANT: do not use abrasive sponges or metallic scrapers or scourers. Over time, these can ruin the enamel surface.
- Use detergents specifically designed for cleaning the appliance and follow the manufacturer's instructions.
IMPORTANT: Clean the filters at least monthly to remove any oil or grease residuals.
MAINTENANCE

WARNING:
- Use safety gloves.
- Disconnect the appliance from the power supply.
GREASE FILTERS
The metal grease filter has unlimited duration. It should be washed at least once a month, either by hand, or by placing it in the dishwasher (use a short cycle and low temperature). If washed in the dishwasher, the grease filter surface may become matt. This will not cause any reduction of performance.
To remove the filter, pull out the handle.
After the filter has been washed and dried, replace it following the inverse procedure.

REPLACING THE HALOGEN LAMPS

WARNING:
- Only use 20W MAX - G4 halogen lamps.
- Disconnect the hood from the electric power supply.
- Insert the blade of a small flat screwdriver where indicated by the three points, and with gentle pressure lift the cover from its position.
- Remove the faulty light bulb and replace with a new one.
- Replace the cover (spring lock).

ACTIVE CARBON FILTER
(filter models only):
The carbon filter must be washed once a month in the dishwasher at the highest possible temperature using a standard dishwasher detergent. It is recommended that nothing else is placed in the dishwasher when washing the filter.
After washing, the carbon filter must be reactivated by placing it in the oven at a temperature of 100°C for 10 minutes.
Replace the carbon filter every 3 years.
Fitting the carbon filter:
- Remove the grease filter.
- Remove the filter holding frame by turning the "g" knobs 90°.
- Fit the "i" carbon filter inside the filter holder "h".
To refit the filter holder and the grease filter follow the inverse procedure.

ITEMS SUPPLIED
Remove all components from their packaged. Check that everything is included.
- Assembled hood with motor, light bulbs and grease filters installed.
• 1 Chimney support bracket • 1 Hood support bracket - Assembly and user instructions - 1 installation template • 1 - Torx T10 adapter • 1 - Torx T20 adapter - 1 deflector - 6 ∅ 8mm wall plugs - 6 ∅ 5x45 screws • 2 ∅ 2.9x6.5 screws - 2 ∅ 3x9 screws
INSTALLATION - PRELIMINARY ASSEMBLY INSTRUCTIONS
The hood has been designed to be installed and used either as a "Suction Model", or as a "Filter Model".
Suction model
Cooking steam is sucked and channelled outside the house through a discharge duct (not supplied), fitted to the hood steam outlet.
Ensure that they type of fitting between the hood steam outlet and the discharge duct fits correctly to both.
IMPORTANT: If already installed, remove the carbon filter/s.
Filtering model
The air is filtered through one of the carbon filters and then resent to the room.
IMPORTANT: Ensure appropriate air circulation around the hood.
Before using the hood ensure that the carbon filter/s has/have been installed.
The hood should be installed away from particularly dirty areas, windows, doors and heat sources.
The hood is sold with all necessary components for installation on most types of walls or ceilings. However, ask a qualified technician to check that the items supplied are suitable for the type of wall/ceiling.
INSTALLATION SIZES

INSTALLATION - ASSEMBLY INSTRUCTIONS
Before starting the installation procedure, remove the grease filter and the carbon filter holding frame following the instructions that can be found in the corresponding maintenance sections.
The instructions below, in number sequence, refer to the drawing shown on the following page, also numbered accordingly.
- Draw a midline on the wall, up to the ceiling.
- Cut the template along line H6 and position the drilling diagram on the wall (fix using adhesive tape). The vertical midline printed on the drilling template must correspond to the midline drawn on the wall. The bottom edge of the drilling diagram must correspond to the bottom edge of the hood.
- Place the support bracket on the drilling template so that it coincides with the dashed triangle. Mark and then drill the two external holes. Remove the drilling template and insert 2 plugs in the wall. Fix the hood support bracket to the plugs using 2 screws.
- Fit the hood on the bracket.
- Adjust the distance between the hood and the wall.
- Adjust the hood so that it is perfectly horizontal.
- From the inside of the hood, mark the two hood fixing holes.
- Remove the hood from the bracket.
- Drill the holes (∅ 8 mm).
- Insert 2 plugs in the wall.
- Fit the G chimney support bracket to the wall at ceiling level. The small cut at the centre must correspond with the mid line drawn on the wall (operation 1). Drill 2 holes (∅ 8 mm) and insert the 2 wall plugs.
- Secure with 2 screws.
- Attach the hood to the bottom bracket.
- Secure the hood to the wall in its final position, with the 2 screws.
- Connect the cooking steam discharge tube to the fitting ring B. The tube must be directed towards the outside (suction model) or towards the deflector (filter model).
The deflector F must be fitted to the G chimney support bracket using 2 screws.
- Connect the power supply.
- Fit the chimneys in position above the hood and fully cover the suction assembly.
- Extract the top section and secure (18a) to the chimney support G (18b) with 2 screws.
Refit the carbon filter holding frame and the grease filter/s.
Check the operation of the hood following the instructions in the hood utilisation section.

USING THE HOOD
- Control panel.
- Grease filters.
- Halogen bulbs.
- Telescopic chimney.
Control panel
a. ON/OFF light key b. Motor ON/OFF key and minimum speed selection (suction power). c. Medium speed selection key (power and suction) d. Maximum speed selection key (power and suction)




- IMPORTANT SAFETY INSTRUCTIONS
- YOUR SAFETY AND THAT OF OTHERS IS PARAMOUNT
- DANGER
- WARNING
- SCRAPPING OF HOUSEHOLD APPLIANCES
- INSTALLATION
- PREPARING FOR INSTALLATION
- THIS IS A HEAVY PRODUCT; THE HOOD SHOULD ONLY BE LIFTED AND INSTALLED BY TWO OR MORE PEOPLE
- ELECTRICAL CONNECTION
- GENERAL RECOMMENDATIONS
- BEFORE USE
- DURING USE
- SAFEGUARDING THE ENVIRONMENT
- DISPOSAL OF PACKING
- SCRAPPING THE PRODUCT
- TROUBLESHOOTING GUIDE
- THE APPLIANCE DOES NOT WORK
- THE HOOD'S SUCTION LEVEL IS NOT SUFFICIENT
- THE LIGHT DOES NOT WORK
- AFTER-SALES SERVICE
- BEFORE CALLING THE AFTER-SALES SERVICE
- IF AFTER THE ABOVE CHECKS THE FAULT STILL OCCURS, GET IN TOUCH WITH THE NEAREST AFTER-SALES SERVICE
- CLEANING
- MAINTENANCE
- GREASE FILTERS
- REPLACING THE HALOGEN LAMPS
- ACTIVE CARBON FILTER
- FITTING THE CARBON FILTER
- ITEMS SUPPLIED
- INSTALLATION - PRELIMINARY ASSEMBLY INSTRUCTIONS
- SUCTION MODEL
- FILTERING MODEL
- IMPORTANT: ENSURE APPROPRIATE AIR CIRCULATION AROUND THE HOOD
- INSTALLATION SIZES
- INSTALLATION - ASSEMBLY INSTRUCTIONS
- USING THE HOOD
- CONTROL PANEL
Brand : WHIRLPOOL
Model : AKR 562 IX
Category : Range hood