KD-CCKIT1000 - Controller Key Digital - Free user manual and instructions
Find the device manual for free KD-CCKIT1000 Key Digital in PDF.


| Product Type | Control System Kit |
| Brand | Key Digital |
| Model | KD-CCKIT1000 |
| Dimensions (approx.) | 2.5 x 6.0 x 1.0 inches |
| Weight (approx.) | 0.5 lb |
| Power Supply | 5V DC via USB or external adapter |
| Power Consumption | < 2W |
| Control Interfaces | IR, RS-232, Ethernet |
| Input Control Methods | IR remote, keypad, app via network |
| Maximum IR Range | 30 feet (line of sight) |
| Compatible Devices | TVs, projectors, AV receivers, media players |
| Number of Controllable Zones | 1 per unit |
| Mounting Type | Desktop or wall-mountable (bracket included) |
| Operating Temperature | 32°F to 104°F (0°C to 40°C) |
| Storage Temperature | -4°F to 140°F (-20°C to 60°C) |
| Maintenance | Clean with dry soft cloth; avoid liquids |
| Safety | Use only provided power supply; keep away from moisture |
| Spare Parts / Repairability | Contact Key Digital support for parts; no user-serviceable components |
| Warranty | 1 year limited warranty |
Frequently Asked Questions - KD-CCKIT1000 Key Digital
User questions about KD-CCKIT1000 Key Digital
0 question about this device. Answer the ones you know or ask your own.
Ask a new question about this device
Download the instructions for your Controller in PDF format for free! Find your manual KD-CCKIT1000 - Key Digital and take your electronic device back in hand. On this page are published all the documents necessary for the use of your device. KD-CCKIT1000 by Key Digital.
USER MANUAL KD-CCKIT1000 Key Digital
The Experts In Digital Video Technology and Solutions™

Video

Audio

Automotion

Climede

Lights

2013.01.01

Wmbs

Security

Key Digital ^® , led by digital video pioneer Mike Tsinberg, develops and manufactures high quality, cutting-edge technology solutions for virtually all applications where high quality video imaging and control are important. Key Digital ^® is at the forefront of the video industry for Home Theater Retailers, Custom Installers, System Integrators, Broadcasters, Consultants, Builders, Designers, Architects and Consumers.
521 East 3rd Street, Mount Vernon, NY 10553
Phone : 914.667.9700 Fax : 914.668.8666
Web : www.keydigital.com

RoHS COMPLIANT
WEEE COMPLIANT
Rev 2 - Apr 2014

Discover The Possibilities®
Compass Control® System Quick Setup Guide

Compass Control ^ is the first fully integrated major control system built from the ground up to use Apple's iOS devices - iPad ^ , iPad ^ mini, iPhone ^ , and iPod touch ^ - as its backbone.
Key digital
www.keydigital.com/compass
The Experts in Digital Video Technology and Solutions™
Table of Contents
| 1. Compass Control® System Overview | 1 |
| 2. Getting Started | 6 |
| 3. Download the Software Package | 10 |
| 4. Download the App | 12 |
| 5. Register the Apple iOS device | 13 |
| 6. Install the KD-MC2500 Master Controller | 16 |
| 7. Set-up the KD-MC2500; The Device Manager | 19 |
| 8. Run the Compass NavigatorTM Software | 21 |
| 9. Open the Sample Template Project in Compass Navigator | 22 |
| 10. Upload the Sample Project to the Server | 24 |
| 11. Download a Project to the iPad | 25 |
| 12. The Compass Control® System Database Managers | 26 |
| How to Contact Key Digital® | 30 |
| Warranty Information | 30 |
| Installation Notes | 31 |
© 2012 Key Digital, Inc. All rights reserved.
1. Compass Control® System Overview
a. System Overview
The Compass Control® System is comprised of 4 major parts. The hub of the system is the KD-MC2500 Master Controller. This component is connected to the Network and receives signals from the controllers and then routes IR, RS-232 and/or IP commands to the system source and display equipment. The second part of a Compass Control® System is a Key Digital® Matrix Switcher. This is the only part of the system that is not actually necessary for operation, but including this allows for A/V switching plus expands the control capabilities of the overall system. In order to perform any programming, the Compass Navigator® Software is required. This third element of the Compass Control® System is offered to all Key Digital Compass Control® System dealers along with programming training via live and web classes. The fourth part of a Compass Control® System is the user interfaces, the controllers. The Compass Control® System uses Apple iOS devices, the iPad, iPad mini, iPod Touch, or iPhone and provides all the unique and advanced features inherent in these state-of-the-art products.
b. Master Controller
The KD-MC2500 Master Controller works as the control hub for the Compass Control® System. It has a number of I/O ports that allow IR, RS-232 and sensor control of the system and peripheral A/V components. In addition, the KD-MC2500 allows IR learning and has two sets of switchable contacts for relay control of external equipment.
KD-MC2500 Front Panel
The front panel of the KD-MC2500 has 14 LED indicators to show the status of the unit. The power indicator is lit whenever the unit has power. The link indicator is lit when the unit is on an active LAN. The status indicator lights whenever the unit is receiving or sending a signal. The WiFi indicator is for future use. There are also indicators for the 8 IR/RS-232 ports and for the 2 relays each lighting whenever that port or relay is active. Additionally, there is an IR Learning window that allows IR signals to be captured and saved directly to IR Database Manager. It is recommended that a shield be placed above the unit and donor remote when learning IR signals to prevent any ambient IR interference from corrupting the signal.
KD-MC2500 Front Plate
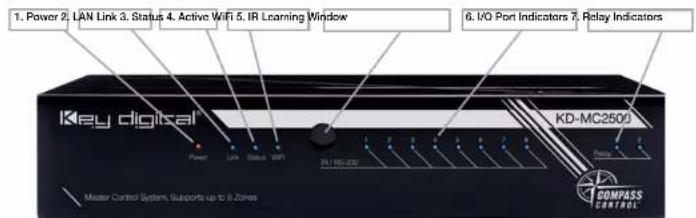
1) Power Indicator
Power On (red)
*Accepting update from manager (blue)
2) LAN Link Indicator
3) Status Indicator
Blinks whenever a signal is received
4) Active Internal WiFi Indicator
Note: Reserved for future use. Not currently active.
5) IR Learning Window
6) I/O Port Indicators (1 - 8)
Blinks when sending IR or RS-232 signals
•Lights when sensor is active
7) Relay Indicators
*Lights when Relay is active
KD-MC2500 Back Panel
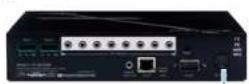
The back of the KD-MC2500 has 2 Phoenix connectors for using the relays (each has Common, NO and NC contacts) and the 8 IR/RS-232 1/8" mini plug connectors. These ports can also be programmed to operate as sensors to determine the state of a piece of equipment. Next to these is a hole to access the reset button. Along the bottom of the back panel are the 1/8" main Serial IR port, the RJ-45 Network connector, a USB connector (for KD-MC2500 Setup), a DB-9 connector for the main serial RS-232 connection, and the power connector.
KD-MC2500 Back Plate

1) Relay 1 & 2 connections
2) I/O Ports (1 - 8)
3) Reset switch
4) Main IR Out
5) RJ-45 LAN Connector
6) USB Port
7) Main RS-232 Connector (Bi-directional)
8) Power Supply Connector
Each side of the KD-MC2500 has tapped holes for attaching the rack mount ears, vents for cooling, and the bottom has four removable rubber feet.

c. Matrix Switchers
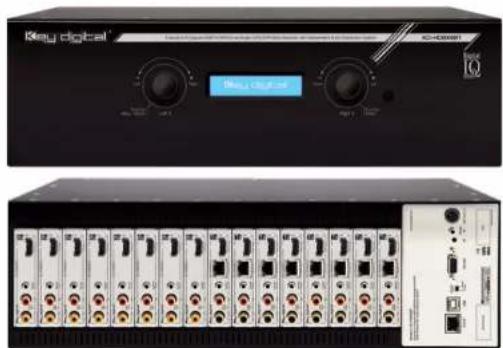
Key Digital® Matrix Switches have been industry standard products since entering the market in the late 1990's. Besides offering superior Video switching capability, these products have developed to offer Audio routing as well as Control routing. In all applications where multiple A/V sources and displays are being used, adding a Key Digital® Matrix Switcher to the system not only provides the A/V switching and routing, but also increases the control options. The current product mix allows the Matrix Switcher to be used to route the control signals, either IR or RS-232, to the remote sources or displays. These signals can even be sent through a choice of Baluns allowing the use of CAT6/STP wiring to deliver A/V and control signals remotely. The Compass Control® System uses this capability and provides a simple method of routing these control signals while also switching the A/V sources to the proper displays.
KD-HID8X8BT - 8 Inputs to 8 Outputs HDBT/HDMI/DVI via Single CAT6/STP Matrix Switcher with Audio Distribution System
d. Compass Navigator ^TM
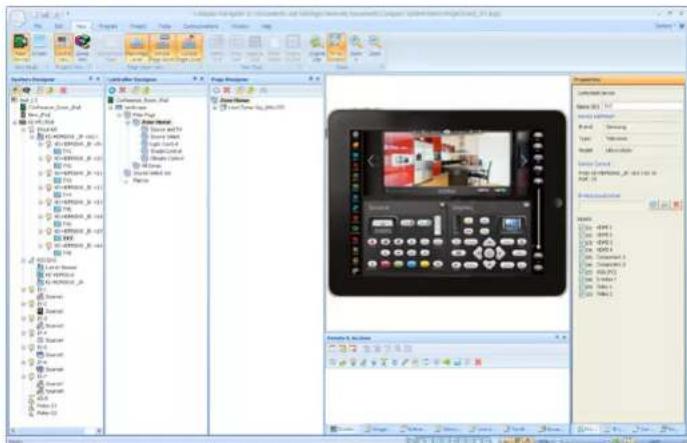
Programming the Compass Control® System requires the use of the PC Editor called Compass Navigator. This Key Digital exclusive program allows both a simple step-by-step operation to quickly get through the basic programming process, plus many more advanced programming capabilities using included tools to create unique and powerful custom control interfaces. Easily program for A/V distribution using the Key Digital® Matrix Switchers, or just set up a simple control interface for controlling the client's existing system. The Compass Navigator® Software allows great flexibility for both basic and complex programming.
Key Digital Compass Navigator™ Software
e. Controllers
The controller of choice for the Compass Control® System is the Apple iPad. This device provides a 9.7" color touch screen which can be used in either portrait or landscape layout. The iPad offers many options that make the user experience very dynamic. And, many of these features have become expected by the end-users who have used iOS devices in the past. These include a great graphics engine, the ability to embed images inside other images, quick navigation from page to page, and the 'flick' option to choose between items, pages, graphics, etc. All of these features, and more, offered by the iPad are available for use when creating the user interface.
Apple iPad 2 with Key Digital Compass Control® App

As a secondary controller option, the Compass Control® System also supports the iPod Touch. This smaller device allows the same level of control as the iPad, but since it has a much smaller footprint, it is recommended that it be used as a secondary remote with the iPad as the main controller. The registration process is the same for the iPod as it is for the iPad.
Apple iPod Touch with Key Digital Compass Control® App

2. Getting Started
Compass Navigator™ software is to be downloaded by Certified Programmers who have successfully completed the necessary online training curriculum. Compass Control is to be sold by Authorized Resellers that have gained authorization from Key Digital. Please follow the below instructions to ensure that your company is awarded the necessary programming certification and resale authorization status for Compass Control®.
a. Go to www.keydigital.com/TestDriveCompassControl.html
i. View the Compass Control Test Drive video to see a short introduction of the Compass Navigator™ Software
b. Register with Key Digital
i. Go to http://keydigital.com/DealerLogin.aspx
ii. Select Click Here to Sign Up. See figure 1.1
Figure 1.1: The Key Digital Training Login Page.
Press "Click Here to Sign Up" to register with Key Digital
![[Key Digital® Training Login] Please Login to Enter Key Digital Dealer Training Section: User ID: Password: Log On Click Here to Sign Up Target Password? Important Notice: Key digital trainings are for Key Digital customers only Unauthorized dealers, distributors or competitors attending these meetings will be removed and blocked. Attendees using generic email servers (i.e. gmail, yahoo etc.) are also subject to removal; please use your business email address or notify sales@keydigital.com if you are a valid dealer using a generic email server. Key Digital reserves the right to prosecute against unauthorized dealers, distributors, reps and competitors found abusing this policy.](/content/2026/05/976179/images/e8b74f554676aaf63b24f664576061ce8b742e6b4f0ea29f711c64dae689bf37.jpg)
iii. Enter all information necessary information including where your company purchased Key Digital products (ie, Distributor, Direct Account, or Rep Firm). See figure 1.2
Figure 1.2: The Key Digital Training Login Registration Page: http://keydigital.com/DealerLogin.aspx
![[Key Digital® Training Login] Please Enter Your Information (fields marked with " are required) Contact Information Full Name: Email: Phone: Password: Confirm Password Company Information Company Name: Street: City: Zip: Fax: Street? State: Country:](/content/2026/05/976179/images/79214880e9e4746f367116fc84b8b67bd4d5bef6e170654bfdcc4b3573b8a4a9.jpg)
iv. Submit your Registration. You will receive an email from webmaster@keydigital.com within two business days confirming your approval. Please ensure that this email address is not routed to your Junk folders. See figure 1.3
Figure 1.3: Registration Confirmation Email from Key Digital
![From: Webmaster@keydigital.com [mailto:Webmaster@keydigital.com]_ Sent: Wednesday, May 23, 2012 12:33 PM To: Email@Domain.com Subject: Training Site Approval Notice ************************** This is an Automated Email Notification, Please DO NOT REPLY ************************** You have been Approved to Use the Key Digital Training Site Please note that your USERNAME is: Email@Domain.com ************************** The "Getting Started with Compass Control" Process: Go to www.keydigital.com/TestDriveCompassControl.html View the Compass Control Test Drive video to see a short introduction of the Compass Control Navigator Software Go to ht! tp://keydigital.com/DealerLogin .aspx Enter your User ID and Password to access the Key Digital Dealer/Reseller portal Press the "Control System Online Training" button to enter the Compass Control Online Training portal.](/content/2026/05/976179/images/b4942b055af4f3505ca9574adc2d1e68a98d816068f6d7bed11acd228aeefc9c.jpg)
c. After receiving the approval email from Key Digital, return to Dealer/Reseller portal: http://keydigital.com/DealerLogin_.aspx
i. Enter your User ID and Password to access the Key Digital Dealer/Reseller portal
ii. Press the "Control System Online Training" button to enter the Compass Control Online Training portal. See figure 1.4
Figure 1.4: The Key Digital Online Dealer Training Portal.
Press the "Control System Online Training" button to begin the certification curriculum.

iii. Gain your Certification
- Optional: View the Compass Control Overview video and take the exam to verify your understanding of Compass Control and components
- MANDATORY: View the C1 Training Video, which will introduce you to all steps necessary to program a simple, single zone project. Complete the Level C1 Exam with a passing grade to receive the Compass Control® Certification.

d. Download the Compass Navigator™ software package
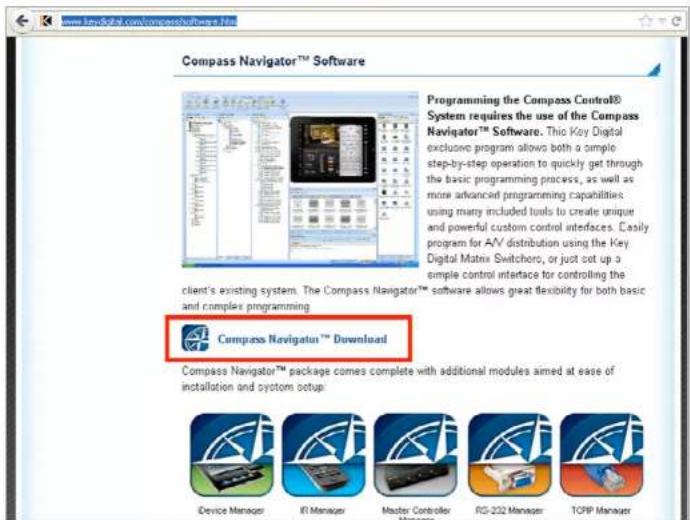
- Go to http://www.keydigital.com/compass/software.htm
- Select Compass Navigator Download. See figure 1.5
- Enter your User ID and Password to begin download
Figure 1.5: The Compass Control Main Page on the Key Digital website. Press the "Compass Navigator Download" button to download the Compass Navigator™ software package.
Continue to Section 3 – "Download the Software Package" of the Compass Control System Quick Start Guide for further information on installing the software package, etc.
3. Download the Software Package
Install the Compass Control® Software Suite from the Key Digital website. When it installs, a Key Digital folder is created in the Programs tree, and there are five programs placed in this folder; Compass Navigator, the KD-MC2500 Device Manager, and the three Database Managers. An icon for each of these is created on the desktop for easy launching of these programs. When launching the Compass Navigator program, be sure to be in administrator mode.


Follow the Install Wizard:
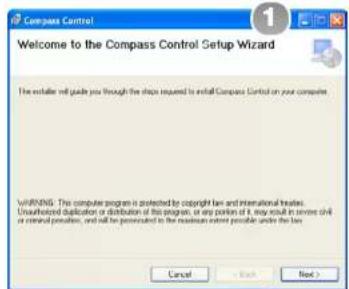
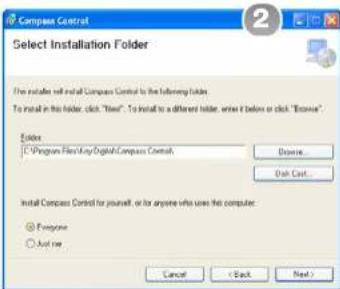
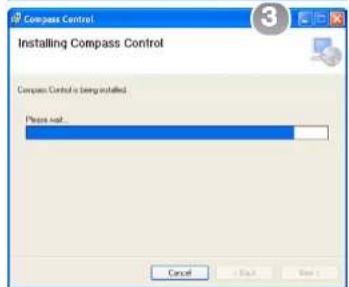

Note: If you encounter the following message when you open Compass on a computer running Windows 7/Vista, you will need to assign administrative privileges to the program. To assign administrative privileges, go to the C: drive, right click the Compass Control icon and select properties. Then, select the compatibility tab and select "Run as an administrator". You will now be able to run the program from the program menu or shortcut icons without any issues.

4. Download the App
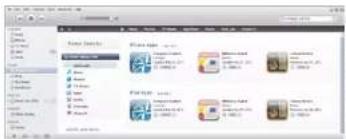
Use the iPad or other iOS device to open the App Store. Or connect the iOS device to the computer and open the App Store in iTunes. Locate the Compass Control® App by using the Search feature. It is listed as Compass Control. Then download it into the controller. Once it is installed, launch the App and select the Registration tab. Load the Demo System into the device. Once the blue Start tab becomes active, select this to launch the Demo file.
Compass Control ^® App on the iPad

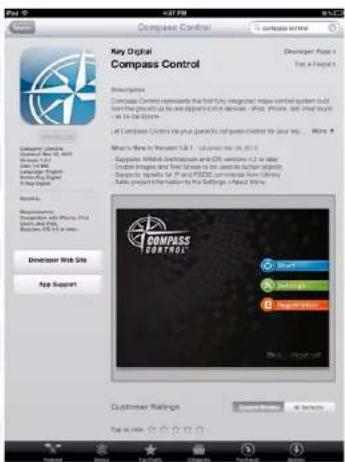
Compass Control ^® App at the App Store on the PC

5. Register the Apple iOS device
There are four steps required to load a file into one of the iOS device controllers. Anyone wishing to upload configurations to an iPad or an iPod needs to be registered through our Dealer Only Registration Portal. Then, all iOS devices must be registered and authorized. This entails first loading the Compass Control® System App from the i-Store onto the iOS device as outlined in the previous section, then marrying the Registration code to the Device ID. After that, the file can be easily uploaded to the secure Key Digital server through the Compass Navigator™ Software, and then downloaded into the iOS device via the Registration tab on the App.
To become a registered dealer, go to http://keydigital.com/compass/User_logon.asp This provides access to the password protected Dealer Only Registration site. Anyone not already registered needs to enter their personal data here, provide their email address as the User ID, and select a Password. Once registered for the site, the dealer needs to log in to register the iOS device.
Key Digital Device Registration Log-in Portal


In order to allow an iPad to be used as a controller for the system, it needs to be registered. This process entails purchasing a registration license for each iPad to be installed, and then using the registration number to marry each iPad to this registration code.
Once this is done, the iPad can be programmed for use in the system.
The file is then generated in the Compass NavigatorSoftware, and it is uploaded to the Key Digital server where it is stored and then sent to the iPad upon launching the App.
This makes it easy to update the program by sending an edited program to the server, and having the App pull the new content whenever needed.
Key Digital Compass Control® Software Registration Card & the iPad Device ID

There are two numbers that must be connected electronically in order to allow the iOS device to receive the file. The first is the Registration License that can be found on the Registration Card. The second number is the Device ID which is found in the iOS device itself.
First, log in to the dealer-only registration site listed above.
Then, enter the Registration Key where indicated, and hit the Register Device button. Make sure to use capital letters and include the hyphens.
This brings up a screen where the iOS device information is entered.
The two really important fields are the Registration Key (simply make sure that this number is correct) and the Device ID number field.
Find the Device ID on the iOS device itself by launching the App.
*This brings up the Set-up screen.
*Hit the Registration button, and the Device ID is listed.
- Enter this number exactly as it appears in the Device ID field.
The other fields are simply informational. However, it is a good idea to provide a unique name for the device, leaving no blank spaces, and use the same name, paying attention to the correct spelling, throughout the file.
Registering an iOS device. Begin at http://www.keydigital.com/compass/

Once this is completed, the iOS device is ready to receive the project programmed in the Compass Navigator™ Software. Be sure to include the Device ID in the Properties window when generating the file in the Compass Navigator™ Software to ensure that the project will be linked to this device. See Section 9 "Open the Sample Template Project in Compass Navigator".
6. Install the KD-MC2500 Master Controller
Connect the KD-MC2500 to the system components and Matrix Switcher.
①
Contents of KD-MC2500 Package

KD-MC2500
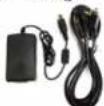
Power Supply

USB Type A to Mini B


3-Pin Terminal Block
for Relay x2
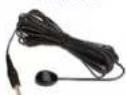
IR Emitters x6

3.5mm RS-232 Data Cable x3
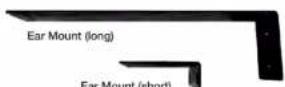
Ear Mount (short)
②
Plug in the KD-MC2500

Power LED Light
Power Cable

3
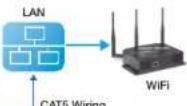
Connect to LAN

Link LED Light

4
Connect to Computer

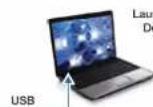
h KD-MC2500

Setup KD-MC2500
5
Connect IR Emitters

IR Emitters
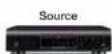
Projector


6
Connect RS-232 Control Cables
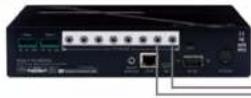
A/V Component
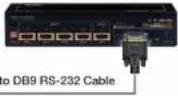

7
Wire Relay-Controlled Devices

Wiring

8
Control a KD-HD8X8BT Matrix Switcher

KD-HD8X8BT

9
Route IR through Matrix Switcher

KD-HD8X8BT
3.5mm to 3.5mm cable
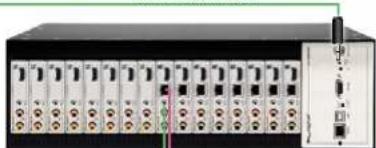
natural_image
Front view of a rack-mounted network device with multiple ports and connectors (no visible text or labels)Source (or Display)

IR Emitter
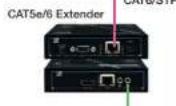


Route RS-232 through Matrix Switcher

7. Set-up the KD-MC2500; The Device Manager

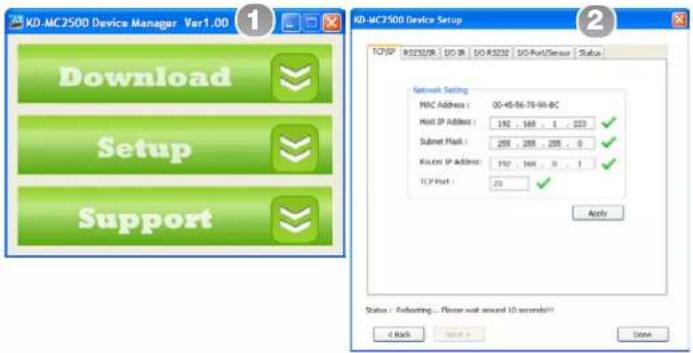
The KD-MC2500 is configured using the KD-MC2500 Device Manager. This sub-program, included with the Compass Software Suite, allows the KD-
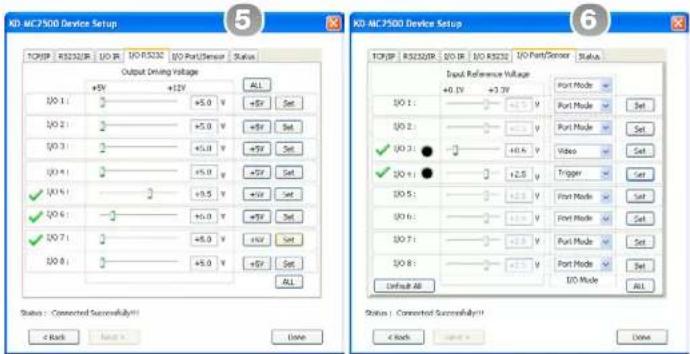
MC2500 to be set up. This includes assigning a static IP Address, updating the internal firmware, setting the RS 232 protocol parameters for the Main RS 232 output, and configuring the I/O ports. Make sure that the KD-MC2500 and the PC are either connected via a USB cable or that both are connected to the same network, and launch the Device Manager. Update the firmware if needed, and then walk through the set-up steps. It is important to assign the 8 multi-
function I/O ports. This will be as Port Mode, Video or Audio Sensor, Bi-level Sensor or Trigger.
KD-MC2500 Device Manager Set Static IP Address
Set Main RS-232 Protocol Settings for I/O Ports used for IR

Set RS-232 Ports Sensor Port Settings
KD-MC2500 Status after Set-up

8. Run the Compass Navigator™ Software
Use the Compass Navigator "Software to create a simple test project and upload it into the iPad. Section 2 in the Compass Control® System Programming Manual details the process of generating a file using the step-by-step programming process. Here is an overview of the Compass Navigator program interface.

The Compass Navigator" Software uses the standard Windows structure. At the top left corner is the "Quick Access" toolbar. These functions are always available, and any command in any of the ribbons can be added to this section. Below that are several tabs called Ribbons that open horizontal menus of options.

Workspace windows
Below the Ribbons is the workspace. This area is comprised of several windows that allow programming of different features. These windows can be moved or closed at will to optimize the space for whichever aspect of the programming is being done. As noted in the discussion of the Window ribbon, these layouts can be saved. Any of the preconfigured workspace layouts can be accessed using the buttons at the bottom numbered 1-8. Also, the default layout can always be accessed.
Compass Navigator™ Layout
![Computer Manager - Microsoft Visual Studio (Microsoft Dynamics Computer System) [Windows XP] [1.0.2] System Designer Controller Designer Page Designer System Name C:\Users\Java\Phd C:\Users\Phd C:\Users\Phd C:\Users\Phd C:\Users\Phd C:\Users\Phd C:\Users\Phd C:\Users\Phd C:\Users\Phd C:\Users\Phd C:\Users\Phd C:\Users\Phd C:\Users\Phd C:\Users\Phd C:\Users\Phd C:\Users\PHD C:\Users\Phd C:\Users\Phd C:\Users\Phd C:\Users\Phd C:\Users\Phd C:\Users\Phd C:\Users\Phd C:\Users\Phd C:\Users\Phd C:\Users\Phd C:\Users\Phd C:\Users\Phd C:\Users\Phd C:\Users\Phd Current Settings Current Settings Current Settings Current Settings Current Settings Current Settings Current Settings Current Settings Current Settings Current Settings Current Settings Current Settings Current Settings Current Settings Current Settings Current Settings Current Settings Current Settings Current Settings Current Settings Current Settings Current Settings Current Settings Current Settings Current Settings Current Settings Current Settings Current Settings Current Settings Current Settings Current Settings Current Settings Current Settings Current Settings](/content/2026/05/976179/images/592445fc91cf8e192ab5205f7276022efee9c24dfcd5e28be1e63c02012d2827.jpg)
There are several windows available for use in the workspace. The primary ones are: the
Properties window which generally docks along the right side;
Devices Library which houses the devices that are being used in the file;
- Control Library which allows devices to be imported from the databases;
System Designer that provides the Tree View for system configuration;
- Controller and Page Designers that allow the graphics to be imported for the user interface.
There are several other windows available, but these are used for specific functions that will be covered in programming discussion. All of these windows are presented during the proper time in the Program ribbon when using the step-by-step process. Any of these windows can be used in any of the user defined layouts.
9. Open the Sample Template Project in Compass Navigator
- Open Sample Template 1.
C:\Program Files\Key Digital\Compass Control\SampleTemplates\SampleTemplate1. Ksp - Select Conference_Room_iPad in the System Designer Window, under the SampleTemplate1 Tree.
Modify Device ID in the Properties Window. Refer to Section 5, "Register the Apple iOS5 device" for information on your Device ID.
![Controller Designer Controller_Board_Board Controller_Board_Board Page Designer Properties Controlling Blocks Name: [01] - Conflume_Board_Board Device Type And Identity Devices Insulation and Detection Vol. = 124 / Serial / Landform Balance 31 Conflume_Board_Board Conflume_Board_Board Balance 31 Balance 32 Balance 33 Balance 34 Balance 35 Balance 36 Balance 37 Balance 38 Balance 39 Balance 40 Balance 41 Balance 42 Balance 43 Balance 44 Balance 45 Balance 46 Balance 47 Balance 48 Balance 49 Balance 50 Balance 51 Balance 52 Balance 53 Balance 54 Balance 55 Balance 56 Balance 57 Balance 58 Balance 59 Balance 60 Balance 61 Balance 62 Balance 63 Balance 64 Balance 65 Balance 66 Balance 67 Balance 68 Balance 69 Balance 70 Balance 71 Balance 72 Balance 73 Balance 74 Balance 75 Balance 76 Balance 77 Balance 78 Balance 79 Balance 80 Balance 81 Balance 82 Balance 83 Balance 84 Balance 85 Balance 86 Balance 87 Balance 88 Balance 89 Balance 90 Balance 91 Balance 92 Balance 93 Balance 94 Balance 95 Balance 96 Balance 97 Balance 98 Balance 99 Balance 100](/content/2026/05/976179/images/9fabca96d05331e69a82fce6e7bb72f436e7c7e2f871a278f347f74174cb99d4.jpg)
- Update the IP Address of your KD-MC2500 Master Controller
- Select KD-MC2500 from Conference_Room_iPad in the System Designer Window, under the SampleTemplate1 Tree.
Modify IP Address in the Properties Window. Refer to Section 6, "Set-up the KD-MC2500; The Device Manager" for information on your IP Address.

The entire Programming process is detailed in the Compass Navigator Programming Manual available on the Key Digital website.
10. Upload the Sample Project to the Server
Once the device is properly registered, the file can be uploaded to the server and then pulled into the device through the App. When the file is completed, or at a point where testing is required, go to the Communication ribbon and select 'Upload System Project'. There will be a prompt to log in to the Registration site using the User Name and Password created earlier. Once entered, the file will begin uploading. Do not navigate away during this process. Once the upload is done, a completion window pops up. The file has now been successfully uploaded to the server.
Back-up Project to Key Digital server

11. Download a Project to the iPad
Once the file has been created and uploaded to the server, use the App on the iOS device to pull the file into it. Launch the App and go to the Set-up page. Select Registration and hit Update Project.
As soon as the blue Start button lights up, hit it to launch the project.
Update Project Button on iPad

12. The Compass Control® System Database Managers
The Database Manager allows commands sets to be edited, refined or even developed from scratch for use in system configurations. There are three Database Managers for use with the Compass Control® System; an IR Manager, an RS-232 Manager and a TCP/IP Manager. All of these offer functionality that provides very deep levels of customization. Each of the Managers allows the existing library to be edited. Components can be added, deleted or the actual code sets can be altered as needed to provide better operation. Codesets can even be imported from an existing project and edited. In this way, a set of commands that need to be tweaked for optimal control of a specific component, can be opened from the project file and edited. In addition, each Manager allows for the creation of a User Defined Library. Each programmer can develop their own subset of most often used devices, which then grants easier access to these components during the programming process. An overview of the three Databases follows here. A deeper discussion of their functionality is found in Section 3 of the Compass Control® System Programming Manual.
a. IR Database Manager
The IR Database Manager allows programmers to oversee the IR Codesets in the database. This includes altering the actual codes and/or codesets themselves, adding devices, adding codes or codesets to the database, importing codes and/ or codesets, and creating new device codesets by learning the IR codes into the database or using Pronto Hex codes. The IR Database Manager also allows the set-up of the default settings for a particular codeset. Additionally, the Manager provides a method to test the codes through the KD-MC2500 to ensure that a particular code or full codeset operates the Device properly.
The IR Database Manager


b. RS-232 Database Manager
The RS-232 Database manages these command protocols by allowing codes to be added, edited, deleted, and whole codesets generated. Additionally, any code can be tested through the database using the KD-MC2500 or the KD-Terminal Control Terminal. Commands can be written using ASCII, Decimal, or Hex, and suffixes can be automatically added to each command in a codeset such as Carriage Return and Form Feed.
The RS-232 Database Manager


c. TCP/IP Database Manager
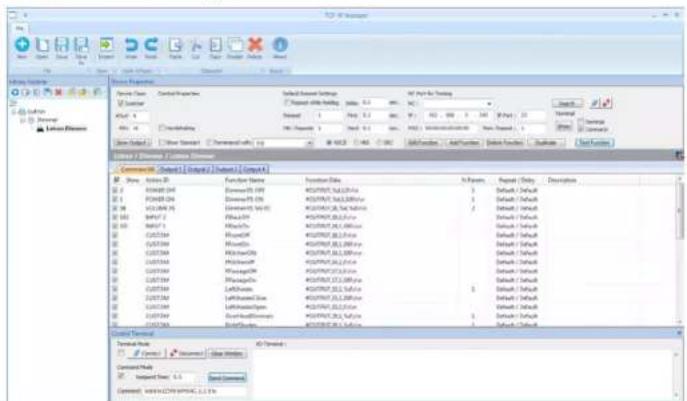
The TCP/IP Database Manager allows the programmer to manage the one-way IP commands in the Database in the same way as the RS-232 command sets in the RS-232 Database Manager. In fact, many of these commands will be the same in both codesets. Two-way IP communications require a two-way Device Driver to be generated for control and feedback. Creating and working with two-way drivers is covered in Section 4 of the Compass Control® System Programming Manual.

The TCP/IP Database Manager

Important Product Warnings:
- Test for proper operation before securing unit behind walls or in hard to access spaces.
- If installing the unit into wall or mounting bracket into sheet-rock, provide proper screw support with bolts or sheet-rock anchors.

Safety Instructions.
Please be sure to follow these instructions for safe operation of your unit.
- Read and follow all instructions.
- Heed all warnings.
- Do not use this device near water.
- Clean only with dry cloth.
- Install in accordance with the manufacturer's instructions.
- Do not install near any heat sources such as radiators, heat registers, stoves, or other apparatus (including amplifiers) that produce heat.
- Only use attachments/accessories specified by the manufacturer.
- Refer all servicing to qualified service personnel. Servicing is required when the device has been damaged in any way including:
Damage to the power supply or power plug
Exposure to rain or moisture

You MUST use the Power Supply provided with your unit or you VOID the Key Digital ^® Warranty and risk damage to your unit and associated equipment.
How to Contact Key Digital®
System Design Group (SDG)
For system design questions please contact us at:
Phone:914-667-9700
E-mail: sdg@keydigital.com
Technical Support
For technical questions about using Key Digital® products, please contact us at:
Phone:914-667-9700
E-mail: tech@keydigital.com
Repairs and Warranty Service
Should your product require warranty service or repair, please obtain a Key Digital® Return Material Authorization (RMA) number by contacting us at:
Phone:914-667-9700
E-mail: rma@keydigital.com
Feedback
Please email any comments/questions about the manual to:
E-mail: customersupport@keydigital.com
Warranty Information
All Key Digital ^® products are built to high manufacturing standards and should provide years of trouble-free operation. They are backed by a limited two-year parts and labor warranty.
Installation Notes
Installation Notes Installation Notes
- Compass Control® System Quick Setup Guide
- Compass Control® System Overview
- a. System Overview
- b. Master Controller
- KD-MC2500 Front Panel
- KD-MC2500 Back Panel
- c. Matrix Switchers
- d. Compass Navigator TM
- e. Controllers
- Getting Started
- a. Go to www.keydigital.com/TestDriveCompassControl.html
- b. Register with Key Digital
- iii. Gain your Certification
- d. Download the Compass Navigator™ software package
- Download the Software Package
- Download the App
- Register the Apple iOS device
- Once this is done, the iPad can be programmed for use in the system.
- Install the KD-MC2500 Master Controller
- Set-up the KD-MC2500; The Device Manager
- Run the Compass Navigator™ Software
- Workspace windows
- Open the Sample Template Project in Compass Navigator
- Upload the Sample Project to the Server
- Download a Project to the iPad
- The Compass Control® System Database Managers
- a. IR Database Manager
- b. RS-232 Database Manager
- c. TCP/IP Database Manager
- Important Product Warnings:
- Safety Instructions.
- How to Contact Key Digital®
- System Design Group (SDG)
- Technical Support
- Repairs and Warranty Service
- Feedback
- Warranty Information
- Installation Notes
Brand : Key Digital
Model : KD-CCKIT1000
Category : Controller