
SDH3652DB - Cooker SHARP - Free user manual and instructions
Find the device manual for free SDH3652DB SHARP in PDF.


| Product Type | Freestanding Cooker |
| Brand | Sharp |
| Model | SDH3652DB |
| Color | Black |
| Energy Source | Electric |
| Overall Dimensions (W x D x H) | 60 x 60 x 85 cm |
| Weight | Approximately 50 kg |
| Oven Type | Fan-assisted electric oven |
| Oven Capacity | 65 liters |
| Number of Oven Functions | 8 (including grill, fan, defrost, etc.) |
| Hob Type | Ceramic glass induction hob |
| Number of Cooking Zones | 4 |
| Cleaning Method | Enamel interior, easy-clean surface |
| Safety Features | Child lock, automatic shut-off, residual heat indicator |
| Spare Parts Availability | Genuine Sharp spare parts available online |
| Repairability Index | 7.5/10 (estimated based on typical design) |
| Energy Efficiency Class | A+ (oven) |
| Control Type | Touch controls and dials |
| Installation Type | Freestanding, requires electrical connection |
| Warranty | 2 years manufacturer warranty |
Frequently Asked Questions - SDH3652DB SHARP
User questions about SDH3652DB SHARP
0 question about this device. Answer the ones you know or ask your own.
Ask a new question about this device
Download the instructions for your Cooker in PDF format for free! Find your manual SDH3652DB - SHARP and take your electronic device back in hand. On this page are published all the documents necessary for the use of your device. SDH3652DB by SHARP.
USER MANUAL SDH3652DB SHARP
CUSTOMER ASSISTANCE 2
US CONSUMER LIMITED WARRANTY 3
CANADA CONSUMER LIMITED WARRANTY....4
IMPORTANT SAFETY INSTRUCTIONS 5
BEFORE USING THE COOKTOP 7
INDUCTION COOKTOP CHARACTERISTICS....7
COOKWARE 7
COOKTOP NOISE 8
COOKTOP FEATURES 9
MODELS 9
CONTROL PANEL 9
SPECIFICATION....11
HEAT SETTING DISPLAY....11
USING THE COOKTOP....12
CONTROLS LOCK 12
TO TURN ON THE COOKTOP 12
CLEANING YOUR COOKTOP 15
DO NOT USE THE FOLLOWING TO CLEAN YOUR UNIT......15
METAL MARKS AND SCRATCHES 15
TROUBLESHOOTING GUIDE 16
CUSTOMER ASSISTANCE
IMPORTANT! Register within 10 days of purchase.
Register ONLINE at www.sharpusa.com/productregistration
To aid in reporting this appliance, please record below the model number and serial number located on the unit. We also suggest you record all the information listed and retain for future reference.
MODEL NUMBER SERIAL NUMBER
DATE OF PURCHASE / / ____ ____
DEALER TELEPHONE
SERVICER TELEPHONE
FOR US
TO PHONE: CALL 1-800-BE-SHARP (237-4277) for:
SERVICE (for your nearest Sharp Authorized Servicer)
PARTS (for your authorized parts distributor)
ADDITIONAL CUSTOMER INFORMATION
TO WRITE: Sharp Electronics Corporation
Customer Assistance Center
Sharp Plaza Blvd.
Memphis, Tennessee 38193
TO ACCESS INTERNET: www.sharpusa.com
Please provide the following information when you write or call: model number, serial number, date of purchase, your complete mailing address (including zip code), your daytime telephone number (including area code), e-mail address and description of the problem.
FOR CANADA
To obtain the name and address of the nearest Sharp Authorized Service Centre, please contact:
Sharp Electronics Of Canada Ltd.
335 Britannia Road East
Mississauga, Ontario
L4Z 1W9
(905) 568-7140
TO ACCESS INTERNET: www.sharp.ca
Please provide the following information when you write or call: model number, serial number, date of purchase, your complete mailing address (including zip or postal code), your daytime telephone number (including area code) and description of the problem.
SHARP®
US CONSUMER LIMITED WARRANTY
SHARP ELECTRONICS CORPORATION (“Sharp”) warrants to the first consumer purchaser (“Purchaser”) that this SHARP brand product (“Product”), when shipped in its original container and sold or distributed in the United States by Sharp or an authorized Sharp dealer or reseller, will be free from defective workmanship and materials, and agrees that it will, at its option, either repair the defect or replace the defective Product or part thereof with a new or remanufactured equivalent at no charge to the Purchaser for parts or labor for the period(s) set forth below.
This limited warranty does not apply to any appearance items of the Product nor to the additional excluded item(s) set forth below nor to any Product the exterior of which has been damaged or defaced, which has been subjected to misuse, abnormal service or handling, or which has been altered or modified in design or construction.
In order to enforce the rights under this limited warranty, the Purchaser should follow the steps set forth below and provide proof of purchase to the servicer.
The limited warranty described herein is in addition to whatever implied warranties may be granted to Purchasers by law. ALL IMPLIED WARRANTIES INCLUDING THE WARRANTIES OF MERCHANTABILITY AND FITNESS FOR USE ARE LIMITED TO THE PERIOD(S) FROM THE DATE OF PURCHASE SET FORTH BELOW. Some states do not allow limitations on how long an implied warranty lasts, so the above limitation may not apply to you.
Neither the sales personnel of the seller nor any other person is authorized to make any warranties other than those described herein, or to extend the duration of any warranties beyond the time period described above on behalf of Sharp.
The warranties described herein shall be the sole and exclusive warranties granted by Sharp and shall be the sole and exclusive remedy available to the Purchaser. Correction of defects, in the manner and for the period of time described herein, shall constitute complete fulfillment of all liabilities and responsibilities of Sharp to the Purchaser with respect to the Product, and shall constitute full satisfaction of all claims, whether based on contract, negligence, strict liability or otherwise. In no event shall Sharp be liable, or in any way responsible, for any damages or defects in the Product which were caused by repairs or attempted repairs performed by anyone other than an authorized servicer. Nor shall Sharp be liable or in any way responsible for any incident or consequential economic or property damage. Some states do not allow the exclusion of incidental or consequential damages, so the above exclusion may not apply to you.
THIS LIMITED WARRANTY IS VALID ONLY IN THE FIFTY (50) UNITED STATES, THE DISTRICT OF COLUMBIA AND PUERTO RICO.
Your product model number & description Model # SDH3042DB, SDH3652DB or Induction Cooktops. (Be sure to have this information available when you need service for your Product.)
Warranty period for this product: One (1) year parts and labor including in-home service.
Product must be accessible to provide service.
Additional item(s) excluded from warranty coverage (if any): Non-functional accessories, service calls to your home to instruct how to use your induction cooktop appliance, replace or repair house fuses or to correct house wiring, improper commercial use, installation, or maintenance, damage to the product caused by delivery, accident, modifications, fire, floods or acts of God.
Where to obtain service: From a Sharp Authorized Servicer located in the United States. To find the location of the nearest Sharp Authorized Servicer, call Sharp toll free at 1-800-237-4277 (1-800-BE-SHARP).
What to do to obtain service: In-home service is provided for one year from date of purchase. In-home service can be arranged by calling 1-800-BE-SHARP. Be sure to have Proof of Purchase available.
TO OBTAIN SUPPLY, ACCESSORY OR PRODUCT INFORMATION, CALL 1-800-BE-SHARP or visit www.sharpusa.com. SAVE THE PROOF OF PURCHASE AS IT IS NEEDED SHOULD YOUR OVEN EVER REQUIRE WARRANTY SERVICE.
SHARP®
CANADA CONSUMER LIMITED WARRANTY
Congratulations on your purchase!
Sharp Electronics of Canada Ltd. (“Sharp”) warrants to the first purchaser for this Sharp brand product (“Product”), when shipped in its original container and sold or distributed in Canada by Sharp or by an authorized Sharp dealer, and Product was not sold “as is” or “sales final” that the Product will during the applicable warranty period, be free from defects in material and workmanship, and will within the applicable warranty period, either repair the defective Product or provide the first purchaser a replacement of the defective Product.
This warranty does not apply to any appearance items of the product nor to the additional excluded item(s) set forth below nor to any product the exterior of which has been damaged or defaced, which has been subjected to improper voltage or other misuse, abnormal service or handling, which has been altered or modified in design or construction, or if the serial number or model number affixed to Product has been removed, defaced, changed, altered or tampered with.
How to get service: Should this Sharp product fail to operate during the warranty period, warranty service is provided by an Authorized Sharp Service Centre or an Authorized Sharp Servicing Dealer. In home warranty service will be carried out to locations accessible by on-road service vehicle and within 50 km of an authorized Sharp service centre. The servicer may if necessary take the unit for repair at the servicer's facility. No other person (including any Sharp dealer or service centre) is authorized to extend, enlarge or transfer this warranty on behalf of Sharp.
The express warranties in this limited warranty are, except for consumer purchasers domiciled in Quebec, in lieu of and, except to the extent prohibited by applicable law, Sharp disclaims all other warranties and conditions, express or implied, whether arising by law, statute, by course of dealing or usage of trade, including, without limitation, implied warranties or conditions of merchantability and/or quality, fitness for a particular use or purpose, and/or non-infringement. Limitations (not applicable to consumer purchasers domiciled in Quebec to the extent prohibited under Quebec law): (a) Sharp shall not be liable for any incidental, special, consequential, economic, exemplary or indirect damages of any kind or nature (including lost profits or damages for loss of time or loss of use or loss of data) arising from or in any connection with the use or performance of a Product or a failure of a Product, even if Sharp is aware of or has been advised of the possibility of such damages; (b) the remedies described in this limited warranty constitute complete fulfillment of all obligations and responsibilities of Sharp to the purchaser with respect to the Product and shall constitute full satisfaction of all claims, whether based on contract, negligence, strict liability or otherwise. Some provinces may not allow the exclusion or limitation of certain damages, or limits on the duration or voiding of implied warranties or conditions; in such provinces, the exclusions and limits herein may not apply. This limited warranty is, except for consumer purchasers domiciled in Quebec, governed by the laws of the Province in Canada in which the purchaser has purchased the Product. For consumer purchasers domiciled in Quebec this limited warranty is governed by the laws of Quebec.
Your product model number & description
Model # SDH3042DB, SDH3652DB or Induction Cooktops.
(Be sure to have this information available when you need service for your Product.)
Warranty period for this product: One (1) year parts and labor including in-home service.
Product must be accessible to provide service.
Additional item(s) excluded from warranty coverage (if any):
Non-functional accessories, service calls to your home to instruct how to use your induction cooktop appliance, replace or repair house fuses or to correct house wiring, improper commercial use, installation, or maintenance, damage to the product caused by delivery, accident, modifications, fire, floods or acts of God.
To obtain the name and address of the nearest Authorized Sharp Service Centre or Dealer, please contact:
SHARP ELECTRONICS OF CANADA LTD 335 Britannia Road East
Mississauga, Ontario
L4Z 1W9
(905) 568-7140
Website: www.sharp.ca
SAVE THE PROOF OF PURCHASE AS IT IS NEEDED SHOULD YOUR OVEN EVER REQUIRE WARRANTY SERVICE.
THIS LIMITED WARRANTY IS VALID ONLY IN CANADA
IMPORTANT Keep these instructions handy for future use.
The appliance is manufactured in compliance with the relevant safety standard.
⚠WARNING Read all instructions carefully before installation and operation.
▲WARNING Failure to follow these warnings could result in a fire or explosion that causes property damage, personal injury or death. To reduce the risk of fire, electric shock or injury, take the following precautions:
Intended Use
1 This appliance is designed for built-in household use only.
2 Do not use outdoors.
3 Do not use the appliance to heat a room.
WARNING COOKING SAFETY
1 Do not allow aluminum foil, paper or cloth to come in contact with a cooking zone.
2 Avoid preparing food in aluminum foil or plastic containers over the hot cooking zones.
3 Protective liners - Do not use aluminum foil to line cooking zone, drip bowls or oven bottoms, except as suggested in the manual. Improper use of these liners may result in a risk of electric shock or fire.
4 Do not allow pans to boil dry or empty. Never leave the cooktop unattended when in use.
5 Always use the proper pot and pan size. (See Page 14)
6 The use of undersized cookware will expose a portion of the hot cooking zone, which can result in ignition of clothing or personal burns.
7 Always remove the covers on sealed or canned goods and before heating to avoid explosion.
8 Close supervision is necessary when any appliance is used by or near children.
9 Do not touch hot surfaces. Use dry pot holders to hold the handles of pots and pans.
10 Use only dry potholders - moist or damp potholders on hot surfaces may result in burns from steam. Do not let the potholder touch hot cooking zone. Do not use a towel or other bulky cloth. Nevertheless, we strongly recommend that a person with physical or mental impairments not use the appliance unless accompanied by a qualified person. The same recommendation applies to children.
11 When the unit is on, do not touch outside the control panel as the surface may contain residual heat. It is important to be aware that the unit's surface will remain hot for a short period of time after use. Do not touch hot surfaces.
WARNING CLEANING SAFETY
▲CAUTION - Clean cooktop with Caution - If a wet sponge or cloth is used to wipe spills on a hot cooking area, be careful to avoid steam burns. Some cleaners can produce steam or noxious fumes if applied to a hot surface. Do not use steam cleaners or high-pressure cleaners to clean the cooktop, as this may result in electric shock.
CONDITION OF UNIT
▲WARNING Do not operate any appliance with a damaged cord or after the appliance malfunctions or has been damaged in any manner. Return appliance to the nearest authorized service facility for examination, repair, or adjustment.
▲IMPORTANT Do not cook on broken cooktop. If cooktop breaks, cleaning solutions and spillovers may penetrate the broken cooktop and create a risk of electric shock.
▲IMPORTANT ENVIRONMENT OF UNIT
1 To reduce the risk of fire, do not let any objects (glass, paper, etc.) obstruct the inlet and outlet of your cooktop.
2 To reduce the risk of electric shock, do not mount unit over a sink.
3 To reduce the risk of fire, do not store anything directly on top of the appliance surface when the appliance is in operation.
4 Always have a working smoke detector in or near the kitchen.
5 ▲IMPORTANT Do not leave lids other metal objects such as knives, forks or spoons on the cooktop. If the cooktop is turned on, these objects can heat up quickly and may cause burns.
6 Do not place rough or uneven objects on the units as they may damage the surface. If the cooktop is near a window, ensure that curtains do not blow over or near the unit.
7 ▲IMPORTANT Do not use the cooktop as a work surface. Certain substances such as salt, sugar, or sand can scratch the glass ceramic surface.
8 Do not store hard or pointed objects over the cooktop as they can damage the unit if they fall on top.
9 Do not put detergents or flammable materials in the equipment installed under the cooktop.
10 Extreme caution must be used when moving an appliance containing hot oil or other hot liquids.
11 While cooking, any overflowed fat or oil on the cooktop may ignite. There is a risk of burning and fire; therefore, control the cooking process at all times. The use of accessory attachments not recommended by the appliance manufacturer may cause injuries. Items with a magnetic field such as: radios, televisions, credit cards, cassette tapes etc., can affect the unit. The marked electrical rating should be at least as great as the electrical rating on the appliance.
12 To prevent accidents and achieve optimal ventilation, allow for sufficient space around the cooking area.
13 Use proper cookware size - This appliance is equipped with four or five cooking zones of different sizes. Choose cookware with a flat bottom large enough to cover the unit heating surface. The use of undersized cookware will expose a portion of the heating surface where direct contact may be made and cause serious injury. Compatible cookware will improve efficiency.
14 To reduce risk of burns, ignition of flammable materials, and spillage due to unintentional contact with cookware, the
cookware handles should be turned inward and not extend over adjacent heating surface.
15 Wear proper apparel - loose fitting or hanging garments should never be worn while using the appliance.
SERVICE AND REPAIR SAFETY
⚠ WARNING Do not repair or replace any part of the appliance unless specifically recommended in the manual. All other services should be referred to a qualified technician.
There are no user serviceable parts on this appliance. Only an authorized service representative should attempt to service your cooktop.
This product may not be treated as household waste. Instead it should be handed over to the applicable collection point for the recycling of electrical and electronic equipment. By ensuring this product is disposed of correctly, you will help prevent potential negative consequences for the environment and human health, which could otherwise be caused by inappropriate waste handling of this product. For more detailed information about recycling of this product, please contact your local city office, your household waste disposal service or the shop where you purchased the product.
READ AND SAVE THESE INSTRUCTIONS
INDUCTION COOKTOP CHARACTERISTICS
Induction cooking is a safe, advanced, efficient, and economical cooking technology. It works by electromagnetic field generating instant heat directly in the cookware bottom, rather than indirectly through heating the glass surface.
△CAUTION The Cooking Zones may appear to be cool while turned ON and after they have been turned OFF. The glass surface may be HOT from residual heat transferred from the cookware and burns may occur.
MAGNETIC DETECTOR
The coil sensor automatically detects whether the pan is magnetic and eliminates accidental "Turn-On."
PAN SIZE DETECTION
The pan recognition sensor automatically detects and adapts the Cooking Zones to the pan sizes in use.
EFFICIENT
Induction cooking heats faster while using less energy. Induction power levels are quick to boil the water.
COOKWARE
USING COMPATIBLE COOKWARE
The magnetic Cooking Zone sensors located below the cooktop surface require the use of cookware made with magnetic material in order to start the heating process on any of the Cooking Zones.
When purchasing pans, optimally the cookware will have the induction compatible symbol on the retail box. Check that the bases of your pans are attracted by a magnet to find out if they are suitable.

It is recommended to always use heavier high quality stainless steel cookware on your Induction Cooktop surface.
If the base of the cookware is only partially magnetic, only the area that is magnetic will heat up. This may mean that heat will not be distributed evenly. The non-magnetic area may not heat up to a sufficient temperature for cooking.
SELECTING SURFACE COOKING COOKWARE
The cookware used with the Induction Cooktop should have flat bottoms that make good contact with the entire surface of the Cooking Zone. Check for flatness by rotating a ruler across the bottom of the cookware. Be sure to follow all the recommendations for using cookware. Use cookware made with the correct material type for Induction Cooking.
PROPER COOKWARE MATERIAL
• Magnetic stainless steel
- Enameled iron
- Cast iron
- Nickel
IMPROPER COOKWARE MATERIAL
• Non-magnetic stainless steel
- Heat resistant glass
- Bottom measuring less than 4.7 inches (12 cm)
- Ceramic container
- Pot with stands
- Copper
- Aluminum
ATTENTION:
- Use quality cookware with heavier bottoms for better heat distribution allowing for more even cooking results.
- The pan size should match the amount of food being prepared.
- Do not let pans boil dry. This may cause permanent damage in the form of breakage, fusion, or marring that can affect the ceramic cooktop. (This type of damage is not covered by your warranty).
- Do not use dirty pans with grease buildup. Always use pans that are easy to clean after cooking.
Even quality cookware can scratch the cooktop surface, especially if cookware is slid over the ceramic cooktop surface without being lifted up. Over time sliding ANY type of cookware over the ceramic cooktop will likely alter the overall appearance of the cooktop. Eventually the buildup of scratches will make cleaning the surface difficult and degrade the overall appearance of the cooktop.
CAUTION
- The Cooking Zones may appear to be cool while turned ON and after they have been turned OFF. The glass surface may be HOT from residual heat transferred from the cookware and burns may occur.
- DO NOT SLIDE Cookware across the cooktop surface. Doing so may permanently damage the appearance of the ceramic cooktop.
- DO NOT TOUCH HOT COOKWARE or PANS directly with hands. Always use oven mitts or pot holders to protect hands from burns.
COOKWARE RECOMMENDATIONS
Be sure to follow the following recommendations for using cookware:
INCORRECT
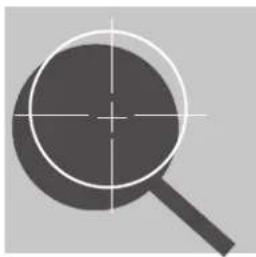
• Cookware not centered on Cooking Zone surface.
- Curved or warped pan bottoms or sides.
- Pan does not meet the minimum size required for the Cooking Zone used.
- Pan bottom rests on cooktop trim or does not rest completely on the cooktop surface.
• Heavy handle tilts pan.
CORRECT
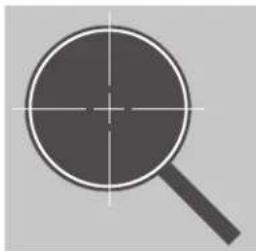
• Cookware centered correctly on Cooking Zone surface.
- Flat pan bottom & straight sides.
- Pan size meets or exceeds the recommended minimum size for the Cooking Zone.
- Pan rests completely on the cooktop surface.
- Pan is properly balanced.
NOTE: ANY one of the incorrect conditions listed may be detected by the sensors located below the ceramic cooktop surface. If the cookware does not meet any of these conditions, one or more of the Cooking Zones will not heat indicated by a flashing power level in the digital display for that affected zone. Correct the problems before attempting to reactivate the cooktop.
USE THE CORRECT COOKWARE SIZE
The Cooking Zones available on the Induction Cooktop require a MINIMUM pan size to be used at each location.
Cooking zone outer line

COOKWARE SIZE GUIDE
The thick outer line at each Cooking Zone is helpful to determine the pan MINIMUM size as well as the pan MAXIMUM size. After centering the cookware on the cooktop, make sure the cookware does cover 1/2" inside of the thick outer line and does not extend more than 1/2" beyond the thicker line on the Cooking Zone. The pan must make FULL contact on the glass surface without the bottom of the pan touching the metal cooktop trims.
NOTE: Pan bottom should not exceed 1/2" (13 mm) from outer Cooking Zone (Induction).
If a pan made of the correct material is centered properly on any of the active Cooking Zones but is TOO SMALL, the power level will flash in the in the digital display and the pan will not heat.
COOKTOP NOISE
The induction fields are generated by electronics equipment, which produce heat at a high power level. A soft-sounding cooling fan runs when the unit is running multiple cooking zones.
Slight sounds may be produced by different types of cookware. Some of the possible causes include:
- Clicking noise may be heard at low power settings. This is due to the magnetic fields in use, which is considered normal operation.
- The operational noises may be different with various cookware used on the cooktop.
- Heavier pans such as enameled cast iron produce less noise than a lighter weight stainless steel pan; Light weight cookware may also vibrate. Heavy weight quality cookware is recommended.
- Cookware with irregular or warped bottoms can vibrate audibly on the ceramic glass surface, though again typically only at high power settings.
- A “cracking” noise may be heard if the cookware base is made of layer of different material.
- A low “humming” noise occurs when cooking, which is normal particularly at high power settings.
- Whistling can occur if both cooking zones are being used at the same time at the high settings, and the cookware has bases made of layer of different material.
- Loose-fitting handles on cookware, typically when riveted on, can vibrate slightly.
- High quality cookware of solid cast iron including enamelware will lower the noise.
MODELS
This manual covers different models. The cooktop you have purchased may have some or all of the features listed.
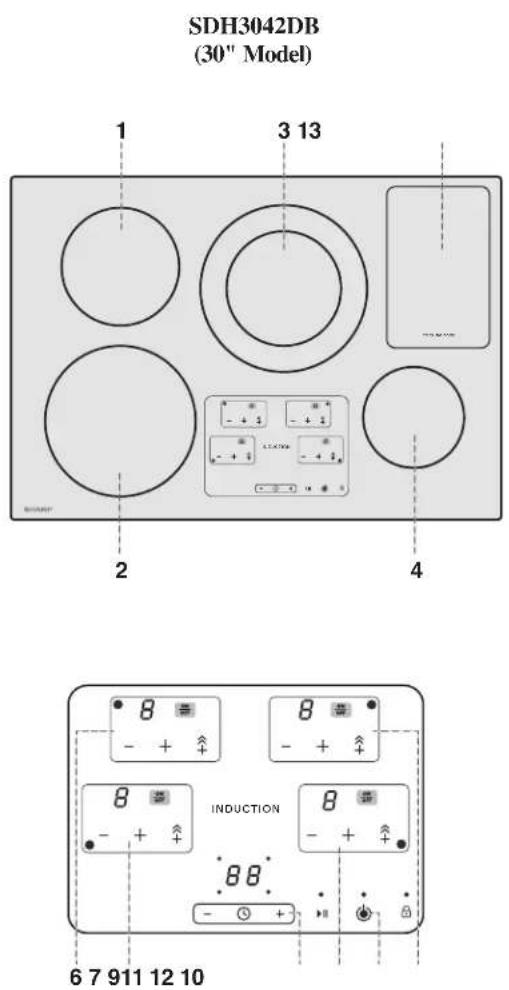
SDH3652DB
(36" Model)


1 Left Rear cooking zone
2 Left Front cooking zone
3 Right Rear cooking zone
4 Right Front cooking zone
5 Center cooking zone
6 Left Rear cooking zone control area
7 Left Front cooking zone control area
8 Center cooking zone control area
9 Right Front cooking zone control area
10 Right Rear cooking zone control area
11 Timer
12 Power
13 Cooling Zone
COOKTOP FEATURES
CONTROL PANEL
Main Power

1 Main Power On/Off
2 Main Power indicator light
3 Control Lock
4 Control Lock indicator light
5 Stop/Go
6 Stop/Go indicator light
Power Control

7 Power Boost
8 Increase power
9 Decrease power
10 Heat level and Residual heat display
11 Power on/off
Timer

12 Minute timer button
13 Increase minute timer setting
14 Decrease minute timer setting
15 Minute timer display
16 Cooking zone indicator lights
SPECIFICATION
| SDH3042DB (30 INCH) SDH3652DB (36 INCH) | |||
| Product dimension (w x d x h) inch 30" x 21" x 2-5/32" 36" x 21" x 2-5/32" | |||
| Cut-out dimension (w x d) inch | Min.: 28-3/4" x 19-21/32"Max.: 29-5/16" x 20-1/16" | Min.: 34-7/16" x 19-21/32"Max.: 35-1/32" x 20-1/16" | |
| Voltage (volts) / Amps 240V / 40A 240V / 50A | |||
| Frequency (Hz) 60 60 | |||
| Total power (Watts) 7400 9600 | |||
| Cooking Zones 4 5 | |||
| Left Rear / Boost | 1800W / 2600W | 7.2" dia. | 1800W / 2400W 7.2" dia. |
| Left Front / Boost | 2200W / 3200W | 9.2" dia. | 1800W / 2400W 7.2" dia. |
| Right Rear / Boost | 2400W / 3700W | 10.2" dia. | 1800W / 2600W 7.2" dia. |
| Right Front / Boost | 1600W / 2000W | 6.2" dia. | 2200W / 3200W 9.2" dia. |
| Center / Boost | N/A | 2400W / 3700W 11.2" dia. | |
| Simmer Enhancer Enabled | Left Front & Right Rear | Right Front & Center | |
HEAT SETTING DISPLAY
| DISPLAY | DESCRIPTION |
| - | No power level for the zone |
| L | Keep Warm function |
| 1-9 | The power level |
| P | The power boost |
| H | A cooking zone is still hot to touch (residual heat) |
| E | Electronics fault error message of specific cooking zone |
| EO-E9 | Error code |
| O | STOP/GO |
CONTROL LOCK
- Control Lock is activated when the cooktop is off. Control Lock prevents activation of any sensor key, except for the Lock key pad, so you must deactivate the control lock firstly, then touch the main POWER key pad to turn on the cooktop.
- Control Lock is activated during the cooktop use. Control Lock prevents activation of any sensor key, except for the ON/OFF, Power and Lock key pad.
TO LOCK
Touch and hold Lock key pad for 3 seconds, a "beep" will sound and the indicator light above the Lock key pad will be lit up.
TO UNLOCK
Touch and hold Lock key pad for 3 seconds, a "beep" will sound, the indicator light will turn OFF. The cooktop is in Standby mode.
IMPORTANT
Touch and hold for 3 seconds

TO TURN ON THE COOKTOP
While in Standby mode, touch the main POWER key pad, a "beep" will sound and the indicator light above the Power key pad will be lit up, indicating that the induction cooktop functions are ready to use. The unit will automatically return to Standby mode if no ON/OFF keys are touched within 30 seconds.

To turn on one or more cooking zones, place a compatible pot or pan on the desired cooking zone. With the cooktop being ON as mentioned above, touch the ON/OFF key pad of the desired cooking zone, the Power display will show a “-”, indicating no power level for the cooking zone has been set yet, then press either the “+” key, “-” key or “‡” (Power Boost) key to select a cooking level. The selected cooking zone will automatically turn off if no power selection key is not pressed within 30 seconds.
Touch the Decrease power key (-) to start at low level, the power display will show 1.

Touch the Increase power key (+) to start at high level, the power display will show 9.
Touch the Power Boost key (4) it will show on the display as a "P", boosting the heating power to the highest level for 10 minutes.
POWER CONTROL
Touch Decrease power key (-) or Increase power key (+) to adjust the desired power level.
NOTE: During cooking, the unit is equipped with safeguards against parching. Heating will appear intermittent phenomenon when cooking zone is used for frying, stir-frying, grilling and other high temperature cooking formats.
The power level displayed may be different from the actual power level at the power sharing and high temperature range. To prevent the cooktop from overheating, the power level is controlled automatically.
POWER BOOST
The Power Boost function is used to cook at maximum power for a short period of time (maximum 10 minutes). The power is reduced to level 9 at the end of the maximum boost time.
In the Boost status, touch “-” key or after 10 minutes the Power Boost setting will switch off automatically, Power Boost indicator light will turn off, Power digital will switch from P to 9.
⚠ WARNING Power Boost is only recommended for BOILING WATER.
⚠ WARNING Do not leave a pot unattended while in Power Boost Mode or other high power settings.

KEEP WARM
While in the Power level 1, touch “-” key to enter into Keep Warm mode, Power digital will switch from 1 to L.

SIMMER ENHANCER
Half Bridge Circuits are enabled on two cooking zones of each model (see page 11) to provide consistent power outputs lower than 1,000W when needed. By manipulating 400W and 600W power outputs, this feature stabilizes power outputs below 1,000W (Power Level 4 and lower). The result is optimized heating performance for simmer.
TO TURN OFF
1 Touch the ON/OFF key of the cooking zone being used, a "beep" will sound and Power display will turn off, and the corresponding cooking zone will turn off, indicating touched cooking zone shut off.
2 Touch the main Power key pad to turn off the entire cooktop, a "beep" will sound and all indicator lights will turn off, indicating the cooktop enter into the Standby mode.
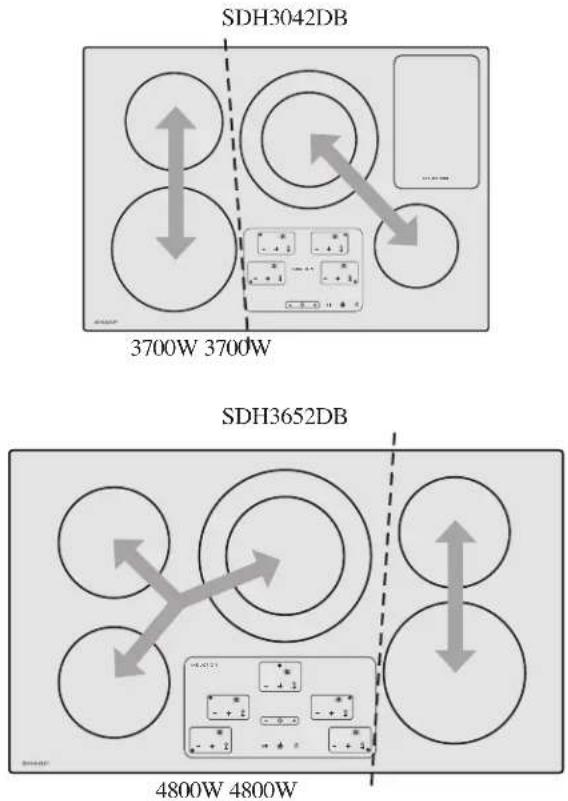
POWER SHARING
Four or five cooking zones are divided into two separate cooking sections, the right side and left side. In each cooking section, the cooking zones share power of one induction inverter.
Power sharing is activated when multiple cooking zones in the same area are turned on, and the controls adjust the power automatically for "Power Sharing". This power sharing is administered by the unit's microprocessors, which will alternate power in one area.
Power sharing tips: To maintain full setting heat for two items, place one item on a cooking zone in one section (left side), and the other item on a cooking zone in another section (right side).
STOP/GO
Use the Stop/Go function to 'Pause' the cooktop for Max. 10 minutes while cooking; the unit will be automatically switched off if Stop/Go is not pressed again within 10 minutes.
TO PAUSE
One or more cooking zones are active. Touch Stop/Go key pad, a "beep" will sound, the indicator light above the Stop/Go will be lit up and all opened Power digital display of the cooktop will show flashing lights.
Any cooking timers/minutes set will stop when deactivating "Stop and Go", the countdown will continue.
All of the buttons are inactive except for Stop/Go, Lock, ON/OFF and POWER key.
If no keys are pressed within 10 minutes, all of the active cooking zones are automatically switched off.
TO RESUME
Touch Stop/Go key again within 10 minutes, the indicator light above Stop/Go button will go off, and the cooktop continues with the settings that were set before the Stop/Go.

SET TIMER
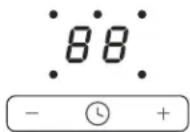
The automatic timer settings range from 1 minute to 99 minutes. (NOTE: There are no “seconds” and “hours” display, only minutes.) The white dot next to the Timer Display will illuminate indicating that the cooking zones are selected.
While cooking, touch the Minute Timer key pad until time light of the desired cooking zone is ON. Minute Timer display reads "00" and blinks. Touch "+" or "-" key to set the desired time. Once the Timer is set and no "+" or "-" key are pressed for 5 seconds, the Minute Timer begins the countdown and the timer display will stop blinking and will stay on in the display. Once the Minute Timer reaches "00", a "beep" will sound, indicating that the time is finished, and the selected cooking zone will automatically shut off.
If you want to set another cooking zone to switch-off automatically, touch Minute Timer key until the desired time symbol indicator blinks, and repeat the same steps above.
If you want to check the remaining time for another cooking zone, touch the Minute Timer until the Minute Timer symbol indicator for the desired cooking zone blinks.
If more than one Timer is programmed, the shortest time remaining will appear in the Minute Timer display and the indicator for that particular cooking zone will be blinking.
TO CANCEL TIMER
Touch the Minute Timer until the Minute Timer symbol indicator for the desired cooking zone blinks, then touch the “+” or “-” to set the timer to 00. The Minute Timer display will blink for 5 seconds and then turn off, indicating that the timer of selected cooking zone has been cancelled.
RESIDUAL HEAT INDICATOR
After using any of the cooking zone, the cooking area will remain hot. Even after turning off the entire unit, the surface of the cooktop will remain hot for some time. The digital display
for the cooking zone will show an “H” to warn the user that the surface is hot to touch (Hot surface indicator) after the cooking zone switch off. You may turn the cooking zone back on even if the “H” is displayed. Wait until the “H” is no longer displayed to clean the unit.
⚠ WARNING Even when an "H" indicator is off after cooking, some residual heat may still remain on the surface of the cooktop.

AUTO TURN OFF
After 2 hours of continuous operation, the cooking zone will automatically turn off.
COMPATIBLE COOKWARE
PROPER COOKWARE
Flat-bottomed pots or pans with or made from the following:
• Magnetic stainless steel
- Cast iron
- Enameled iron
- Nickel
IMPROPER COOKWARE
Pots or pans with or made of the following CANNOT be used on your cooktop:
• Non-magnetic stainless steel
• Bottom measuring less than
- 12 cm(4.7 inches)
- Pot with stands
- Heat resistant glass
- Ceramic container
- Copper
- Aluminum
- Check that the bases of your pans are attracted by a magnet to find out if they are suitable.
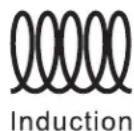
Optimally the cookware will have this induction compatibility symbol on the retail box.
Check that the bases of your pans are attracted by a magnet to find out if they are suitable.
NOTE: Some cookware can produce noises when used on induction cooking zones. This is not a fault in the cooktop, and its function will not be impaired in any way as a result.
After each use, be sure the controls are turned to OFF and let your cooktop COOL down completely, and then start cleaning your cooktop. When it is cool to the touch, apply approximately 1 teaspoon (5 ml) of non-abrasive cleaner to the surface of the ceramic glass with a lightly damp cloth. Use a second cloth to remove any remaining cleaner residue. Wipe dry with a dry cloth.
DO NOT USE THE FOLLOWING TO CLEAN YOUR UNIT
- Glass cleaners which contain ammonia or chlorine bleach as these materials may stain the cooktop
- Caustic cleaners that may etch the surface
- Abrasive cleaners
• Metal scouring pads and scrub sponges - Powdery cleaners containing chlorine bleach
- Flammable cleaners such as lighter fluid or WD-40
NOTE: Sugary products can damage the ceramic glass surface. If dry sugar, sugar syrup, tomato products, or milk spills on the surface DURING heating, clean the glass surface immediately.
METAL MARKS AND SCRATCHES
1 Be careful not to slide pots and pans across your cooktop. It will leave metal markings on the cooktop surface. These marks are removable using a ceramic glass cleaner with cleaning pad for ceramic glass.
2 If pots with a thin overlay of aluminum or copper are allowed to boil dry, the overlay may leave black discoloration on the cooktop. This should be removed immediately before heating again or the discoloration may be permanent.
NOTE: If the ceramic glass top of the cooktop is broken, turn off the unit and the circuit breaker. The cooktop glass will have to be replaced.
If you encounter the following problems while using your cooktop, check the guide below to see if you can correct the problem yourself before calling for assistance or service:
| PROBLEM POSSIBLE CAUSE SOLUTIONS | ||
| 1. Power boost does not work Total power of the cooking section in use has reached maximum rated power of 3700W (SDH3042DB) or 4800W (SDH3652DB). | Place one item on a cooking zone in one section, and the other item on a cooking zone in another section. (See POWER SHARING) | |
| 2. The fans keep running for one minute after the cooking zone has been switched off | The electronics are cooling down This is a normal occurrence | |
| 3. “E”appears in the Power display Electronics fault error message of particular cooking zone | See E0, E1, E2, E3, E7, E8, E9, EE | |
| 4. “E0”appears in the Timer display | IGBT overheating | Turn off unit to allow IGBT to cool. Restart unit |
| 5. “E1” appears in the Timer display No cookware found or improper placement of cookware on the cooking zone | Make sure that the cookware is centered on the cooking zone, and that it is also induction compatible. See COMPATIBLE COOKWARE | |
| 6. “E2” appears in the Timer display | Supplied voltage to cooktop is too low | This may be caused by reduced voltage being supplied to the house circuit. If connections are correct and the supplied voltage returns to normal, the code will disappear |
| 7. “E3” appears in the Timer display | Supplied voltage to cooktop is too high | This may be caused by increased voltage being supplied to the house circuit. If the connections are correct and the supplied voltage returns to normal, the code will disappear |
| 8. “E7” appears in the Timer display | NTC1 Break off | Turn the cooktop “OFF”, then turn circuit breaker “OFF” for about 30 seconds. Turn circuit breaker “ON” and turn the cooktop “ON” using the POWER pad. |
| 9. “E8” appears in the Timer display | NTC1 Short circuit | |
| 10. “E9” appears in the Timer display | NTC2 Break off | |
| 11. “EE” appears in the Timer display | NTC2 Short circuit | |
| 12. Noise | Noise like humming, crackling, clicking and buzzing | This is a normal occurrence, see Operational Cooktop Noises |


- CUSTOMER ASSISTANCE
- FOR US
- FOR CANADA
- SHARP®
- US CONSUMER LIMITED WARRANTY
- CANADA CONSUMER LIMITED WARRANTY
- CONGRATULATIONS ON YOUR PURCHASE
- YOUR PRODUCT MODEL NUMBER & DESCRIPTION
- ADDITIONAL ITEM(S) EXCLUDED FROM WARRANTY COVERAGE (IF ANY)
- THIS LIMITED WARRANTY IS VALID ONLY IN CANADA
- INTENDED USE
- WARNING COOKING SAFETY
- WARNING CLEANING SAFETY
- CONDITION OF UNIT
- ▲IMPORTANT ENVIRONMENT OF UNIT
- SERVICE AND REPAIR SAFETY
- READ AND SAVE THESE INSTRUCTIONS
- INDUCTION COOKTOP CHARACTERISTICS
- MAGNETIC DETECTOR
- PAN SIZE DETECTION
- EFFICIENT
- COOKWARE
- USING COMPATIBLE COOKWARE
- SELECTING SURFACE COOKING COOKWARE
- PROPER COOKWARE MATERIAL
- IMPROPER COOKWARE MATERIAL
- ATTENTION
- CAUTION
- COOKWARE RECOMMENDATIONS
- USE THE CORRECT COOKWARE SIZE
- COOKTOP NOISE
- MODELS
- COOKTOP FEATURES
- CONTROL PANEL
- CONTROL LOCK
- TO LOCK
- TO UNLOCK
- IMPORTANT
- TO TURN ON THE COOKTOP
- POWER CONTROL
- POWER BOOST
- KEEP WARM
- SIMMER ENHANCER
- TO TURN OFF
- POWER SHARING
- STOP/GO
- TO PAUSE
- TO RESUME
- SET TIMER
- TO CANCEL TIMER
- RESIDUAL HEAT INDICATOR
- AUTO TURN OFF
- COMPATIBLE COOKWARE
- PROPER COOKWARE
- IMPROPER COOKWARE
- DO NOT USE THE FOLLOWING TO CLEAN YOUR UNIT
- METAL MARKS AND SCRATCHES
Brand : SHARP
Model : SDH3652DB
Category : Cooker