
Milton - Air conditioner ARGO - Free user manual and instructions
Find the device manual for free Milton ARGO in PDF.


| Product Type | Portable Air Conditioner |
| Model | Milton |
| Brand | ARGO |
| Cooling Capacity | 12000 BTU/h |
| Power Supply | 220-240 V ~ 50 Hz |
| Power Consumption (Cooling) | 1200 W |
| Dimensions (W x D x H) | 45 x 35 x 70 cm |
| Net Weight | 25 kg |
| Main Functions | Cooling, Fan, Dehumidification |
| Fan Speeds | 3 speeds |
| Remote Control | Included |
| Timer | 24-hour timer |
| Sleep Mode | Yes |
| Auto Swing | Yes (vertical) |
| Refrigerant | R32 |
| Energy Efficiency Ratio (EER) | 2.6 |
| Noise Level (High) | 52 dB(A) |
| Air Flow Rate (High) | 480 m³/h |
| Self-Evaporating System | Yes |
| Filter | Washable anti-dust filter |
| Condensate Drainage | Continuous drain option |
| Safety Features | Overheat protection, auto shut-off |
| Repairability | Replaceable filter and drain hose |
| Maintenance | Clean filter every 2 weeks |
Frequently Asked Questions - Milton ARGO
User questions about Milton ARGO
0 question about this device. Answer the ones you know or ask your own.
Ask a new question about this device
Download the instructions for your Air conditioner in PDF format for free! Find your manual Milton - ARGO and take your electronic device back in hand. On this page are published all the documents necessary for the use of your device. Milton by ARGO.
USER MANUAL Milton ARGO
PORTABLE AIR CONDITIONER (LOCAL)
Pilton

natural_image
White portable air conditioner unit with ventilation slots and a small logo (no visible text or symbols)OPERATING INSTRUCTIONS
Read the instructions carefully before operating the appliance or carrying out maintenance work. Observe all the safety instructions; failure to observe the instructions may lead to accidents and/or damage. Store these instructions in a safe place for future reference.

Appliance filled with slightly flammable gas R32.

Before installing and using the appliance, read the owner's manual.

Before repairing the appliance, read the service manual.
The Refrigerant
- To realize the function of the air conditioner unit, a special refrigerant circulates in the system. The refrigerant is the fluoride R32 = GWP (Global warming potential). This refrigerant is flammable and inodorous. It can lead to explosions under certain conditions, however the flammability of this refrigerant is very low and it can be ignited only by fire.
- Compared to other common refrigerants, R32 is a non-polluting refrigerant with no harm to the ozonosphere and a lower effect upon the greenhouse effect. R32 has very good thermodynamic features which lead to a really high energy efficiency. The units therefore need less filling.
Warning:
Do not try to accelerate the defrosting process or to clean the appliance in different ways other than those recommended by the manufacturer. Should repair be necessary, contact your nearest authorized Argoclima Service Centre. Any repairs carried out by unqualified personnel may be dangerous. The appliance has to be stored in a room that doesn't have any continuously operating ignition sources. (for example: open flames, an operating gas appliance or an operating electric heater.) Do not pierce or burn.
Appliance has to be installed, operated and stored in a room with a floor area larger than 4 m^2 . For repairs, strictly follow manufacturer's instructions only for appliances filled with R32 flammable gas. Be aware that refrigerants do not have any odour.



GENERAL OPERATING AND SAFETY INSTRUCTIONS
- This appliance is a local air conditioner designed for domestic use.
- Only use this air-conditioner as described in this manual.
- Ensure that the required voltage and frequency (220-240 V/50 Hz) match the available power source.
- Fuse style T3.15AH250V, the electricity passing through the fuse cannot be above 3.15A.
- This appliance can be used by children aged from 8 years and above and people with reduced physical, sensory or mental capabilities or lack of experience and knowledge if they have been given supervision or instruction concerning use of the appliance in a safe way and understand the hazards involved.
• Children shall not play with the appliance. - Cleaning and user maintenance shall not be made by children without supervision.
- Ensure that the electricity system is able to deliver the operating current required by the air conditioner, in addition to that normally absorbed by other appliances (household appliances, lighting system, etc.). Please refer to the maximum power input data indicated on the air conditioner's data plate.
- Connection to the electricity grid must take place in accordance with current installation standards.
- Ensure that the automatic switches and system protection valves are able to withstand a start-up current of 5A (normally for less than 1 second).
- The system socket must always be fitted with an efficient earth connection.
-
Make sure that the plug is fully inserted. Do not use multiple adapters. Do not touch the plug with wet hands. Make sure that the plug is clean.
-
Do not use the plug as a means by which to start/stop the air conditioner: use the ON/OFF button on the remote control or on the control panel.
- Do not install the air conditioner in rooms where it may receive water splashes (e.g. laundry rooms).
- This air conditioner can be used by children of 8 years of age or older, and by persons with reduced physical, sensory and mental abilities or who lack the necessary know-how and experience to operate it, if under the supervision or instruction of a person responsible for their safety, so that they are fully aware of the attendant risks.
- Before moving or cleaning the device, ensure that it is unplugged from the socket.
- Do not move the air conditioner while it is operating; first turn the appliance off, check for any condensate build-up and empty it if necessary.
- To turn the appliance off, set the remote control to OFF and remove the plug from the socket. Pull on the plug only. Do not pull the cord.
- Do not use the appliance if the cord or plug are damaged. If the power supply cord is damaged, it must be replaced by the manufacturer, dealer or a similarly qualified person so as to avoid any safety risks.
- Keep the unit away from fire, possible fire sources, inflammable or explosive objects.
- Do not leave the unit unattended while it's operating, turn the unit off and unplug it.
- If drainage hose is used, the ambient temperature musnt't be lower than 0^ . It can cause water leakage to the air conditioner.
- Do not splash or pour water on the air conditioner
PRECAUTION!
- Do not insert any objects into the air conditioner: this is very dangerous as the fan rotates at high speed.
- Ensure that air circulates freely around the unit. Do not cover the air intake and delivery grilles with drapes or other items.
WARNING!
- The air conditioner must be positioned at least 50 cm away from the wall or other obstacles, on a flat and stable surface so as to avoid water leakages.
- The air conditioner is equipped with a compressor overload protection system, whereby the compressor only starts once 3 minutes have elapsed from its previous stoppage.
- Please wait at least 3 minutes before starting the unit. This helps to prevent the compressor from being damaged.
WARNING!
In the event of an anomaly, switch the appliance off and unplug from the socket. Do not dismantle or attempt to repair or modify the product. In the event of a malfunction, contact the after-sales service centre directly.
WARNING!
- Do not expose the air conditioner to direct sunlight as this may alter the colour of the materials; in addition, possible overheating of the product may activate the protection mechanism, causing it to switch off.
- Do not use insecticides, oils, detergents or spray paints near the appliance; do not use aggressive chemical detergents to clean the casing as this may damage the finish and colour.
- Close all open windows to maximise air conditioning efficiency.
The manufacturer shall not be held liable if the relevant safety and accident prevention rules are not observed.
DESCRIPTION OF THE APPLIANCE
FRONT VIEW

REAR VIEW
1) CONTROL PANEL AND FUNCTION BUTTONS WITHOUT REMOTE CONTROL
2) HORIZONTAL FINS AND AIR INTAKE
3) VERTICAL FINS AND AIR INTAKE
4) WHEELS
5) AIR FILTER
6) AIR EXPULSION HOSE END FITTING
7) AIR EXPULSION HOSE
8) END FITTING FOR WINDOW
9) POWER CORD
10) CORD CABLE CLAMP
11) REMOTE CONTROL

(11)

Min/max operating limits (internal temperature)
Cooling: 16 °C DB / 35 °C DB
Dehumidification: 16 °C DB / 35 °C DB
Cooling mode room temperature adjustment range: 16 °C DB / 30 °C DB
APPLIANCE START-UP
Open the packaging and remove the box from above. Remove the product and the other elements supplied (illustrated in the box below).
LCD remote control
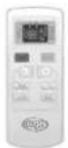
Type AAA batteries for the remote control

Round fitting for window (1) to be positioned between the end of the tube and the end fitting for the window

End fitting for window, supplied into 2 parts (2)
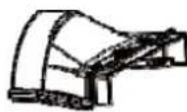
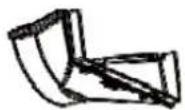
Part A
Part B
Flat fitting for positioning between the air discharge outlet and the hose

Hose

Screws

Clamp Cord winder Drain hose

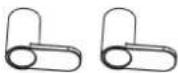

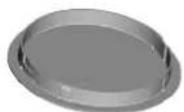
Window unit kit (3 pcs)
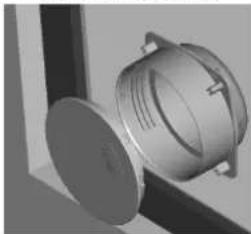
natural_image
3D rendered mechanical component with cylindrical housing and mounting bracket (no visible text or symbols)Round fitting for window unit, to be positioned between the end of the tube and the window unit
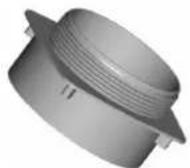
Window unit

Cap
Position the product vertically on a flat and stable surface, as close as possible to a window and at least 50 cm from walls or other nearby obstacles.
INSTALLATION OF CORD WINDER HOOKS
Install the cord winder hooks to the back of the unit using the screws, as shown in the figure.
When the appliance is not being used, wind the power cord around the hooks.
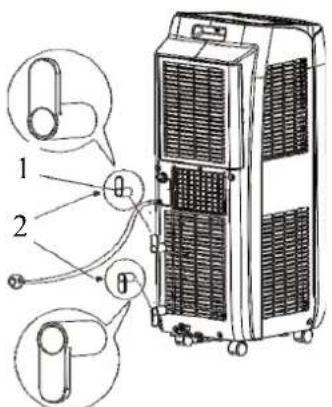
The hooks must be positioned facing upwards and downwards.
- Hook
- Screw

natural_image
Line drawing of a multi-tiered industrial air conditioner unit with cooling fins and ventilation grilles (no text or labels)Wind the cord around the hook.
USE WITH END FITTING FOR WINDOW
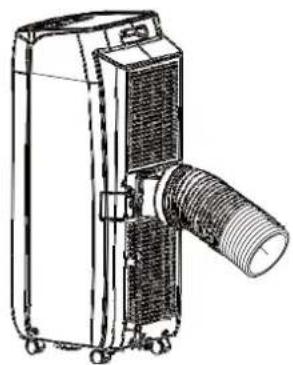
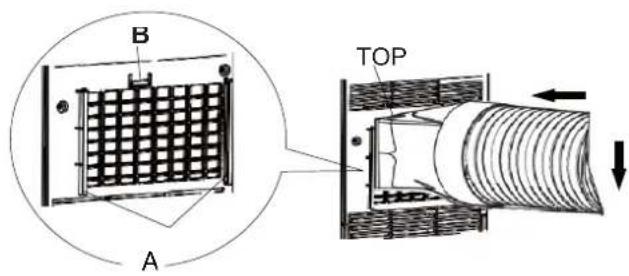
Connect the flat fitting to the hose, extend the hose as far as necessary for reaching the outside and it connect to the back of the air conditioner.
Next, slide the flat fitting downwards into the grooves (A) and secure it with the hook (B).
The upward-facing side of the flat fitting is marked "TOP".
natural_image
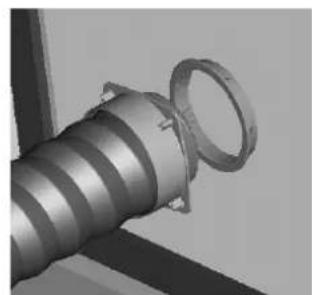
Technical line drawing of a portable air conditioner unit with coiled tube (no text or symbols)Connect the round window fitting (1) to the end of the hose then the end fitting for the window (2), previously obtained by joining parts A and B
Open the windows and lock one of the two leaves with the handle.
Place the end fitting against the fixed leaf of the window, and draw the other leaf towards it.

natural_image
Close-up of a white plastic pipe fitting with a coiled tube and flange, labeled 1 and 2 (no text or symbols on the object itself)

natural_image
Pure mechanical diagram showing a pipe inserted into a rectangular opening (no text or symbols)USE WITH WINDOW UNIT KIT
Make a hole measuring roughly 135 mm through the window pane.
Insert the window unit without its closure cap into the window. Insert the round fitting into the retractable hose and insert the retractable hose with the round fitting into the window unit.

natural_image
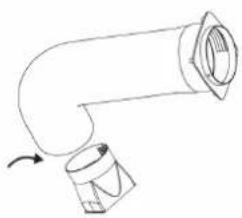
Simple line drawing of a two-panel window with a single circular dot on the left pan (no text or symbols)Insert the flat fitting onto the hose.
natural_image
Close-up of a metallic cylindrical pipe fitting with a looped end, mounted on a vertical support (no text or symbols visible)Insert the assembled hose into the back of the air conditioner.
natural_image
Simple line drawing of a pipe with a container and valve, no text or symbols present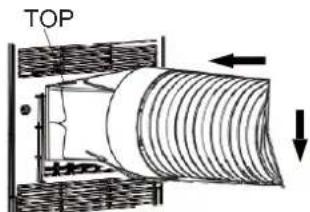
The outlet must be between 40 cm and 130 cm above the ground.
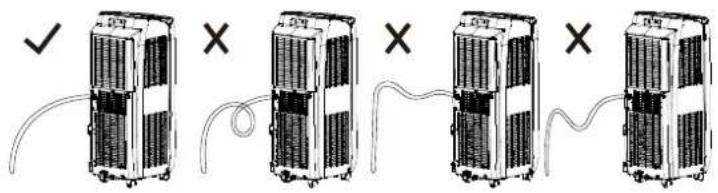
Avoid tight curves or bends in the flexible hose.

When the air conditioner is not being used, disconnect the hose and fit the closing cap.

natural_image
Technical line drawing of a mechanical assembly with no visible text or symbols
natural_image
3D rendering of a cylindrical mechanical component mounted between two vertical supports (no text or symbols visible)Connect the power cord to a suitable electrical socket (230 V). Insert the batteries supplied into the remote control, while observing the polarities. Select the desired operating mode from the remote control.
HOW TO USE THE APPLIANCE
This appliance can be used for cooling, dehumidifying and ventilating.
When switching between modes, the fan continues to rotate but the compressor stops: the compressor will start after 3 minutes. This delay protects the compressor from potential damage.

natural_image
Line drawing of a portable air conditioner unit with ventilation slots and a scroll wheel (no text or symbols)Cooling, Ventilation

natural_image
Line drawing of a portable air conditioner unit with a grid vent (no text or symbols)Dehumidification
THE DISCHARGE TUBE MUST ALWAYS BE CONNECTED to the appliance: the only exception is when the appliance is used solely for dehumidification, in which case it is advisable to let the appliance discharge directly into the environment for maximum efficiency (consult the "Dehumidification Mode" paragraph).
Regularly clean the air filters beneath the easily removable rear grille to keep the air conditioner working efficiently.
OPERATING MODES
1. COOLING MODE (COOL)
- The first time it is turned on, the air conditioner operates in cooling mode with the default temperature set to 25^ .
- The "Cool" LED on the control panel will turn on.
- The temperature can be adjusted to between 16^ and 30^ .
- In this mode, whenever the ON/OFF button is pressed, the unit switches off, the appliance saves the temperature setting and, when switched back on again, retains this setting.
- In this mode, the fan speed can be adjusted and the Timer and SLEEP functions can be set.
- For more silent operation, run the fan at low speed.
2. DEHUMIDIFICATION MODE (DRY)
- Press the MODE button to select Dry.
- The temperature is controlled by the PCB and cannot be regulated.
- In this mode, whenever the ON/OFF button is pressed, the unit switches off, the appliance saves the settings and, when switched back on again, retains them.
- The fan speed is set to low and cannot be adjusted.
NOTE
The air conditioner does not cool the room when it is used as a dehumidifier.
When the appliance is used as a dehumidifier, the flexible hose must not be connected.
For maximum dehumidification efficiency, leave the rear discharge attachment free to discharge directly into the environment.
The dehumidification mode is recommended during autumn and winter.
If used in summer, it is best to leave the flexible hose attached so that the hot air can be discharged towards the outside rather than into the room.
During dehumidification, continuous drainage should be implemented (consult the next chapter, "CONDENSATE ELIMINATION").
3. VENTILATION MODE (FAN ONLY)
- Press the MODE button to select Fan and wait until the relative icon appears.
- In this mode, the fan speed can be adjusted.
- The temperature cannot be adjusted.
CONDENSATE ELIMINATION
This appliance automatically vaporises condensate in the cooling mode.
When the air conditioner operates in cooling mode, there is no need to drain condensate continuously; only in certain weather conditions with very humid air may it occur that water deposits inside the unit. When its inner tank is full, the air conditioner beeps 8 times and the message "H8" appears on the display to signal that the tank is full and stop the appliance's operation.
INSTALLATION OF THE DRAINAGE HOSE
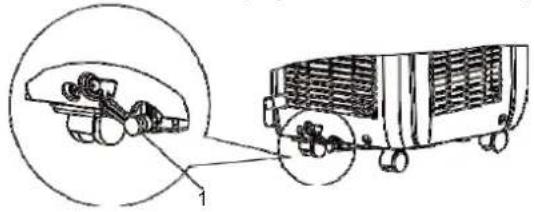
- Remove the rubber plug at the back of the unit (1).
natural_image
Technical line drawing of a vehicle chassis with wheels and a magnified inset showing mechanical components (no text or symbols)- Screw the drainage hose (4) onto the drainage opening then secure it with the clip (2).
Insert the cap onto the other end of the drainage hose (1), secure it with the clip (2) then insert it into the clamp (3).
natural_image
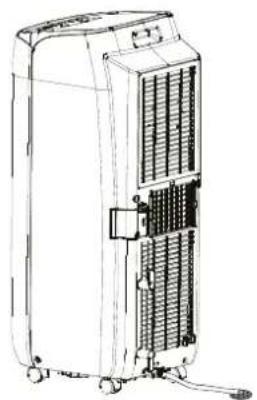
Line drawing of a portable air conditioner unit with cooling fans and ventilation slots (no text or symbols)- Mount the clamp (2) onto the back of the unit, to the right of the drainage opening (1), using a screw (3).

Cooling
When the unit operates in the cooling mode, ensure that the rubber cap closing the drainage opening on the back of the appliance is properly positioned.
To empty the container, switch the air conditioner off and unplug the cord. Remove the cap from the rear drainage opening and place its end over a normal drain.
Ensure that the tube is not twisted or bent. The tube must slope downwards. Re-close the drainage opening with the cap, insert it into the clamp and resume use of the air conditioner.
Dehumidification
WARNING!
When using the air conditioner in dehumidification mode, we recommend always
ensuring continuous drainage, in order to maximise dehumidification efficiency.
Use the drainage outlet on the appliance. The water can be drained into a drain by simply connecting a tube with 14 mm internal diameter (not supplied).

- Remove the cap by turning it anti-clockwise then remove the plug.

natural_image
Diagram of a mechanical device with a close-up inset showing a cylindrical component (no text or symbols present)-
Screw the connection tube provided turning it clockwise.
-
Next, insert the drainage tube into the connection tube.

natural_image
Line drawing of a multi-tiered industrial air conditioner unit with cooling fins and a hose (no text or symbols)- Avoid bends in the drainage tube.
Insert the batteries into the remote control, while respecting the indicated polarities.
Only use type AAA 1.5V batteries.
Remove the batteries if the remote control is not used for a month or longer.
Do not attempt to recharge the batteries. Replace all batteries at the same time.
Do not throw the batteries into fire: they may explode.

natural_image
Technical line drawing of a car interior showing battery pack, casing, and housing (no text or symbols)
INFORMATION FOR CORRECT DISPOSAL OF THE BATTERIES PURSUANT TO EUROPEAN DIRECTIVE 2006/66/EC
Replace the batteries when depleted. At the end of their working life, batteries must be disposed of separately from unsorted waste. They must be must be delivered to appropriate separated waste disposal plants or to dealers that provide a similar service. Separate waste disposal of batteries prevents potential negative effects on the environment and human health resulting from inadequate disposal, and also allows the materials from which it is made to be recovered and recycled in order to achieve significant savings in terms of energy and resources. The separate disposal obligation is underlined by the crossed-out dustbin symbol appearing on the battery. Illegal disposal of the product by the user is subject to administrative penalties as per current regulations.
FOR OPTIMAL REMOTE CONTROL OPERATION, POINT THE TRANSMITTER HEAD TOWARDS THE RECEIVER LOCATED ON THE AIR CONDITIONER.
The remote control can be activated by pressing the ON/OFF button on the portable unit. The icon on the remote control display will flash once and a buzzer will sound to indicate that the signal was transmitted to the air conditioner. In the OFF mode, the set temperature and set timer will appear on the remote control.

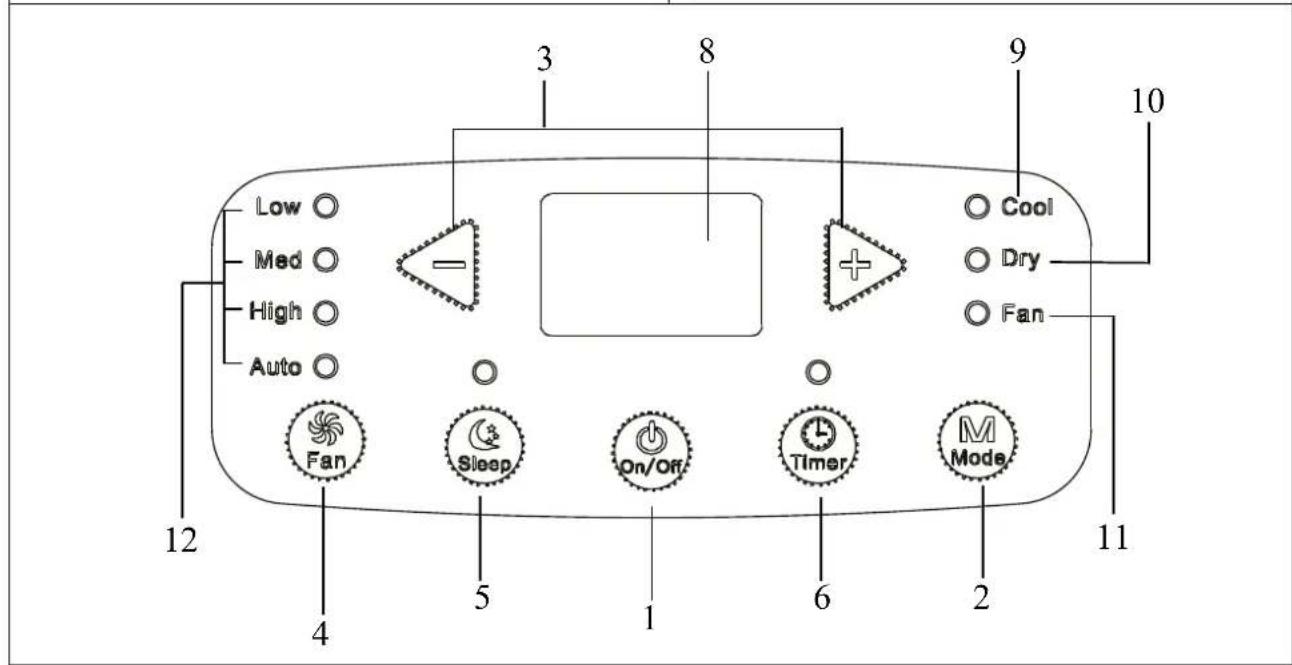
(1) ON/OFFBUTTON
Press this button to switch the unit on or off.
When switched on, the appliance will start functioning based on its last settings (save function).
(2) MODE SELECTION BUTTON (MODE)
Press this button to select the various operating modes, according to the following sequence:
Cooling (Cool) → Dehumidification (Dry) → Ventilation (Fan Only)
In the COOL mode the display lights up. In the DRY and FAN modes the display does not light up.
(3) TEMPERATURE + - AND TIMER ADJUSTMENT BUTTONS
The temperature can be adjusted to between 16 °C and 30 °C.
Increase temperature (+):
1) Allows for adjusting the desired temperature in cooling (COOL) mode.
2) Whenever the (+) button is pressed, the set temperature increases by 1 °C.
Decrease temperature (-):
1) Allows for adjusting the desired temperature in cooling (COOL) mode.
2) Whenever the (-) button is pressed, the set temperature decreases by 1 °C.
The same button allows for setting the TIMER.
(4) FAN SPEED ADJUSTMENT BUTTON
Press this button when the appliance is switched on for adjusting the ventilation speed in cooling mode (AUTO), to low (Low), medium (Med) or high (High).

The fan speed cannot be adjusted in DRY mode and is fixed to low speed.
(5)SLEEP BUTTON (on both the remote control and portable unit)
Press this button to activate the Sleep function, which automatically adapts the temperature to changes in body and room temperature throughout the night, so as to optimise comfort when sleeping and minimise consumption. In cooling mode, the temperature increases by 1 °C in an hour then by 2 °C in two hours, and remains in this setting for the whole period. The Sleep function is not available in the ventilation, dehumidification and auto modes. The indicator light turns on whenever the Sleep function is set.
(6)TIMER BUTTON (on both the remote control and portable unit)
Press and hold this button for 1 second to set the timer.
1) Timer-on (automatic switch-on)
When the appliance is off, this button is used to set a delay after which the unit will switch on.
Remote control: Press TIMER. The T-ON and H icons will light up on the remote control. Press the + and - buttons within 5 seconds to set the delay. The T-ON icon will remain on to indicate that the TIMER has been set.
Portable unit: Press TIMER. Select a number of hours from 0.5 to 24. Press the TIMER button to confirm.
2) Timer-off (automatic switch-off)
When the appliance is running in the COOL mode, set a delay after which the unit will switch off.
Remote control: Press TIMER. The T-OFF and H icons will light up. Press the + and - buttons within 5 seconds to set the delay. Select a number of hours from 0.5 to 24. Press the TIMER button to confirm. The T-OFF icon will remain lit to indicate that the switch-off TIMER is running.
Portable unit: Press TIMER. Select a number of hours from 0.5 to 24. Press the TIMER button to confirm.
Resetting the timer: If a TIMER has been set, press TIMER to display the delay. Press TIMER again to cancel the setting.
(7) X-FAN BUTTON (only on remote control)
By pressing the X-FAN button in the cooling and dehumidification modes, when the unit is switched off the fan continues to turn for roughly 2 minutes in order to fully dry the evaporator.
(8) TEMPERATURE AND ERROR DISPLAY
| Problem Cause Solution | |
| H8 Tank full of water. Empty the tank. | If the problem persists, contact a service centre. |
| F1 Room temperature sensor failure. Contact a service centre. | |
| F2 Failure of temperature sensor on the evaporator. | Contact a service centre. |
| F0 Refrigerant leakage. Air conditioner out of order. | Contact a service centre. |
| H3 Overload protection device on compressor. | The room temperature exceeds the appliance's operating range (beyond 35°) or there is too much humidity. Wait for |
| E8 Overload protection. the temperature to drop below 35 °C.Check if the evaporator and compressor are obstructed by objects. If they are, remove the objects, disconnect the unit then restore the power supply.Clear the obstructed ventilation grilles.If the problem persists, contact a service centre. | |
| F4 The external temperature sensor has short-circuited. | Contact the service centre. |
The temperature and error display lights up only in the COOL mode. In the DRY and FAN modes the display does not light up.
SAFETY FUNCTIONS
REMOTE CONTROL LOCK
Simultaneously press "+" and "-" to lock the remote control.
The "Lock" icon will light up on the remote control, and the latter will not respond to commands.
SWITCHING BETWEEN °C AND °F.
Press the "-" and "MODE" buttons simultaneously to switch between °C and °F.
LIGHT FUNCTION
Press the "+" and "FAN" buttons simultaneously for 3 seconds to set the activation/deactivation of the lamp.
CARE AND MAINTENANCE
WARNING!
Prior to carrying out any cleaning or maintenance, unplug the unit from the power socket.

1. Cleaning the air filters
The air filter must be checked at least once every two weeks of operation. Operating with dirty or clogged filters will decrease the effectiveness of the air conditioner and can cause serious problems.
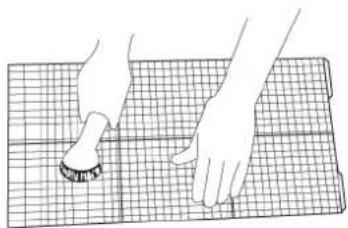
To remove the filter, release the rear grille then slide out the filter by gently pulling it sideways.
Use a vacuum cleaner to remove any dust. Should this not be sufficient, wash the filter with lukewarm water and neutral detergent (if necessary), rinse it with cold water then leave it to dry naturally before putting it back in place.
After putting the filter back in place, close the grille and resume use of the air conditioner.
natural_image
Line drawing of hands cutting a grid paper with a circular cutter (no text or symbols)2. Cleaning the casing.
Use a soft damp cloth to clean the outer surface of the air conditioner.
Do not use excessively hot water, solvents, petrol or other aggressive chemical compounds, talcum powder and brushes: they may damage the surface or colour of the casing.
Remove any stains using warm water with a little neutral detergent.
Do not pour water onto the air conditioner to clean it: this may damage the internal components or cause a short circuit.

3. Storage.
When you do not envisage using the air conditioner for a long time, clean the filters before storing it away. Keep the appliance in a vertical position at all times. Do not place any heavy objects on the top and, if possible, protect the air conditioner with a plastic sheet.
4. Transport.
Preferably keep the air conditioner in the vertical position when transporting it.
Should this not be possible, rest it on its right-hand side; when it reaches its destination, immediately put the appliance in the vertical position and wait at least 4 hours before using it in the cooling mode.

natural_image
Line drawing of a car interior showing seat, front panel, and rear panel with no text or symbols- For complete safety, regularly check the condition of the power cord; should it be damaged through use, contact the Service Centre to replace it.
TIPS FOR MAXIMISING COMFORT AND MINIMISING CONSUMPTION
CHECK that:
• the unit's extraction and delivery grilles are always unobstructed;
• the air filters are always clean: a dirty filter will decrease the passage of air and thus reduce the unit performance;
• the doors and windows are closed, to avoid infiltration of unconditioned air;
• the flexible hose is correctly positioned, without folds or sharp bends;
• the room temperature is above 18 °C for the cooling mode, and above 10 °C for dehumidification mode.
REGULATION (EU) No. 517/2014 - F-GAS
The unit contains R32, a fluorinated greenhouse gas with global warming potential (GWP) = 675. Do not release R32 into the atmosphere.
Kg. 0.34 = 0.230 Tonn CO _2 equiv

INFORMATION FOR THE CORRECT DISPOSAL OF THE PRODUCT IN ACCORDANCE WITH EUROPEAN DIRECTIVE 2012/19/EU
This appliance may not be scrapped with domestic waste at the end of its life cycle. We call your attention to the crucial role played by the consumer in the re-use, recycling and other forms of recovery of such waste. The appliance must be scrapped by a sorted waste disposal centre or by returning it to the retailer (no charge is levied for this service), when you purchase a new equivalent appliance. Sorted disposal of electric and electronic equipment prevents the negative effects on the environment and human health resulting from improper scrapping, and also allows the materials from which it is made to be recovered and recycled, with significant savings in terms of energy and resources. The sorted disposal requirement is indicated by the crossed waste bin label affixed to the appliance.

improve your life
www.argoclima.com


- PORTABLE AIR CONDITIONER (LOCAL)
- Pilton
- OPERATING INSTRUCTIONS
- The Refrigerant
- Warning:
- GENERAL OPERATING AND SAFETY INSTRUCTIONS
- PRECAUTION!
- WARNING!
- The manufacturer shall not be held liable if the relevant safety and accident prevention rules are not observed.
- DESCRIPTION OF THE APPLIANCE
- FRONT VIEW
- REAR VIEW
- APPLIANCE START-UP
- INSTALLATION OF CORD WINDER HOOKS
- USE WITH END FITTING FOR WINDOW
- USE WITH WINDOW UNIT KIT
- HOW TO USE THE APPLIANCE
- OPERATING MODES
- COOLING MODE (COOL)
- DEHUMIDIFICATION MODE (DRY)
- NOTE
- VENTILATION MODE (FAN ONLY)
- CONDENSATE ELIMINATION
- INSTALLATION OF THE DRAINAGE HOSE
- Cooling
- Dehumidification
- FOR OPTIMAL REMOTE CONTROL OPERATION, POINT THE TRANSMITTER HEAD TOWARDS THE RECEIVER LOCATED ON THE AIR CONDITIONER.
- ON/OFFBUTTON
- MODE SELECTION BUTTON (MODE)
- TEMPERATURE + - AND TIMER ADJUSTMENT BUTTONS
- FAN SPEED ADJUSTMENT BUTTON
- (5)SLEEP BUTTON (on both the remote control and portable unit)
- (6)TIMER BUTTON (on both the remote control and portable unit)
- X-FAN BUTTON (only on remote control)
- TEMPERATURE AND ERROR DISPLAY
- SAFETY FUNCTIONS
- REMOTE CONTROL LOCK
- SWITCHING BETWEEN °C AND °F.
- LIGHT FUNCTION
- CARE AND MAINTENANCE
- Cleaning the air filters
- Cleaning the casing.
- Storage.
- Transport.
- TIPS FOR MAXIMISING COMFORT AND MINIMISING CONSUMPTION
- CHECK that:
- REGULATION (EU) No. 517/2014 - F-GAS
- INFORMATION FOR THE CORRECT DISPOSAL OF THE PRODUCT IN ACCORDANCE WITH EUROPEAN DIRECTIVE 2012/19/EU
Brand : ARGO
Model : Milton
Category : Air conditioner