
GT221 - Hedge Trimmers BLACK & DECKER - Free user manual and instructions
Find the device manual for free GT221 BLACK & DECKER in PDF.
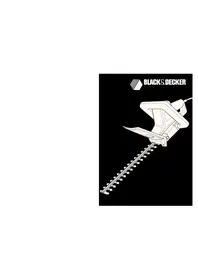


| Product type | Electric hedge trimmer |
| Brand | Black & Decker |
| Model | GT221 |
| Blade length | 55 cm (22 inches) |
| Power supply | Corded electric |
| Voltage | 230 V |
| Frequency | 50 Hz |
| Power | 550 W |
| Weight | 3.2 kg |
| Dimensions (L x W x H) | 95 x 25 x 20 cm |
| Color | Black and orange |
| Main features | Hardened steel blade, ergonomic handle, blade guard, double-action cutting |
| Cutting capacity | Up to 16 mm diameter |
| Maintenance and cleaning | Clean after use, oil the blades regularly, check the power cord |
| Safety | Two-hand trigger, blade guard, quick stop in 0.5 seconds |
| Spare parts and repairability | Replacement blade, protective cover, switch available |
| Noise level | 94 dB(A) |
| Vibration | 5.5 m/s² |
| Warranty | 2 years |
| Country of manufacture | China |
Frequently Asked Questions - GT221 BLACK & DECKER
User questions about GT221 BLACK & DECKER
0 question about this device. Answer the ones you know or ask your own.
Ask a new question about this device
Download the instructions for your Hedge Trimmers in PDF format for free! Find your manual GT221 - BLACK & DECKER and take your electronic device back in hand. On this page are published all the documents necessary for the use of your device. GT221 by BLACK & DECKER.
USER MANUAL GT221 BLACK & DECKER


Hedge Trimmer GT200 Series
Instruction Manual
Congratulations!
On your purchase of this hedge trimmer from Black & Decker. This trimmer has the following features for your benefit:
• Full bale handle for comfort of use. • Safety lock-off switch to prevent accidental starting. • Front guard for user safety. • Dual action blades for less vibration.
Safety instructions

Read all of this manual carefully, observing all the recommended safety instructions before, during and after using your machine. Maintain your machine in good working order.
Familiarise yourself with the controls on your machine before attempting to operate it, but above all, be sure you know how to stop your machine in an emergency. Retain this manual and all other literature supplied with your machine for future reference.

Warning! When using electric tools, basic safety precautions should always be taken to reduce the risk of fire, electric shock and personal injury. Read all of these instructions before using the tool.
For safe operation:
- Keep the work area clean. Cluttered areas and benches invite injuries.
- Consider work area environment. Do not expose power tools to rain and do not use power tools in damp or wet locations. Keep the work area well lit. Do not use power tools in the presence of flammable liquids or gases.
- Guard against electric shock. Avoid body contact with earthed or grounded surfaces (e.g. pipes, radiators, ranges, refrigerators).
- Keep children away. Do not let visitors touch the tool or extension cord. All visitors should be kept away from work area.
- Store idle tools. When not in use, tools should be stored in a dry, high or locked place, out of reach of children.
- Do not force the tool. It will do the job better and more safely at the rate for which it was intended.
- Use the right tool. Do not force small tools or attachments to do the job of a heavy duty tool. Do not use tools for purposes not intended: for example, do not use a circular saw to cut tree limbs or logs.
- Dress properly. Do not wear loose clothing or jewellery as they can be caught in moving parts. Rubber gloves and non-skid footwear are recommended when working outdoors. Make sure long hair is kept out of the way.
- Use safety glasses. Use a face or dust mask as well if the cutting operation is dusty.
- Do not abuse the cord. Never carry the tool by its cord or yank it to disconnect it from the socket. Keep the cord away from heat, oil and sharp edges.
- Secure your work. Use clamps or a vice to hold your work. It is safer than using your hand and it frees both hands to operate the tool.
- Do not overreach. Keep proper footing and balance at all times.
- Maintain tools with care. Keep tools sharp and clean for better and safer performance. Follow instructions for lubricating and changing accessories. Inspect tool cords periodically and if damaged have repaired by an authorised service facility. Inspect extension cords periodically and replace if damaged. Keep handles dry, clean and free from oil and grease.
- Disconnect tools. Disconnect when not in use, before servicing and when changing accessories such as blades, bits and cutters. Pull plug before carrying out any adjustment, servicing or maintenance.
- Remove adjusting keys and wrenches. Form the habit of checking to see that keys and adjusting wrenches are removed from the tool before switching it on.
- Avoid unintentional starting. Do not carry a plugged-in tool with a finger on the switch. Ensure the switch is off when plugging in.

- Use outdoor extension cords. When a tool is used outdoors, use only extension cords intended for outdoor use and so marked.
- Stay alert. Watch what you are doing. Use common sense. Do not operate when you are tired.
- Connect dust extraction equipment. If devices are provided for the connection of dust extraction and collection facilities, ensure these are connected and properly used.
- Check damaged parts. Before further use of the tool, a guard or other part that is damaged should be carefully checked to determine whether it will operate properly and perform its intended function. Check for alignment of moving parts, binding of moving parts, breakage of parts, mounting and any other conditions that may affect its operation. A guard or other part that is damaged should be properly repaired or replaced by an authorised service centre unless otherwise indicated in this instruction manual. Have defective switches replaced by an authorised service centre. Do not use the tool if the switch does not turn it on and off.

Warning! The use of any accessory or attachment, other than recommended in this instruction manual, may present a risk of personal injury.
- Have your tool repaired by a qualified person.
- This electrical appliance is in accordance with the relevant safety rules. Repairs should only be carried out by qualified persons using original spare parts, otherwise considerable danger to the user may result.
Training
- Never allow children or persons who are unfamiliar with this type of machine to use it, nor anyone who has not read this leaflet.
- Do not allow children, animals or other persons near your machine when in use - always keep them at least 6m (20ft) away from the cutting area.
- Remember that the operator/user is responsible for accidents or hazards occurring to other people or their property.
- Your machine is designed for use on AC (mains) electrical supplies only - do not attempt to use on any other supply.
- Plug your machine into a power point - never a lighting socket.
- Never carry your machine by the cable or jerk the cable to separate the connectors. Keep the cable away from heat sources, oils or sharp edges. Check the condition of your cable before use and do not use if damaged.
- We recommend that first-time users receive informed, practical instruction on how to use a hedge trimmer, as well as reading this manual.
Preparation
- To protect your feet, always wear stout shoes or boots.
- Use protective equipment. Wear safety spectacles or goggles and heavy-duty gloves while operating your machine.
- Use a face mask if dusty.
- Use ear protection if the sound level seems uncomfortable when using your machine.
- Protect long hair from contact with the hedge trimmer.
- Do not operate your machine barefoot or in open sandals.
- Do not wear loose jewelry.
- Clothes should be close-fitting but not restrict your movement.
- The power supply cable should be regularly inspected for signs of damage or aging, and only used if in good condition.
- Always keep the power supply cable away from the blades - be aware of its position at all times.
- Always be sure your machine is in a safe operating condition.
- Before using your machine, disconnect it from the electrical supply and visually check that the blade fixings are secure. A damaged blade or loose blade nuts are a major hazard and must be replaced.
- Ensure hedges, etc., are free from foreign objects such as railings or barbed wire that may damage your machine. Avoid dangerous starting; do not carry your hedge trimmer to the hedge while it is plugged in.

Operation
- Always ensure that you work in such a way that the cable is kept away from the blades.
- Release switch lever to turn machine off and remove the plug from the mains:
- Whenever you leave your machine unattended.
- Before checking, cleaning, adjusting, unjamming blades or working on the machine.
- If the machine starts to vibrate abnormally (check immediately).
- After striking a foreign object. Inspect the machine for damage and make repairs as necessary.
- Never attempt to stop the blades. Always allow them to stop on their own.
- Do not put hands or feet near blades.
- Start your machine carefully according to the instructions and with your body well away from the blades.
- Do not use your machine in the rain and do not allow it to get wet. Avoid using the machine in wet conditions.
- Use your machine only in daylight or good artificial light.
- Always be sure of your footing, particularly on slopes and always wear non-slip footwear.
- Walk, never run. Do not force the machine.
- Never operate the machine with defective or missing guards or shields.
Maintenance and storage
- Store your machine in a dry place when not in use, out of the reach of children.
- Do not use solvents or cleaning fluids to clean your machine. Always disconnect from the electrical supply before cleaning.
- Do not operate your machine if any parts are defective; discard all defective parts and fit new parts before use.
- Keep all nuts, bolts and screws tight to be sure your machine is in a safe working condition.
- Use only Black & Decker recommended replacement parts and accessories.
Black & Decker policy is one of continuous improvement to their product and as such they reserve the right to change product specification without prior notice.
Double insulation

Your machine is double insulated. This means that all external metal parts are electrically isolated from the power supply. This is achieved by placing an extra insulation barrier between the electrical and mechanical parts. Double insulation means greater electrical safety and obviates the necessity of having the machine earthed.
Electrical safety (UK only)

Your machine should always be switched off at the mains before disconnecting any plug and socket connector or extension cables.
Fuse replacement
If your machine is supplied with a cable fitted with a non-re-wireable plug.
- The plug is fitted with a 5 amp fuse which is the recommended fuse for your machine.
- Only use replacement fuses which are approved to BS1362.
- When changing the fuse in your plug, always ensure the fuse cover is refitted. If the fuse cover is missing or damaged do not use the plug.
Note: Fuses do not give personal protection against electric shock.
Plug replacement
- Disconnect the plug from the supply.
- Cut off the plug and dispose of immediately. Insertion of a detached plug into a 13 amp socket outlet may result in electric shock.
- Only fit BS1363A approved plugs fitted with the correctly rated fuse.
Fit a BS1363A approved plug
Connect blue to N (neutral)

Fit a 5 amp fuse approved to BS1362
Connect brown to L (live)
Make sure that the outer sheath of the cable is held firmly by the clamp

Never use a light socket

ENGLISH
- The cable wire colours, or a letter, will be marked at the connection points of most good quality plugs. Attach the wires to their respective points in the plug (see above). Brown is for “Live” (L) and blue is for “Neutral” (N).
- Before replacing the top cover of the mains plug ensure that the cable restraint is holding the outer sheath on the cable firmly and that the two leads are correctly fixed at the terminal screws.

Warning! Never connect live or neutral wires to the earth pin marked "E" or ± .
Note: Do not wire an extension cable directly into your machine yourself. Instead, take your machine to your nearest Black & Decker service centre.
Increased safety can be obtained by having a qualified electrician install a high sensitivity (30mA) circuit breaker in the house wiring. If you do not wish to have one installed, then we strongly recommend that the electrical power to the machine be supplied through a high sensitivity residual current device (RCD). The RCD is designed to provide a high degree of personal protection against harmful electric current should fault conditions occur.

Warning! The use of an RCD or other circuit breaker unit does not release the operator of the machine from the safety instructions and safe working practices given in this manual.
We recommend that if your mains cable is cut or requires replacement that you return your machine to a Black & Decker service centre. When repaired, your machine will be tested for electrical safety.
Cable connection system (UK only)
Black & Decker continually make every effort to achieve the highest standards in performance, quality and reliability and recommend the use of a new outdoor cable connection system.
The new system gives additional protection against the possibility of water or moisture entering into the cable connector during normal use.
Note: The new connection system does not release the operator of the machine from the safety precautions and safe working practices given in the instruction leaflet. Particular attention is drawn to the coupler system as being ‘weather resistant’ and not suitable for immersion, submersion or being subjected to water jets. Care should be taken to prevent the cable from lying or trailing through pools of water or from splashing with hose pipes.
A6615 20m cable, socket, 13 amp plug
A6616 20m cable, socket, 13 amp plug and cable tidy frame
A6617 30m cable, socket, 13 amp plug and cable tidy frame
A6613 40m cable, socket, 13 amp plug and cable tidy reel
Existing cable systems (UK only)
If you already own an outdoor cable system, we recommend that you replace the existing 'female' cable connector with the new 'female' connector (see below) which is supplied loose in the carton. (Please read the section entitled "Fitting the 'female' connector".)


old 'female' connector new 'female' connector
Should you wish to convert more than one cable system, the new female connector is available as an accessory from most major DIY retail outlets and from Black & Decker service centres (cat. no. A6624S). If in doubt, consult a qualified electrician.
Existing powered garden tools (UK only)
To connect existing Black & Decker garden power tools to the new system you will require an adaptor (see below). This is available as an accessory from most major DIY retail outlets (cat. no. A6623S).


Warning! This adaptor is only suitable for products rated up to 500W. It is not recommended for use with the following: Hover mowers, rotary mowers with grass collection, chainsaws, shredders and blower vacs. Please contact your local service centre should you require further advice.
Fitting your own extension cable (UK only)
- When fitting your own extension cable fit a 13 amp plug (see "fitting the mains plug") to one end of the cable and a 'female' connector (supplied loose in the carton) to the other end (see below). For wiring instructions see the following sections.
- A 'male' connector is already attached to the electrical supply cable on your machine and is designed to be non-rewireable (see below). This should not be removed. Should the cable and plug become damaged or need replacing, please return the machine to your Black & Decker service centre.


'female' connector 'male' connector

Warning! Never wire an extension cable with anything other than the 'female' connector supplied and a 13 amp BS1363A approved plug with the recommended fuse. Never wire a 'male' connector to your extension cable and never wire an extension cable with a plug of any kind at each end of the cable. This is extremely dangerous and results in the pins being live which may cause a fatal electric shock.


Fitting the 'female' connector (UK only)
To remove the cover, unscrew the fixing screw until it is free of the nut which is located in the hexagonal recess on the underside of the connector. Take care not to lose the nut if it falls out. There is no need to completely remove the fixing screw as it is intended to remain captive in the cover. The cover can now be removed by applying pressure as shown below.

The extension cable contains two wires which are colour coded for easy recognition; brown is for 'Live' (L) and blue is for 'Neutral' (N). The female connector is marked 'L' for live and 'N' for neutral. These markings are located inside the body near the terminal screws (see next page, figure a). With the connector cover removed, lift out the cable protector and proceed as follows:
• Pass the cable through from the narrow end of the cable protector (see opposite, figure a).
• Prepare the cable ends to the specified strip lengths (see opposite, figure b).
- Remove cable clamp (see opposite, figure a). Take care of loose parts.
- To connect the extension cable to the connector terminals, unscrew the terminal screws until the clamp washers have lifted just enough to enter the conductor between the raised washer and the terminal (see below). Connect the brown lead to 'L' and the blue lead to 'N'.
N.B. There is no need to remove the terminal screws. Connections are not to be made under the screw heads.
terminal screw

clamp terminal washer conductor position to left of screw
- Locate the cable and cable protector into the body correctly (see below, figure a). Then fit the cable clamp over the outer sheath of the cable and screw down until the screws are fully home. Failure to do this may result in the cover not fitting correctly to the connector body.
- Before replacing the cover of the 'female' connector make sure that the cable clamp is holding the outer sheath of the cable firmly with screws fully home and that the two leads are correctly fixed at the terminal screws and are not taut (see next page, figure a).
- Place the cover onto the body assembly ensuring that it seats flat, then retighten the fixing screw into the nut until the cover is securely held (see next page, figure c).
- Finally check that the cable protector is secure and that there are no gaps between the cover and the connector body.

Assembly instructions
- To avoid risk of injury, it is advisable to leave the blades in their cardboard cover until the front handle has been fitted.
You will need a No 2 Posidrive screwdriver.
Fitting the front handle (Please see diagram 2)
- Clamp the handle (1) into the recesses (2) on the side of the unit. Pass the large screws (3) through the handle into the body, and tighten.
Fitting the guard (Please see diagram 3)
- Slide the guard over the length of the blade and locate onto the recesses on the side of the body.
- Insert the two guard fixing screws through the sides of the guard into the unit body and tighten.
Note: The guard and handle must always be fitted to the unit for protection of the user.
Operation of your hedgetrimmer (Please refer to diagram 4)
Models with lock-off switch: - TO SWITCH ON - Press in lock-off button (A) and squeeze the trigger (B) • TO SWITCH OFF - Release the trigger. - For units with a brake mechanism: - SWITCHING ON
- The motor may start momentarily before the blades begin to move. By fully depressing the switch trigger, drive to the blades will be connected and then the blades will begin to move.
- SWITCHING OFF
- The motor may run on after the blades have stopped. This is perfectly normal.
Electronic (Please see diagram 5)
Models with electronic speed control:
Alter the speed to suit the application -
Low speed for light trimming.
High speed for fast hedge trimming.
Switch off before changing speed settings.
The speed of the blades can be adjusted from High speed to Low speed by rotating the control knob.
Low speed is obtained when No. 1 on the knob is visible.
High speed is obtained when No. 2 on the knob is visible.
Cutting techniques for better results (Please see diagrams 6.1 to 6.5)
- The blades will cut most effectively when they are not exactly parallel with the line of cut, but have the tips of the blades pointing slightly towards the hedge. This lateral tilt should not exceed 5° to the line of cut.
- Most users trim the top of a hedge first. Hold the tool at the desired angle and move it steadily along the line of cut. The double edged blade enables you to cut in either direction or with a side to side movement.
- For a very level finish, a piece of string can be stretched along the length of the hedge at the required height to serve as a guide. The hedge may be cut just above the string.
- To keep very flat sides it is better to cut upwards with the growth. Cutting downwards can produce an uneven result. • Take care to avoid hard objects, such as wire, which could cause damage to cutting blades. Remember that your hedgetrimmer is also suitable for clipping most shrubs or brambles.
Failure to work
If your hedgetrimmer does not work, unplug it and check:
- The power point (try another tool or appliance).
- The plug and its fuse.
- The plug and socket connections.
If in doubt, get help from a qualified electrician, or visit your Black & Decker service centre.
Care and maintenance
- Switch off and disconnect from the power supply before cleaning or adjusting your machine.
- For best performance, keep the blades and air slots in the motor housing clean. Use a cloth or brush to remove cuttings, sap, or other debris.
- Prevent the blades from rusting by applying a film of light machine oil after cleaning.
- Plastic parts may be cleaned using a non-abrasive cleaner and a cloth dampened with warm water.
- Do not immerse any part of the hedgetrimmer in water.
- Avoid all other types of detergents, cleaners, or solvents. These may contain chemicals that could seriously damage the plastic. Do not spray the hedgetrimmer with water, and do not allow water to enter the hedgetrimmer.
- After cleaning, the tool can be stored in its packaging for protection.
- Self-lubricating bearings are used in the tool, and lubrication is not required.
What to do if your hedgetrimmer needs repair
Information on how and where to send your hedgetrimmer for repair or service is given on the reverse of the parts diagram included with your product. We recommend you keep this in a safe place.
Australia/New Zealand: See Black & Decker under 'Tools electric' in your yellow pages.
Unwanted products and the environment

Should you find one day that your product needs replacement, or is of no further use to you, think of the protection of the environment. Black & Decker service centres will accept your old products and will dispose of them in an environmentally safe way.
Black & Decker lawn and garden guarantee
This guarantee provides: 36 months parts cover and 12 months labour (UK), 24 months parts cover and labour (Australia) and 12 months replacement product cover (New Zealand). In all cases proof of purchase will be required.
If your Black & Decker product becomes defective, within the guarantee period, due to faulty materials and workmanship, we guarantee to either replace all defective parts, or at our discretion, replace the unit free of charge, provided that:
- The product is returned to us or our authorised repairers with evidence of purchase.
- The product has been used within the parameters of its consumer classification.
- The product has not been used for hire purposes.
- Repairs have not been attempted by anyone other than our own service staff or authorised repairers.
- The failure represents normal wear and tear.
This guarantee is offered as an extra benefit and is additional to your statutory rights.
The guarantee policy
Failures due to the following are not covered:
- Replacing worn or damaged blades, nylon line and chains, or cords damaged during storage or use. These are regarded as replacement items which wear during normal usage.
- Failures as a result of sudden impact or obvious abuse.
- Failures due to usage not in accordance with instructions and recommendations contained in the instruction manual.
The use of other than genuine Black & Decker accessories and parts may damage or reduce the performance of your Black & Decker product and may render the guarantee void.
Black & Decker after sales service
Black & Decker offers a nationwide after sales service through company operated service centres. It is our aim to offer excellent service, fast repairs, extensive parts availability and full accessory support.
If you need any help or advice please contact your local Black & Decker service centre manager. Full details of our unique after sales service can be obtained from any of our service centres (a full directory is printed on the reverse of the parts drawing included with your product).
Australia/New Zealand: See Black & Decker under 'Tools electric' in your yellow pages.
Other Black & Decker products
Black & Decker has a full range of outdoor power tools that make life easy in the garden. If you would like further information on other products, please contact the Black & Decker service information centre at the address on the back cover, or contact your Black & Decker stockist.
Other products include (UK only):
Lawn mowers Hedge trimmers Grass trimmers Chainsaws Lawnrakers Compost shredders Blower vacs
EC Declaration of Conformity
We declare that units:
GT200, GT201, GT220, GT221, GT230, GT231, GT233, GT240, GT241, GT243, GT331, GT334, GT341, GT344, HT22, HT23, HT33, HT40, GT430, GT440, GT150
conform to 89/392/EEC, 89/336/EEC, EN50144, EN55014, EN55104, 73/23/EEC
A weighted sound pressure 91dB (A)
A weighted sound power 104dB (A)
Hand/arm weighted vibration <2.5m/s²

Brian Cooke
Director of Engineering
Spennymoor, County Durham DL16 6JG, United Kingdom
ENGLISH
Tagliasiepi Gamma GT200
conform to 89/392/EEC, 89/336/EEC, EN50144, EN55014, EN55104, 73/23/EEC
GT243, GT331, GT334, GT341, GT344, HT22,
HT23, HT33, HT40, GT430, GT440, GT150
to the standards 89/392/EEC, 89/336/EEC,
EN50144, EN55014, EN55104,
Director of Engineering
Spennymoor, County Durham DL16 6JG United Kingdom
Spennymoor, County Durham DL16 6JG
United Kingdom
Hedge Trimmer GT200 Series


- HEDGE TRIMMER GT200 SERIES
- INSTRUCTION MANUAL
- CONGRATULATIONS
- SAFETY INSTRUCTIONS
- FOR SAFE OPERATION
- TRAINING
- PREPARATION
- OPERATION
- MAINTENANCE AND STORAGE
- DOUBLE INSULATION
- ELECTRICAL SAFETY (UK ONLY)
- FUSE REPLACEMENT
- PLUG REPLACEMENT
- ENGLISH
- CABLE CONNECTION SYSTEM (UK ONLY)
- EXISTING CABLE SYSTEMS (UK ONLY)
- EXISTING POWERED GARDEN TOOLS (UK ONLY)
- FITTING YOUR OWN EXTENSION CABLE (UK ONLY)
- FITTING THE 'FEMALE' CONNECTOR (UK ONLY)
- ASSEMBLY INSTRUCTIONS
- FITTING THE FRONT HANDLE (PLEASE SEE DIAGRAM 2)
- FITTING THE GUARD (PLEASE SEE DIAGRAM 3)
- OPERATION OF YOUR HEDGETRIMMER (PLEASE REFER TO DIAGRAM 4)
- ELECTRONIC (PLEASE SEE DIAGRAM 5)
- CUTTING TECHNIQUES FOR BETTER RESULTS (PLEASE SEE DIAGRAMS 6.1 TO 6.5)
- FAILURE TO WORK
- CARE AND MAINTENANCE
- WHAT TO DO IF YOUR HEDGETRIMMER NEEDS REPAIR
- UNWANTED PRODUCTS AND THE ENVIRONMENT
- BLACK & DECKER LAWN AND GARDEN GUARANTEE
- THE GUARANTEE POLICY
- BLACK & DECKER AFTER SALES SERVICE
- OTHER BLACK & DECKER PRODUCTS
- EC DECLARATION OF CONFORMITY
- TAGLIASIEPI GAMMA GT
Brand : BLACK & DECKER
Model : GT221
Category : Hedge Trimmers