
FP715Si - Thermostat DANFOSS - Free user manual and instructions
Find the device manual for free FP715Si DANFOSS in PDF.


| Product Type | Programmable Room Thermostat |
| Brand | Danfoss |
| Model | FP715Si |
| Dimensions (approx) | 85 x 85 x 30 mm |
| Weight | 150 g |
| Power Supply | 230 V AC, 50 Hz |
| Display Type | LCD screen |
| Temperature Range | 5°C to 35°C |
| Accuracy | ±0.5°C |
| Programming | 7-day programmable with up to 4 time periods per day |
| Control Type | PID (Proportional-Integral-Derivative) |
| Application | Heating only |
| Mounting | Wall mounting |
| Protection Class | IP20 |
| Certifications | CE, UKCA |
| Frost Protection | Yes, adjustable |
| Holiday Mode | Yes |
| Child Lock | Yes |
| Cleaning | Wipe with a dry, soft cloth |
| Safety Precautions | Install by a qualified electrician; disconnect power before cleaning |
Frequently Asked Questions - FP715Si DANFOSS
User questions about FP715Si DANFOSS
0 question about this device. Answer the ones you know or ask your own.
Ask a new question about this device
Download the instructions for your Thermostat in PDF format for free! Find your manual FP715Si - DANFOSS and take your electronic device back in hand. On this page are published all the documents necessary for the use of your device. FP715Si by DANFOSS.
USER MANUAL FP715Si DANFOSS
natural_image
Black-and-white photo of a woman in a white dress cutting apples at a table, with a window and plant nearby (no text or symbols visible)FP715Si
Electronic 2-Channel Full Programmer for Heating and Hot Water with Service Interval Timer
FP715Si
Electronic 2-Channel Full Programmer for Heating & Hot Water with Service Interval Timer
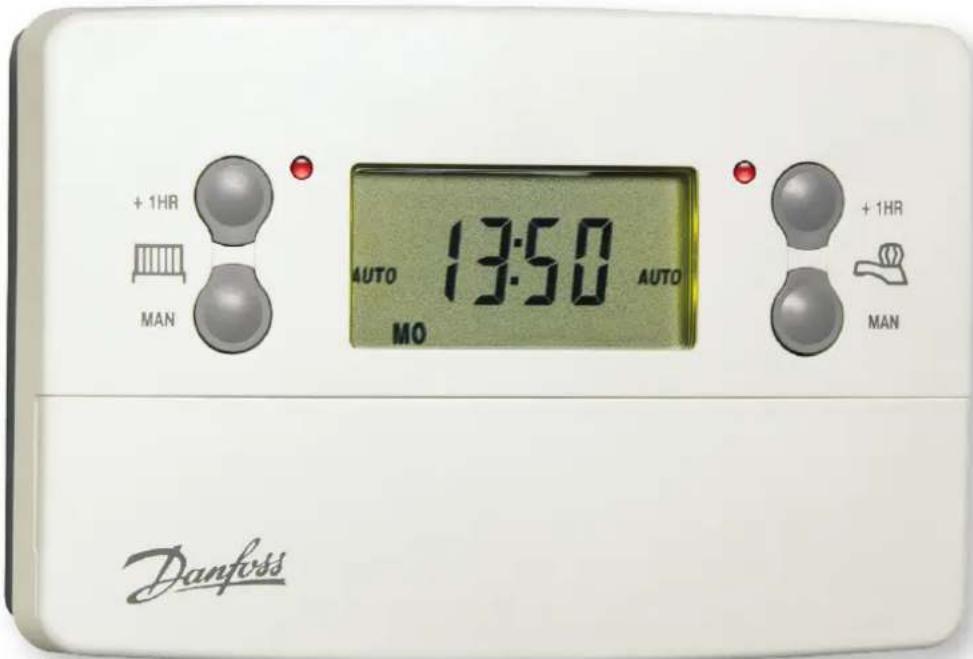
For a large print version of these instructions please call Marketing on 0845 121 7400.

Certification Mark
This product complies with the following EC Directives: Electro-Magnetic Compatibility Directive.
(EMC) (2004/108/EC)
Low Voltage Directive.
(LVD) (2006/95/EC)
CE

natural_image
Simple line drawing of a trash bin with no text or symbolsDanfoss can accept no responsibility for possible errors in catalogues, brochures, and other printed material. All trademarks in this material are property of the respective companies. Danfoss and the Danfoss logotype are trademarks of Danfoss A/S. All rights reserved.
Thank you for buying a Danfoss product
GB
GB
1.0 User Instructions
1.1 Your Programmer
1.2 Preset Programmes
1.3 Before you start ....7
1.4 Choice of 24hr or AM/PM display....7
1.5 Setting the Date and Time 7
1.6 Accepting the Preset Programmes ....8
1.7 Before you Change the Preset Programmes .....9
1.7.1 Programming the Heating in 5/2 Day Mode...... 10
1.7.2 Programming the Heating in 7 Day Mode .... 11 1.7.3 Programming the Heating in 24 Hour Mode.... 12
1.8 Programming your Hot Water 13
1.9 Running your Programme 14
2.0 Advanced
2.1 Temporary Override Buttons.... 15
2.2 Holiday Programme
2.3 Changing Clocks Forward and Backward 17
2.4 Service Interval Timer....18
2.5 Making a Full Reset 19
2.6 Fault Check List.... 20


The text below has been edited and approved by the Plain English Campaign, who has issued a Crystal Mark to be displayed with it.
What is a Programmer?
... an explanation for householders.
Programmers allow you to set 'On' and 'Off' time periods. Some models switch the central heating and domestic hot water on and off at the same time, while others allow the domestic hot water and heating to come on and go off at different times.
Set the 'On' and 'Off' time periods to suit your own lifestyle. On some programmers you must also set whether you want the heating and hot water to run continuously, run under the chosen 'On' and 'Off' heating periods, or be permanently off.
The time on the programmer must be correct. Some types have to be adjusted in spring and autumn at the changes between Greenwich Mean Time and British Summer Time.
You may be able to temporarily adjust the heating programme, for example, 'Override', 'Advance' or 'Boost'. These are explained in the manufacturer's instructions.
The heating will not work if the room thermostat has switched the heating off. And, if you have a hot-water cylinder, the water heating will not work if the cylinder thermostat detects that the hot water has reached the correct temperature.
1.0 User Instructions
1.1 Your Programmer
GB
The FP715 Si allows you to switch your heating and hot water on and off at times that suit you.
Your programmer has had the date and time set up during manufacture and will automatically change between Greenwich Mean Time and British Summer Time.
You can programme up to 3 ON/OFF times per day for the heating and the hot water and the two systems can be operated independently.
1.2 Preset Programmes
Your FP715 Si comes ready programmed with a set of operating times which often suit most people.
| Event No. | Hot Water and Heating | Mon-Fri Sat-Sun** | |
| 1 1st ON | 6:30 7:30 | ||
| 2 1st OFF | 8:30 10:00 | ||
| 3* 2nd ON | * 12:00* | 12:00* | |
| 4* | 2nd OFF* | 12:00* | 12:00* |
| 5 | 3rd ON | 17:00 | 17:00 |
| 6 3rd OFF | 22:30 | 22:30 | |
| * Not applicable if unit set to 2 ON/OFF's per day by installer**Not applicable if unit set to 24 hour mode by installerSee page 9 for explanations of different settings | |||
If you want to change any of these settings, you can do so by following the instructions on pages 9-14. First, follow the steps on page 7-8 to set the correct time and date.
1.3 Before you start
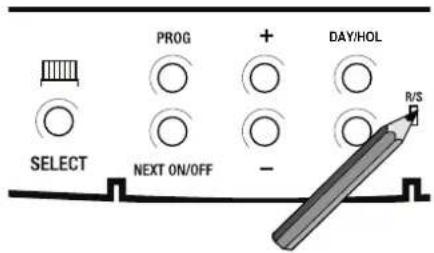
Open the flap on the front of the clock. Press the RESET button using a non-metallic object (e.g. pencil/matchstick) until you hear a click and the 2 red lights on the front of the unit flash once.
This will stop and restart the electronics, without losing the factory set time and date settings.
To fully reset the unit see page 19.

1.4 Choice of 24hr or AM/PM display
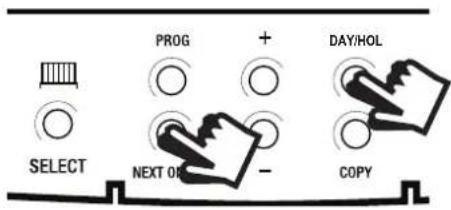
Press and hold DAY/HOL and NEXT ON/OFF for 1.5 seconds to toggle between 24hr clock and AM/PM display, as required.
1.5 Setting the Date and Time
These settings are made during manufacture and only need to be changed in the unlikely event that the unit has lost the settings.
Setting the Date
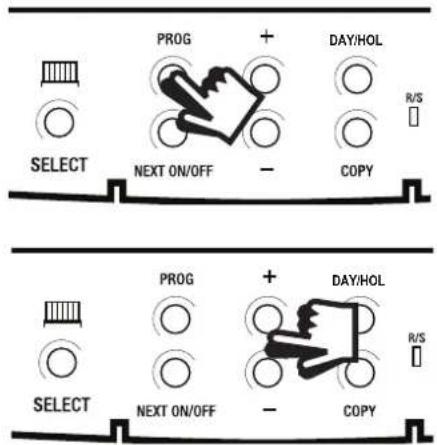
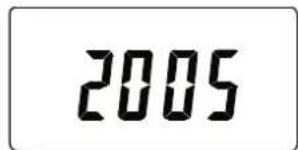
Press and hold PROG for 5 seconds to display year.
Use the + or - buttons to set the correct year.
GB
Press DAY/HOL to display day and month. Use the + or - buttons to set the correct month (Jan = 1, Feb = 2 etc.).
Press DAY/HOL to display day and month. Use the + or - buttons to set day of month.
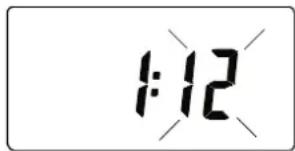
Press PROG to display the time.
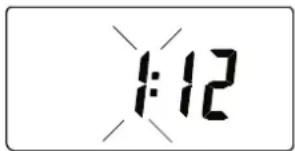
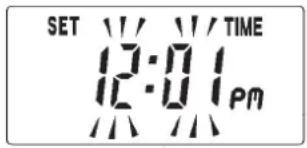
The words SET TIME will appear at the top of the display and the time will flash on and off.
Use the + or - buttons to set the correct time (press and hold to change in 10 min. increments).
Setting the Day
The day of the week is set automatically.
1.6 Accepting the preset programmes
If you are happy to use the preset programmes on page 6, you don't need to do anything else.
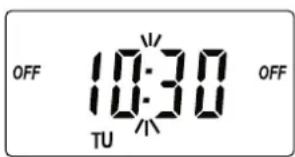
Press the PROG button once to return to run mode.
1.7 Before you change the preset programmes
Your installer will have set your unit to operate in one of the following modes:
- 5/2 day - one set of programmes for weekdays and another for weekends (page 10-11)
- 7 day - different settings for each day of the week. (page 11-12)
• 24 hour - one set of programmes for the whole week. (page 12-13)
See INSTALLER SETTING tick box on inside fl ap label to ascertain which mode your unit is set.
| INSTALLER SETTING | |
| 24 Hour | |
| 5+2 Day | |
| 7 Day | |
Please Note
The unit must be programmed in sequence. ON/OFF times cannot be set out of sequence.
If you want to leave a preset time as it is, simply press NEXT to move on to the next setting.
Your installer will have set your unit to programme either 2 or 3 ON/OFFs per day. If your clock has been installed to allow 3 ON/OFFs and you do not wish to use one of the ON/OFF settings, simply programme the ON time to be the same as the OFF time and the setting will not operate.
1.7.1 Programming the heating in 5/2 day mode
GB
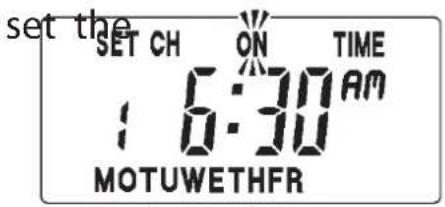
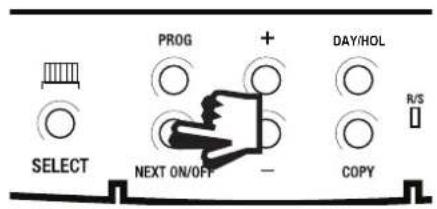
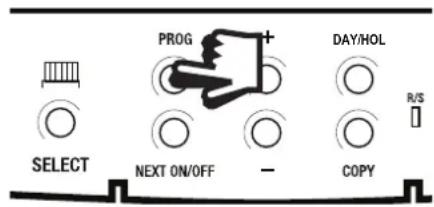
- Press PROG once until SET CH ON TIME appears at the top of the display and MOTUWETHFR appears at the bottom of the display.
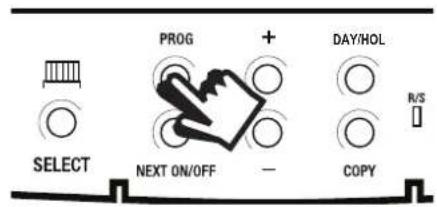
Use the + or - buttons to time you would like your heating to first come on in the morning (Event 1).
- Press NEXT ON/OFF once only.
Use the + or - buttons to time you want your heating to go off (Event 2).
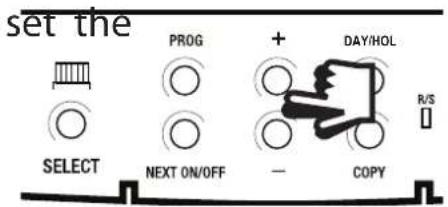
To move to the next setting, i.e. when you would like your heating to come on again (Event 3) press the NEXT ON/OFF button again.
-
Continue programming the central heating ON and OFF times for weekday Events 4, 5 & 6 as in Step 2.
-
Press the DAY/HOL button and SASU will appear at the bottom of the display.
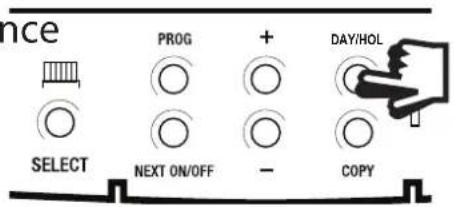
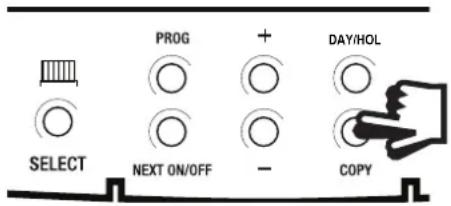
If the same programme is required press the COPY button and the previous days programme will be entered.
If a different programme is required repeat steps 2-4.
-
Press the PROG button once to enter hot water programming or twice to return to run mode.
-
Proceed to page 14.
Please Note
If this setting is made on a weekend day SASU will show in place of MOTUWETHFR.
1.7.2 Programming the heating in 7 day mode
-
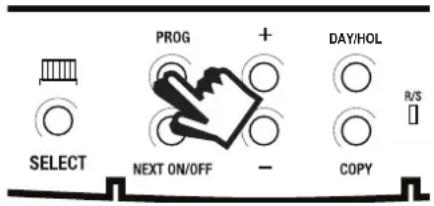
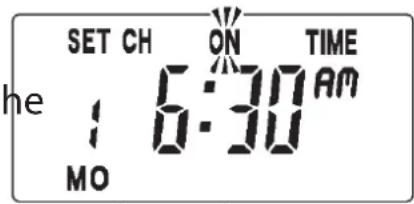
Press PROG once until SET CH ON TIME appears at the top of the display. Note the current day is displayed. Press the DAY/HOL button until the required day is displayed.
-
Use the + or - buttons to set the time you want your heating to first come on in the morning (Event 1).
-
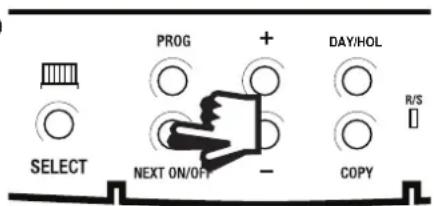
Press NEXT ON/OFF to move to Event 2.
GB
- Continue programming the central heating ON and OFF times in this way by using the + or - buttons to set the time you want and pressing the NEXT ON/OFF button to move to the next setting.
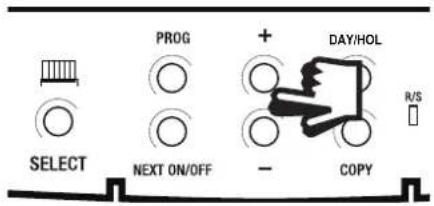
- Press DAY/HOL button once only. The next day will appear at the bottom of the display. Repeat steps 2-5.
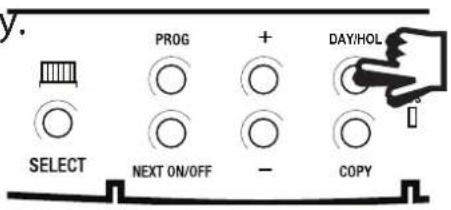
- Press the PROG button twice to return the unit to RUN mode (time appears and the colon in the display begins to flash).
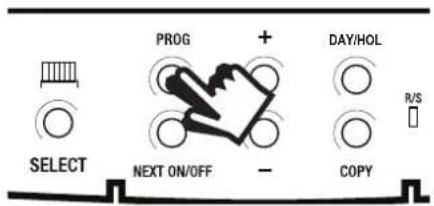
- Proceed to page 14.
1.7.3 Programming the heating in 24 hour mode
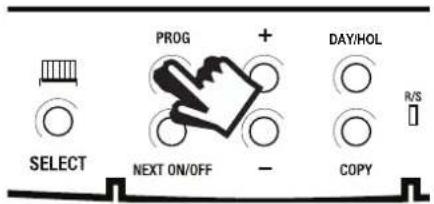
- Press PROG once until SET CH ON TIME appears at the top of the display.
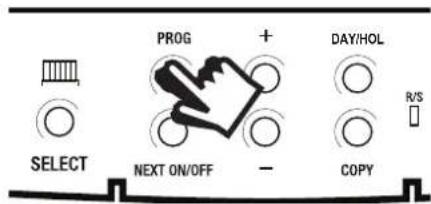
Use the + or - buttons to set the
time you want your heating to first come on in the morning (Event 1).
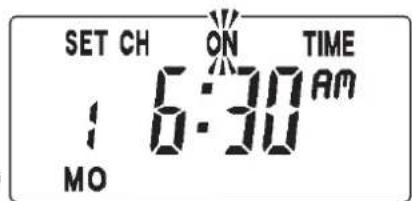
- Press NEXT ON/OFF to move to Event 2.
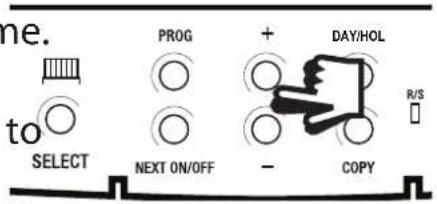
Continue programming the central heating ON and OFF times by pressing:
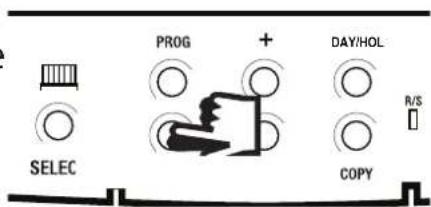
a) NEXT ON/OFF button to move to the next setting,
b) + or - buttons to amend the time.
-
Press the PROG button twice return the unit to RUN mode (time appears and colon in the display begins to flash).
-
Proceed to page 14.
1.8 Programming your Hot Water
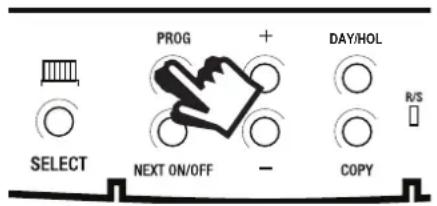
To set the hot water programme press the PROG button twice until SET HW ON TIME appears on the display.
Set the hot water programme in the same way as the heating programme, using:
a) + and - buttons to alter the time,
b) Pressing the NEXT ON/OFF button to move to the next setting,
c) Pressing DAY/HOL to advance through days of the week (7 day mode) or to advance to Saturday and Sunday programming (5/2 day mode) and repeat steps a-c.
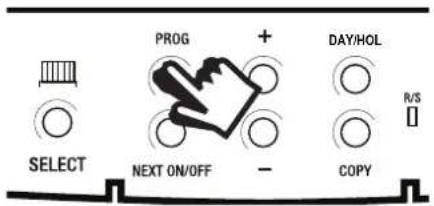
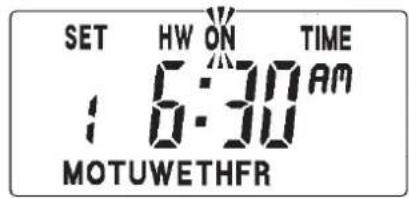
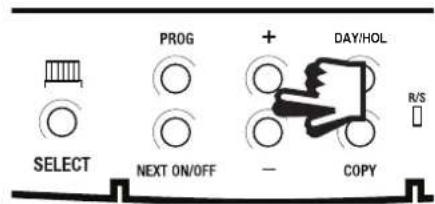
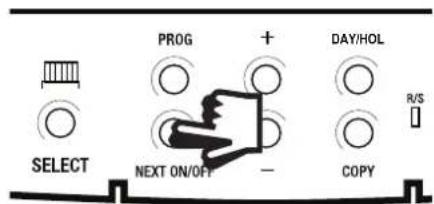
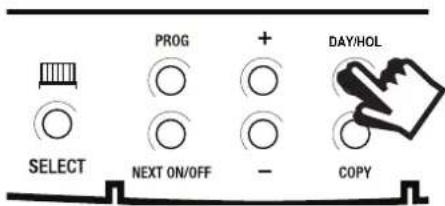
Finally press PROG once to return the unit to run mode (time appears and colon in the display begins to flash).
GB
1.9 Running Your Programme
to run the central heating programme:
press the SELECT button next to the radiator symbol until AUTO SELECT is displayed in the LCD.
To run the hot water programme:
press the SELECT button next to the tap symbol until AUTO is displayed in the LCD.
As you press the SELECT button the display will change between ON, OFF, ALLDAY and AUTO.
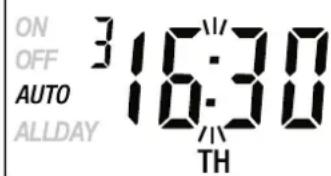
- AUTO = the heating/hot water will come on and go off at the programmed times.
- ON = the heating/hot water will remain on constantly.
- OFF = the heating/hot water will not come on.
- ALLDAY = the clock will turn the heating/hot water on at the first programmed ON and will leave it on until your last programmed OFF.
Select the option you require depending on your circumstances, time of year, etc.
2.0 Advanced Settings
2.1 Temporary Override Buttons
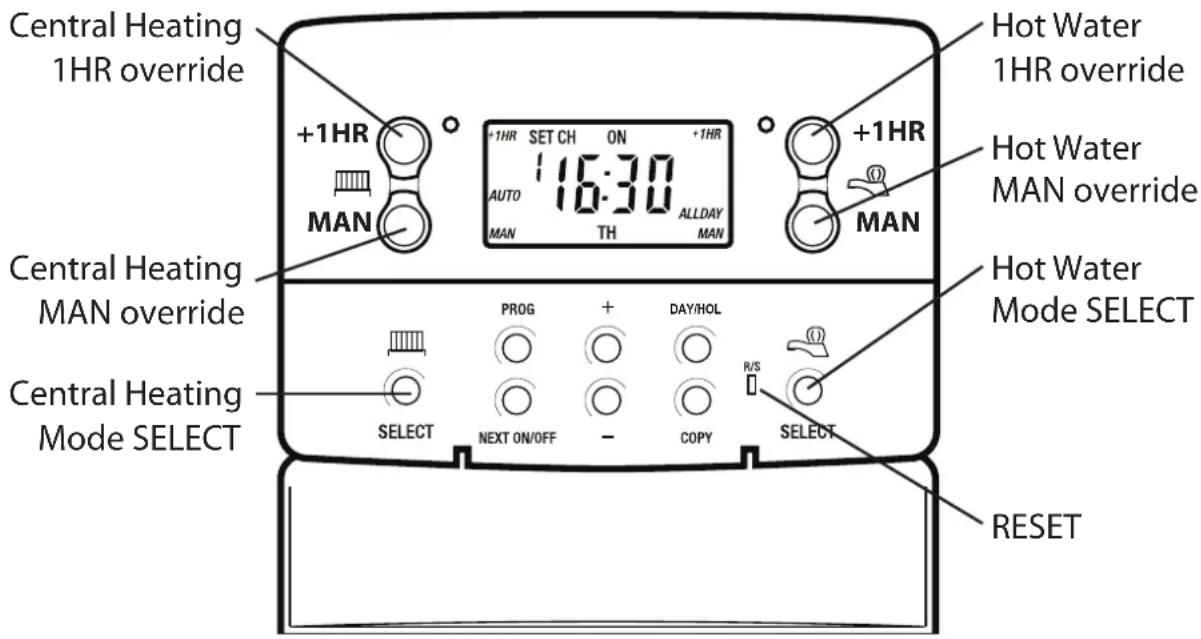
Sometimes you may need to change the way you use your heating temporarily, i.e. due to unusually cold weather. The FP715 Si has two convenient overrides which can be selected without affecting the set programme.
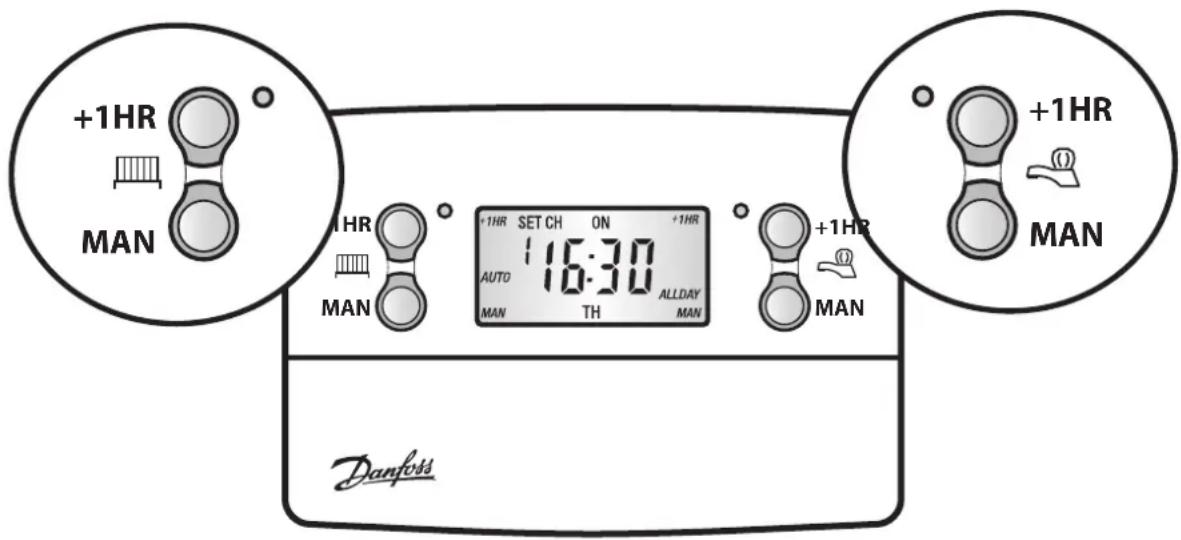

The grey buttons next to the radiator symbol are the Heating override buttons.

The grey buttons next to the tap symbol are the Hot Water override buttons.
+1HR
Pressing this button when either system is in AUTO or ALLDAY mode will cause the heating/hot water to remain on for an extra hour. If it is pressed while the programme is OFF the heating/hot water will come on immediately for 1 hour then go off again. +1HR will be shown in the display.
MAN
Pressing this button when either system is in AUTO or ALLDAY mode will cause the heating/hot water to go OFF until the next programmed ON, or vice versa. MAN will be shown in the display.
2.2 Holiday Programme
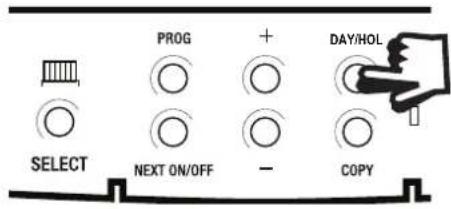
To automatically bring the heating back on when returning from holiday the FP715-Si has a built in holiday feature.
GB
Follow the steps below to set the date that the heating system needs to come back on.
- Press DAY/HOL
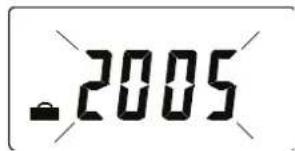
- Use the + or - buttons to select the year.
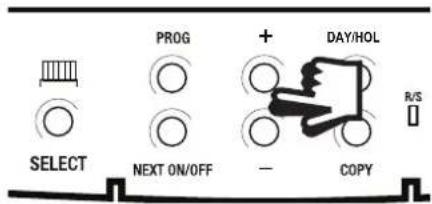
- Press DAY/HOL, then use the + and - buttons to select the month.
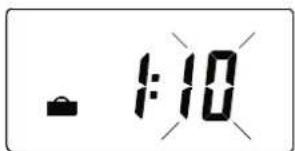
- Press DAY/HOL again, then use the + and - buttons to select the day in month.
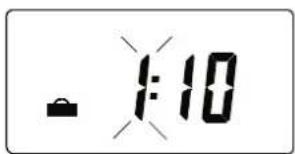
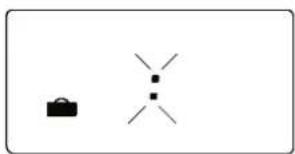
- Press DAY/HOL to turn heating off and enter holiday mode.
natural_image
Simple diagram with a briefcase and three X-shaped symbols (three squares, two crosses) arranged in a cross pattern on a white background.To cancel holiday mode press DAY/HOL.
2.3 Changing Clocks Forward and Backward
This is handled automatically. Should the installer have turned off Automatic Time Change then follow the instructions below.
Open the fl ap on the front of the unit to reveal the programming buttons.
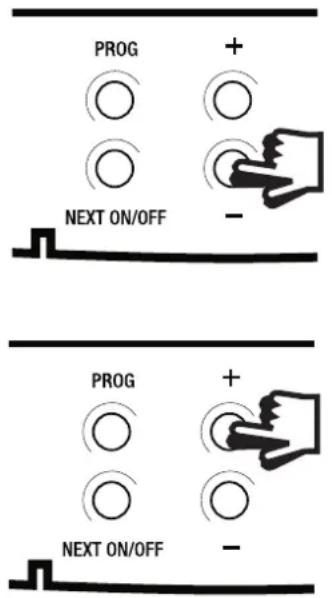
To change from Summer to Winter (clocks back) -
- press and hold - button
To change from Winter to Summer (clocks forward) -
- press and hold + button
GB
Take care when making this change for the first time. If it is made in the wrong direction the unit will have to be reset and any user-settings re-entered.
(See pages 7-8 on how to reset the unit and how to set the date, time and day).
2.4 Service Interval Timer
GB
- If the property is owned by a landlord he may, for gas safety reasons, have instructed the installer to set the service interval timer.
- If set, 28 days prior to the boiler service due date, a momentary visual and audible warning will remind you to have the boiler serviced in the next 28 days. This will be repeated each day at noon.
- If the boiler is not serviced within 28 days the daily audible warning will sound for 1 minute at the beginning of each hour and must be cancelled each day by pressing any button on the unit.
- In addition, all overrides and programming buttons will be disabled and the heating and hot water will operate for a set portion of each programmed hour.
- The installer will cancel or reset the service interval timer as part of the boiler service.
- This is a gas safety feature that can only be accessed by an installer.
- When the service interval timer is set the service due date can be viewed in RUN mode by pressing and holding the COPY button.
2.5 Making a Full Reset
If it is necessary to fully reset the unit, excluding the date and time, follow the instructions below.
- Press and hold the +1HR and MAN buttons on the left hand side of the product.
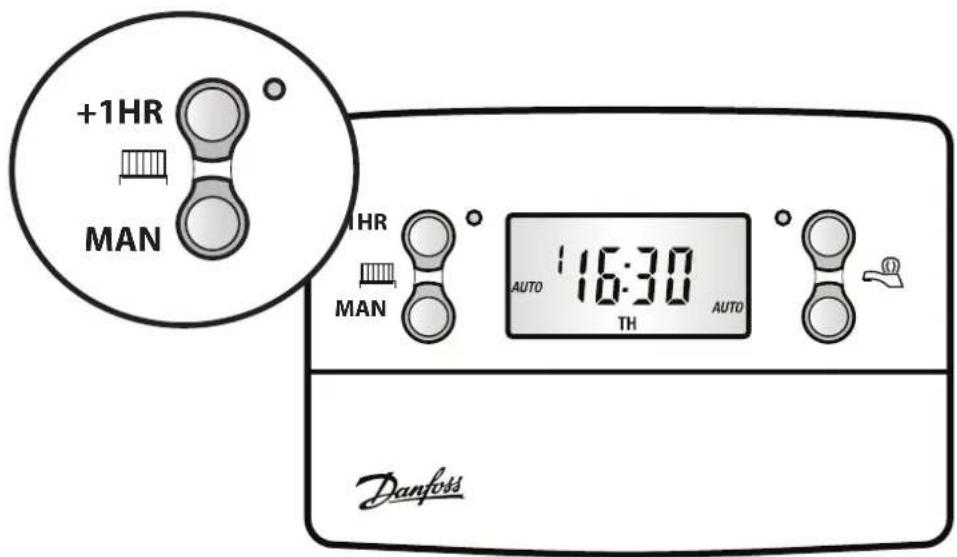
- Press the RESET button and hold for 3 seconds.
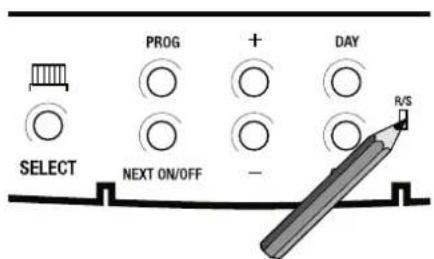
- Release the RESET button. The display will change to show the current time.
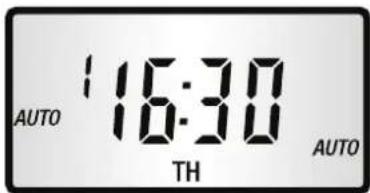
Example
- Finally, release both the +1HR and MAN buttons.
The unit is now fully reset and must be re-programmed, see pages 10-14.
No Hot Water
Check FP715 programmer. Turn the heating selector to OFF and the water selector to ON.
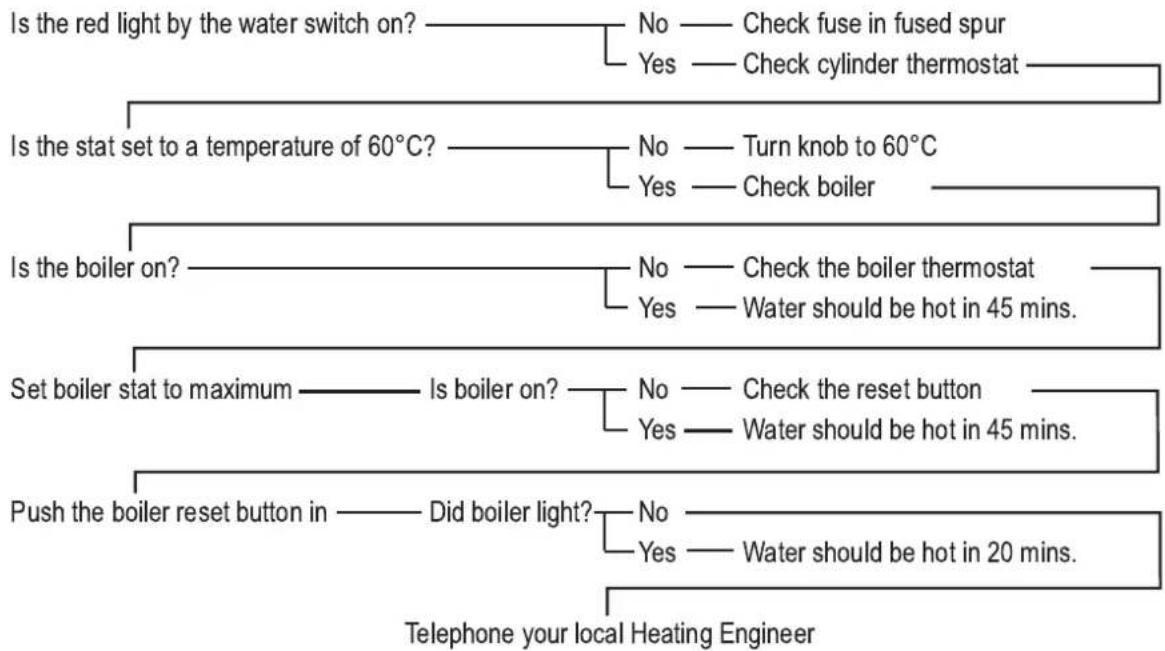
flowchart
graph TD
    A["Is the red light by the water switch on?"] --> B["No — Check fuse in fused spur"]
    A --> C["Yes — Check cylinder thermostat"]
    D["Is the stat set to a temperature of 60°C?"] --> E["No — Turn knob to 60°C"]
    D --> F["Yes — Check boiler"]
    G["Is the boiler on?"] --> H["No — Check the boiler thermostat"]
    G --> I["Yes — Water should be hot in 45 mins."]
    J["Set boiler stat to maximum"] --> K["Is boiler on?"] --> L["No — Check the reset button"]
    J --> M["Yes — Water should be hot in 45 mins."]
    N["Push the boiler reset button in"] --> O["Did boiler light?"] --> P["No — Water should be hot in 20 mins."]
    Q["Telephone your local Heating Engineer"] --> R["End"]
After the water has been heated, return the programmer and other controls to the required settings.
No Heating
Check FP715 programmer. Turn the water selector to OFF and the heating selector to ON.
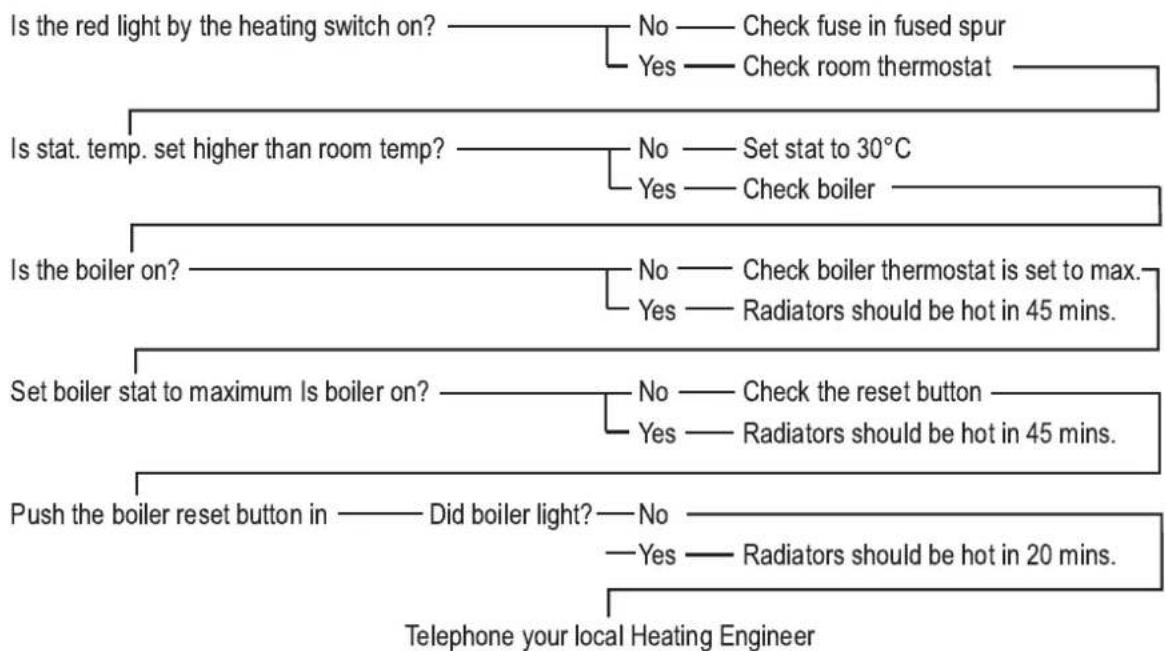
flowchart
graph TD
    A["Is the red light by the heating switch on?"] --> B["No — Check fuse in fused spur"]
    A --> C["Yes — Check room thermostat"]
    D["Is stat. temp. set higher than room temp?"] --> E["No — Set stat to 30°C"]
    D --> F["Yes — Check boiler"]
    G["Is the boiler on?"] --> H["No — Check boiler thermostat is set to max."]
    G --> I["Yes — Radiators should be hot in 45 mins."]
    J["Set boiler stat to maximum Is boiler on?"] --> K["No — Check the reset button"]
    J --> L["Yes — Radiators should be hot in 45 mins."]
    M["Push the boiler reset button in — Did boiler light?"] --> N["No —"]
    M --> O["Yes — Radiators should be hot in 20 mins."]
    P["Telephone your local Heating Engineer"] --> Q["End"]
After the heating has come back on, return the programmer and other controls to the required settings.
GB
GB
GB
natural_image
Modern kitchen appliance with a vise and glass oven, no visible text or symbolsDanfoss Ltd.
Ampthill Road
Bedford MK42 9ER
Tel: 01234 364621
Fax: 01234 219705
Email: ukheating@danfoss.com
Website: www.heating.danfoss.co.uk
- FP715Si
- For a large print version of these instructions please call Marketing on 0845 121 7400.
- GB
- User Instructions
- Advanced
- What is a Programmer?
- Your Programmer
- Preset Programmes
- Before you start
- Choice of 24hr or AM/PM display
- Setting the Date and Time
- Setting the Date
- Setting the Day
- Accepting the preset programmes
- Before you change the preset programmes
- Please Note
- Programming the heating in 5/2 day mode
- Programming the heating in 7 day mode
- Programming the heating in 24 hour mode
- Programming your Hot Water
- Running Your Programme
- to run the central heating programme:
- To run the hot water programme:
- Advanced Settings
- Temporary Override Buttons
- Holiday Programme
- Changing Clocks Forward and Backward
- Service Interval Timer
- Making a Full Reset
- No Hot Water
- No Heating
- Danfoss Ltd.
Brand : DANFOSS
Model : FP715Si
Category : Thermostat