
LED-504K SMT - Television Grunkel - Free user manual and instructions
Find the device manual for free LED-504K SMT Grunkel in PDF.


| Product Type | LED Television |
| Model | LED-504K SMT |
| Brand | Grunkel |
| Display Size (Diagonal) | 50 inches |
| Resolution | 3840 x 2160 (4K UHD) |
| Refresh Rate | 60 Hz |
| Dimensions (with stand) | 112.5 x 70.2 x 25.4 cm (approx.) |
| Dimensions (without stand) | 112.5 x 65.4 x 8.5 cm (approx.) |
| Weight (with stand) | 12.5 kg (approx.) |
| Weight (without stand) | 11.2 kg (approx.) |
| Power Consumption (typical) | 100 W |
| Power Supply | 100-240 V, 50/60 Hz |
| Connectivity | 3x HDMI, 2x USB, 1x AV, 1x RF, 1x LAN, Wi-Fi |
| Audio Output Power | 2 x 8 W |
| Smart TV Platform | Built-in (Linux-based) |
| Supported Video Formats | MP4, AVI, MKV, MOV, etc. |
| Supported Audio Formats | MP3, AAC, WMA, etc. |
| Wall Mount VESA | 200 x 200 mm |
| Remote Control | Infrared |
| Energy Class | A+ (typical for 50-inch LED) |
| Cleaning Instructions | Wipe with a soft, dry cloth. Avoid liquids. |
| Operating Temperature | 5°C to 40°C |
Frequently Asked Questions - LED-504K SMT Grunkel
User questions about LED-504K SMT Grunkel
0 question about this device. Answer the ones you know or ask your own.
Ask a new question about this device
Download the instructions for your Television in PDF format for free! Find your manual LED-504K SMT - Grunkel and take your electronic device back in hand. On this page are published all the documents necessary for the use of your device. LED-504K SMT by Grunkel.
USER MANUAL LED-504K SMT Grunkel
natural_image
Warning symbol of a lightning bolt inside a triangle (no text or numbers)3
2
1
natural_image
Technical line drawing of a rectangular electronic device with internal compartments and mounting feet (no text or symbols)Ajustes de sistema
natural_image
Basketball game action shot showing a red ball in mid-air during a dunk, with no visible text or symbols on the main image area.Música
Please read this manual carefully before installing and operating the TV
Keep this manual handy for further reference
Content
Safety Information 1
Important Safety Precautions 2
TV Buttons And Terminal Interface 3
External device connection diagram 4
Install And Connect TV 5
Main Menu 6
System Setting
Network 6
Time Setting 7
Gommon 7
Language Setting 7
Application Manage. 7
Screen Saver. 7
OTA Update . 8
System Recovery 8
About. 8
Multimedia
Video....8
Music 9
Photo. 9
Applications 9
Input 9
TV
Picture Setup 10
Sound Setup 10
Function 11
Setup 11
Help....12
Specifications....13
Supporting signals 13
Remote Controller....14
Safety Information
CAUTION
RISK OF ELECTRIC SHOCK DO NOT OPEN

natural_image
Warning symbol of a lightning bolt inside a triangle (no text or numbers)Important Safety Precautions
1) Read these instructions.
2) Keep these instructions.
3) Heed all warnings.
4) Follow all instructions.
5) Do not use this apparatus near water.
6) Clean only with dry cloth.
7) Do not block any ventilation openings. Install in accordance with the manufacturer's instructions.
8) Do not install near any heat sources such as radiators, heat registers, stoves, or other apparatus (including amplifiers) that produce heat.
9) Do not defeat the safety purpose of the polarized or grounding-type plug. A polarized plug has two blades with one wider than the other. A grounding type plug has two blades and a third grounding prong. The wide blade or the third prong are provided for your safety, If the provided plug does not fit into your outlet, consult an electrician for replacement of the obsolete outlet.
10) Protect the power cord from being walked on or pinched particularly at Plugs, convenience receptacles, and the point where they exit from the apparatus.
11) Only use attachments /accessories specified by the manufacturer.
12) Use only with the cart, stand, tripod, bracket, or table specified by the manufacturer, or sold with the apparatus. When a cart is used caution when moving the cart/apparatus combination to avoid injury tip-over.
13) Unplug this apparatus during lightning storms or when unused for long periods of time. Caution:

14) To reduce the risk of fire or electric shock, do not expose this apparatus to rain or moisture.
15) The mains plug is used as disconnect device, the disconnect device shall remain readily operable.
16) The socket-out shall be installed near the equipment and shall be easily accessible.
17) This product should never be placed in a built-in installation such as a bookcase or rack unless proper ventilation is provided or the manufacture's instructions have been adhered to.
18) The apparatus shall not be exposed to dripping or splashing and that no objects filled with liquid, such as vases, shall be placed on the apparatus.
19) Do not place any sources of danger on the apparatus (e.g. liquid filled objects, lighted candles).
20) Wall or Ceiling Mounting - The appliance should be mounted to a wall or ceiling only as recommended by the manufacturer.
21)
Never place the TV, remote control or batteries near naked flames or other heat sources, including direct sunlight. To prevent the spread of fire, keep candles or other flames away from the TV, remote control and batteries at all times.
22) The USB terminal should be loaded with 0.5 A under normal operation.
These servicing instructions are for use by qualified service personnel only. To reduce the risk of electric shock do not perform any servicing other than that contained in the operating instructions. unless you are qualified to do so.
23) The battery shall not be exposed to excessive heat such as sunshine, fire or the like.
24) ☐ This equipment is a Class II or double insulated electrical appliance. It has been designed in such a way that it does not require a safety connection to electrical earth
25) The maximum using environment temperature is 45 degrees. The Maximum using altitude is 2000 meters
TV Buttons And Terminal Interface
TV Buttons
Note: The following is only functional schematic, And the actual position and arrangement of different models may be different.
STANDBY
SOURCE
MENU
CH-
CH+
VOL -
VOL+
STANDBY: Turn ON/OFF Power.
SOURCE: External Signal Input Selection.
MENU: Display Main MENU And Confirm MENU Item Selection.
CH+/-:Selecting Channel.
VOL+/-:Adjusting Volume.
Note: The following are the various terminal interface, the actual position and arrangement, the number of different models may be different.
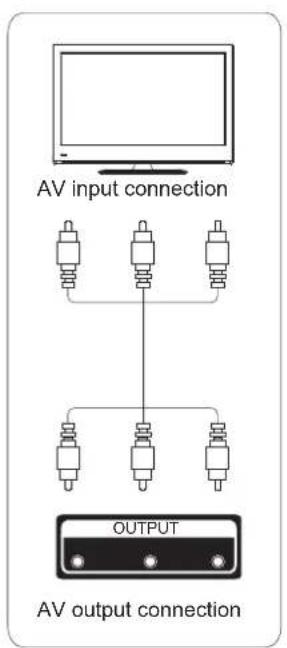
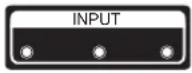 | External AV Signal Input And Relevant Right/Left Sound Channel | 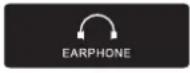 | When earphones are plugged in,speakers are disabled |
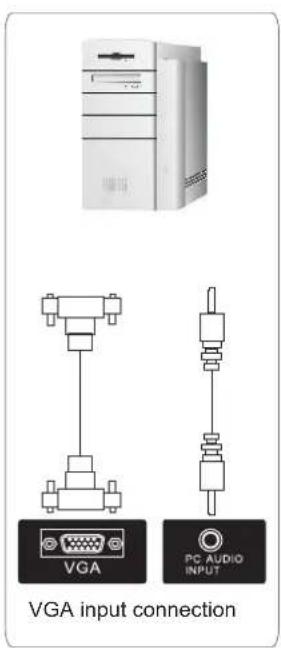
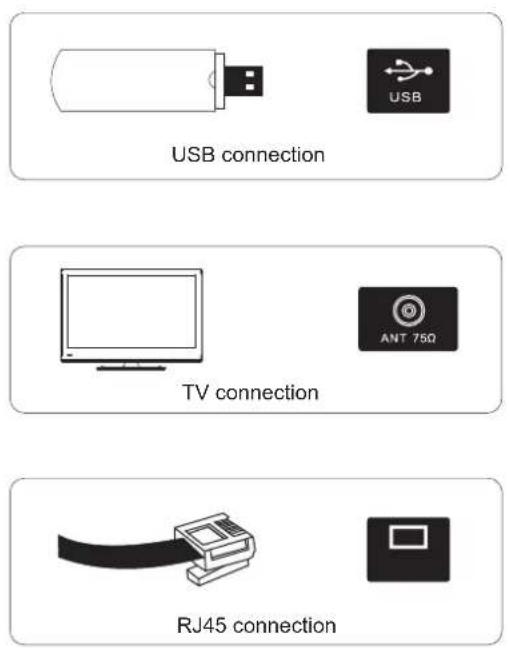
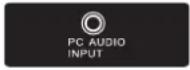 | VGA input and audio input when VGA input |  | Connect a USB device here to playits media files or to recordprogramsvia the PVR function. |
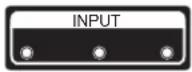 | Connect to the composite terminal of your DVD/VCR(Some models without this interface) |  | Connect the SPDIF receiver. |
 | Digital signal input from HDMI video connector. |  | Connect the Internet. |
 | Connect the antennal/cadle tv input (75/VHF/UHF) |  | Audio Line Out. |
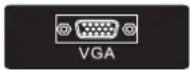 | PC analog signal input |
External device connection diagram
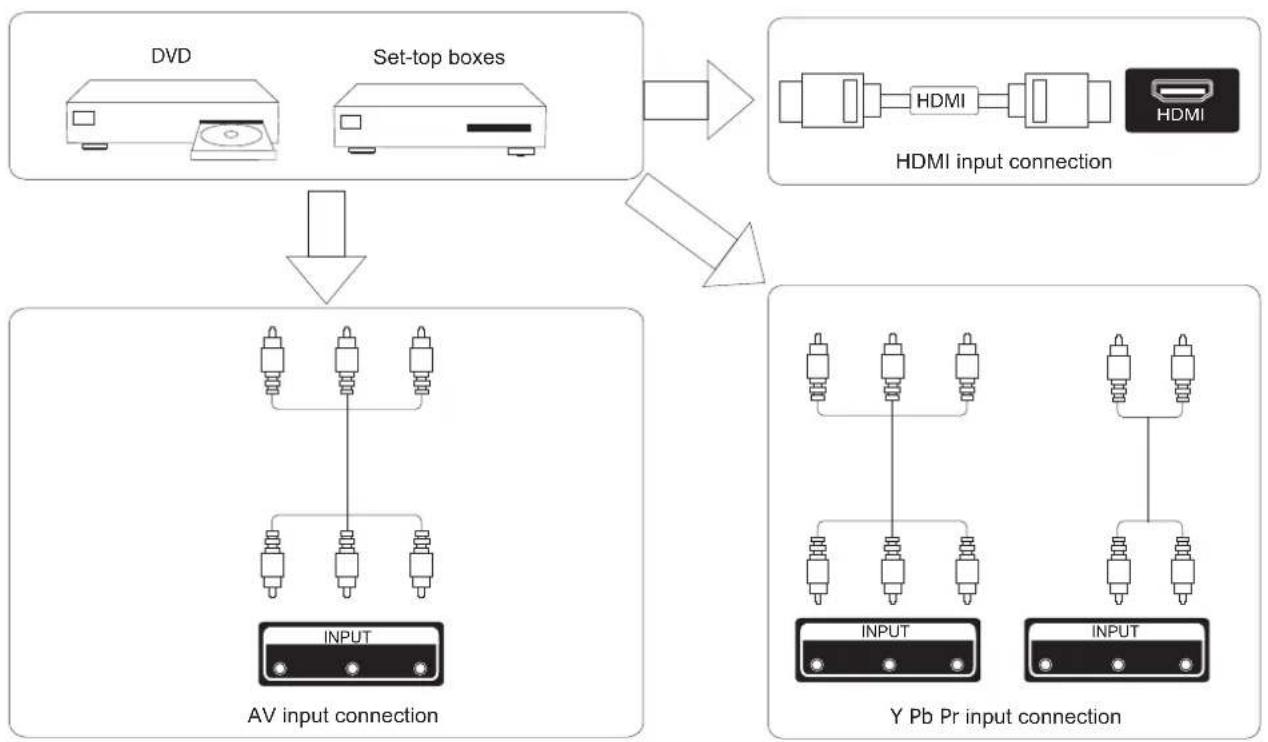
flowchart
graph TD
    A["DV"] --> D["AV input connection"]
    B["Set-top boxes"] --> D
    D --> E["HDMI input connection"]
    E --> F["Y Pb Pr input connection"]
    subgraph AV Input
        G["INPUT"] --> H["Resistors"]
        I["Resistors"] --> J["Resistors"]
        K["Resistors"] --> L["Resistors"]
    end
    subgraph Y_PbPrInput
        M["INPUT"] --> N["Resistors"]
        O["Resistors"] --> P["Resistors"]
        Q["Resistors"] --> R["Resistors"]
    end
Install And Connect TV
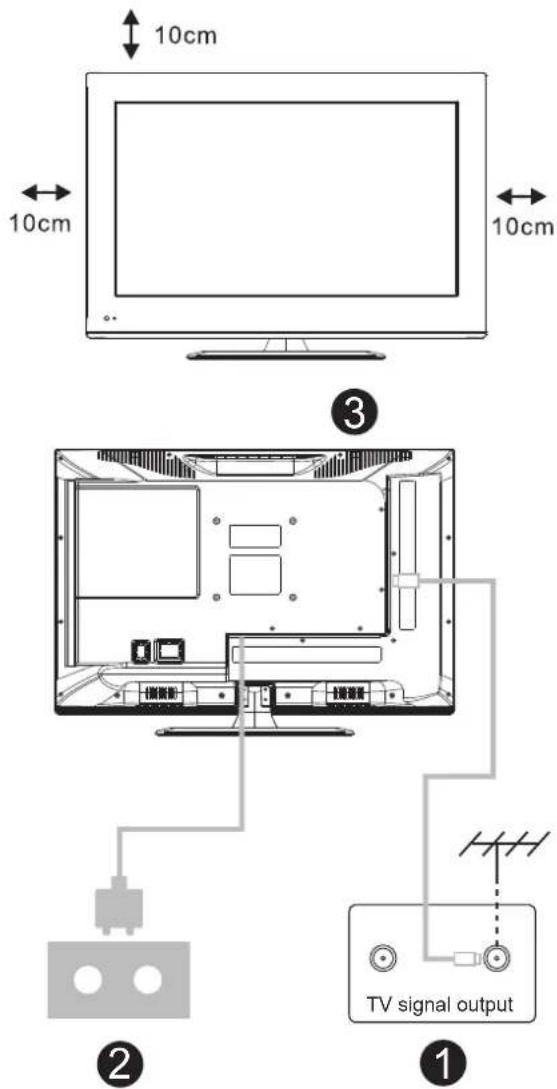
To put your TV in a firm place which can bear the weight of the TV.
To avoid danger, please don't expose the TV near water or heating place (such as light, candle, heating machine), do not block the ventilation at the back of TV.
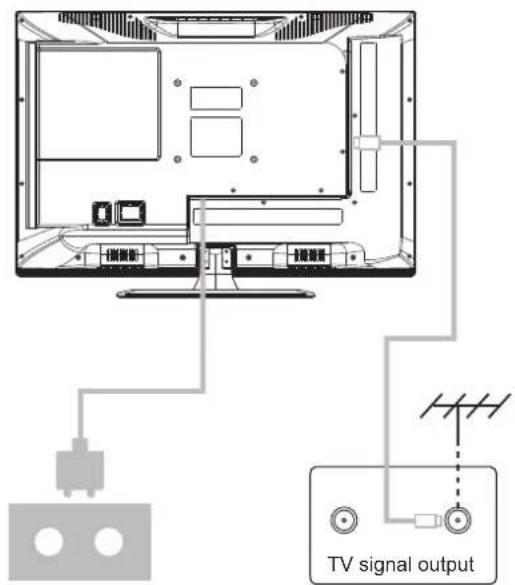
- Connect the antenna cable to the antenna socket on the back of the TV.
-
To plug the power cord of TV (AC 100-240V\~50/60Hz).
-
Press the power button of the TV the indication light will turn to green. if it is on standby mode (the light is red), press the power button on the remote control to turn on the TV.
Picture for reference purposes only.
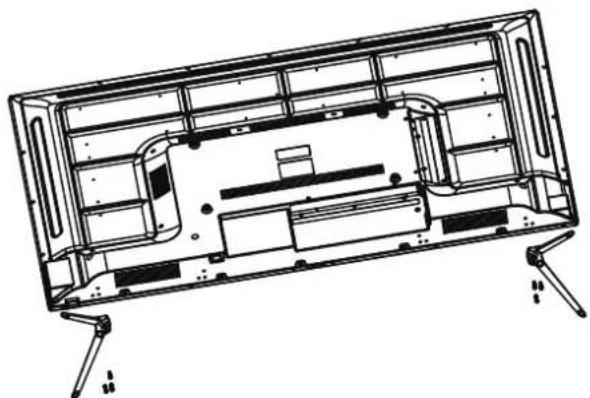
- Open the carton and remove the TV and scattered accessories and base (some models without base).
- to avoid the injury of the TV, covered with a soft mattress, put it on the table, face down on a soft mattress, the base of the neck is fixed on the TV with screws.
- screw the base and connected to the TV.
- the installation is complete.
Note:
Picture for reference purposes only.
Please prevail in kind
natural_image
Technical line drawing of a rectangular electronic device with internal components and mounting feet (no text or symbols)INSTALLATION OF THE SUPPORT
Setting up your TV
Place your TV in a firm place that can support the weight of the TV. To avoid any danger, please do not expose the TV to places with water or heat (such as lamps, candles, heating devices), or block ventilation on the back of the TV.
Connect the antenna and the power
-
Connect the antenna cable to the antenna socket on the back of the TV.
-
Connect the power cord to the TV (AC 100-240V \~ 50 / 60Hz).
Turn on the TV.
- Press the power button on the TV, the indicator light will turn green.
If it is in standby mode (the light is red), press the power button on the remote control to turn on the television.
Note: The image is provided only as a reference
INSTRUCTIONS FOR INSTALLING THE TELEVISION BASE
- Open the packaging and remove the accessories for mounting the base.
- To avoid possible damage to the TV, cover the base where you will work with a soft cloth and put the panel down to avoid breakage and scratches. The base is fixed to the TV with screws.
- Screw the base to the TV.
- The installation has finished.
Note: The image is provided for reference only.
INSTALLATION OF THE SUPPORT
Fixing the TV to the wall
- Spread a soft cloth over the surface of the table to avoid damaging the screen and place the TV on it.
- Use a screwdriver to unscrew the screws located at the bottom of the. Remove the bottom part of the base. Please remove the screws and the base carefully.
- Make the necessary marks for the cabbage, according to the dimensions indicated.
- Drill 4 holes of sufficient depth in the marks made on the wall. Place the support, insert the corresponding screws and fix the support by tightening the screws.
5 Tighten the screws on the back of the TV and hang the TV from the wall.
NOTA:
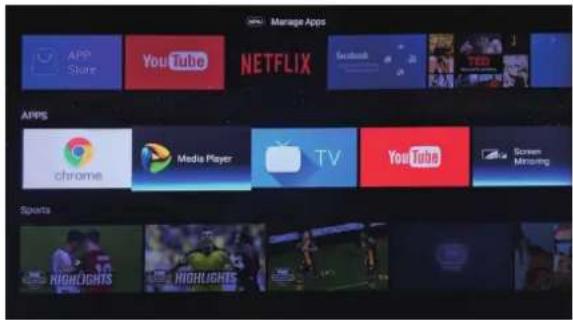
The Main Menu UI are as follow.
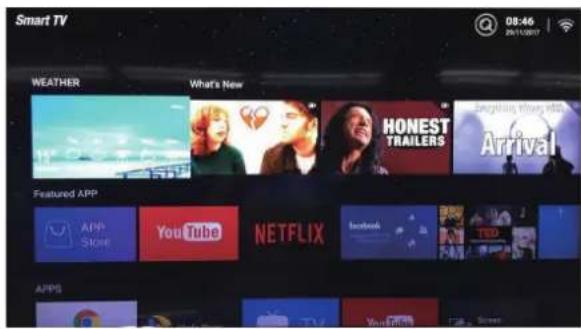
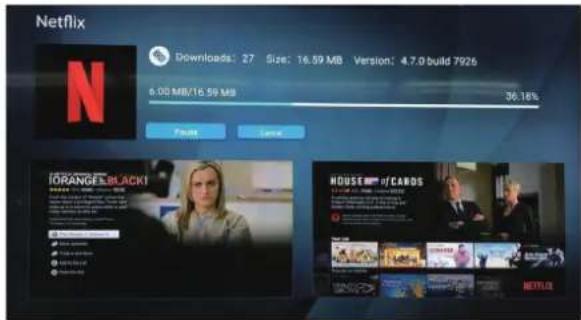
Input the signal, and select the input source.
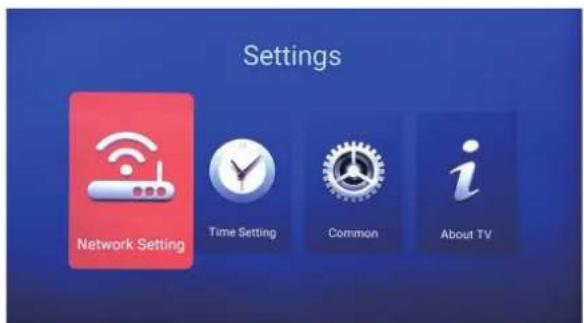
System Setting
Select the Setting in the Main Menu to enter the System Settings.
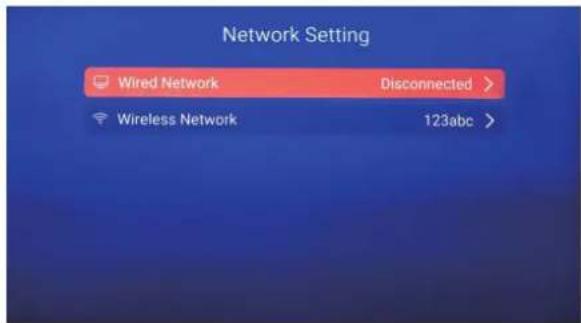
Network Setting
Select the wifi, and press the password to connect.
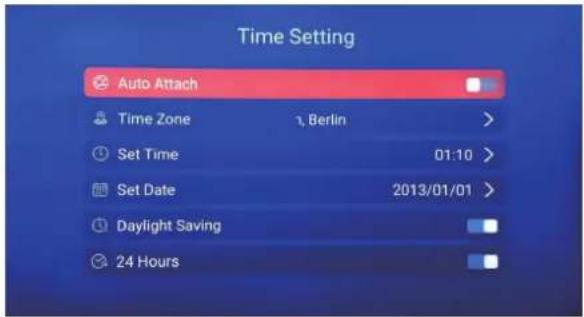
Time Setting
Au to At tach Get the current time and date automatically.
Time Zone Select the local time zone.
Set Time Choose to set the time.
Set Date Choose to set the date.
Daylight Saving Choose daylight saving time.
24 Hours Select the 12 hours or 24 hours.
Gommon
Press the to select the Common and set the common setting.
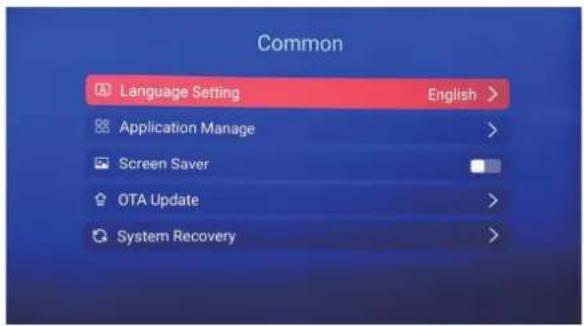
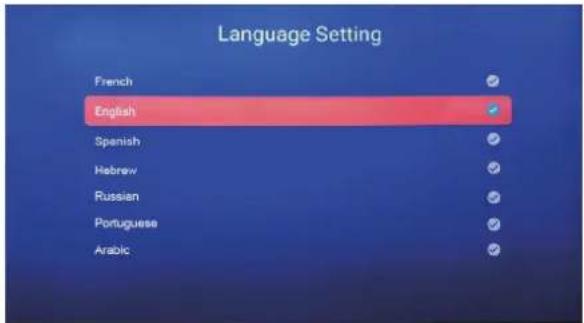
Language Setting
Select current display language.
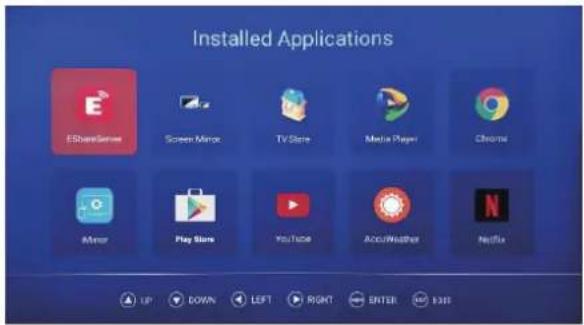
Application Manage
Set up management to install the application.
Screen Saver
Set to turn on or turn off screen saver.
OTA Update
Set system wireless update.
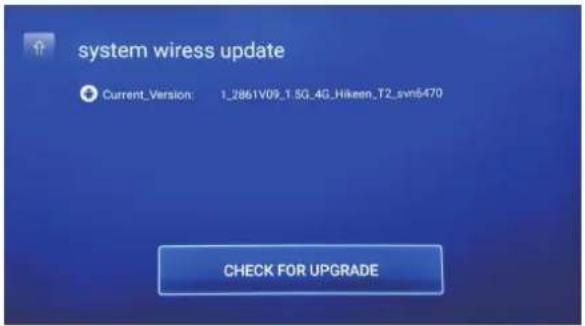
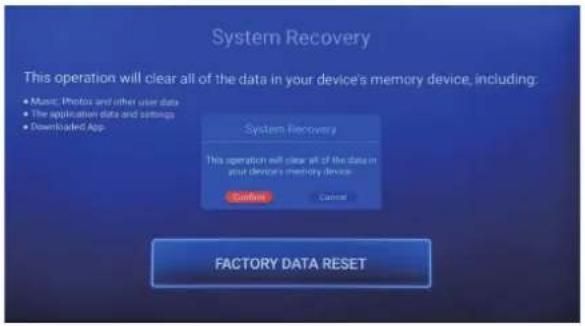
System Recovery
Recovery system to original state.
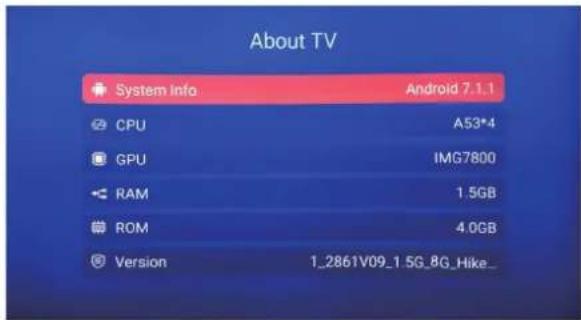
About
Information about the TV.
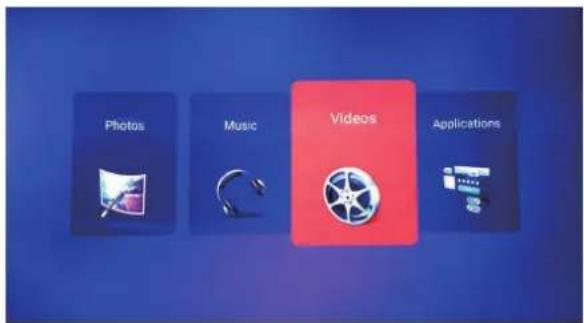
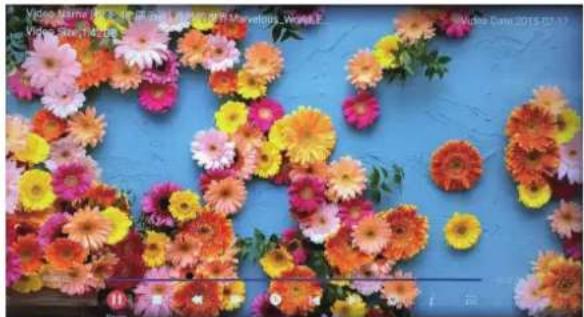
Multimedia
Press the Input to select Media source.
natural_image
Floral arrangement on a blue background with colorful flowers (no text or symbols visible)Music
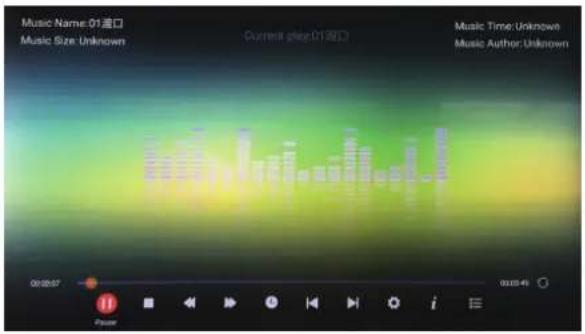
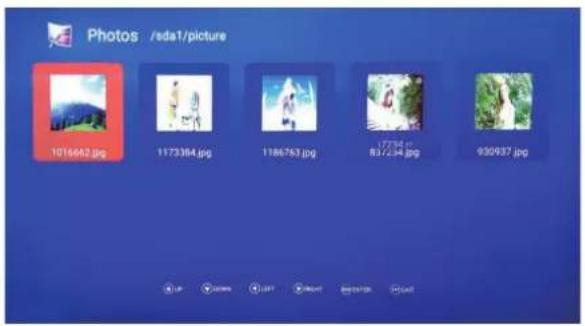
Photo
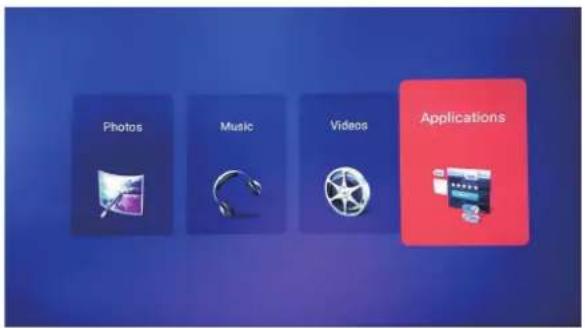
Applications
The picture is for a reference only; the actual item is the standard.
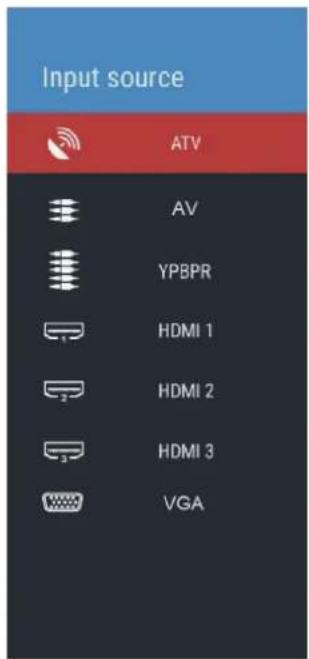
Input Source
Press INPUT button to enter input source
TV Setting
Press the button to enter the TV Setting elevated MENU
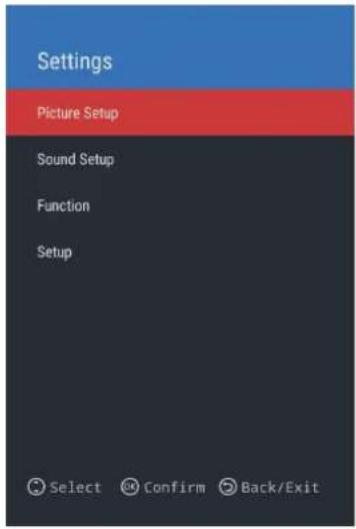
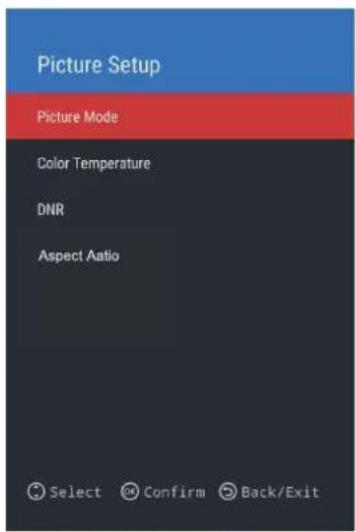
Picture Setup
Press the to set the picture setup.
Picture Setup MODE
Highlight the item and Press OK to enter the sub-menu, that shows the picture mode you can choose: Picture Mode/Color Temperature/ DNR/ Aspect Aatio.
Picture Mode Choose picture mode as Standard/ Dynamic/ Mild/ User.
Color Temperature Select the color temperature that you feel comfortable.
DNR Select the DNR as Off/ Low/ Middle/ High/ Auto.
Aspect Aatio Select the Cinema as Wide/ 4:3/ Auto/ Panorama.
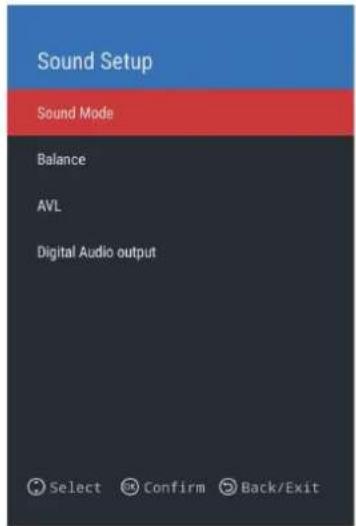
Sound Setup
Balance/ AVL/ Digital Audio output.
Sound Mode Select the sound mode as Standard/ Movie/Music/ User.
Balance Adjust the sound balance left and right.
AVL Select AVL On or Off.
Digital Audio output Set the digital audio output to Auto/ PCM/ Off.
Function
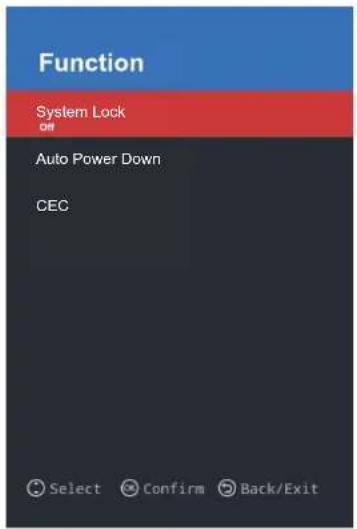
System Lock/ Auto Power Down/ ECE.
System Lock Select Set system lock On or Off.
Auto Power Down Choose to set the automatic shutdown as Off/ 1 hour/ 2 hour/ 4 hour.
CEC Select Set CEC menu HDMI Control/ Device auto power off/ TV auto power on/ HDMI system audio enable/ Speaker Prederence.
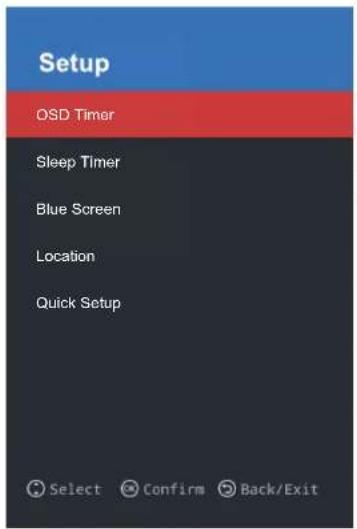
Setup
Blue Screen/ Location/ Quick Setup.
OSD Timer SChoose to set the OSD timer Off/ 10s/ 20s/ 30s/ 40s/ 50s/ 60s.
Sleep Timer SChoose to set the sleep timer Off/ 00:15/ 00:30/ 01:00/ 01:30/ 02:00/ 03:00.
Blue Screen Set the blue screen On or Off.
Location Set the location Home or Store.
Quick Setup Choose Set Quick Set button.
| No Power | Check the AC cord of TV is plus in or not. If still no power, please Pull out the plug and replug in after60 seconds. And open the TV again |
| Signal receive not properly | To cause double image or phantom if there has high building or high mountain round TV. You can adjust image effect by manually operation: consult instruction of vernier regulation or change the direction of external antenna.If you use the indoor antenna . under certain circumstance, receive will be more difficult .So you can change the direction of the antenna to adjust the image effect . If can't change image receiving effect either , you have to use external antenna. |
| No picture | Check the antenna at the back of TV is connected properly or not.Try to select other channels and check whether the TV problem itself or not |
| but,Video is ok without audio | Increase the volume.Check the TV is in mute mode or not , and please press the mute button to make sound resume. |
| but, Audio is ok color error or no picture. | Increase contrast and brightness. |
| snow statics picture and noise | Check the antenna at the back of TV is connected or not. |
| Level broken line | vacuum, such as hair drier, Maybe has electrical appliance interfere. please turn off these kinds of electrical appliance, cleaner and so on. |
| Image or-Dual "simulacrum" The TV no response with the Remote. | Perhaps the location for the antenna is not good.Use the tall beamed antenna can be improved quality of the display image.Operate the remote direct to the remote sensor on the TV.If still no response for the TV, please check if the plastic bag on the remote take or not. And check if the location for the battery is correct.Change the new battery.The TV will shift to the STAND BY if no response from the remote in the few minutes. |
| .NO Video In (PC Mode) | Please check if the display cable connect to the VGA correcte.Please check if there has the bend on the display cable. |
| Vertical twinkling (PC Mode) | Enter the main menu, Use the clock regulator for the Video display noise to eliminate the vertical line. |
| horizontal ripping (PC Mode) | Adjust the Audio sound horizontal in the main menu to clear the horizontal ripping line. |
| The screen is too bright or too dark (PC Mode) | Adjust the contrast ratio or brightness in the main menu. |
| PC Function no response | Check the computer setting in the state of compatible display resolution |
| Ripping line in RCA connecting | Please use good quality connecting cable. |
| Problem still exist | Unplug the power cable and wait for 30 seconds, then connect.If there is some problem with our TV, do not repair it by yourself, please contact with the customer service center. |
There will be complete picture and the brightness will come down if the TV is in: Note So please do not keep the TV in a state of same, the static picture for too long time Menu or same picture that has much difference in brightness and contrast ratio for too long time.
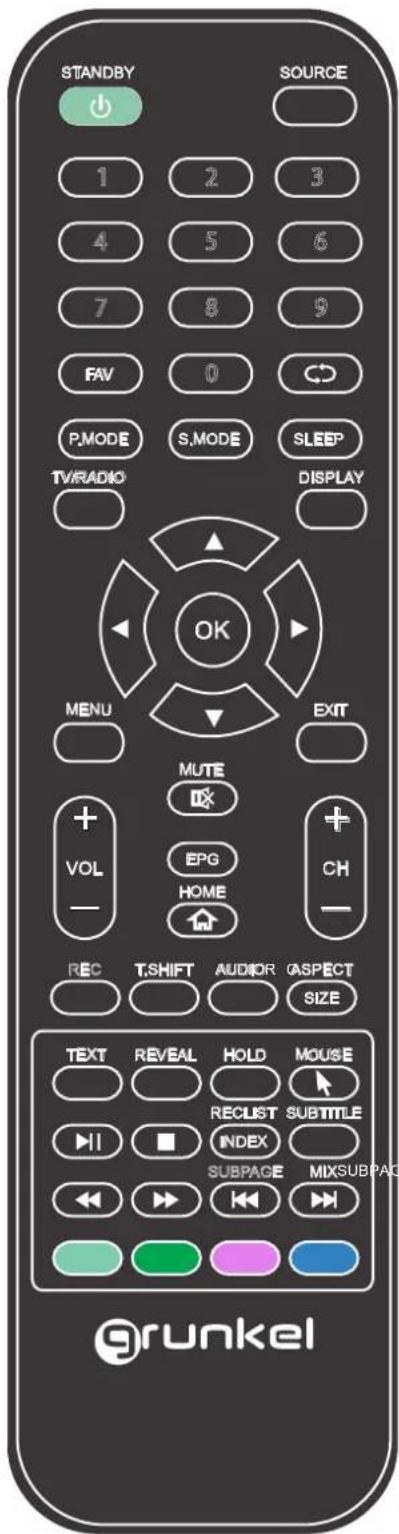
STANDBY:
Turn the TV ON or into standby mode.
SOURCE:
Press to open the source menu.
NUMBER BUTTONS :
Use 0-9 to select a Channel directly.
C D :
This button switches back and forth between the current and previous channel you watched.
FAV:
Press to display the favorite channel list which you stored before.
P.MODE:
Press to cycle through the available video picture modes.
SMODE:
Press to cycle through the different sound settings.
Sleep:
Select the automatic off time for your TV.
TV/RADIO:
In DTV mode select TV or RADIO mode.
DISPLAY:
Displays information on the Programme being currently viewed.
▲▼ ◀▶/OK:
Use to select on-screen menu items and change menu values
MENU:
Brings up the main TV menu to the screen.
EXIT:
To exit the current menu.
MUTE
Press to mute the sound. Press again or press V+ to unmute the TV.
VOL +/:-
Press to increase/decrease the sound level.
CH+/-:
Press to scan through channels.
EPG :
In DTV mode, press to show Electronic Program Guide menu.
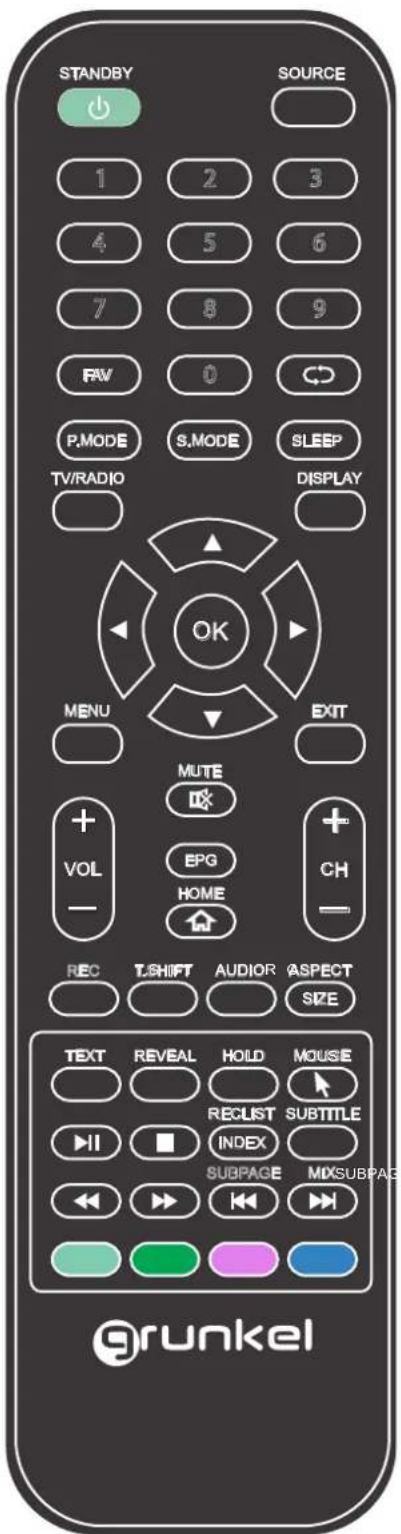
MEDIA:
Switch to MEDIA (USB) source.
REC:
In DTV mode, press to record.
T.SHIFT:
In DTV mode, press to execute the time shift function.
AUDIO:
DTV/MEDIA mode: select a background sound, if available. ATV mode: select a sound mode: Stereo/Dual I/II/Mono.
ASPECT/SIZE:
To select a display mode./ Double height rendering.
TEXT:
TV/Teletext select.
REVEAL:
Reveal any hidden text.
HOLD:
Hold or continue on text.
SUBPAGE:
Press this button to view the video textsub pages.
INDEX/R.LIST:
Displays RECORD LIST in DTV mode.
SUBTITLE:
Display the information of the digital channel you are viewing.
MIX:
TV and TXT pictures are mixed together on transparent background.
Colour & TELETEXT buttons :
Select preferred TELETEXT page.
Media control buttons

Stop in MEDIA mode or exit the REC or TIMESHIFT mode.

PLAY/PAUSE in MEDIA mode.

Jump to previous and next track in MEDIA mode.

Fast reverse and fast forward key inMEDIA mode.
Only operates when a compatible USB device is connected
grunkel
NORMAS DE GARANTIA
COINTER ELECTRONICA S.L.
Fax: 954 183 143
E-mail: tecnico@counter.com
GARANTIA
grunkel
COINTER ELECTRONICA S.L.
- Ajustes de sistema
- Content
- Safety Information 1
- Important Safety Precautions 2
- TV Buttons And Terminal Interface 3
- External device connection diagram 4
- Install And Connect TV 5
- Main Menu 6
- System Setting
- Multimedia
- Input 9
- TV
- Safety Information
- CAUTION
- Important Safety Precautions
- TV Buttons And Terminal Interface
- TV Buttons
- Install And Connect TV
- INSTALLATION OF THE SUPPORT
- INSTRUCTIONS FOR INSTALLING THE TELEVISION BASE
- NOTA:
- Network Setting
- Time Setting
- Gommon
- Language Setting
- Application Manage
- Screen Saver
- OTA Update
- System Recovery
- About
- Music
- Photo
- Applications
- Input Source
- TV Setting
- Picture Setup
- Picture Setup MODE
- Sound Setup
- Function
- Setup
- MEDIA:
- REC:
- T.SHIFT:
- AUDIO:
- ASPECT/SIZE:
- TEXT:
- REVEAL:
- HOLD:
- SUBPAGE:
- INDEX/R.LIST:
- SUBTITLE:
- MIX:
- Colour & TELETEXT buttons :
- Media control buttons
- grunkel
- NORMAS DE GARANTIA
- GARANTIA
Brand : Grunkel
Model : LED-504K SMT
Category : Television