JLR0602 - Washing machine Jocel - Free user manual and instructions
Find the device manual for free JLR0602 Jocel in PDF.


| Product Type | Washing Machine |
| Brand | Jocel |
| Model | JLR0602 |
| Load Capacity | 7 kg |
| Spin Speed | 1000 rpm |
| Dimensions (W x D x H) | 60 cm x 55 cm x 85 cm |
| Weight | 65 kg |
| Power Supply | 220-240 V, 50 Hz |
| Rated Power | 2000 W |
| Energy Efficiency Class | A+ |
| Wash Programs | Cotton, Synthetics, Delicates, Quick Wash, Eco, Wool, Hand Wash, Spin Only, Drain |
| Water Consumption per Cycle | 49 L |
| Noise Level (Wash/Spin) | 61 dB / 78 dB |
| Display Type | LED Digital |
| Delay Start | Yes (1-24 hours) |
| Child Lock | Yes |
| Overflow Protection | Yes |
| Drum Material | Stainless Steel |
| Heater Power | 1800 W |
| Included Accessories | Inlet Hose, Drain Hose, User Manual |
| Warranty | 2 Years |
Frequently Asked Questions - JLR0602 Jocel
User questions about JLR0602 Jocel
0 question about this device. Answer the ones you know or ask your own.
Ask a new question about this device
Download the instructions for your Washing machine in PDF format for free! Find your manual JLR0602 - Jocel and take your electronic device back in hand. On this page are published all the documents necessary for the use of your device. JLR0602 by Jocel.
USER MANUAL JLR0602 Jocel
Names of Parts----inside front cover
Matters Needing Attention----1-3
Installation----4-5
Control Panel----6
Operational Functions----6-7
During using
Program Selection----8
Preparation----9
Washing Methods----10-11
Other Function----12
Maintenance
Maintenance 13
Trouble Shooting----14
Wiring Circuit----15
Technical Specification----16
NamesofParts
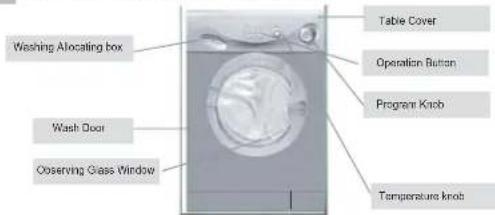
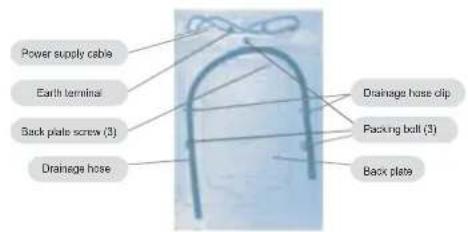
| CautionandWarningsymbols | |
| For your safety, any instructions in this manual with this "Warning" sign shall be strictly followed. | |
| For your safety and to prevent damages to the washing machine, any instructions in this manual with this "Stop" sign shall be strictly followed. | |
This diagram may vary slightly with the layout of the washing machine you have just purchased due to technical improvements.
MattersNeedingAttention
- Safety
1. A separate earthed socket is required for the power supply. After installation of the washing machine, the power plug should be accessible during the normal wash.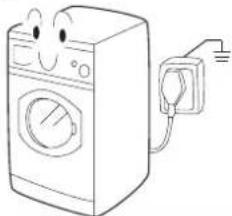  | 2. Hold the plug and not the electric cable when unplugging the washing machine.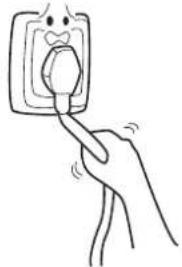 |
3. Fuses in the power circuit should be rated for 15A. Refer to a washing machine technician or a Haier designated service point for power cable replacement.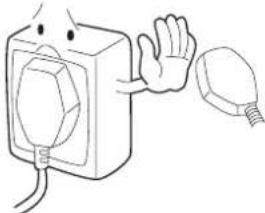  | 4. For your safety, dry hands before touching the washing machine and wear appropriate footwear .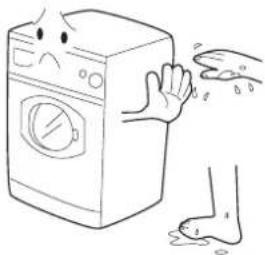  |
5. Do not use flammable detergent or dry cleaning agent; do not use flammable spray in close vicinity to the washing machine; do not remove or insert the plug in the presence of flammable gas.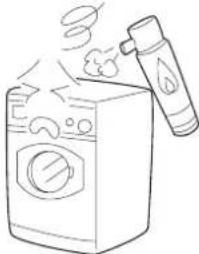  | 6. The door of the washing machine will become hot during the water heating process. Avoid contact with the door during the heating process. For safety, keep children away from the washing machine.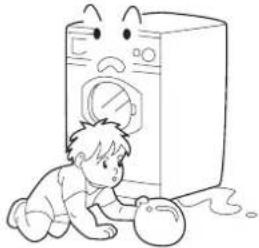  |
7. Do not allow children play with the packing materials after unpacking.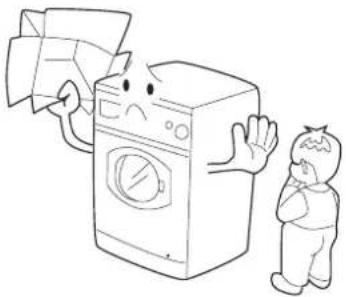  | |
MattersNeedingAttention
8. The washing machine must not be used in the open or in area of high moisture as water droplets may form on electrical components, Air dry the appliance if the washing machine components become wet.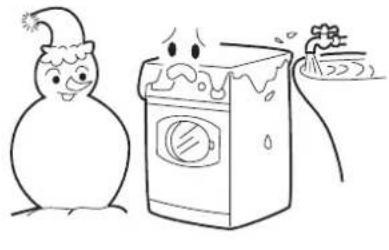 | 9. The washing machine should be place in a well ventilated area maintaining a space between walls or furniture.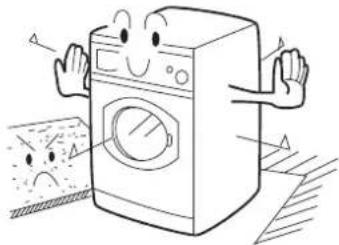  |
10. Keep away from heat sources and direct sunlight to prevent plastic and rubber components from aging.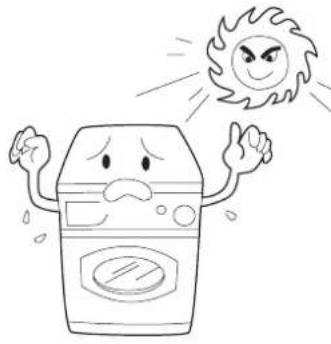 | 11. During installation, ensure that the electric cable is not trapped by the washing machine and avoid damage to the electric cable.Dear customer, For the machine and your own security, DO NOT REPAIR IT BY YOURSELF!DO NOT USE THE WASHING MACHINE WHICH SOME PARTS ARE LOST!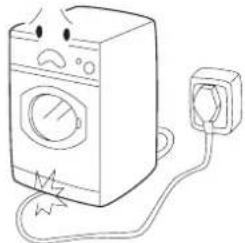  |
Use
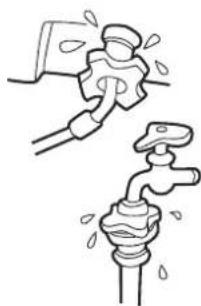
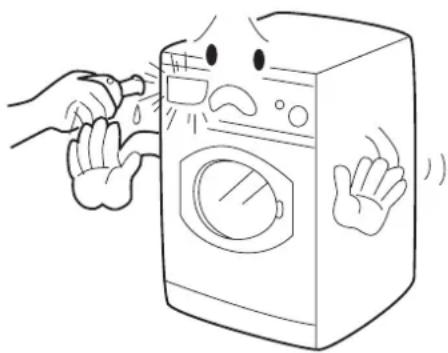
- Make sure that the washing machine is securely connected to the water supply, take the necessary precautions or contact the local service center if the connection is poor or there is a water leakage.
natural_image
Illustration of a hand washing a faucet with water droplets (no text or symbols)
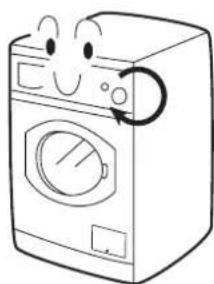
- After turning the power off, turn the program knob clockwise to set washing program.
natural_image
Simple line drawing of a washing machine with cartoon eyes and a scroll wheel (no text or symbols)
MattersNeedingAttention
3. Never place heavy objects ,a heating applianceor a water container on the top panel of the washing machine.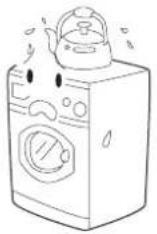  | 4. Do not wash foam rubber or similar sponge materials.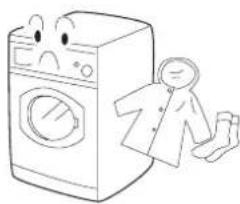  |
5. Before washing, do up zippers, buttons , laces and repair damaged areas,under- wear or small articals should be placed in the laundry bag or a pillowslip.Do not wash clothes containing wire frames.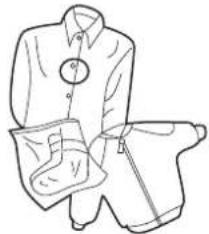  | 6. Do not open the detergent box during the wash cycle.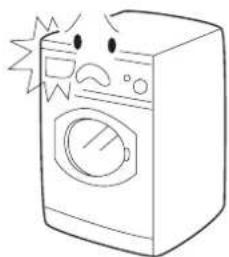  |
7. The door is fitted with a self-lock device and will not open until 2~3 minutes after the wash- ing machine stops. Do not force the door open. Do not open the door when water level reaches the port hole.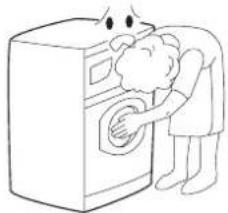  | 8. After washing, turn off the tap to prevent leakage; unplug the washing machine and wipe clean the lower part of the port hole.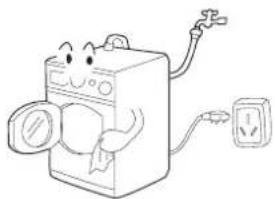  |
9. Keep the door slightly open when the washing machine is not being used. Never cover the machine with a plastic sheet.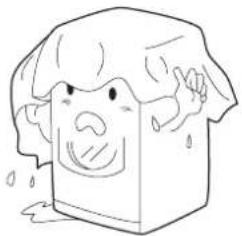  | |
Installation
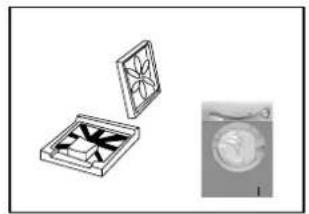
- As shown in figure1 remove all the packing materials (including the foam base). Upon opening of the package, water drops may be seen on the plastic bag and the porthole. This in normal phenomenon resulting from water test in the factory.
natural_image
Illustration of a box with internal blades and a separate close-up of a circular object labeled '1' (no text or symbols on the objects themselves)Fig 1
- Check attachments and materials.
| Qty\Model\Name | Operational manual | Quality certificate | Water hose | Drainage holder | Plastic plugs |
| HBF600T | 1 | 1 | 1 | 1 | 3 |
- Remove the packing screws as shown in figure 2.
The packing bolts protect the appliance from shock during transportation. The steps below should be followed before using the appliance,
- Remove the rear panel of the washing machine;
- Remove the three packing bolts from the rear panel of the washing machine, the rubber hose and then the shock absorption channel steel;
- Reinstall the back plate;
- Fill the holes left by the packing bolts with plastic plugs.
(Attention: the packing bolts and rubber hose should be kept in a safe place for later use)
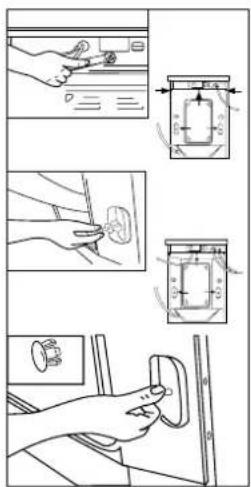
Fig 2
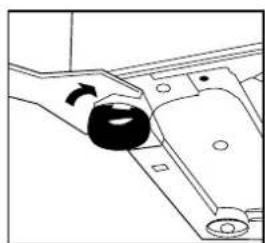
- Adjusting the position of the washing machine. There are adjustable feet under the bottom of the washing machine. Before use, the washing machine should be adjusted, as shown in figure 3, so that it is level.
natural_image
Mechanical component diagram showing a rotating knob and mounting bracket (no text or symbols)Fig 3
Installation
Connectionofwaterinlethoseandwashingmachine
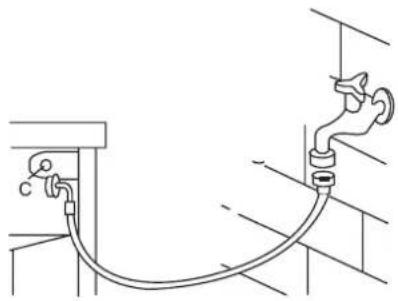
- Please connect the straight terminal of the inlet hose to the water tap and make sure to fasten it.
- Please connect the bended terminal of the inlet hose to the solenoid valve and make sure to fasten it.
NOTE: - Please be sure that the COLD inlet hose is connected with the solenoid valve for cold water (marked with "C") .
natural_image
Line drawing of a pipe connection with a faucet, no text or symbols presentWaterdrainagehose
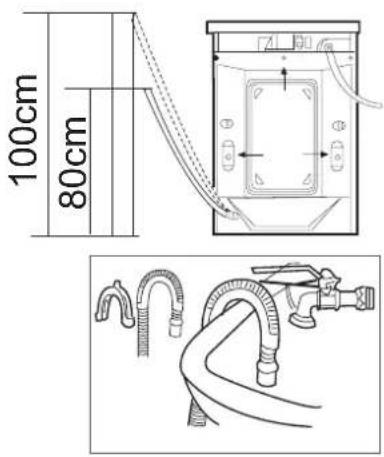
● The height of the terminal of the water drainage hose should be between 80cm-100cm, the water drainage hose must be securely placed on the clip on the back of the washing machine.
- Use the water drainage support supplied as an accessory for proper installation of the water drainage hose .fix the water drainage hose support with waterproof sring.Do not use an excessively long water drainage hose and contract the authorized technician if the water drainage hose needs to be extended.the water drainage hose should not be extended more than250cm.(longer extension will result in concurrent water inflow and outflow).The diameter of the extension hose should be the same as the original hose.
caution:water drainage hose must not be immersed in water.the original and extension hoses should be tightly connected.
Connectionofpowersupply
Check the following items before connection to the power supply.
● The socket conforms to the maximum power load(The maximum current load of the socket and power supply cable should not be less than 15A).
● Power supply voltage conforms to the required value.
● The power supply socket and the plug of the washing machine compatible, if they are compatible, Refer to a washing machine technician or a Haier designated service point for power cable replacement. The washing machine should be connected to an earth before use.
● Supplementary earth cable should not be necessary if the socket is connected to the earth.
● Supplementary earth cable should be installed on the upper back of the washing machine and connected to an earth if the power supply socket has no earth connection.
ControlPanel
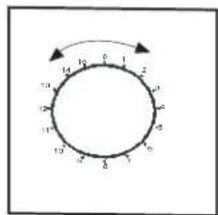
A Washing program
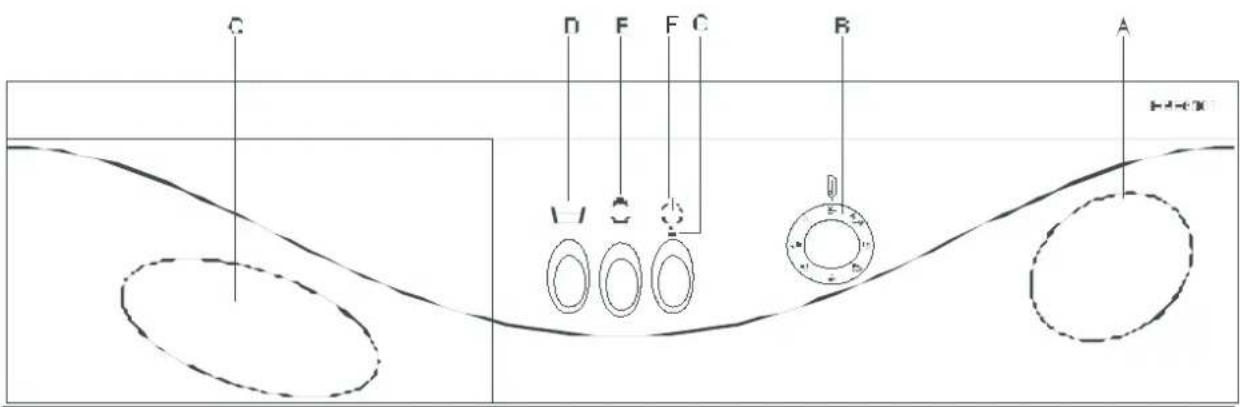
Turn the knob to set the desired wash program.
Caution: Turn the knob at "0", then turn off the power and turn the program knob for setting desired wash program.
The program knob will not rotate with the programmed washing process.
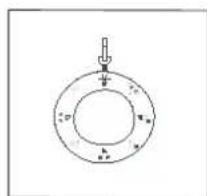
B Washing temperature
Turn the knob to set the desired temperature.
Temperatures between 30^ C- 90^ C can be setted, No heating wash is selected when the knob is set at *.
natural_image
Simple line drawing of a circular mechanical component with a downward arrow and internal markings (no text or symbols)OperationalFunctions
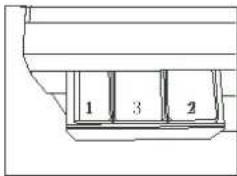
C Detergent distributor
Program discription are printed on the handle of the detergent distributor, there are three detergent compartments numbered 1,2,3 Box 1: Pre-washing detergent Box 2: Standard washing - extra-fast washing Box 3: Softening agent, adjusting agent, perfume
D Soak Button
For the synthetics cycle and the wool cycle, push the button down, the anticrease funtion wil I be skipped and automatically enter into the next step; Release the button, the anti-crease funtion will work again.

E Economic Wash button
It reduces water and power consumption when rinsing if the machine does not have a full load.
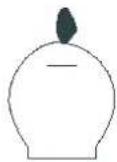
Note: Select this function when "Cotton" "Synthetics", "Wool" or "Silk" (programs 1-12) is selected.
F Power button
Press the button, washing machine will working; release the button, the washing machine will stop.
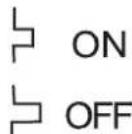
G Door light
The light will illuminate when the door is locked.

ProgramSelection
HD600TXE/HD600SWE/HD600GE
| Program Setting Laundry Temperature | Detergent | ||||||
| Comp.1 prewash detergent | Comp.2 detergent | Comp.3 softener. | |||||
| Cotton | 1 | Intense | Very heavy soil | * -30-40-50-60 -70-80-90 | ★ | ★ | ○ |
| 2 | Prewash | Heavy soil | * -30-40-50-60 | ★ | ★ | ○ | |
| 3 | Normal | Soiled cotton | * -30-40-50-60 | X | ★ | ○ | |
| 4 | Middle | Non-fade and medium soiled cotton | * -30-40 | X | ★ | ○ | |
| 5 | Delicate | Fading and medium soiled cotton | * | X | ★ | ○ | |
| Synthetic | 6 | Normal | Non-fade heavily soiled chemical fiber | * -30-40-50-60 | X | ★ | ○ |
| 7 | Middle | Non-fade and medium soiled chemical fiber | * -30-40 | X | ★ | ○ | |
| 8 | Delicate | Fading and medium soiled chemical fiber | * | X | ★ | ○ | |
| Wool | 9 | Normal | Non-fade heavily soiled woolen fabrics | * -30-40 | X | ★ | ○ |
| 10 | Delicate | Fading and medium soiled woolen fabrics | * | X | ★ | ○ | |
| Silk | 11 | Normal | Non-fade heavily soiled silk fabrics | * -30 | X | ★ | ○ |
| 12 | Delicate | Fading and medium soiled silk fabrics | * | X | ★ | ○ | |
| 13 | Quick | Medium-soiled lanudry | * -30 | X | ★ | ○ | |
| 14 | Rinse | * | X | X | ○ | ||
| 15 | Spin | * | X | X | X | ||
| 0 | End | Turn the program knob at "0" position and turn off the power. The wash program ends and the washing machine stops operation. | |||||
NOTE: " " means softener liquid detergent can be added when necessary.
" " means detergent can be added when necessary.
" " means no detergent can be added.
Preparation
| 1.PowersupplyPlug in the power supply220V~240V/50Hz. | 2.WatersupplyTurn on the tap ensure that the water is clear.Caution: Before staring the washing machine turn on the water faucrt to ensure that the water faucet and the water inlet hose are connected correctly and do not leak. |
| 4.DetergentselectionOnly special low foam detergent should be used in automatic drum washing machine, form blended or wool fabrics special detergent should be used. dry cleaning solvent should not be used such as trichloroethylene or alike (caution :load the required amount of detergent only). | 3.Laundrytreament● sort out clothes according to type and extent of dirt.There are three types of clothes: cotton, synthetical and woolen (silk) fabrics.● separate white clothes from colored. If whites and coloreds are combined for one load, make sure the coloreds are colorfast.-Remove all objects from pockets that may cause damage to the machine, such as keys and coins.-Clothing with frayed edges or yarns should be put in a wash bag or special bag before washing.-Repare damaged clothing,lose buttons or damaged zips and hooks before washing.-Bed sheets and table ware should be loosely loaded and not folded.● This washing machine is for household use and designed for mechanically washable clothes. When washing, separate unwashable clothes with reference to clothes labels. |
5.WashLoad
| Type | Non-fade cottons | Delicate fabrics | Woolen fabrics | Blending fabrics |
| Max load | 5kg | 2kg | 1kg | 2.5kg |
WashingMethods
1. Laundryloading
Evenly load the laundry in the washing machine and then tightly close the door of the washing machine
Note: 1) When first using the washing machine, let it run unloaded for one program to prevent the laundry from being tainted by oil or dirty water from the washing machine. 2) Do not overload the washing machine.
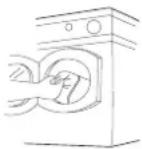
Reference loading
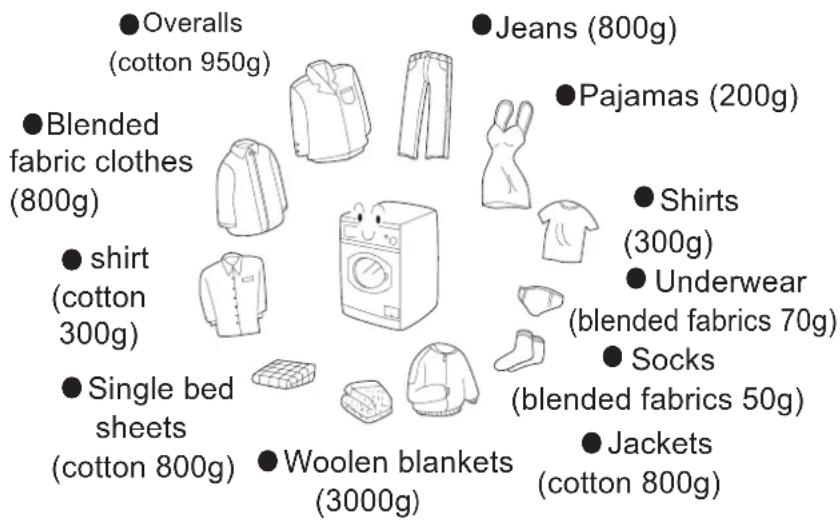
other
| Category | Value | |---|---| | Overalls (cotton) | 950g | | Jeans (cotton) | 800g | | Pajamas (cotton) | 200g | | Shirts (cotton) | 300g | | Underwear (blended fabrics) | 70g | | Socks (blended fabrics) | 50g | | Jackets (cotton) | 800g | | Woolen blankets (cotton) | 3000g | | Single bed sheets (cotton) | 800g | | shirt (cotton) | 300g | | Blended fabric clothes (cotton) | 800g | | Blended fabric clothes (cotton) | 200g |2. Useofdetergent
Pull out the detergent drawer, put required detergent, softening agent and bleaching agent into the corresponding boxes. Push back the drawer gently.
Caution: 1) Do not add liquid detergent into box 1 and 2
2) For pre-washing program, detergent should be added to both box 1 and 2; for other programs, do not add detergent to box 1
3) Do not overuse softening agent as this may damage artificial fabrics.
natural_image
Illustration of a hand cleaning a washing machine with expressive faces (no text or symbols)3. Washingprogramsetting
Set the wash program correctly in accordance with the laundry load. The methods for setting wash programs are indicated on the handle of the distributor on the washing machine. Turn the program knob to the desired program.
Caution: If you want to choose another program, first turn the program knob at "0", then turn off the power and turn the program knob for setting desired program.
WashingMethods
4. WashingtemperatureSetting
Set the washing temperature as required, otherwise, set at position * when heating is not needed.
5. Selecting the function button
Select function buttons as required (refer to the directions printed on the control panel), otherwise keep all the button released.
6.Washing
Press the power button and the washing machine will automatically commence the programmed washing process.
Caution: The program knob will not rotate with the programmed washing process.
7.End
Wait 2-3 minutes after the washing process is finished, press the power button again to cut off the power supply. Open the door to take out the laundry. Turn off the tap and unplug the washing machine.
Caution: When the washing program finishes, the door lock light will glitter before the door can be opened.
Additionalinformation
Energyandwatersavingduringwashprocess
- Collect clothes for one full wash load.
- Do not overload the washing machine.
- Prewash heavily soiled clothes.
- Reduce the amount of detergent or choose fast or minimal washing programs for lightly soiled clothes dirty.
- Choose a proper washing temperature. Only exceed 60 °C for heavily soiled clothes.
- Do not use more detergent than required.
- Softening agent makes clothes feel softer and easier to iron.
OtherFunctions
1. Power-off memory function:
This machine has a power-off memory function. In case of abrupt power failure or the power must be cut off during a program cycle, the present settings will be saved, and operation will resume when the power is switched on again.
2. Trouble messages: judge the malfunctions from door lock light
Error 1: The door lock light does not illuminate.
Cause: Door is not properly shut.
Correction: Shut the door properly.
Error 2: The door lock light glitters 2 times and stops 4 seconds repeatedly.
Cause: Drainage error, water not emptied within 4 minutes.
Correction: Clean the filter and check the drain hose for blockage. If error still exists, please contact the maintenance personnel.
Error 3: The door lock light glitters 3 times and stops 4 seconds repeatedly.
Cause: Temperature sensor not properly connected or damaged.
Correction: Contact the maintenance personnel.
Error 4: The door lock light glitters 4 times and stops 4 seconds repeatedly.
Cause: Heating coil damage or overload of laundry that leads to a failure to reach the set temperature within the specified time (This message is display at the end of a program).
Correction: Reduce load and then start washing again or contact the maintenance personnel.
Error 5: The door lock light glitters 5 times and stops 4 seconds repeatedly.
Cause: Water level not met in 8 minutes.
Correction: Make sure that tap is turned on, and water pressure is normal.
If problem still exists, please contact the maintenance personnel.
Error 6: The door lock light glitters 6 times and stops 4 seconds repeatedly.
Cause: Timing control silicon damage.
Correction: Contact the maintenance personnel.
Error 7: The door lock light glitters 7 times and stops 4 seconds repeatedly.
Cause: Motor overheat protection or damage.
Correction: Contact the maintenance personnel.
Error 8: The door lock light glitters 8 times and stops 4 seconds repeatedly.
Cause: Water exceeds protective level.
Correction: Contact the maintenance personnel.
Maintenance
| 1. Turn of the water and electricity supply after every wash. Open the door to prevent the formation of moisture and odors. If the washing machine is left idle for a long period, drain any remaining water in the machine and replace the drainage hose. | 2. Unplug the machine during cleaning and maintenance. Use a soft cloth dampened with soapy liquid to clean the machine case and rubber components. Do not use corrosive or abrasive chemicals or solvents. | |
4.Cleaning the Filter(once a month)Press the lower edge of the filter compartment cover to open;(Fig1-2)Remove the filter by turning counterclockwise; (Fig3)Flash clean with running water;Filter replacement is the reverse of removal.Caution:Attention shall be paid to ensure that the filter is replaced correctly to avoid possible leakage.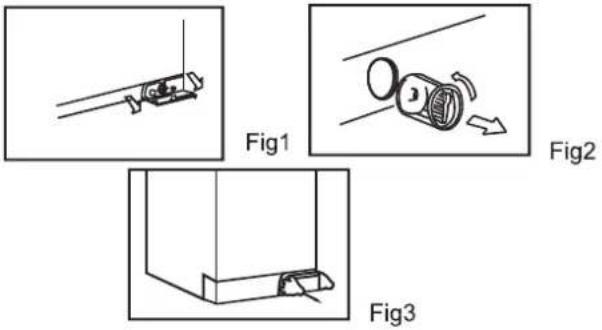 | 4. To prevent blockages to the water supply or the ingress of contaminants,clean the water inlet and inlet water filter regularly.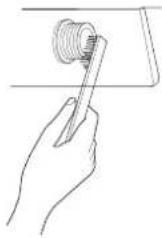 | |
| 6. If the washing machine is left idle for a long period turn off the water and electricity supply and open the door slightly to prevent the formation of moisture and odors. | 5. If the machine is to be moved a distance location,replace the vibration mounting locks which were removed during installation as shown below.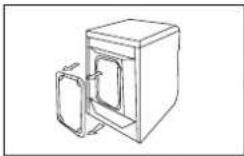 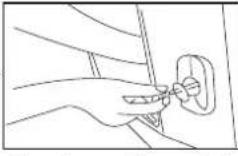 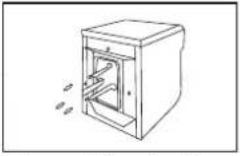 Remove the back cover. Replace the rubber plugs. Remove the back cover. Replace the rubber plugs.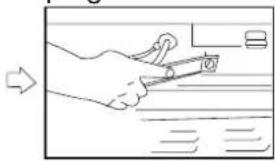 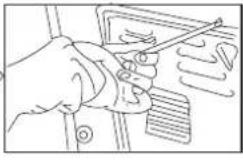 Tighten the bolts with a spanner. Replace the back cover. Tighten the bolts with a spanner. Replace the back cover. | |
Troubleshooting
| The following circumstances do not constitute problems. Do not contact the maintenance service until the problem has been confirmed. | |
| Problem | Possible Cause |
| The washing machine fails to operate | ● Poor connection to power supply● Power failure● Door is not properly closed● Machine has not been switched on |
| Washing machine does not fill with water | ● Water is not turned on● Water pressure is less than 0.03MPa● The inlet hose is kinked● Water supply failure● The program knob is not properly set● The door is not properly closed |
| The water supply and drainage do not stop | ● Check that the height of the water hose is below 80cm |
| Drainage failure | ● Drainage hose is blocked● Drainage hose end is below 100cm above the floor level |
| Strong vibration during spin | ● Some packing fixing bolts removed● Washing machine on a uneven surface |
| Operation stops before completion of the wash cycle | ● Water or electricity failure |
| Excessive foam in the drum | ● The detergent is not a low foam type Excessive detergent has been used |
TechnicalSpecification
| Model Item | |
| Power supply | 220V~240V/50Hz |
| Maximum working current (A) | 15 |
| Water pressure (MPa) | 0.03 R≤1 ≤ |
| Washing power (W) | 230 |
| Spinning power (W) | 340 |
| Max. washing load (kg) | 5 |
| Spinning speed (r/min) | 600 |
| Washing program | 15 |
| Maximum power (W) | 2000 |
| Size (mm) | 850x520x595 |
| Net W eight (kg) | 65 |
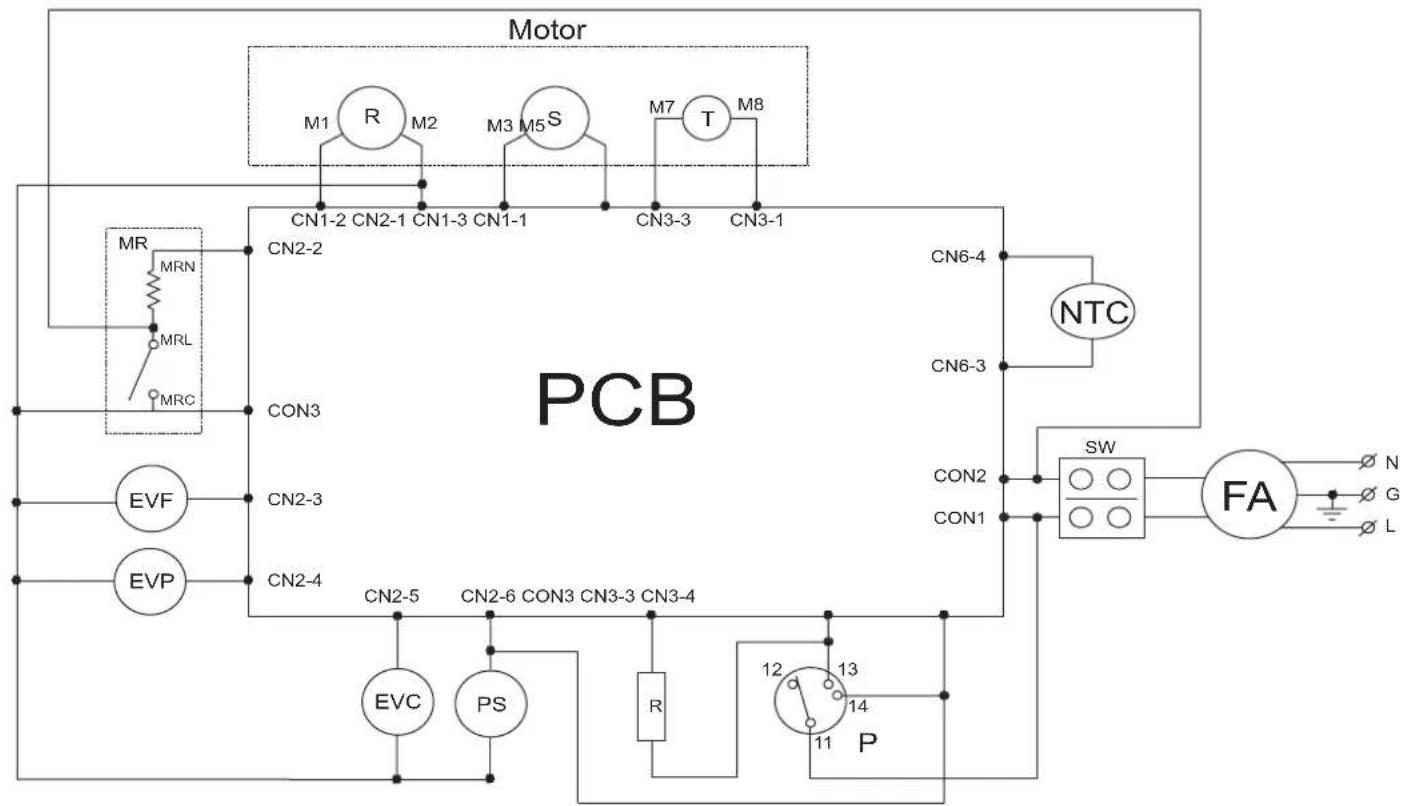
WiringCircuit
flowchart
graph TD
    Motor["Motor"] --> M1["M1"]
    Motor --> M2["M2"]
    Motor --> M3["M3"]
    Motor --> M5["S"]
    Motor --> M7["M7"]
    Motor --> M8["M8"]
    M1 --> CN1-2["CN1-2"]
    M2 --> CN2-1["CN2-1"]
    M3 --> CN1-3["CN1-3"]
    M4 --> CN1-1["CN1-1"]
    M5 --> CN3-3["CN3-3"]
    M6 --> CN3-1["CN3-1"]
    M7 --> CN3-3
    M8 --> CN3-1
    M9["MR"] --> MRN["MRN"]
    MRN --> MRL["MRL"]
    MRL --> MRC["MRC"]
    EVF["EVF"] --> CN2-4["CN2-4"]
    EVP["EVP"] --> CN2-4
    CN2-4 --> CN2-5["CN2-5"]
    CN2-5 --> CN2-6["CN2-6"]
    CN2-6 --> CN3-3["CN3-3"]
    CN2-6 --> CN3-4["CN3-4"]
    CN2-5 --> CN2-6
    CN2-6 --> CN3-3
    CN2-6 --> CN3-4
    CN2-5 --> EVC["EVC"]
    CN2-6 --> PS["PS"]
    CN2-6 --> R["R"]
    CN2-6 --> P["P"]
    NTC["NTC"] --> SW["SW"]
    SW --> FA["FA"]
    FA --> N["N"]
    FA --> G["G"]
    FA --> L["L"]
PCB-Printed Circuit Board
MR-Door Lock
PS-Drain Pump
EVP,EVF-Cold water Valve
FA-Interference Suppressor
SW-Power Switch
Motor-Motor
R-Heating Element
P-Pressure Switch
EVS-Hot Water Valve
NTC-Temperature Sensor
Motor-Motor
- During using
- Maintenance
- NamesofParts
- MattersNeedingAttention
- - Safety
- Use
- Installation
- Connectionofwaterinlethoseandwashingmachine
- Waterdrainagehose
- Connectionofpowersupply
- ControlPanel
- A Washing program
- B Washing temperature
- OperationalFunctions
- C Detergent distributor
- D Soak Button
- E Economic Wash button
- F Power button
- G Door light
- ProgramSelection
- Preparation
- WashingMethods
- Laundryloading
- Useofdetergent
- Washingprogramsetting
- WashingtemperatureSetting
- Selecting the function button
- 6.Washing
- 7.End
- Additionalinformation
- Energyandwatersavingduringwashprocess
- OtherFunctions
- Power-off memory function:
- Trouble messages: judge the malfunctions from door lock light
- Troubleshooting
- TechnicalSpecification
- WiringCircuit
Brand : Jocel
Model : JLR0602
Category : Washing machine