
F8012N - Digital photo frame LG - Free user manual and instructions
Find the device manual for free F8012N LG in PDF.


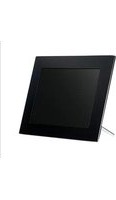
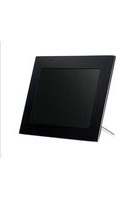
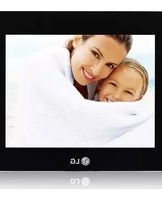
| Product Type | Digital Photo Frame |
| Brand | LG |
| Model | F8012N |
| Display Size | 8 inches |
| Display Resolution | 800 x 600 pixels |
| Aspect Ratio | 4:3 |
| Internal Memory | 1 GB |
| Memory Card Slot | SD / MMC |
| Supported Image Formats | JPEG, BMP, PNG |
| Supported Video Formats | Motion JPEG (AVI) |
| Power Source | AC Adapter (DC 5V 2A) |
| Power Consumption | Approx. 10 W |
| Dimensions (W x H x D) | 200 x 150 x 20 mm |
| Weight | 0.5 kg |
| Material | Plastic with acrylic lens |
| Mounting Options | Desktop stand |
| Clock & Calendar | Yes |
| Slideshow Modes | Fade, dissolve, random |
| Remote Control | Included |
| Cleaning Instructions | Wipe with a soft, dry cloth |
| Safety Precautions | Avoid exposure to moisture and extreme temperatures |
| Spare Parts Availability | Contact LG service center |
| Repairability Index | Not rated |
Frequently Asked Questions - F8012N LG
User questions about F8012N LG
0 question about this device. Answer the ones you know or ask your own.
Ask a new question about this device
Download the instructions for your Digital photo frame in PDF format for free! Find your manual F8012N - LG and take your electronic device back in hand. On this page are published all the documents necessary for the use of your device. F8012N by LG.
USER MANUAL F8012N LG
Digital Photo Frame User's Guide
F8012N
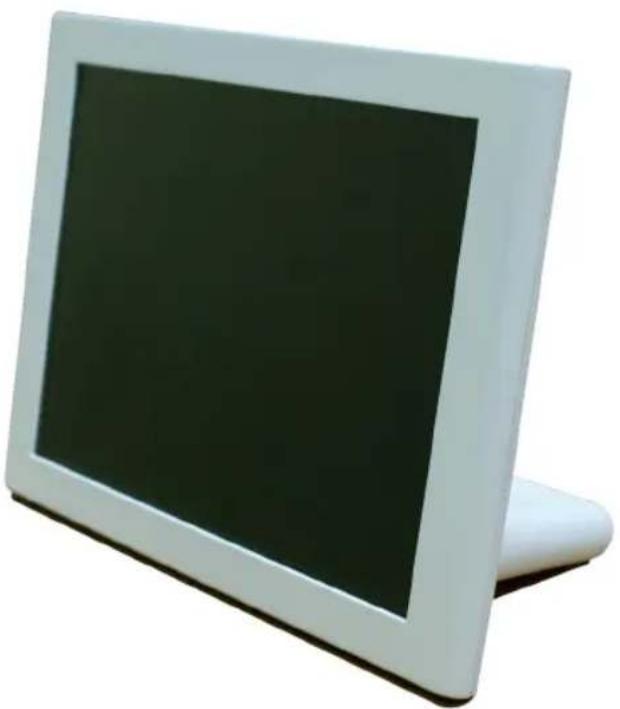
Make sure to read the Important Precautions before using the product.
Keep the User's Guide (CD) in an accessible place for future reference.
See the label attached on the product and give the information to your dealer when you ask for service.
Table of Contents
Preparation and Installation / Connection
Important Safety Precaution 1
Composition of product 3
Accessories 3
Names of parts 4
Remote Control Button Names and Functions 6
Remote Controller Sensor / Replacing the Remote Control Battery 7
Installation and connection of product 8
Installing Type / Connecting Power Cord 8
Connecting USB / Connecting Memory card 9
Menu and Functions
Before beginning 11
Setting / Key-Help 11
HomeMenu 12
Screen composition and buttons 12
Slide Show 13
Playing photo and slide show menu 13
Music 15
Playing music 15
Playing screen composition and buttons 16
Video 17
Playing video 17
Playing screen composition and buttons 18
File management 19
Screen composition and buttons 19
File management menu 20
File copy/delete / Selecting all file/Canceling all file 21
Setup 22
Power On Message function 24
Appendix
Troubleshooting 25
Specifications 27
Service information 28
Digital Photo Frame
Important Safety Precaution
This unit has been engineered and manufactured to ensure your personal safety, however improper use may result in potential electrical shock or fire hazards. In order to allow the proper operation of all safeguards incorporated in this display, observe the following basic rules for its installation, use, and service.
On Safety
Use only the power cord supplied with the unit. In case you use another power cord, make sure that it is certified by the applicable national standards if not being provided by the supplier. If the power cable is faulty in any way, please contact the manufacturer or the nearest authorized repair service provider for a replacement.
The power supply cord is used as the main disconnection device. Ensure that the socket-outlet is easily accessible after installation.
Operate the display only from a power source indicated in the specifications of this manual or listed on the display. If you are not sure what type of power supply you have in your home, consult with your dealer.
Overloaded AC outlets and extension cords are dangerous. So are frayed power cords and broken plugs. They may result in a shock or fire hazard. Call your service technician for replacement.
As long as this unit is connected to the AC wall outlet, it is not disconnected from the AC power source even if the unit is turned off.
Do not open the display:
■ There are no user serviceable components inside. ■ There are dangerous high voltages inside, even when the power is OFF. ■ Contact your dealer if the display is not operating properly.
To avoid personal injury:
■ Do not place the display on a sloping shelf unless properly secured. ■ Use only a stand recommended by the manufacturer. ■ Do not drop an object on or apply impact to the product. Do not throw any toys or objects on the product screen. This can cause personal injury and/or damage the product.
To prevent fire or hazards:
■ Always turn the display OFF if you leave the room for more than a short period of time. Never leave the display ON when leaving the house. ■ Keep children from dropping or pushing objects into the display's cabinet openings. Some internal parts carry hazardous voltages. ■ Do not add accessories that have not been designed for this display. ■ When the display is to be left unattended for an extended period of time, unplug it from the wall outlet. ■ Never touch the power cord during periods of thunder and lightning. This can be very dangerous and can cause electric shock.
On installation
Do not allow anything to rest upon or roll over the power cord, and do not place the display where the power cord is subject to damage.
Do not use this display near water such as near a bathtub, washbowl, kitchen sink, laundry tub, in a wet basement, or near a swimming pool.
Displays are provided with ventilation openings in the cabinet to allow the release of heat generated during operation. If these openings are blocked, built-up heat can cause failures which may result in a fire hazard. Therefore, NEVER:
■ Place the display in a built-in enclosure unless proper ventilation is provided. ■ Place the display near or over a radiator or heat source.
Do not rub or strike the Active Matrix LCD with anything hard as this may scratch, mar, or damage the Active Matrix LCD permanently.
Do not press the LCD screen with your finger for a long time as this may cause some afterimages.
Some dot defects may appear as Red, Green or Blue spots on the screen. However, this will have no impact or effect on the display performance.
Leaving a fixed image on the screen for a long time may cause damage to the screen and cause image burn-in. Make sure to use a screen saver on the product. Burn-in and related problems are not covered by the warranty on this product.
Make sure the panel faces forward and hold it with both hands to move. If you drop the product, the damaged product can cause electric shock or fire. Contact an authorized service center for repair.
Avoid high temperatures and humidity.
On Cleaning
■ Unplug the display before cleaning the face of the display screen. - Use a slightly damp (not wet) cloth. Do not use an aerosol directly on the display screen because over-spraying may cause electrical shock. - When cleaning the product, unplug the power cord and scrub gently with a soft cloth to prevent scratching. Do not clean with a wet cloth or spray water or other liquids directly onto the product. An electric shock may occur. (Do not use chemicals such as benzene, paint thinners or alcohol) - Spray water onto a soft cloth 2 to 4 times, and use it to clean the front frame; wipe in one direction only. Too much moisture may cause staining.
![graph LR A["WATER"] --> B["User with a brush and plug"] B --> C["Device with a hand holding a pen"] C --> D["Product with chemical bottles"] D --> E["Product with chemical bottles"] E --> F["Product with chemical bottles"]](/content/2026/05/968573/images/265c025bf5c982b2b4694745357dae2d12f1ac445741303f4e8d9fbc42876e95.jpg)
On Repacking
- Do not throw away the carton and packing materials. They make an ideal container in which to transport the unit. When shipping the unit to another location, repack it in its original material.
On Disposal
■ The fluorescent lamp used in this product contains a small amount of mercury. ■ Do not dispose of this product with general household waste. ■ Disposal of this product must be carried out in accordance to the regulations of your local authority.
Composition of product
Accessories
■ Check the accessories.
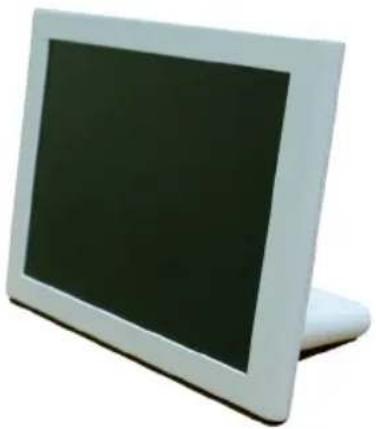
Digital Photo Frame
Remote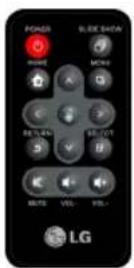
CD User's guide / Cards
USB Cable to PC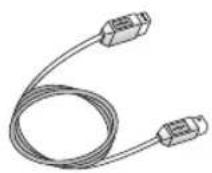
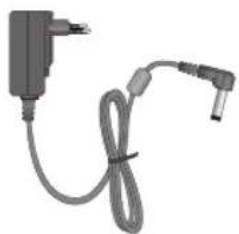
Power Adapter

Note
Note: The Digital Photo Frame and its accessories may look different from those shown here.
Composition of product
Names of parts

Front
![graph TD A["1"] --> B["2"] C["3"] --> D["4"] E["5"] --> F["6"] G["7"] --> H["8"] I["> "] --> J[">"] K["<"] --> L["<"] M["+"] --> N["+"]](/content/2026/05/968573/images/05c14951e85f9c80a03207692a68c6c0a42d7daf54ca521b34969f48d1c66020.jpg)
1 BACK Button: Go to previous screen. 2 MENU Button: It pops up menu. 3 SELECT Button: Select the file. 4 UP/DOWN Button: Go to Up / Go to Down. 5 LEFT Button: Go to Left. 6 OK Button: OK. 7 RIGHT Button: Go to Right. 8 POWER Button: If pressing long, you can turn off the power, and if pressing short, it goes to power saving mode. If the power button is on, it switches on the blue light, and if it becomes power saving mode, it flickers regularly. If the power is turned off, it switches to red.
Composition of product

Side/Back
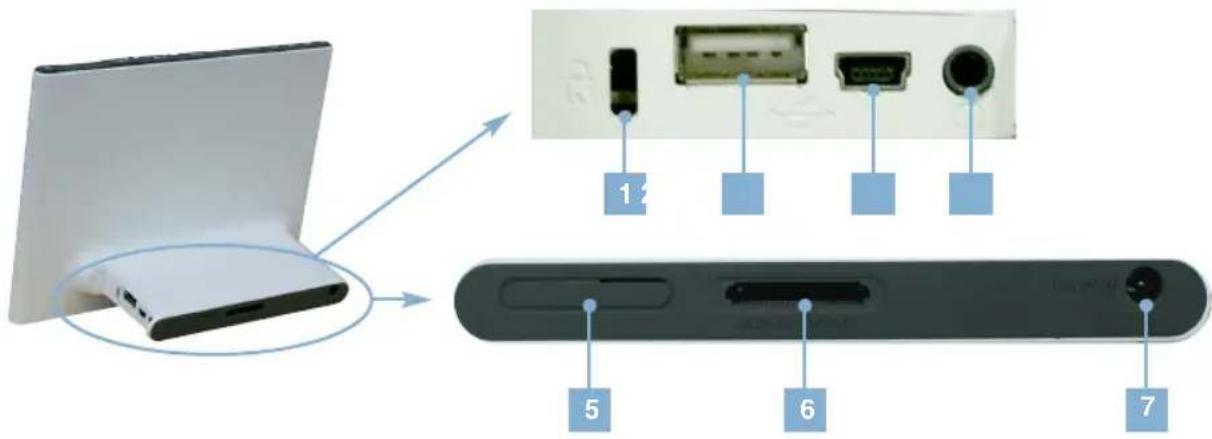
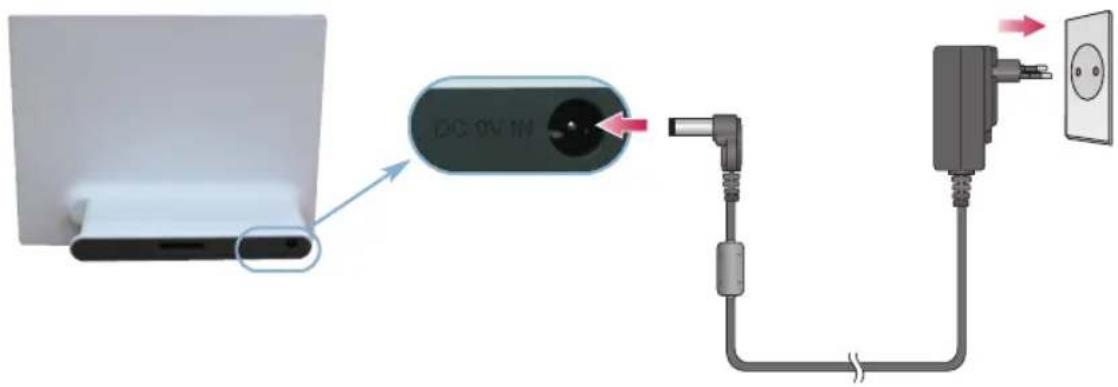
1 Kensington Security Slot (Separate purchase required): Connected to a locking cable that can be purchased separately at most computer stores. 2 USB terminal for connecting to saving device: You can bring the file by connecting to external saving device and USB memory. 3 USB terminal for connecting to PC: You can use this product as a mass storage device or mini monitor by connecting to PC using a provided USB cable. 4 Headphone / earphone terminal: When playing video clip or music, you can listen to the sound by connecting head/earphone. 5 Speaker: When playing video clip or music, you can listen to the sound. 6 SD/MS/xD/MMC Slot: You can open the file by inserting SD/MS/xD/MMC card. When there is no left capacity in the internal memory, it is possible to be used for an extension of memory. 7 DC 9V IN terminal: After connecting power adapter to DC 9V IN terminal, you can use it by connecting power cord.

Note
- Please refer to page 9 for an external device connection and use method.
Remote Control Button Names and Functions
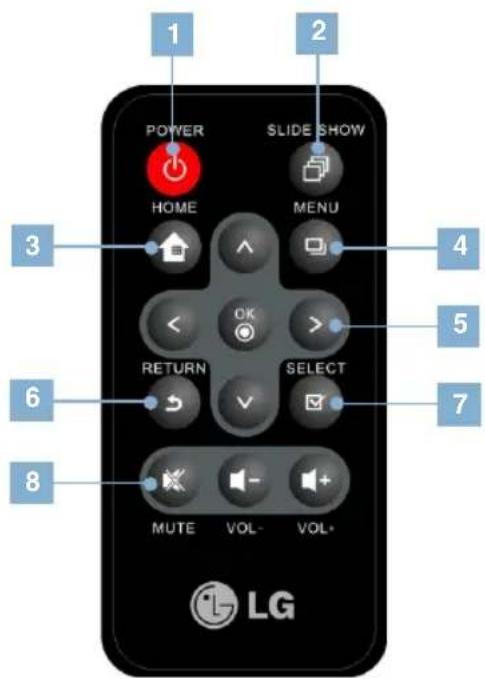
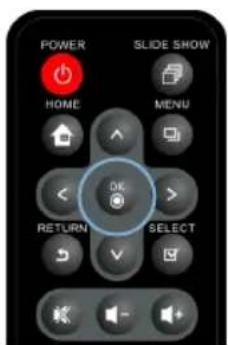
1 Turn ON/OFF
2 Go to Show Slide
3 Go to Home Menu
4 It pops up menu
5 Go to Up
Go to Down
< Go to Left
Go to Right
OK OK
6 Go to previous screen
7 Select the file
8 It goes to mute
It adjusts volume.

Note
Before using the remote control, please remove the safety film on the bottom of the remote control as shown in the picture.
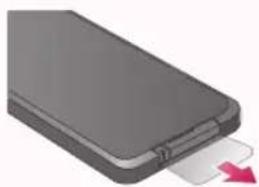
Product Composition
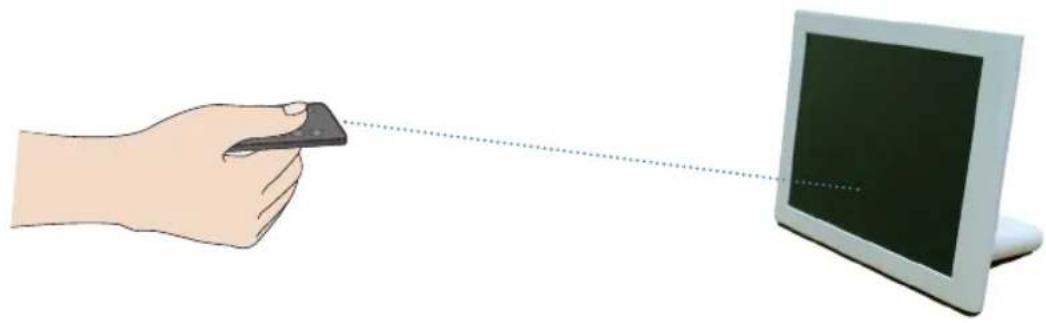
Remote Controller Sensor
There is a remote controller sensor at the center of the product. Please point the remote controller toward the sensor when using it.
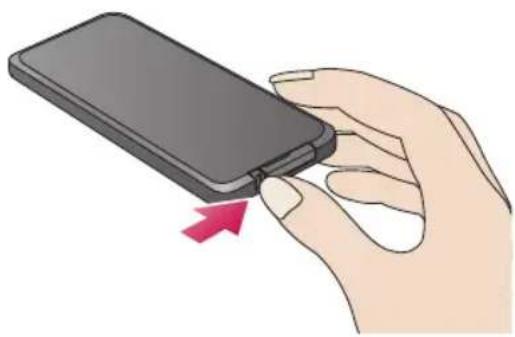
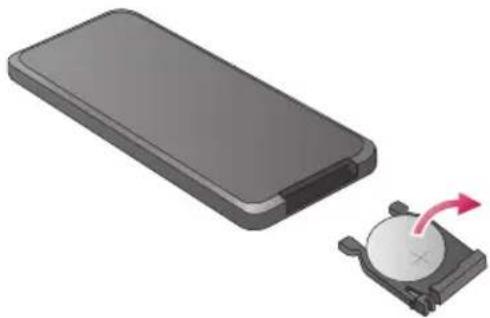
Replacing the Remote Control Battery
1. Use your fingernail to push the battery holder at the bottom to the right.
2. Pull the battery holder out.
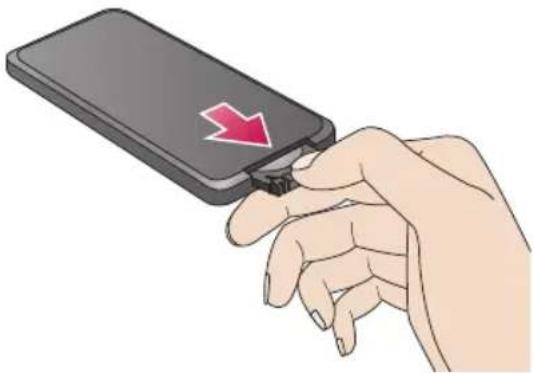
3. Replace the battery (Lithium Cell CR2025 3V) and push the holder back in.
Note
- Use only the specified battery. Otherwise, the battery could explode.
- Be careful that foreign substances do not enter the remote control when changing the battery. If the battery is not used correctly, it could cause leakage or corrosion.
Installation and Connection of the Product
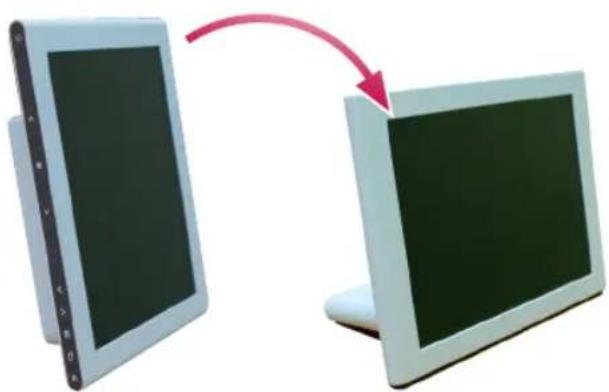
Installation Type
1. You can use the product by setting it up horizontally or vertically.
Connecting the Power Cord
1 After connecting the power adapter to the DC 9V IN terminal on the product, connect the power cord.
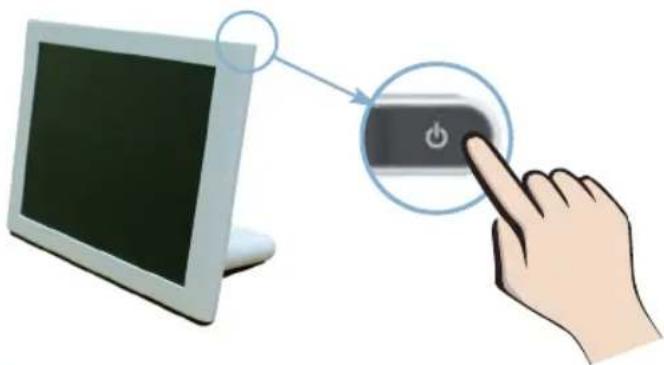
2 Press the power button (⏻) at the top right of the product to turn it on. To turn it off, press and hold the power button for 2-3 seconds.
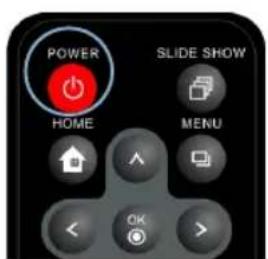

Note
- When the Auto setting in the Orientation menu of the Setup is enabled, the image automatically rotates as well. However, the Menu and Key-Help do not rotate. ■ The product and its accessories may look different from those shown here.
Connecting USB / Connecting Memory Card![graph TD A["Connecting Kensington Security Slot"] --> B["Internal Device"] B --> C["Connecting Headphone / earphone"] B --> D["USB Cable"] D --> E["Storage device"] E --> F["USB Memory"] F --> G["PC"]](/content/2026/05/968573/images/5f822fd538c7648beecb1a43f3940b418e71fbfb454d54d9f813d4f8b3404d5e.jpg)
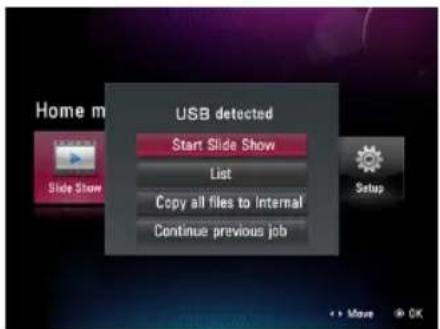
1 Storage Device Connection
- Connect to the product's USB terminal.
- Connect to the USB terminal of the external storage device.
- When the external storage device is detected, a window pops up as shown below. Select the desired operation.
Installation and Connection of Product
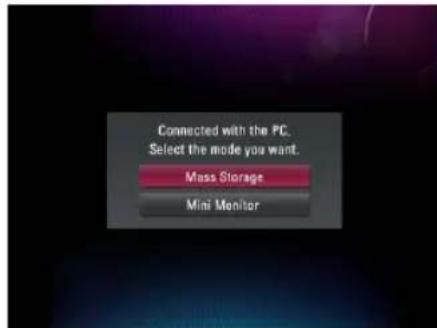
2 PC Connection
- Connect to the product's USB terminal using the provided USB cable.
- Connect to the PC's USB terminal.
- If PC is read, a window pops up as below. Please select the use mode you want between Mass storage and Mini monitor.
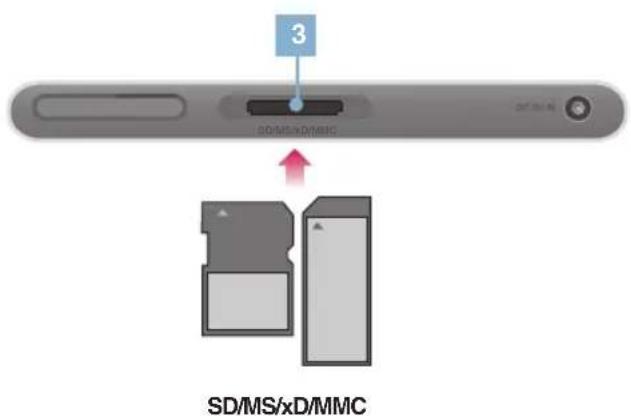
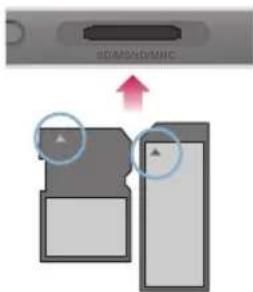
3 Memory card slot (SD/MS/xD/MMC)
- Please check the memory card's arrow direction.
- Please push it into the slot.
- If an external memory card is read, a window pops up as below. Please select an operation you want.
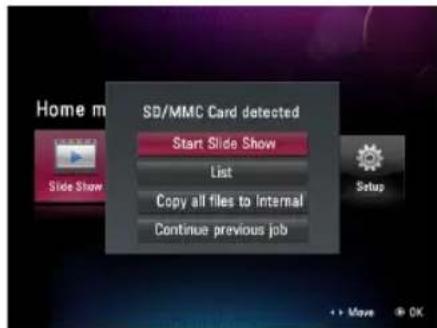
Note
- The internal memory of the product is 2GB. If the memory is full, no more files can be saved. ■ Two or more external devices can be connected together.
- Do not turn the product off or remove external devices while moving, saving, playing, or deleting files.
- If you remove an external device while playing a file, the product may operate abnormally. In this case, please turn the power off and on again.
- When connecting external storage devices to the product, use the cables included with the devices. (For more information on storage devices and cable purchase, contact the relevant service centers for the devices.)
- This product does not support external hard drives and card readers.
- When connecting to PC by USB cable, the volume name (Ex: E:, F:, G:, and so on) of the moving disk depends on the computer's environment.
Before beginning
Setting
- When turning on the power for the first time, a setup window appears where you can set up Language, Date and Time, and Power on Message. After finishing the setup, it won't appear again, but if you initialize, it will reappear.
- If you need a detailed explanation for each menu or to change the setup, please refer to ⚙ Setup (→ P22).
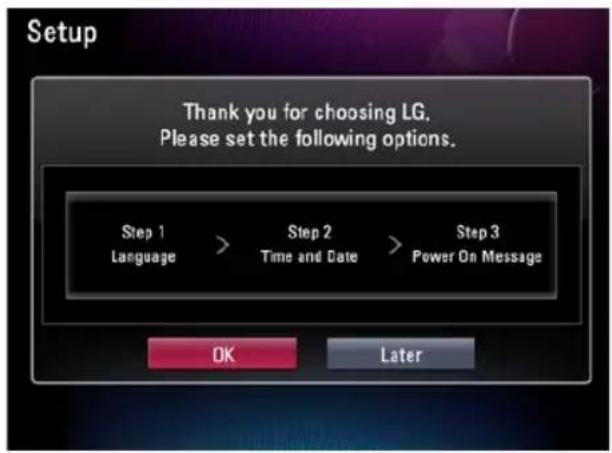
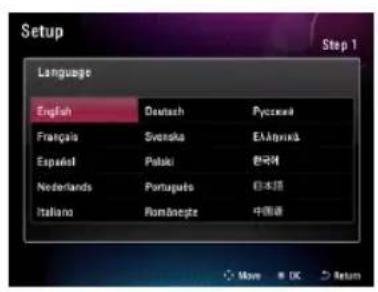
1st Step: Language

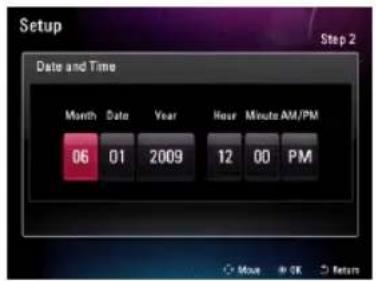
2nd Step: Date and Time

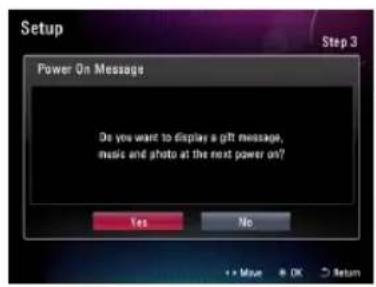
3rd Step: Power on Message
Key-Help
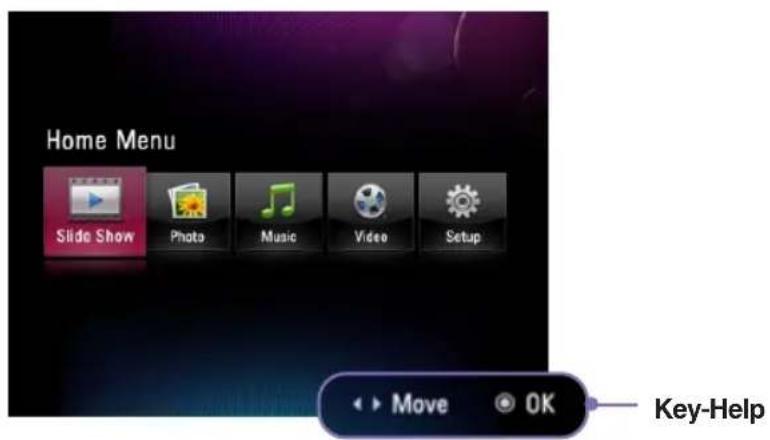
- Key-Help is indicated at the right lower part of each menu to help the user adjust buttons. Please refer to it for adjusting the product's buttons.
Screen Composition and Buttons
- Please select the desired menu.
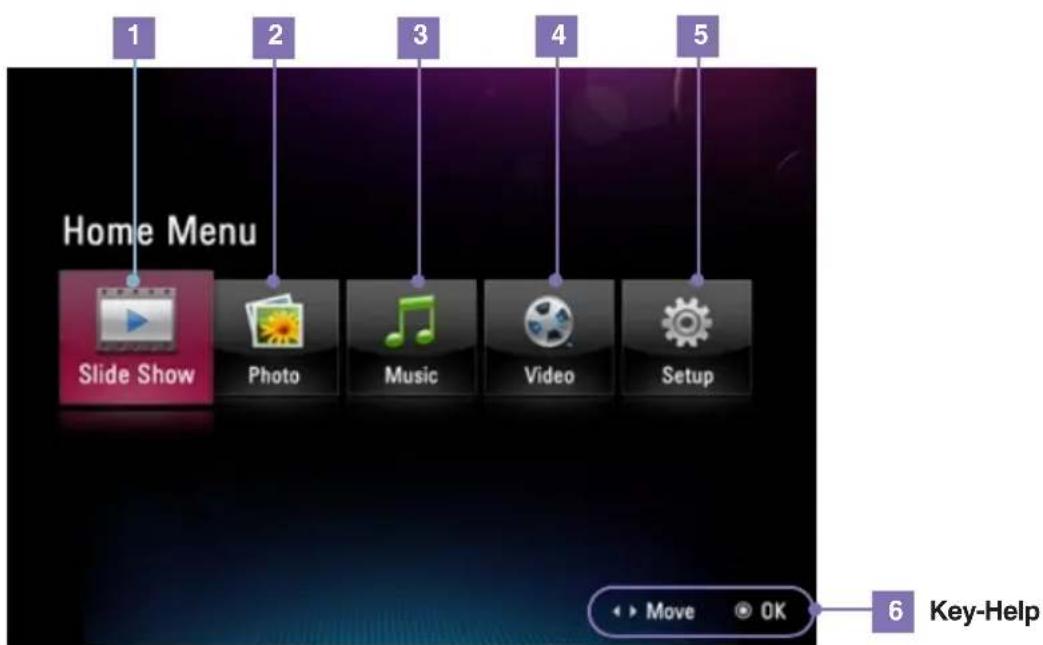
1 Slide Show: You can appreciate the photo. (P18) 2 Photo: You can select and manage the photo. (P19) 3 Music: You can appreciate the music. (P15) You can select and manage the music. (P19) 4 Video: You can appreciate the video. (P17) You can select and manage the video. (P18) 5 Setup: You set up other circumstances. (P22)
■ You can play photo files in Slide Show. - To use a Slide Show, press the button on the remote control or select the Home Menu. - If selecting a 📋 Slide Show at the home menu, it basically plays photos. If you want to play music or video, please begin at 🌐 Music and 🕒 Video.
Playing photo and slide show menu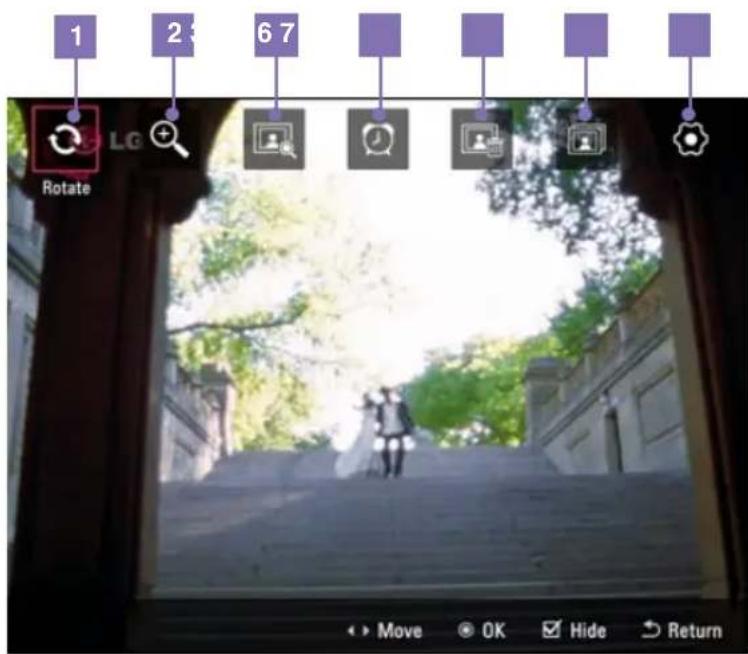
Operating key
Open/close menu
Menu movement
Menu detailed adjustment
Selecting menu/setup




Rotate
You can rotate the photo at regular angles.
0° - 90° - 180° - 270°

Zoom
You can extend the photo by button. It extends the photo in order from 100% to 400%, and if pressing button at 400%, it goes back to 100%.
100% - 150% - 200% - 300% - 400%
Extension rate indication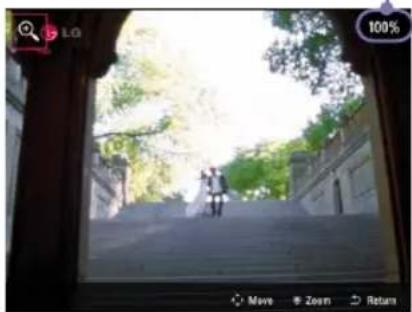

List
It moves to

Photo that you can manage the file. ( → 19P)
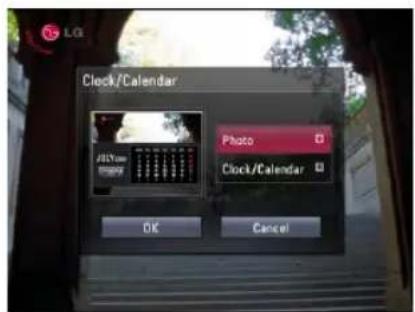
4 Clock/Calendar
You can set up clock and calendar.
- Photo
+ : Insert photo - : Delete photo
- Clock/Calendar
1~4: Select Theme -: Delete clock/calendar
5 Copy
It copies the photo being currently played. It is only possible to copy external device's photo into internal memory. When playing internal memory's photo, copy menu is deactivated.
6 Delete
It deletes the photo being currently played.
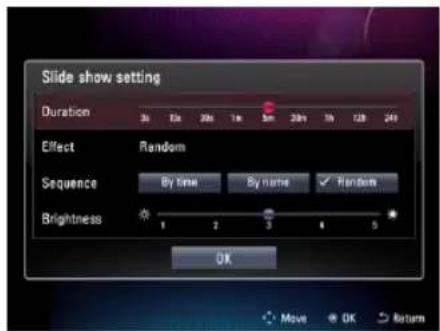
7 Slide show setting
Set up slide show's circumstance.
• Duration : Set up photo's switch time. 3s, 10s, 30s, 1m, 5m, 30m, 1h, 12h, 24h
- Effect : Set up effect when photo is switched. At random selection, all effect except multiple images is indicated randomly.
* Multiple images are not supported when setting up display direction vertically.
Random, Multi image, Cross Comb, Door Open, Door Close, Mosaic Random, Mosaic Bar, Snail, Transition, Shutter, Sliding, Corner Sliding, Dissolve, Stairs
- Sequence: Set up photo play order. By Time, By Name, Random
- Brightness: Set up brightness of the screen. 1~5
Tip
- Press the button to go to the previous photo in Slide Show. Press the button to go to the next photo.
- If the size/capacity of the photo is large, photo switching time could be longer than the time that you originally set.
- If you want to appreciate photo and music together, please set up Music auto play at Setup.
Playing music
1 If you want to play the music, please select Music at Home menu.
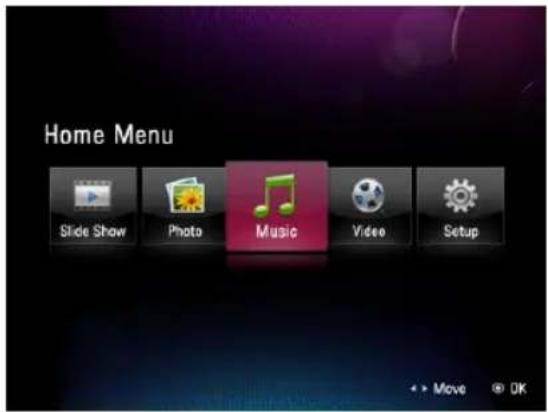
Music at Home menu.
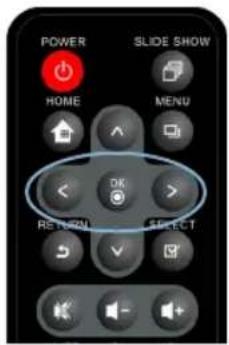
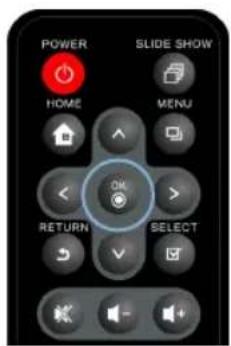
2 Please select the file you want by button.
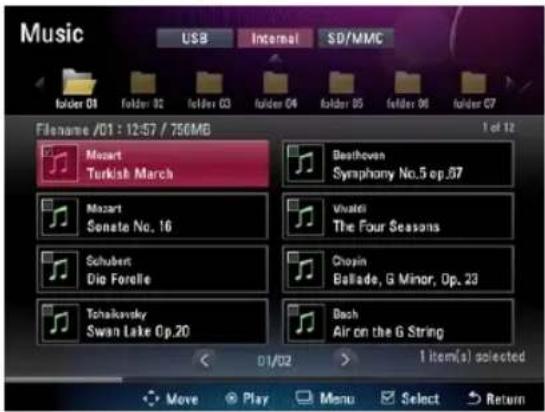
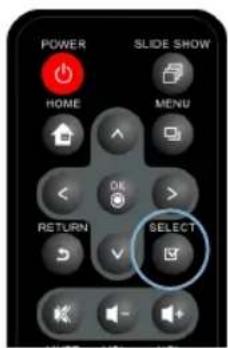
3 If pressing button, it plays the music you selected.
![Music: [Title] Turkish March [03:30], [Artist] Mozart 6/11, [Album] Unknown. 0:32:45 2:40:00. pc Random Prev: Happy Song.mp3 [04:00], Next: Sad Song.mp3 [05:20]](/content/2026/05/968573/images/13fd8fcd9cf5dd34830aa67d80485d36b08b8ecc3f34755a1237de9c0a0f590d.jpg)
Playing screen composition and buttons![Music: 1 [Title] Turkish March [03:30], 2 [Artist] Mozart 6/11, 3 [Album] Unknown. 0:32:45 2:40:00. × Random Prev: Happy Song.mp3 [04:00], Next: Sad Song.mp3 [05:20]. 4, 5 Key-Help: Operating key, Play mode setup, Playing previous song, Playing next song, Pause/play, Volume adjustment](/content/2026/05/968573/images/5736a300aec7673f48bb149bfeebbca35b691cfe2dff89707b19bb958436f893.jpg)
1 File information indication It indicates file name, musician, and album title. 2 Playing order It indicates the total number of the file to be played and order of the file being currently played. 3 Play bar It indicates playing state of the file being currently played. 4 Previous/next file indication It indicates the previous file and will next file.
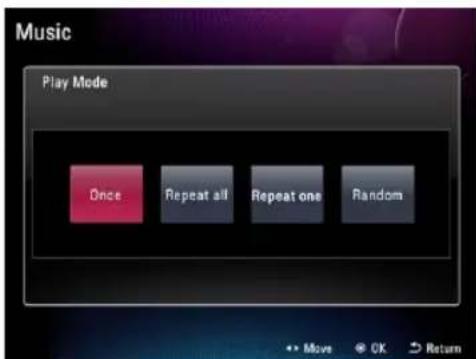
Play mode
- If you press the button on the music playing screen, it moves to play mode.
- You can set up the repetition configuration of the selected music.
- You can select among Once, Repeat all, Repeat one, and Random.
Playing video
1. If you want to play a video, please select Video at the Home menu.
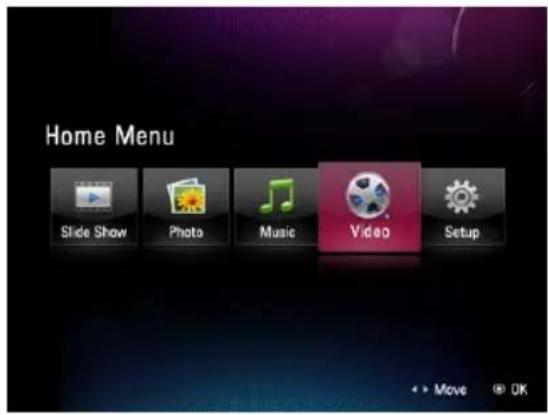

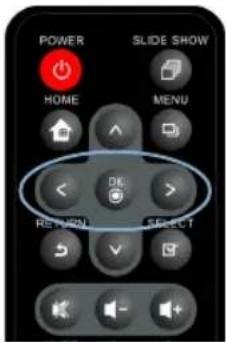
2. Please select the file you want by using the button.
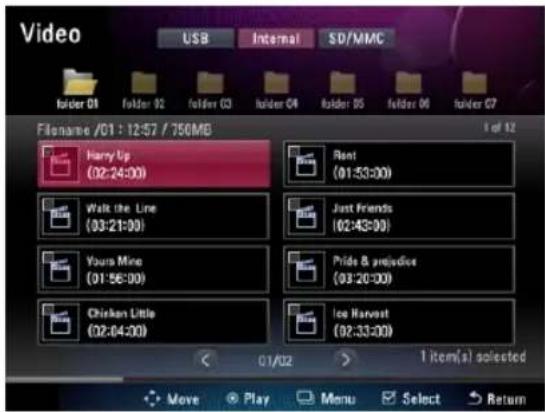
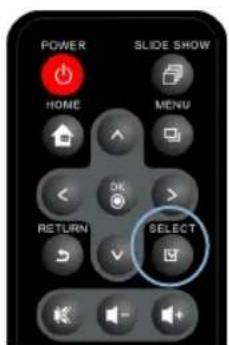
3. If you press the button, it plays the video you selected.
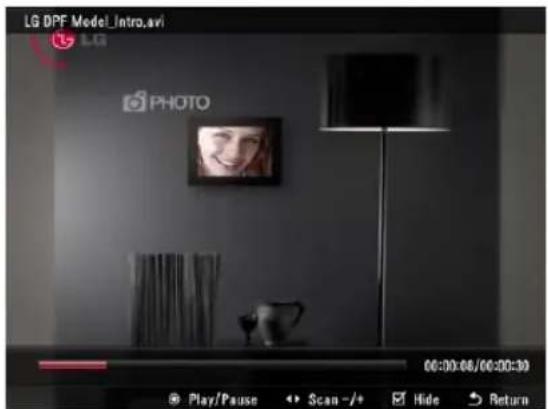
Playing screen composition and buttons
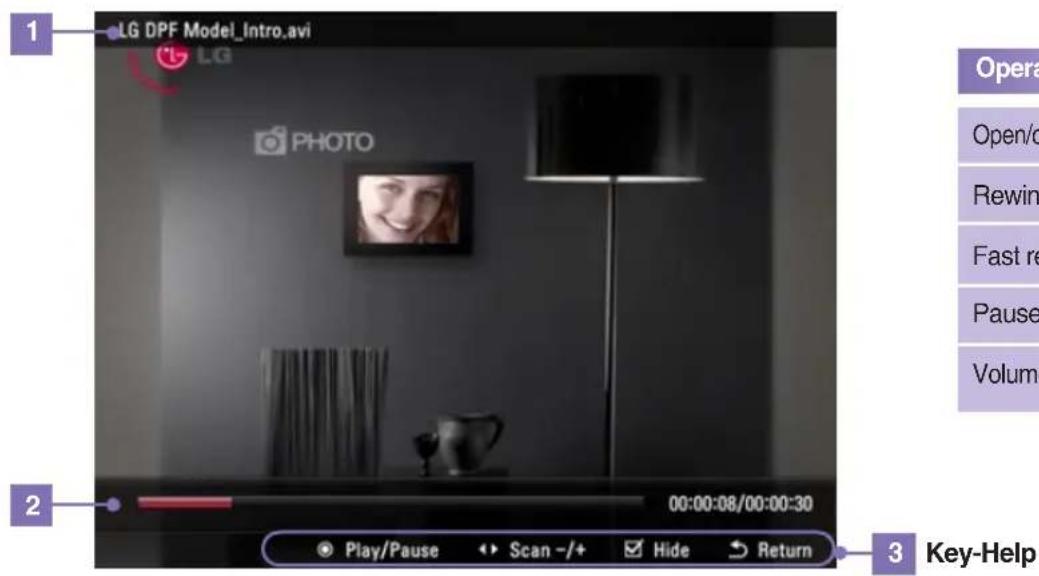
| Operating key | |
| Open/close play bar | |
| Rewind | |
| Fast rewind | |
| Pause / play | |
| Volume adjustment | |
1. File information indication: It indicates the name of the file currently being played. 2. Play bar: It indicates the playing state of the file currently being played.
Screen Composition and Buttons
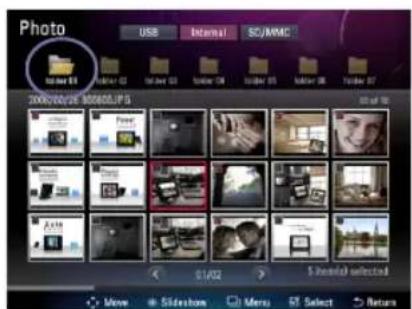
- You can separately manage each file in Photo, Music, and Video.
- Below is an explanation by giving you an example of the Photo, and the operation method for Music and Video is also identical.
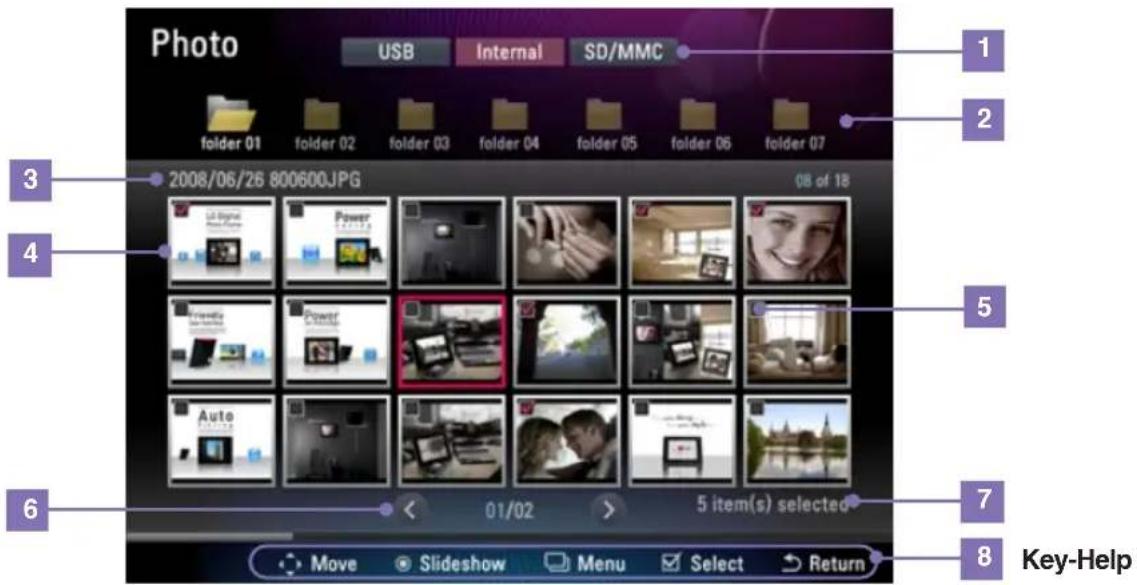
| 1 | Apparatus type selection | Indicates inside memory and connected external memory apparatus. Please select desired type. | ||
| 2 | Folder | Indicates folder at the apparatus you selected. Please select desired folder. | ||
| 3 | File information | Indicate file's name and capacity and so on. | ||
| 4 | File's table of contents | All files within selected folder are indicated, and preview is possible for photo file. Information of corresponding file is indicated for file of music and video. | ||
| 5 | Selection indication | To select any media file content. Press it to select content and press it again to unselect the content. |  |  |
| <Enabled> | <Disabled> | |||
| 6 | Page indication | The number of current page and the whole page is indicated, and page movement is possible by using < , > key. If pressing < , > key long, each moves to the first and last page. | ||
| 7 | The number of selected file | It indicates the total number of currently selected file. | ||
Tip
- Recommend that you designate the file name in the same language as the product's current setup language. If a different language is used, some letters could be broken.
File management menu
- If you press the button at Photo, Music, and Video, it moves to each menu.
- Usable menu could be different according to the nature of the file.
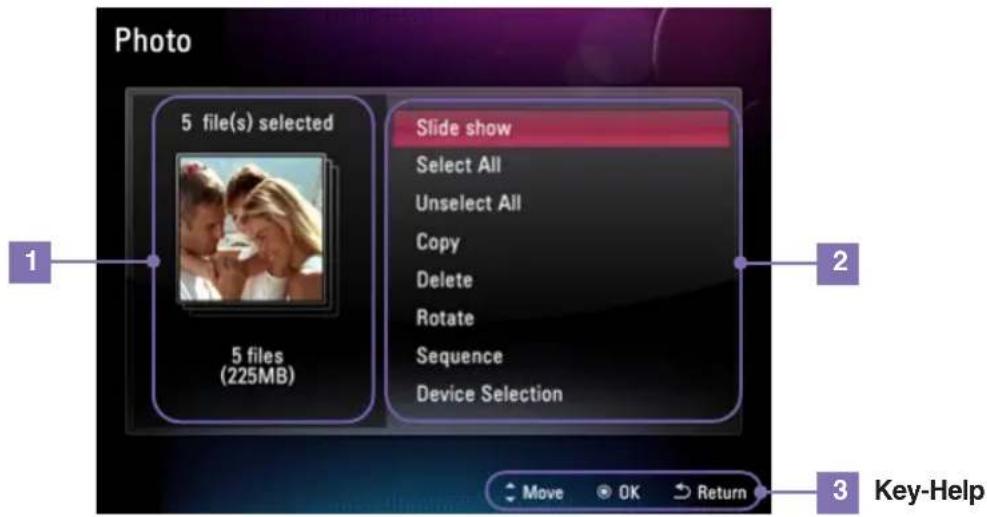
1 Selected file indication
Indicates the number and capacity of selected file.
2 Function
Please select the function you want.
■ Slide Show Start Slide Show. ■ Select all Select all files within currently located device. (P21) ■ Unselect all Cancel all selected files within currently located device. (P21) ■ Copy Copies file. (P21) ■ Delete Deletes file. (P21) ■ Rotate You can rotate the photo. ■ Sequence Set up photo play order. ■ Device Selection Select the connected other device.
File management
File copy / delete
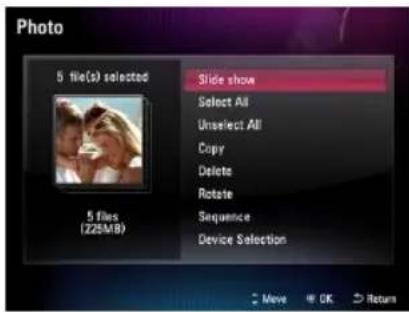
1 Selecting Copy/Delete menu
If you press the button at each of Photo, Music, and Video, the menu appears. Please select copy or delete menu.
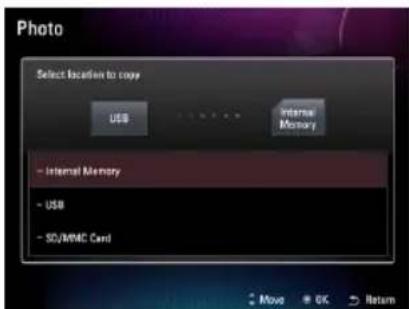
3 Designating copy location (Delete menu doesn't count.)
Please assign the device copying the file.
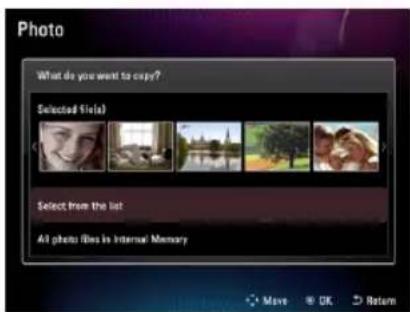
2 File selection
After checking currently selected file, please select selection from the list if you want to select again. You can select all files within currently located device.
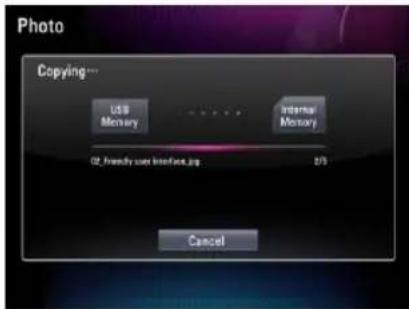
4 Copy/delete
It copies/deletes the file. If copy/deletion completes, please press button.

Note
- When copying/deleting the file, you can use copy/delete menu after first selecting the file you want from the list.
- You can't copy the file from internal memory to internal memory (between internal memories).
Selecting all file / Unselecting all file

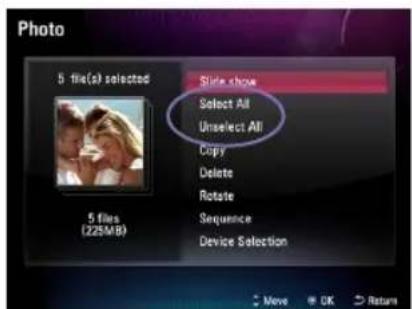
Select all files/Unselect all files within the device
If pressing 📋 button at 🎨 Photo, 🌐 Music, and 🌒 Video menu appears. Please select Select all or Unselect all.

Select all files/Unselect all files within folder
If pressing button at the location of corresponding folder, it performs select all. If pressing once more, it performs unselect all.
- You can set up product's basic circumstance at Setup.
- To use a setup, select the ⚙ Setup on the HomeMenu.
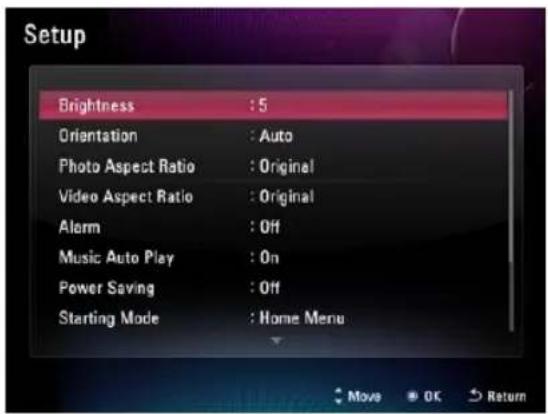
- Brightness
Set up the screen's brightness. It is possible to adjust from 1 to 5.
- Orientation Set the display direction of the product.
(* This product reads the photo information and the orientation value and rotates the photo accordingly.)
• Auto Sensor automatically shows in rotation by perceiving the product direction. • Landscape Shows at breadth. • Portrait Shows at length.
- Photo Aspect Ratio Adjust the aspect ratio of the screen.
- Width Custom It expands the photo size horizontally to fill the screen.
- Height Custom It expands the photo size vertically to fill the screen. • Full1 It shows the picture fit to the size of the screen regardless of the ratio of the picture. • Full2 It shows the picture fit to the size of the screen maintaining the ratio of the picture. The outer edges may be cut off depending on the size of the picture.
■ Video Aspect Ratio Adjust video aspect ratio.
• Original It shows by automatically adjusting the screen ratio. • 4:3 It shows as the ratio of 4:3. • 16:9 It shows as the ratio of 16:9.
- Alarm
You can set up the alarm. Set up the time, repetition setup, sound, and so on.
| ■ Music Auto play | If music file is detected at photo slide show, it sets up that both are automatically played together. | |
| ■ Power Saving | You can set up the time that power is turned on or off. | |
| ■ Starting mode | Set up the screen that initially shows up when turning on the power. | |
| Home Menu Start at Home Menu.Silde Show Start Slide Show.Last Mode Start from the last state that the power is off. | ||
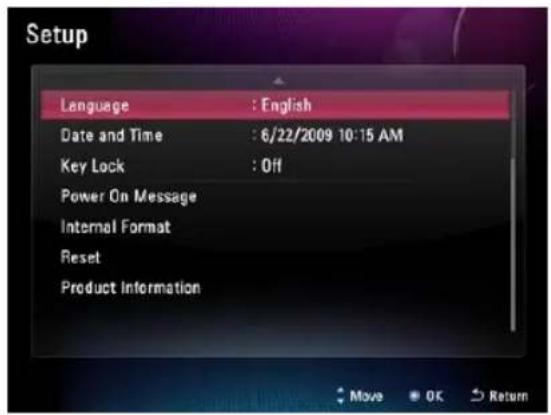
| ■ Language Select a language used in the menu screen. | ||
| ■ Date and Time Set up date and time. | ||
| ■ Key lock It sets up that product body's button doesn't operate. | ||
| ■ Power on Message Set up present message.(P24) → | ||
| Off No setup for present messageOn When giving present, you set up by selecting the photo and phrase proper to the objective. | ||
| ■ Internal Format | Delete all data stored in internal memory. | |
| ■ Reset | Initialize all setups. | |
| ■ Product information | Verify product information. | |
Power On Message function
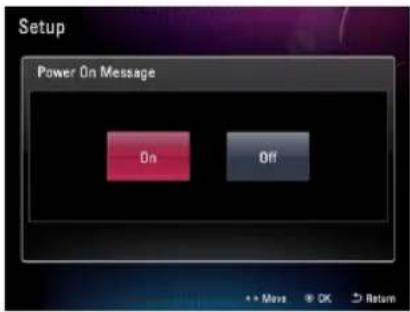
■ Power On Message is the function to show setup function when other turns on the power by setting up message, photo, music, and video.
1 Selecting 'On'
Please select the 'On'.
3 Selecting photo/video
Please select one of photo or video and the file you want from the list. Please select Skip button unless you want to insert.
* If selecting video, you cannot insert the music.
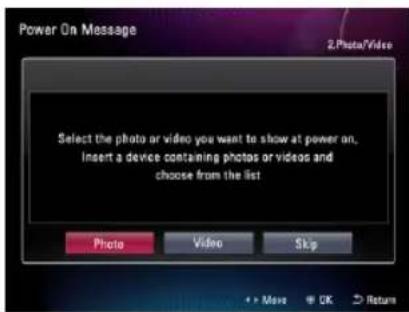
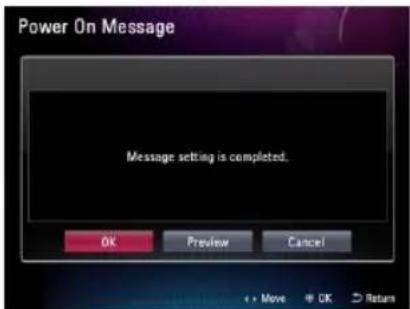
5 Setup completion
If setup completes, you can see the Power On Message setup by Preview button.
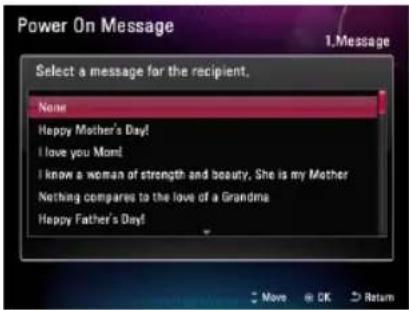
2 Selecting message
Please select the message you will send.
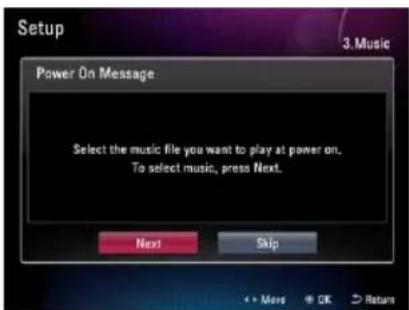
4 Selecting music (It counts only for selecting the photo.)
Please select the music. If selecting Next button, you can select the music from the music list, and if selecting Skip button, it doesn't insert the music and goes into the next step.

Note
- Even though you set up display direction vertically, the phrase of Power On Message isn't supported vertically.
| Problems | Solutions |
| The screen does not work. | Check if the product is connected to the power adapter properly.Check if the power adapter is connected to the power outlet properly.Press the Power button to turn the product on. |
| The photo is not displayed on the screen. | There are some image file formats which are not supported.Please check the product specifications. |
| Video screen and sound doesn't operate. | The configuration of video file could not match. Please check product standard and then change the video configuration. |
| The music does not play back. | There are some music file formats that are not supported. Please check the product specifications.Press the 12 buttons to check if the volume is turned off. |
| The USB / memory card is not detected. | Check if the USB cable is connected to the product and the external device properly.There are some memory card formats which are not supported.Please check the product specifications.Check if the files stored in the external device are supported file formats. |
| The screen is black or none of the buttons work. | The product may not respond because of invalid file format, virus infection or unexpected situation.Turn DC Jack plug off and on to make it function normally. |
| I want to format the internal memory. | If you want to format internal memory, it is safe to use Setup -> Internal Format. Format will delete all media file.Do not format internal memory using PC after connecting the product to PC because it may cause malfunctions. |
| It takes long for photo to come up. | When opening the file from external memory card, it could take time.The time that photo comes up could be different depending on file format type and size. |
Troubleshooting
| Problems | Solutions |
| The screen ration is not normal. | Please adjust the screen ratio again at the Setup -> Photo Aspect Ratio. |
| The screen color is dim or dark. | Please adjust screen brightness. You can adjust at Setup -> Brightness or Slide show setting -> Brightness. |
* Information in this document is subject to change without notice.
| Model | F8012N |
| Size | 8" |
| Dimension (Width x Height x Depth) | 200 x 151.5 x 82.5 mm |
| Weight (excl.packing) | 484 g |
| Resolution | 800 x 600 |
| Power Input | DC 9V 2.0A |
| Power Consumption | General : 5WPower off : less than 1W |
| USB | Version 2.0 X 2(up stream (host) X1, down stream (slave) X1) |
| Internal Memory | 2 GB |
| Supported file format | JPEG, BMP, GIF, PNG, MP3, Motion JPEG, MPEG1, MPEG4(SD) |
| Supported Memory Cards | SD ≤ 2GB / SDHC ≤ 32GB / MMC ≤ 2GB / MS ≤ 128MB / MS-PRO ≤ 32GB |
| AC-DC Adapter | ADS-18C-12N 09018GPG(EU)ADS-18C-12N 09018GPB(UK)ADS-18C-12N 09018GPCU(USA) |
Service center
- LG Electronics Service center web site : http://www.lgservice.com
Software Update
- For software update, please refer to www.lge.com
Product Registration
- Visit www.lge.com and register the Serial No. on the product package or the back of the product.
- The Serial No. is a combination of 12 digits with English letters and numbers.
- If you register the Serial No., you can enjoy free A/S service and various events.

LG


- DIGITAL PHOTO FRAME USER'S GUIDE
- TABLE OF CONTENTS
- PREPARATION AND INSTALLATION / CONNECTION
- IMPORTANT SAFETY PRECAUTION
- COMPOSITION OF PRODUCT
- INSTALLATION AND CONNECTION OF PRODUCT
- MENU AND FUNCTIONS
- BEFORE BEGINNING
- HOMEMENU
- SLIDE SHOW
- MUSIC
- VIDEO
- FILE MANAGEMENT
- SETUP
- APPENDIX
- TROUBLESHOOTING
- SPECIFICATIONS
- SERVICE INFORMATION
- DIGITAL PHOTO FRAME
- ON SAFETY
- ON INSTALLATION
- ON CLEANING
- ON REPACKING
- ON DISPOSAL
- ACCESSORIES
- NOTE
- NAMES OF PARTS
- FRONT
- SIDE/BACK
- REMOTE CONTROL BUTTON NAMES AND FUNCTIONS
- PRODUCT COMPOSITION
- REMOTE CONTROLLER SENSOR
- REPLACING THE REMOTE CONTROL BATTERY
- INSTALLATION AND CONNECTION OF THE PRODUCT
- INSTALLATION TYPE
- CONNECTING THE POWER CORD
- STORAGE DEVICE CONNECTION
- PC CONNECTION
- MEMORY CARD SLOT (SD/MS/XD/MMC)
- SETTING
- KEY-HELP
- SCREEN COMPOSITION AND BUTTONS
- OPERATING KEY
- CLOCK/CALENDAR
- COPY
- DELETE
- SLIDE SHOW SETTING
- TIP
- PLAYING MUSIC
- PLAY MODE
- PLAYING VIDEO
- PLAYING SCREEN COMPOSITION AND BUTTONS
- FILE MANAGEMENT MENU
- SELECTED FILE INDICATION
- FUNCTION
- FILE COPY / DELETE
- SELECTING COPY/DELETE MENU
- DESIGNATING COPY LOCATION (DELETE MENU DOESN'T COUNT.)
- FILE SELECTION
- COPY/DELETE
- SELECTING ALL FILE / UNSELECTING ALL FILE
- BRIGHTNESS
- ALARM
- POWER ON MESSAGE FUNCTION
- SELECTING 'ON
- SELECTING PHOTO/VIDEO
- SETUP COMPLETION
- SELECTING MESSAGE
- SELECTING MUSIC (IT COUNTS ONLY FOR SELECTING THE PHOTO.)
- SERVICE CENTER
- SOFTWARE UPDATE
- PRODUCT REGISTRATION
Brand : LG
Model : F8012N
Category : Digital photo frame