Light² 100 - Mouse Sharkoon - Free user manual and instructions
Find the device manual for free Light² 100 Sharkoon in PDF.


| Product Type | Gaming Mouse |
| Sensor | Optical (PixArt 3325) |
| Max DPI/CPI | 5,000 |
| Min DPI/CPI | 200 |
| DPI Steps | 7 (fully customizable) |
| Illumination | RGB (9 effects) |
| Max Polling Rate | 1,000 Hz (switchable: 125/500/1000 Hz) |
| Number of Buttons | 6 (all programmable) |
| Switch Type | Omron (left/right buttons) |
| Operating Life | Min. 20 million clicks |
| Mouse Feet | 3, pure PTFE (additional set included) |
| Frames Per Second | 4,000 |
| Inches Per Second | 100 |
| Max Acceleration | 20 g |
| Connector | USB (gold-plated) |
| Cable Type | Ultraflexible textile braided cable |
| Cable Length | 180 cm |
| Onboard Memory | 64 kB (stores 5 profiles) |
| Software | Sharkoon Gaming Software (Windows) |
| Package Contents | Mouse, additional mouse feet, manual |
Frequently Asked Questions - Light² 100 Sharkoon
User questions about Light² 100 Sharkoon
0 question about this device. Answer the ones you know or ask your own.
Ask a new question about this device
Download the instructions for your Mouse in PDF format for free! Find your manual Light² 100 - Sharkoon and take your electronic device back in hand. On this page are published all the documents necessary for the use of your device. Light² 100 by Sharkoon.
USER MANUAL Light² 100 Sharkoon
1.1 General 3
1.2 Button Properties 3
1.3 DPI Properties 3
1.4 Software Properties 4
1.5 Cable and Connectors 4
1.6 Package Contents. 4
2. Connecting the Gaming Mouse 5
3. Overview 5
4. Shortcuts 6
5. Selecting the Polling Rate 6
6. Software Installation 7
7. Software Overview 8
8. Button Assignment 9
9. DPI Settings 10
10. Illumination 11
11. Advanced Settings 12
12. Macro Manager 13
13. Profile Options. 14
1. Specifications
1.1 General
| Max. DPI/CPI | 5,000 |
| Min. DPI/CPI | 200 |
| Sensor | Optical |
| Chip | PixArt 3325 |
| Illumination | RGB |
| Max. Polling Rate | 1,000 Hz |
| Frames Per Second | 4,000 |
| Inches Per Second | 100 |
| Max. Acceleration | 20 g |
| Mouse Feet | 3, Pure PTFE |
1.2 Button Properties
| Number of Buttons | 6 |
| Programmable Buttons | 6 |
| Durable Omron Switches in Left and Right Mouse Buttons | √√ |
| Operating Life Cycles of Buttons | Min. 20 Million Clicks |
1.3 DPI Properties
| DPI Steps | 7 (Fully Customizable) |
| DPI Switch | √√ |
| DPI Indicator | LED |
1. Specifications
1.4 Software Properties
| Gaming Software | ✓ ✓ |
| Onboard Memory for Game Profiles | ✓ ✓ |
| Capacity of Onboard Memory | 64 kB |
| Number of Profiles | 5 |
1.5 Cable and Connector
| Connector | USB |
| Gold-Plated USB Plug | √√ |
| Ultraflexible Cable | √√ |
| Textile Braided Cable | √√ |
| Cable Length | 180 cm |
1.6 Package Contents
■ Light² 100
■ Additional Set of Mouse Feet
■ Manual
2. Connecting the Gaming Mouse
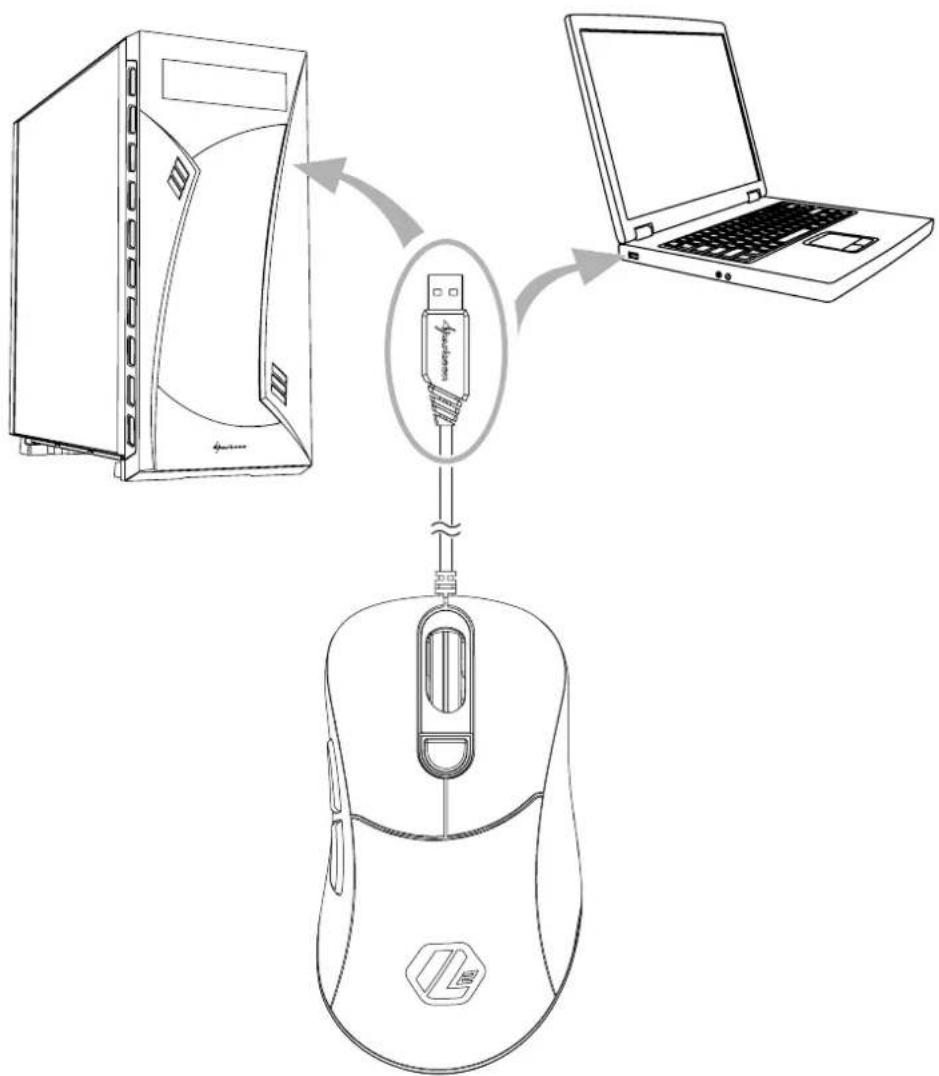
flowchart
graph TD
    A["Desktop Computer"] -->|USB cable to the computer| B["Laptop"]
    B --> C["Switched Mouse"]
3. Overview
A Left Mouse Button
B Scroll Wheel
Right Mouse Button
D DPI Switch
E Thumb Button 1
F Thumb Button 2
Golling Rate Switch
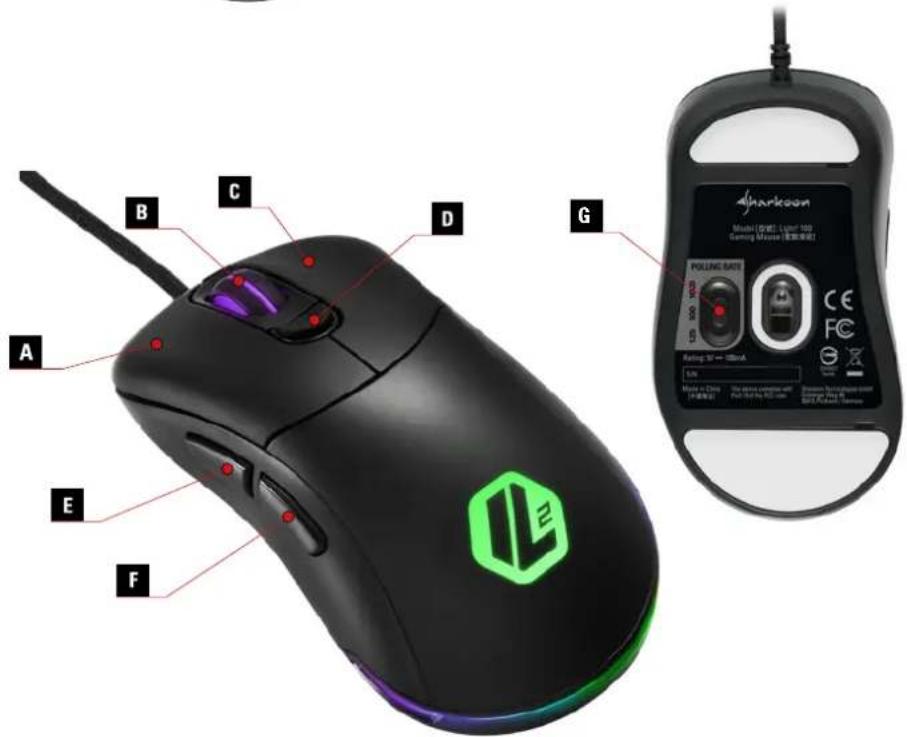
4. Shortcuts
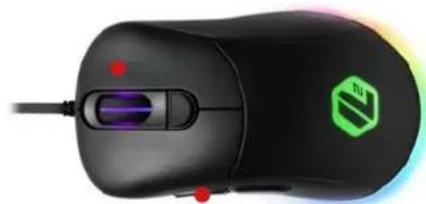
Thumb button 1 + Right mouse button
(hold for 3 seconds):
Lighting Effects
Thumb button 2 + Left mouse button + Right mouse button (hold for 3 seconds):
Switch Profile
(Profile 1 Red, Profile 2 Green, Profile 3 Blue,
Profile 4 Yellow, Profile 5 Purple)
Thumb button 1 + Thumb button 2 + Scroll wheel
(hold for 3 seconds):
Reset to Factory Default
natural_image
Close-up of a black computer mouse with a glowing green logo on its side (no text or symbols visible)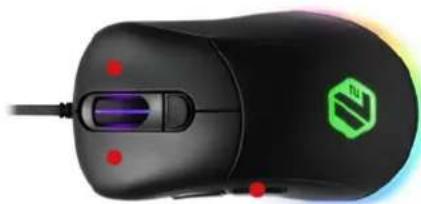
natural_image
Close-up of a black computer mouse with a glowing green logo on its side (no text or symbols visible)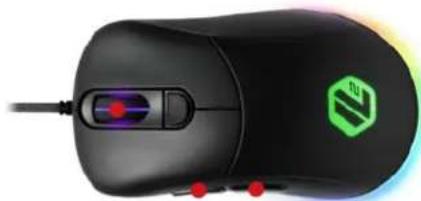
natural_image
Black computer mouse with a glowing green logo and red indicator lights (no text or symbols visible)5. Selecting the Polling Rate
The polling rate can be altered using a switch on the underside of the Light ^2 100. Three levels are available. When the switch is in the lowest position, the polling rate is 125 Hz. When positioned in the middle, the polling rate is 500 Hz. The highest position is for a polling rate of 1,000 Hz.
![sharkoon Model [ 按钮 ] Light® 190 Gaming Mouse [ 按钮 滑钮 ] POLLING RATE 125 500 1000 Rating: 5V → 100mA S/N Made in China [中国集团] The Device complies with Part 15 of the FCC cube CE FC 8.3m/0.7 40nm Sharkoon Technologies Smith (Johnson Press) 26-15 Padsheim | Germany](/content/2026/05/968218/images/a67bf15b3b5ac20a08875606d08e1a81c1a7b52fd685d5bb8144876320228d54.jpg)
6. Software Installation
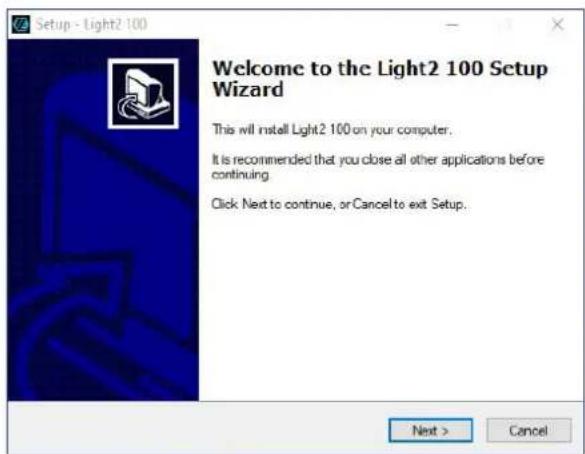
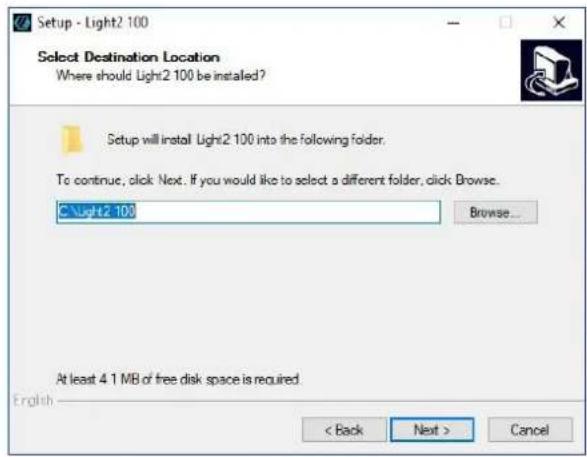
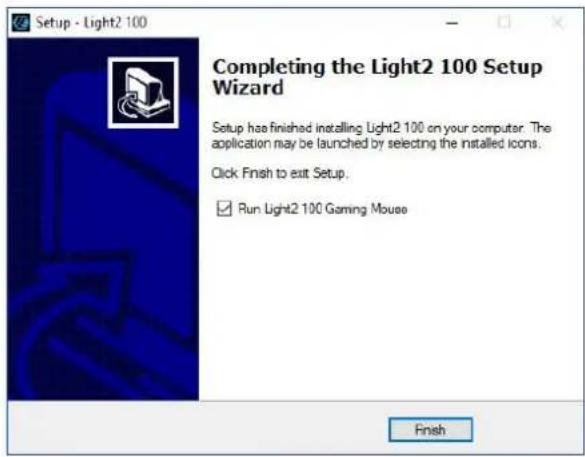
Download the gaming software for the Light ^2 100 from the Sharkoon website at www.sharkoon.com. Unzip the ZIP file in a folder of your choice and then double click the file "Light2_100.exe" to launch the installation.
Follow the instructions of the setup wizard and then click on "Finish" to complete the installation. The Light ^2 100 symbol will then appear in the taskbar. The software has now been successfully installed.
To start the gaming software, double click on the Light ^2 100 symbol in the taskbar. Please note: The gaming software continuously runs in the background while the computer is on. Only this allows the full range of functions of the Light ^2 100 to be used. The Light ^2 100 symbol will be displayed in the Windows taskbar while the gaming software is running.
1
2
3
7. Software Overview
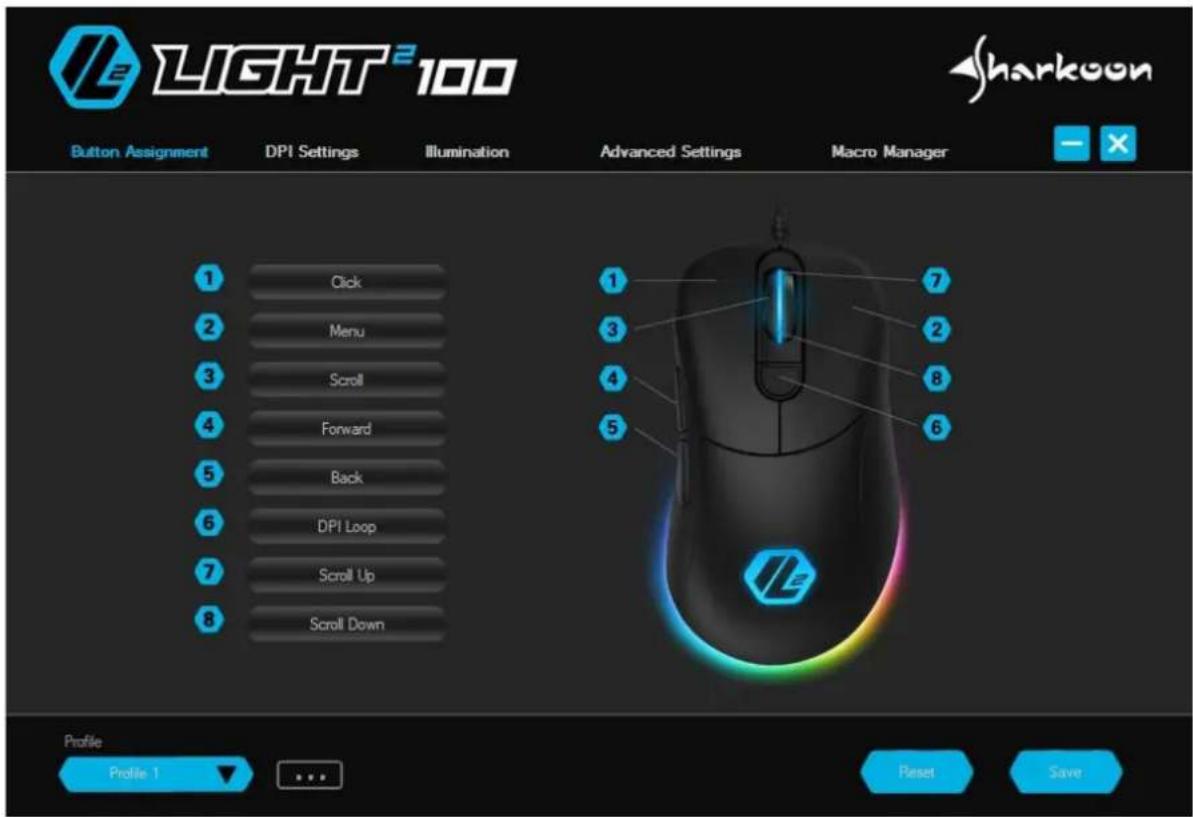
Button Assignment: The assignment of the eight buttons of the Light ^2 100 can be configured as desired. Individual keys can be designated with different commands, functions and macros.
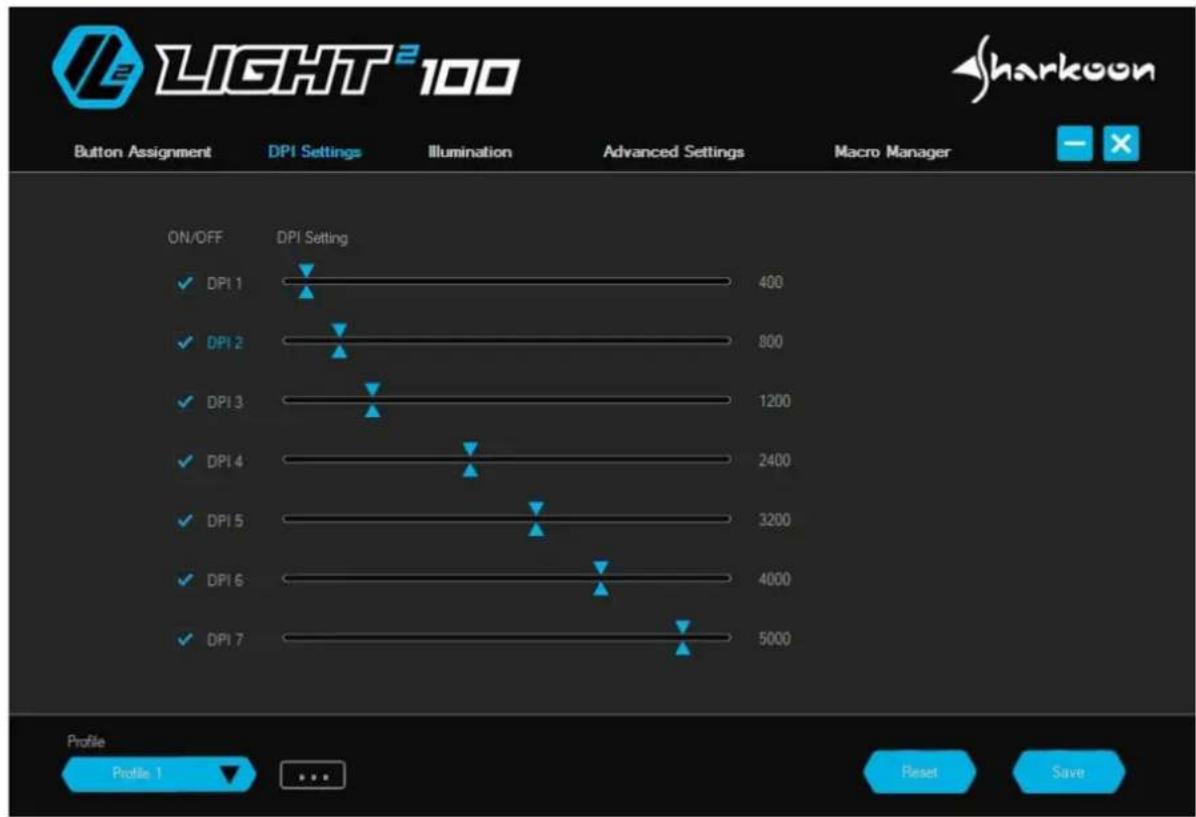
DPI Settings: With this menu, up to seven separate DPI steps can be individually set.
Illumination: The Light ^2 100 has various illumination effects which can be selected and modified in this menu.
Advanced Settings: Here, settings can be made for the sensitivity and speed of the mouse.
Macro Manager: In the menu Macro Manager, different macros can be recorded, modified or deleted. These are saved separately, but are then available for use in any profile.
Profile: Below in the gaming software, one of five profiles can be selected. In each profile, the settings are saved for Button Assignments, DPI, Illumination and the Advanced Settings.
Reset/Save: To apply changes made to the settings, click the "Save" button. The "Reset" button returns the selected profile back to the factory settings. Please note: Settings that are not saved by the user are not maintained by the software after it is closed.
8. Button Assignment
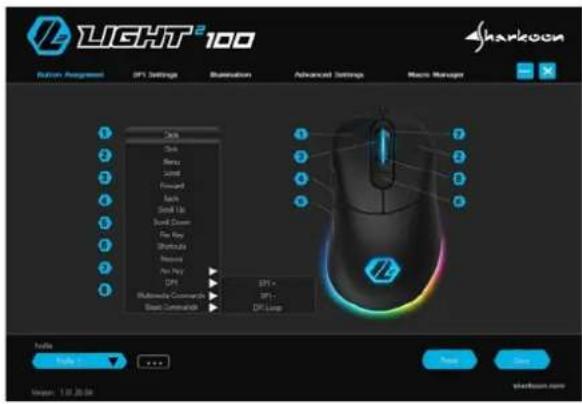
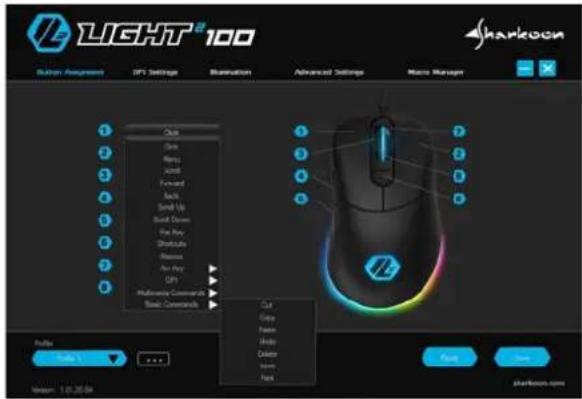
The Light ^2 100 has eight freely configurable buttons, which can be re-assigned via the software. To change the assignment of a button, select the desired button from the list which is on the left next to the illustration of the Light ^2 100. Click on the corresponding field for the button which is to be changed and choose a function from the dropdown list:
Click: Corresponds to the single left click. At least one button of the Light ^2 100 must be assigned with this function.
Menu: This corresponds to the context menu, selected, by default, with a right-click.
Scroll: Enables vertical and horizontal scrolling of scrollable elements.
Forward/Back: For structured navigation back and forth in the Web or in file managers.
Scroll Up/Scroll Down: Moves the scrollable element either up or down.
Fire Key: Opens the menu for setting the fire key function. With this function, a command can be quickly repeated when the corresponding mouse button is pressed. Up to 255 repetitions are possible.
Shortcuts: Allows the assignment of a keyboard key or keyboard combination to the chosen mouse button. Please note that certain keys, depending on the keyboard layout and keyboard type, may be excluded from the assignment.
Macros: Assigns a recorded macro to the chosen mouse button. The macro is executed when the button is pressed.
Aim Key: When the mouse button is held down, the DPI are increased or decreased to the value that you have previously selected.
DPI: Here are commands for selecting the DPI steps. Please note: When changing to a new DPI step, the illumination flashes briefly.
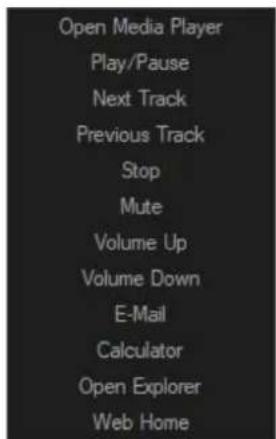
Multimedia Commands: This allows different Windows programs and functions to be opened and also has controls for the media player. Please note: The selected media player can be changed at any time in Windows Default Apps. However, not every media player is supported by Windows and incompatibilities may occur.
Basic Commands: This comprises some basic Windows commands.
9. DPI Settings
line
| DPI Setting | Value | | ----------- | ----- | | DPI 1 | 400 | | DPI 2 | 800 | | DPI 3 | 1200 | | DPI 4 | 2400 | | DPI 5 | 3200 | | DPI 6 | 4000 | | DPI 7 | 5000 |The seven DPI steps of the Light ^2 100 can be modified as desired. Each step can be assigned with a DPI value between 200 and 5,000. The currently selected DPI step is highlighted in blue. DPI steps which are not needed can be deactivated.
The DPI steps are named, from top to bottom, DPI 1 to DPI 7. To deactivate a step, click in the box which is on the left next to the DPI step name. The check will disappear. The empty box indicates that the DPI step is deactivated. The step will no longer be selected when switching through the DPI steps with the corresponding mouse button. To reactivate the step, click again in the box to replace the check.
To adjust the level of the DPI step, move the top or bottom blue slide control - to the left or to the right - along the slide bar.
10. Illumination
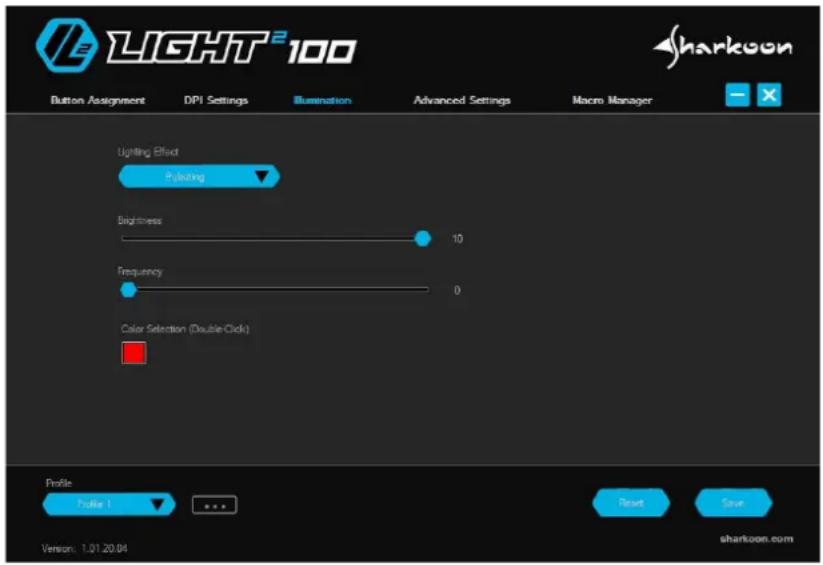
This menu allows the lighting effects of the Light ^2 100 to be set and modified. Nine different lighting effects are available. In addition, the illumination can be completely deactivated if desired. Depending on the selected lighting effect, other elements can be adjusted such as brightness, frequency or individual colors.
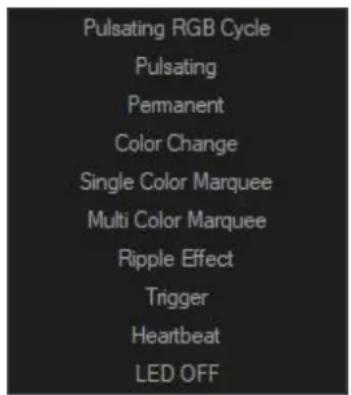
Pulsating RGB Cycle: The illumination continually changes its color within the RGB spectrum. With each change, a color fades in and out. The effect can be modified in brightness and frequency.
Pulsating: The mouse is illuminated in a single color, which fades in and out at regular intervals. Color, brightness and frequency can also be adjusted.
Permanent: The mouse is continuously illuminated in a single chosen color. In addition to the color, this effect also allows the brightness to be adjusted.
Color Change: The color of the illumination changes in the RGB spectrum. Here, the change between colors is fluid. This effect can also be adjusted for brightness and frequency.
Single Color Marquee: The illumination moves from the left side of the mouse, across the rear and then up to the scroll wheel. The light has a continual movement up and down. Color, brightness and frequency can also be adjusted.
Multi Color Marquee: The mouse is illuminated as in "Single Color Marquee". However, the effect lights with different colors, which have been chosen beforehand. In addition to the color, the brightness and frequency can also be adjusted.
Ripple Effect: Beginning from the left side, the individual zones of the mouse fade in and out, one zone after another. During this, the color alternates in the RGB spectrum. Brightness and frequency are also adjustable.
Trigger: When clicked, the mouse illuminates briefly in a chosen color. When clicked again, the mouse illuminates in another chosen color. Apart from color, brightness and frequency can also be set.
Heartbeat: Illuminates the mouse similar to the "Pulsating" effect. The illumination fades in and out at intervals, emulating a heartbeat rhythm. Color, brightness and frequency can also be adjusted.
11. Advanced Settings
In "Advanced Settings", options for the precision and speed of the Light ^2 100 can be activated and adjusted. Modifications can be made for mouse sensitivity, scroll speed and double-click speed. To adjust any of the settings, move the corresponding slide control to the left or right.
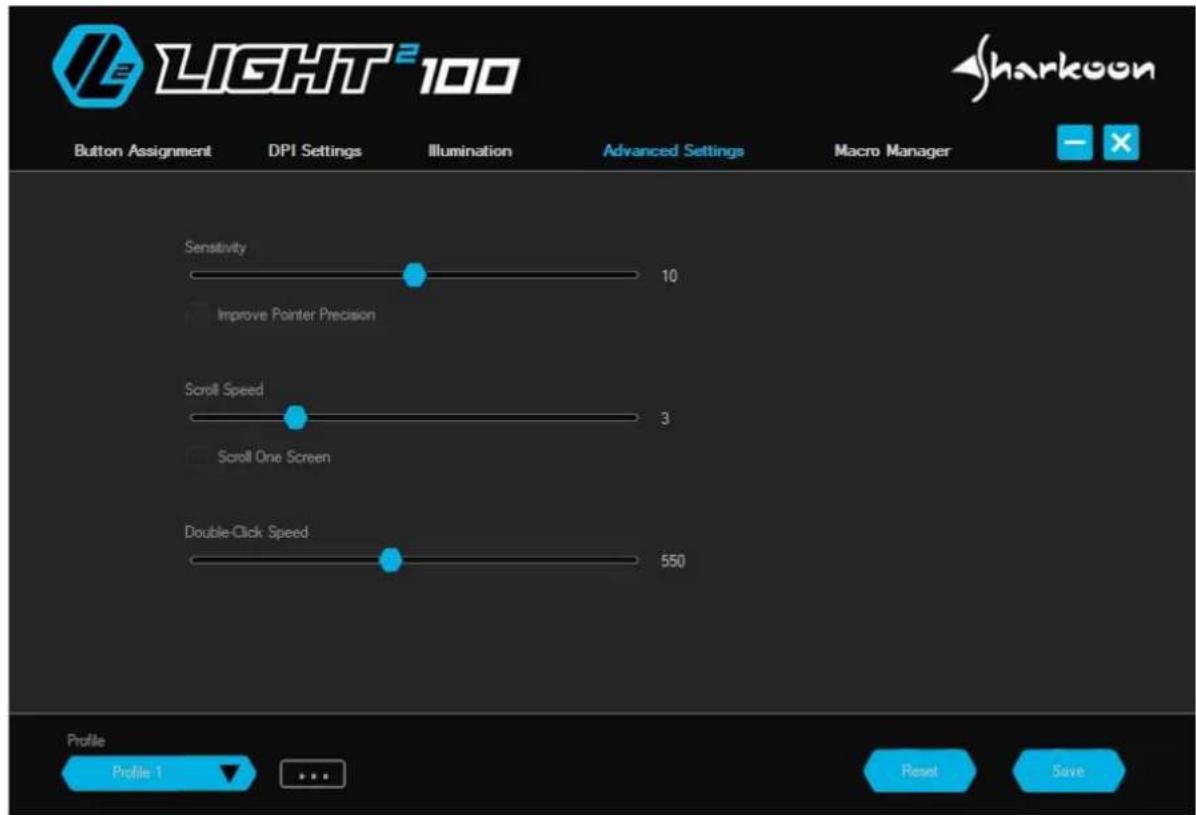
Sensitivity: With this option, the pointer speed can be adjusted. The higher the value, the faster the mouse pointer moves across the screen. In addition, the option "Improve Pointer Precision" can be activated. With this option, the faster the mouse is moved, the faster the mouse pointer moves.
Scroll Speed: When scrolling with the scroll wheel, the screen moves according to the chosen value. With a higher value, the screen will move with less turning of the scroll wheel. With a lower value, the screen will need more turning of the scroll wheel to move the same distance. In addition, there is a setting to allow the screen to be moved by one whole side when scrolling.
Double-Click Speed: In this menu, it can be set how far two mouse clicks are allowed to be apart while still being recognized as a double-click. The higher the value, the faster the clicks must follow each other.
12. Macro Manager
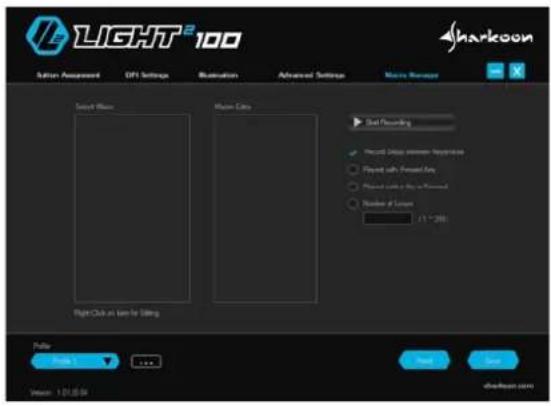
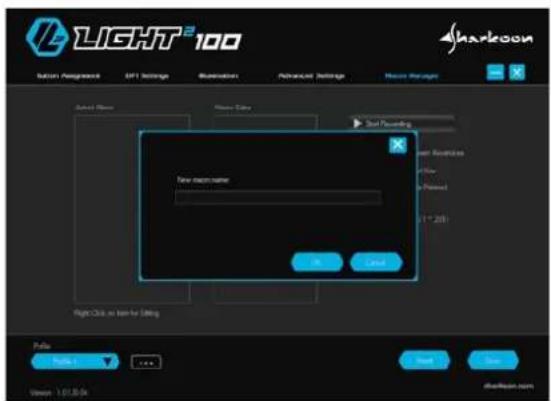
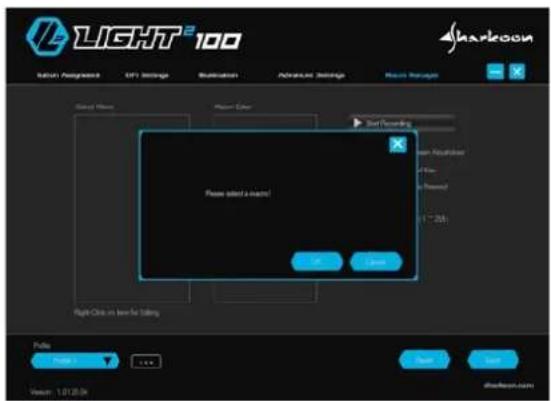
In the Macro Manager, macros with up to 50 key commands can be recorded, edited and deleted. Macros are independent of game profiles but can be used for any of these profiles after they have been recorded. Before a macro can be used, it must be assigned to a mouse button in the menu "Button Assignment". Please note: Depending on the keyboard and keyboard layout, certain keys are excluded from the macro recording.
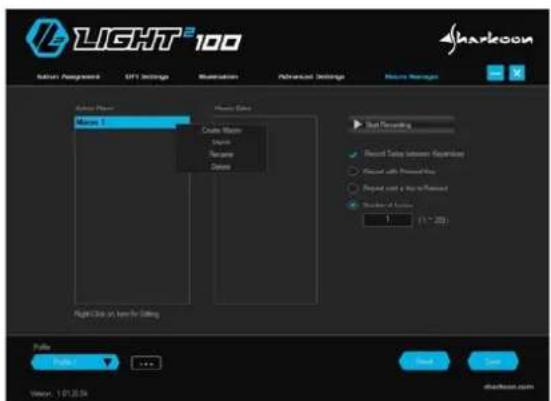
Select Macro: Here, macros can be created and deleted. To create a macro, make a right click in the field under "Select Macro". You then have the possibility to create a new macro or to import a macro which is already saved on the PC. If you wish to create a new macro, you will be asked to give this a name.
Macro Editor: The "Macro Editor" field displays the sequence of the key inputs during the recording of a macro. To start recording, click on "Start Recording" and then type in the key commands which are to be recorded. To stop recording, click on "Stop Recording". You can now see all the recorded key inputs in the "Macro Editor" field. Each recorded command is listed twice in the editor: once for pressing the button and once for releasing it. If the relevant option has been activated, the duration and delay of key inputs will also be displayed.
Options: On the right, next to the macro editor, you can activate the option "Record Delay between Keystrokes". With this option, duration and delays when pressing and releasing the keys will be recorded and shown in the recording in milliseconds. In addition, you can choose that the macro is continuously repeated while the mouse button is pressed down. Or, alternatively, there is the option to begin a continuous repetition of the macro by clicking the mouse button and ending the repetition when the button is clicked again. With the last option, you can determine an exact number of up to 255 repetitions (loops) which are activated when the mouse button is pressed.
Editing: Select a recorded key input with a right-click in order to edit this. There is now the possibility to delete or change the key input, or, if desired, a new command can be inserted into the recording. For this, there is a selection of new commands: keyboard key, left-click, right-click, scroll, or the insertion of a delay. All existing macros can be edited at any time through a right-click. It is possible to create a new macro, to save the chosen macro on the PC, to rename it, or to delete it.
13. Profile Options
On the bottom of the Light ^2 100 software are the profile options. Here, five different profiles can be either selected, saved or altered. Click on the blue field with the black triangle to select a profile.
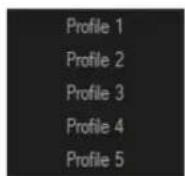
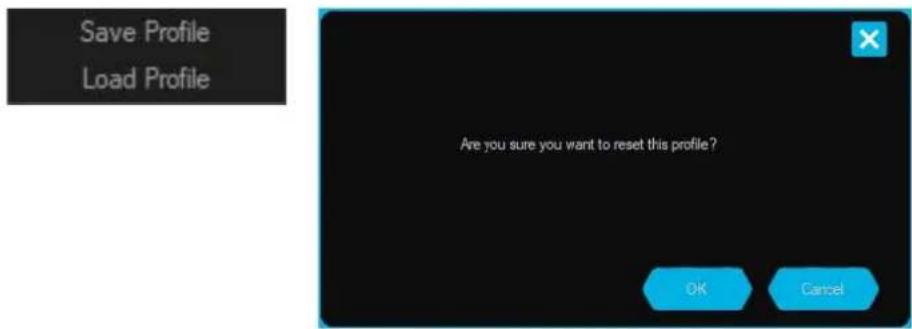
Save Profile / Load Profile: To save a profile on the PC or to import an already existing profile, click on the grey edged field with the three dots. When "Save Profile" is selected, the active profile can then be given a name and assigned a location on the PC. When "Load Profile" is selected, a profile which is already saved on the PC can be imported into the onboard memory of the mouse. All the settings of the currently active profile will be replaced by the settings of the newly imported profile.
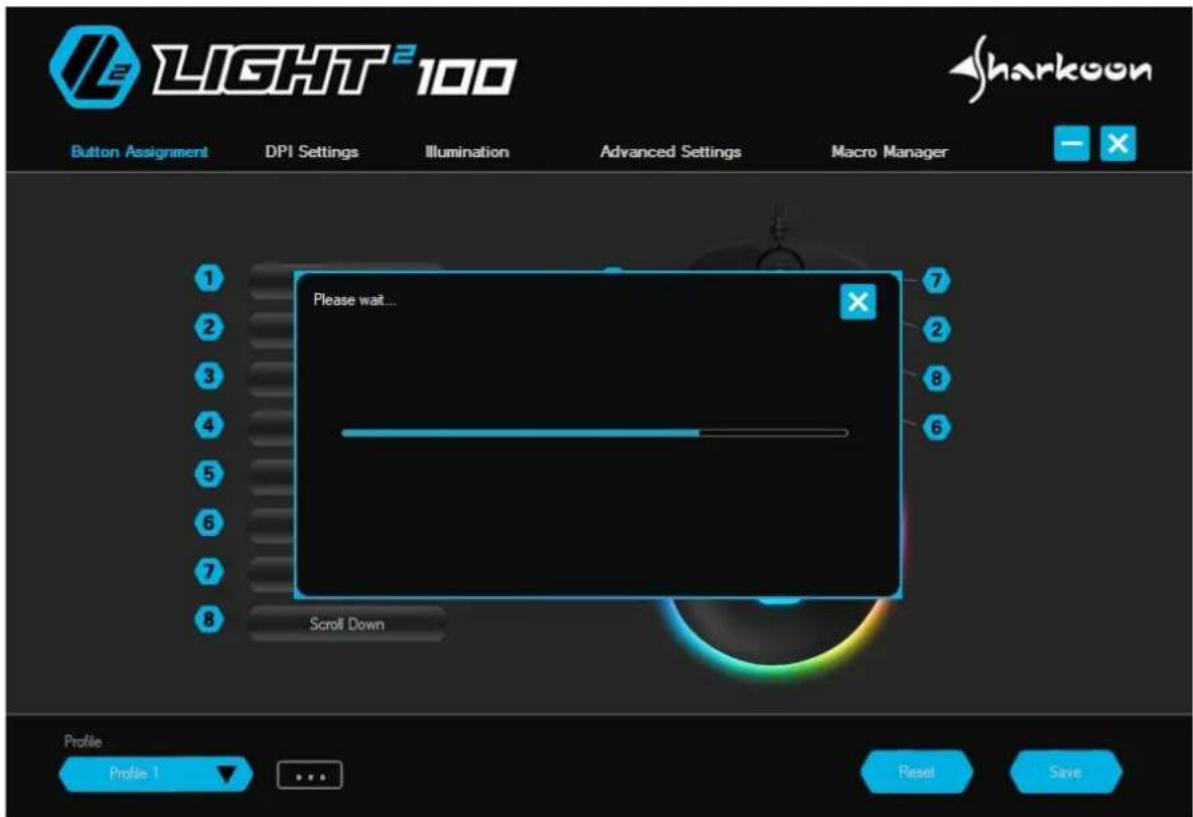
Reset / Save: The two blue buttons on the bottom right of the software allow the currently active profile to be reset to factory default and for all settings and modifications to be applied. To reset the active profile, click on the corresponding button and confirm the reset in the window which then appears. To actively apply all newly made settings and modifications, click on the button "Save".
For potential loss of data, especially due to inappropriate handling, Sharkoon assumes no liability.
All named products and descriptions are trademarks and/or registered trademarks of the respective manufacturers and are accepted as protected.
As a continuing policy of product improvement at Sharkoon, the design and specifications are subject to change without prior notice. National product specifications may vary.
The legal rights of the downloadable software belong to the respective owner. Please observe the license terms of the manufacturer before using the software.
All rights reserved especially (also in extracts) for translation, reprinting, reproduction by copying or other technical means. Infringements will lead to compensation. All rights reserved especially in case of assignation of patent or utility patent. Means of delivery and technical modifications reserved.
Disposal of your old product
Your product is designed and manufactured with high quality materials and components, which can be recycled and reused.

When this crossed-out wheeled bin symbol is attached to a product, it means the product is covered by the European Directive 2012/19/EU.
Please be informed about the local separate collection system for electrical and electronic products.
Please act according to your local rules and do not dispose of your old products with your normal household waste. The correct disposal of your old product will help prevent potential negative consequences to the environment and human health.
© Sharkoon Technologies 2020


- Connecting the Gaming Mouse 5
- Overview 5
- Shortcuts 6
- Selecting the Polling Rate 6
- Software Installation 7
- Software Overview 8
- Button Assignment 9
- DPI Settings 10
- Illumination 11
- Advanced Settings 12
- Macro Manager 13
- Profile Options. 14
- Specifications
- General
- Button Properties
- DPI Properties
- Software Properties
- Cable and Connector
- Package Contents
- Connecting the Gaming Mouse
- Overview
- Shortcuts
- Selecting the Polling Rate
- Software Installation
- Software Overview
- Button Assignment
- DPI Settings
- Illumination
- Advanced Settings
- Macro Manager
- Profile Options
- Disposal of your old product
Brand : Sharkoon
Model : Light² 100
Category : Mouse