
DS-2TP23-10VM/W - Camera Hikvision - Free user manual and instructions
Find the device manual for free DS-2TP23-10VM/W Hikvision in PDF.


| Product Type | Handheld Thermography Camera |
| Brand | Hikvision |
| Model | DS-2TP23-10VM/W |
| Dimensions (L x W x H) | 244 mm x 104 mm x 100 mm (9.6" x 4.1" x 3.94") |
| Weight | Approx. 1.0 kg (with battery) |
| Power Source | Rechargeable battery (included), charging via charging base or USB interface |
| Battery Type | Replaceable lithium-ion battery |
| Display | Touchscreen with menu icons and status icons |
| Thermal Detection | High-sensitivity IR detector, real-time temperature measurement |
| Image Modes | Thermal, Optical, Fusion (combined), Picture-in-Picture (PIP) |
| Palette Modes | White Hot, Black Hot, Fusion, Rainbow, Ironbow, Red Hot, Dark Blue |
| Digital Zoom | 1x, 2x, 4x |
| Connectivity | Wi-Fi, Bluetooth, USB (for file export and upgrade), CVBS output |
| Storage | SD card (included), supports recording and snapshot capture |
| Alarm Function | Interval alarm and insulation alarm with audible warning option |
| Laser Light Supplement | Long-distance laser for illumination (warning: avoid eye exposure) |
| LED Light | Torch function |
| Focus Mechanism | Manual focus knob |
| Trigger Button | For recording video or capturing snapshots |
| Operating Temperature | 0°C to 40°C (32°F to 104°F) for charging |
| Accessories Included | Charging base, power adapter, USB cable, battery, lens cover, SD card, user manual, CD |
| Maintenance | Clean lens gently with ethanol and cloth; avoid dust, moisture, and extreme temperatures |
| Safety Precautions | Do not disassemble; use correct battery replacement; avoid laser exposure to eyes |
Frequently Asked Questions - DS-2TP23-10VM/W Hikvision
User questions about DS-2TP23-10VM/W Hikvision
0 question about this device. Answer the ones you know or ask your own.
Ask a new question about this device
Download the instructions for your Camera in PDF format for free! Find your manual DS-2TP23-10VM/W - Hikvision and take your electronic device back in hand. On this page are published all the documents necessary for the use of your device. DS-2TP23-10VM/W by Hikvision.
USER MANUAL DS-2TP23-10VM/W Hikvision
natural_image
Technical line drawing of a handheld device with no visible text or symbolsUser Manual
COPYRIGHT 2018 Hangzhou Hikvision Digital Technology Co., Ltd.
ALL RIGHTS RESERVED.
Any and all information, including, among others, wordings, pictures, graphs are the properties of Hangzhou Hikvision Digital Technology Co., Ltd. or its subsidiaries (hereinafter referred to be “Hikvision”). This user manual (hereinafter referred to be “the Manual”) cannot be reproduced, changed, translated, or distributed, partially or wholly, by any means, without the prior written permission of Hikvision. Unless otherwise stipulated, Hikvision does not make any warranties, guarantees or representations, express or implied, regarding to the Manual.
About this Manual
This Manual is applicable to Handheld Thermography Camera.
The Manual includes instructions for using and managing the product. Pictures, charts, images and all other information hereinafter are for description and explanation only. The information contained in the Manual is subject to change, without notice, due to firmware updates or other reasons. Please find the latest version in the company website (http://overseas.hikvision.com/en/).
Please use this user manual under the guidance of professionals.
Trademarks Acknowledgement
HIKVISION and other Hikvision's trademarks and logos are the properties of Hikvision in various jurisdictions. Other trademarks and logos mentioned below are the properties of their respective owners.
Legal Disclaimer
TO THE MAXIMUM EXTENT PERMITTED BY APPLICABLE LAW, THE PRODUCT DESCRIBED, WITH ITS HARDWARE, SOFTWARE AND FIRMWARE, IS PROVIDED "AS IS", WITH ALL FAULTS AND ERRORS, AND HIKVISION MAKES NO WARRANTIES, EXPRESS OR IMPLIED, INCLUDING WITHOUT LIMITATION, MERCHANTABILITY, SATISFACTORY QUALITY, FITNESS FOR A PARTICULAR PURPOSE, AND NON-INFRINGEMENT OF THIRD PARTY. IN NO EVENT WILL HIKVISION, ITS DIRECTORS, OFFICERS, EMPLOYEES, OR AGENTS BE LIABLE TO YOU FOR ANY SPECIAL, CONSEQUENTIAL, INCIDENTAL, OR INDIRECT DAMAGES, INCLUDING, AMONG OTHERS, DAMAGES FOR LOSS OF BUSINESS PROFITS, BUSINESS INTERRUPTION, OR LOSS OF DATA OR DOCUMENTATION,
Handheld Thermography Camera - User Manual
IN CONNECTION WITH THE USE OF THIS PRODUCT, EVEN IF HIKVISION HAS BEEN ADVISED OF THE POSSIBILITY OF SUCH DAMAGES.
REGARDING TO THE PRODUCT WITH INTERNET ACCESS, THE USE OF PRODUCT SHALL BE WHOLLY AT YOUR OWN RISKS. HIKVISION SHALL NOT TAKE ANY RESPONSIBILITES FOR ABNORMAL OPERATION, PRIVACY LEAKAGE OR OTHER DAMAGES RESULTING FROM CYBER ATTACK, HACKER ATTACK, VIRUS INSPECTION, OR OTHER INTERNET SECURITY RISKS; HOWEVER, HIKVISION WILL PROVIDE TIMELY TECHNICAL SUPPORT IF REQUIRED.
SURVEILLANCE LAWS VARY BY JURISDICTION. PLEASE CHECK ALL RELEVANT LAWS IN YOUR JURISDICTION BEFORE USING THIS PRODUCT IN ORDER TO ENSURE THAT YOUR USE CONFORMS THE APPLICABLE LAW. HIKVISION SHALL NOT BE LIABLE IN THE EVENT THAT THIS PRODUCT IS USED WITH ILLEGITIMATE PURPOSES.
IN THE EVENT OF ANY CONFLICTS BETWEEN THIS MANUAL AND THE APPLICABLE LAW, THE LATER PREVAILS.
Regulatory Information
FCC Information
Please take attention that changes or modification not expressly approved by the party responsible for compliance could void the user's authority to operate the equipment.
FCC Conditions
This device complies with part 15 of the FCC Rules. Operation is subject to the following two conditions:
- This device may not cause harmful interference.
- This device must accept any interference received, including interference that may cause undesired operation
EU Conformity Statement
CE This product and - if applicable - the supplied accessories too are marked with "CE" and comply therefore with the applicable harmonized European standards listed under the EMC Directive 2014/30/EU, the RoHS Directive 2011/65/EU.
2012/19/EU (WEEE directive): Products marked with this symbol cannot be disposed of as unsorted municipal waste in the European Union. For proper recycling, return this product to your local supplier upon the purchase of equivalent new equipment, or dispose of it at designated collection points. For more information see: www.recyclethis.info.
2006/66/EC (battery directive): This product contains a battery that cannot be disposed of as unsorted municipal waste in the European Union. See the product documentation for specific battery information. The battery is marked with this symbol, which may include lettering to indicate cadmium (Cd), lead (Pb), or mercury (Hg). For proper recycling,
return the battery to your supplier or to a designated collection point. For more information see: www.recyclethis.info.
Industry Canada ICES-003 Compliance
This device meets the CAN ICES-3 (B)/NMB-3(B) standards requirements.
This device complies with Industry Canada licence-exempt RSS standard(s). Operation is subject to the following two conditions:
(1) this device may not cause interference, and
(2) this device must accept any interference, including interference that may cause undesired operation of the device.
antenna type and its gain should be so chosen that the equivalent isotropically radiated power (e.i.r.p.) is not more than that necessary for successful communication.
This equipment should be installed and operated with a minimum distance 20cm between the radiator and your body.
These instructions are intended to ensure that user can use the product correctly to avoid danger or property loss.
The precaution measure is divided into Warnings and Cautions
Warnings: Neglecting any of the warnings may cause serious injury or death.
Outlines: Modeling any of the options may obtain insurance equipment claims.
● Make sure the plug is properly connected to the power socket.
- If smoke, odor, or noise arises from the device, immediately turn off the power, unplug the power cable, and contact the service center.
- The installer and user are responsible for password and security configuration and its settings.

Cautions
- Do not drop the device or subject it to physical shock.
- Wipe the device gently with a clean cloth and a small quantity of ethanol, if necessary.
- Do not aim the lens at the sun or any other bright light.
- When any laser equipment is in use, make sure that the device lens is not exposed to the laser beam, or it may burn out.
- Do not expose the device to high electromagnetic radiation or extremely hot, cold, dusty, or damp environments.
- Place the device in a dry and well-ventilated environment.
- Keep non-waterproof devices away from liquids.
- Keep the device in original or similar packaging while transporting it.
- A few device components (e.g., electrolytic capacitor) require regular replacement. The average lifespan varies, so periodic checking is recommended. Contact your dealer for details.
- Improper use or replacement of the battery may result in explosion hazard. Replace with the same or equivalent type only. Dispose of used batteries in conformance with the instructions provided by the battery manufacturer.
● Never attempt to disassemble the device.
Safety Instruction

CAUTION: THE PRODUCT IS BUILT IN A REPLACEABLE BATTERY. RISK OF EXPLOSION IF BATTERY IS REPLACED BY AN INCORRECT TYPE. DISPOSE OF USED BATTERIES ACCORDING TO THE INSTRUCTIONS.
Laser Light Supplement Warning
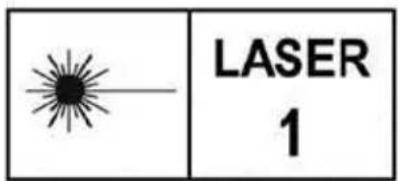
Warning: The laser radiation emitted from the device can cause eye injuries, burning of skin or inflammable substances. Before enabling the Light Supplement function, make sure no human or inflammable substances are in front of the laser lens.
Table of Contents
About This Manual....1
Overview of Contents 1
1 Overview 2
1.1 Box Content 2
1.2 Product Introduction 3
1.3 Functions 3
2 Appearance 5
2.1 Dimensions 5
2.2 Components 6
3 Basic Functions....7
3.1 Charging the Device....7
3.1.1 Charging via the charging base 7
3.1.2 Charging via the USB interface 9
3.2 Power On and Off 10
3.3 Interface Description 11
3.4 Focus Lens 12
3.5 File Exporting 13
3.6 Upgrade 14
3.7 Operation 14
4 Main Configurations 16
4.6.4 Client Software.... 31
5 System Settings 33
5.1 Unit Settings.... 33
5.2 Display Settings.... 33
5.3 Auto Power-off Duration Settings 34
5.4 Device Initialization.... 34
5.5 Device Information 34
6 Appendix....35
6.1 Common Material Emissivity Reference 35
6.2 Frequently Asked Questions (FAQ) 36
About This Manual
This document introduces the way to perform and maintain the Handheld Thermography Camera.
It covers what is Handheld Thermography Camera, how to set up alarm and rules for Handheld Thermography Camera, concrete functions and descriptions of the camera. It shows you how to record and capture with the camera, and export the files. It also advices basic handling methods of frequently happened errors.
Overview of Contents
This document contains the following chapters, and appendixes:
Chapter 1 Overview introduces the handheld Thermography camera, including the box content, product introduction, and major functions.
Chapter 2 Appearance shows the dimensions of the camera and explains the functions of all components.
Chapter 3 Basic Functions describes how to charge, power on and off the camera, focus the thermal lens, and export file. It also tells the lens assembling procedure and how to operate it with touch-screen and by buttons.
Chapter 4 Main Configurations shows you the way to measure temperature and set temperature alarms. Besides, it describes how to record videos and capture snapshots. You can do Wi-Fi settings, palettes selection, temperature section settings, digital zoom, LED light control, and remote control via client software according to this chapter.
Chapter 5 System Settings indicates the unit settings, display settings, and device initialization, etc.
Chapter 6 Appendix lists the emissivity value of common materials for reference and the frequently asked questions.
1 Overview
1.1 Box Content
See the table below for the box content.
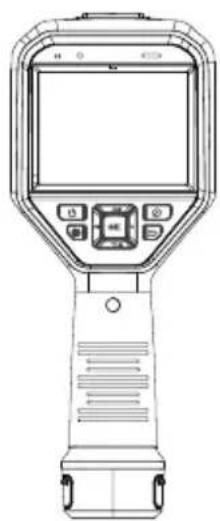
natural_image
Line drawing of a handheld electronic device with control panel and display screen (no text or symbols)Handheld Thermography Camera (x 1)
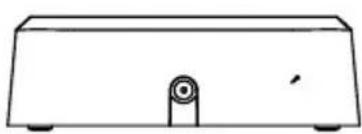
natural_image
Simple line drawing of a rectangular container with a central hole and side supports (no text or symbols)Charging Base (x 1)
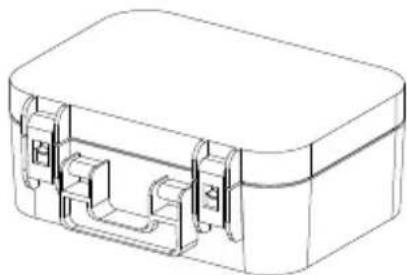
natural_image
Line drawing of a rectangular mechanical device with internal components (no text or symbols)Box (× 1)
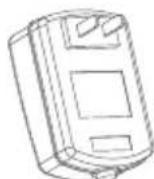
power Adapter (x1)
natural_image
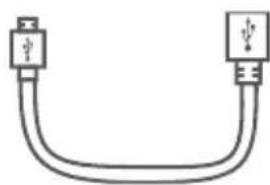
Pure electrical circuit lines without any symbolsUSB Cable (× 1)
natural_image
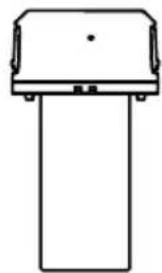
Simple line drawing of a vertical rectangular object with a top handle and base, no text or symbols present.Battery (x1)

User Manual (x 1)
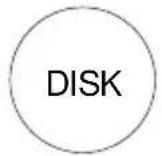
Disk (× 1)
Note: The Handheld Thermography Camera includes one lens cover, one battery and one SD card.
1.2 Product Introduction
The handheld Thermography camera is a camera with both optical images and thermal images. It can do thermometry, video recording, snapshot capturing, alarm, and it can connect to Wi-Fi, Hotspot and Bluetooth. The built-in high-sensitivity IR detector and high-performance sensor detects the variation of temperature and measure the real-time temperature.
The Picture-in-picture technique of the Thermography camera and the fusion of optical view and thermal view, enhances the details of the images display. It supports multiple palettes and alarm types. When the detected temperature in the scene does not match with the alarm rules, the device alarms by color of the palette mode automatically. It helps the users to find the risky part and lower your property loss. The device supports Wi-Fi connection, live viewing, recording, and capturing, etc.
The handheld Thermography camera is easy to use, and adopts ergonomic design. It is widely applied to substations, electricity prevention detection of companies, and reconnaissance survey of construction field.
1.3 Functions
Thermometry
Device detects the real-time temperature, and display it on the screen.
Storage
Device is equipped with memory module to store recorded videos, captured snapshots, and important data.
Fusion
Device can display fusion of thermal view and optical view.
Palette and Alarm
Device supports multiple palettes, and you can set the palette mode according to the alarm function
Wi-Fi Function
Device can be connected to Wi-Fi. You can connect the device via Wi-Fi hot spot, and you can view live view, capture, and recording, etc.
Digital Zoom
Device supports 1x, 2x and 4x digital zoom.
LED Light:
LED light supplement makes the device a torch in required scenarios.
Laser Light Supplement:
Long-distance laser light supplement.
2 Appearance
2.1 Dimensions
100mm (3.94")
244mm (9.6")
104mm (4.1")
2.2 Components
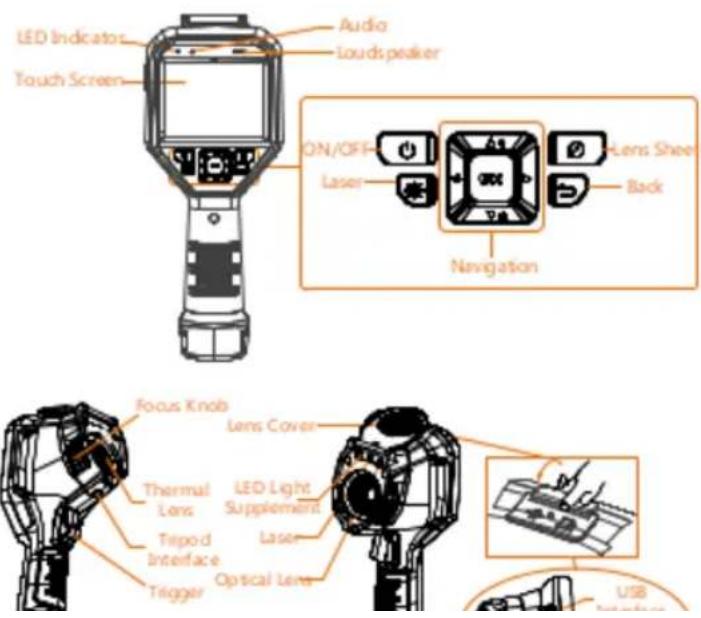
Handheld Thermography Camera - User Manual
| Lens | |
| Trigger | Pull the trigger to record videos or capture snapshots. |
| USB Cover | Connect the camera to your PC via USB cable to export files. |

Warning:
The laser radiation emitted from the device can cause eye injuries, burning of skin or inflammable substances. Before enabling the Light Supplement function, make sure no human or inflammable substances are in front of the laser lens.
3 Basic Functions
3.1 Charging the Device
3.1.1 Charging via the charging base
Steps:
- Hold the camera, and press both battery lock catches of the Thermography camera, see figure below.
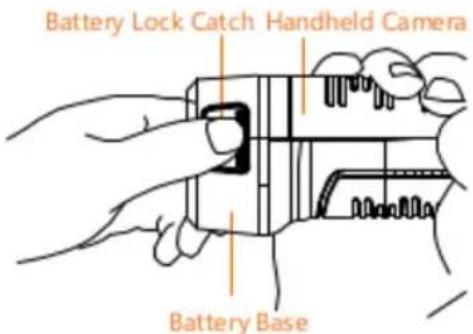
- Hold the lock catches, and draw the battery base to take out the battery, see figure below.

Charging Base
Front View
Side View
- When the battery is fully charged, draw the battery from the charging base.
- Align the ribbed piece on battery with the notch of the camera, and insert the battery into the camera, see figure below.
Ribbed Piece
3.1.2 Charging via the USB interface
Note: Please make sure the battery is installed before charging.
Steps:
- Open the top cover of the camera.
- Connect the USB interface and the power adaptor with USB cable.
3.2 Power On and Off
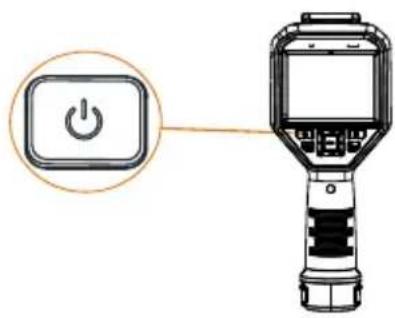
Power On
Remove the lens cover, and hold the button for over three seconds to turn on the device. You can observe the target when the interface of the camera is stable.
Power Off
When the monocular is turned on, hold the button for three seconds to power off the device.
3.3 Interface Description
In the observation interface, tap the screen or press OK button to show the menu bar, see figure below.
Real-time Temperature
Color-Temperature Scale
Menu Icons
Min. Temperature Display
Max. Temperature Display
Center Temperature Display
Status Icons
For the descriptions of the menu buttons, see the table below.
Settings
In the Local Settings () interface, you can set basic parameters, including thermometry units and range, fuse settings.
 | File | You can view the capture snapshots or videos stored in File. |
 | Thermal/Optical | In the Thermal/Optical Settings ()interface, you can set the display to thermal/optical/PIP/combined (fuse) modes. |
 | Thermometry | In the Thermometry Rule Configuration (mode, you can measure the real-time temperature by rules. |
 | Palettes | You can set the palettes of the display and the device displays accordingly. |
 | Contrast | You can adjust the contrast of display manually or automatically. |
For the descriptions of the status icons, see the table below.
| USB | This icon shows whether the device is connected to PC via USB interface. | |
 | Wi-Fi | This icon shows whether the device is connected to Wi-Fi or not. |
 | Hot Spot | This icon show whether the device hot spot is enabled or not. |
 | SD Card | This icons shows that the device memory card has short free space. |
— | Battery | This icon shows the battery status of the device. |
— | Unit | This icon shows which unit the device is using now: °C, °F, or Kelvin. |
3.4 Focus Lens
Before you start:
Adjust the lens focal length properly before you set any other configurations, or it may affect the image display and temperature accuracy.
Steps:
- Power on the handheld Thermography camera.
-
Aim the camera lens to the appropriate scene.
-
Adjust the focus knob clockwise or anticlockwise, see figure below.


Do NOT touch the lens to avoid affecting the display effect.
3.5 File Exporting
- Select and copy the snapshots to PC and view the files.
- Disconnect the device from your PC.
Note: For the first time connection, the driver will be installed automatically.
3.6 Upgrade
Steps:
-
Connect the thermography camera to your PC with USB cable and open the detected disk.
-
Copy the upgrade file and paste it to the root directory of the device.
-
Disconnect the device from your PC.
-
Reboot the device and then it will upgrade automatically. The upgrading process will be displayed in the main interface.
Note: After the upgrading, the device automatically reboot. You can view the current version in Local Settings (⚙️) > Device Information.
3.7 Operation
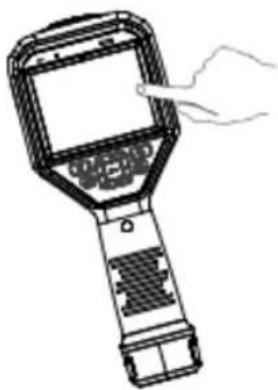
The camera supports both touch-screen control and button control.
Touch-screen control
Tap on the screen to set parameters and configurations.
Handheld Thermography Camera - User Manual
natural_image
Line drawing of a handheld electronic device with a screen and handle, emitting exhaust smoke (no text or symbols)Button control
Press the navigation buttons to set parameters and configurations.
4 Main Configurations
4.1 Temperature Measurement
Before you start:
Go to Settings > Device Settings > Unit Settings to set the temperature unit as K/°C/°F. Refer to 5.1 Unit Settings for details.
Purpose:
The thermometry (temperature measurement) function provides the real-time temperature of the scene and display it on the left of your screen. The thermometry function is turned on by default.
4.1.1 Thermometry Settings
Purpose:
The thermometry parameters affect the accuracy of temperature measurement.
Steps:
- Select the Local Settings (⚙️) from the main menu.
- In the Local Settings interface, select Thermometry Settings.
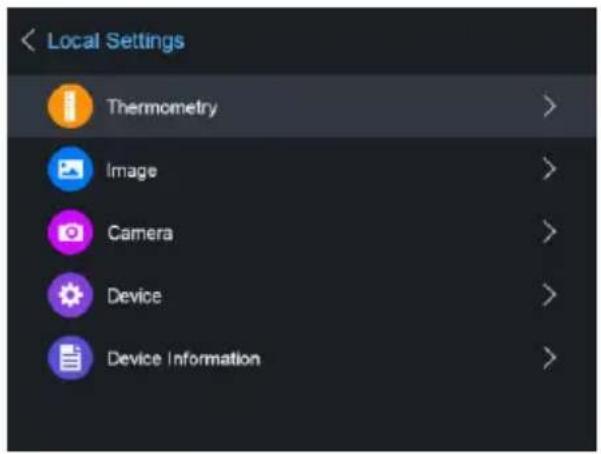
1) Set the Thermometry Range, Emissivity, Distance, Background Temperature, Reflection Temperature, Humidity, and Temperature Bias.
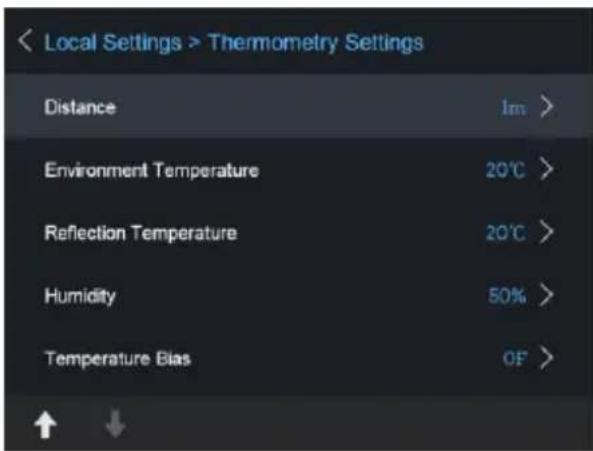
- Thermometry Range:
Select the thermometry range.
- Emissivity:
Set the emissivity of your target as the effectiveness in emitting energy as thermal radiation.
Note: Refer to the 6.1 Common Material Emissivity Reference for Emissivity values.
- Distance (m/feet):
The straight-line distance between the target and the device.
● Background Temperature:
The average temperature of the environment.
● Reflection Temperature:
If any object (not the target) of high temperature is in the scene, and the target emissivity is low, set the reflection temperature as the high temperature to correct the thermometry effect.
- Humidity:
Set the relative humidity of current environment.
- Temperature Bias:
The device may have slight deviation of temperature measuring, you can set the Temperature Bias to correct it.
- Return to previous menu to save the settings.
4.1.2 Thermometry Rule Configuration
Purpose:
The thermometry parameters affect the accuracy of temperature measurement.
Steps:
- Select the Thermometry Rule Configuration ( ) from the main menu.
- Set the point/line/frame rules, see figure below.
For Point Rule:
You can set Center Point Thermometry, High-Temperature Point, Low-Temperature Point, and Custom Point Thermometry.
● Center Point Thermometry
System detects the temperature of the center.
Step:
Tap and the temperature (center of view) displays
Cen: XX.
● High-Temperature Point
System locates the point of the highest temperature.
Step:
Tap and the temperature (Highest temperature of view) displays Max: XX.
● Low-Temperature Point
System locates the point of the lowest temperature. Step:
Tap and the temperature (Lowest temperature of view) displays Min: XX.
- Custom Point Thermometry

System detects the temperature of a custom point.
Steps:
1) Choose on the interface.
2) Press OK button.
3) Move the point with the navigation buttons or tap on the touch-screen to select a point.
4) Press OK button to confirm. The temperature of custom point (e.g. P1) displays P1:XX.
5) Repeat step 1 to 3 to set other custom points.
Note: At most ten custom points supported.
For Frame Rule:
Steps:
1) Choose on the interface.
2) Press OK button to generate a default frame.
3) Press the , , , and button to move the frame up/down/left/right.
4) Press ☐ to enlarge the frame, and press ⚙ to contract the frame. Or you can drag the corner of the frame on touch-screen to enlarge or contract the frame.
5) Press OK button to confirm. The Max. Temperature, Low Temperature, and Average Temperature of frame (e.g. S1) displays ST Max XX Min XX Avg XX.
6) Repeat step 1) to 5) to set other frames.
Note: At most three frames supported.
For Line Rule:
Steps:
1) Choose ▼ on the interface.
2) Press OK button to generate a default line.
3) Press the , , , and button to move the line up/down/left/right.
4) Drag points of the line on the touch-screen to extend or shorten the line.
5) Press OK button to confirm. The Max. Temperature, Low Temperature, and Average Temperature of line (e.g. L1) displays □ heat or line or heat □. The real-time temperature trend chart will display.
Note: Only one line supported.
Delete Rules:
Step:
- Select the Local Settings (⚙️) from the main menu.
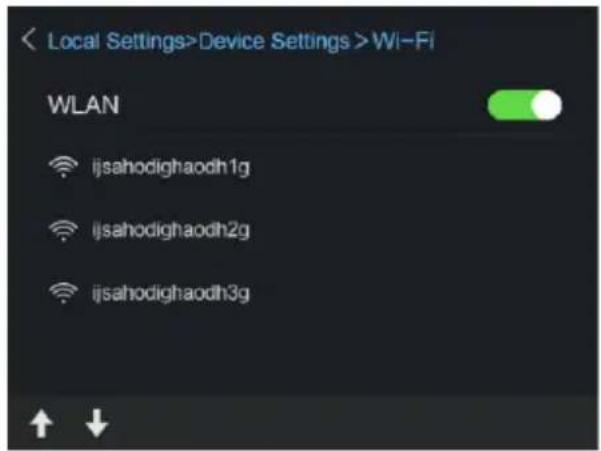
- Go to Local Settings > Device Settings > Wi-Fi Settings.
- Tap on ☐ Connect to Wi-Fi to enable Wi-Fi, and the searched Wi-Fi will be listed below.
- Select your Wi-Fi and enter password to show the keypad interface.
Note: Do NOT tap enter or space, or the password may be incorrect.
-
Tap Close to hide the keypad.
-
Tap OK to confirm.
4.2.2 WLAN Hot Spot Settings
Purpose:
Set the handheld Thermography camera as a Wi-Fi AP, and connect your phone to the Wi-Fi. You can set the parameters of the camera via client software.
Steps:
- Select the Local Settings (⚙️) from the main menu.
- Go to Local Settings > Device Settings > Wi-Fi Hotspot Settings.
- Tap on 🔒 Hot Spot to enable the WLAN hot spot function.
- Tap Set Hot Spot to set the WLAN hot spot. The hot spot name and password display automatically.
- Edit the hot spot name and password, show the keypad interface.
Note: Do NOT tap enter or space, and at least 8 characters, or the password may be incorrect. - Tap Close to hide the keypad.
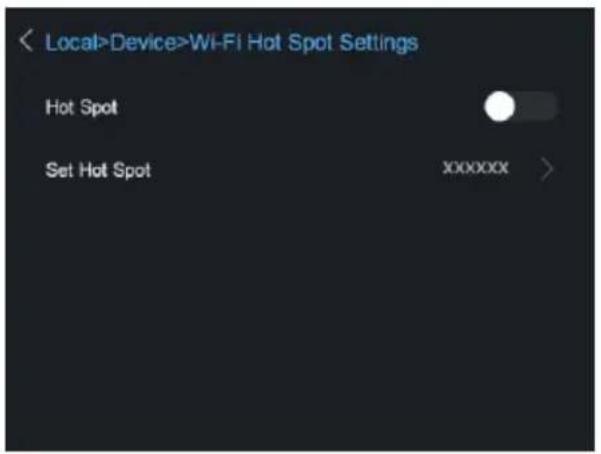
Result:
Connect your phone to the Wi-Fi. Refer to 4.6.4 Client Software.
4.2.3 Bluetooth settings
Purpose:
After pairing the handheld camera with bluetooth headsets successfully, you can record and hear the sound contained in the videos or images via bluetooth headsets
Steps:
- Select the Local Settings (⚙️) from the main menu.
- Go to Local Settings > Device Settings > Bluetooth.
- Tap on 📄 Bluetooth to enable the bluetooth function. The handheld camera will search the nearby enabled bluetooth headsets and pair them automatically.
Note: You can also press 📋 or OK button to quit the pairing.
- After pairing you can record and hear the sound via the headsets while recording and playing the video or image.
4.3 Storage Settings
Insert memory card into the camera, and you can record videos, capture snapshots, and mark and save important data.
Notes:
- Thermography camera does not support capturing or recording when the menu is shown.
- When the Thermography camera is connected to your PC, it does not support capturing or recording.
- Go to Local Settings > Device Settings > Filename Header, you can set the filename header for capturing or recording to distinguish the files recorded in a specify scene.
4.3.1 Recording Settings
Steps:
- Select the Local Settings ( ) from the main menu.
- Go to Local Settings > Camera Settings > Trigger Settings
- Select the Record.
- Press OK to confirm.
Note: You can set the Flashlight Setting ON/OFF if required.
-
Press to exit the setting interface.
-
In the live view interface, pull the trigger to start recording. The recording icon and count down number display in the interface.
-
When you finish, pull the trigger again to stop recording. The recording video will be saved automatically and exit.
Note: You can also press OK or to stop recording.
- Refer to 3.5 File Exporting to export the videos.
Note: in the menu interface, you can pull the trigger to exit, and pull the trigger again to start recording.
4.3.2 Capturing Settings
Steps:
-
Select the Local Settings (⚙️) from the main menu.
-
Go to Local Settings > Camera Settings > Trigger Settings
-
Select the Capture.
-
Press OK to confirm.
Note: You can set the Flashlight Setting ON/OFF if required.
-
Press ☐ to exit the setting interface.
-
In the live view interface, pull the trigger to capture snapshot.
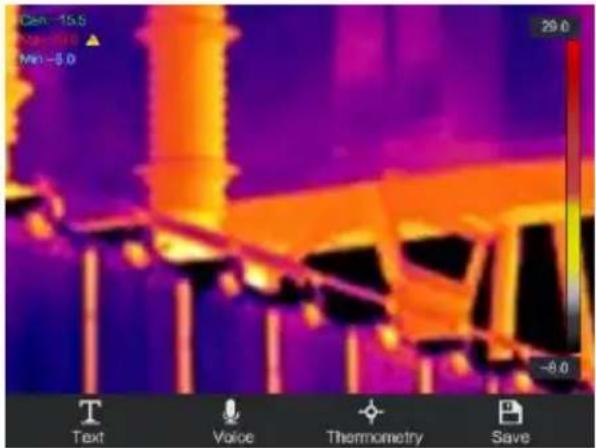
- The live view freezes and device displays the snapshot editing interface.
1) Set text remark or voice remark.
- Tap to add text remarks. Tap the screen to show the keypad interface, enter the comment and confirm.
Tap 8 to add voice remarks. Hold the OK button to start recording and release the button to stop recording.
2) Add thermometry data.
- Tap ✦ to add thermometry rules, refer to 4.1.2 Thermometry Rule Configuration for details.
3) Tap 📋 or pull the trigger to save the snapshot.
Note: You can also press 📄 to quit the saving.
- Refer to 3.5 File Exporting to export the snapshots.
Note: in the menu interface, you can pull the trigger to exit, and pull the trigger again to capture snapshot.
4.3.3 View recorded files
Steps:
-
Select the Files (☐) from the main menu.
-
Press the A, V, D, and ◁ button to select the video or ,
4.4 Image Configuration
Set the image temperature difference and temperature range of the scene.
4.4.1 Temperature Difference/Range
Purpose:
Set a temperature section and the palette only works for targets within the temperature section. You can adjust the temperature range and set the temperature difference.
Steps:
- Select the Temperature Difference/Range Settings (T) from the main menu.
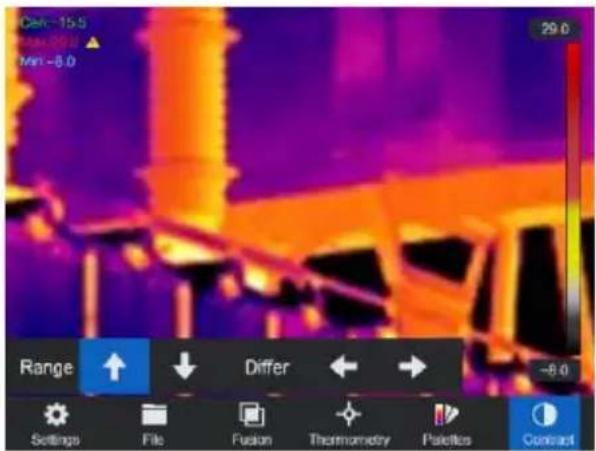
- Select Auto (☑) adjustment or Manual (☐).
For Auto Adjustment:
1) Select Auto (讲).
2) Press OK to confirm. The device adjusts temperature difference and temperature range parameters automatically.
For Manual Adjustment:
1) Select Manual (↓).
2) Press OK to confirm. The color-temperature bar displays.
3) Press ▷ to enlarge the temperature section range (e.g. temperature range changes from 20° C - 40° C to 19° C - 41° C), or press ▷ to narrow the temperature range.
4) Press to move the temperature section higher (e.g. temperature range changes from 20^ C - 40^ C to 30^ C - 50^ C), or press to lower the temperature section.
- Press 📋 to exit the setting interface.
4.4.2 Palettes Settings
Purpose:
The palettes allow you to select the desired colors: white hot, black hot, fusion, rainbow, ironbow, red hot, and dark blue are selectable.
Steps:
- Select the Palettes Settings (P2) from the main menu.
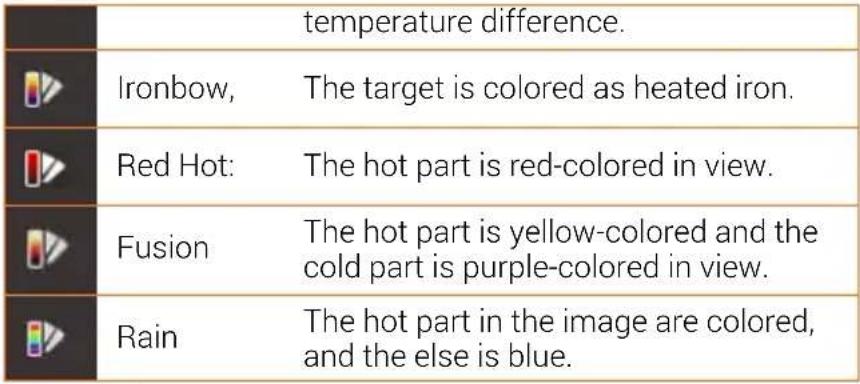 |
- Press ➕ to exit the setting interface.
4.4.3 Thermal/Optical Configuration
Purpose:
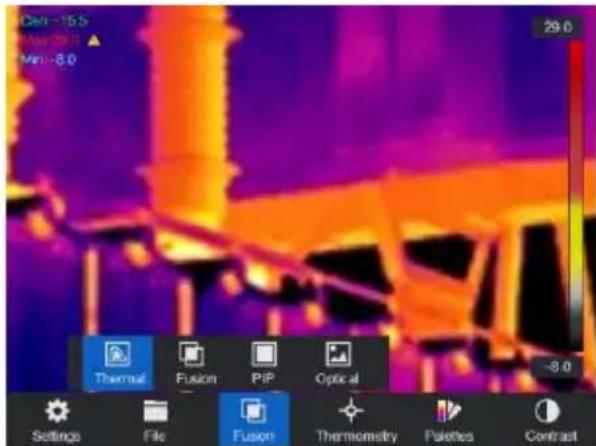
You can set the thermal/optical view of the device. Thermal, Fusion, PIP, Optical are selectable.
Steps:
- Select the Thermal/Optical Settings (☐) from the main menu.
- Tap on the icons to select a view mode.
| Thermal | In thermal mode, the device displays the thermal view. | |
| Combined | In combined mode, the device displays the combined view of thermal channel and optical channel. | |
| PIP Mode | In PIP (Picture in Picture) mode, the device displays thermal view inside the optical view. |
Handheld Thermography Camera - User Manual

Optical
in optical mode, the device displays the optical view.
- Press 📋 to exit the setting interface.
4.5 Alarm Configuration
Before you start:
Go to Palettes Settings (P) to set the palette.
Purpose:
Set the alarm rules and the device will alarm when the temperature triggers the rule.
Steps:
- Go to Palettes Settings (P) from the main menu.
natural_image
Thermal imaging view of a column with heat signatures indicating temperature distribution (no text or symbols visible)Handheld Thermography Camera - User Manual
| [GST6] | Interval Alarm | Set the alarm temperature section (e.g., 90°C - 150°C), when target temperature is within the section (e.g., 100°C), the device alarms. |
| Insulation Alarm | Set the alarm temperature section (e.g., 90°C - 120°C), when target temperature is without the section (e.g., 70 °C or 125°C), the device alarms. |
- Press 📋 to exit the setting interface.
Note: Go to Local Settings > Image Settings > Audible Warning, Tap on ☐ to enable audible warning. The device will sound When alarm is triggered.
4.6 Other Configurations
You can set the digital zoom, control the LED indicator and laser, and control the device via client software.
4.6.1 Digital Zoom
Purpose:
Digital zoom in the view, and you can view the target or scene in larger
4.6.3 Laser Settings
In the live view interface, hold the button to enable/disable the laser light.
Warning:
The laser radiation emitted from the device can cause eye injuries, burning of skin or inflammable substances. Before enabling the Light Supplement function, make sure no human or inflammable substances are in front of the laser lens.
4.6.4 Client Software
- Task 1. Connect the Camera to Wi-Fi
Purpose:
Connect the camera to Wi-Fi network, and you can control the camera via mobile client, etc.
Steps:
- Connect your device to Wi-Fi network, refer to 4.2.1 Wi-Fi Settings.
- Download and install the iVMS-4500 client software to your phone.
- Launch the app.
- Follow the startup wizard to create, and register an account.
- Add the handheld Thermography camera to online devices.
Result:
View the live view, capture snapshots, and record videos via the client.
● Task 2. Set the Camera as Wi-Fi AP
Purpose:
Set the camera as a Wi-Fi AP, and connect your phone to the Wi-Fi. You can set the parameters of the camera via client software.
Steps:
-
Set your device as Wi-Fi hot spot, refer to 4.2.2 WLAN Hot Spot Settings.
-
Download and install the iVMS-4500 client software to your phone.
- Launch the app.
- Follow the startup wizard to create, and register an account.
- Connect your phone to the WLAN Hot Spot of the camera.
- Select Wi-Fi configuration in the software, enter the serial number of camera to add the device. Refer to the manual of client software for details
Result:
View the live view, capture snapshots, and record videos via the client.
5 System Settings
In the system settings interface, you can set the display brightness, CVBS output, device initialization parameters, and view the device information.
5.1 Unit Settings
Go to Local Settings (⚙️) > Device Settings > Unit Settings
For Temperature Unit:
Set the temperature unit as Degree Celsius (°C)/Degree Fahrenheit (°F)/Degree Kelvin (K).
For Distance Unit:
Set the distance unit as Meter (m)/Feet (').
5.2 Display Settings
Go to Local Settings (⚙️) > Device Settings > Display Brightness
For Screen Brightness:
Set the screen brightness as Low/Medium/High.
Go to Local Settings (⚙️) > Image Settings > Display Settings
For Status Icons:
Enable/disable the statue icons display.
For Time:
Enable/disable the date and time display.
For Parameters:
Enable/disable the parameters display. Parameters means the material emissivity and the temperature unit.
Go to Local Settings (⚙️) > Image Settings > CVBS Output
For CVBS Output:
Enable/disable the CVBS output.
Note: Connect the camera to external CVBS display unit before you enable the CVBS Output function.
5.3 Auto Power-off Duration Settings
Go to Local Settings (⚙️) > Device Settings > Auto Power-off Duration Settings to set the automatic shutdown time for device as required.
5.4 Device Initialization
Go to Local Settings (⚙️) > Device Settings > Device Initialize to initialize the device and restore default settings of Measurement Tool, Device Storage, and Restore Default Settings (Restore all parameters).
5.5 Device Information
Go to Local Settings (⚙️) > Device Information to view the device information: Model, Version No., FPGA Version No., Serial No., IP address and so on.
6 Appendix
6.1 Common Material Emissivity Reference
| Material | Emissivity |
| Human Skin | 0.98 |
| PCB | 0.91 |
| Cement Concrete | 0.95 |
| Ceramics | 0.92 |
| Rubber | 0.95 |
| Paint | 0.93 |
| Wood | 0.85 |
| Asphalt | 0.96 |
| Brick | 0.95 |
| Sand | 0.90 |
| Soil | 0.92 |
| Cotton | 0.98 |
| Cardboard | 0.90 |
| White Paper | 0.90 |
| Water | 0.96 |
6.2 Frequently Asked Questions (FAQ)
Q: The charge indicator flashes red.
A: Examine the items below.
- Examine whether the device is charged with the standard power adapter.
- Plug and unplug the battery once.
- Make sure the charging temperature is above 0^ C ( 32^ F).
Q: Device image is fuzzy.
A: Refer to 0
Focus Lens to adjust the focus knob clockwise or anticlockwise.
Q: Wi-Fi is not found.
A: Examine whether the Wi-Fi function is turned on. If not, refer to 4.2.1 Wi-Fi to turn on Wi-Fi.
Q: Capturing or recording fails.
A: Examine the items below:
- Whether the device is connected to your PC and disabled the capturing and recording.
- Whether the storage space is full.
- Whether the device is low-battery.
Q: The PC cannot identify the camera.
A: Examine whether the device is connected to your PC with standard USB cable.

See Far, Go Further
- User Manual
- ALL RIGHTS RESERVED.
- About this Manual
- Trademarks Acknowledgement
- Legal Disclaimer
- Regulatory Information
- FCC Information
- FCC Conditions
- EU Conformity Statement
- Industry Canada ICES-003 Compliance
- Cautions
- Safety Instruction
- Laser Light Supplement Warning
- Table of Contents
- About This Manual....1
- Overview 2
- Appearance 5
- Basic Functions....7
- Main Configurations 16
- System Settings 33
- Appendix....35
- Overview of Contents
- Overview
- Box Content
- Product Introduction
- Functions
- Thermometry
- Storage
- Fusion
- Palette and Alarm
- Wi-Fi Function
- Digital Zoom
- LED Light:
- Appearance
- Dimensions
- Components
- Warning:
- Basic Functions
- Charging the Device
- Charging via the charging base
- Steps:
- Charging Base
- Front View
- Side View
- Ribbed Piece
- Charging via the USB interface
- Power On and Off
- Interface Description
- Focus Lens
- File Exporting
- Upgrade
- Operation
- Button control
- Main Configurations
- Temperature Measurement
- Thermometry Settings
- Purpose:
- Thermometry Rule Configuration
- For Point Rule:
- - Custom Point Thermometry
- For Frame Rule:
- For Line Rule:
- Delete Rules:
- WLAN Hot Spot Settings
- Bluetooth settings
- Storage Settings
- Notes:
- Recording Settings
- Capturing Settings
- View recorded files
- Image Configuration
- Temperature Difference/Range
- Palettes Settings
- Thermal/Optical Configuration
- Alarm Configuration
- Handheld Thermography Camera - User Manual
- Other Configurations
- Digital Zoom
- Laser Settings
- Client Software
- Result:
- System Settings
- Unit Settings
- Display Settings
- Auto Power-off Duration Settings
- Device Initialization
- Device Information
- Appendix
- Frequently Asked Questions (FAQ)
Brand : Hikvision
Model : DS-2TP23-10VM/W
Category : Camera